paper: pretty paper. true stories. {and scrapbooking classes with cupcakes.}

lovely to meet you Twitter Facebook Pinterest YouTube

Take a Scrapbooking Class

online scrapbooking classes

Shop Shimelle Products

scrapbook.com simon says stamp shimelle scrapbooking products @ amazon.com shimelle scrapbooking products @ amazon.co.uk

Reading Material

travel

Using Paper Scraps in Scrapbooking with Valeska Guimaraes

Using Paper Scraps in Scrapbooking with Valeska Guimaraes @ shimelle.com

We’ve entered a funny time of year in the northern hemisphere: is it summer and school is still out and you’re enjoying the sunshine and the odd adventure? Or is it autumn and school is back in session, life has a more predictable schedule, and you’re ready for the temperature and the leaves to both start dropping? If you’re leaning in to autumn vibes, today’s guest artist Valeska Guimaraes is here for you with a shift to autumnal colours and botanicals. As usual, supplies have affiliate links where possible. Thanks! -Shimelle

Scrapbook page with rainbow paper scrap border by Shimelle

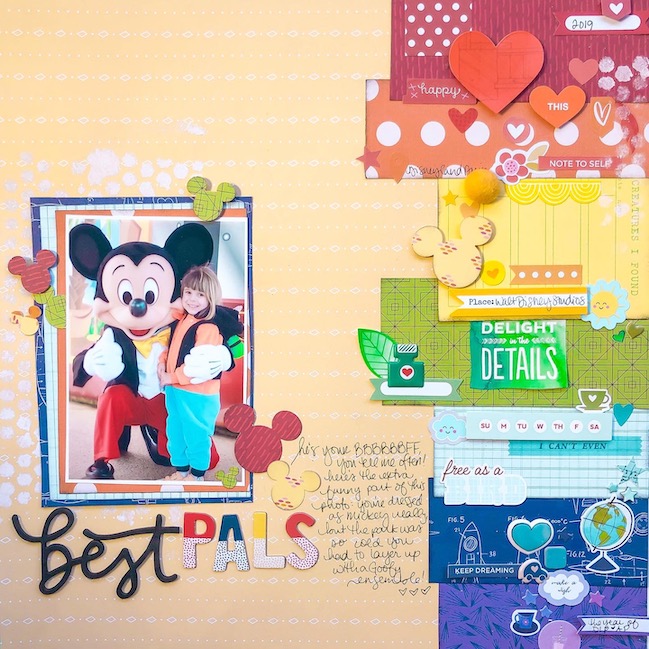
My name is Valeska Guimaraes and I’m so happy to be here with you today. I was inspired by Shimelle’s layout A Border of Scraps (Best Pals), which she used a simple technique that works so well! The composition she explained was to find a rainbow of paper scraps and line them up to make a border on your page. So easy and pretty, don’t you think?

Using Paper Scraps in Scrapbooking with Valeska Guimaraes @ shimelle.com

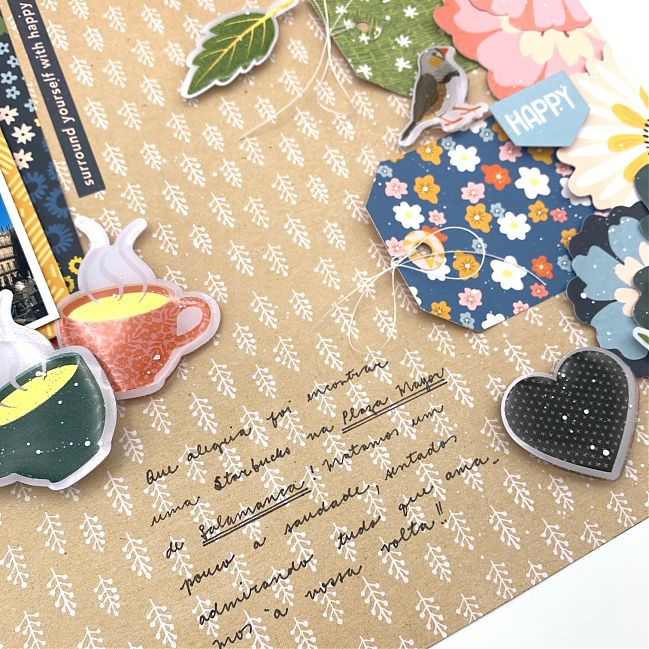
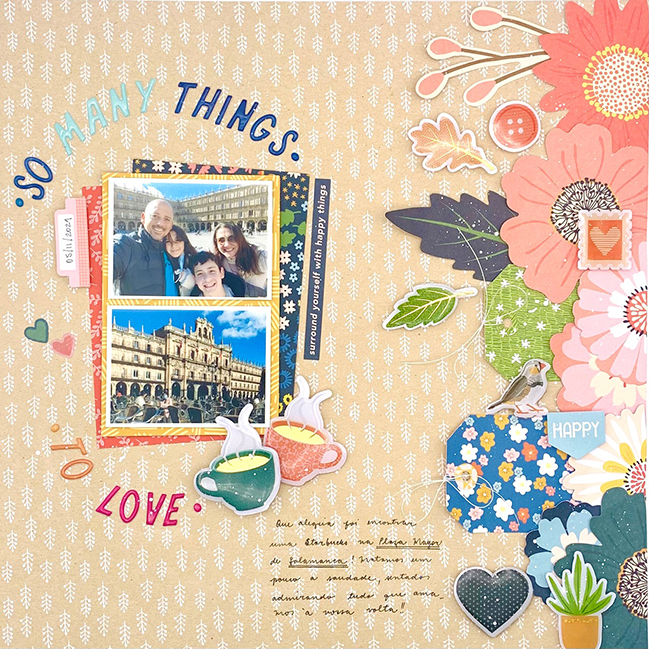
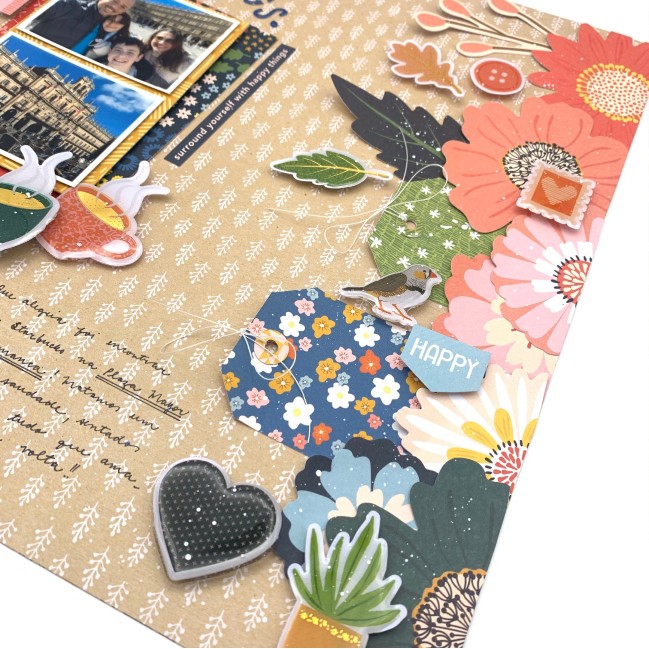
Well, I decided to try this with some flowers, tags and embellishments. It is not exactly a rainbow but I love those autumn colors from Paige’s Bungalow Lane collection. I think it can be easily done with scraps, die cuts or stickers too.

Using Paper Scraps in Scrapbooking with Valeska Guimaraes @ shimelle.com

I also used a layering technique with 3D foam adhesive that will give some dimension to my layout. I really enjoy this technique, in fact is one of my favorite and I use it in most of my projects.

Using Paper Scraps in Scrapbooking with Valeska Guimaraes @ shimelle.com

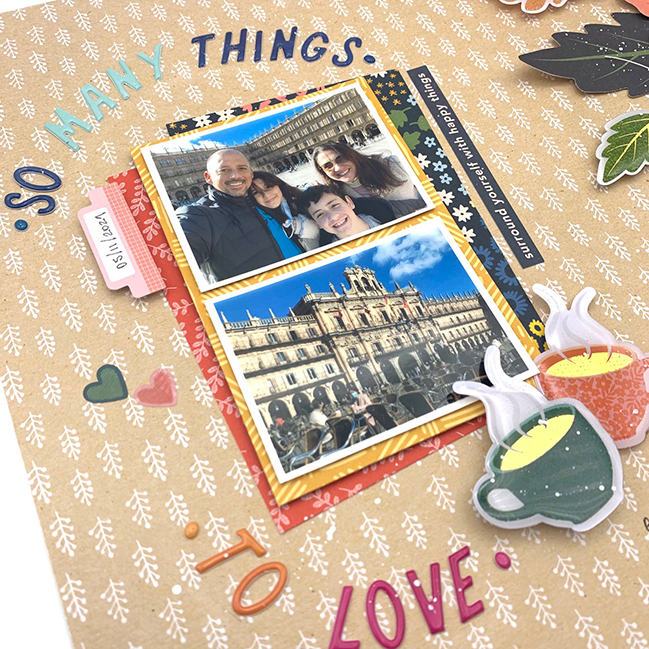
A round title is a very good way to get your attention. I used the colorful alphabet stickers from Paige Evans and I decided to use two pictures of my family. The photos were taken in a sunny autumn day in our trip to Salamanca, Spain. My family loves to travel together and discover beautiful cities around the world. That day we found a local Starbucks which made me really happy! I finished my page by adding some white acrylic paint splatters directly on the paper, but I protected my photos from the paint.

I really hope you enjoy it and get inspired to try this new “technique” and remember to share your work with us, especially if you make some rainbows with any season’s colour palette (#scrapbookrainbows)! It was an honor to be here sharing a little bit of my work and my life with you! Thank you for stopping by!

Valeska Guimaraes is a Brazilian living in Portugal with her family. They have lived in Panama and Peru for fifteen years and have now started a new adventure in Europe. Valeska loves scrapbooking and everything about paper crafts. She is a dentist but stopped working to spend more time with her family and ended up falling deeper into the love of scrapbooking. Valeska loves to spend hours in her craft room, making things and drinking coffee. Mini albums and layouts are definitely her favorite projects to make. You can see more of Valeska’s work on Instagram or tutorial videos on Youtube.

Scrapbooking from the photos with Sheena Rowlands

Scrapbooking from the photos with Sheena Rowlands @ shimelle.com

When you set out to make a new scrapbook page, what comes first: the photos, the story you want to tell, the products you want to use? Today guest artist Sheena walks us through a page she made by choosing the photos first and letting that dictate what she selected through her creative process. Sometimes I find it helpful to remember that the end result doesn’t need to make this obvious: if one thing leads to another on your layout and you’re happy with the end result, it’s okay if no one else clocks whether you started with the photos, the words, or the products, or something else. Paying attention to your creative process can help each of us make more wonderful things, but those who enjoy flipping through the pages of our albums might just appreciate the final project, especially if they aren’t crafty themselves. A little thought ramble for you today, but one that might ramble the right way for some of you as you work on the next project on your desk! Right, onto Sheena, with a reminder that supplies have affiliate links which make all of this series possible. Thanks! -Shimelle

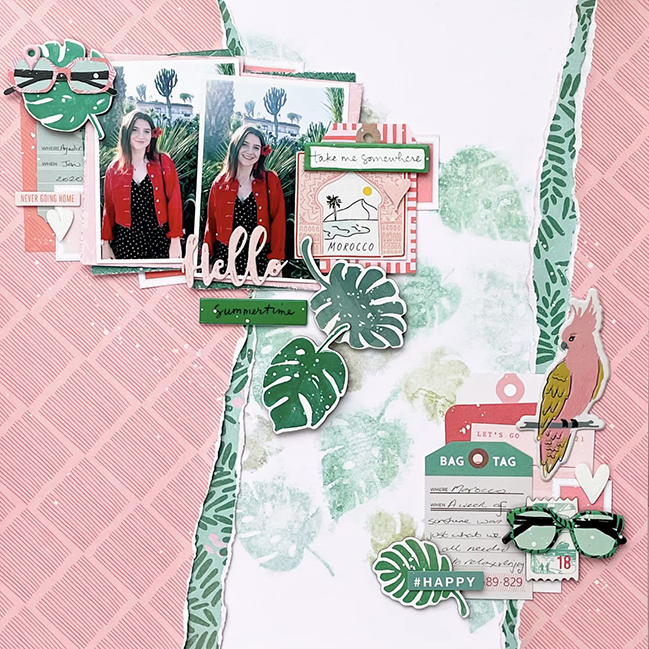
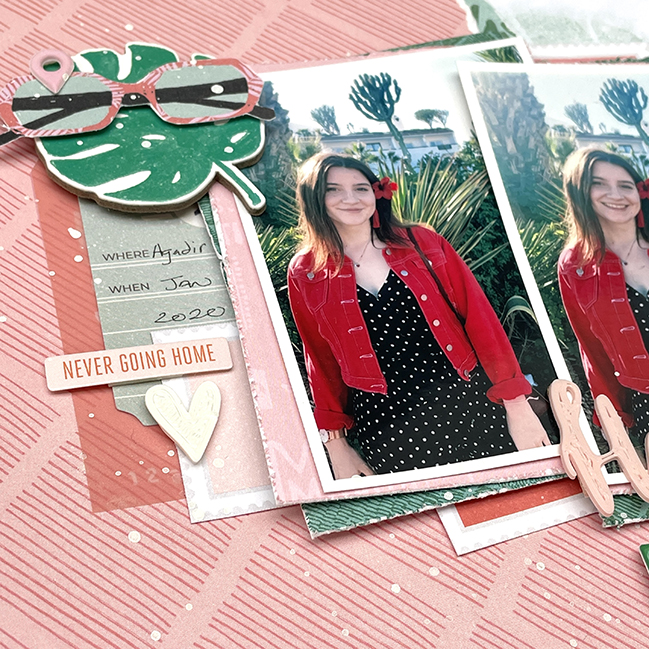
Hello Summertime. This layout began with the photos I, which is not always the case for me, it could be the story or a certain paper, but these pictures of my Daughter are from our last family holiday in the winter sunshine in Morocco and I wanted to scrap them. Exploring the world is something we all enjoy, and I have lots of holiday photos from far and wide.

Scrapbooking from the photos with Sheena Rowlands @ shimelle.com

As I like to scrap our trips, I keep all travel type supplies together in my craft space so I can pull them out and make a start and this way the collections get mixed together and papers and embellishments get chosen more by their colour than the manufacturer. Taking my inspiration from the photos, I picked out everything in pinks, reds and greens. This layout features three different Crate Paper collections, some Pinkfresh Studio, and a Making Memories paper from 2008!

Scrapbooking from the photos with Sheena Rowlands @ shimelle.com

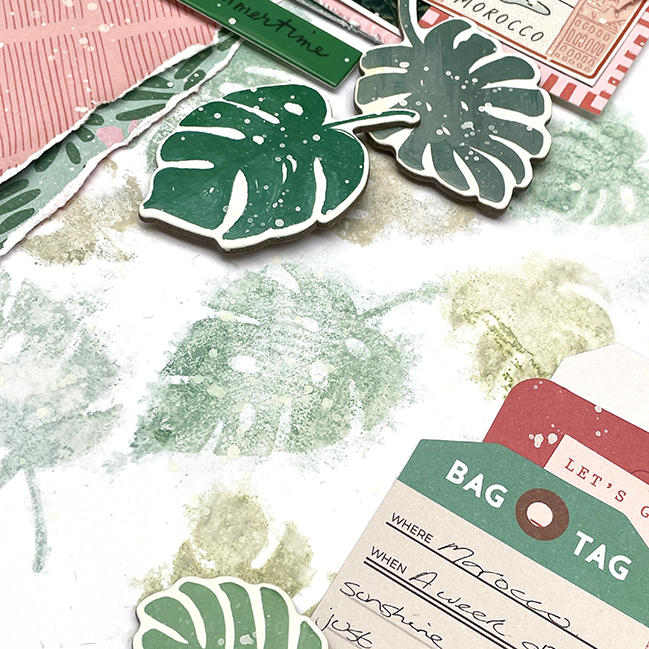
The background was easy to make using gessoed cardstock as my base. Then stamping onto it using four different Ink Oxides – Evergreen Bough, Iced Spruce, Speckled Egg and Bundled Sage using tropical leaf stamps in three sizes. The stamped images were sprayed lightly with water allowing the edges to blur creating a softer effect.

When the background was dry I added my torn papers and created the clusters, around the photos and my journaling on the tag, sticking with my colour combo and creating a diagonal line to lead your eye down the page.

Sheena Rowlands is a UK mum to grown children, part time nurse, and lifelong crafter. Scrapbooking has been her creative release for over sixteen years and for the past twelve years she has also recorded her family’s story using a Project Life format. She scrapbooks her family, travels, and furry grandpup. Her pages often feature machine and hand sewing, ink work, and clustering of embellishments. Sheena runs a small scrapbook embellishment business Sheenanigans and with two friends a retreat and workshop company Birds of a Feather . Presently Sheena designs for the Hey Little Magpie store and Just Nick Studio and have previously designed for shops, magazines and Shimelle. You can find Sheena on Facebook, Instagram, Sheenanigans.

Scrapbooking Disney in a Travel Album with Jennie Ray

Making a Disney scrapbook travel album with Jennie Rey @ shimelle.com

Happy Friday, friends! In a week with ideas perfect for projects with lots of photos, I would love for you to see this oh-so-clever paper contraption beautifully created by guest artist Jennie Rey! -Shimelle

Hi friends, Jennie Rey here! Like Shimelle I love love love everything Disney! I’ve been to Disneyland Paris quite a few times and in 2016 a dream came true when I was able to travel to Orlando, Florida, to go Walt Disney World with my husband and daughter. I can still feel the excitement we felt when we finally drove through the gate and entered the most magical place on earth!

When looking for inspiration on documenting a Disney trip you quickly end up on Shimelle’s blog! I love her use of bold colors and combining different patterns and I decided to challenge myself to do the same and I really like how it turned out!

Making a Disney scrapbook travel album with Jennie Rey @ shimelle.com

I’ve documented my two trips to Florida in four (!) 6×8 travel albums but I also wanted to include my love of everything Disney in my Stories album so I made a 6×8 spread about our visit to the four main parks. A little problem with documenting Disney is the number of photos you come home with.
Making a Disney scrapbook travel album with Jennie Rey @ shimelle.com

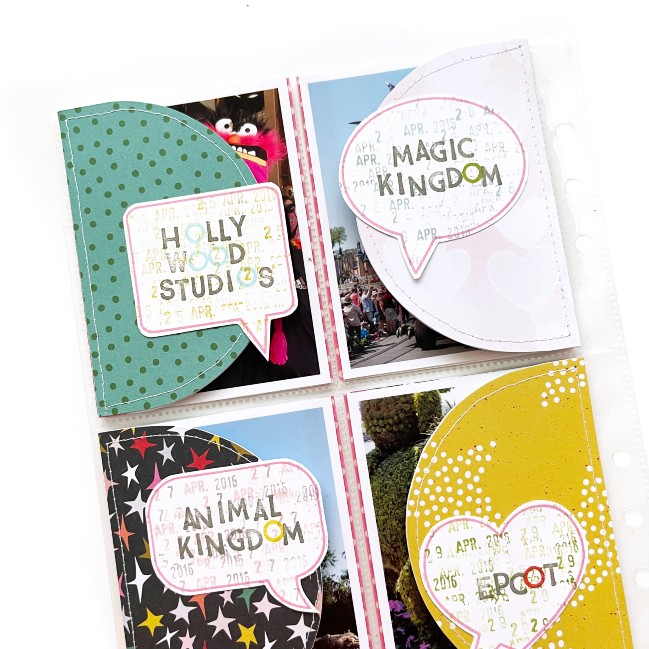
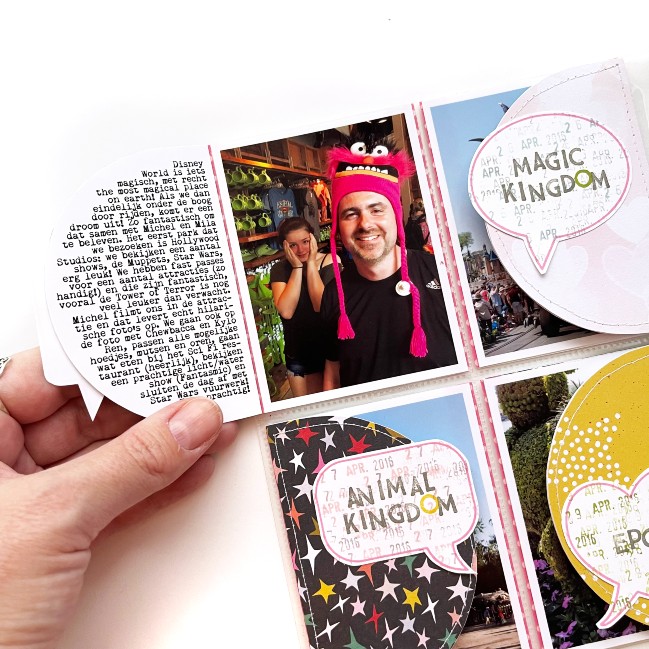
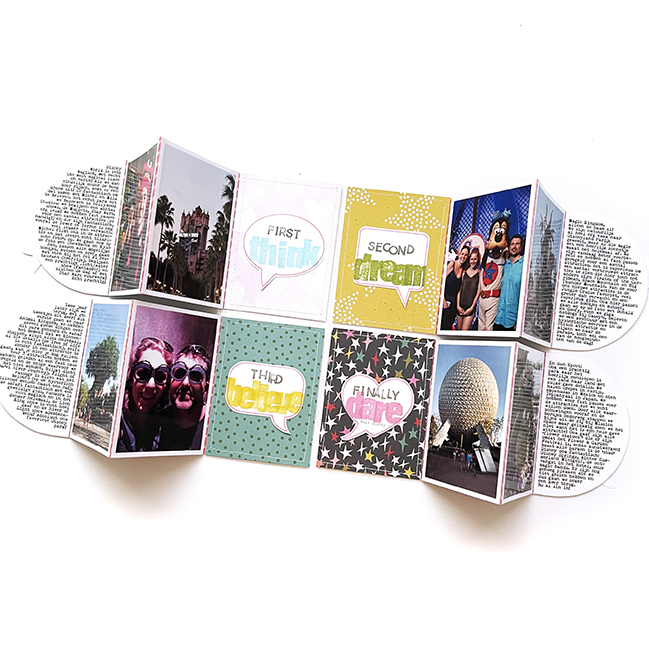
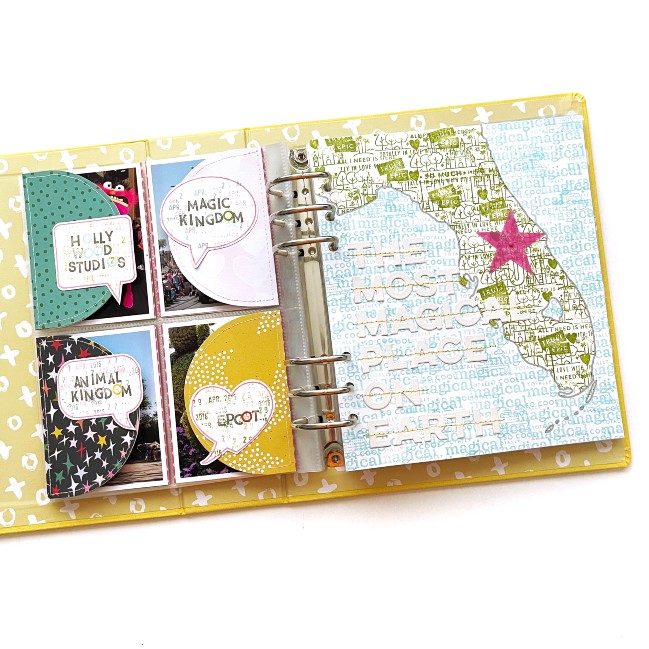
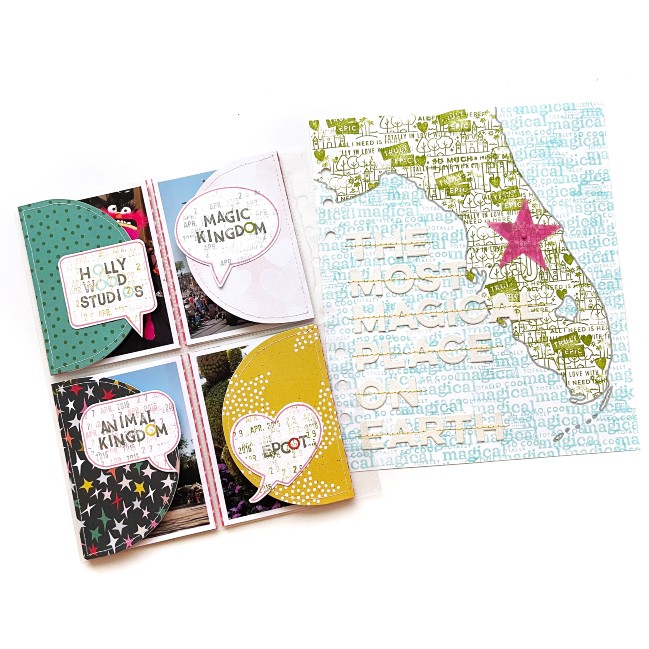
To be able to include a little bit more I decided to make a little mini-album flip-out per park and just stick it to the outside of the page protector.

Making a Disney scrapbook travel album with Jennie Rey @ shimelle.com

Making a Disney scrapbook travel album with Jennie Rey @ shimelle.com

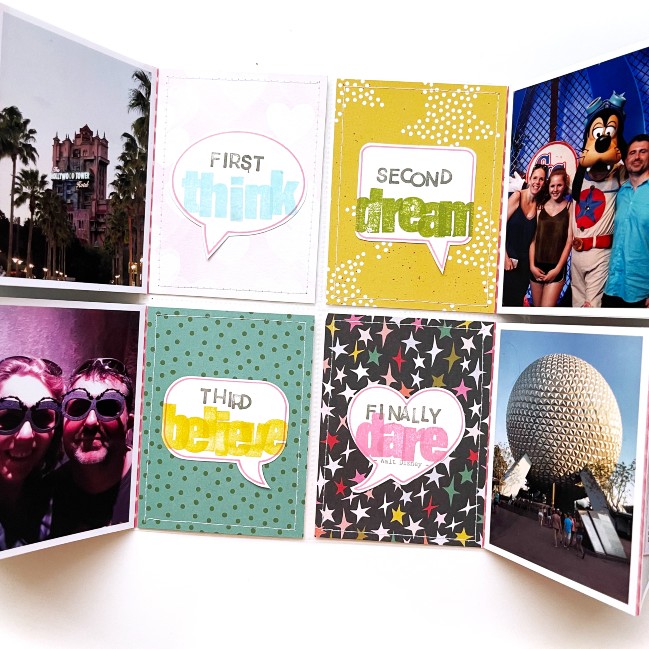
For the mini-album flip-outs I’ve used two 3×4 pieces of patterned paper, 4 3×4 photos and a piece of white cardstock for my journaling. I cut one of the 3×4 patterned papers and my journaling card in a half-circle and attached all the pieces together using washi tape. I stitched around the edges of the patterned paper pieces, just for some texture. I stamped the names of the parks inside a speech bubble (and also repeat-stamped the date) and added those to the front of the flip-outs. I also used speech bubbles spread over 4 3×4 cards to stamp a Walt Disney quote.

Making a Disney scrapbook travel album with Jennie Rey @ shimelle.com

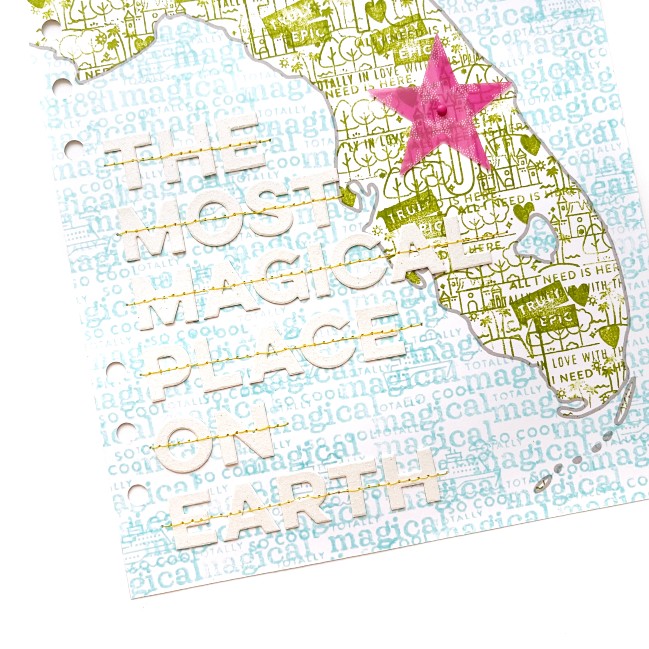
For my right side page I found a map of Florida on the internet and traced it in Procreate on my iPad. I printed the map on regular paper and cut out the Florida piece and used it as a mask so I could repeat-stamp to fill the water part. I did the same with the land part using another color. I added a title using cardstock alphabet stickers and stitched those onto the page and lastly, I added a star to the map to mark the location of Disney World!

Making a Disney scrapbook travel album with Jennie Rey @ shimelle.com

Jennie Rey is lives in The Netherlands. She has been married to husband Michel for twenty-three years and they have two children who are now adults. Hybrid scrapbooking is Jennie’s favourite thing to do and the hobby has kept her grounded through the last few years of unpredictability. Jennie is a member of the Ali Edwards Creative Team and loves the December Daily and Week in the Life projects, and also enjoys documenting her travels and her family’s daily life. Check out Jennie’s class on hybrid scrapbooking via Ali Edwards or find her work on Instagram.

Scrapbooking Multiple Mini Photos with Tracey Fox

Scrapbooking Multiple Mini Photos with Tracey Fox @ shimelle.com

As someone who has been known to clock up hundreds of photos on a Disney Parks day, today’s guest artist Tracey Fox is here to show me I don’t need to make hundreds of single photo pages really. I mean I can, if I want to, but she’s here to show exactly how multiple photo layouts can look cooler than cool. Amazing. Out of this world, even. And as usual: a reminder that supplies have affiliate links where possible and that makes all this possible. Thank you! -Shimelle

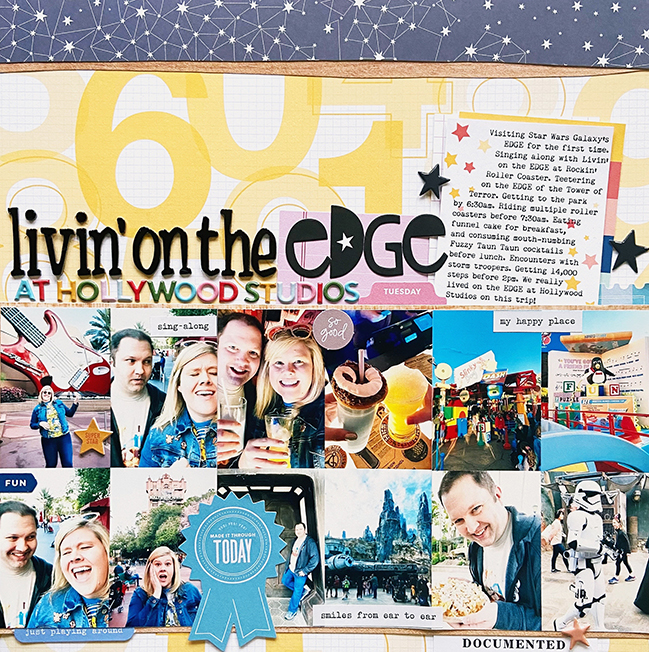
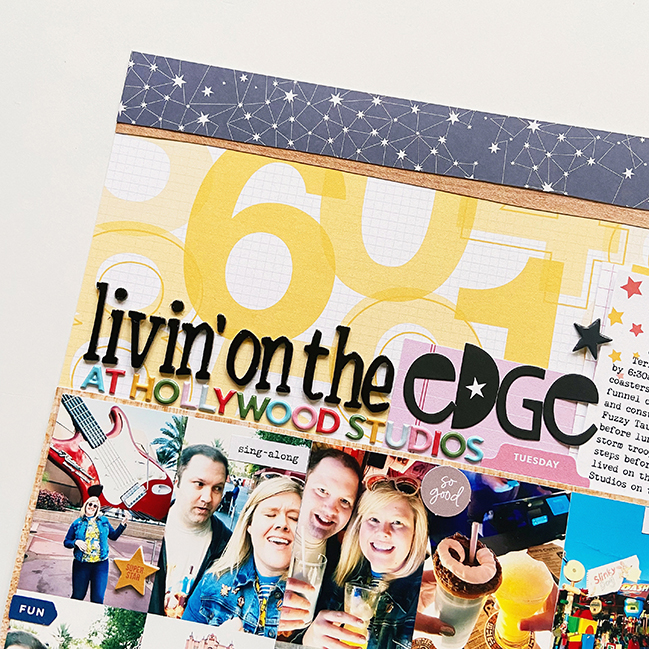
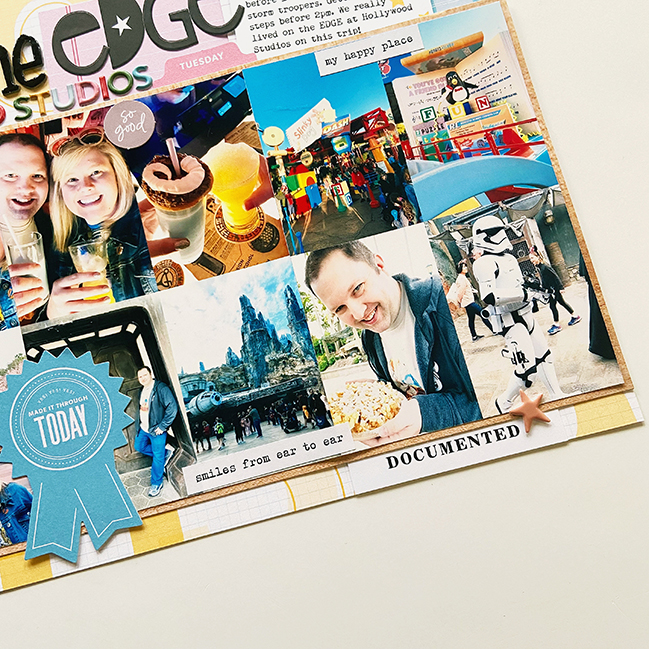
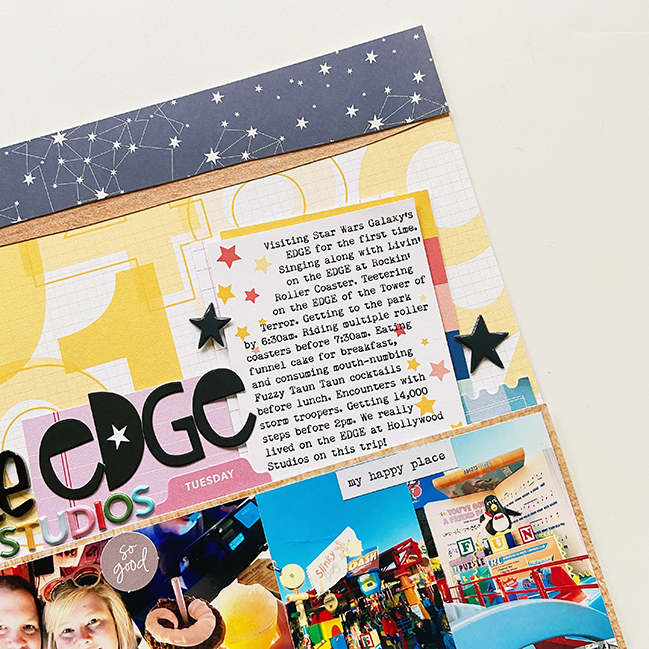
I almost always start layouts with lots of photos, but after that, the fun part is digging through my scrappy stash of products and finding just the right items to accompany those photos and help tell my story. And it’s even more fun when those products all come from different collections and manufacturers! So much creative inspiration can come from the scrappy challenge of mixing and matching products. On this layout, I set out to document our experience at Disney’s Hollywood Studios on our last trip to Walt Disney World in January of 2020. We did an extra early rope drop at the park to grab our virtual boarding group for the Rise of the Resistance ride, and we ended up packing so much in before lunch, it felt like livin’ on the edge – both figuratively and literally!

Scrapbooking Multiple Mini Photos with Tracey Fox @ shimelle.com

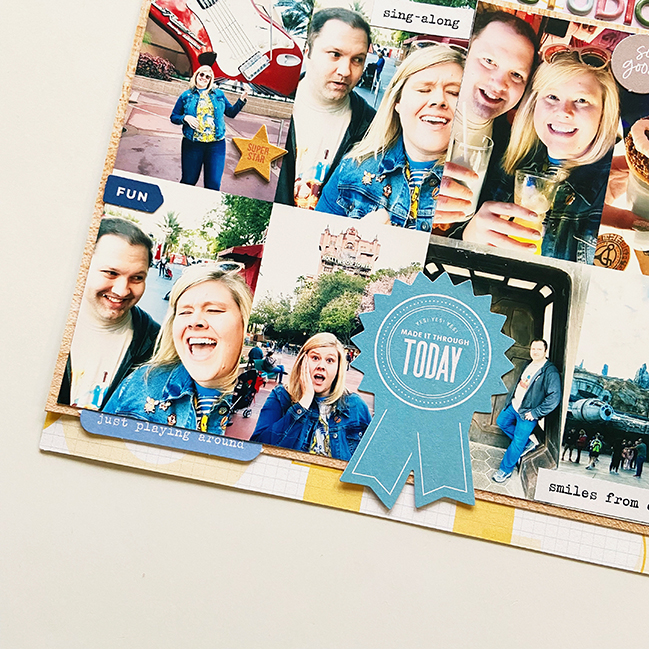
I gathered 12 photos from our intense morning at the park, printed them each at 2” by 3”, and arranged them in a simple grid and stretched them in a band design across the page. This left me plenty of room on the page to play with paper and stickers. For the background, I selected a yellow, number-covered patterned paper from Pinkfresh Studio’s Some Days collection. I keep this collection in a kit specifically for Disney pages, because its bold and bright colors and patterns remind me of the parks and go super well with my Disney photos and stories. The constellation paper I used along the top of the page is from Ali Edwards Design, Inc’s Good Old Days kit. Starry sky patterns like this fit so well with Hollywood Studios pages due to the Star Wars theming! I also selected a light wood grain paper from Elle’s Studio to back my band of photos and to include in the paper layers along the top of the layout. Choosing a large-scale pattern, a smaller-scale pattern, and a mostly solid neutral is a great formula for ensuring patterns can mix well on a page without competing.

Scrapbooking Multiple Mini Photos with Tracey Fox @ shimelle.com

For my title, I relied on some super old chipboard Thickers from my scrappy stash and paired them with cardstock letter stickers from Bella Blvd and some smaller puffy alpha stickers from Pinkfresh Studio. Varying the size, texture, color, and style of the letters is a great way to add interest to a title, especially on a page that is all about experiencing a variety of fun things! After I added my journaling on a 3”x4” card by Elle’s Studio, I finished embellishing the page with stickers and die cuts from various manufacturers.

(Scrapbooking Multiple Mini Photos with Tracey Fox @ shimelle.com

I pulled a few items from that same Pinkfresh collection where I got the background paper, grabbed some of my favorite go-to phrase stickers and past kit die cuts from Elle’s Studio, and continued the starry theme with some shiny puffy star stickers from Crate Paper.

Scrapbooking Multiple Mini Photos with Tracey Fox @ shimelle.com

I really love how this layout came together and how I was able to let myself be inspired by the colors and themes from my photos to select products I already owned that worked together — regardless of how long I have had them or where they originally came from. While working with a single collection definitely has its benefits, like taking the guess work out of selecting products, mixing and matching helps you use up what you already have without shopping for new collections, and you can’t beat the creative satisfaction of making it all work!

Tracey Fox is a self-proclaimed “scrapbookin’, feminist nerd” living in Ohio with her husband and cats. She has degrees in Music Education and Women’s Studies and currently works full-time in data analytics for a large university. Needing something to do with her college photos, Tracey started scrapbooking in 2004 and has never looked back. Tracey is the host of the Scrappy Like a Fox Facebook group, and she has served on the creative teams for Elle’s Studio, Freckled Fawn, ColorCast Designs, Paper Issues, and Feed Your Craft. She has also guest designed for numerous crafty companies and has contributed class content for The Awesome Ladies Project, Crafty Jen Schow, and Get it Scrapped. Find Tracey on Instagram,Facebook, or her website.

Starburst Scrapbooking Inspiration with Niki Rowland

Starburst Scrapbooking Inspiration with Niki Rowland @ shimelle.com

Greetings witches and wizards! Today we’re joined by Hogwarts Guest Professor Niki Rowland to share a magical scrapbook page inspired by a sketch I shared almost ten years ago. Turns out the ideas we tried a long time ago can still help create pages that make us happy today! What magic that can be! And a less magical reminder – supplies have affiliate links and that makes all this possible. Thanks for clicking when you’re shopping! Now, onto the scrapping magic! -Shimelle

Hey everyone! This is Niki and today I have a layout and process video to share that has been inspired by Shimelle! I was delighted to take part in this project and as Shimelle is such a huge inspiration it was an easy task.

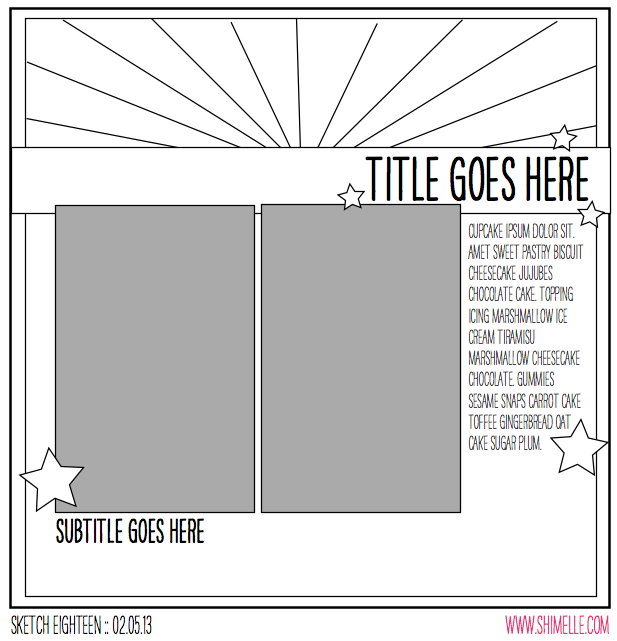
Starburst Scrapbooking Sketch by Shimelle - 2013

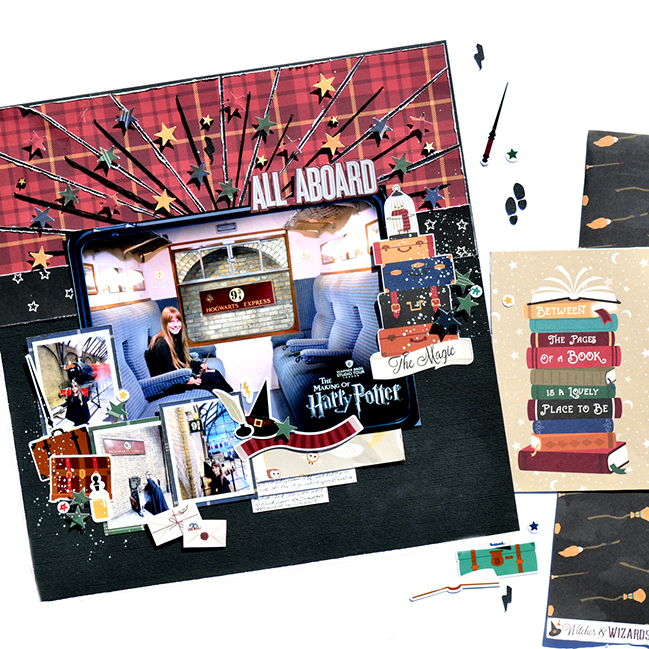
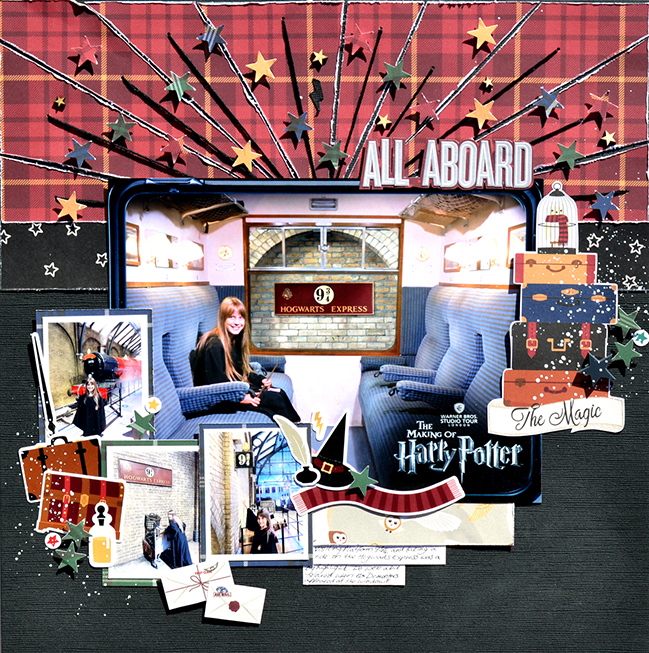
I looked back through Shimelle’s archives and came across this sketch dated May 2013, and the layout Shimelle made for this sketch. The purpose of this sketch was to add a starburst to your layout and this is something I absolutely love to do so this was the perfect inspiration. I decided to make a Harry Potter themed layout today because I recently visited the Harry Potter Studio tour with my daughter and several years ago Shimelle made lots of layouts about her trip to the Studio Tour, which I crushed over at the time, so this theme is another way Shimelle has inspired me.

There is one final way in which Shimelle has inspired me today and that is her block of two 6×4” photos. Together they made a 6×8” landscape block and my photo is a 6×8” landscape photo. I find this photo size particularly tricky to use and therefore I often look to Shimelle’s layouts when scrapping with this size to see how she has tackled the task. There are many layouts of Shimelle’s that use this photo formation and therefore lots of sources of inspiration.

Starburst Scrapbooking Inspiration with Niki Rowland @ shimelle.com

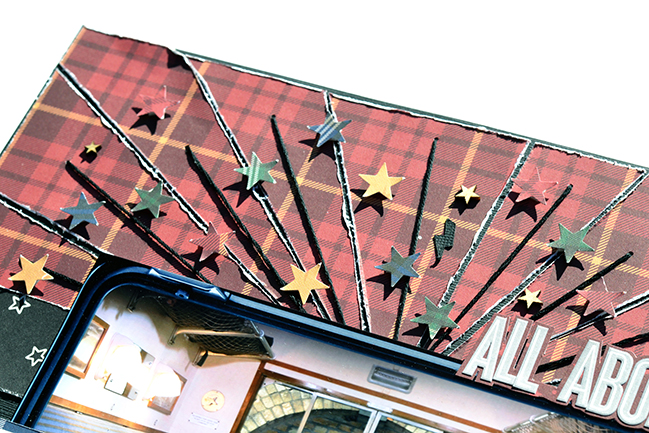
I started off with a black background and I cut a 4×12” strip of patterned paper to turn into a starburst. I didn’t have much paper left from the collection I was using, (Witches & Wizards 2 by Echo Park Paper) so had to use one strip, rather than several different patterns. I used a pencil and a ruler to draw my starburst and then I cut all the pieces with scissors. I distressed all the edges and stuck them to the top of my black cardstock background. Because my starburst was all one pattern I wanted to embellish it further by adding long stitches of black thread to each ray, and I also added punched stars in several different colours, as well as some tiny wooden stars too. This helped to make it more interesting and therefore more of a feature, in the absence of lots of different patterns.

Starburst Scrapbooking Inspiration with Niki Rowland @ shimelle.com

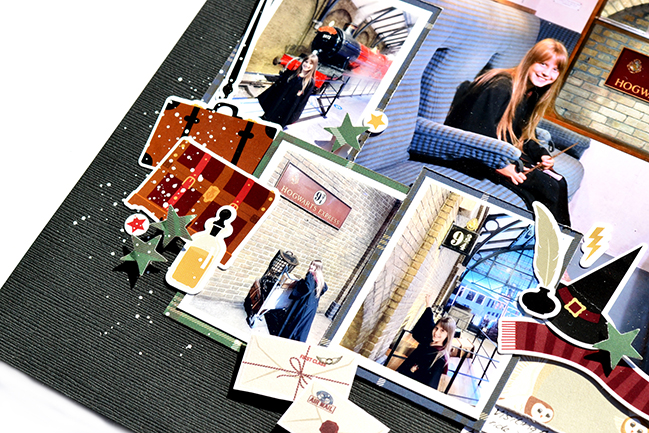
I placed my photo centrally which is slightly different from Shimelle’s sketch and layout and I also added three more small photos to the bottom left corner. I turned the small photos into an embellishment cluster of their own by adding a few stickers, punched stars and fussy cut envelopes.

Starburst Scrapbooking Inspiration with Niki Rowland @ shimelle.com

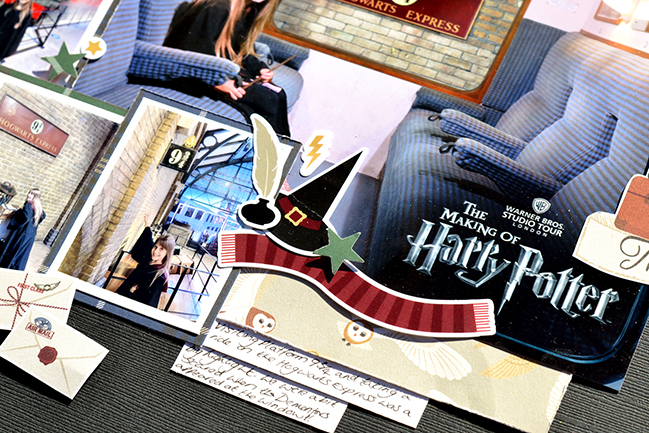
To the right of the small photos I added a small amount of patterned paper and two journaling strips. I didn’t have access to a white or silver pen when making this layout so couldn’t write directly onto the black background so journaling strips were my answer.

Starburst Scrapbooking Inspiration with Niki Rowland @ shimelle.com

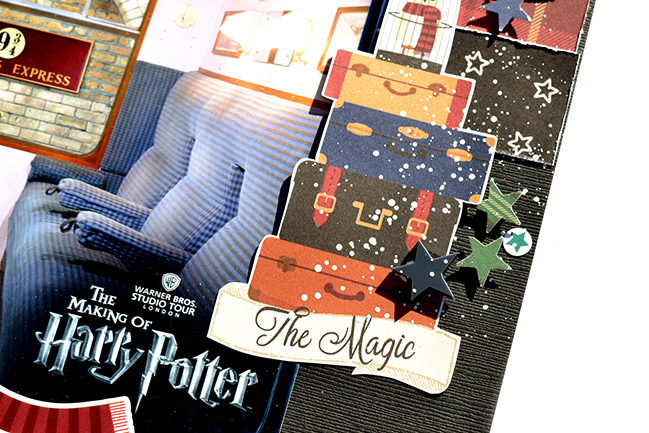
On the right I fussy cut a large stack of suitcases from a journaling card and added this as an additional area of embellishment.

For my title I used small (and very old!) alphabet stickers which I mounted first onto a plain piece of paper. I did this for two reasons: firstly to ensure they stood out against the background, and secondly so that I could raise the title as one piece onto foam pads. I finished off with splatters of white paint and a few more punched stars.

Starburst Scrapbooking Inspiration with Niki Rowland @ shimelle.com

If you are ever struggling for inspiration then I would definitely recommend looking at sketches. They don’t have to be followed exactly and can just give you that little spark you need to get your creativity flowing. Even basic ones can get you thinking differently.

Thank you so very much for joining me today, enjoy the video and happy scrapping!

Niki Rowland has a passion for memory keeping and pretty paper. She lives in the UK with her husband and three children, and runs GoGo Getaway Scrapbooking Retreats. She loves coffee, sweet treats, books, and Lego. You can find Niki’s scrappy adventures on Instagram and YouTube.

Scrapbooking a Moment in Time with Michelle Crela

Scrapbooking a moment in time with Michelle Crela @ shimelle.com
Welcome back! Please say hello to guest artist Michelle Crela, who has created a work of art using cut files, embellishments, and photos to tell the story of who she is right now. Such an interesting topic to consider: what motifs would you put on the page to scrap your own personality at this moment in time? -Shimelle

Hi crafty friends! Sometimes it’s good to slow down a bit and allow yourself a moment of self-reflection. So I took a short creative time out and created a self-portrait. It shows me, in my little creative world, away from the hustle and bustle, away from Covid and everyday life. It shows me, in happy moments, inspired and creative. Because that’s me. Surrounded by loving people and incredibly many pens, colors and creative chaos. In thought already at the next book, the next trip, the next creative project. This layout shows you me as I am, as a creative free spirit, book lover and coffee junkie.

Scrapbooking a moment in time with Michelle Crela @ shimelle.com

I designed this layout in my favorite colors. Although I usually like to work on a plain white background, I wanted a little more texture for the wall behind my back – it symbolizes my peg board where I pin creative ideas, notes to myself and also keep my pens, brushes, notebooks and more. To create the layout, I used different cut files. I just cut everything that suits me and inspires me without worrying too much about how it would all fit together. During the design, I then focused more on what is really important to me and found a way for it to fit together. It relaxes me immensely in my creative process to first have a large selection of options for my page.

Scrapbooking a moment in time with Michelle Crela @ shimelle.com

I started with the cutfile of the girl with the book. I think that fits me perfectly. I backed the cutfile with the matching papers and took the artistic liberty to give my hair beautiful copper highlights, since I could not keep my hands off the shiny paper. In real my hair is also highlighted, but unfortunately not so beautifully shiny.

Scrapbooking a moment in time with Michelle Crela @ shimelle.com

Then I backed more cut files with colorful papers: the tins with pens and brushes, paints, the books. My coffee and my camera must also be there in any case. As a title for my layout I designed a banner with a text that I want to keep in mind for my creative year 2022. To live a little more in the moment. Not only to plan for someday. To enjoy everyday life, regardless of whether it is sometimes a bit hectic and chaotic.

Before I subsequently arranged the individual elements on the paper, I added hand-sewn details in various places. Mainly because I find it relaxing to sew on my layouts and because it adds more texture to my layout. I like my layout to be full of details, textures, and colors.

Scrapbooking a moment in time with Michelle Crela @ shimelle.com

Another thing that adds a little texture to my layout are the little balls on the garland, the real feather and the real fluffy ball. While I bought the charms as they are and sewed them on, the little paper balls are quite simple things I made myself. To do this, I punched out a circle 4 times with a paper punch. 3 circles I have then folded and glued together on the fourth circle. I framed my photos by punching out the frames with metal punches and then placed them next to my books on the shelf. After arranging and sticking the main elements on my layout, I then grabbed various stickers to complete my layout. Again, I made sure to surround my designed me, with things that I like.

Have you ever thought about taking a moment to reflect on where you are in your life? To appreciate what you have and just become aware of how many possibilities are open to you? Maybe you’d like to do the same and create a self-portrait that shows you. It is a very nice feeling to simply sketch yourself and enjoy the moment.

If it appeals to you, I would be incredibly happy if you want to share your self-portrait with me. If you post a moment-in-time page on Instagram, please tag me @Michelle_Crela so I can see!

Currently serving on the design team of Hip Kit Club, Michelle Crela has previously worked with My Creative Scrapbook, Scrapbook Werkstatt, and others. She enjoys trying new techniques and products and sharing her insights with other like-minded people. Find Michelle’s ideas for techniques, minibooks, and scrapbook pages on her Instagram, where she looks forward to meeting you.

Creating with Connection with Sarah Millerhouse

Creating with Connection with Sarah Millerhouse @ shimelle.com

Oh bright and beautiful rainbow colour! Guest artist Sarah Millerhouse is here today to share her rainbow-infused take on scrapbooking mermaids and birthday celebrations. Sarah has included detailed notes on the supplies she used, so those have affiliate links for you if you see something you’d like to add to your cart. I hope you’re having a crafty and colourful day! -Shimelle

For me, creating is about connection. I started scrapbooking when I was in high school because I wanted to remember the details and how I felt about the world at that time in my life. My work back then looked very different, but the goal was the same. I wanted to leave something behind that told my story. When I create a page now, it is usually always focused on making sure my kids and my husband remember their story. I want them to know that they are so very loved and that I have cherished and relished in every minute we have spent together. Because I lost a parent at a very young age, I have a need to document my days. It is important to me that if I were gone tomorrow, my family would have a legacy of love and photos and words to look through that would leave no doubt in their mind how I felt. I also believe that, through my pages, they are able to see who I am. As cheesy as it sounds, my pages are a reflection of my soul. The colors and layers and textures reflect who I am. When I create, I work and work until my page feels like me. I have a connection to the photos I use and every fine detail in each and every project.

For this layout, I wanted to reflect how I felt about the day we celebrated my sweet girl turning two. It was a day full of fun, laughter, the people we love, and the colors of the ocean! I used Foundations mixed media paper and started with the background using a large format stencil to create mermaid scales.

Creating with Connection with Sarah Millerhouse @ shimelle.com

I added Distress Oxide Inks with an ink blending tool to blend the colors on the paper in rainbow order. While the scale stencil was still on the page, I laid another stencil, by Tim Holtz, over the top of that to an additional layer of visual interest. I used the same ink blending tool, but I applied more pressure to get darker pigment through the top stencil.

Creating with Connection with Sarah Millerhouse @ shimelle.com

Across the bottom third of the page, I layered on Distress Inks in the same colors as the oxides to mimic water and the reflection of a sunset on the water! Once those inks were dry, I added splatters of white acrylic paint. By adding this layer of color across the page, it provided a place for my photos and embellishments to rest on the page. On top of the distress inks, I added a few strips of patterned paper, from the All Girl collection by Echo Park, in descending lengths. I distressed the edges of each strip and glued them only at the top so that I could bend them up to add even more texture.

Creating with Connection with Sarah Millerhouse @ shimelle.com

I added two sweet photos from Ruby Jane’s party! One is of her in her precious outfit, enjoying the sunshine! The other is with the beautiful mermaid that came to her party. She was mesmerized by her! I backed these photos with more patterned paper from the same collection and popped them up on foam to help them stand out on the page. I embellished all around the photos with an assemblage of pretty things! I started with the three mermaid chipboard stickers from Shimelle’s Head in the Clouds collection. I distressed them a little and added some glitter details. I added the rainbow chipboard piece from the same collection just under my photos. I distressed and added glitter to this piece as well. I added wooden buttons from Shimelle’s Never Grow Up collection and a few cardstock stickers from the All Girl collection. I also added and popped up a tiny butterfly from the Go the Scenic Route collection by Paige Evans.

Across the top I popped up the title in reverse rainbow order using eight different sets of Thickers. I thought the title “2 Beautiful” was a cute play on words and just perfect for the layout! I added Jewelz by Buttons Galore and More and enamel dots from the Never Grow Up collection around the page in tone-on-tone layers. As a final touch, I added a strip of journaling under the last layer of patterned paper across the bottom of the page. I matched my ink colors to the colors of the layout and tried to capture the joys of my first two years with my sweet girl!

Sarah Millerhouse is an elementary school principal, owns a catering business, is a wife and mother and still finds time to scrapbook! She’s been scrapbooking for almost twenty years and loves how her style evolves with time. Sarah lost her father at an early age and believes her need to document the detail of life comes from that loss. He loved to take photos and document memories, so she is grateful for what he captured and hopeful the future generations of her family will be able to treasure the legacy created through scrapbooks. You can see more of Sarah’s work on Instagram.

Scrapbooking Delicate Cut Files with Piroska Czakó-Radványi

Scrapbooking Delicate Cut Files with Piroska Czakó-Radványi @ shimelle.com

Hands up if you have a cutting machine like a Silhouette, Cricut, or ScanNCut. How often do you cut something delicate and light? Today’s guest artist Piroska is here with a scrapbooking idea for just that! -Shimelle

When I start making a layout, I often grab a cut file – it helps me to arrange the layout and I really love the special effect it gives to my pages. For today’s post I used the Stained Glass Rose digital cut file of CUT to YOU.

Scrapbooking Delicate Cut Files with Piroska Czakó-Radványi @ shimelle.com

First, I cut the cut file from white cardstock and started to back them with some patterned papers of the Splendor collection of My Mind’s Eye. This collection is an older one, but I still love its beautiful florals and colours. By backing a cut file, I like to chose papers with smaller patterns, and the Splendor collection has beautiful B side papers.

The circle cut file inspired me to use more circles on my layout, so I cut several circles in different sizes with my Sizzix, using the 662229 Framelits by Tim Holtz for Sizzix.

Although the A side papers are also beautiful, I chose only B side papers for these. Then I arranged the cut file and the circles on a white cardstock and placed my photo. It looked too plain, so I decided to add a border on the upper side from the B side of the Remember paper.

Scrapbooking Delicate Cut Files with Piroska Czakó-Radványi @ shimelle.com

My favourite part of creating is decorating the layout. I cut a pink embellishment with the Embroidery Frame die of Lora Bailora’s Abril collection. I added some floral chipboard elements from the Splendor collection and cut some floral elements from white cardstock with the help of the Flower Wreath, the Flowers Bouquet and the Spring Branches dies of Lora Bailora’s Abril collection.

I really love the white on effect of these embellishments. Finally, I added my title chipboard from the chipboard elements from the Splendor collection and my journaling – which is a line from the B side of the Remember patterned paper.

Piroska Czakó-Radványi lives with her husband and their 8.5 year old daughter in Budapest, Hungary. Piroska works as a teacher in a secondary grammar school teaching German language. She started scrapbooking in 2007, when she met her husband as she loved making handmade presents for him. She prefers to make 12”x12” layouts with lots of flowers, leaves, and/or butterflies. You can see more of Piroska’s work on Instagram, & Facebook .