paper: pretty paper. true stories. {and scrapbooking classes with cupcakes.}

lovely to meet you Twitter Facebook Pinterest YouTube

Take a Scrapbooking Class

online scrapbooking classes

Shop Shimelle Products

scrapbook.com simon says stamp shimelle scrapbooking products @ amazon.com shimelle scrapbooking products @ amazon.co.uk

Reading Material

travel

Scrapbooking Photo Clusters with Sarah Wyles

Scrapbooking Photo Clusters with Sarah Wyles @ shimelle.com

Did you have an inspiring weekend for National Scrapbook Day? I hope so! But here’s some more: guest artist Sarah Wyles is here to share some beautiful embellishment work! -Shimelle

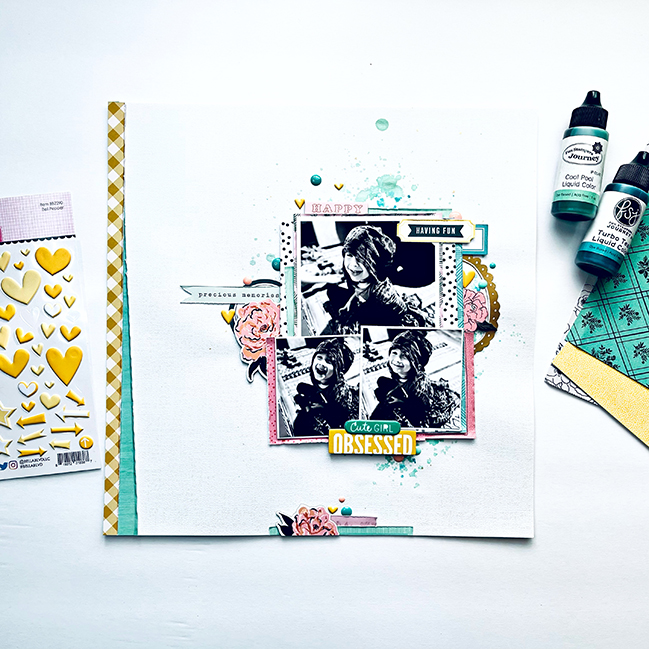
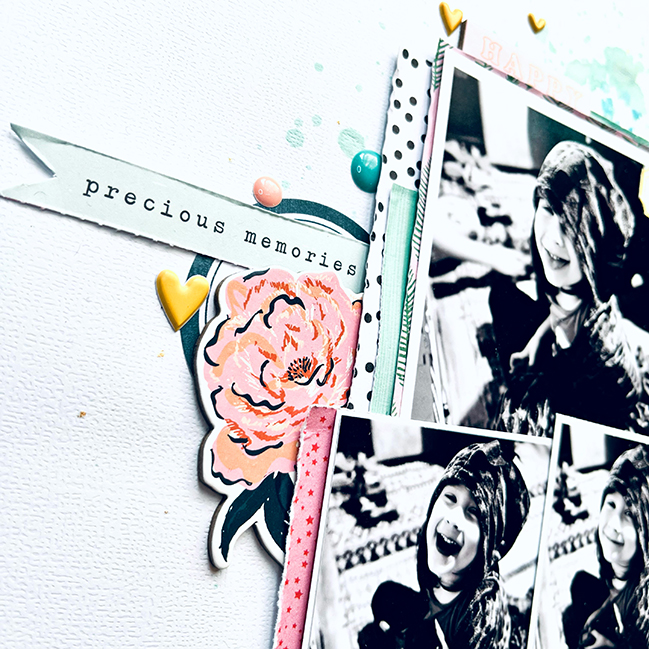
Hey everyone! I was so excited to be asked to be a part of this! And then I kind of freaked out cause I didn’t know what I was going to do. Just being honest. But a few days later I walked in to see my daughter playing on her floor with her ponies, dinos and cute little dino blanket on her head and snapped a few pics and thought this was perfect!

I scrapbook a lot of pictures and they always mean something to me, even if it doesn’t look like it to others. But this, this was a shot of my little girl, being completely herself and loving every minute of it. I want to make sure to collect all of these moments because she’s growing up and doing it fast and I don’t want to forget any of it. Now for putting my layout together….

Scrapbooking Photo Clusters with Sarah Wyles @ shimelle.com

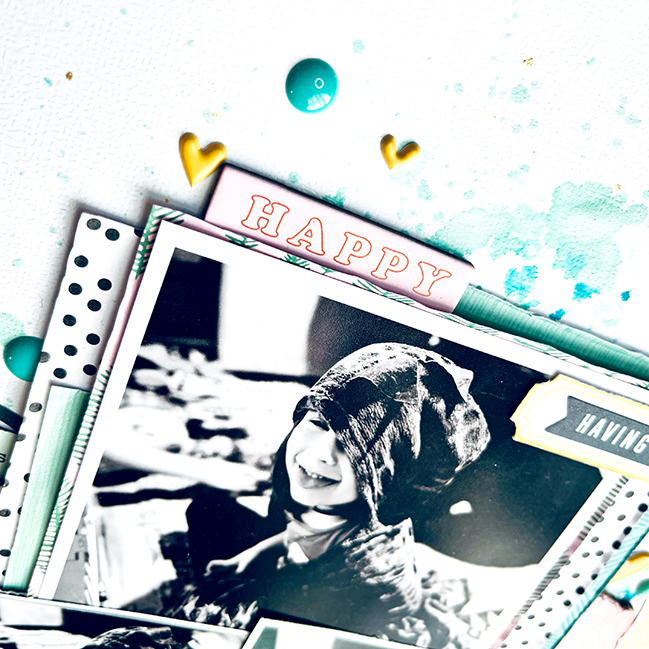
I decided in the beginning how I wanted to have my photos clustered together, so I added some adhesive and stuck them together and figured I would figure out the rest as I went. I knew she was looking to the left in all three of them so I knew I wanted my pictures to be on the right side of the layout, then came the little bit of mixed media on the background. I pulled two of my Fun Stampers’ Journey liquid colours and splattered them around, hit it with my heat gun, cause I’m impatient and kept moving.

I pulled out my little bin where I keep all my scraps and partially used 6×6 paper pads and started pulling the colors I had decided to use. I have a love for the colors teal, pink, and yellow. I also threw in some black and white paper and small touches of gold. These are colors I love together but are also some of my daughters favorites so it works out great for me.

Scrapbooking Photo Clusters with Sarah Wyles @ shimelle.com

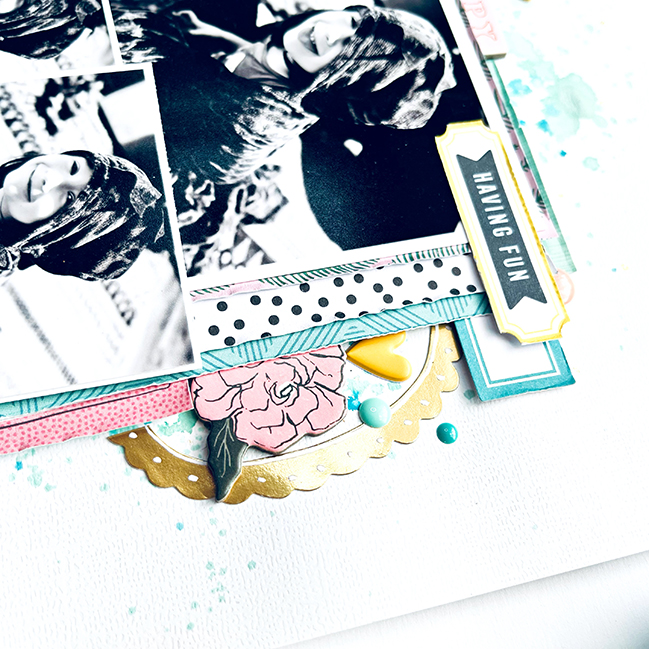
I started pulling papers and tucking them behind my pictures, not even caring that they were from different collections or manufacturers, they looked good together and that’s all that mattered to me. I love scrapping this way, it makes it easy for me. Once I had all the layers right where I wanted them, all stuck together, I added some foam adhesive to the back leaving a space to the upper left where I had decided to place a tag that slid down behind the pictures, a little note for my little miss when she gets older. I am not huge on journaling where it can be seen, I usually do it with a hidden journal spot or on the back of the layout, but I wanted to leave a little note for my daughter, something hidden for her, that let her know exactly how this moment made me feel and how I loved it.

After that, I pulled out my bin that holds a bunch of random ephemera pieces and chipboard pieces, pulled things in my color set and started tucking them here and there till I was happy. This always takes longer than I think it probably should, but I move things around so much.

Scrapbooking Photo Clusters with Sarah Wyles @ shimelle.com

I thought I was done at this point, I liked my layout and thought my daughter was front and center and pulled the focus, but I felt like my page was a but one sided, so I decided to grab some of my scrap paper strips and add them to the far left edge and a few little strips at the bottom. I went back and grabbed some of my Bella Blvd puffy stickers and My Mind’s Eye enamel dots, tucked them here and there and I was finally happy with my layout and called it done.

Sarah Wyles is a self confessed addict to paper crafting. She loves to scrapbook, whether that be traditional, mixed media and pretty much everything in between. Sarah has been scrapping since she was nine! She loves all the pretty things and says she never really worries if they come from the same collections so long as they come together and make something pretty. If you are interested in anymore inspiration from Sarah, feel free to check out her social media on Instagram and Facebook.

Happy Scrapbook Day! NSD Special Offers!

shimelle lettering - patterned papers

Happy International Scrapbook Day! I hope you’ve found something crafty to inspire you today! Here’s a quick round up of some special NSD offers around here.

1. Class Discounts! Three classes are available at a special price this week. These are all self-paced classes with permanent access. Registration can take up to 48 hours, but is usually much quicker.

Half & Half is all about page composition that starts with a background that is half one paper, half another paper. It also includes a mini class on quadrant page design. For NSD, this class is just $12 USD.


Start with a Sketch breaks down how sketches can be interpreted to create a variety of pages. For NSD this class is just $20 USD (it’s usually $30).


Most Magical Scrapbook shares fifty layouts from start to finish to follow my entire process in creating an album to document a trip. It’s a Disney trip, but you can decide to follow along with your own Disney photos or ignore the theme park element entirely and adapt it to any story you want to tell. For NSD, this class is just $20.


This offer ends next Saturday, the 14th of May 2022.

2. Words, words, words!
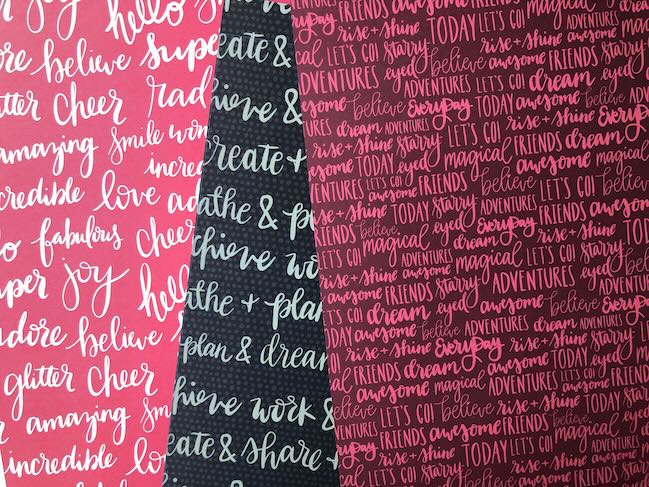
When I designed paper collections, I always started with lettering. A selection of words would fit together to set a theme and make everything make sense to me! In honour of NSD, I’m sharing words with all of you! I started taking requests during Friday Live yesterday and will finish taking them next Saturday, so I’ll be adding to the collection for a little over a week. All the words will be letter as transparent PNG files and will be free to download. Use them on any personal crafting projects you like: cut them on a cutting machine, overlay them on photos, print them on journaling boxes, whatever you fancy. Downloading a word is free; requesting a word is $2. To request a word, pop it in the box and click through to check out!


Requested Word:


This offer ends next Saturday, the 14th of May 2022.

If you would like to request a word but don’t want it shared with everyone else, that won’t be available this week. Once I have lettered all of these words, I’ll open those requests for a short time. Those words will be $6 during that time period. (During the rest of the year, this is something I offer on a contract basis for things like logo design, and it’s considerably more than $6.) I just want to make sure I finish this project before taking on those extras. Thanks!
3. 5% off at Scrapbook.com – including next month’s Best of Both Worlds kit!
Today only you can use code NSD2022 for 5% off your full order. (Heads up – affiliate links here!) You could order the June Best of Both Worlds kit and scrap along with me during all the livestreams next month. You could check out the Pops of Color special that’s a particularly excellent value. Or stock up on essentials or grab a new album! Whatever you fancy. Happy shopping!
This offer ends at the end of today, Arizona time.

Strangely enough, we’re starting the build on our kitchen here on National Scrapbook Day, so I’ll leave you to those special updates for now, and see you on Monday’s livestream at 1:30pm UK time!

Glitter and Detail Cutting with Veronika Seňová

Glitter and Detail Cutting with Veronika Seňová @ shimelle.com

Ready to get inky and sparkly? Guest artist Veronika is here to share how she used stencils, inks, glitter paste, and patterned paper to dress up a joyous birthday memory! As usual, supplies have affiliate links to make it easy for you to shop. Have an amazing and sparkly day! -Shimelle

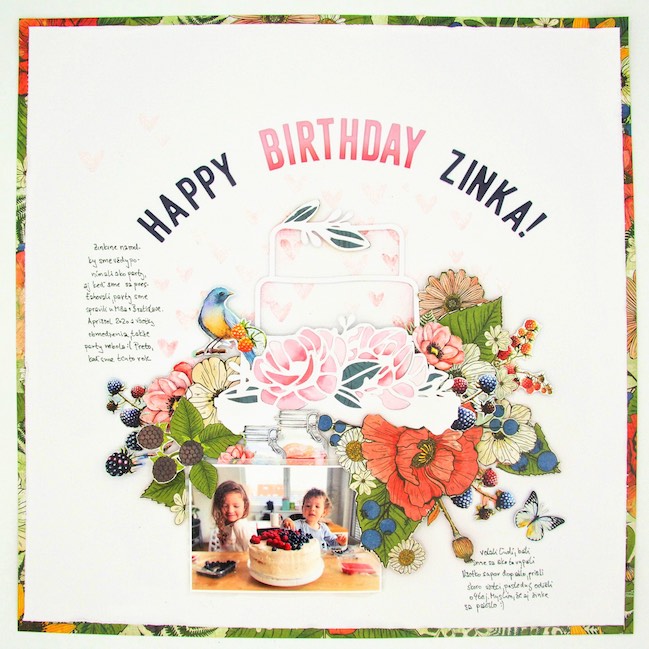
Hello Scrappy friends, I have a birthday layout to share with you today. We love to celebrate our baby’s birthday with friends, so we really missed it back in 2020. But this year it was possible to have a party as we used to have, so we prepared everything and of course cake as well. And I really like this picture of my two girls, embellishing it. So I decided to scrap this for Zinka’s birthday instead of a classic birthday photo.

Glitter and Detail Cutting with Veronika Seňová @ shimelle.com

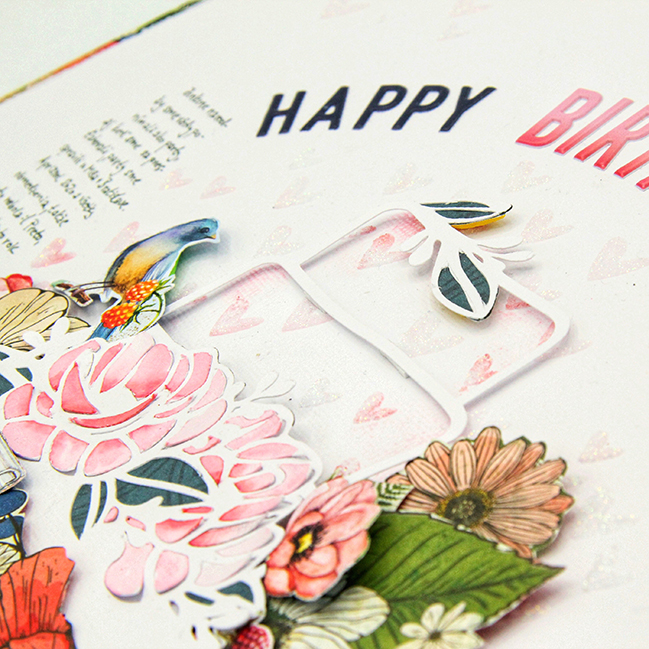
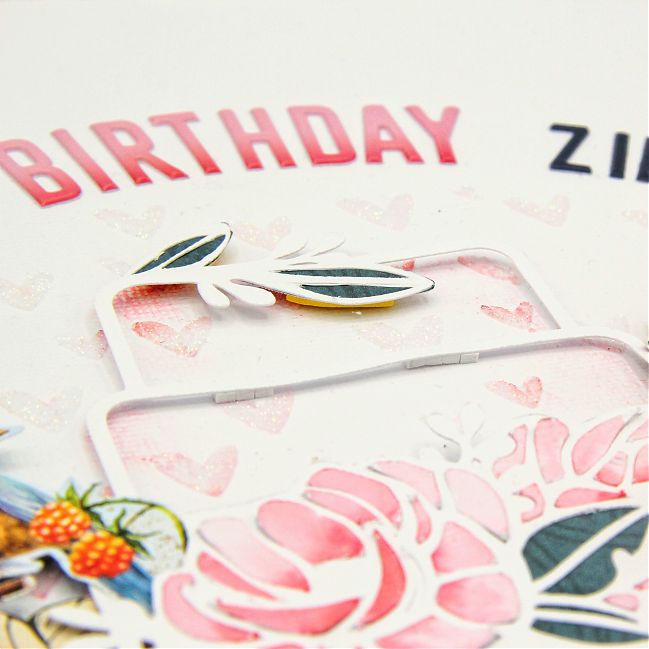
I wanted to use stencils, so I was looking for something in my stash that would match my photo. I liked this stencil with hearts. I tried to use it just with Distress Oxide Inks, but it was not fancy enough for the festive party look I imagined, so I went for glitter paste. There was still a bit of red Oxide color on the stencil and it created a beautiful dreamy effect together with paste.

Glitter and Detail Cutting with Veronika Seňová @ shimelle.com

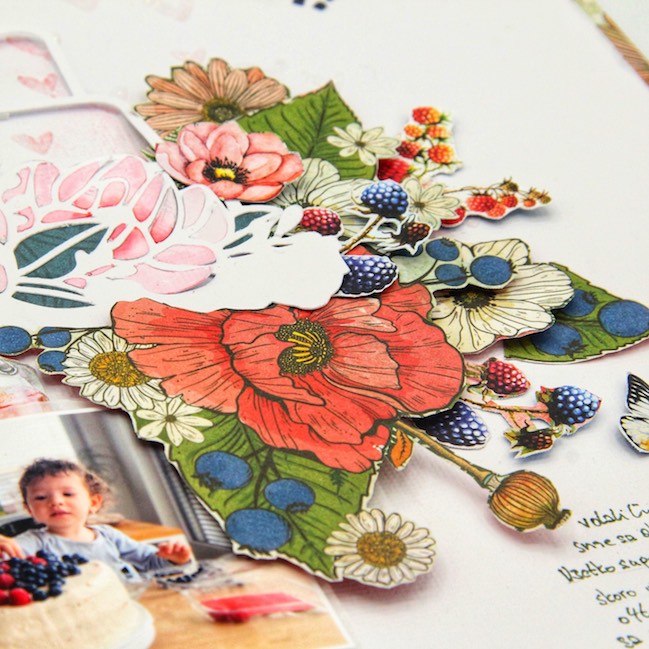
Then I decided that I want have also cake cutfile on my layout, to use stencilled area as part of cake. So I went on etsy and found this beautiful one with peonies. (Here’s a similar floral cake cut file.) I colored the leaves of flowers with same Oxide as I used with stencil and paste.

Glitter and Detail Cutting with Veronika Seňovár @ shimelle.com

As there are raspberries and blueberries in my photo, I was looking in my stash for papers with this fruits. I found two papers, one from Mintay papers and another one from the Vicki Boutin Fernwood collection. I detail cut fruits and flowers as well as a bird and butterfly, and then I adhered it around my cake cut file and my photo. I used glue and foam squares to create dimension. Then I went for the simple title “Happy Birthday Zinka” above my composition, and at the end I wrote my journaling. As a final touch I backed my cardstock with rest of patterned paper from Vicki that I used in layout.

Veronika Seňová lives in Slovakia, and is a mathematician, wife, and mother of two little girls. She loves to take pictures and scrap them to document family memories. Veronica started scrapbooking when her first baby was born and it has been her passion ever since. You can see more of Veronika’s work on Instagram.

Bold Patterns and Multiple Photos with Becky Powell Reames

Bold Patterns and Multiple Photos with Becky Powell Reames @ shimelle.com

Hello friends! Only a few days until International Scrapbook Day, so I hope you are having a fun and crafty week already. Today please welcome guest artist Becky Powell Reames, who loves Instagram and memory keeping! A reminder that affiliate links are used for products where possible. Thanks! -Shimelle

I love finding inspiration from the layouts that others post on Instagram. I follow over 800 different creators on IG because each of them has grabbed my attention at one time or another in some kind of way. Maybe I loved a photo they took, or a color scheme they used for a layout. Maybe their journaling was especially poignant or I loved a title they built for a page. Usually, it is because I like their scrapbooking style; it spoke to me, it made me want to scraplift their work or challenge myself in a new way.

One of the accounts I follow is Shimelle. I recently was looking through her feed and found a couple of her layouts that really jumped out at me. In the past, I have focused on double page spreads, but for the past couple of years I have been really into single page spreads, usually with only one photo. Shimelle is so good at adding more than one photo to a single page spread and making it look amazing. The layouts of hers that inspired me most recently were one where she used multiple photos on a single page spread and one where she used a bold pattern paper at the top of her layout. I LOVE a bold pattern print paper but sometimes struggle with how to combine it on my layouts. I fear overpowering my photo/s.

Bold Patterns and Multiple Photos with Becky Powell Reames @ shimelle.com

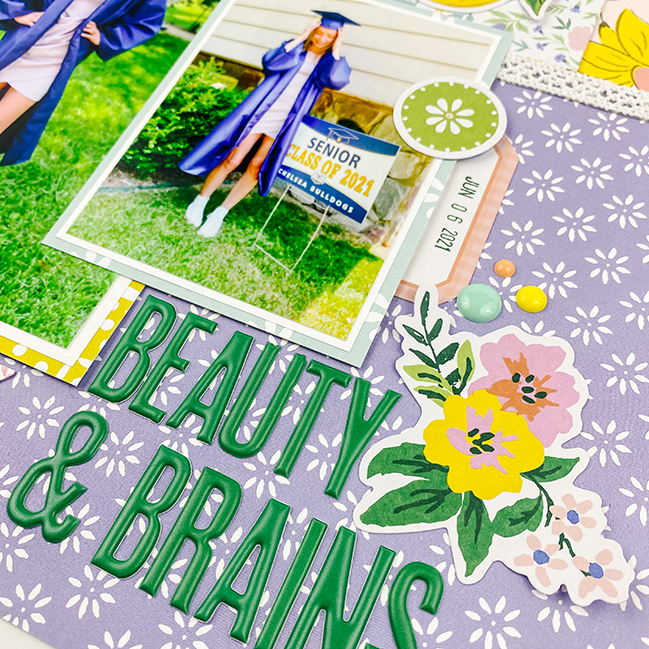
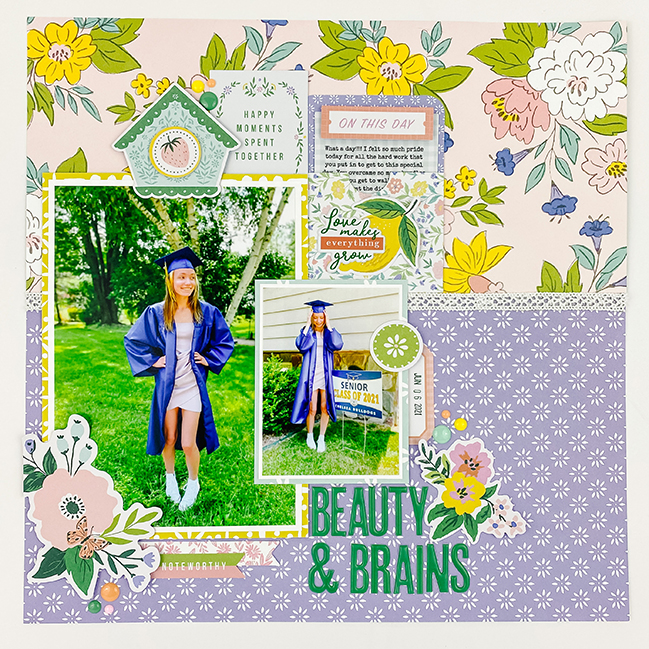
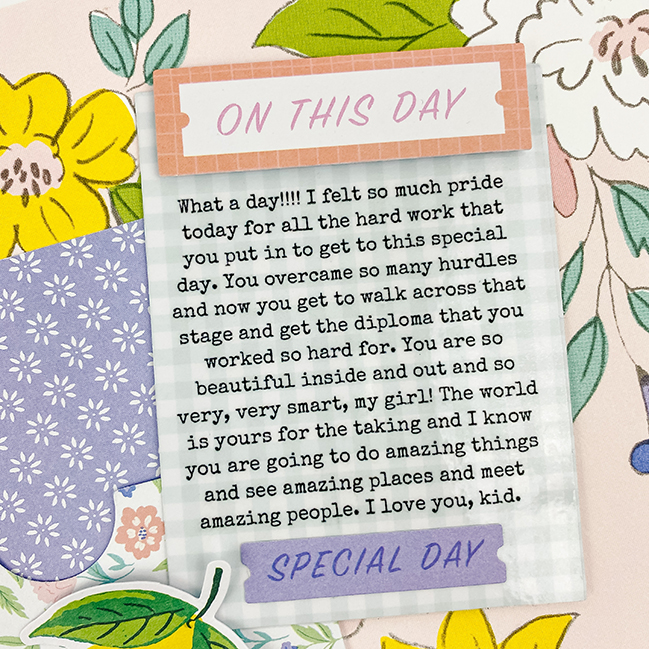
Seeing these two layouts of Shimelle’s in quick succession inspired me to try a scraplift of sorts. I decided to try a bold pattern paper at the top, and to add more than one photo to my single page layout. I chose to work with the Happy Blooms collection from Pinkfresh Studio for my page, because I love the bright greens in it and I felt like it had a good purple to go with my photos as well. I often choose product for a layout based on the colors in my photo/s. The photos on my layout are of my youngest daughter on the afternoon of her high school graduation where she is wearing a light purple dress under her graduation gown and is standing on the very green grass of late spring. I printed the main photo of my layout a little larger, as a 5×7 since the patterned paper at the top had such a bold print, and kept the bulk of my page to one side in order to allow for some white space for the eye to rest on the opposite side of the page. My journaling is somewhat hidden in a pocket and is printed on clear sticker paper. I then added the “special day” sticker at the bottom of my journaling and raised the “on this day” label on some foam tape at the top of the journaling.

Bold Patterns and Multiple Photos with Becky Powell Reames @ shimelle.com

I hope that you enjoyed seeing my layout and maybe found some inspiration for yourself! I would love to connect with you on Instagram where we can inspire each other, perhaps!

Becky Powell Reames is a single mom of two adult humans and two rescued cats, all of whom keep her on my toes and help her to keep a fresh outlook on life. A former elementary school teacher who now works in the world of philanthropy, she loves to spend her spare time working in mhery craft room on scrapbooking! She began scrapbooking in 1998 when she made a scrapbook of her now ex-husband and childhood and family photos to put out at her wedding. Becky loves to learn new techniques and try new things, and in the past couple of years has embraced stamping as an added element to her scrapbook pages. Becky records memories in 12×12 albums or Traveler’s Notebooks with the occasional odd sized album thrown in for seasonal projects. You can see her work on Instagram, where she would love to meet you.

Distress Ink Rainbows with Monique Lowe

Distress Ink Rainbows with Monique Lowe @ shimelle.com

Hands up if those hands are inky today! Guest artist Monique has a beautiful rainbow to share with you today – all made with Distress Inks in her favourite colours. And yep, I’ve added affiliate links to those Distress Inks in this post if you want to go shopping. And yep, it kinda feels silly that I have to disclose that at the beginning of every blog post, but I don’t like getting in trouble so I’m just here to follow those rules and scrapbook with rainbow colours. I’m sure you understand. And now over to Monique! -Shimelle

Rainbow colours bring me so much joy so I find myself naturally drawn to using all the colours when I create. As far as favourites go, a close second is making something beautiful, from scratch. It’s such a little thing but never fails to fill my creative cup to the brim. This layout captures both of these elements, along with a sweet memory, so it goes without saying, that I loved every minute of crafting this page.

!Distress Ink Rainbows with Monique Lowe @ shimelle.com

My layout comprises of two main layers, a sheet of patterned paper with a subtle black, grey and white print (with a heart shape cut out of the centre) and a white mixed media cardstock background, which I add a rainbow of colour to.

Distress Ink Rainbows with Monique Lowe @ shimelle.com

Beginning with the background, I started off by adding some stencilled little hearts using opaque white texture paste. Once dry, I chose a variety of mini Distress Ink Pads in my favourite rainbow colours and ‘swooshed’ each ink pad diagonally across the cardstock, working in rainbow sequence. The fun part about applying the ink pad directly to the background, is the lovely visual texture and sense of movement you can achieve by seeing the swoosh marks. This rainbow ‘swoosh’ technique is a really quick way of adding fun pops of colour to a page.

Distress Ink Rainbows with Monique Lowe @ shimelle.com

For some handmade floral embellishments, I repeated this same rainbow process on a new sheet of mixed media cardstock. I swooshed each colour in a vertical stripe down my page until I’d worked through all the colours. I then took my wet paintbrush and added dabs of water where each colour met, creating a lovely watercolour effect. I was careful not to completely paint over all the swoosh marks as I wanted to keep some of that visual texture too. This technique works well with both Distress Ink Pads and Distress Oxides as they react beautifully to water.

Distress Ink Rainbows with Monique Lowe @ shimelle.com

Once dry, I used a variety of Sizzix floral dies to cut flowers of various shapes and sizes. I then layered and glued different sized flowers, in similar colours together to create 3D floral ephemera. With my patterned paper heart frame stuck down in place, I added in my title and 3 photos and placed my florals within the heart, working tone on tone with the background.

Distress Ink Rainbows with Monique Lowe @ shimelle.com

Last but not least, a short and sweet story for my journaling to accompany precious pics with my twins, the night before they turned six. These cuddles felt extra precious because they are growing up so very fast and I just want to treasure these little moments forever. I have such a clear memory from my own childhood on the eve of my 6th birthday so I really wanted to document the same moment with own babies.

Distress Ink Rainbows with Monique Lowe @ shimelle.com

While I’ve used hearts and flowers for my layout, any shapes would be just as effective, and punches or hand cut shapes could easily be used instead of metal dies. Equally so, you could pick a more muted or alternative rainbow for your colour palette. If you have larger ink pads or prefer distress oxides, you could still use this technique but have slightly broader swooshes. For me, the main thing is to have fun with the process and see where it takes you. I’m never too certain how a layout will turn out as I tend to venture off, letting the process of creating lead the way. But, whatever route your creative journey takes you, I hope something I’ve shared today inspires you to create, document a memory or just have some fun playing with colour.

Originally from South Africa, Monique Lowe now lives in Scotland with her husband, twins, and two cocker spaniels. She is a part time school teacher and full time passionate crafter and chaos creator. She draws on sunshine and bright colours when creating and particularly loves playing with mixed media. . Find more from Monique on Instagram,Facebook and Youtube.

Hidden Journaling with Natsuko Suzuki

Hidden Journaling with Natsuko Suzuki @ shimelle.com

Hello friends! Ready for more scrappy rainbows? Because today Natsuko joins us all the way from Japan with her adorable take on the spectrum of colour. Plus a little reminder that there’s a discount code just about to expire if you’re going to shopping: use code APRIL5OFF for an extra 5% off your whole order at scrapbook.com. (That’s an affiliate link!) Right, take it away, Natsuko! -Shimelle

Hi friends! I’m Natsuko, a Japanese Scrapper. Today I’m happy to share a layout I made with some pictures of my daughter. When I make layouts, I love adding layers and dimension. For this one, I detail cut a lot of stars, added foam under some of them and overlapped them.

Hidden Journaling with Natsuko Suzuki @ shimelle.com

Usually, I write a short bit of journalling or just the date and place of where the picture was taken, but this time I wanted to write a lot, so I made little folded notes with washi tape and hid the journalling inside. In this way the layout would not be too busy.

Hidden Journaling with Natsuki Suzuki @ shimelle.com

I always tell my daughter to be herself, and it’s okay to be different. Sometimes it’s difficult, because many people in Japan put emphasis on cooperativeness than individuality. I lived in England during my childhood, and came back to Japan when I was 10. I had a hard time blending in because of cultural differences, and was always seen as an oddball. As I grew up, I realized that nothing was wrong about being different and having your own opinion. I became stronger and made a lot of friends who actually wanted to be friends with me.

Hidden Journaling with Natsuko Suzuki @ shimelle.com

In the journalling, I wrote a message to my daughter not to be afraid of being alone if she’s uncomfortable being with people who don’t approve of her. I want her to be happy and confident. This is a good way to keep the writing hidden if its long or if you don’t want it to be seen.

Hidden Journaling with Natsuki Suzuki @ shimelle.com

Scrapbooking is fun and therapeutic for me, and sometimes just playing with paper is fine. There is no rule in scrapping, and what’s important is to simply enjoy it! Thanks to Shimelle, for the great opportunity! Happy Scrapping!

Natsuko Suzuki is from Japan and has been scrapbooking for more than ten years. Most of her layouts are about her family, especially her daughter, and their everyday moments. Her style ranges from colorful to chic, depending on the picture she chooses. You can see more of Natsuko’s work on Instagram & Facebook.

Rainbows and Die-Cut Files with MJ Magnuson

Rainbows and Die-Cut Files with MJ Magnuson @ shimelle.com

Ready for some more #scrapbookrainbows inspiration? How about a double page layout? Please welcome today’s guest artist, MJ Magnuson! A reminder that supplies have affiliate links to make the guest artist series possible. Thanks for clicking through when you go shopping! -Shimelle

From my perspective, it doesn’t get much better than rainbows! They are so essential to the person that I am, and I wanted to create a project that authentically felt like me. If you were to take a step into my wardrobe (which includes all of my colorful and most cherished scrapbook albums), you would see a bright array of clothing, shoes, hats, and all of the things that make me feel the most like me. I wanted to create that same vibe with this project!

Ideation is one of my favorite parts of crafting, creating, and even when working at my 9-5pm job. I started by laying out some of my most recently purchased rainbow sheets (including some notable patterned papers from the Fantástico collection from Obed Marshall and the Pebbles Kid At Heart collection), and then I just let my creativity fly!

However, I really wanted to strike a balance between adding “all of the rainbows” without it feeling too disconnected. I also LOVE using big bold cut file titles in my projects, and I truly believe that every page could use a little sparkle- so I backed one of my favorite Paige Taylor Evans cut files (which is saying a lot) with some gorgeous Diamond glitter paper from the Stamp Market.

Rainbows and Die-Cut Files with MJ Magnuson @ shimelle.com

To tie the two pages together, I added a mix of star die cuts from the same glitter sheet to each of the pages and also used the same Pebbles background paper from the right page as the cut file border from the left page. I have been itching to use some pom poms and fabric strips in my crafting, so I added some rainbow pom poms to the left edge and a soft daisy strip of fabric to the right page. I really loved how this softened up the right page, as I knew that I wanted to create a title of rainbow letters on the right page (and I didn’t want to pull too much focus away from the title). I added those colorful alphas, along with a fun mix of stickers, and then decided that this page was ready to roll!

The inspiration behind this page is a bit darker, despite the punch of rainbow that this spread packs. The photo was from my 30th birthday amid the pandemic, and I had recently lost my job. I wasn’t going to let it get me down, though, and I made it a priority to go out and get some fun photos outside- socially distanced, of course ;) This photo was taken on the way back after being stuck inside for 8 weeks due to the pandemic, and after everything I had been going through during that time, this day felt like a burst of sunshine in the darkness.

Despite all of the fear of the pandemic and the uncertainty regarding my job situation, this was a great day. I used the cut file title and the alphas to serve as a reflection of the hope that I tried to invoke during this time, in the face of surmounting obstacles. Documenting memories like this is so important, and I appreciate having this photo and moment to look back on!

Rainbows and Die-Cut Files with MJ Magnuson @ shimelle.com

My biggest hope for creating projects like this is that it inspires other crafters to tell their stories. The tough ones, the fun moments, the goofy, or even embarrassing ones. YOU are worthy of having your stories shared, appreciated, and heard. Who you are deserves to be celebrated, and even if colorful rainbows aren’t your jam- try using pastels or creating a cool monochromatic masterpiece. No matter how you create, you will never regret sharing pieces of yourself in your own crafting projects. I promise you that!

You might know MJ Magnuson as @scrappygolucky on Instagram! If you’re into all things rainbow, authenticity, and finding fun ways to tell your story, then join along with her crafty adventures on Instagram.

Scrapbooking on a small scale with Cristin Howell

Scrapbooking on a small scale with Cristin Howell @ shimelle.com

What size scrapbook pages do you make? With the exception of the Christmas season, I’m all in for 12×12 and have been for a while now. It’s a format that works well for me, but it doesn’t stop me adoring plenty of crafters’ work in other page sizes and album formats! Today’s guest artist Cristin shares a different page style in terms of size and binding but something familiar for sure – #scrapbookrainbows! Enjoy! -Shimelle

Hi there! It’s Cristin here. First, I’d like to thank Shimelle for having me as a guest on her blog. I’m delighted to share this page with you today. and I love making bright & colorful scrapbook pages on a smaller scale (travelers notebook sized or 6×8). Keeping things in this format helps me keep up with recording my memories and, most importantly, remembering the good times. At the beginning of 2021, I started using binder/loose leaf rings to contain my scrappy albums. It’s an inexpensive, informal way to scrapbook and it’s easy to add in pages and not worry about bulky ephemera. I wanted to share a fun layout with you documenting a trip to a u-pick citrus farm this past December.

Scrapbooking on a small scale with Cristin Howell @ shimelle.com

I had never been in a tangerine orchard before! I took lots of pictures of the little tangerines while looking through the branches. Of course I had to include a selfie with my spouse, John, and the “fruit” of our labor (ha!) – our bucket of tangerines. I usually scrapbook with a bright palette and for this occasion, a fun RAINBOW theme seemed perfect. Besides the fun background patterned paper, more rainbows were needed!!

Scrapbooking on a small scale with Cristin Howell @ shimelle.com

Sketching a curved line on plain white cardstock created the structure for the rainbow shape. Any shape will work fine – I like to cut my cardstock to the page size first. Then, a small paintbrush paired with a rainbow assortment of acrylic craft paints (any brand) followed the line to create the colorful rainbow ribbon.

Scrapbooking on a small scale with Cristin Howell @ shimelle.com

I recommend trying non-traditional rainbow colors and mixing up the color order to match your photos or paper. I like sticking with the same color saturation, though – meaning, the colors are all the same brightness. After drying, I trimmed these pieces from the cardstock and adhered them to the background.

Small letter stickers were used for the title, and since I’m scrapping on a small scale (no room to spare!), I stuck the title right on top of my main photo. I love how colorfully this turned out! Thanks so much for hanging out with me today as I shared my layout with you!

Cristin Howell lives in central Florida, USA. Memory keeping is her passion and she has been scrapbooking on and off since 1999. Cristin loves to create layouts in full color – bright pinks and turquoise are her favorites! This past year, she has been scrapbooking on a smaller Traveller’s Notebook-sized scale.. Find Cristin on Instagram & her website.