pretty paper. true stories. {and scrapbooking classes with cupcakes.}

lovely to meet you Twitter Facebook Pinterest YouTube

Take a Scrapbooking Class

online scrapbooking classes

Shop Shimelle Products

scrapbook.com simon says stamp shimelle scrapbooking products @ amazon.com shimelle scrapbooking products @ amazon.co.uk

Reading Material

travel

photography Category

How do you deal with imperfect digital photos?

how to deal with imperfect digital photos
how to deal with imperfect photos
Like with so many things, there has to be a balance with scrapbooking, right? The need to be in the moment has to balance the desire to have photographs of plenty of real life events, both big and small. I will be the first to admit that this very balance creates some very imperfect photos in my collection. Pictures I could certainly compose, focus and light much better with even thirty more seconds of thought. But if it’s a moment that will be gone thirty seconds later, what’s the use?

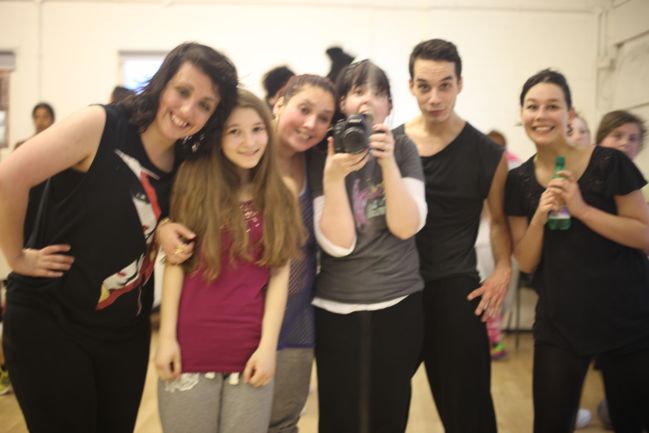
And so I end up with photos like this: this is a picture from this past week taken in a total spur of the moment, straight from the camera (except for resizing) so you can see all its flaws. Like how I didn’t even notice the line in the mirror join went right through my face, how the focus is not sharp (and it was taken with far too shallow depth of field to ever get all six of us in focus), how the colouring isn’t great. But that’s the shot I have from that particular moment: take it or leave it, right? And as a scrapbooker, the keeping is far more likely.

So my question to you this time is How do you deal with imperfect digital photos? Do you delete them except in certain circumstances? Do you try to identify them quickly and recreate the moment as much as possible? Do you try printing them small or large or editing them to look a bit better? Do you include them in pockets or somewhere less obvious than your clearest, most beautiful images? Do you keep meaning to scrapbook but just put them back in the file? Dish the dirt on your strategy and whether it works for you.

how to deal with imperfect digital photos
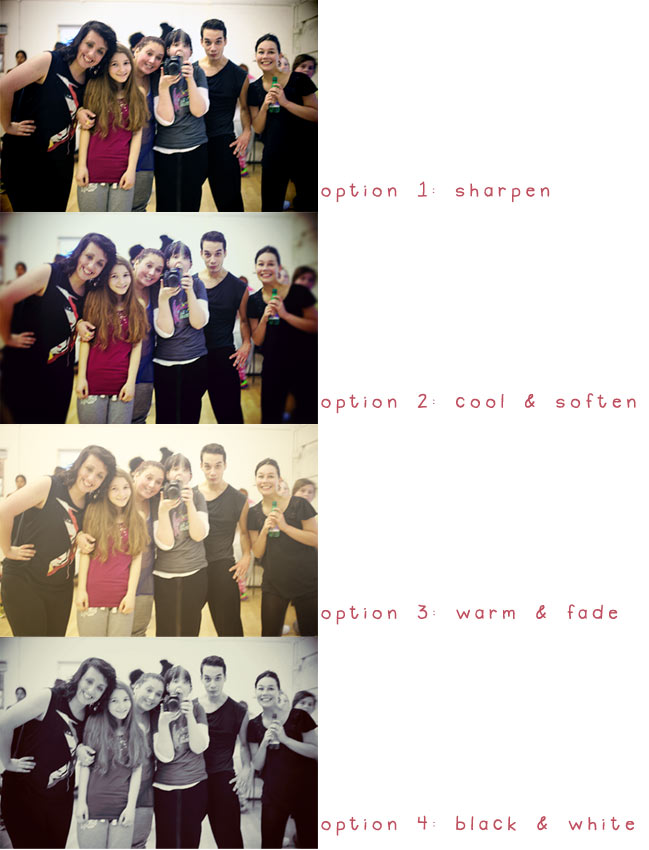
Faced with an image like this, I’m likely to turn to Photoshop and make the best out of an imperfect photo by arting it up just a bit. None of these strategies will take an out-of-focus, poorly composed photo and make it win prizes, but they do make things just a little more clear for me to remember that moment in my albums. The four options I come back to each time are to sharpen the image (to see if it’s possible to crisp up something that is just barely out of focus), to cool the colours and soften the focus even more so there’s an obvious look of something other than digital precision, to warm and fade the image so it mimics an analogue photo that sat on an old roll of film for far too long, or to convert the image to a black and white that captures the right feel.

After a long time using Totally Rad’s separate actions for my photo editing, I switched to their RadLab system, and it is definitely my favourite way to edit images – both the everyday snaps that come out a bit rubbish and the favourite fancy shots too. (If you’re looking for a system like that, I reviewed RadLab here and code 1128SHIMELLE gets you 15% off your purchase.)

I also find the printing small option works wonders for not emphasising an imperfect photo when on a scrapbook page! Easy.

Now… what are your strategies? (And if you’ve been editing with Picnik – have you made any decisions about what you’re going to use after their site closes next week? A bit sad about that!)

Camera School 06 :: Making it to Manual

camera school 06 :: making it to manual
For whatever reason, someone, somewhere decided to make the manual mode on a camera seem difficult. It’s not difficult in the slightest. It’s just not automatic. You have to rotate some dials and click some buttons now and then. But they aren’t difficult dials and complicated buttons.

For everyday photography, I use manual to set just one thing. I only think about one thing for each shot – because I’ve already finished thinking about the other stuff. That really doesn’t follow the rules of amazing photography, and I’m fine with that. I don’t need amazing for everyday pictures. I want that balance of photography that’s fun and photos with a unified style.

I only think about one thing because I set the ISO and the aperture once, then I can just focus on shutter speed. Because at the most basic level, there are three things that determine how light or dark a photo will be: the sensitivity of the sensor (ISO), the size of the lens opening (aperture) and how long the lens stays open – that’s shutter speed. When I pull out my camera, I set the ISO using 100-400-800 (which you can tweak to the specifics of your camera once you’re used to it) and set the aperture according to how much of the scene I want in focus. I shoot at the widest aperture the majority of the time because that’s the look I like, though there are times when that has to change to accommodate a group of people, for example. So say I am going to photograph a flower on a sunny day. I would go right to the 100 ISO and the lowest number for the aperture – on my 50mm lens, that would be 1.4. Then I stop thinking about those two things. From here on out, I only worry about shutter speed.

camera school :: making it to manual mode
On an SLR, part of looking through the viewfinder is seeing the light meter. Except if you weren’t looking for it, you might not even notice it’s there. The light meter is what made photography make sense to me when I first learned my way around a camera as a kid and it’s what makes it work for me now. It’s just that the light meter today is a little more high tech – but it tells me the same exact information. On an old Canon AE-1 series, the light meter was activated with a half-press – just like the half-press to auto-focus now… except this was still the times of all manual focus. The half-press was just for measuring the light, and a tiny arm would ping up on the side. If it was in the middle, then things were good. If it went to way to one side, the picture would be too dark and way to the other side would mean too light. The reason I noticed it more was partly because it actually moved inside the viewfinder, so it was pretty obvious! But also because a fully manual camera like that required you to look or to know every single setting on your lens… and I found it easier to look.

What’s shown in my viewfinder now is exactly the same information, just more precise and without something flicking around to get my attention. It’s more subtle, but the mechanics are the same: a half-press on the shutter button will read the light and mark a spot along a line. If the spot is near the middle, then the camera things you’re good to go. If the spot moves to the left, the shot will be dark and if it moves to the right, it will be light. Seriously, if you’ve never noticed this before, go get your camera and look through the viewfinder now. I will still be here once you’ve found it.

camera school :: making it to manual mode
So your first step once you’ve moved to M on your dial is realising that light meter is there and being able to set the ISO and the aperture and then adjust the shutter speed with its help. At first, start dialling the shutter speed up or down until you get the marker right at the middle point, then take your picture. Get used to that process, just taking pictures of all sorts of things. Walk around your house or walk around the garden or down the street and focus on adjusting the shutter speed with that dial. Soon you’ll come to remember which way you need to dial. When I looked at the preview screen, I was forever thinking if it’s too light, dial right, and I knew I need to dial left if the opposite is the case. Eventually you will dial without thinking about which way you need to go – it will just come naturally – but it takes time for that to happen. That time is so very much worth it.

But here’s the kicker: if you’re always lining it up with the middle point then you’re really not shooting in manual after all. You’re doing the work of manual, but you’re adjusting the camera to exactly what it would do in aperture priority – because it would adjust the shutter speed until the marker was in the middle. So why not just shoot in aperture priority all the time?

First of all, you can, if you really want to. I use aperture priority for certain things. Some people use it all of the time and get great pictures; some people use it none of the time and get great pictures. There are as many methods as there are photographers.

Secondly – and this is the important part – going against what the camera tells you is how you develop a style for your pictures. It makes sense if you think about it: if you shoot in automatic modes, your pictures will look essentially like all the other photos taken on all the other cameras in automatic modes, and that’s a huge number of photos. If you come up with your own combination of settings that speaks to you, then your photos will look like just your photos because most of the other photos will be in those automatic settings you abandoned. Do you see where this is going?

camera school :: making it to manual
So when I look through the viewfinder, I never aim for the marker in the middle. I tend to like my pictures around two stops to the right – which means the camera things I’m overexposing my photos, just a bit. To me, it lets more light in and creates more glow and softer colours. I don’t always go with the two stops to the right (if I did, I could just set that as a custom automatic setting! How’s that for blowing your mind?) but it’s where I start. Then I go through a little process that couldn’t be done with that beloved Canon AE-1. I look at the picture on the preview screen and check for various things. I can make adjustments and shoot again if needed – provided it’s a subject that is possible to shoot again. Which is why it’s good to try this method on things that don’t move or melt or wilt rather than say… a wedding. There are no do-overs at weddings. Stacks of books allow for endless reshoots.

If you want to give this a try, you will need something like a stack of books (or something that won’t move, melt or wilt while you’re learning) and some time to put your camera through its paces. Even though setting that marker in the middle isn’t getting fully advantage of manual mode, I think it’s an important place to start. It will let you see what your camera ‘thinks’ is right – and part of taking consistent photos is learning exactly what your camera will do in any given situation. (To the point where I think I would choose sticking with an older camera I know really well over upgrading just to have the latest and greatest… but we’ll talk more about that another day.) So start by shooting with the marker right in the middle, then try moving it to the right or the left and see what happens. If you really want to be able to keep track, you can even write notes on cards and put them in the photo so you can later compare and see everything in the shot. (Though you can see pretty much all the information you ever wanted to know about a photo through the digital file, but sometimes post-it notes are just the way forward, right?)

camera school :: making it to manual mode Not to worry: there’s an entire camera school post on photographing water coming soon. We’ll get there.

This isn’t an assignment you can do in a day. This is an on-going process of learning how something works, discovering your preferred style and refining it. Photographers continue to refine their style as they work. Even real photographers. So it’s not something you’ll finish tonight and move on to something new tomorrow morning. Taking the time to really look at your images (both big on your computer screen and printed) will help you find what you like. Your style may be slightly over-exposed because you like light or slightly under-exposed because you like rich colour. You may love shooting at wide apertures with lots of blur or it may drive you crazy and make you feel you need glasses! You may like the colours very cool and crisp or you might prefer warmth to your images – just a tad or a full-on vintage look. Your style will be true to you when you choose it yourself rather than looking at something else and replicating it. Replicating can teach so many things, and it’s very useful in its place, but replicating alone cannot develop your style. Looking at your own pictures and pointing out what you do and do not like about them? That will develop your style.

So no single assignment today. More a collection of things to keep in mind. Find that light meter in your viewfinder and embrace it as a tool that can help you in such a simple and essential way. Remember manual isn’t difficult – it can be just one dial. And look at your very favourite images to see if there is a certain style already starting to emerge. If so, embrace it. If not, don’t sweat it.

It’s only a camera. You’ll be fine.

click here for more camera school posts

Camera School 05 :: Fun with Aperture

camera school :: fun with aperture

We bashed through the basics of aperture in lesson four, and I have to say aperture is way more fun when you just let go of the technical stuff and see what your camera can do. So today let’s do just that.

You may have noticed I have a habit of taking photos of things in the grass. There are a few reasons behind that – partly because that means I can shoot outside with lovely natural light. Also it means I’m getting outdoors for something in my workday, which is nice. As I don’t have a garden, it usually means I’m heading to the park, where I get all my best ideas. And I love how you can see the seasons change just from the grass. I consider grass to be the most lovely of all neutral backdrops and give the chance I will photograph just about anything there.

It’s also the perfect place to have fun with aperture.

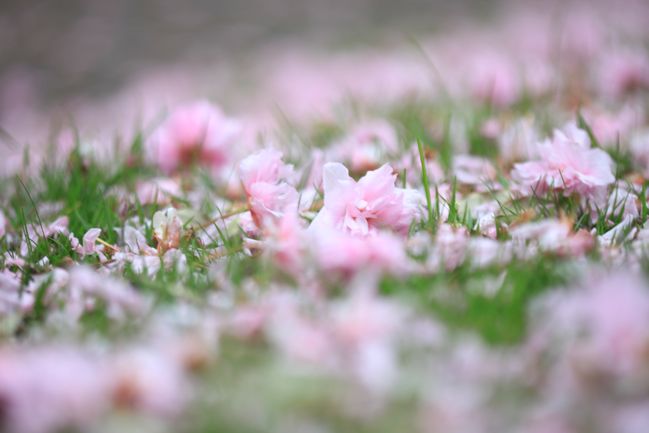
cherry blossoms in the grass
See, the grass can instantly tell you the season with springtime colours like these. The biggest part of this adventure is learning to step away from the viewfinder. All of today’s examples were taken without my eye to the viewfinder and without the preview screen – just trial and error of getting the settings right first, placing the camera on the ground (or perhaps on top of something small, to get an angle) and clicking with your best guess of the framing. Now that’s something that is really easy with fully automatic modes – because you can let the camera decide everything and it will get the lighting pretty much right and put mostly everything in focus. But shots like this are a bit boring with everything in focus, really! There’s something about the selective focus that makes the difference between ‘oh, isn’t that delicate and pretty’ and ‘why are you photographing a bunch of stuff on the ground?’ – at least to me.

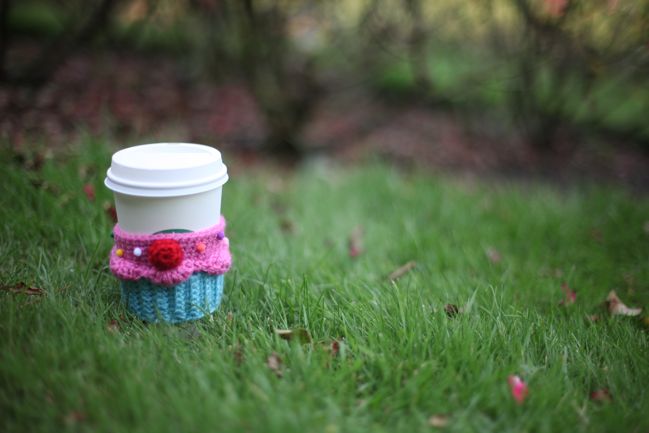
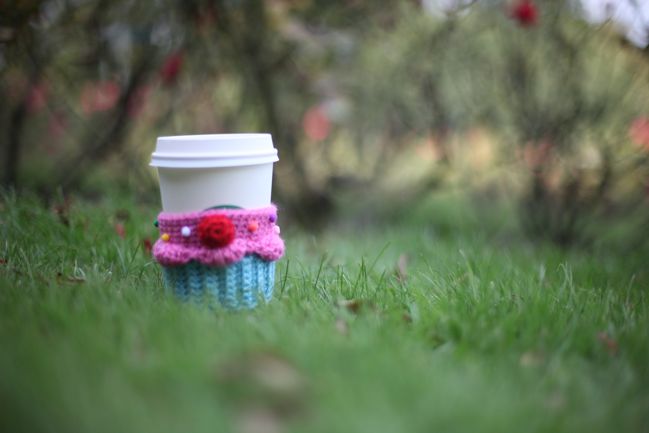
coffee cup in the grass coffee cup in the grass
Yes, ‘fun with aperture’ to me often means no looking through the camera. Here’s why – the first of these two shots is taken from a low angle, but I’m still looking through the camera. The camera is maybe eight inches off the ground? The second picture is taken without me looking, and the camera is right in the grass. The perspective is completely different and it changes the idea of size and detail and all sorts of things. Both angles have their place in different functions (like you might notice that the plane of focus in the second shot is actually too shallow to capture all the detail of the adorable stitchery by Twinkie Chan) but if you never try the not-looking option, you’ll never know what stylishness you’re missing!

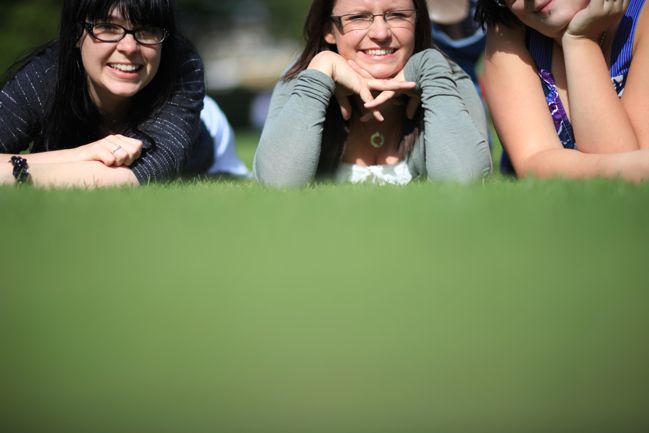
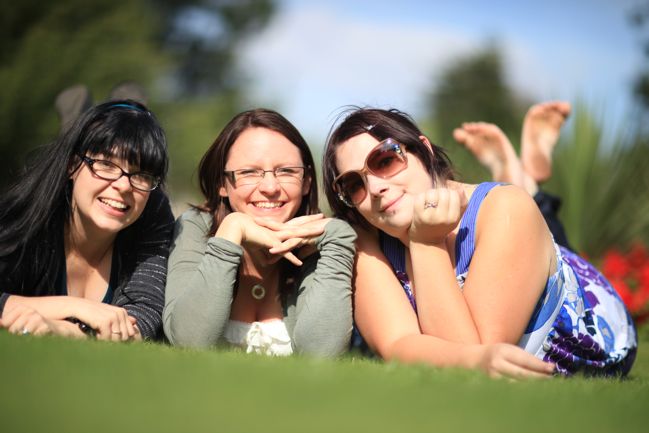
outtake :: friends in the grass friends in the grass
You can shoot just the grass, objects placed in the grass or people laying on the grass, of course. And there is a lot of trial and error involved in this. There are nine shots between the first outtake and the keeper shot here, while we got the angle of the camera right and got ourselves positioned so we didn’t have trees growing from our shoulders or the camera focusing on our elbows rather than our faces. As these were all shot with the self-timer, there’s more hassle involved in getting up, trying to correct what wasn’t right and then getting back in the shot, but still – nine shots is hardly the longest photo shoot in the world. Trial and error will get you there more quickly than you might think.

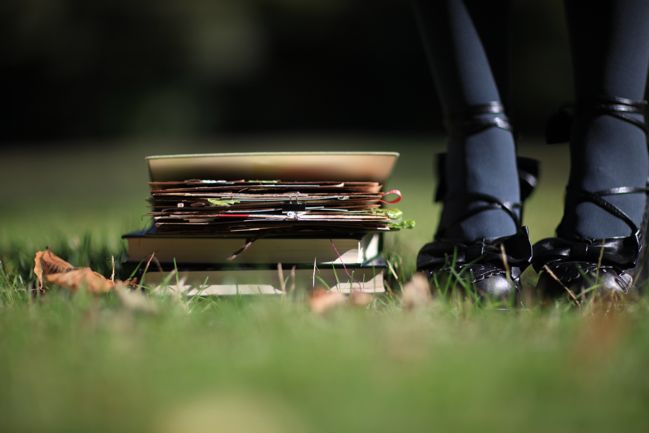
staged photo in the grass
This is a little trick you can use for self-portraits – include something that isn’t you (something that won’t move). For this example, I set up the books and got that shot just how I wanted it then didn’t move the camera and put on the self-timer and jumped in the shot. The first shot I stood a bit too far away from the books, so I tried again and stood closer – this was that second shot. A lot less trial and error. I’ve used the same technique for self-portraits that weren’t just my feet too and I find it way less stressful than just trying to get the focus right without anything else in the frame… though it always takes more than two shots for me to not make a stupid face! (More about that another day… and we can all bond over silly fake smiles we pull for the camera, even though we don’t mean to!)

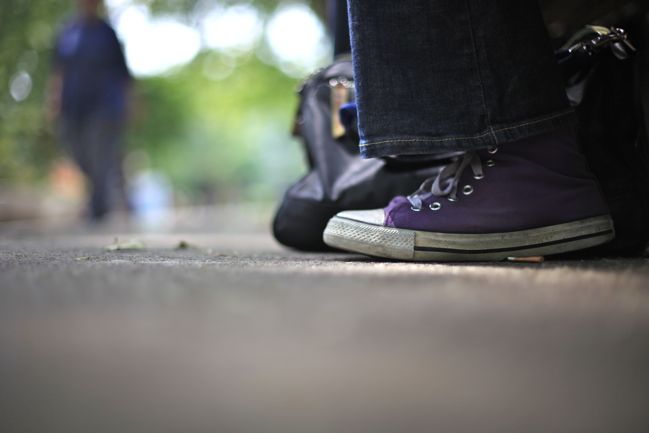
concrete rather than grass
Sadly, sometimes the ground is not covered in grass and you may be confronted with concrete, dust, wood or gravel perhaps. The same ideas apply and you may find each carries its own context in the photo. The same feet in the same purple sneakers look young and playful in the grass, but carry more angst on the littered city pavement. That’s something I love about photography – how you notice some things when you take the picture and some things after. Somewhere in the middle there is a magical combination of the purposeful and the accidental all in the single snap of the shutter.

So here’s a new assignment: whether it’s grass or some other background you love, step away from the eyepiece and see what you can capture with the unique aspect of a shot without everything in focus. Embrace trial and error and enjoy the funny shots where everything is blurred or crooked or off-centre. It’s all part of the experience. If you’re happy to just give it a try with what you already now, then grab your camera and go. If you would prefer a few more steps to make it easy, then try these:

1. Before you leave the house, figure out how to set your camera to its lowest aperture. If you’re not already shooting in full manual, shoot in aperture priority (A or Av on the dial of an SLR) and set your ISO like we walked about here and set your aperture to its lowest setting, then the camera will take care of the shutter speed to give you the right amount of light for the shot.

2. Grab something you want to photograph in the grass and take it outside and set up your little scene. (Or if it’s lovely and autumnal or springlike where you are, you can just use what nature has put there in terms of leaves and flowers!)

3. Just eyeball what you think would be a good distance and angle to place the camera on the ground. Without looking through the viewfinder, press the shutter halfway to focus then completely to take the picture. Now look to see what you got!

4. From there, use trial and error to recompose the shot – closer, further away, better focus, more (or less) centred in the frame – until you get something you like. When you start to get close, you won’t want to move the camera when you review your shots, so even though you’re trying not to look through the viewfinder, you may still want to get down on the ground. So you know… don’t wear your prom dress or anything.

5. Extra-credit for trying a self-portrait! Even if it’s just your shoes. (Extra-extra credit for cute shoes, of course!)

A note for point and shoot users: if you can’t control aperture on your camera, don’t despair. Try this in macro mode (usually a little flower) and you may have some luck, especially if you zoom in to the max available. It won’t blur to the same extent but it will limit the focus more than your fully auto mode.

And one thing just to throw out there: these images – even the ‘after’ examples – are far from perfect. I know it and I’m fine with it, because I find I have far more fun when I don’t worry about perfection in every shot. And bonus: when I have more fun taking pictures, I take better pictures! I can point out flaws in these images, from focus to framing to shadows. But they were all photos that were fun to take and each of them is better than what I would have shot a year or two before, so even if it’s not perfection, it’s progress. That works for me. If it works for you too, consider us instant friends in this adventure.

click here for more camera school posts

Woodland Vintage Baby Shower (and scrapbook page)

woodland vintage baby shower and scrapbook page
woodland vintage baby shower
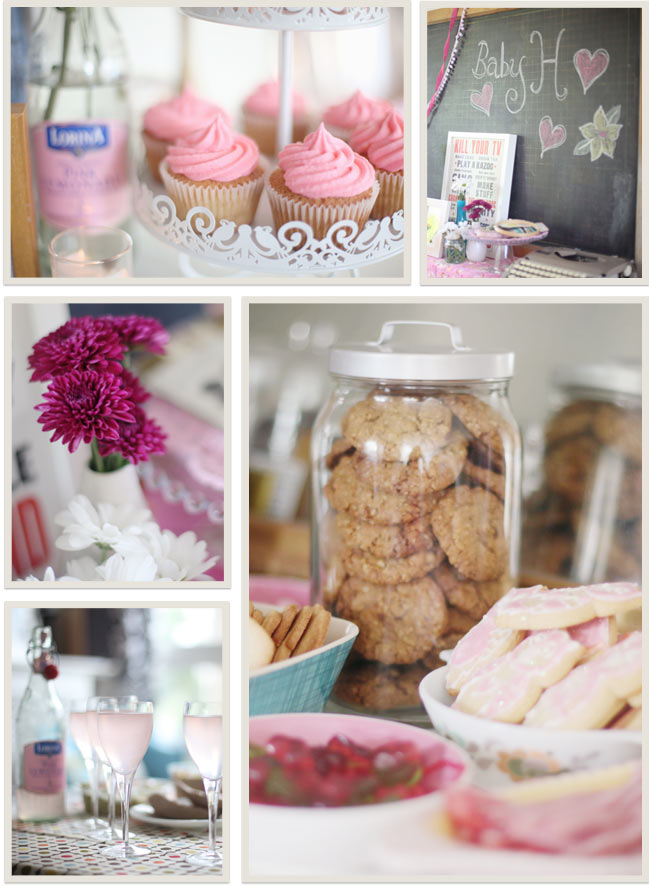
Any day now, this lovely friend of mine is going to Instagram from the hospital with a picture of a brand new baby girl, and although she wasn’t going to have a big party, I may have been quite excited at an excuse to cover my house in pink and throw the teeniest of baby showers.

woodland vintage baby shower decorations
I think we managed to fool Laura (or at least she didn’t let on if she figured it out!) by inviting her for a day of lunch and photos and crafting with the girls, which isn’t an unheard of thing in our world. But usually when the girls arrive, there are not pink tissue-paper pom-pons hanging from the ceiling and a dozen types of pink sweets in bowls. So the four of us sipped pink lemonade and got crafty with a bit of baby wardrobe embellishing. Thanks so much to Leanne and SJ for your party-throwing and secret-keeping assistance!

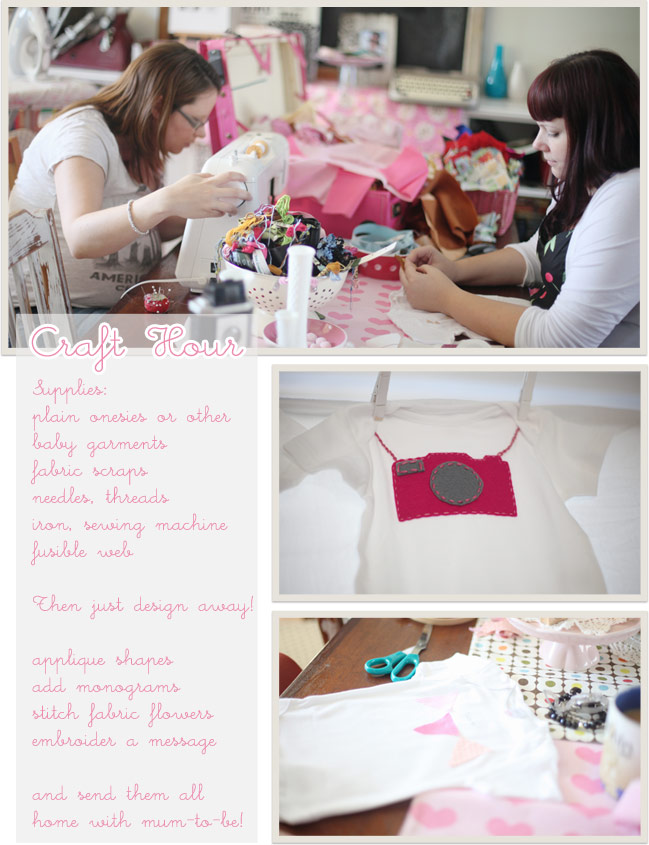
diy custom onesies at baby shower
First of all, we always reserve the right to spend more than an hour on craft hour. We just like the name.

Second, a bit of DIY onesie creating is super easy and fun and it’s inexpensive enough that it doesn’t matter if something goes terrible wrong and you need to just bin one and start again. It’s actually best to find the bargain baby clothes because the more ‘named’ brands stitch logos on their baby clothes and seriously, does a newborn really need to be advertising for a giant chain? And if you or someone you know has a bit of a fabric scrap collection and they aren’t too precious about it, you can just work from that without needing to buy specific fabric. The clothes are tiny so most everything just takes small scraps of fabric. Cut things to whatever shape you want (and if you’re not a dab hand at drawing them, you can print out a variety of shape templates by searching for colouring book pages) and then either use fusible web to iron it to the onesie or you can sew it on by machine or by hand. Even with just four of us we had quite a mix of techniques, with an appliqued camera, a fabric-pieced fox, a monogram, fabric flowers and bunting. All very cute and in a variety of sizes so Baby H should be clothed in custom gear for quite a while!

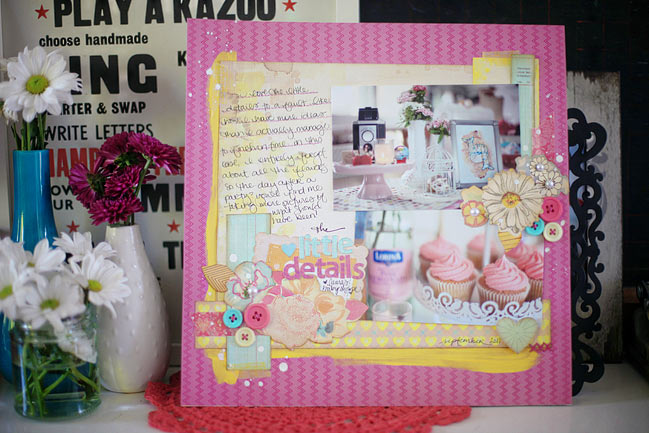
baby shower scrapbook page

And of course all that photo-fun isn’t complete without lashings of pink patterned paper, pearls and paint. But mostly I wanted to share some pink cupcakes with on a Monday morning! Please enjoy one in your choice of vanilla or blackberry, and of course – completely carb- and calorie-free!

Have a beautiful week!

xlovesx

Camera School 02 :: Let ISO set you free

photography class for scrapbookers :: setting ISO
I promised I wouldn’t make this technical. I promise to keep that promise. And that’s because my entire process for taking a picture is about stripping away as much of the technical as I can. Basically if you can totally figure out just a couple basics, then the rest gets really easy.

You know what else I promise? No triangles. Hear me out.

Exposure is a fancy photography word that refers to how much light is in the picture – is it too light, too dark or just right? And if you read articles or indeed whole books on exposure, they will inevitably start talking about this triangle where you have to balance three different things on every single shot to get the exposure right. And okay, if you break it down that is entirely true, but the triangle thing just does not work for me. Because it makes it seem like you have to come up with this perfect combination of three different things every single time we click the shutter. Who has time to think about all that stuff on every shot? (Okay, superhero photographers totally do. I am not a superhero photographer and I’m cool with that. Way less pressure to save the world.)

So I would rather think about just one technical thing on each shot. I think that’s an amount of technical stuff I can handle on a shot-by-shot basis. I’d rather get the other stuff sorted and out of the way so I can minimise what I have to consider for each click. I start with the easiest of the three things: ISO.

sunny day - low iso Trinity College, Dublin, on a sunny day – shot at 200 ISO. SOOC.

Now don’t even go into worrying about what ISO stands for. There will be no quiz. The IS in ISO has to do with the novel idea that there should be an international standard. Back in the seventies, the various film companies thought it would be helpful if a 100 film was always pretty much the same thing and a 400 was always the same and an 800 was the same, and so on. No matter what brand of film you bought. I love that they did this. So when you had a film camera, you had to look at the conditions, choose the film speed that would be best for those conditions and then you were stuck with that ISO until you got to the end of the roll of film. In general, 100 film was great for bright sunshine, 400 was a happy medium for overcast days or shooting indoors and 800 or higher was what you needed to shoot in low light. I’m simplifying, but this is the overall outline. Three points to remember: 100, 400, 800. There were plenty of other speeds, but those three would get you through the vast majority of all your needs.

But that was film. Now we have digital equivalents and they kept the term ISO except THEY DIDN’T FOLLOW ANY STANDARD. Oh nice one, camera companies. Really. So my 100 may not be your 100 and that’s not super helpful. But the 100, 400, 800 rule is still your best bet. They didn’t follow the standard closely but they did stay in line with the general concept. So if it’s sunny, you can set your camera to 100, if you’re indoors or it’s overcast outside, try 400 and if it’s pretty dark, try 800. Now you might have other options to go much higher than 800 now – it just depends on your camera. And because digital cameras don’t follow a single standard, you may want to try out other numbers around 100, 400 and 800 to see if your camera just likes another number better. But if you can remember those three numbers, you can set the ISO once for your conditions and then stop thinking about it entirely until those conditions change.

I really like it when I can just set something, leave it and not have to think about it.

It can also completely ruin everything. Let me illustrate.

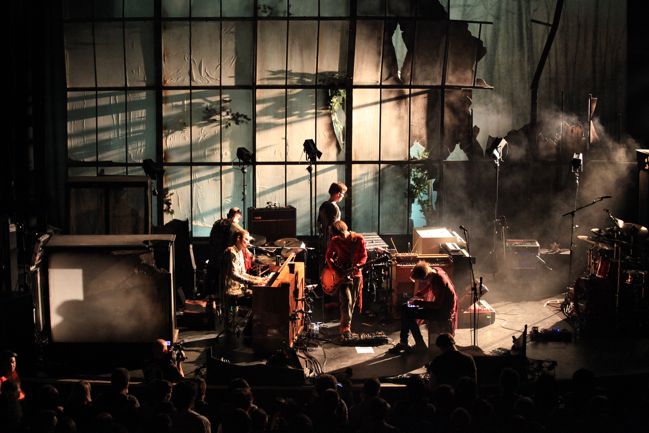
lowlight - high ISO Not the 2006 pictures, but another concert with low light. This is at ISO 5000. Really. SOOC, but this lost a lot of detail in shrinking it for the blog.

In 2006, I shot some concert photos in a dark club with a few stage lights. So my ISO was set as high as I dared since there wasn’t much light at all (and flash and concerts do not mix). No problem – shot the pictures, came home, went to sleep.

Except the next morning we were going on holiday. To Iceland. In summer. WHEN THE SUN NEVER SETS, essentially. Do you see where this is going yet? I was taking pictures in bright sunshine at almost all hours of the day and my ISO was set somewhere around 1200 for four entire days. (You can see a sampling of those shots here.) I think I was just so excited about being there that I forgot how to work my camera.

If you shoot in bright sunlight at a high speed (like 800+) when you really only needed 100 or 200, your photos can still look fine on the view screen of your camera. But when you download them to your computer or print them, you’ll find they aren’t as clean as you would like. There’s lots of grit (often called ‘noise’) and the colours don’t come out as smooth as they should. If you try to zoom in or print those photos at a big size, they will be a bigger mess. It looks similar to when you take a really low quality digital image (like a quick snap from a phone or a really old digital camera) and blow it up – it’s not quite boxy pixels but it’s also not quite right either.

So while I love that I can remember those three numbers, set my ISO and not worry about it until the conditions change, I must worry about it when the conditions change. On the fifth day in Iceland I reverted to my normal habits, turned the camera on and immediately went to set the ISO, which was when I first noticed that giant mistake I had made. Time to set the ISO right and move forward. The photos from the second half of the Iceland trip are so much nicer than the first half. Smooth even. There are a few shots in there that I totally love to this day, and they were taken with my very first digital camera (the Canon 300) and today there are mobile phones with more detail to the images. Oh digital technology: you are so fickle and changing unlike the long life of a film camera!

If you learn from my non-ISO-changing stupidity, you can avoid your own batch of priceless-but-gritty photos and remember the key element here: set the ISO once for your conditions and then stop thinking about it entirely until those conditions change.

shooting indoors - middle ISO Indoors with a mix of light sources, shot at 640. SOOC – though this is the kind of image that would benefit greatly from some additional processing.

Lesson two’s assignment has two options. Option A is for anyone who just read this and thought I don’t even know where the ISO is on my camera. It is totally time to learn. All cameras have different buttons and wheels so there are two places that can help you super quick: your camera manual (look up ISO in the index) or Google (type in ‘how to set the ISO on’ followed by the name of your specific camera). Seriously, seriously, seriously find how to change the ISO. It will set you free.

Option B is what you do once you know how to change the ISO. Take two clicks of the same scene – one with the correct ISO and one with it set way wrong, like a high ISO for a sunny day or a low ISO for darkness. You’ll probably need to do this in a mode other than fully automatic, since many completely automatic modes will set the ISO for you, but for the moment it really doesn’t matter which mode you pick. On an SLR, go for P (program mode) or A/Av (aperture-priority – Nikon and Canon use different notation). On a point and shoot the modes are a bit less standard from camera to camera, but for the sake of this exercise you can pick any mode that lets you set the ISO. Remember that 100-400-800 guideline and take two pictures that are identical except for the ISO. One shot with the right ISO and one with something to another extreme.

Transfer those pictures to your computer and have a look at them full screen. What happens on your camera if the ISO is too high? Too low? Sure, I could just tell you, but it works so much better to see it with your own eyes. Knowing how your camera behaves in different ISO settings will help you and your camera become buddies. I swear your camera will instantly have more respect for you.

And once you can control the ISO, the rest of this stuff is going to get way easier. Like what we’ll cover tomorrow in lesson three. So go take pictures of stuff!

A note about automatic ISO: I use it for one thing and one thing only. Video. I shoot my YouTube videos with the same camera I use for everything else, and almost entirely with natural light. But there is a problem that the darn clouds sometimes cover up the sun WHILE I AM RECORDING. So inconsiderate. It meant some of the video would be lighter and other parts darker. Setting the ISO to automatic means right in the middle of the video, the camera will compensate for the change in the light. That is awesome, and proves that my camera is willing to join me in the battle against the clouds. Or something. But the rest of the time, Camera and I are all about setting the ISO on a real number, not the auto setting. Added bonus of setting the ISO: longer battery life than on automatic.

click here for more camera school posts

Camera School 01 :: Facing your Fear

camera school :: photography tips for scrapbookers
I’ve decided there is really only one important thing when it comes to photography, and that is to lose all fear. Go boldly in the direction of capturing something new to you. Be brave enough to take pictures that fail miserably and can’t be saved. Don’t be afraid to take a picture in a public space or to take a self-portrait or to ask a friend (or even a stranger) to be your model.

I first started to learn about photography for real in a high school journalism class. Before that, I only had instamatic type cameras – point and shoots with 35mm, 110 or even disc film. In fact, I should have learned something from the disc camera, but I’ll come back to that in a bit. In journalism class they threw photography vocabulary words at us, set us loose with Canon SLRs and sent us into the darkroom to develop and print our own images. The darkroom is magical. You know how memorable smells stay with you? I can dream of the smell of darkroom chemicals. I shot everything with a fixed 50mm lens, printed everything in black and white, and ‘everything’ was a mix of indoor school moments and outdoor school football games. A few of us were able to get a tiny bit of work with the local newspaper selling on our assorted football pictures, because Friday night football was a big deal and I think they paid between $5 and $15 per picture. A few of us absolutely fell in love with cameras and I’m pretty sure I could guess from the roll call of that group of teenagers who still shoots on some form of SLR today.

Then there was the rest of the class. As soon as there was vocabulary and technique and procedure, the group split. We hadn’t even gotten to the fun we could have with composition or depth of field or anything remotely creative: they had hit the wall with the technical know-how and suddenly felt photography just wasn’t their thing. Of course I didn’t realise it then, but years (and so many discussions with scrapbookers) later, it all makes perfect sense. The truth is photography is a balance of technical and creative stuff, and no matter what your gut instinct, there is no reason to be afraid of any of it.

LESSON ONE: Let go of all fear.

You may want a notebook for Camera School, by the way. Somewhere you can track things to do, remember things you want to try and note things that inspire you greatly. And to track your progress through a series of assignments. I’m only calling them assignments to match this whole idea of Camera School and I’ve already told you this is school in the loosest sense of the word, so don’t worry. You can pick and choose what you want to take on. You can take all the time you need. You can work out of order. You can do absolutely whatever you would like really – I’m just going to call them assignments because that makes it clear and easy.

So your first assignment is to take a photo that gets over your particular fear. Which means it may help to identify your photography fears in the first place. Do any of these apply to you?

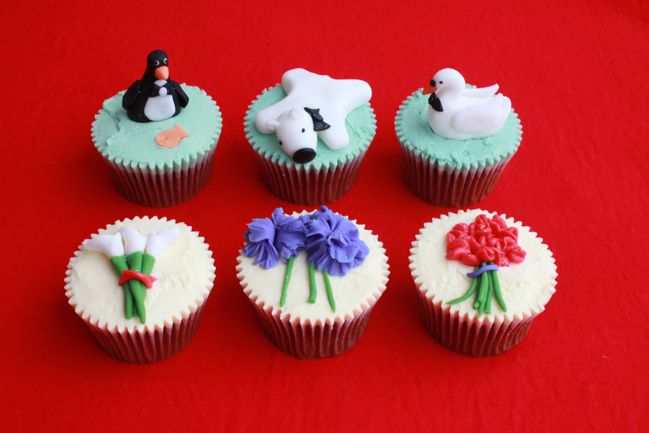
cupcakes Facing my technical fear: shooting cupcakes in an entirely different style for me with some specific technical needs – for this cupcake workshop at The Make Lounge.

Technical fear: When someone starts talking about exposure and aperture and compensation and f-stops and grey cards, you’re convinced it’s another language. If your camera manual intimidates you, this may be you.

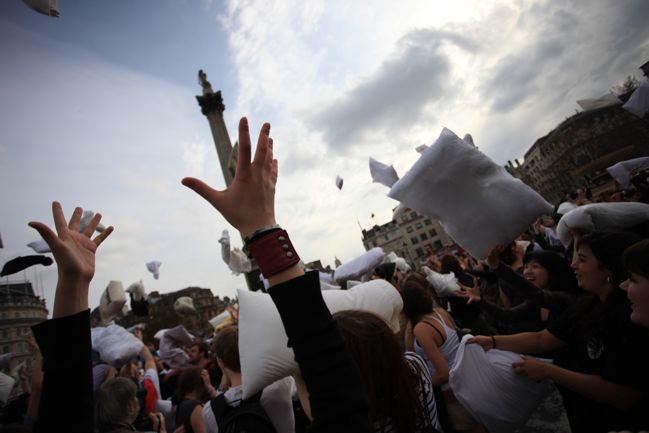
london pillow fight Facing my creative fear: trying to find an interesting angle to shoot for a pillow fight flash mob in Trafalgar Square.

Creative fear: Do you like the safe shot? So most of your images look the same, maybe with the subject right in the centre? Do you always stand straight up to take a picture? Do you see other pictures that look lush but you automatically think you couldn’t take a photo like that? Then creative fear may have captured you, I’m afraid.

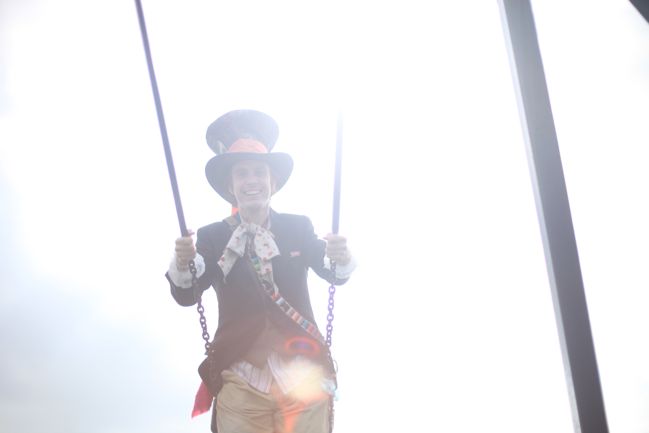
mad hatter Facing my confidence fear: photos, fancy dress and a public playground filled with staring onlookers? Fear definitely faced.

Confidence fear: If you pick up your camera and automatically become shy and overly polite, this is you. You don’t want to get in someone’s way – to the point you will lose the shot. You would be terrified to take a picture in a shop or a library or in front of many people. The idea of asking someone if it’s okay to take a photograph in front of their house absolutely and completely fills you with dread. You want to take pictures of other people so you can learn, but you’re totally lost with how to make that happen.

flowers Facing my accuracy fear: a lucky shot grabbed while riding on a golf cart and not looking through the viewfinder.

Accuracy fear: A little like creative fear but more along the lines of specifically knowing that a shot might not work and therefore you would rather not click the shutter button. Trying a something that might not work with the settings you know pretty much freaks you out. The fact that I take a fair amount of shots without looking through my viewfinder in any way makes you think I am a crazy woman. You want everything lined up, perfectly framed and perfectly exposed at all times… because a blurry or ill-coloured photo makes you feel like you totally screwed up.

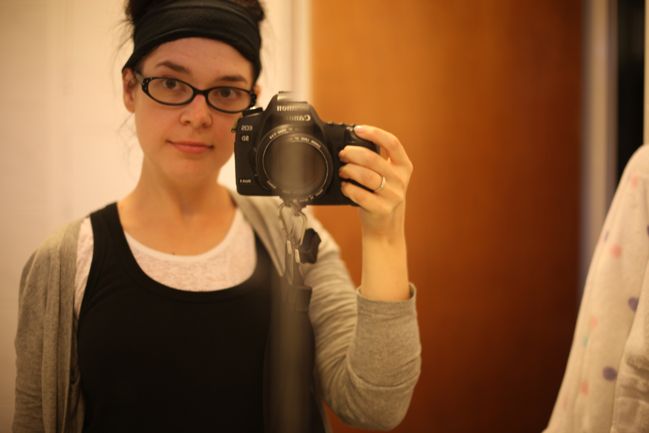
mirror self-portrait Facing my self-portrait fear: trying to capture something very real that I wouldn’t normally photograph, complete with eyes that say I need more sleep and vitamins.

In-the-picture fear: Right now, you’re already dreading me asking you to take a self-portrait. You are absolutely fine with photographs as long as you are not in them. Turning the lens toward yourself makes you want to run and hide like you just saw something dart across the floor that was part rat, part tarantula.

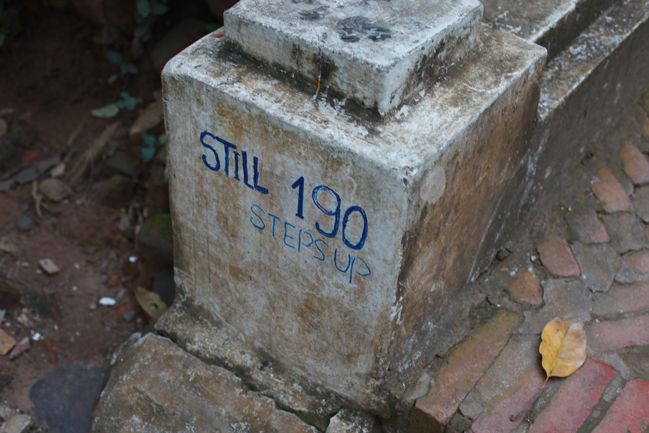
steps in luang prabang, laos Facing a whole bunch of fears at once, but mostly the idea that once I climb a zillion stairs to get the great view, will I make it back down with taking a tumble with my camera?

Can’t-put-my-finger-on-it fear: To be honest, you’re not quite sure why you don’t push yourself to take better pictures. You want to, but you haven’t found the right thing to motivate you to step up your game. You might not feel afraid of anything at all, but in a way, you’re a little bit afraid of just being awesome. Or in general, you’re not too sure what it is that holds you back.

Got it? If you have found something there that applies to you, it’s time to set it aside. Officially. At least until the end of these blog posts. I’ll make you these promises:
You don’t have to share a photo with anyone in the world if you don’t want to.
Your camera will not explode or laugh at you if you try something and the pictures just don’t come out that great.
You won’t have to memorise a list of vocabulary words or read your camera manual from cover to cover. (I have to admit it can be handy for a few things though, okay?)
You don’t have to have any special fancy camera.

But I also hope:
You will give new things a try.
You will let yourself be happy with your work.
You will accept compliments from others.

Because all three of those things make for a lot of good in life, I do believe.

So here’s assignment one: take one photo that proves you can set aside your personal photography fear.

There’s no deadline. You don’t have to share (but if you would like to, please do). You can interpret that assignment in any way you like.

Just let it go and click the shutter, and I’ll be back here tomorrow with something new.

By the way, all of these pictures are straight out of camera (SOOC) without any editing other than resizing and compressing for the web. They are not perfect by any means – but each one represents some bit of progress in my own little journey. Throughout Camera School, I’ll tell you what edits I’ve added to the photos, I promise.

Congratulations Leanne & Kevin!

congratulations l and k
wedding photo
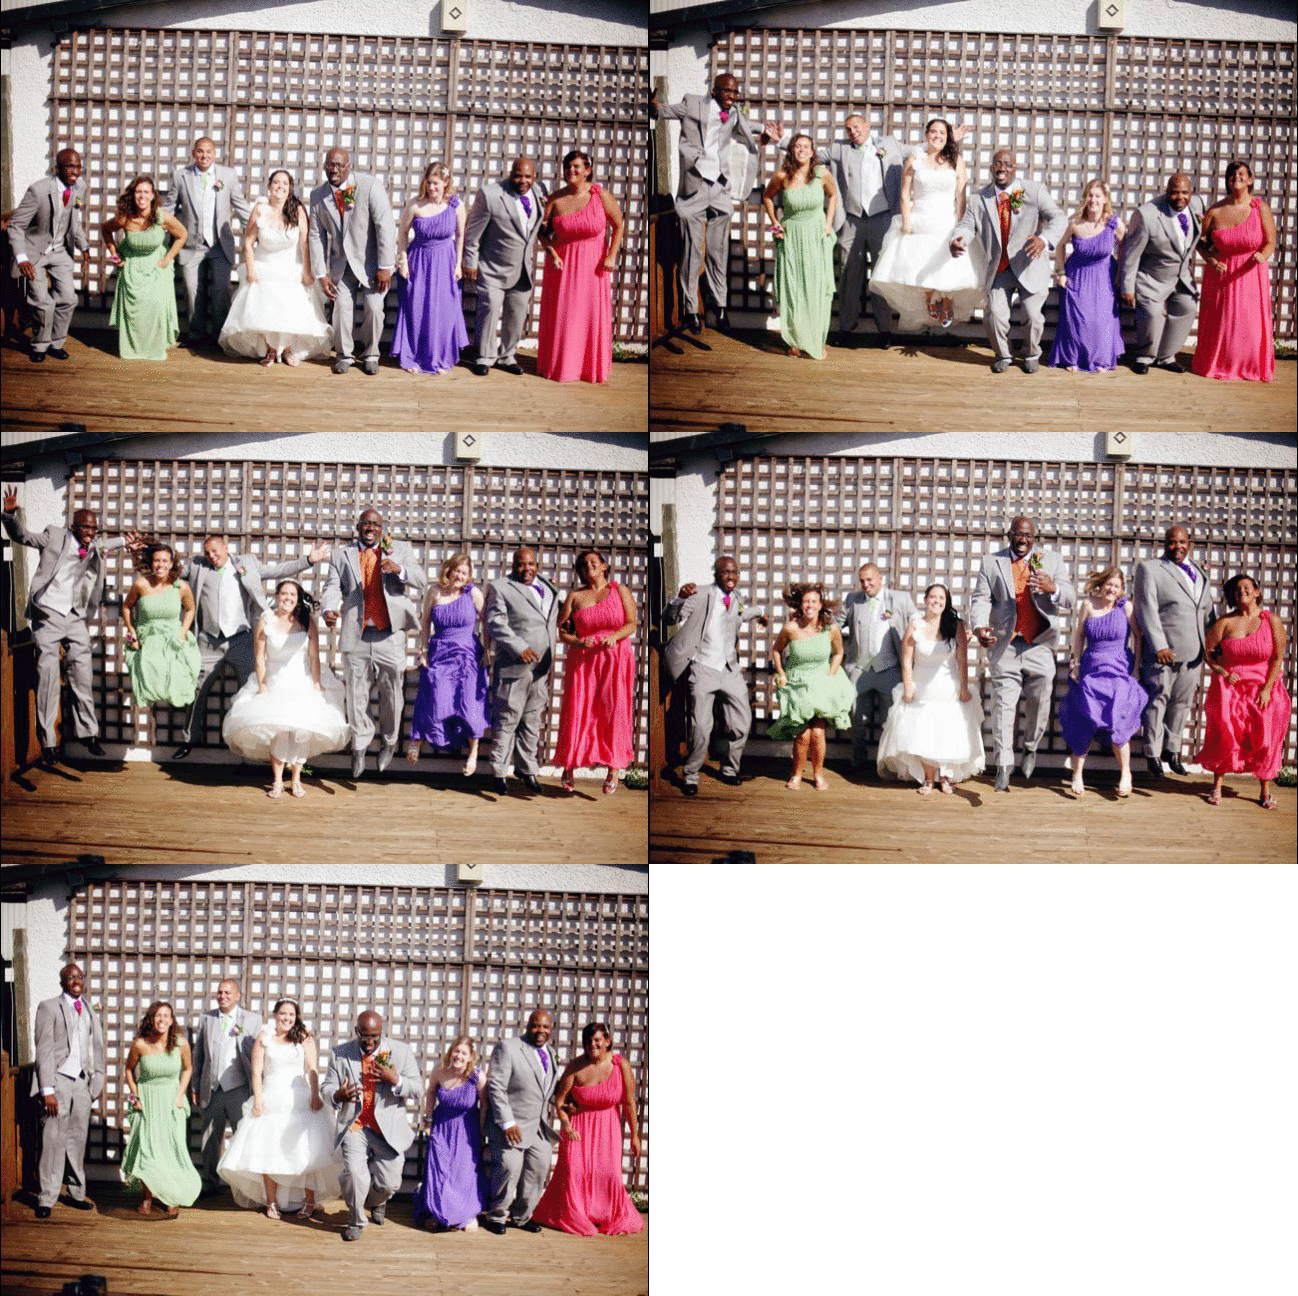
I spent yesterday at the wedding of a lovely scrapbooking friend, Leanne and her main man, Kevin. Just wanted to share this little jump for joy and send then many, many congratulations and much happiness for their newly married life!

Enjoy your getaway and see you when you’re back!

xlovesx

RadLab Photoshop Plug-In - A Review

review of rad lab for photoshop by totally rad actions
I’m not the only person who will say it, but I’ll declare it right now: I love Totally Rad Actions. I just searched my email for the receipt from my first purchase and I’ve been using them since 2008, and I’ve loved them since day one. I don’t use a lot of processing on my day-to-day images, but when I do want to take an image from just okay to something so very cool, Totally Rad is how I get there. But there have always been two drawbacks:

1. You pretty much have to memorise the actions to use them without spending all day either trying them or referencing a guide. Because actions are just text and the play button, so if you don’t remember which action does what, there’s going to be a lot of trial and error going on. As a result, I tend to use recipes that repeat the same actions frequently. While that makes their use more efficient for me, it also means there are a great many fabulous options I pretty much overlook all the time because I’m focusing on what I know.

2. It only worked with full Photoshop – CS3 or higher. So I couldn’t really talk about it all that much here, when many of my readers use Photoshop Elements and I can’t really give a justification to take that big step to full Photoshop if Elements does everything you want it to do.

So now Totally Rad have released a new product. It addresses both of these things.
1. It creates this completely easy-to-use interface that lets you see what each action will do to your photo before you apply it. No more needing to memorise what every action does.

2. It works in Photoshop Elements as well as full Photoshop.

It’s called… RadLab.

I purchased it last week and have been using it for a week (well, five days) before reporting here as I wanted to make sure I gave it a whirl with different images. After a week of trying it, I love it and I really recommend it if you’re looking for a way to develop a post-processing style without a cumbersome workflow. It’s still a major purchase item – it’s not something I would suggest as a spend if you only edit photos now and then. But I know some of you are further into your photography than that, so this is a good step in that case.

Here’s a look at how I’ve been using it so far. I’ve been using it in Photoshop CS3, on a Mac, so if you have a different edition, the Photoshop screen may look a bit different, but the functionality is the same.
Using RadLab by Totally Rad Actions in Photoshop
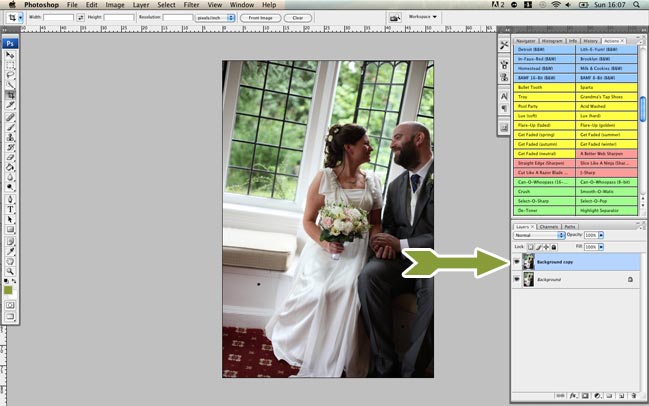
1. Open the photo and immediately duplicate the layer. This is a good measure for all photo edits, as it means you can’t accidentally save over your original JPG, as you’re making it a PSD image straight away. It’s extra helpful with RadLab as you can later adjust all your settings on one layer – but we’ll get to that in a minute. So duplicate the layer and then use the copy as the active layer.
Using RadLab by Totally Rad Actions in Photoshop
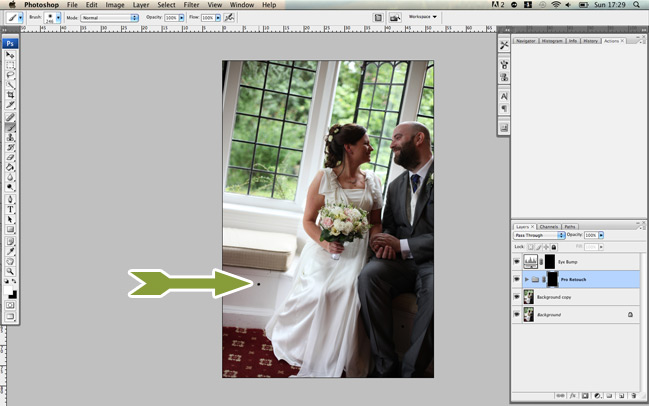
2. Make any paint-brush edits first. Paint-brush edits is a totally technical term I’ve coined. In truth, I call them paint-brush-y edits, but that’s probably too annoying for general conversation. What I mean are the type of edits you’re not applying to the entire image, but painting into certain areas, like lightening or darkening a certain part of the photo or smoothing skin. Some photos need paint-brush edits and others don’t, but RadLab isn’t the place to do them and it seems a lot easier to add those edits first rather than last. If you’re making any changes here you definitely want to commit no matter what, go ahead and flatten all this and duplicate the background layer again so you have one clean image and the copied layer to process.
Using RadLab by Totally Rad Actions in Photoshop
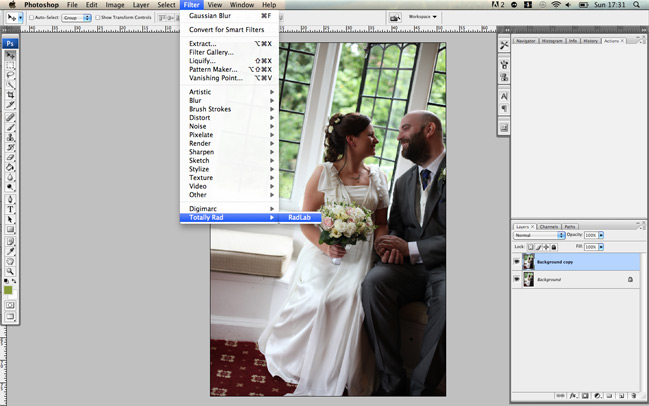
3. Now open RadLab. It’s not an action in itself – it’s in the filters menu. Select it there and it will launch this whole new workflow on top of your Photoshop screen. Magical.
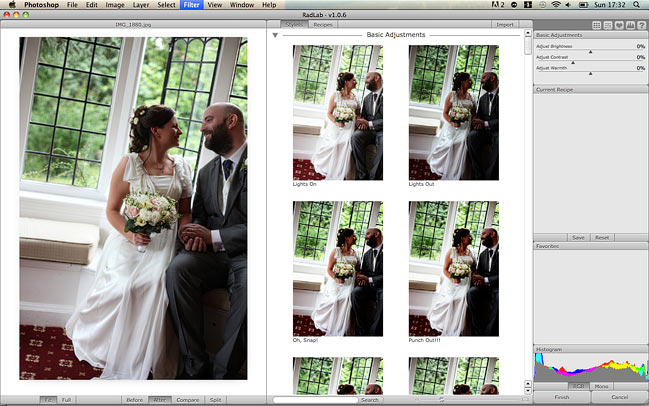
Using RadLab by Totally Rad Actions in Photoshop
Your image appears at the far left, the potential edits appear in preview form in the middle and your editing controls are at the right. Have a look through the middle window for your different options. There are seventy-eight different effects (called stylets) you can use, but then you can mix and match them for nigh-on-unlimited final outcomes. When you see something you like, hover over it to see it previewed on the larger image. If you like it, click and it will apply the effect.
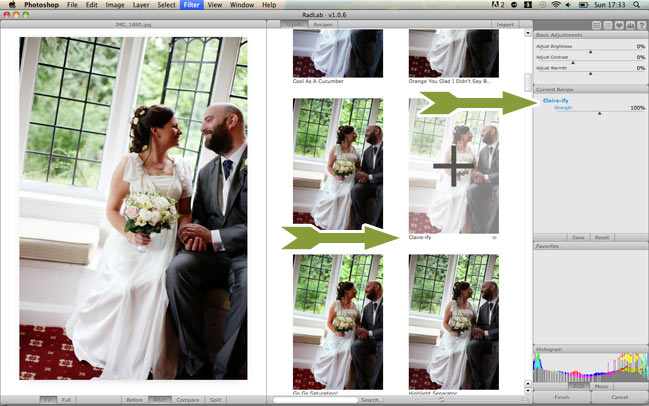
Using RadLab by Totally Rad Actions in Photoshop
Once you’ve applied an effect, you can edit it at the right. Strength is the most obvious edit and works much like opacity would work with layers. Use the slider to adjust whether you want more of less of the selected effect. It’s particularly handy with the vintage washes which may default to a bit more extreme than needed, but unlike opacity, you can also boost an effect to more than the default if you like.
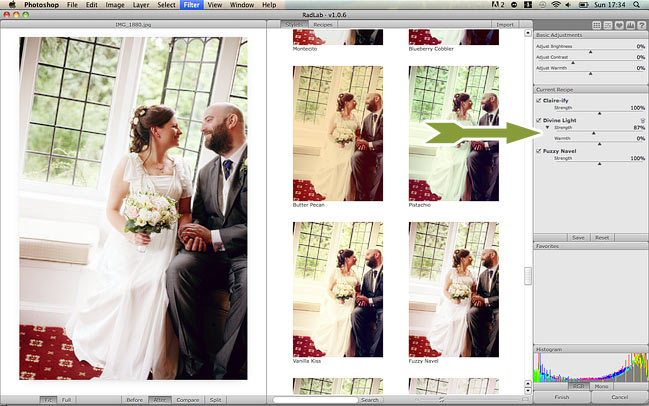
Using RadLab by Totally Rad Actions in Photoshop
Some effects have more options, like the extra slider here for warmth. You can also click entire effects on and off (much like the layer palette) so once you’ve layered a few up, you can see if perhaps they aren’t all necessary. At the top of that frame you’ll also find overall edits for brightness, contrast and warmth, without having to leave the RadLab window.
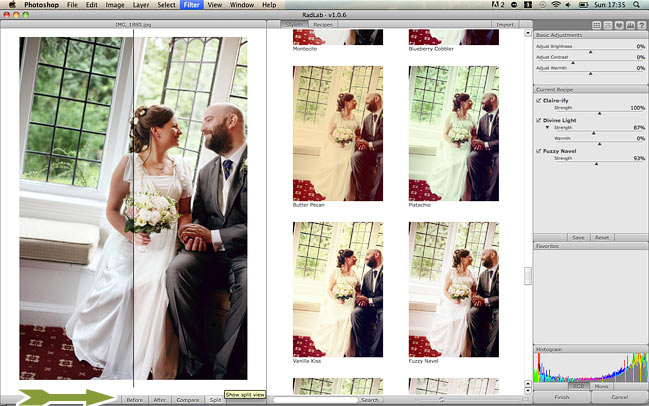
Using RadLab by Totally Rad Actions in Photoshop
The default view of your image within RadLab is the ‘after’ with all the effects applied, but at the bottom of the window you can also select the before to see the original then two things that are even better: compare lets you see both the before and the after, side by side, and split applies your effects to just the right side of the image. I find it’s useful to be able to see that before so I don’t go so far into process-land that I lose the mood of the original image, so these tabs are much appreciated in my workflow.
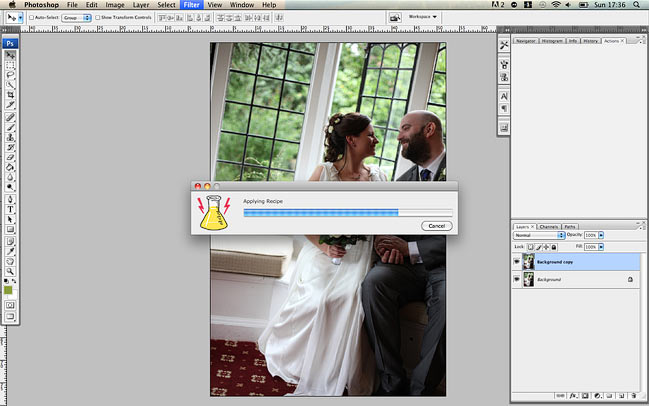
Using RadLab by Totally Rad Actions in Photoshop
Once you’re happy with all your processing in RadLab, click the Finish button at the bottom right, and you’ll be taken back to your regular Photoshop window, where you can either save or continue editing.
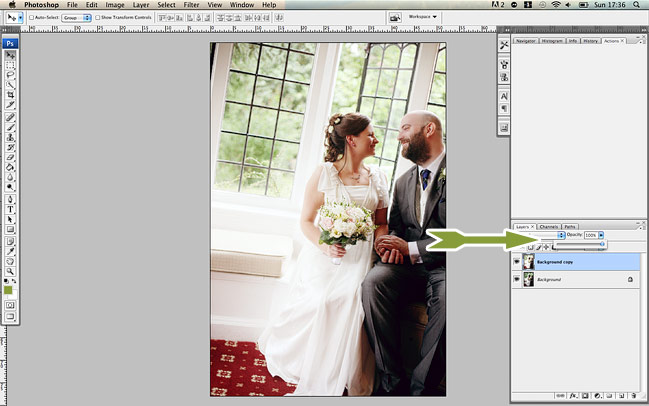
Using RadLab by Totally Rad Actions in Photoshop
If you decide you’ve been too heavy-handed with the processing, all of your edits are now on one layer above your original image in the background, so the opacity slider can take the processing down a notch if needed. Then just save (or resize and save for web) as you usually would!
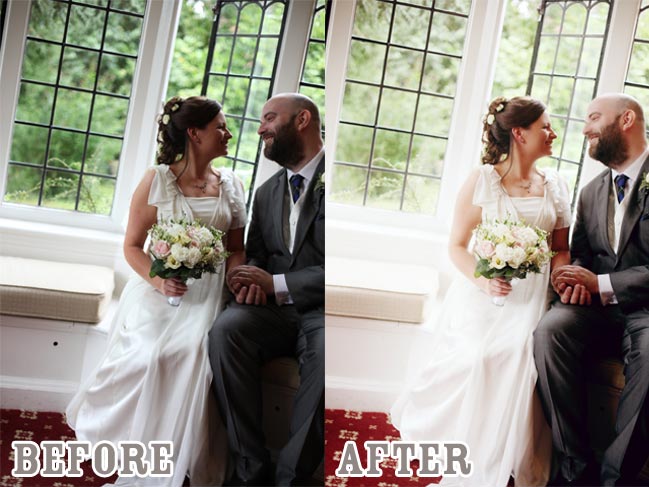
Using RadLab by Totally Rad Actions in Photoshop
So there’s the finished image using pretty much only RadLab (though I did paint out the bolt in the wood panel) and I like the after way better than the poorly exposed before image.

What I really like about RadLab:
RadLab saves your history of recent edits and lets you save your own recipes of edits, so you can apply the same look to all the photos in a session much quicker than adding all those actions to each photo manually. The first thing I did was save my four most used recipes. True, you can make actions of multiple actions without RadLab. I have a few of those but some combinations just don’t seem to like working that way and they worked just fine in this setting.

Because you can save time with the saved recipes, I timed how long it took me to run the processes in the two different ways (with and without RadLab) and I estimate my editing time with RadLab is, on average, one third of what it is without RadLab. As in an hour’s worth of editing now takes twenty minutes. Um, that is the definition of totally rad in my book. I wish I could make time improvements like that with pretty much everything else in my life.

The fact that everything is visual means my edits are generally better because I’m not relying on my memory of a handful of actions I use most often and forgetting other things that would be perfect for the photo. So it’s faster and higher quality, which is a rarity in life.

It’s ridiculously easy to install. There’s no messing with settings or anything – you pretty much just click ‘go’ when you download it and when it’s done, you open Photoshop and it’s there.

Different looks produced by RadLab for Photoshop by Totally Rad Actions
A few drawbacks of RadLab:
If you have already paid for the two action sets, you are paying for several of them again. But not all of them though, as the paint-brush actions and such aren’t included here, and I wouldn’t want to be without some of my most-used tools, like Pro Retouch, Yin-Yang and f-zero. There are also new effects you’re getting in RadLab that don’t come in either action set (I’m particularly fond of the addition of a 600-style Polaroid finish and some of the less-intense warming tones) so that may help rationalise things if you’re adding this on to an existing collection of Totally Rad Actions.

There is one bit of scrolling that I get wrong with the way I use my mouse, and I mean to scroll up and down through the stylets I’ve applied, but I accidentally scroll the strength slider for whatever stylet I’m nearest. I’m pretty sure this is just because I’m a bit weird with how I use the mouse and I don’t think it would affect everyone. It might affect you on a mighty mouse or if you use multi-finger scrolling on a Mac laptop. It’s not a big deal – it just makes me roll my eyes and put the slider back, but I wanted to tell you the whole truth about what I’ve found over the week.

As mentioned earlier, this isn’t a little bargain add-on for just a few photos. It’s $149, which isn’t spare change. (UK readers, that’s about £90 today.) It’s not for everybody and I want to be totally upfront about that. But if I multiplied out the time savings I’m making, it’s worth every penny.

Photoshop takes up a ton of processing power and you’ll know if Photoshop crashes on you often. That really doesn’t apply to everyone – it depends on your computer and how much you like to push it to the max! I haven’t experienced any extra drain from running RadLab, but if you experience a lot of crashes, I would think it could get frustrating if you saved your progress less than in your usual workflow.

So there’s the whole truth from me! If you want to see more detail and watch a video and see actual professional photographers use this on their photos, head over to Totally Rad for plenty more (and, of course, the option to buy it for yourself). There are definitely other tricks and tips there – this is just what I’ve found from a week of using RadLab and the developers know way more than I do about what it can really do.

Happy snapping – whether you’re processing or not!

xlovesx