pretty paper. true stories. {and scrapbooking classes with cupcakes.}

lovely to meet you Twitter Facebook Pinterest YouTube

Take a Scrapbooking Class

online scrapbooking classes

Shop Shimelle Products

scrapbook.com simon says stamp shimelle scrapbooking products @ amazon.com shimelle scrapbooking products @ amazon.co.uk

Reading Material

travel

photography Category

Photo editing :: adding drama to an overcast scene

photo editing - adding drama to overcast scenes
editing overcast photos
Oh for the love of all that is good, is anyone else tiring just a little of the overcast sky effect? It seems to be descending over my neighbourhood at least every fifteen minutes, even if the other fourteen minutes seem lovely and blue. One day this week I was convinced I was causing the rain as I would get ready to leave the house, look outside and see a clear sky, head out the door and be drenched by a sudden downpour in not more than fifteen steps. We did have a beautifully summery April… it now seems we might be suffering from early-onset autumn.

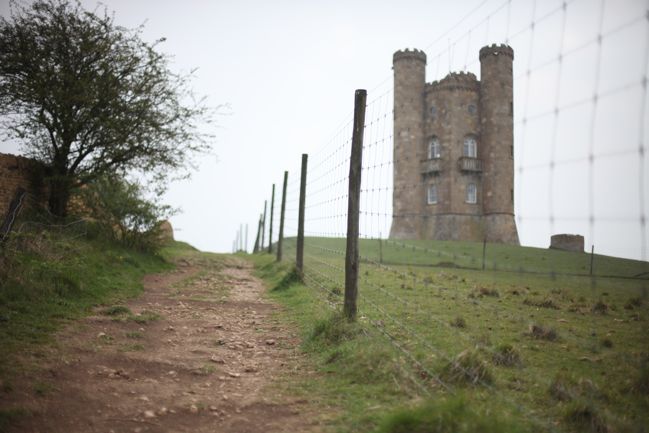
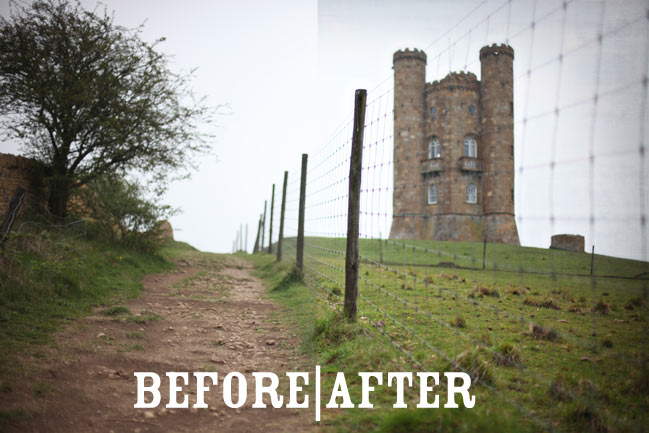
Which leads me to think about overcast photos. Sometimes an overcast sky is just what you need – it can be gorgeously flattering to skin tones, it means no one will squint. Very nice, but it tends to fall a bit flat for me in terms of scenery. I present the photo above as evidence. It was taken on a long hike to Broadway Tower in the Cotswalds, and it goes without saying that we didn’t visit on a day with quite so much bright blue brilliance as the images on their website. But it wasn’t stormy and moody in the sky either – just plain grey with lots of thick cloud and shadow.

I don’t do a lot of drastic editing to my photos, but I do try to punch up the drama a little bit when things fall flat. I also try to keep things to a quick workflow so I don’t feel chained to my computer forevermore!

Before we get started: I use Totally Rad Actions for much of my editing. If you do a lot of editing or want a worthwhile professional editing set for Photoshop, they are definitely worth a look. If that’s not the right match for you, you can find lots of free actions and tutorials out there, and I really suggest trying all the options available at Picnik if you want to try editing effects with no investment in software or tools.

editing overcast photos
First, I wanted to boost the detail to add a bit more grit to the trail and definition to the grass. I use the Boutwell Magic Glasses action for this and left it at the full 100% opacity.

editing overcast photos
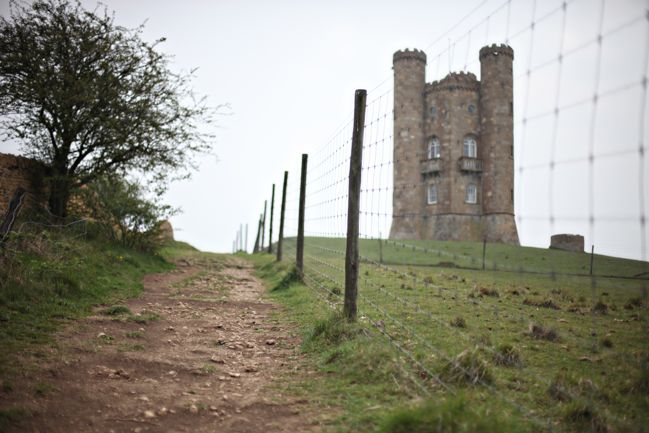
Second step was to boost the colour a bit to get out of that overall grey cast. With the Magic Glasses layer selected, I chose hue/saturation from the image adjustments menu and moved the saturation slider up to 25. Now there’s more colour in the greens, more red in the dirt path and there’s a slight bit of blue in that very grey sky.

editing overcast photos
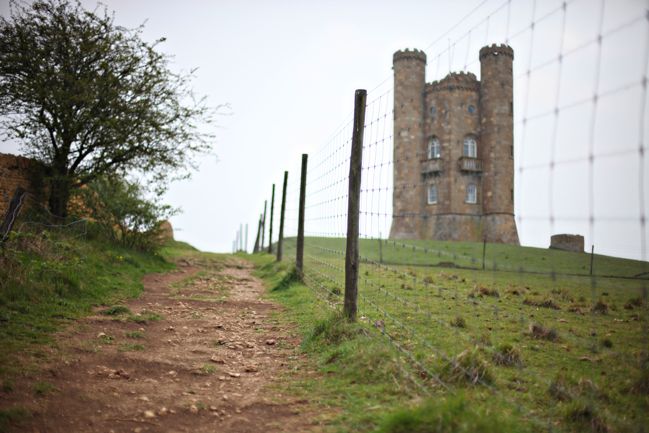
Third step was to darken the corners to add some drama. I usually shoot in that style anyway – a wide open lens will add some natural vignetting to the edges and much of the image will already be in soft focus. But there just wasn’t enough contrast so I added a bit more with the Vignette & Blur action, set to 25% opacity.

editing overcast photos
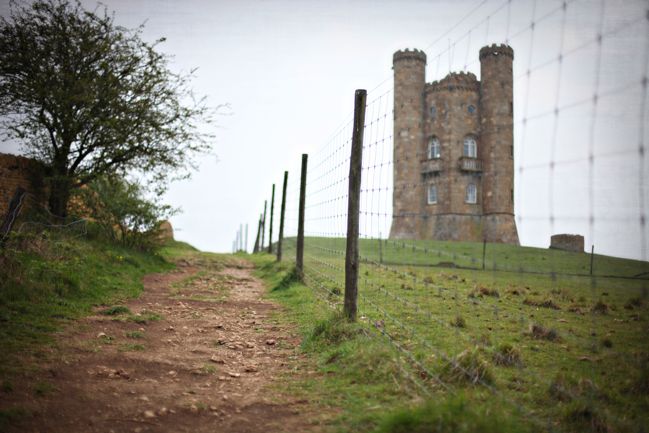
And finally, something for the sky. There just wasn’t enough colour or texture there in the shot to create something dramatic in the clouds, so instead I added a texture that doesn’t look like clouds at all. The Dirty Birdie texture looks a bit like what would happen if you photocopied a blank piece of paper over and over again on a photocopier that really needs to be cleaned. I applied the texture to the whole picture in a new layer, then used the eraser tool to remove most of it from the foreground, leaving the most visible noise at the top right edge and just to the right of the top of the tree. Then I reduced that layer to 85% opacity to blend it a bit.

editing overcast photos
Is it a huge difference from the before to the after? Perhaps not – but I didn’t want it to look like a completely different picture. There is definitely more detail and some more power in that bland overcast sky, so for just a couple minutes of editing, I’m happy with that!

By the way, if you tend to take pictures of actual people instead of dirt tracks and old towers, Cheryl Johnson has a new workshop on portraits starting soon. Just a heads up!

Now… off to catch up on some crafting on this overcast afternoon, I do believe!

xlovesx

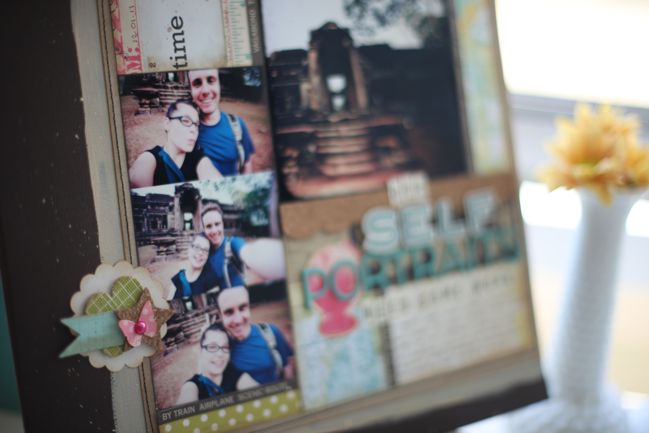
Scrapbooking self-portraits

scrapbooking self-portraits
scrapbook page
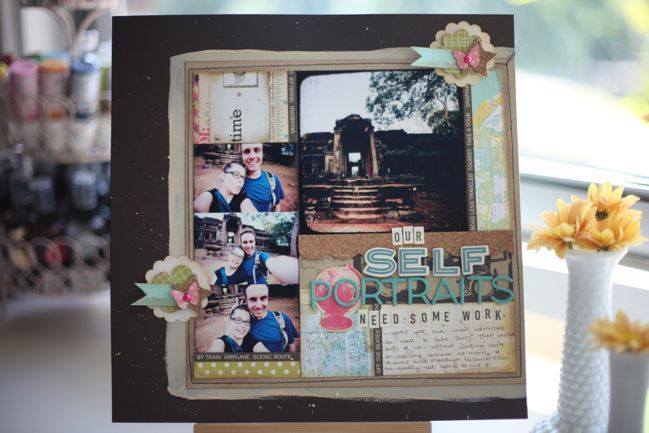
Of those nine thousand pictures I took while we were on the road, I would say around a hundred have either of us in the shot. And probably only ten have both of us.

That’s 0.1% of our pictures actually indicate we were both there, in some foreign place where we’re unlikely to be again.

And that’s pretty pathetic really.

scrapbook page
There are quite a few reasons why there aren’t more pictures of both of us. We had two lenses: one was too close to be held at arm’s length and the other was so wide it distorted us like a funhouse mirror. We had a Gorillapod and I’m all for taking pictures with the camera sat on a bench or the ground or whatever is available, but when you’re in tourist land, it’s not always the safest to be out of arm’s reach of your camera. It’s too easy for your most valuable item to end up in the hands of a pickpocket. Or a monkey (true story). Plus there’s also the fact that both of us pretty much crack up when we try to pose for the camera, so we end up with ridiculous expressions and in general: our self portraits really need some work.

I got to sit in on Corinne’s self-portrait workshop at Crop on the Rhine after our trip and as I was listening I found myself thinking how much I wish I had known that before we left. Clever but simple tips on making things look as flattering as possible, then she set everyone loose with their cameras to give it a try. I have much respect for ladies who can hold a heavy camera up in the air with one hand. That may be another reason why my self-portraits need some work. There’s a personal trainer that takes clients out on the heath in front of our flat. She has a sign that says something like What do you want to achieve? but I think she might think I was off my rocker if I said ‘I want to be able to hold my 2kg camera at arm’s length and above my head’. So I guess I’ll just have to get crafty with other solutions.

tips for self-portraits
Last week I downloaded this e-book, The Art of Self-Portraiture, and it is very comprehensive without being boring or technical. It’s not the sort of book you can read and put everything into your very next shot – it discusses what the author learned from taking a self-portrait every day for a year, so there are lots of different things covered, including lighting, using a tripod or holding the camera, using the timer, cropping an image to make it more exciting. Lots of useful stuff and things I’m definitely going to use to try to improve our self-portraits in future. It isn’t free, but it is on an early-bird special this month so if it sounds like something you might like, this week would be the time to check it out.

***
In other news, I am heartbroken by the news in Joplin, Missouri, today. I went to uni in a nearby town and worked in a record store in Joplin while I was a student. It was the place to go for shopping, movies and was just a lovely place. So many of the places I recognise are completely gone and my thoughts are with all of those trying to get through today in such sad circumstances. I really don’t know what else to say – I think I’ve rewritten this paragraph six times already so I’m just going to finish here and hope today’s storms are not so destructive. Stay safe, everybody.

xlovesx

Scrapbooking Day Challenge 5 :: Try a new photo edit

scrapbooking challenge :: photo edit
scrapbooking challenge :: photo editing tutorial
The other day when I shared my day in photos, one of the big questions that came up was the editing process for creating that look. Was it a Photoshop thing? Was it a camera thing? And the answer is… it’s a little bit of both.

One of the nicest things about a camera with manual control is you can decide what you like rather than just the camera making the decision. In many cases, I actually prefer my photos a bit over-exposed. Not immensely so – just a bit lighter than usual, and definitely lighter than what I would get by following the camera. When I look at my light meter, I normally aim for one or two points to the right, and I just like the colour better there. It works well with shallow depth of field and it provides a way to pretty up a sky that isn’t very blue. So that was the first step: all those photos were a bit lighter than you would expect – right from the camera.

If you have an SLR, you can try this. Go get it and set it to Manual and choose a low number for your aperture – so your lens is wide open. I shot all those pictures at f1.4 on a 50mm lens. (This is the lens I use on a day-to-day basis and it makes it pretty easy to make things beautiful.) Set your ISO to something appropriate to your surroundings. I still use the same ISO reminders that I learned in high school: 100 for sunshine, 400 for cloudy, 800 for I wish someone would turn on some more lights! And if your camera goes higher than 800, you can adjust for darker conditions with higher numbers. Now that you’ve set the aperture and the ISO, all you have worry about is shutter speed. And that makes shooting in manual a lot easier than it seems. Once those two steps become second nature, you’ll wonder why it ever seemed intimidating.

With those two things set, look through the viewfinder and half-press your shutter to focus on something. Look at the viewfinder to find your light meter. On a Canon, there’s an a ruler from -2 to +2, with an arrow pointing down on the very centre. On a Nikon, there’s a – at the left and a + on the right and a zero at the very middle. They both work the same way, and if you’ve never paid attention to them before, they can be very useful indeed! When you half-press, you’ll see a little marker come up to show you where you are with your current settings. Try turning your wheel to adjust the shutter speed and you’ll see the little arrow move (or if you don’t see it move, half-press again and it will be in a different place and if that doesn’t work, get out your manual because you’re turning the wrong wheel, probably). So the point in the middle? That’s what your camera thinks is the best exposure for these settings (so the best shutter speed, since we’ve set the other two things already). Take the picture so you can see how that looks on the screen. Now move the wheel again so your shutter speed changes — move it so the arrow moves a bit to the left and snap again. That picture should appear darker than the first shot. Move it several clicks the other way so now you’re a couple lines to the right of the middle and snap again. Now your picture should be lighter – even lighter than the first image. And that is what shooting in manual is all about, really. For me, anyway. So I snapped all those shots with the arrow one or two lines to the right of that middle point. (By the way, you can also do this in Aperture Priority and let the camera set the shutter speed while you tell it to shoot lighter rather than right in the middle – but I think we’ve covered enough technical trickery for this single blog post, so we’ll leave that for another time.)

photo before edit
But then that wasn’t quite what I wanted either. I loved that the images were light, but I also wanted them warmer in tone. And to an extent, I could have done that in camera. But I didn’t. So I turned to Photoshop for the warm part of the glow.

I use Totally Rad Actions for most of my photo editing. If you do a lot of editing, then I totally recommend them. If you only edit every once in a while, then it’s a pretty big package to get if you’re not going to use it much, if you know what I mean. Plus they only work with full Photoshop – not Photoshop Elements, so I’ll tell you that right from the start. (They also have a Lightroom product, and I’ve seen people request an Elements product, but I haven’t seen anything about them bringing that out just yet. Also, if you’re an Elements user, please don’t switch off now, because in a couple paragraphs there will be an answer for you, I promise.) Okay, so anyway, if you go here, you can get an idea of all the different looks that these actions create (and if you follow many photo blogs, you may start to recognise some looks, as there are plenty of people out there using these same sets). So basically, I ran one action and that was it. It’s called Flare-Up Golden. It adds a warm, orangey flare over the top of the photo. In most cases, it’s far too warm and orangey for my liking at the 100% opacity, so I dial it down to 50% or less. For that set of photos, that was it. Now… technically, yes, anything that exists in an action can be created by your own tinkering in Photoshop. But in just that one action alone, there are nineteen steps. With the action, I just push one button then adjust the opacity when it’s done. Without the action, I have to go through a million things. Plus here’s the truth: the people who make awesome actions know more about Photoshop than I do. There are whole portions of Photoshop I have discovered just by a step in an action that made me wonder what exactly was happening. I’m convinced that program has an infinite number of settings and the people who make fab action sets? They know almost all of them.

before processing
But I also realise that may be no use to you at all if you don’t have Photoshop or that set of actions. So how about some alternatives to achieving a warm glow without all that? Even with a picture from your phone or point and shoot. Picnik can do this for you in just a few easy steps. Choose a picture and go upload it there now.

Starting with the ‘Edit’ tab, make two adjustments. Click ‘Exposure’ and move the top slider to the right to lighten the photo. Click OK when you’re happy that it’s light enough. Then choose ‘Colors’ and move the temperature slider to the right. Stop when it’s warm enough and click OK again.

Then move to the ‘Create’ tab and select ‘Effects’ and scroll down to ‘Lomo-ish’ which is under the Camera heading. Click that effect and for the settings, move the top slider to about 70% for blur and the bottom slider to to about 40% for fade. Adjust as necessary for your image and then click at the top to save your newly edited photo!

photo edited with Picnik
Of course, there are plenty of ways you can edit your pictures – not just to make things lighter and warmer! So that’s challenge five for this lovely day of scrapbooking: Try a new photo edit. You can just follow these steps in Picnik or you can try something completely different! Just take an image and try a new look! You can upload it to Flickr, the photography gallery at Two Peas or your blog. Whatever works! And if you find something you think we should all try, let us know in the comments!

A note about all the Scrapbooking Day challenges here: You can enter any time between now and Sunday, 15th May, so you have a full week to do as many challenges as you like. Unless otherwise noted, winners have a choice of prize – an online class pass or a gift pack of scrapbooking stash. I’ll also be choosing three winners from all the links and comments left today (Saturday the 7th of May) on any post, so just participating and saying hello gives you another chance to win!

xlovesx

PS: While this is my last post of today, this happy day of scrapbooking, Two Peas is celebrating all weekend. So tomorrow I will be focusing on their challenges – continuing with the supplies I started with this morning – and tomorrow I’m hosting a live chat there. It’s at 8pm UK time and 2pm US Central time, so perhaps you can stop by to say hello. And all the challenges at Two Peas? They have prizes and they don’t close until next Sunday too. So just in case you’re looking for even more to keep you creative this week, I think they can help! See you tomorrow, and thank you for joining me for such a happy Scrapbooking Day 2011.

My Day in Photos

a scrapbooker's day in photos
A little project with the Beyond Blogging class today. Click any thumbnail below as their days appear online. If you’re viewing this through a reader, please click here to see the full post.

Shooting with shallow depth of field

shooting with shallow depth of field
The last time I bought a new lens for my camera, I spent the better part of two months reading every review I could find. I hate that feeling of making a major purchase and wondering if I’ve made the right decision or in three weeks will I find something else that would have been two percent more perfect and now I’m left without a means to change, you know? So read, read, read was my system. Go through pages and pages of search results looking for the good, the bad and the ugly.

One of the reviews mentioned that the lens in question was perfect for _one of those crazy depth-of-field photographers. And if you don’t know if you fit in this category, then you definitely don’t. Oh, that just about sold me. For I’ll say it right now: I love crazily shallow depth-of-field. I will go to every length I can think of to get just a tiny sliver of the photo in focus and everything else pleasantly blurred. If that makes me crazy, so be it.

shooting with shallow depth of field
That lens isn’t actually one I have with me on this trip, because it’s the heaviest thing in my entire camera bag and really not practical for carrying every day, but I’ve brought the best compromise I can: the Canon 50mm f1.4. (I’m just carrying two lenses, by the way – the other is a wide angle I’ll talk more about another day.) The 50mm is my most used lens at home and has been my most used lens so far on this trip. It’s small and lightweight, but sturdier than the less expensive f1.8 (which I used and loved until all the king’s horses and all the king’s men couldn’t put the plastic 1.8 back together again) And I almost always have it set wide open to f1.4, which means it’s fast, great even in low-light and creates that crazy one-thing-in-focus look.

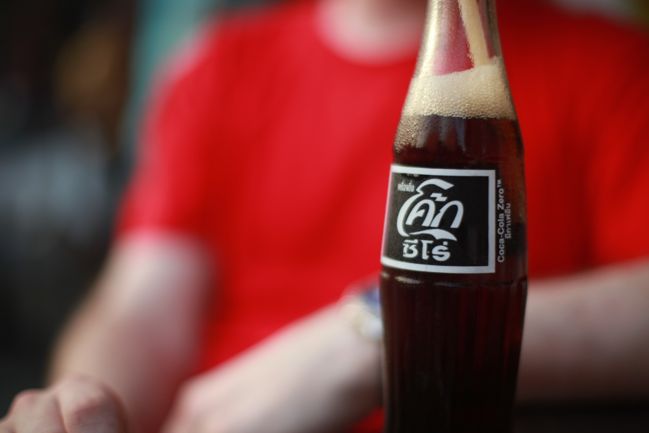
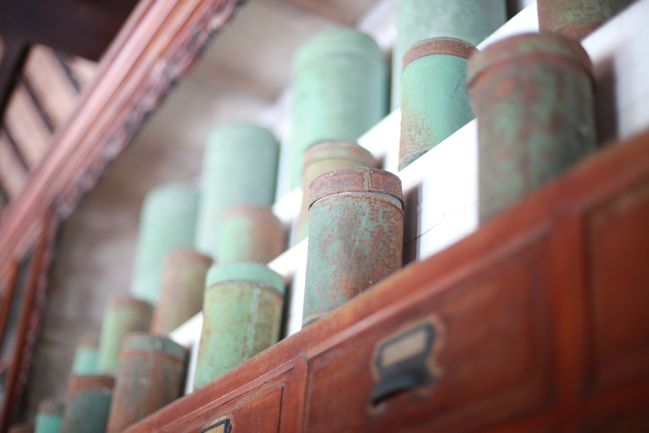
If depth of field is a new concept for you – it’s totally easy. See the picture of the soda bottle above? That’s the only thing in focus and the background of the picture is blurred, right? That’s because the depth of field is shallow. The wider the opening on the camera (the aperture), the more you’ll get this effect. If the lens isn’t opened as much, more of the scene will be in focus. That’s why pinhole cameras don’t need to be focused – the opening is so small that everything is in focus! On many cameras (even some point and shoots), the aperture is something you can adjust, and the numbers always work in the same way: the lowest number is the widest opening and the highest number is the smallest opening. So f1.4 means not much will be in focus… f22 (no decimal point) means pretty much everything will be in focus.

shooting with shallow depth of field
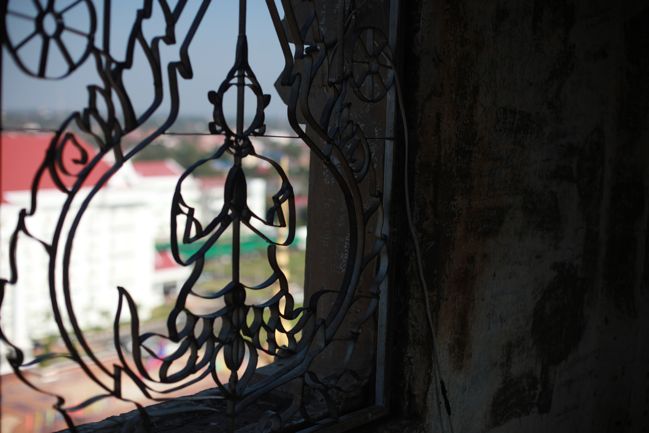
As for why I love my depth of field to be so crazily shallow, well… it’s partly because it’s how I see with my own eyes! I’m near-sighted to a pretty crazy amount, so without my glasses I’ll see just one thing in focus and the rest as a blur. There’s something comforting about recreating that with a camera lens! But mostly it’s because I like how you can focus on just one detail, no matter how small, and make the rest of the world fade away into the background. That ornate iron window screen? The background included traffic, a government building and a construction site. Not at all as peaceful as the window itself! I find that time and time again I come back to the idea that you can take all the visual stress out of a photo with shallow depth of field… though it does mean you have to pay attention to getting the right thing in focus, as it would be just as easy here to blur the window frame and focus on the building. Easy but not as lovely, I do believe.

shooting with shallow depth of field
Are you joining the crazy club with me for loving the softness of shallow depth of field? Or does it actually drive you mad wanting to just see everything in focus? I would love to know! If you want to share a link to your favourite shallow DOF photo, please do!

For advice on trying more with shallow depth of field, try
this post for a well-rounded technical discussion,
this post for a quick look at how camera modes can help,
this post if you shoot video,
and this post includes some notes on point and shoot cameras with good control of depth of field (namely the Lumix and the Powershot).

xlovesx

Instagram :: A Review for Scrapbookers

Instagram - A review for scrapbookers
Instagram review

Lately I’ve found a new app is taking my iPhone time: Instagram. It’s a photo-sharing app and it’s free, so it seems like something that a scrapbooker or two or ten just might find interesting, right?

Instagram review

Instagram is currently a pretty simple app, and although there is talk about making it more robust, I love the current simplicity. Grab it for free from the app store and create a username and password. Then there are just a few functions that make everything work: feed is a running page of images posted by the users you follow, popular is a page with the thirty-two most popular images currently on the Instagram network, share is where you upload your photos, news lists recent activity like comments on your photos and new followers and your profile has all your account settings. That’s everything – easy enough!

Instagram review

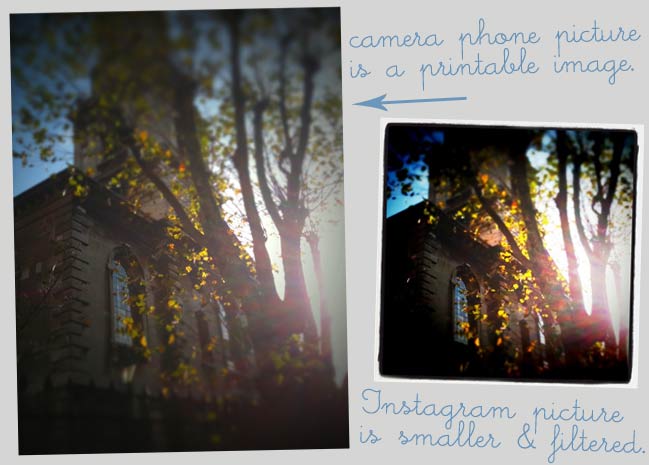
When you share your photos, you can use the camera and take the photo right then or you can select an image from your camera roll, meaning you can use any camera app you like or even photos you’ve taken with another camera and transferred to your iPhone. Within Instagram, all photos are cropped to square images and there are a selection of optional photo processing filters you can choose if you fancy. Which makes Instagram sound a lot like Hipstamatic except there is a big difference: Instagram images are saved at 612 pixels square: that’s a web size, not a print size like Hipstamatic (1536 pixels square). To give you an idea, the images on my blog are 649 pixels wide, so it really is a web-only size and not something you’ll be able to print at a regular size (mini prints might be okay) and then have a clear image for your scrapbook. For that reason, my preference is to take photos with the iPhone camera using other apps (the regular camera function, Hipstamatic and some others I’ll write about soon) because then you have the original image (which is print-sized) saved to your camera roll as well as the new web-sized Instagram image. For those who don’t print their photos, then they would probably think I’m a little crazy for the extra step but I think scrapbookers will understand the method to my madness.

Can you print Instagram photos?

What’s the point of Instagram? Well, it depends. If plenty of your friends have an iPhone, then it’s a great way to keep in touch as a group and share a little about your day. Share what you’ve been crafting or baking, ask for opinions on new shoes or an experimental hairdo or catch up with baby and kitten photos from friends. But Instagram is iPhone only, so if you don’t have an iPhone or your friends don’t, then by now you’re probably completely over this blog post and ready to move right along. Sorry – I don’t have anything to do with the app other than giving it a try!

Instagram review

If you have an iPhone but your friends don’t, there are still reasons you might love Instagram. First you can sync your Instagram with your Facebook, Twitter or Flickr account, making it a way to add photos to your account quickly, even with filters. Or you can jump right into the Instagram community and make new friends or find new photographers to follow and learn from their inspiring images. Take a look at the images under the popular tab and you’ll find amazing images, and most of them have been taken with the iPhone camera. There are some pretty amazing photographers in the community sharing lots of tips for improving your images. I spend the most time on my iPhone while sitting on a train or waiting for an appointment and taking a few photo ideas away from that ten minutes of waiting is just the sort of thing that makes me love this app.

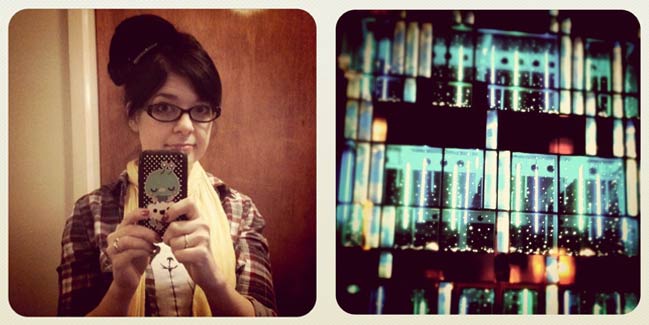
Instagram review Two informal uses for Instagram: Does my hair look okay like this? and I’m standing in front of the building that looks like this. Where are you? for those moments when you end up separated in the crowd.

Does all this make the app useful for scrapbookers? If you like to capture little details of your day and document them in some way (even if you’re only sharing with a few people), then yes: this is a scrapbooking app. Just be aware of the web-sized images so you’re not disappointed when it comes to actually scrapbooking those bits of everyday life.

Instagram review

One thing I would really suggest is deciding from the beginning whether you want your photos to be private or public. If you intend to share images that you’re happy for the world to see, then no problem. But if you open your account, get a few followers and then decide you’d rather only share your photos with your real-life friends, those original followers – whether you knew them or not – will be able to see your pictures. So if you would rather share only with your friends, open your account then go straight to your profile and change the privacy setting. With your photos switched to private, you’ll get a request from anyone who asks to see your photos, and you can confirm or ignore each request.

If you’re on Instagram, say hello! My username is Shimelle so I’m pretty easy to find. Other Instagram members I would suggest following include JoshJohnson, who is a professional photographer by day but also posts ‘Instatips’ with great advice on getting the most from the phone camera and the app, Paatri, who has a fab street photography style and Make_Shift, who does some nifty tricks with abstract composition and exposure. It’s also cool to find a photographer in a part of the world you really like and follow them for a stream of images from somewhere you love but can’t really visit all the time. I’ve been following user Axs for fab shots of Tokyo and I’m watching for an Icelandic Instagrammer to follow through the winter!

If you’re an Instagrammer, leave your username in the comments if you like. Or share your favourites to follow. And if you have an iPhone but haven’t downloaded Instagram, what are you waiting for?

xlovesx

TTV Photography for Scrapbookers

TTV photography tutorial for scrapbooking
No matter how much I fall in love with new technologies and improvements in digital photography, my nostalgic heart loves imperfect imagery just as much. Give me photos with colour casts, grain, hot spots and scratches and all I see is character rather than mistakes. I love having a selection of pictures in my scrapbooks, from the crystal clear images I can get from my digital camera to film photos from vintage cameras. TTV photography puts both to use by using your digital camera to capture an image through the viewfinder of a vintage camera, complete with scratches and distortion. Admittedly, it may not be a look that everyone loves, but if you fancy something that looks a bit like the older photos in your collection, this can be such a fun technique to try.
TTV photography tutorial for scrapbookers
What is TTV?
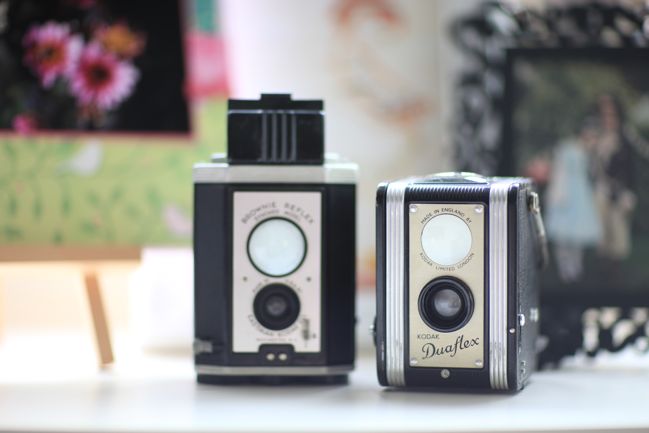
TTV stands for Through the Viewfinder, because the basic idea is to capture an image of just what you see through the viewfinder of another camera. The viewfinders on modern cameras are quite tiny, but they were considerably bigger on older cameras that weren’t designed to be held right up to your eye. Twin Lens Reflex cameras typically have a large viewfinder on the top of the camera, that you can see even when the camera is held at arm’s length.

A variety of Twin Lens Reflex (TLR) cameras are available today — some are such collector’s items that they are far too pricey to try on just a whim, but others are widely available on Ebay, on market stalls and at boot sales (garage sales for those of you on the other side of the Atlantic). You’ll find a variety at both ends of the price scale on Etsy to give you an idea of all the types available. There are also brand new versions of these cameras, such as the Blackbird Fly from Japan. I use a Kodak Duaflex that I found for less than a fiver from the camera stall at nearby Greenwich Market.

If you find a Twin Lens Reflex camera in good condition, you can actually still use it with film. Most of them take medium format 120 film (some take 127), which you can buy at a camera shop and you can have developed at most photo processors — just know that they will likely send it away to be processed rather than developing it in the same way that they do 35mm on the hour. Most developers take a week to ten days to process it, including the time for sending it to and from the shop. Just something to keep in mind if you are curious about the film option when looking for a vintage TLR camera – but definitely not required for TTV photography. You don’t even need it to be in working order as long as you can see an image in the viewfinder!
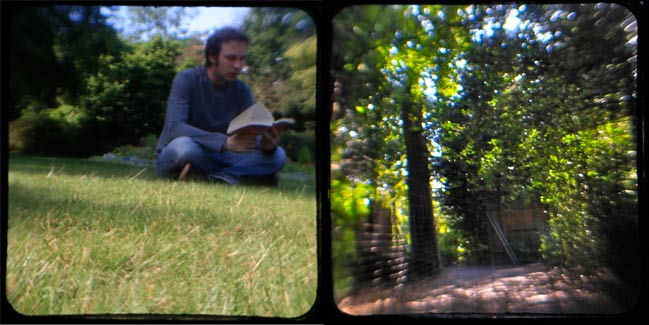
examples of TTV photography
How to take TTV images
The basic premise of TTV photography is simple: use a vintage camera to compose your shot, then use your digital camera to photograph the actual viewfinder of the older camera. That can be as simple as setting the vintage camera on the table, then holding your digital camera as you would normally and focusing on the top of the vintage camera. The resulting image would look something like this:
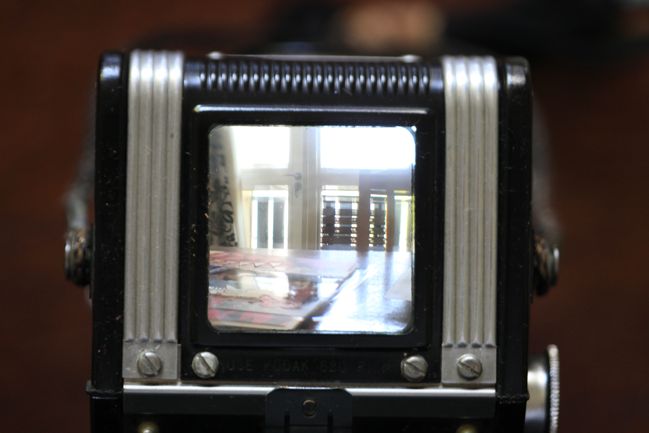
TTV tutorial for scrapbookers

Once you have loaded this image onto your computer, you can crop it into a square to eliminate the rest of the camera and the table. (It’s okay if your image wasn’t perfectly straight, as you can straighten it at this point too.) That brings us to a picture like this:
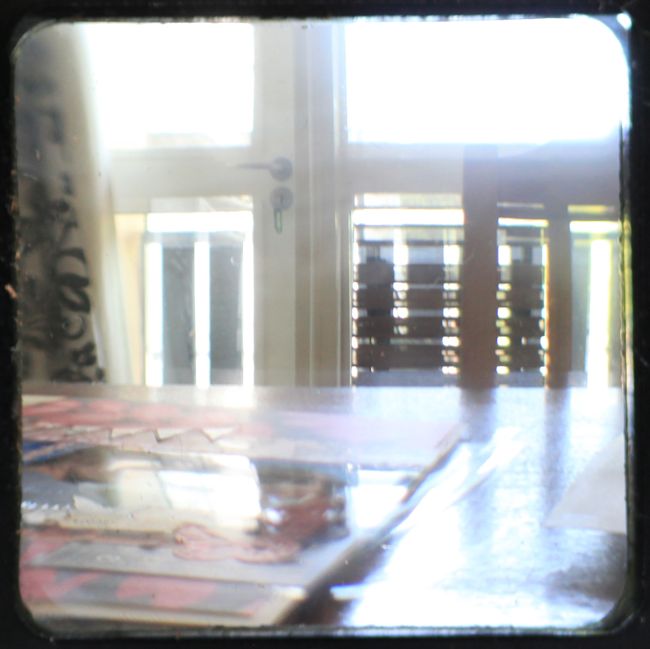
TTV photography tutorial for scrapbookers

But we can make improvements on this by controlling the light a bit more. Right now, the image is filled with light because the same light source is coming into the picture twice – once into the TLR camera to make the image appear in the viewfinder, but then again into the lens of my digital camera because there is plenty of light available in the room between where I’m holding the camera and where I’m focusing. Eliminating that light will create a more accurate image. And everything you need can be found in your scrapbooking stash: black cardstock and adhesive! Roll the cardstock into a tube that will fit around the lens of your digital camera, making sure the other end of the tube will fit around the top of your vintage camera. There’s no exact science to this — it’s just a case of rolling the cardstock until it fits your set up, then taping it in place when you get a good fit. You can attach it to either camera – whichever you prefer – with a rubber band and then the cardstock tube will stay in place for as long as you want to take pictures but it won’t be any trouble to remove either.
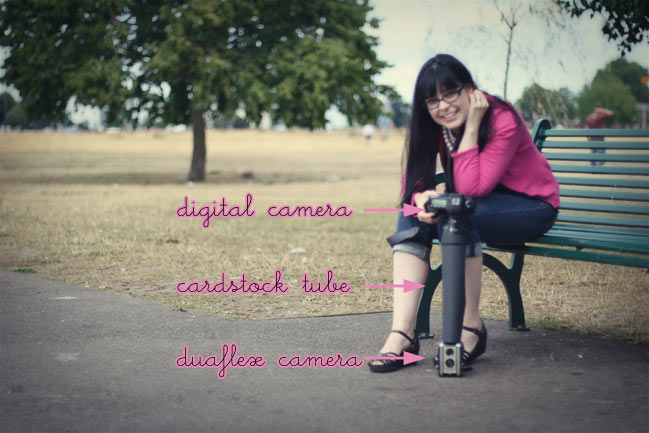
TTV photography tutorial for scrapbooking
You can do this with any digital camera, including a point and shoot. If your point and shoot has a macro or flower mode, that may give you the best focus on the viewfinder. If you are using a DSLR and have a range of lenses to choose from, you’ll want to choose something that will give you the best macro focus while also having a distance range that makes it easy enough to focus on the the older camera — you don’t want something that requires you be several feet away from the camera, because the further away you have to be, the longer you’ll need to make that black cardstock tube! I use the Canon EF 100mm f/2.8 Macro USM Lens but please don’t feel that you have to have that lens to try this technique. Use whatever camera or lens you have available and adjust your cardstock tube to be shorter or longer as needed.

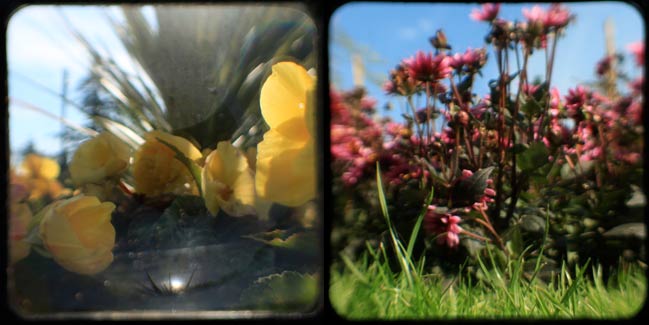
Adding the black tube to your set up will prevent excess light and also eliminate any reflections that appear on the glass of the viewfinder. This is especially useful when taking photos outside with overhead sun. You can see the difference in these two images taken in the same conditions but with and without the black cardstock tube.
TTV photography tutorial for scrapbooking
The image on the left was taken without the tube, so you can see reflections, glare and a great deal of light on the picture. The image on the right was taken with the black cardstock tube, eliminating the reflections and allowing for much brighter colours to appear.

All you need to do in post-processing is possibly straighten the image if it’s not perfect and then crop it into a square. You can do that with pretty much any basic photo software. I do that in iPhoto, and it’s also possible in Picasa, online with Picnik or with Photoshop/Photoshop Elements too of course.
TTV photography tutorial for scrapbooking
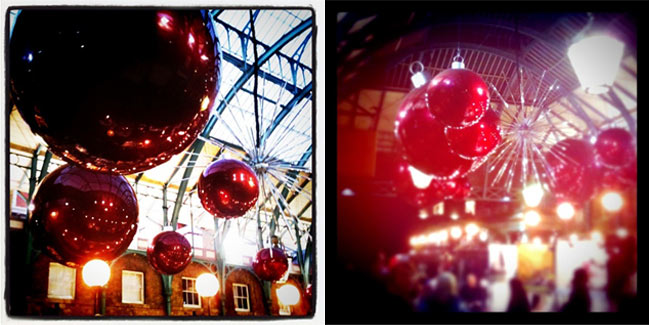
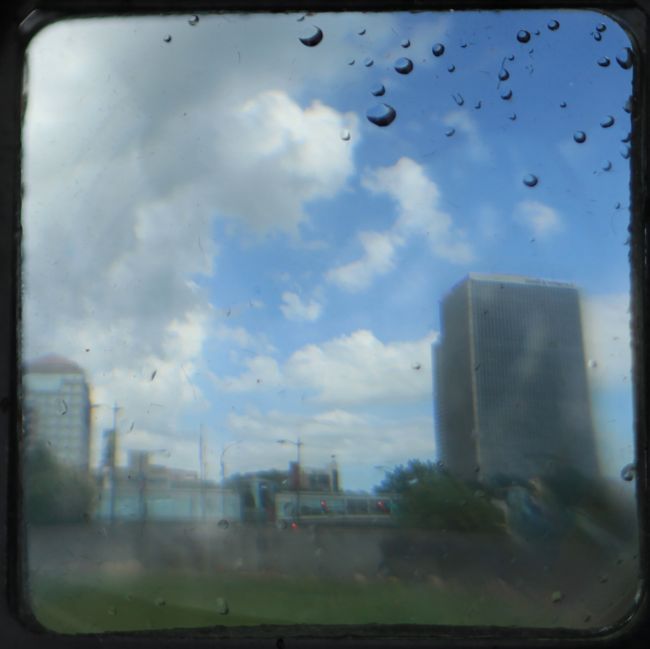
You can also try getting a little creative by adding a little something right on top of the viewfinder. I got a bit too close to a fountain and the end result of these water droplets on the glass is quite cool! Of course I’m a little fond of sprinkling some glitter on the viewfinder for something festive!

By the way, you can also take some interesting images with the black tube and your digital camera without the vintage camera. That’s how I captured this picture (see it on a scrapbook page here) and it’s something I fancy trying a bit more for the unique look.

How to fake TTV images
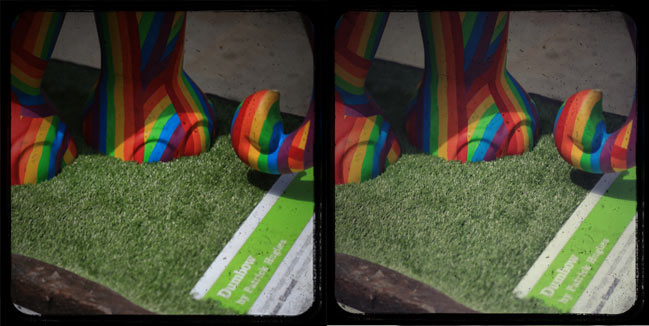
If you like the look of TTV but the DIY aspect just doesn’t sound fun for you, you can fake the look of a TTV image by taking any digital photo and adding an overlay with the square black frame and scratches. You can find some of these made specifically for scrapbookers, like these toy camera frames by Tia Bennett, and you can also find a selection of frames on Flickr, where photographers have taken a picture of something neutral to leave you with just the black frame, which you can copy and paste over another image.
TTV photography tutorial for scrapbookers

For these pictures, I pasted this frame by Flickr member Toke Nygaard over a digital photo. On the left, I kept the original colour from the digital picture, while I added a filter layer on the right to soften the image a bit for a more vintage feel. For both, I pasted the frame over the image in Photoshop, then set the frame layer to multiply mode so the photo would show through the frame.

Faking TTV images by pasting a frame is easy but it is limited to just adding the frame and scratches — it won’t skew the focus of your image like you get by using an actual vintage camera. It’s just a choice of how much degradation you want to your image.
scrapbooking projects with TTV photos
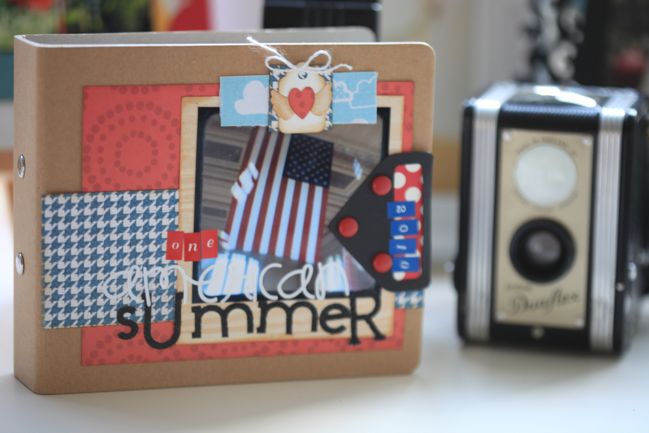
Scrapbooking and papercrafting with TTV images
Printing TTV images follows the same process we covered for printing Hipstamatic photos as it’s just a case of printing square images. You can achieve that on your home printer or with an online printer, so just pick whichever you prefer.
scrapbooking projects with TTV photos
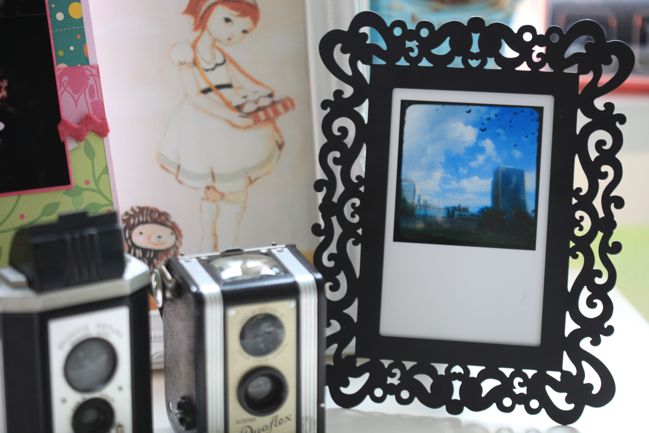
Unlike your Hipstamatic images, you can print these at any size that would be appropriate to your digital camera, so if you could normally print your digital images at 8×10 or larger, you can do that with your TTV photos too. They are great for framing and popping on the wall — see examples here and here.

Last year, I printed one photo with a TTV frame at 8×8 for each day of my Christmas Journal. For each day of the holidays, my album had one 8×8 scrapbook page with an 8×8 photo print opposite and I loved the mix. I printed the first few at home until I knew I was happy with the settings and such, then I saved up the rest of the images in a folder and printed them all at once just after Christmas so I could save money by printing them online. (Especially since I could take advantage of the after-Christmas sales! Bonus.)
scrapbooking projects with TTV photos
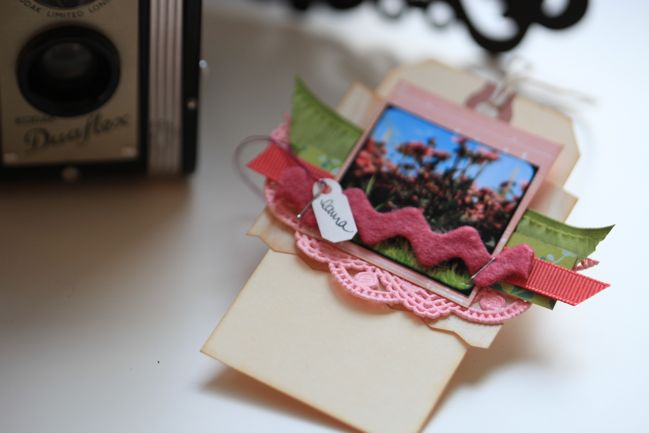
They can also be printed at teeny-tiny sizes perfect for adding to cards and gift tags. These will definitely be making an appearance on my holiday wrapping later this year, but it is far too early to be talking so much about Christmas, I do believe! Until then, it’s a great way to personalise your gifts and cards by using a TTV image of something the recipient loves or even an image of the actual person. They also make great place cards for a party.
scrapbook pages with TTV photos
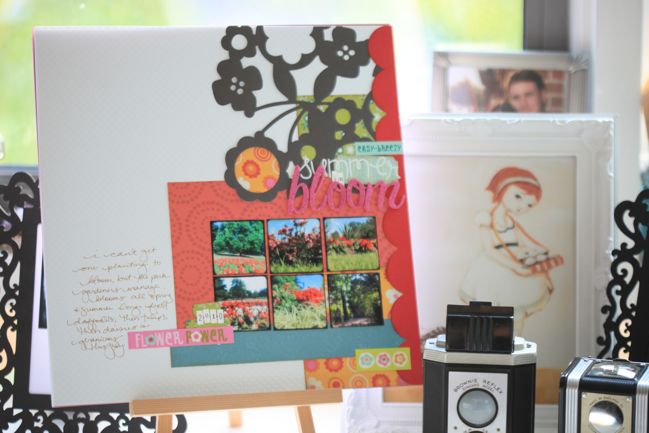
Of course, squares make grid-based scrapbook pages a flash, so that’s a natural design choice for scrapbooking a group of TTV images. While many of the TTV photos I’ve taken this summer are of flowers, there’s no reason why you couldn’t use TTV photography with things that are a bit more traditional scrapbook material. I think it would add a beautiful twist on some summer photo opportunities with children, like blowing bubbles in the garden or visiting a local fair or carnival.

If you give TTV photography a try, be sure to link up your images in the comments here — I’d love to see what you’ve been snapping with any old camera you find!

xlovesx

An invitation to you...

a photo to scrapbook

This weekend, choose just one photo of all the images you have. Make it a picture you love but a picture you haven’t scrapped. Or you haven’t scrapped enough.

This weekend? Make something of it.

Blog the photo and share what it means to you.

Or scrapbook the photo and give yourself the freedom to love what you create.

Or have it printed and frame it or display it in your home.

Or find a way to carry it with you wherever you go, as a picture in your wallet or the wallpaper on your mobile phone.

You’re invited:
Choose a photo. Do something with it. Share.

Share in the comment below. You can either just write a comment explaining what you did or you can leave a link to your blog or online page gallery so everyone can check out what you made.

I have a lovely prize to share with one or two of you who take up the invitation by the end of the weekend.

As for me, I’m going to scrapbook that photo at the top of this post. From shooting straight into bright sun, it came out of the camera just like that — completely overexposed and not in any way perfectly composed. And yet, I find it somewhat magical. I’ll be back to share the results soon. Can’t wait to see (or hear) what you plan to do!

xlovesx