Scrapbooking Day Challenge 5 :: Try a new photo edit

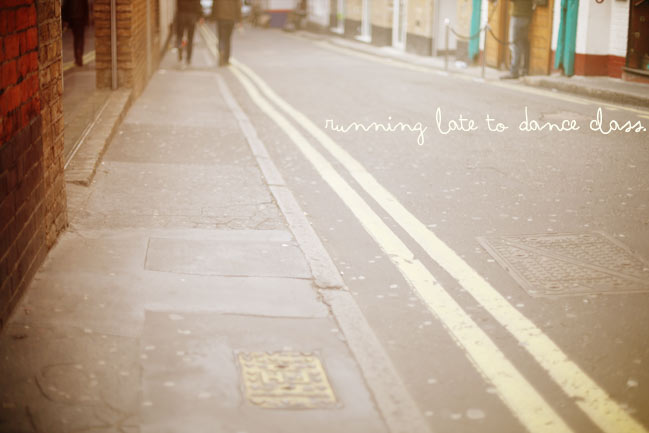
The other day when I shared my day in photos, one of the big questions that came up was the editing process for creating that look. Was it a Photoshop thing? Was it a camera thing? And the answer is… it’s a little bit of both.
One of the nicest things about a camera with manual control is you can decide what you like rather than just the camera making the decision. In many cases, I actually prefer my photos a bit over-exposed. Not immensely so – just a bit lighter than usual, and definitely lighter than what I would get by following the camera. When I look at my light meter, I normally aim for one or two points to the right, and I just like the colour better there. It works well with shallow depth of field and it provides a way to pretty up a sky that isn’t very blue. So that was the first step: all those photos were a bit lighter than you would expect – right from the camera.
If you have an SLR, you can try this. Go get it and set it to Manual and choose a low number for your aperture – so your lens is wide open. I shot all those pictures at f1.4 on a 50mm lens. (This is the lens I use on a day-to-day basis and it makes it pretty easy to make things beautiful.) Set your ISO to something appropriate to your surroundings. I still use the same ISO reminders that I learned in high school: 100 for sunshine, 400 for cloudy, 800 for I wish someone would turn on some more lights! And if your camera goes higher than 800, you can adjust for darker conditions with higher numbers. Now that you’ve set the aperture and the ISO, all you have worry about is shutter speed. And that makes shooting in manual a lot easier than it seems. Once those two steps become second nature, you’ll wonder why it ever seemed intimidating.
With those two things set, look through the viewfinder and half-press your shutter to focus on something. Look at the viewfinder to find your light meter. On a Canon, there’s an a ruler from -2 to +2, with an arrow pointing down on the very centre. On a Nikon, there’s a – at the left and a + on the right and a zero at the very middle. They both work the same way, and if you’ve never paid attention to them before, they can be very useful indeed! When you half-press, you’ll see a little marker come up to show you where you are with your current settings. Try turning your wheel to adjust the shutter speed and you’ll see the little arrow move (or if you don’t see it move, half-press again and it will be in a different place and if that doesn’t work, get out your manual because you’re turning the wrong wheel, probably). So the point in the middle? That’s what your camera thinks is the best exposure for these settings (so the best shutter speed, since we’ve set the other two things already). Take the picture so you can see how that looks on the screen. Now move the wheel again so your shutter speed changes — move it so the arrow moves a bit to the left and snap again. That picture should appear darker than the first shot. Move it several clicks the other way so now you’re a couple lines to the right of the middle and snap again. Now your picture should be lighter – even lighter than the first image. And that is what shooting in manual is all about, really. For me, anyway. So I snapped all those shots with the arrow one or two lines to the right of that middle point. (By the way, you can also do this in Aperture Priority and let the camera set the shutter speed while you tell it to shoot lighter rather than right in the middle – but I think we’ve covered enough technical trickery for this single blog post, so we’ll leave that for another time.)
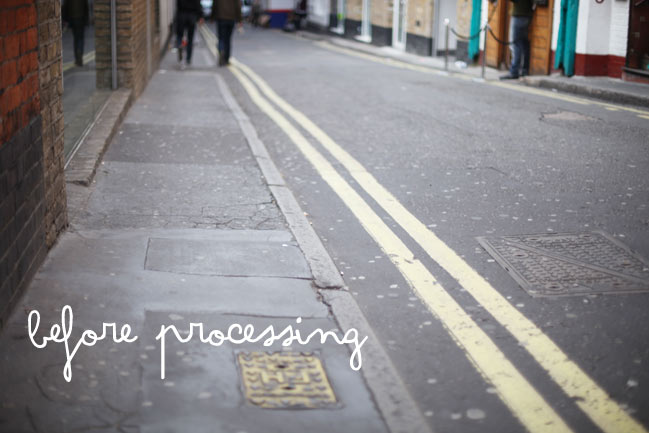
But then that wasn’t quite what I wanted either. I loved that the images were light, but I also wanted them warmer in tone. And to an extent, I could have done that in camera. But I didn’t. So I turned to Photoshop for the warm part of the glow.
I use Totally Rad Actions for most of my photo editing. If you do a lot of editing, then I totally recommend them. If you only edit every once in a while, then it’s a pretty big package to get if you’re not going to use it much, if you know what I mean. Plus they only work with full Photoshop – not Photoshop Elements, so I’ll tell you that right from the start. (They also have a Lightroom product, and I’ve seen people request an Elements product, but I haven’t seen anything about them bringing that out just yet. Also, if you’re an Elements user, please don’t switch off now, because in a couple paragraphs there will be an answer for you, I promise.) Okay, so anyway, if you go here, you can get an idea of all the different looks that these actions create (and if you follow many photo blogs, you may start to recognise some looks, as there are plenty of people out there using these same sets). So basically, I ran one action and that was it. It’s called Flare-Up Golden. It adds a warm, orangey flare over the top of the photo. In most cases, it’s far too warm and orangey for my liking at the 100% opacity, so I dial it down to 50% or less. For that set of photos, that was it. Now… technically, yes, anything that exists in an action can be created by your own tinkering in Photoshop. But in just that one action alone, there are nineteen steps. With the action, I just push one button then adjust the opacity when it’s done. Without the action, I have to go through a million things. Plus here’s the truth: the people who make awesome actions know more about Photoshop than I do. There are whole portions of Photoshop I have discovered just by a step in an action that made me wonder what exactly was happening. I’m convinced that program has an infinite number of settings and the people who make fab action sets? They know almost all of them.
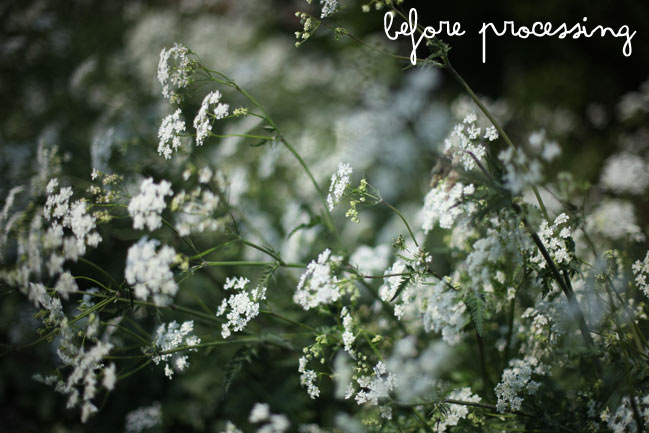
But I also realise that may be no use to you at all if you don’t have Photoshop or that set of actions. So how about some alternatives to achieving a warm glow without all that? Even with a picture from your phone or point and shoot. Picnik can do this for you in just a few easy steps. Choose a picture and go upload it there now.
Starting with the ‘Edit’ tab, make two adjustments. Click ‘Exposure’ and move the top slider to the right to lighten the photo. Click OK when you’re happy that it’s light enough. Then choose ‘Colors’ and move the temperature slider to the right. Stop when it’s warm enough and click OK again.
Then move to the ‘Create’ tab and select ‘Effects’ and scroll down to ‘Lomo-ish’ which is under the Camera heading. Click that effect and for the settings, move the top slider to about 70% for blur and the bottom slider to to about 40% for fade. Adjust as necessary for your image and then click at the top to save your newly edited photo!
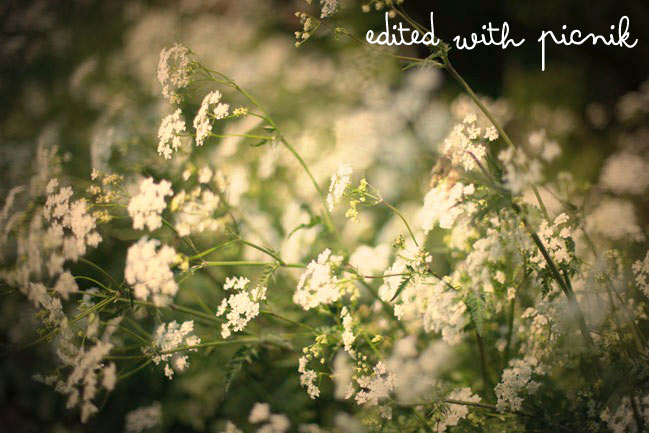
Of course, there are plenty of ways you can edit your pictures – not just to make things lighter and warmer! So that’s challenge five for this lovely day of scrapbooking: Try a new photo edit. You can just follow these steps in Picnik or you can try something completely different! Just take an image and try a new look! You can upload it to Flickr, the photography gallery at Two Peas or your blog. Whatever works! And if you find something you think we should all try, let us know in the comments!
A note about all the Scrapbooking Day challenges here: You can enter any time between now and Sunday, 15th May, so you have a full week to do as many challenges as you like. Unless otherwise noted, winners have a choice of prize – an online class pass or a gift pack of scrapbooking stash. I’ll also be choosing three winners from all the links and comments left today (Saturday the 7th of May) on any post, so just participating and saying hello gives you another chance to win!
xlovesx
PS: While this is my last post of today, this happy day of scrapbooking, Two Peas is celebrating all weekend. So tomorrow I will be focusing on their challenges – continuing with the supplies I started with this morning – and tomorrow I’m hosting a live chat there. It’s at 8pm UK time and 2pm US Central time, so perhaps you can stop by to say hello. And all the challenges at Two Peas? They have prizes and they don’t close until next Sunday too. So just in case you’re looking for even more to keep you creative this week, I think they can help! See you tomorrow, and thank you for joining me for such a happy Scrapbooking Day 2011.
![]() Read more about: inspiration-party photography
Read more about: inspiration-party photography
Next post: More scrapbooking challenges from Two Peas
Previous post: Scrapbooking Day Challenge 3 :: Add a border between the photos


