pretty paper. true stories. {and scrapbooking classes with cupcakes.}

lovely to meet you Twitter Facebook Pinterest YouTube

Take a Scrapbooking Class

online scrapbooking classes

Shop Shimelle Products

scrapbook.com simon says stamp shimelle scrapbooking products @ amazon.com shimelle scrapbooking products @ amazon.co.uk

Reading Material

travel

inspiration party Category

Challenge 06 :: Scrapbook with a BIG Title
Scrapbook with a BIG Title // scrapbook page by Nicole Nowosad

Ready to make something big? Contributing designer Nicole Nowosad joins us now for our next challenge: make a big title for your page! I love her page design – it’s one I want to try myself this weekend!
Scrapbook with a BIG Title // scrapbook page by Nicole Nowosad

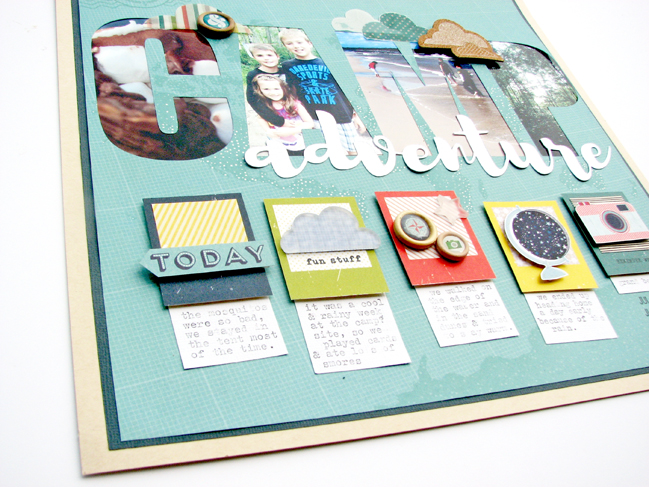
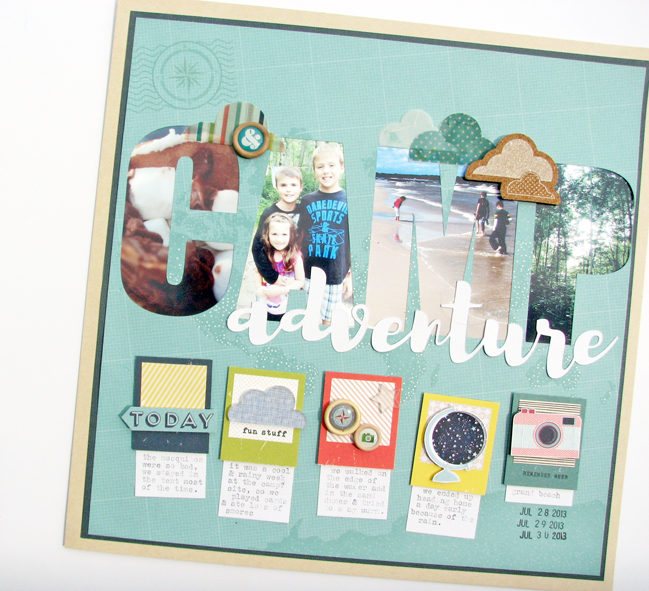
We are fortunate to have a lot of outdoor camping spots within close range of our city. We don’t often take the opportunity to battle the mosquitoes and make a weekend of it. Truth is, we are more of hotel travellers! A few years ago, we made a trip out to a local camping ground and had a brief and wet weekend at the park. Although it wasn’t the greatest of weekends, we still made some great memories and spent time together.
Scrapbook with a BIG Title // scrapbook page by Nicole Nowosad

Scrapbook with a BIG Title // scrapbook page by Nicole Nowosad

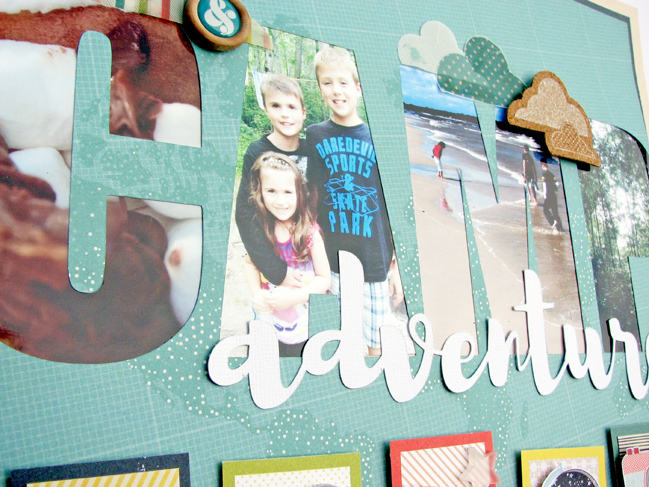
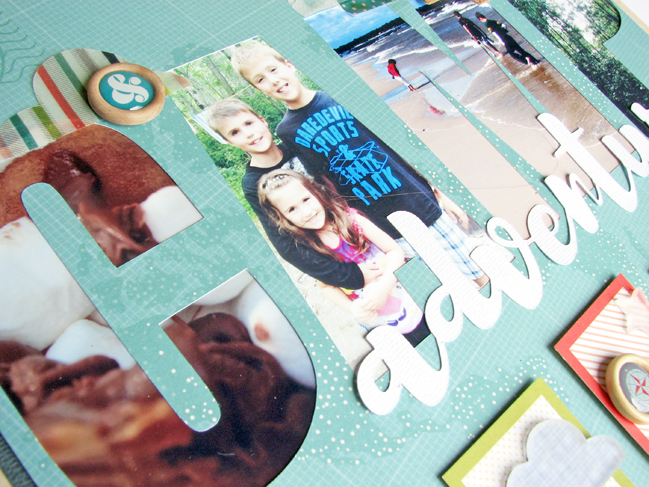
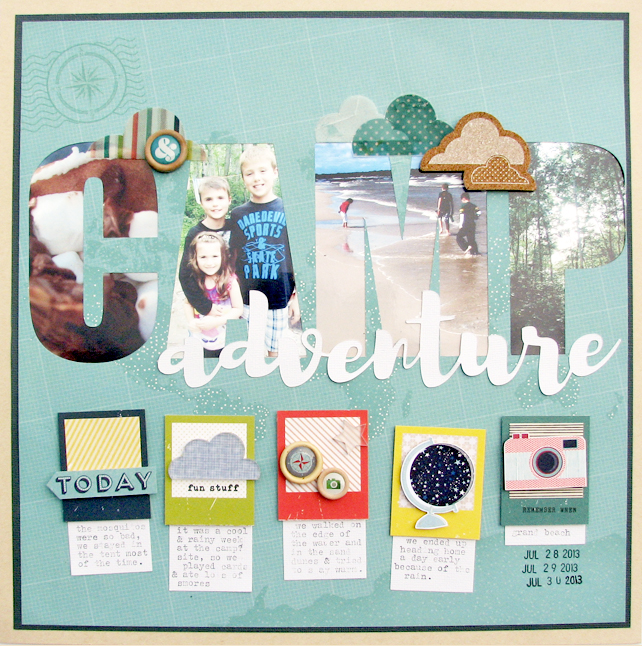
I only captured a few photos from that weekend and wanted to highlight them in a different way. The photos we are pretty busy but I didn’t want to just narrow it down to one or two on the page. I decided to diecut a large title “CAMP” out of some patterned paper and then in the open spaces, added a photo behind each of the letters – one photo signifying something we remember about that trip. I love how each of the letters highlights a different photo, while also making a title for the page. It took a little time to balance out what photo would look best behind what letter, but the result something different and unique!
Scrapbook with a BIG Title // scrapbook page by Nicole Nowosad

Scrapbook with a BIG Title // scrapbook page by Nicole Nowosad

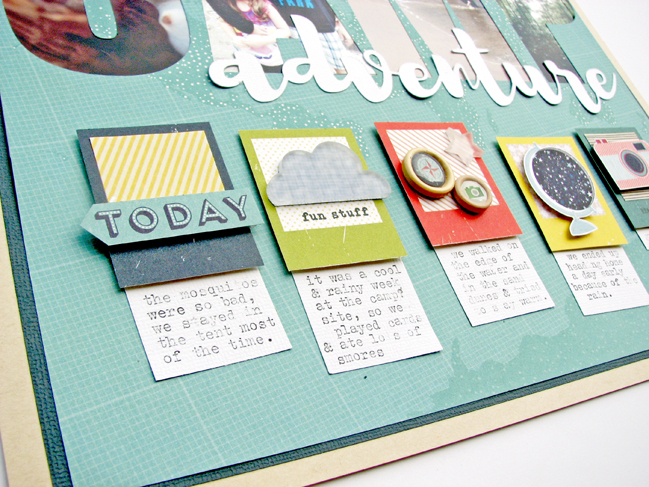
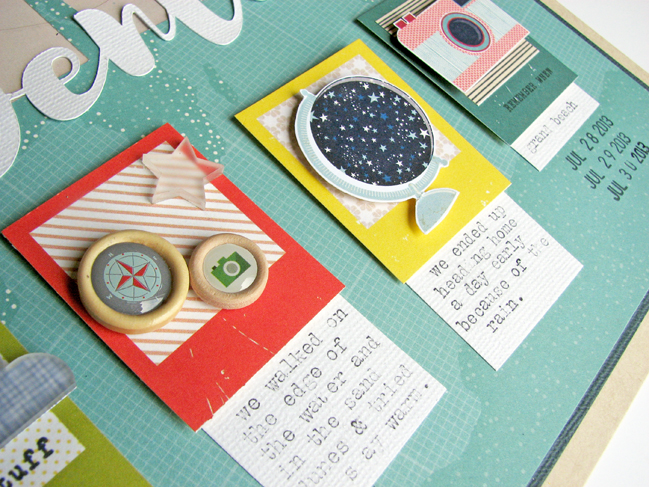
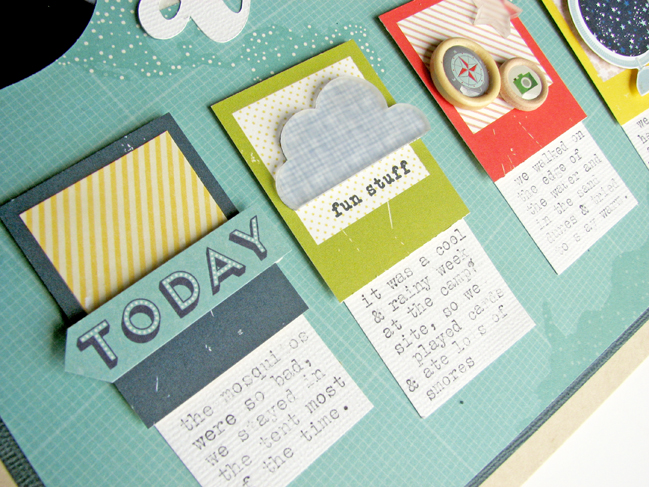
We had a few small different memories of the trip that I wanted to make sure to have included on my page, so I documented little bits of journaling beneath each the five small polaroids that I had cut from some patterned paper and embellished with more fussy cut patterned paper, wood buttons and clear shapes. It is an easy way to note a few small things about this weekend away with the kids.
Scrapbook with a BIG Title // scrapbook page by Nicole Nowosad

Scrapbook with a BIG Title // scrapbook page by Nicole Nowosad

Now it’s your turn – what word will you turn into a BIG title for your next page? Don’t forget to share it here this weekend to get your discount on the new class!


A note about this weekend’s challenges: I’m leaving all the challenges open until the end of the following weekend to allow more time to participate, but the special discount on the new class will be sent to those who upload a new project just this weekend – by the end of Sunday, 30th of October, 2016. This is for new layouts created this weekend, not archived layouts made previously. One discount applicable per person. You can upload your page to another site (blog, Instagram, Facebook, scrapbooking gallery, etc) and use the InLinkz button above to link to that OR you can upload a photo of your page directly with the same button rather than linking elsewhere. Either is fine! If you have trouble figuring out what to click, give a shout in the comments and I’ll email you with help. Thanks!

Challenge 05 :: Scrapbook the Outdoors

an outdoor travel colour story // scrapbook page by Helen De Ram

Hands up if you have plenty of outdoor photos you need to get into your albums! As beautiful as they are, it can be easy to fall into a rut of ruddy, dark colours and neutrals with outdoor pages, and sometimes it’s nice to remember the world outside our windows isn’t actually entirely made of kraft, evergreen, and bark. Please welcome guest artist Helen De Ram, who challenges you to scrap at least one outdoor photo in a colourful style of your choice.

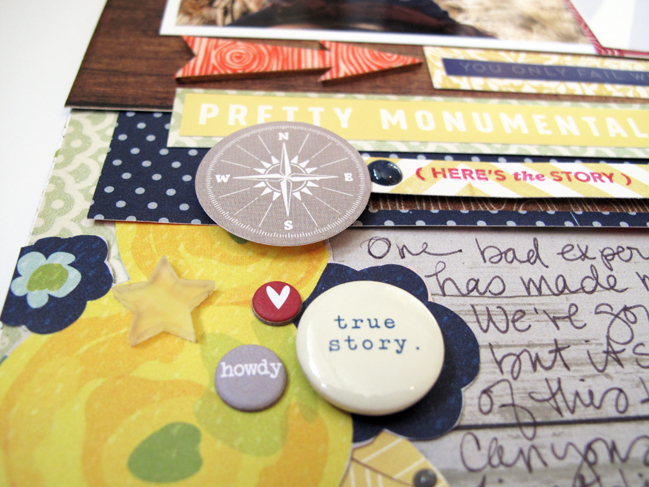
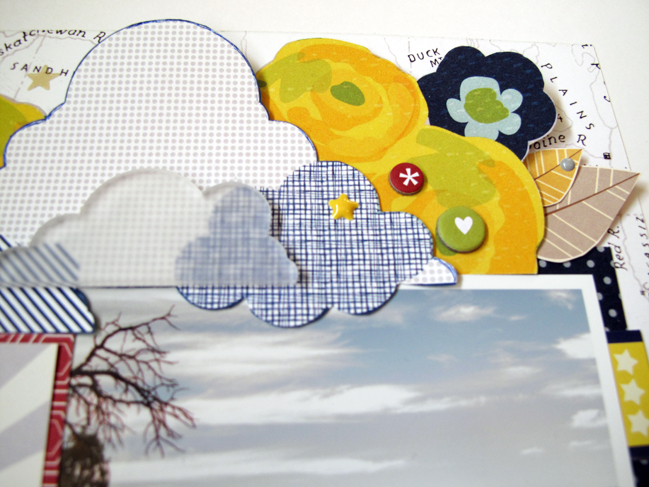
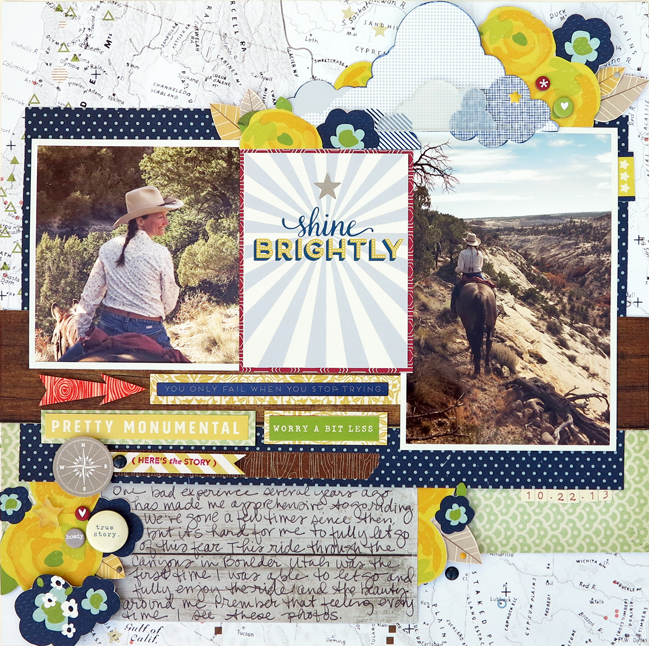
My husband and I enjoy the great outdoors and try to experience it in different ways. A road trip out west every summer gives us the opportunity to take horseback rides through beautiful landscapes in a part of the country that we love. This page tells the story of a ride we took through southern Utah that helped me let go of a previous bad experience so I could fully enjoy myself.

When selecting a color story for the layout, I took my inspiration from the photos and my memories of the colors in the canyons and deserts we rode through. I selected blue, green, brown, and grey, as well as yellow and red.

The Grey Floral paper from Shimelle’s True Stories collection did double duty as I was able to use the navy polka dot side behind the photos, and the yellow and blue flowers on the other side were perfect to cut out and use as a visual triangle around the page.

an outdoor travel colour story // scrapbook page by Helen De Ram

I usually use letter stickers to create my title, but instead the Shine Brightly card from the Starshine cut apart sheet was perfect in color and sentiment. To make it clear that it was my title, I placed it in the center and used red patterned paper as a border.

I was able to find several sentiments in the phase stickers from both Starshine and True Stories that were good matches to my color story. They also help to connect the photos and title card to the journaling and embellishments at the bottom of the page.

an outdoor travel colour story // scrapbook page by Helen De Ram

Starting with a color story made it easier to select patterned papers and embellishments to create the design as well as support the story and the photos on my page. Will you choose your colors first for this challenge or is there a perfect product you have in mind to suit an outdoor story of your own? We can’t wait to see what you make with those pictures.


A note about this weekend’s challenges: I’m leaving all the challenges open until the end of the following weekend to allow more time to participate, but the special discount on the new class will be sent to those who upload a new project just this weekend – by the end of Sunday, 30th of October, 2016. This is for new layouts created this weekend, not archived layouts made previously. One discount applicable per person. You can upload your page to another site (blog, Instagram, Facebook, scrapbooking gallery, etc) and use the InLinkz button above to link to that OR you can upload a photo of your page directly with the same button rather than linking elsewhere. Either is fine! If you have trouble figuring out what to click, give a shout in the comments and I’ll email you with help. Thanks!

Today’s Guest Artist: Helen De Ram loves coffee with cream, old movies, and quiet country roads. You can find more from Helen on Instagram.

Challenge 04:: Layers of Colour

Scrapbooking with layers of colour // scrapbook page by Leigh Ann Odynski

For our next challenge, contributing designer Leigh-Ann Odynski, invites you to embrace colour and pattern with layers of simple shapes. It’s a great project for small scraps of paper and the end result is beautiful – I can’t wait to see what you make!

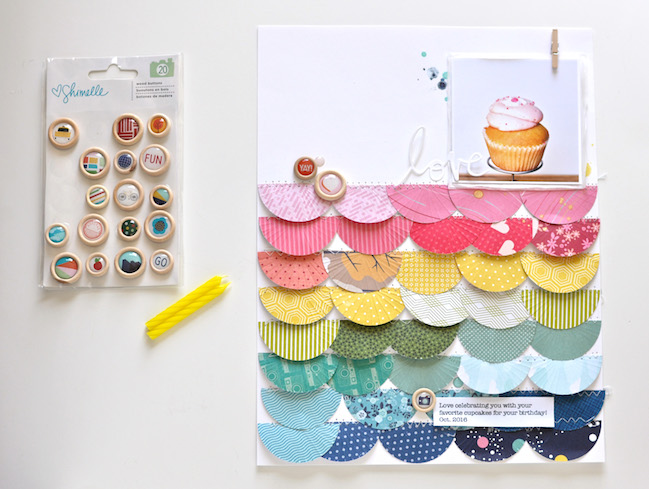
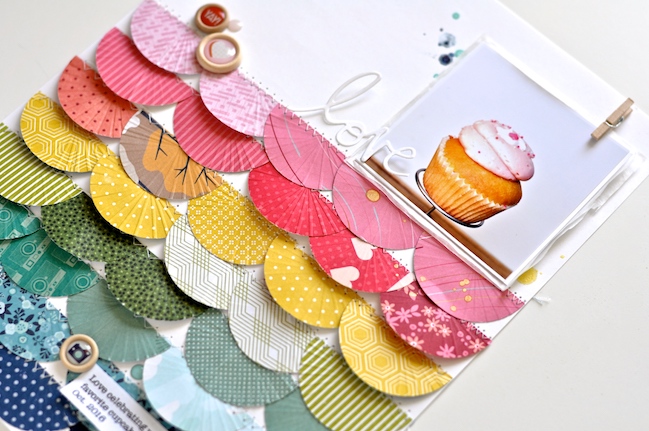
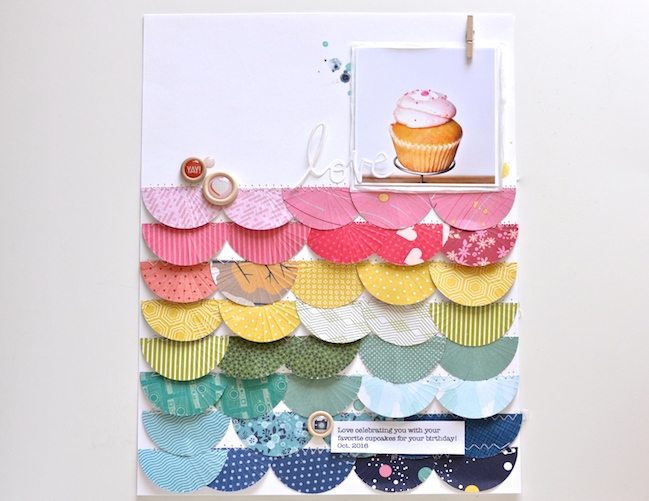
It’s almost time for trick or treating! How fun is that? I am sure I am not alone in loving a good sweet treat! On this scrapbook page, I wanted to feature a different kind of treat. It’s one of our family’s favorite birthday treats, cupcakes.

Scrapbooking with layers of colour // scrapbook page by Leigh Ann Odynski

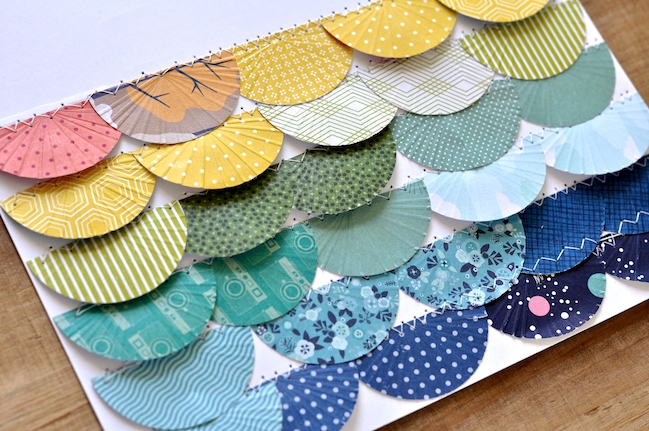
I thought about how to embrace dimension on this layout. I came up with the idea to punch circles and score them so that they resemble cupcake wrappers. In Shimelle rainbow colors of course! Just punch 2 inch circles and score them with straight lines as shown above, before cutting them in half. You can use a score mark (at 1 inch) to cut them in half.

In deciding where to place them on the layout, I tried different spots, but thought they looked most like cupcake wrappers when placed this way. Try it out and see how you can layer them up!

Starting with the bottom row, attach some of the “wrappers” with foam dots. This gives tons of dimension. The scoring also adds dimension to each half circle.

Once you have a full row, just zigzag stitch across the top to give even more texture. Continue with the rows and stitching until you have the amount you desire!

Scrapbooking with layers of colour // scrapbook page by Leigh Ann Odynski

I decided to drop a few splats of Heidi Swapp Color Shine behind the photo, just for a fun icing look. I added tissue behind the photo to give more dimension and resemble bakery paper.

Scrapbooking with layers of colour // scrapbook page by Leigh Ann Odynski

The wood buttons from the new Go Now Go collection were just perfect as a minimal embellishment, and they tie in the wood grain color from the photo.

Your turn to have a go at this challenge with plenty of layers of colour! You can also share what sweet ideas you have to embrace dimension!


A note about this weekend’s challenges: I’m leaving all the challenges open until the end of the following weekend to allow more time to participate, but the special discount on the new class will be sent to those who upload a new project just this weekend – by the end of Sunday, 30th of October, 2016. This is for new layouts created this weekend, not archived layouts made previously. One discount applicable per person. You can upload your page to another site (blog, Instagram, Facebook, scrapbooking gallery, etc) and use the InLinkz button above to link to that OR you can upload a photo of your page directly with the same button rather than linking elsewhere. Either is fine! If you have trouble figuring out what to click, give a shout in the comments and I’ll email you with help. Thanks!

Challenge 03 :: Scrapbook with Autumnal Colours

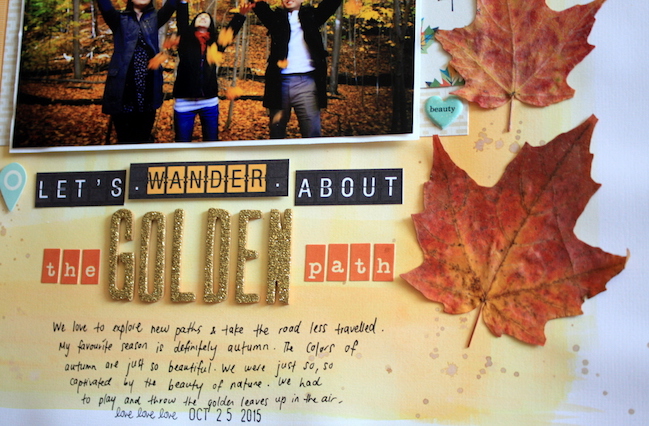
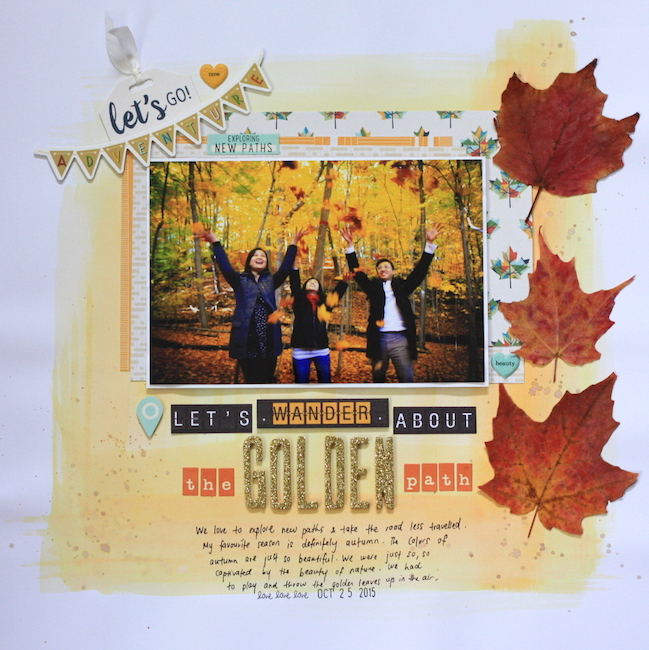
an autumn colour story // scrapbook page by Karen Lai

Next up, please welcome guest artist Karen Lai with our third challenge. This one is all about the colours of autumn!

I love the colours of autumn. I love to go on a hike to see the beautiful leaves and actually bring some of the leaves home.

I wanted to scrapbook this photo of a hike that we went off trail and found an area full of beautiful golden-leaved trees and red leaves on the ground. We dove right in – playing and throwing the leaves up in the air as though we were kids. It was so much fun!

an autumn colour story // scrapbook page by Karen Lai

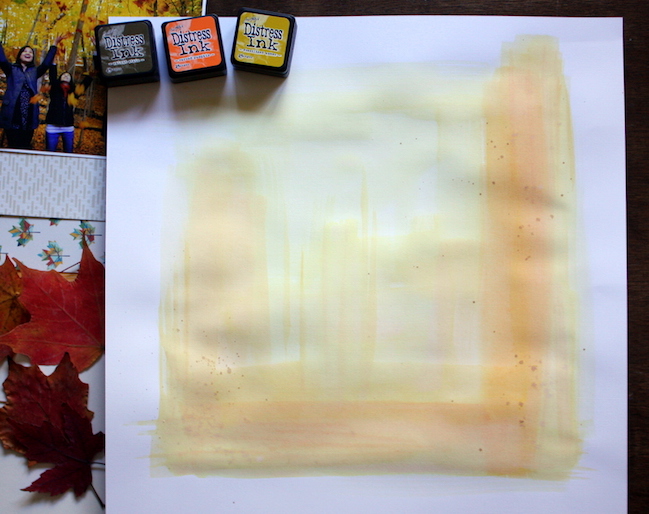
For my layout, I started by painting the background with autumn colours with Distress Inks. I love using them like watercolours. Then I chose papers and embellishments from Shimelle Go Now Go collection because it matches perfectly to my autumn hiking adventure theme. I added the leaves I collected during the hike in my layout as well because the colours were just so pretty. Then I created the title by cutting parts of the patterned paper and added different alphabet stickers from October Afternoon and American Crafts.

an autumn colour story // scrapbook page by Karen Lai

Now it’s your turn – I challenge you to scrapbook with a colour scheme inspired by autumn!


A note about this weekend’s challenges: I’m leaving all the challenges open until the end of the following weekend to allow more time to participate, but the special discount on the new class will be sent to those who upload a new project just this weekend – by the end of Sunday, 30th of October, 2016. This is for new layouts created this weekend, not archived layouts made previously. One discount applicable per person. You can upload your page to another site (blog, Instagram, Facebook, scrapbooking gallery, etc) and use the InLinkz button above to link to that OR you can upload a photo of your page directly with the same button rather than linking elsewhere. Either is fine! If you have trouble figuring out what to click, give a shout in the comments and I’ll email you with help. Thanks!

Today’s Guest Artist: Karen Lai loves coffee, watching tv dramas and hiking. You can find more from Karen on Twitter, Pinterest, and her blog.

Challenge 02 :: Patterned Paper Fringe (and a free pumpkin cut file)

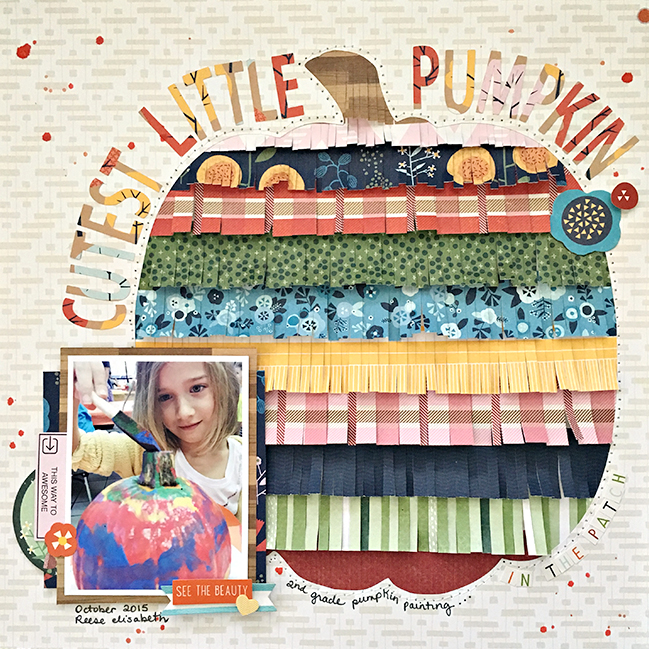
Patterned Paper Fringe and a free pumpkin cut file // scrapbook page by Heather Leopard

Ready for your second challenge this weekend? It’s from contributing designer Heather Leopard, who gives you two options for your page: try patterned paper fringe or scrap with her pumpkin cut file. Or you could be an overachiever and try both!

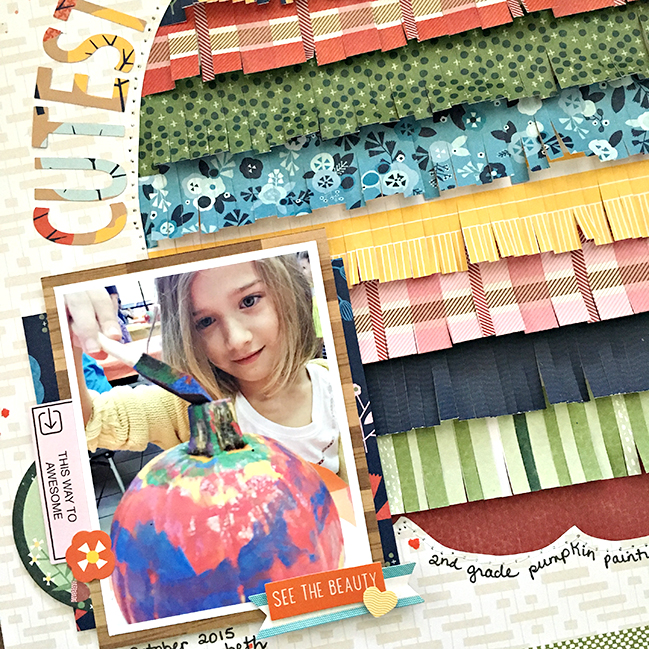
Hello my friends…While Halloween is all about dressing up and going out trick or treating, it’s also about decorating pumpkins, whether carving or painting so I thought I’d do a layout about my daughter’s Halloween party at school. Sorry, no costumes allowed and by the way, where’s the fun in that?

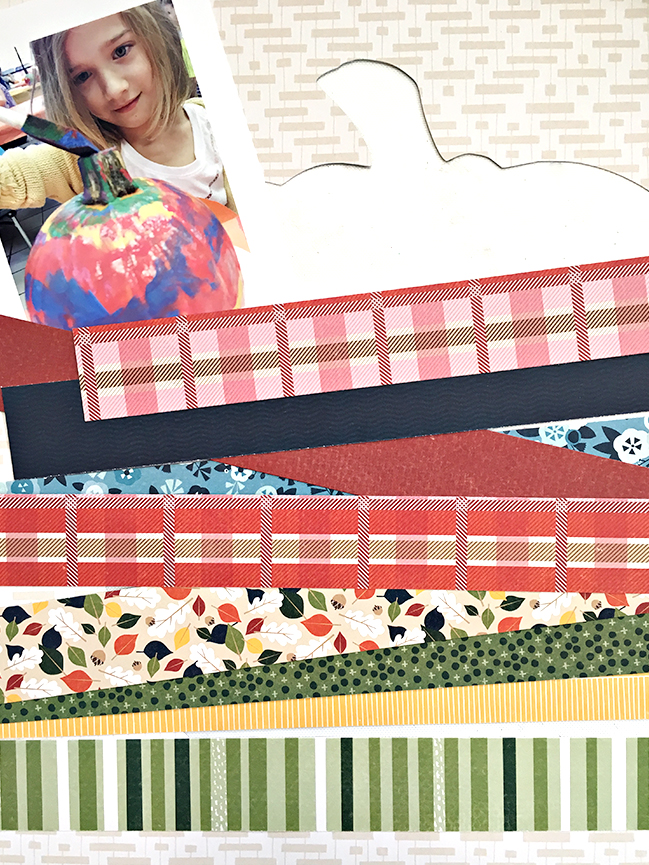
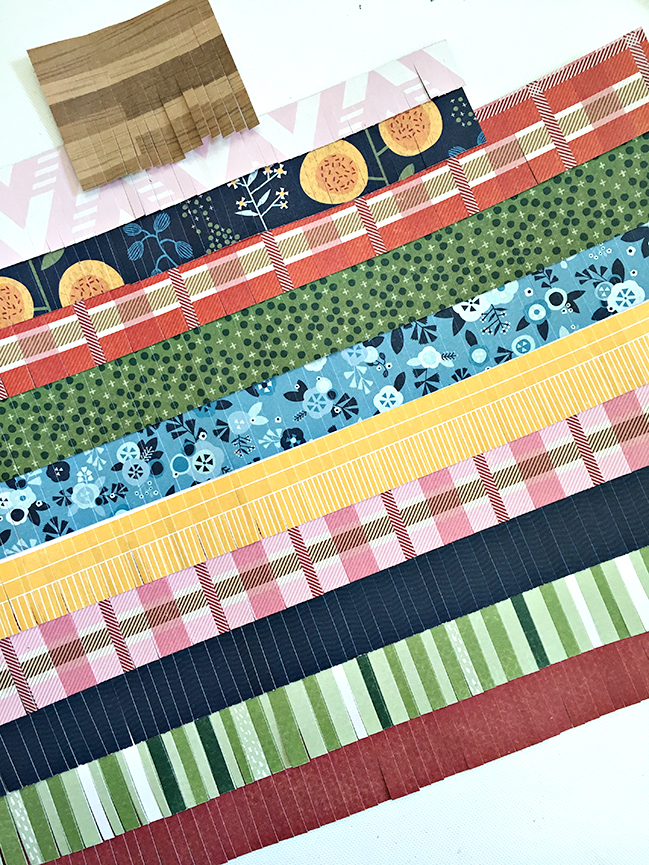
Anyway, today’s tutorial is all about super sized die cuts. I’m sharing a few TRICKS as well as a TREAT with you today. I was inspired by this cute photo of my daughter painting a pumpkin at her school last year. I decided I wanted to do a super sized pumpkin cut with fringe on the inside. At first, I had planned to use varying colors of orange for the fringe but orange is a bit hard to find in this collection so I went back to the drawing board. I put my thinking cap on and went ahead and cut the pumpkin out. You can download my free Silhouette cut file HERE. I kept both pieces and you should too if you plan to recreate this project. Set them both aside.

Patterned Paper Fringe and a free pumpkin cut file  // scrapbook page by Heather Leopard

As I was pondering, I realized I should mimic the colors my daughter was painting her pumpkin – blues, red, yellows, green, etc. so I set out to look for fun patterns in those colors.

Patterned Paper Fringe and a free pumpkin cut file  // scrapbook page by Heather Leopard

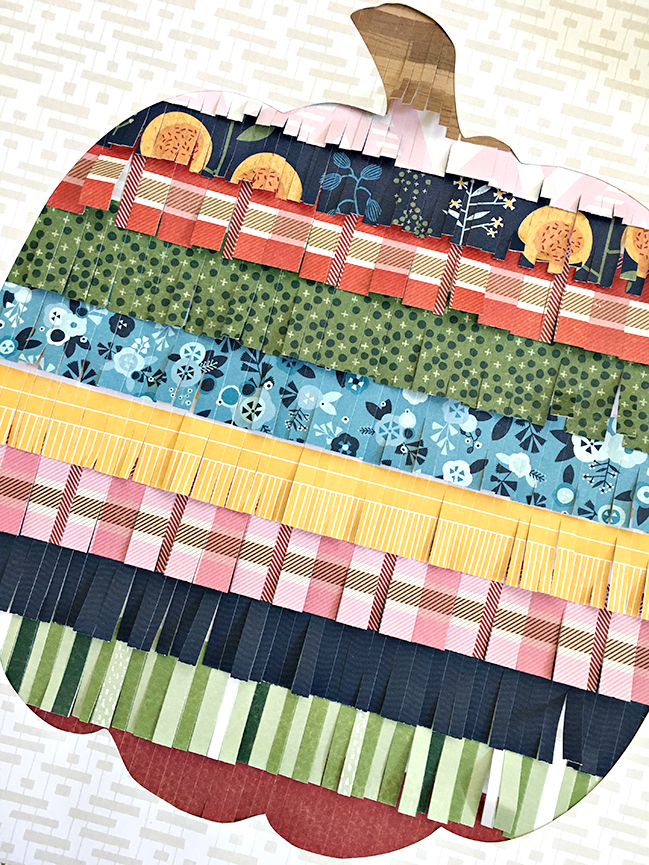
Next I cut little slits about 1/4” to 1/2” apart on each strip and adhered one on top of the other use the cut out piece that I would typically throw away as the base.

Patterned Paper Fringe and a free pumpkin cut file  // scrapbook page by Heather Leopard

Once all the layers have been added, trim around the pumpkin and lay the overlay on top. Stitch it to the top for a pretty effect.

Patterned Paper Fringe and a free pumpkin cut file  // scrapbook page by Heather Leopard

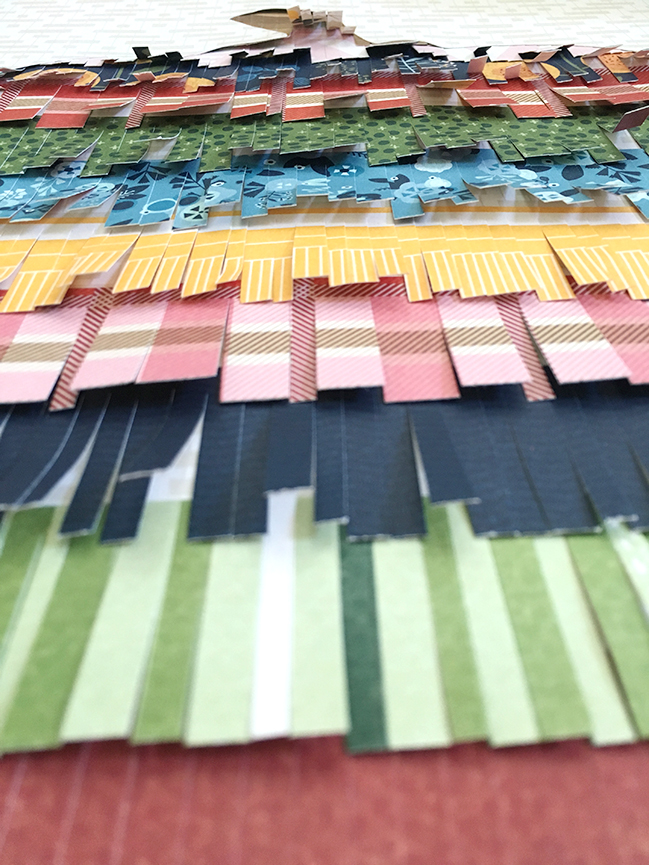
Pull up gently on the little strips to lift them up. You can simply lift them or roll them up over a thin pencil or like object to curl the edges.

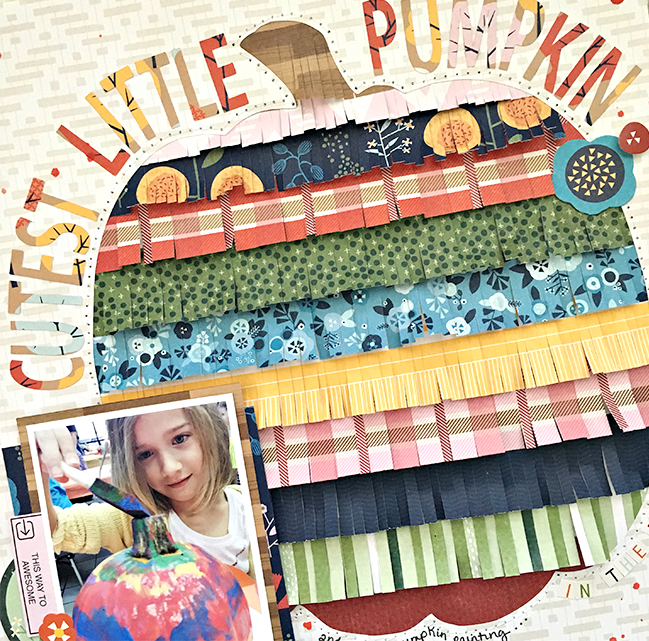
Add a title around the top of the pumpkin. This title is included in the free Silhouette cut file, which you can download HERE or you can create your own.

Patterned Paper Fringe and a free pumpkin cut file  // scrapbook page by Heather Leopard

Add layers of pattern paper, die cuts and stickers over and under your photo. Adhere to the page using foam adhesive to lift it up. You don’t want to crush those lovely lifted strips.

Patterned Paper Fringe and a free pumpkin cut file  // scrapbook page by Heather Leopard

To complete the layout, I added journaling below the photo and around the bottom of the pumpkin along with a smaller alpha to complete the title, even though the large title at the top works great if used alone.

Thanks for stopping by today. Please share any projects you make using this free cut file or with patterned paper fringe to participate in this challenge!


A note about this weekend’s challenges: I’m leaving all the challenges open until the end of the following weekend to allow more time to participate, but the special discount on the new class will be sent to those who upload a new project just this weekend – by the end of Sunday, 30th of October, 2016. This is for new layouts created this weekend, not archived layouts made previously. One discount applicable per person. You can upload your page to another site (blog, Instagram, Facebook, scrapbooking gallery, etc) and use the InLinkz button above to link to that OR you can upload a photo of your page directly with the same button rather than linking elsewhere. Either is fine! If you have trouble figuring out what to click, give a shout in the comments and I’ll email you with help. Thanks!

Challenge 01 :: Lots of Little Photos

Challenge 01 :: Lots of Little Photos

Goodness me, I have a lot of photos from those twelve days. Thank goodness I dropped my phone and not my camera! Does a giant stack of new photos make you excited or intimidated? It is actually one of my very favourite things about scrapbooking: I never feel like I have to make it through every photo in the stack, so I’m excited by all the potential in those new photos! Of course, if I made them all single photo layouts, I’d need even more room to store all my albums, so let’s be practical with this first challenge of the weekend: create a new page with lots of little photos!

A few posts in the archives might be useful for this challenge: Glitter Girl’s Multiple Photo Mayhem adventure and a double page Sketch to Scrapbook Page spin both include process videos, and Formulas for Stretching Supplies shares four layouts from one kit to scrap seven small photos and one big one.

Now, to get you started on this first challenge, take a look at these fabulous examples from contributing designer Nicole Nowosad and guest artist Michelle Gallant.

challenge: lots of little photos // scrapbook page by Nicole Nowosad

challenge: lots of little photos // scrapbook page by Nicole Nowosad

challenge: lots of little photos // scrapbook page by Nicole Nowosad

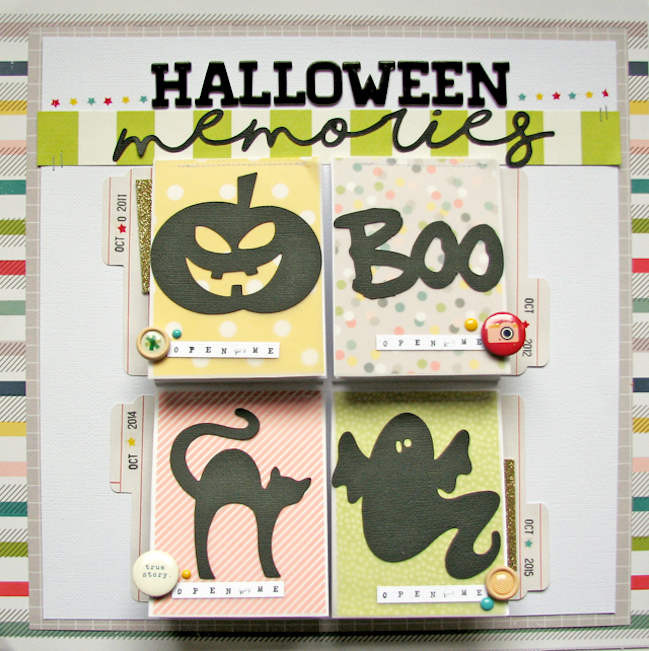
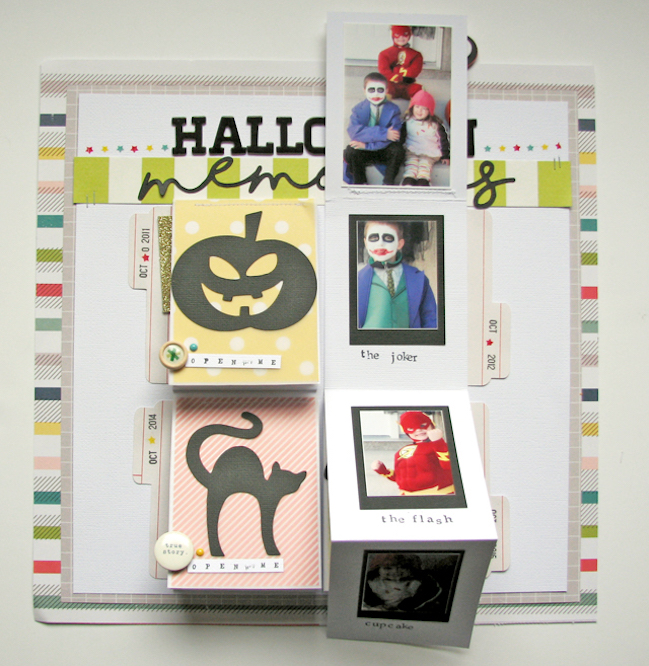
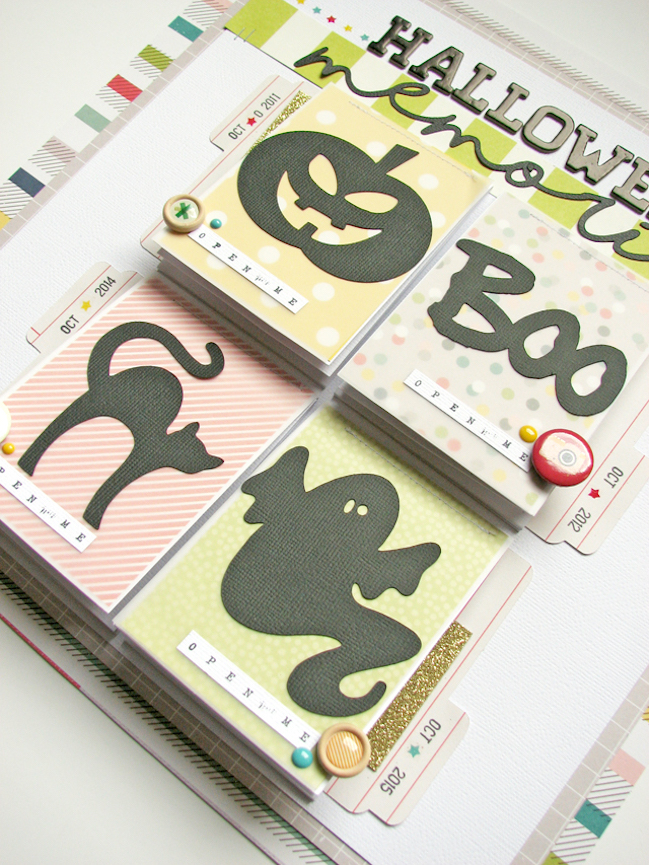
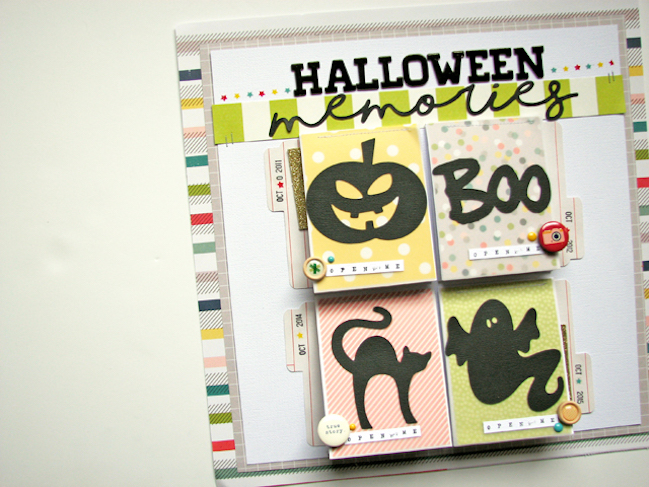
Halloween is always a busy time of the year in our house, carving pumpkins and pulling costumes together. Every year I try to take photos of each of my kids for Halloween all dressed up and thought it would be fun to make a bit of a recap page on this project. I had so many photos to scrap that I was a little stumped at first at just how to pull them all together. I decided to print some smaller photos of each of my kids as well as their group photo for each year and then create mini flip outs on my page to keep them all together in one year!

challenge: lots of little photos // scrapbook page by Nicole Nowosad

challenge: lots of little photos // scrapbook page by Nicole Nowosad

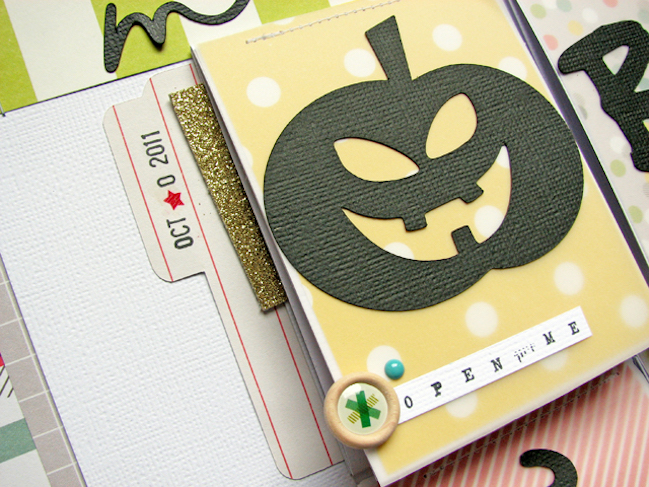
I simply cut a 3“x 12” strip of paper and scored it every 4”, folding it accordion style to the inside of another 3“x 8” piece of folded card stock that I decorated with some die cut shapes, vellum, and wood buttons. I added in each of the small photos and stamped their costume to the empty area in the mini flip out before securing the little mini books to my page in a simple grid. It is a great way to tuck in lots of small photos in a simple and interactive way too!
- Nicole

challenge: lots of little photos // scrapbook page by Michelle Gallant

challenge: lots of little photos // scrapbook page by Michelle Gallant

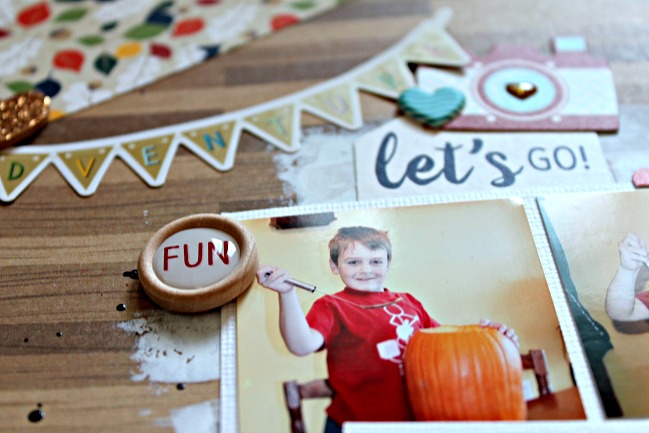
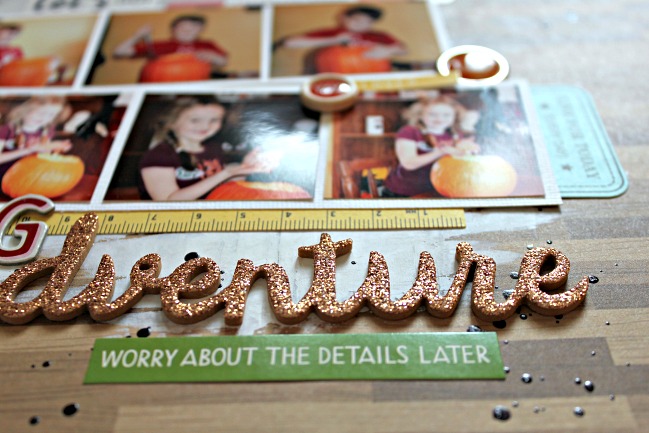
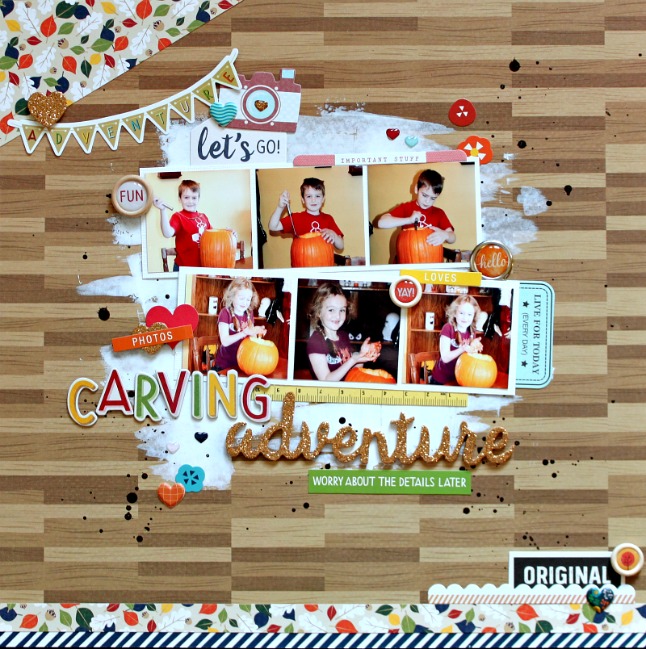
I decided to use these photos of my kids because it was the first year we let them carve the pumpkins by themselves (with a little help with the cutting). They were so proud!

challenge: lots of little photos // scrapbook page by Michelle Gallant

For my project I used mostly the Go Now Go collection. I love the colors of this collection, it was perfect for my pumpkin page!
- Michelle


I’m leaving all the challenges open until the end of the following weekend to allow more time to participate, but the special discount on the new class will be sent to those who upload a new project just this weekend – by the end of Sunday, 30th of October, 2016. This is for new layouts created this weekend, not archived layouts made previously. One discount applicable per person. You can upload your page to another site (blog, Instagram, Facebook, scrapbooking gallery, etc) and use the InLinkz button above to link to that OR you can upload a photo of your page directly with the same button rather than linking elsewhere. Either is fine! If you have trouble figuring out what to click, give a shout in the comments and I’ll email you with help. Thanks!

Today’s Guest Artist: Michelle Gallant loves taking photos, spending time with family and watching hockey. You can find more from Michelle on Instagram, and her blog.

Leigh Ann, Meghann, and a love of circles

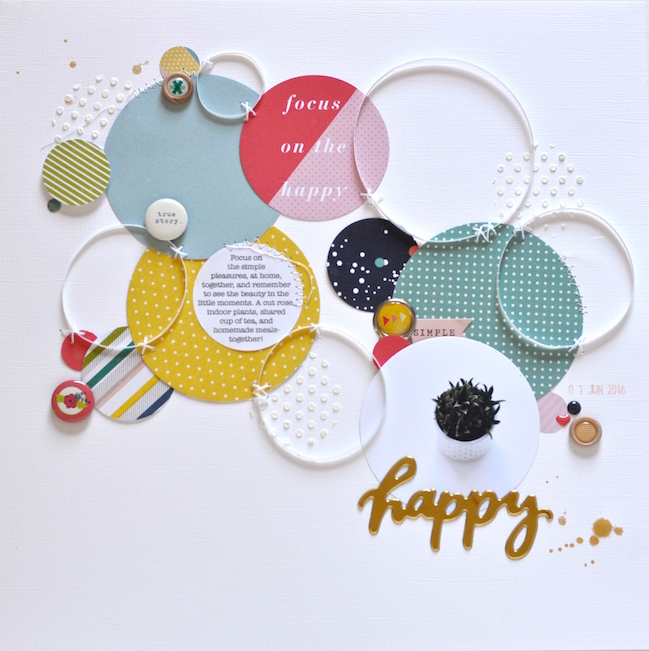
circles in scrapbook page design // scrapbook page by Leigh Ann Odynski

To bring our weekend to the full team, we have one more new project from Leigh Ann Odynski, and then it’s my turn! Next weekend, while the challenges are still open, you’ll see my take on all the fun. But let’s not get ahead of ourselves: time for Leigh Ann to show you how she took her inspiration from Meghann and made it her own!

I love Meghann’s clean, detailed style, and was inspired by the repetition of circular elements on her page! When using an inspiration piece, I like to note my initial reactions and what I love about it, or what catches my eye. I continue on to start my page without looking at the inspiration piece again, and this way my mind can focus on creating a new page, or piece of art with its own story.

circles in scrapbook page design // scrapbook page by Meghann Andrew

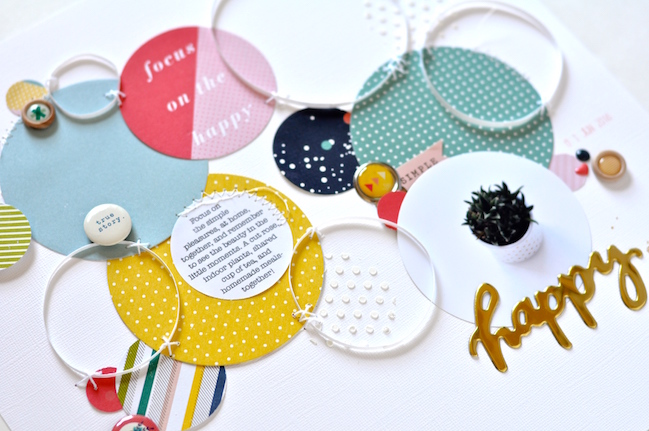
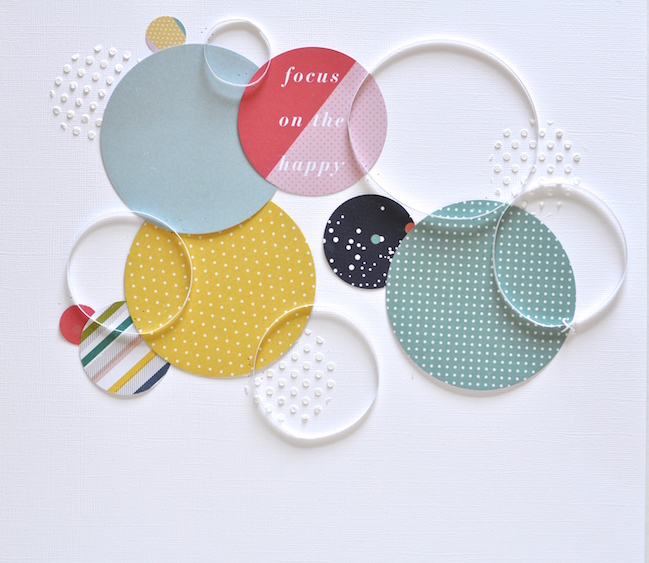
Of course, with this page from Meghann, the circle-based design is such an eye-catcher. My own style focuses on adding texture to the background in many instances. With this in mind, I started by punching a circle in the middle of copy paper. Spreading texture paste in dots masked by the circle allowed me to repeat what I love about Meghann’s layout: the movement and rhythm created by the different colors and patterns of the circles on her page. I love the interest she created, and chose many different colors and patterns for my paper circles as well.

circles in scrapbook page design // scrapbook page by Leigh Ann Odynski

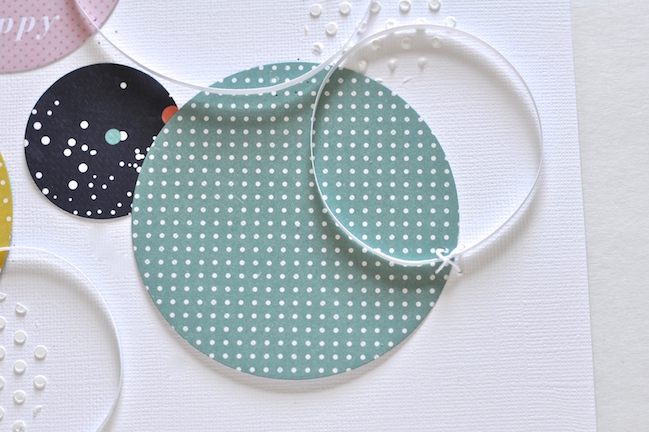
Next I like to look at my page and see if my imagination can come up with any new way to add another layer to the page. While daydreaming, I came up with the idea of using thin strips of white card stock to resemble an embroidery hoop. Think old school quilling strips, glued at the end in different sizes. I cut varying lengths of the white card stock to 1/16th of an inch (about the thickness of wood veneer embellishments) and hand stitched the “hoops” to the page with crochet thread.

circles in scrapbook page design // scrapbook page by Leigh Ann Odynski

Then I used a circular photo like Meghann did, and placed my title across the bottom of it since it and the background card stock are white.

circles in scrapbook page design // scrapbook page by Leigh Ann Odynski

I hope you are inspired to look at inspiration pages in a new light. You can use any element or idea from the page that inspires you, and recreate one in your own style. Even pages that aren’t your style , can be inspiring when broken down into elements used to create the feeling of design. Shape, color, pattern, texture, line, and space are all elements you can take from any scrapbook page to create your own design. Have fun and enjoy the process!

If you put Leigh Ann’s inspiration to work for you on any project between now and the 10th of August, please share it here. We’d love to see what you make!


This weekend is brought to you by The 20 Project – a brand new online class with 20 new process videos. Class starts Wednesday, so now is the perfect time to sign up!

The 20 Project: online scrapbooking class from Shimelle Laine

Heather, Laureen, and diagonal lines

quilted composition with diagonal lines // scrapbook page by Laureen Wagener

_Next up in our weekend of inspiration, Heather Leopard takes her inspiration from this page created by Laureen Wagener and shared via Scrapbook Like a Superhero!

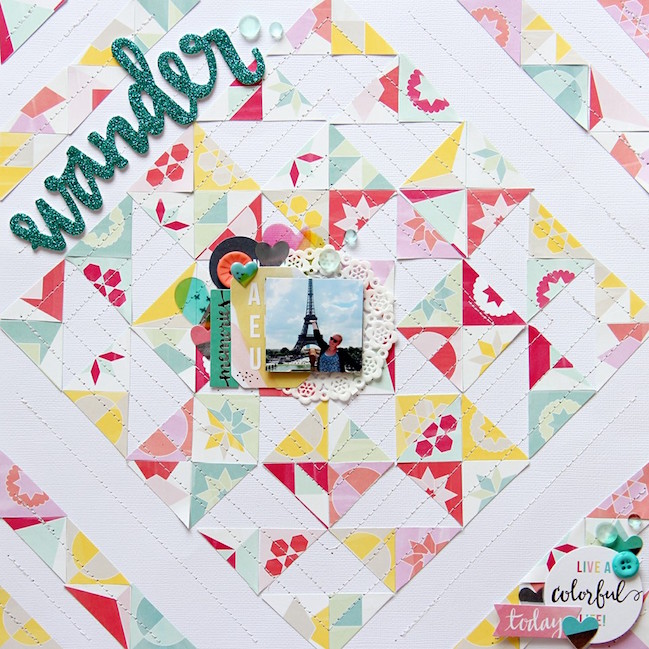
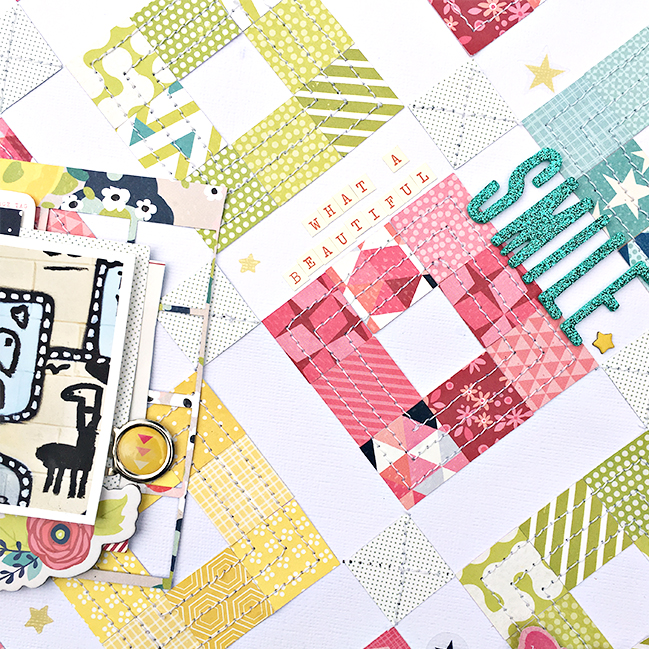
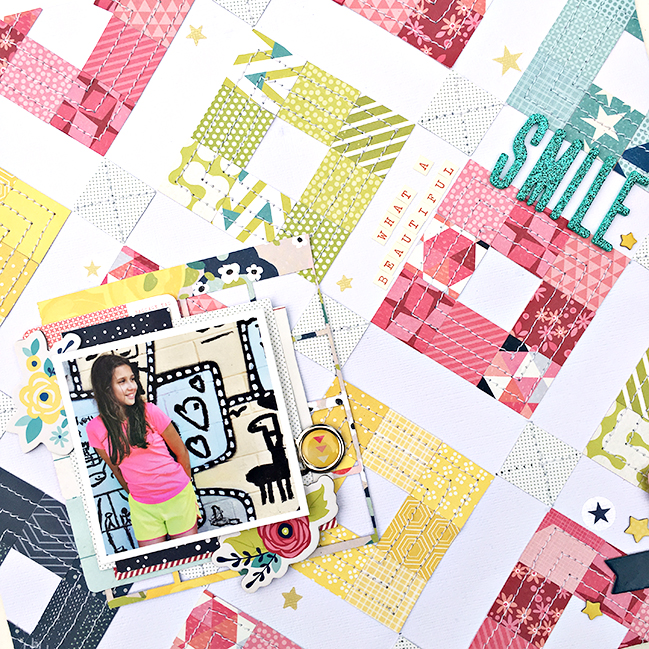
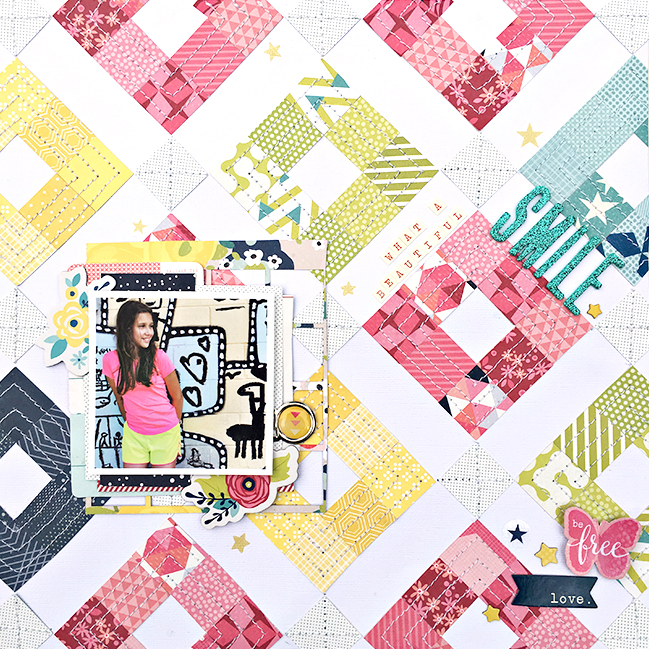
I’m a huge fan on Laureen’s work. She’s a woman after my own heart – mixing and matching paper patterns in fun and unique ways. I was particularly drawn to this layout of hers because of the quilt-like look and the geometric intricacies of the page. I also love that she created it all on a diagonal. As much as I would have loved to copy this layout exactly as it is because it’s perfection, I had to make it unique to me.

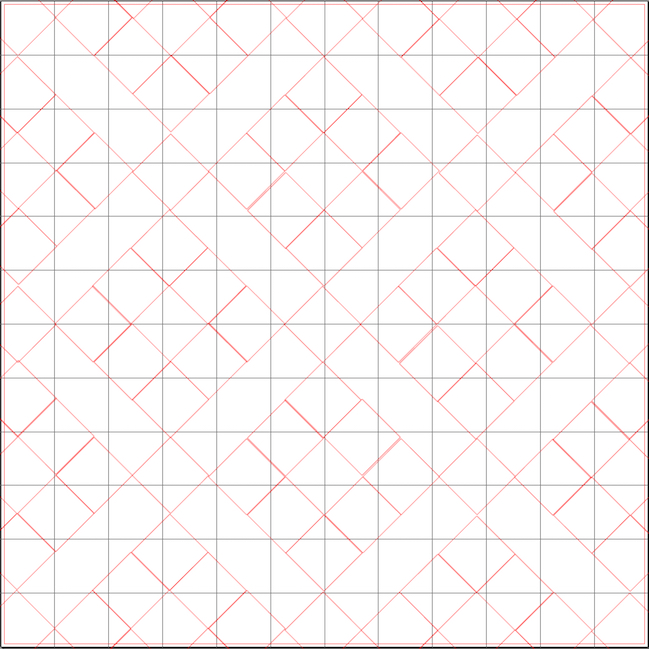
I started by designing a similar look in my Silhouette software. I kept with the diagonal feel but to make it my own, I chose to make smaller boxes to give it a zoomed out look and instead of piecing together triangles to form the squares, I kept the squares as whole pieces.

quilted composition with diagonal lines // scrapbook page by Heather Leopard

I chose to use 5 different colors with at least 5 – 7 different patterns within the color scheme. To cut these, I grouped the boxes together and cut multiples of each pattern in each color scheme. You can download my cut file here. Repeat for each color scheme until you have lots of little piles of patterns for each color.

quilted composition with diagonal lines // scrapbook page by Heather Leopard

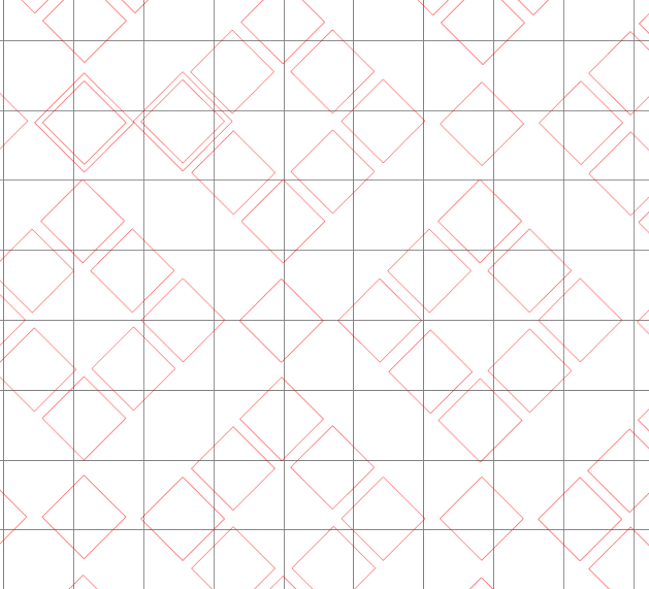
Next I used the internal offset feature, set to .79 to create smaller boxes. You can download the file I created with the internal offset images here. After all, there’s no need for us both to do all the work!

quilted composition with diagonal lines // scrapbook page by Heather Leopard

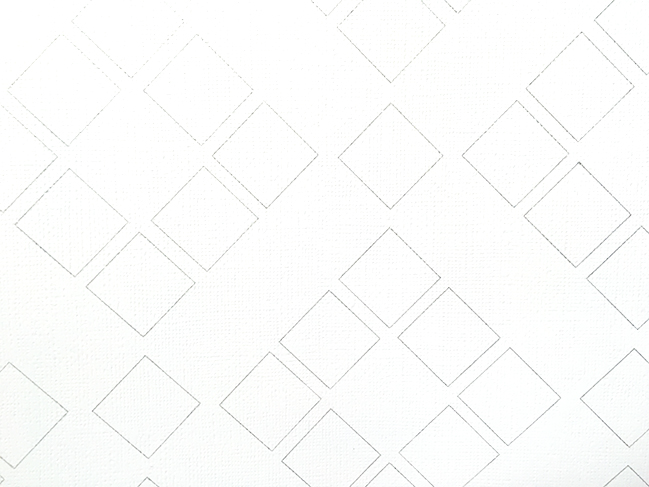
Once I removed the outside larger boxes, I used my sketch pen to draw a template on my cardstock. This made it easy peasy to know exactly where to place each square. I certainly didn’t want my lines to get off and not match up halfway through the project. I went to town, adhering the squares on the cardstock with just a slight dab of liquid adhesive. I didn’t want to add too much since I was going to sew over it.

quilted composition with diagonal lines // scrapbook page by Heather Leopard

Next, I really liked how Laureen stitched 3 rows over each full square so I chose to do the same. It was quite the task for all these little boxes but I LOVE the end result! I added layers behind my single photo, a sparkly title at an angle and a little cluster of embellishments in the corner to call this layout done. Actually, I still need to add the journaling, which I plan to do in the open diagonal space right below my photo.

quilted composition with diagonal lines // scrapbook page by Heather Leopard

Thanks Laureen for the incredible inspiration. I can’t wait to see what you create next!

quilted composition with diagonal lines // scrapbook page by Heather Leopard

Hopefully this has inspired you as well. If you download and use the cut files I created, please share them here, on the Scrapbook like a Superhero Facebook page or on Instagram and tag me. I’d love to see what you create!

If you put Heather’s inspiration to work for you on any project between now and the 10th of August, please share it here. We’d love to see what you make!


This weekend is brought to you by The 20 Project – a brand new online class with 20 new process videos. Class starts Wednesday, so now is the perfect time to sign up!

The 20 Project: online scrapbooking class from Shimelle Laine