pretty paper. true stories. {and scrapbooking classes with cupcakes.}

lovely to meet you Twitter Facebook Pinterest YouTube

Take a Scrapbooking Class

online scrapbooking classes

Shop Shimelle Products

scrapbook.com simon says stamp shimelle scrapbooking products @ amazon.com shimelle scrapbooking products @ amazon.co.uk

Reading Material

travel

photography Category

A new online scrapbooking class :: Love your Pictures, Love your Pages

online scrapbooking class

Ready for a summer scrapbooking adventure? I hope you’ll join me for a new online scrapbooking class here at shimelle.com!

Love your Pictures, Love your Pages is a four-week, high-energy journey through July. Each week we’ll be taking pictures and scrapbooking and putting it all together to make something you love.

Starting on Monday, the 5th of July 2010, full-colour PDF prompts come straight to your inbox. There are six prompts each week: the first three focus on photography and the last three focus on scrapbooking — but of course the two go hand in hand!

This is not a technical photography class. There are plenty of amazing classes already out there with people far more qualified to take you through the technical parts of your camera. Instead, we’ll be focusing on options for creative photographs — the kind of pictures that really inspire you to get scrapping. You don’t need a super-fancy camera to take part. The class prompts will show sample images from point-and-shoot cameras, dSLR cameras, toy cameras and mobile phone cameras. No matter what you’re using, you’ll find something just right!

As we start to scrapbook those photos, you can craft with paper or pixels! If you’re new to my classes, it’s worth knowing that there’s never a set of ‘do it exactly like this’ instructions. The class materials encourage you to use the supplies you have on hand and adapt any of the ideas to suit your own style. Of course, if you want to recreate things exactly as you see them, you’re welcome to do that too! Classmates share their work, creating even more inspiration to kickstart your creativity — it’s one of my very favourite things about hosting classes here.

The scrapbooking prompts give you the option of creating stand-alone layouts to go into your existing albums or you can create an album dedicated just to photos you take this summer. Most of the sample pages are 12×12 and can be adapted easily if you would like to work in a mini-book size for this project.

Here’s a look at exactly what’s included in Love your Pictures, Love your Pages:
…24 full-colour PDF prompts delivered straight to your inbox, Monday through Saturday.
…3 resource workbooks: A Month of Sketches with a full complement of detailed page sketches for your scrapping, Camera Basics with an overview of technical basics on a variety of cameras and Photoshop Magic with step-by-step instructions for some of my favourite photo-editing techniques. (Photoshop definitely isn’t required for this class — but this workbook can be useful if you do have it or you install a free trial download.)
…Exclusive designs in printable format for paper scrappers and image formats for digital scrappers
…Members-only access to chat and share your work with other participants, including a special section dedicated to helping you with specific shots you would like to kick up a notch
…Permanent archive of all class materials so you can participate whenever fits your schedule and know everything is always available for you in just a few clicks
…-Special members only discounts to some of my favourite places, including Digital Photography School and Totally Rad Actions.- (Unfortunately these discounts have now expired.)

In total, the class comes in at just under 200 pages of material, even before we start talking on the message boards! You can sign up any time in your choice of currencies: £16 GB Pounds or $24 US dollars. Just click the image to join us:

Class starts on the 5th of July and the message board will open a few days before that — you’ll receive an email with all the details on how to sign in once the board opens!

Do keep in mind that the email address you use when you pay is the only way I can get in touch with you, so do make sure it’s a valid email that you can read. If you would like your prompts sent a different email than the one you use to pay, leave a note on your payment (or send me an email if you forget – shimelle at gmail dot com).

Any questions, just ask! And watch for a few sneak peeks of both the photo and scrappy sides of the project as the starting day draws near!

I’d love to see you in class!

xlovesx

Travel photography tips for Scrapbookers

travel photography for scrapbookers
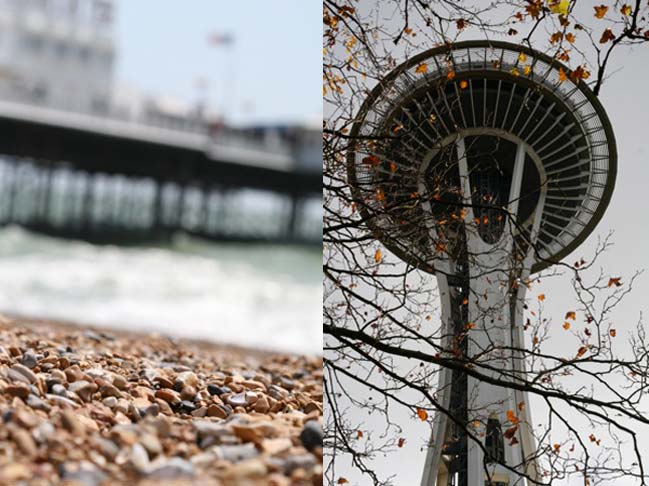
travel photography tips for scrapbookers Brighton Beach, Sussex and Seattle, Washington.

Keeping with this little theme of the occasional photography post, the start of summer seems a good time to discuss travel photography. For me, travel and my camera go hand in hand and I can’t imagine going somewhere new and not taking pictures, though I hear it can be done. Instead, I tend to take several hundred photos only to return home and wish I had taken even more.

There are also approximately twelve billion and three things one could say about travel photography, but I fear that is just too much for a blog post. In fact, everything I’ve included here is probably too long for a blog post, but it’s the sort of thing you could take in stages so I’m just going to keep it all right here in one big post and call it my ten big tips for taking travel photographs you will love to scrapbook. Sound okay to you?

Remember creative frames.
When we go somewhere new, we’re surrounded by things we’ve never seen. So we pick up our camera and start shooting, right? Oooh. We don’t have that at home. I should take a picture! Which is all well and good, but it is very easy to let that feeling take all our creative energy and leave us with a big stack of pictures that are somewhat less than inspiring. The kind of picture where we’ve just pointed the camera at some noteworthy object and clicked the shutter. Oh goodness — we do know how to take more interesting pictures than this! We do it at home all the time! Or most of the time. Or some of the time when we’re really thinking about it, anyway. How on earth did we leave that ability at home?

Whenever I start to be distracted by the Ooooh, look at the things I have never ever seen effect, I use the up and down shortcut to jar me back to the idea that my favourite photographs are those that use a creative frame rather than just pointing and clicking. The up and down shortcut just means to stop wherever you are and take and up and a down picture — either by moving your camera up high in the air then down low on the ground or by pointing the camera up at the sky then down at the floor. The shot of the pier in Brighton was taken with the camera actually sat on the pebbles at the beach. The Space Needle on the right was a case of looking up — and standing under the tree to add some interest to a flat, grey sky. The up and down shortcut is a quick way to find a new perspective, and it’s that quick reminder that helps get me back to the way I would shoot pictures when I was on more familiar ground.
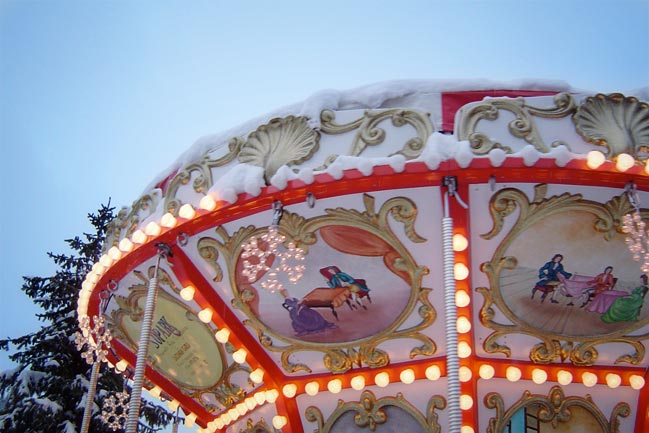
travel photography tips for scrapbookers Courcheval, France.

Sometimes the creative frame comes from another object, like the branches of the tree, but other times it can be done just by moving the camera so each item isn’t exactly in the middle of the frame. This picture in snowy France is obviously a carousel. You can’t see the rest of it, but you can tell what it is anyway. The part I found unique was the style of the painting at the top of the carousel, and the quirky effect created by the row of unlit lightbulbs. The rest of the carousel really didn’t matter, and if the rest had been included, you wouldn’t notice what I actually wanted to remember. So a second shortcut I tend to use is this style of composition that crops the scene, leaving about a third of the photo with quite empty space (like the sky). It changes up the look of the photos on a trip, but it’s also super handy for scrapbookers, because you can use this empty space for journaling, titles, embellishments or anything else crafty that you like. (Actually, Ali just posted about scrapping with that space in photos — find it here.)
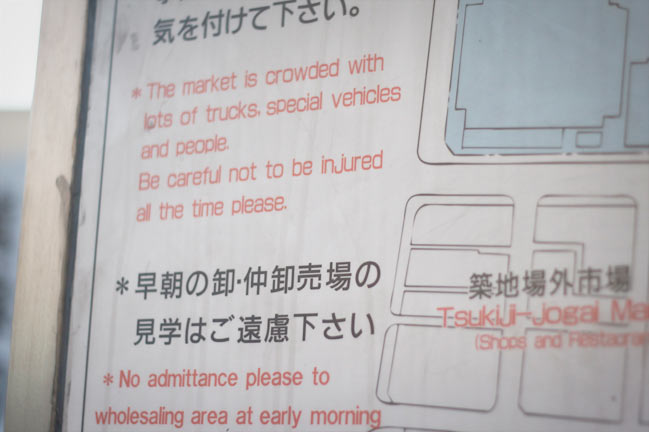
 

travel photography tips for scrapbookers Tsukiji Fish Market, Tokyo, Japan.

Capture language.
I like to think this isn’t just something I appreciate from my days teaching English, but I find the essence of language to be one of the most amazing things about travel. Going somewhere and not speaking the language forces you to find entirely new ways to communicate. Or you might be lucky enough to meet someone there who does speak your language but is terribly self-conscious about not speaking it very well — when you don’t speak more than three words in their language at all! The language of a new place can be enthralling or terrifying — but how on earth can you capture that on film?
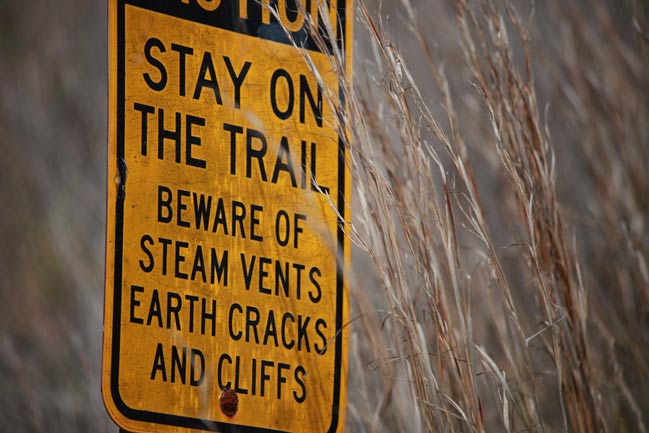
travel photography tips for scrapbooking Volcano National Park, Hawaii.

My answer is to photograph the written language you find — like that on signs. I love the politeness of the safety warnings in Japan (and in fact, I never experienced anything in Japan that wasn’t draped in politeness. I love that so!) and the signs near the volcano made me laugh at their contradiction: apparently this place is so calm and civil that there is a trail, and yet you may fall victim to a giant crack or cliff at any moment if you are not always careful! Great examples to scrapbook because they say so much about the surroundings even though these particular photos don’t show much else. Just pair them with other images. I paired the first with images of the busy market scene and the second with photos of the steam coming right through the path.
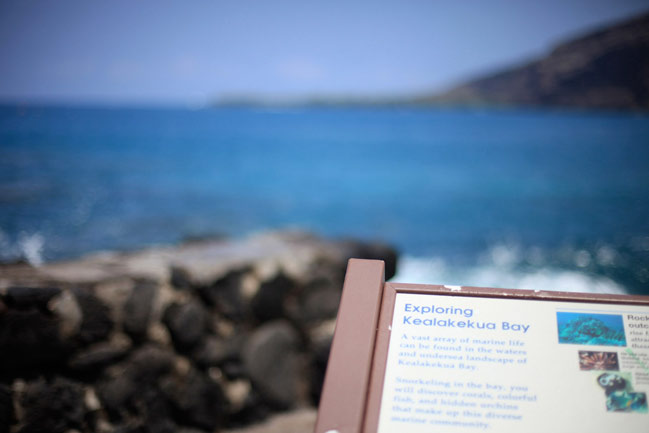
travel photography tips for scrapbooking

Also helpful for scrapbooking? Taking pictures of signs of the places you’ve been! If you asked me the name of the place where we went kayaking (and I got run over by someone else’s kayak, but that is a story for another day), I wouldn’t be able to tell you! The name was long and for non-locals, quite tough to pronounce. But hey — I can take a picture of the sign. That I can do! So there you go: apparently it was Kealakekua Bay! And a little bonus: by stepping back just a bit for this picture, I could include the actual bay in the shot! So we started just down the road off the left of the picture, kayaked over to the peninsula you see at the other side of all that water, and then back again later that day. At Kealakekua Bay, obviously. Because it’s in the picture. Now I can’t forget! (I can, however, forget quite how it’s pronounced.)
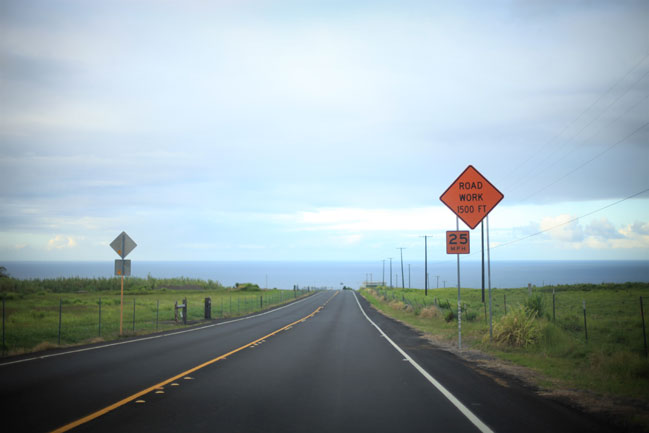
 

travel photography tips for scrapbooking Somewhere on the Big Island in Hawaii.

Modes of transport.

If half the fun is getting there, we better take some pictures of the journey! Provided there are at least two of you in the car, you can do that easily on a driving holiday. This road shot was taken right through the windscreen, and I love how it looks like by the time we hit the road work, the road will run straight into the ocean! I’m also trying to get better at taking pictures of the rental car itself if we have one. It’s always funny to see what car someone else chooses for you, like when I asked for the smallest car available (I am hopeless at parking large cars!) and got one of these giant things as a result!
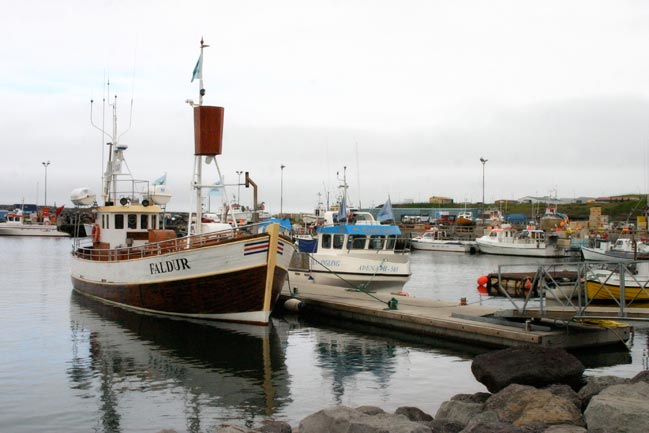
travel photography tips for scrapbooking Húsavík, Iceland.

It’s even more fun to find less everyday modes of transportation to photograph. Going somewhere with a coastline? Find the harbour and take pictures of boats! I’m not a big fan of the open sea but I am a big fan of finding the boat with the funniest name or the prettiest paint colours. Or you might find yourself at a destination known for bicycles, tuk-tuks, bullet trains, rickshaws, elephants, motorcycles or rollerblades! If you do a fair bit of walking on a city trip, take a picture of a road crossing since the signs vary so much from country to country. Modes of transportation are often things you can photograph quickly and you won’t even have to persuade members of your travel crew to smile for the camera — and they will add a bit more reality to your pages when you come to scrapbooking your adventure.
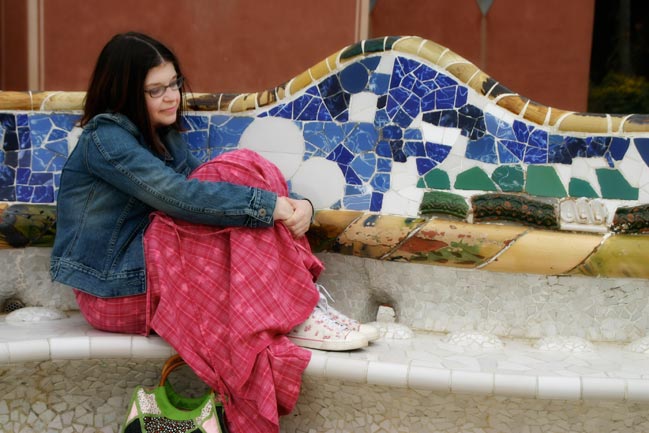
 

travel photography tips for scrapbookers Park Guell, Barcelona, Spain.

Get yourself in the picture.

Hey you — you with the camera! Just how many photos from your last trip actually prove you were there? It’s time to get yourself in the picture, at least a few times per destination! You’ll notice from these examples that most of my travel photographs don’t really include people at all, so I have to make a concerted effort if I want any pictures to actually show I was there. Even when scrapbookers know they should get in the picture, it’s often the standard sort of ‘stand in front of this landmark and smile’ shot that almost looks like you are just standing in front of an overgrown postcard. I actually feel really awkward and self conscious posing for pictures like that, so my answer has been to find ways that are either quite natural or silly fun.
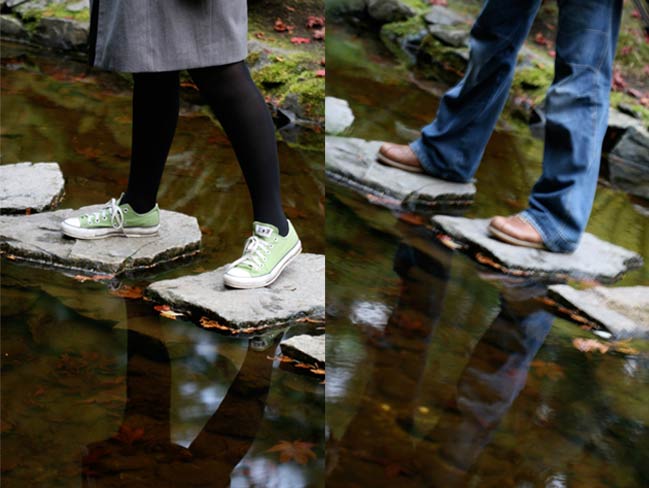
travel photography tips for scrapbooking Butchart Gardens, Victoria, Canada.

This is definitely silly fun. I take pictures of my feet anywhere I travel (I even have a minibook about it!) and I often decide to take those pictures on bad hair days or days that for whatever reason, I’m just not feeling like smiling for the camera. Find somewhere that shows your surroundings and aim the camera at your feet rather than your face! Plus you can use the camera’s timer for this sort of shot without a tripod, since you can just rest the camera on the ground. That makes it work even if you’re traveling solo.
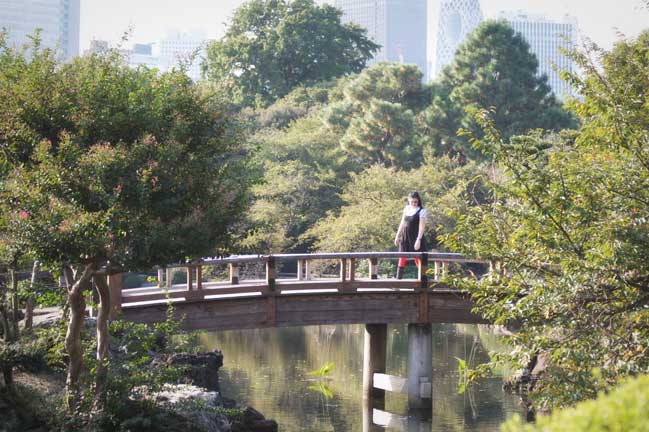
travel photography tips for scrapbookers Shinjuku Gyoen, Tokyo, Japan.

This bridge picture and the park bench above fall under the more natural category and admittedly both of them required someone else to pick up the camera — though you could recreate the first with a tripod. There’s no looking or smiling at the camera, and both scenes were things that actually happened. I was going to walk across that bridge even if there were no cameras involved; I had been sitting just like on that bench for quite a while talking to The Boy — he just happened to get up and take the picture making it look like I was waiting alone on the bench. So perhaps both of those techniques could be useful for times when you want to take pictures of your friends and family, but please remember to include yourself in some shots. Don’t make me come over there and kick you.
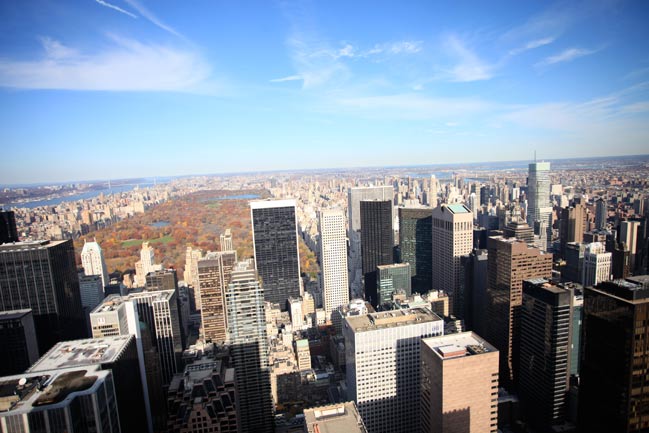
 

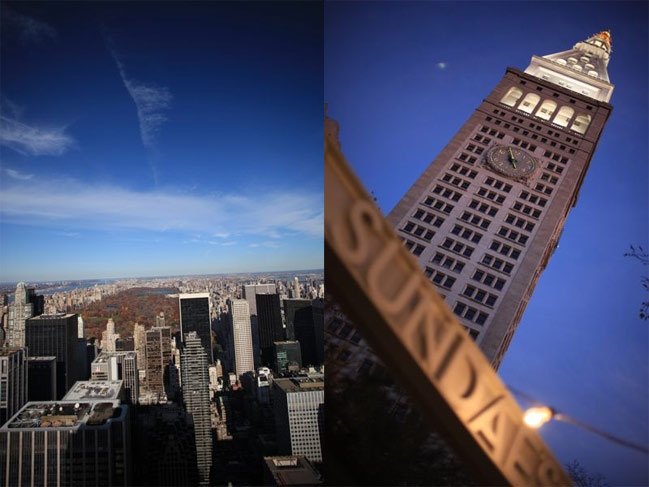
travel photography tips for scrapbooking Central Park and many a building, New York City.

See the skyline.

If you’re heading to a city destination, rest assured its locals know the skyline. Whether it has giant skyscrapers, giant ferris wheels, or giant modern art installations, it will be something unique to that place on earth. So you better get a picture!

Unless you just don’t do heights, viewing decks can be the best place to see an entire city at a glance. Rockefeller Center, the London Eye, the Eiffel Tower, the Space Needle, the CN Tower and the like all make it pretty obvious that you can see the entire view for a price. On a beautiful day, it’s often worth the price of the ride to the top. On a less than perfect day, you might be better off with a free but less glamorous equivalent, like riding the elevator to the top of a relatively tall hotel and taking a look through the hallway windows.
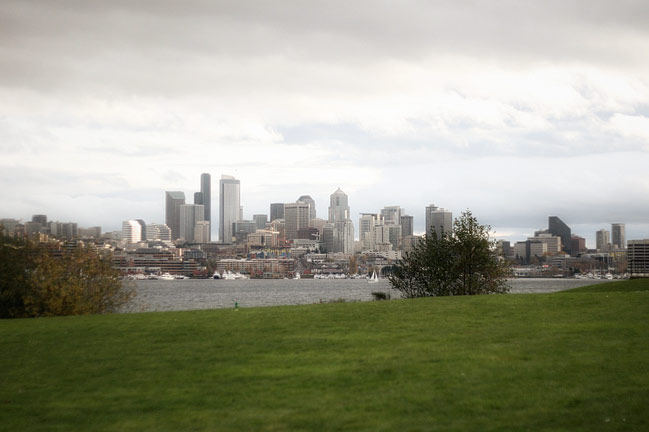
travel photography tips for scrapbooking from Gasworks Park, Seattle, Washington.

If you prefer to keep your feet on the ground, you’ll just need to back up far enough to see the skyline! Check your travel guide or a map for large open spaces like parks that are outside the downtown area, and you might just find the perfect mix of all those modern buildings set against something more natural and green. If you like to write on your photos when scrapbooking, skyline photos are great. Just grab a list of all key locations in the city and write them in following the lines made by the buildings in your picture.
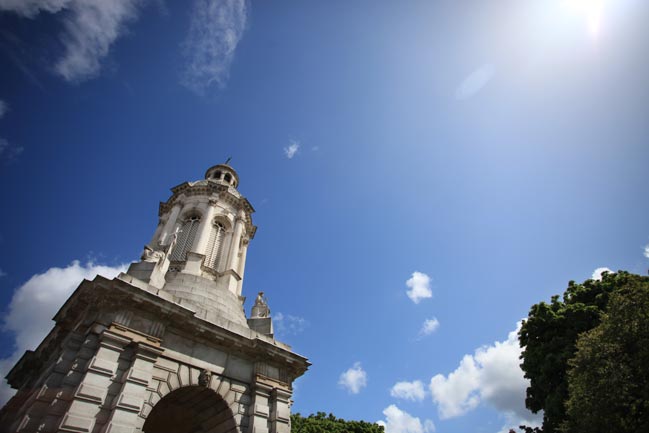
 

travel photography tips for scrapbookers Trinity College, Dublin, Ireland.

Get close to the architecture

It’s always worth getting close to all those buildings too! When you’re walking around, you’ll find details that you could never pick out in those full skyline shots. Sometimes the details are so fine they’ll fill your entire frame, but my favourites are the shots that show the architecture as we see it with our own eyes — looking up at buildings against the open skies.

travel photography tips for scrapbookers Hotels in Honolulu.

Whether the buildings are centuries or just decades old, their designs will tell quite a story about the places you visit. The architecture of Trinity College in Dublin is certainly older than the campus where I studied! And the courtyard appeared to be such a suntrap in a town that is known for its often grey weather. The two hotel buildings filled with balconies show just how much everything in Waikiki is created with the beach in mind! Some resort towns see so much change as hotels are demolished and new ones built that the photos of what you saw will be even more interesting years from now when the place looks entirely different. This is extra true if you ever visit Las Vegas. I’ve been there twice, ten years apart. On the second trip, I noticed the hotel where I first stayed wasn’t there at all. Consulting an older map, it turns out it was most definitely now underneath the Bellagio, and there was another hotel on the strip ready to be reduced to rubble just a few days after I left, so I’m sure I wouldn’t recognise it in another ten years!
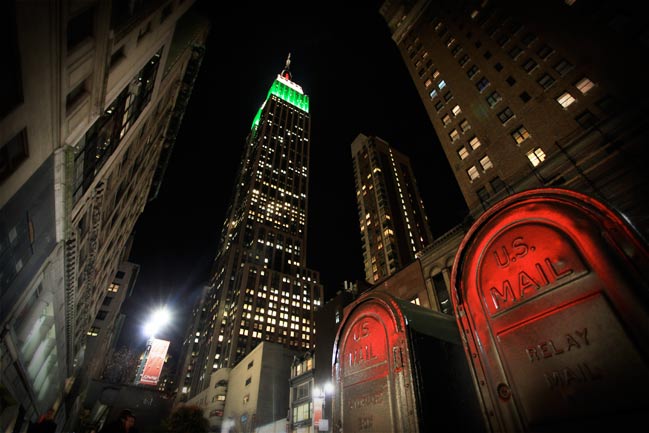
 

travel photography tips for scrapbooking Empire State Building, New York.

Stay out late

No matter how dense the population of your holiday destination, things will look different after dark! The tricky part is figuring out how to photograph them after dark without ending up with a big blurry mess!

First, resist the urge to turn on your flash. If things are close enough to be effected by the flash, it will just light everything up to look like a synthetic day. If they are too far away to lit by the flash, it will just add grain and noise and throw off your camera’s focus system. So just turn it off and work with what you actually see.
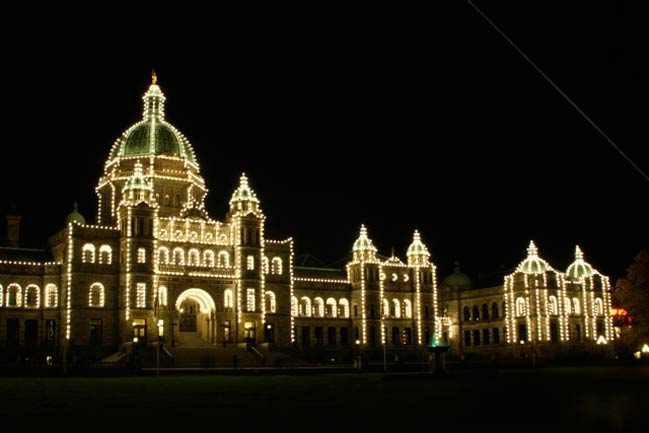
travel photography tips for scrapbookers BC Parliament Buildings, Victoria, Canada.

From there, it’s a case of balancing ISO (the light sensitivity of the frame) and exposure (the length of time the shutter stays open) so you can get the lights and reflections you see to be accurately translated to your pictures. If your camera has very high ISO options, you can keep your exposure quite fast so you can hold the camera in your hands like normal. If your highest ISO doesn’t help, you’ll need a way to keep your camera steady so you can keep the shutter open longer. Use a tripod or sit your camera on something stable and use a long exposure. (If you don’t know how to change the ISO or exposure on your camera, get out your manual and find out before you go on your trip! The buttons are different on every camera but you can adjust these on pretty much every camera, even a point and shoot, and once you know how it will be easy!)
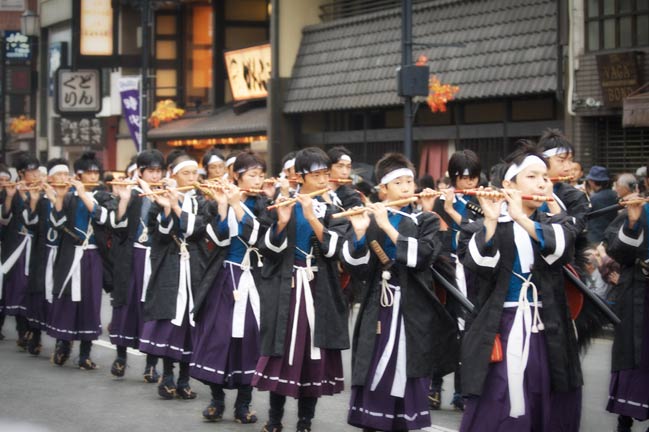
 

travel photography tips for scrapbooking Jidai Matsuri, Kyoto, Japan.

Find the traditional.

Of course, big city buildings are rarely the emotional heart of any travel destination. This place had a story long before you arrived, and that’s what you want to observe. Even if you’re not a history buff, it’s hard to ignore the elements of traditional culture that make every location unique. If scrapbooking is about storytelling, then this is exactly the angle we’re looking for as we explore somewhere new! One of the best things you can do to catch all available photo opportunities is in the preparation. With your travel dates in mind, search online for festivals and celebrations that might coincide with your travel. In just a few minutes you can find out about parades, parties and traditional festivities, and all you have to do is show up and soak up the experience. If you’re traveling with the whole family, it can make a nice change of pace from the regular itinerary too (and you can choose whether you stay all day or just a short while).
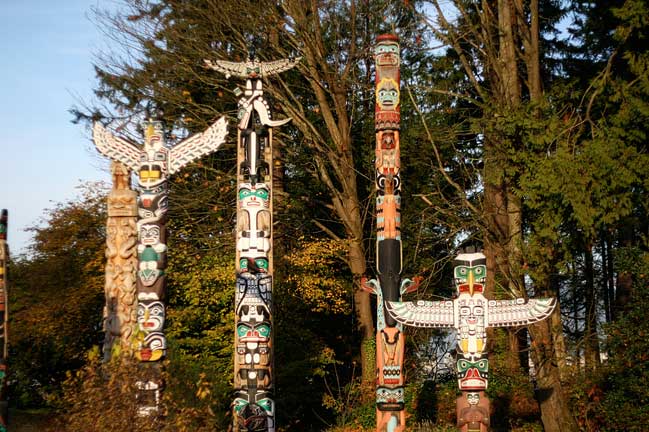
travel photography tips for scrapbooking Totem Poles in Stanley Park, Vancouver, Canada.

If nothing appears on the calendar, you can always find a bit of history standing still and practically posing for your camera! Travel guides are likely to point out some historic locations to visit, but you can also search photo sites like Flickr for the name of your destination and see all the different images that have been posted. Many of the photos there will include additional information in the post, and you can always ask if you can’t tell where a particular picture is located. Flickr can be a great way to prep yourself with ideas for your travel photos since you can find images specific to your travels.
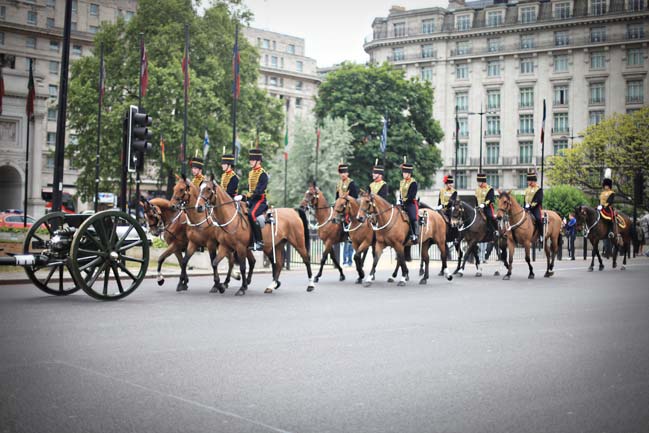
travel photography tips for scrapbookers Royal Horse Parade, London.

Of course, there’s also the notion of just having your camera ready all the time so you can catch what happens spontaneously too. Like for days when you’re walking down the road and a Royal Horse Parade comes marching past! I definitely understand not wanting to feel weighed down by heavy equipment for all of the journey, so even if your best camera is something substantial, don’t discount your camera phone or a small point and shoot — something lightweight that you can keep in your pocket or purse.
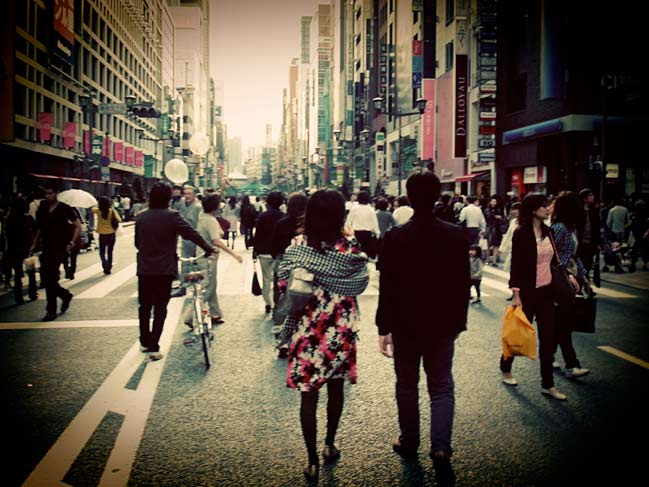
 

travel photography tips for scrapbooking Ginza shopping district, Tokyo, Japan.

Pretend you know where the locals go.

When you’re a tourist, it’s quite likely you’ll end up in places filled with other tourists. Ask a group of Londoners if they’ve been on the London Eye or toured the Tower of London, and you’ll find many of them haven’t even thought of it. But most of them have been the equivalent tourist magnets in the places they have visited elsewhere — just one of those funny things about the urgency of the places we visit briefly compared to the ‘no hurry’ atmosphere at home.

I always feel a little cheated if I only see the big touristy landmarks — real travel feels like some of the time should be spent doing just what the locals would do. Except without having to go to work, of course. We’re on holiday, right?
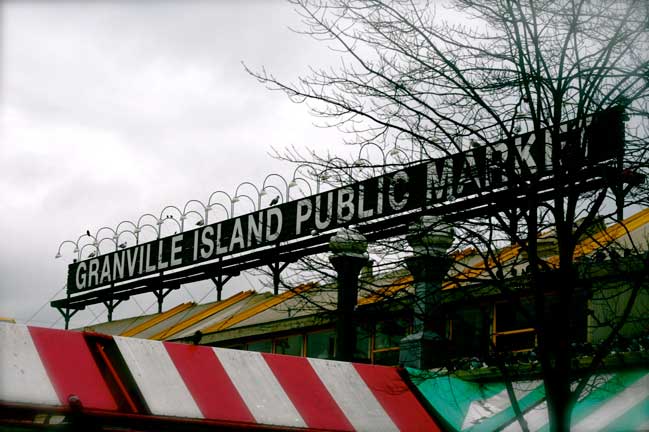
travel photography tips for scrapbookers Granville Island, Vancouver, Canada.

Thing is, unless you have a contact in that location, it can be down to just guessing what the real locals do – especially if you don’t speak the language very well. Some of the time you’ll find so many locals you’ll know you have it right — like when you go into a restaurant and have genuinely no idea what you’re ordering because it’s the sort of place that would never consider printing menus in another language! Other times, you’ll find yourself at some sort of halfway point, like markets that are popular with both tourists and locals. Embrace it, photograph it and just go with the flow: sometimes it’s just as much about pretending you know what the locals know. You might even find you blend in well enough that another tourist will ask you for directions. Consider it a compliment!
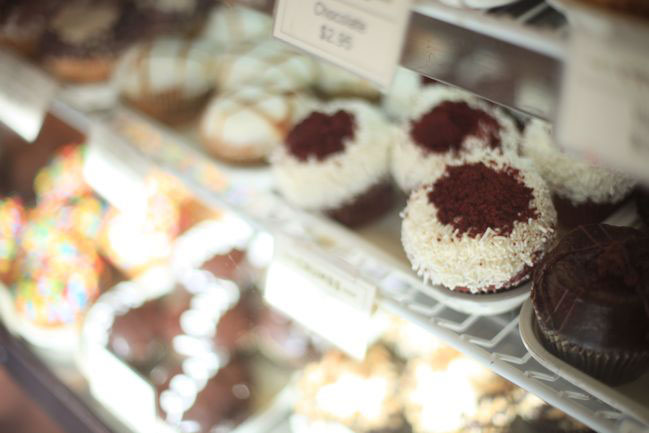
 

travel photography tips for scrapbooking Crumbs Bakery, New York.

Don’t forget your dinner.

And one last note: if you’re anything like me, one big part of travel fun is what’s on the plate! I love trying the local specialties, and falling in love with a few new foods for each place on the map. Admittedly, if you’re not a foodie this could possibly sound insane, and that’s fair enough. But if you do love the culinary part of the adventure, get some pictures! Use a macro lens or the macro setting on your point and shoot so you can shoot the details of pretty dishes up close. Again, you’ll want to avoid your flash so you can be discreet if you’re taking a picture in a quiet restaurant (plus flash is usually quite pesky with reflective surfaces like plates and dishes). On a short trip, you can even use your camera phone to keep a record of everything you eat. May you not have the same reaction I did when I tried that experiment and realised that I may try to eat healthily at home but take me fifty miles away and I transform to a junkfood junkie! Even if you do — there’s an instant scrapbook page in the making!


As long as this is for a blog post, this is really just a tiny bit of what’s up for discussion in travel photography. If it’s something you’re really interested in, you may want to check out the new Transcending Travel book from Digital Photography School — it’s an instant digital download, so you can read it in the planning stages of your trip or you can take it with you for some reading on the plane if you’re more a last minute traveller like me!

And that new shimelle.com class I mentioned last week? You’ll be able to sign up before the end of this week! Not long to wait now! Plus a little extra bonus project coming up too.

Wishing you a photogenic week and a lovely summer at home or far away!

xlovesx

Worth getting out early

photography tips for scrapbookers
Click for wallpaper size.

I am not a morning person. It’s something you learn within about two days of meeting me. Morning and I just don’t get along and over the years I’ve developed strategies for putting morning in its place. Things like getting up ridiculously early so that 8am won’t actually feel like morning when you’ve been up since 4, or the classic staying up all night before a long-haul plane journey not just to lessen the jet-lag, but also to make sure I actually get to the airport on time! But most effective is something far simpler: finding a reason for the morning to be motivating.

photography tips for scrapbookers

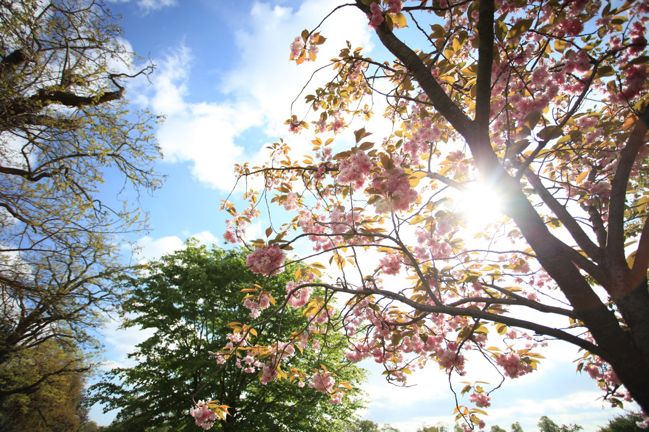
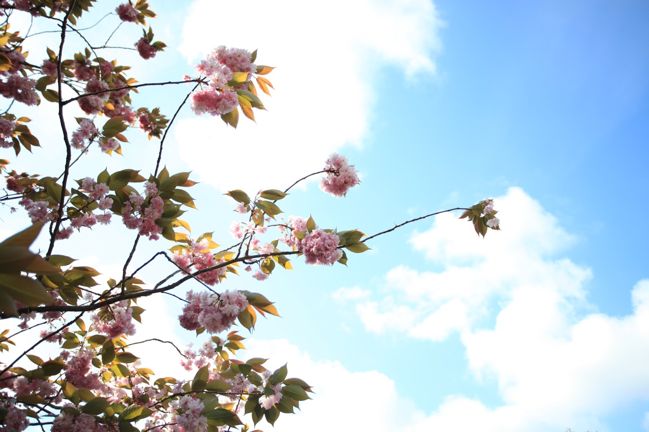
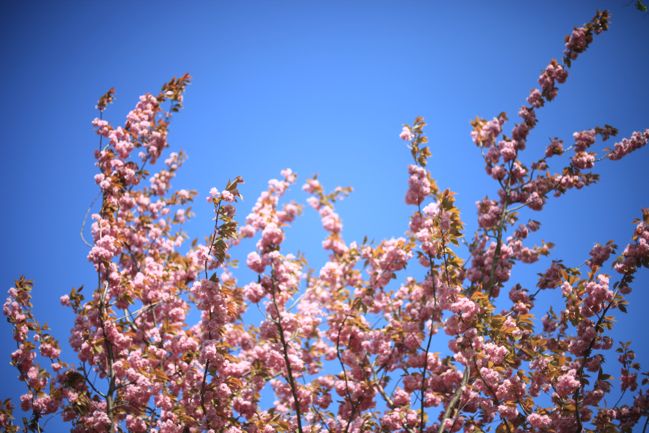
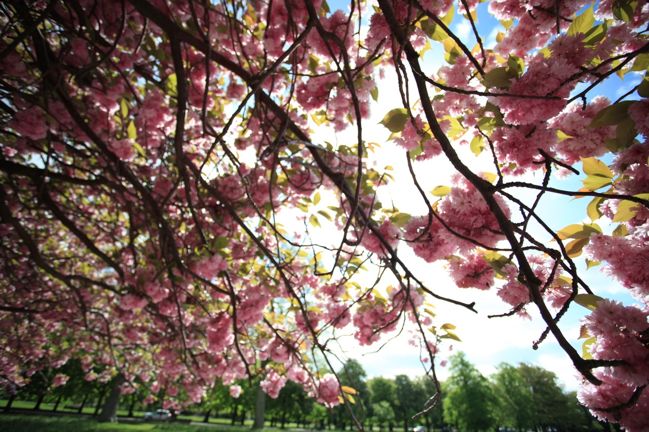
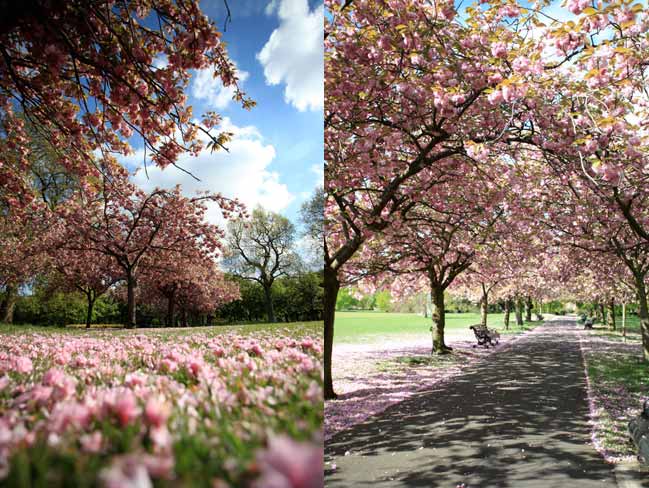
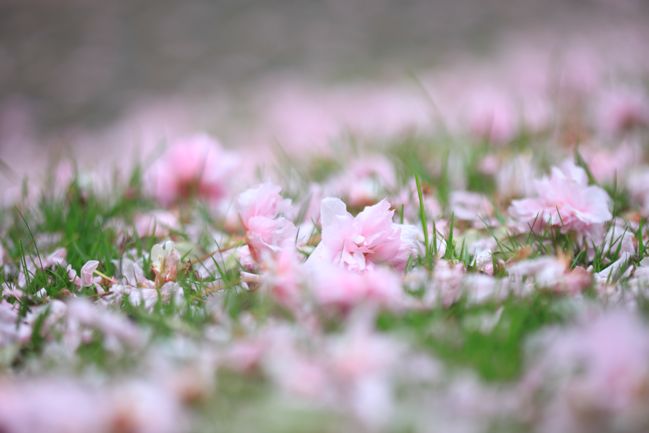
Like when the sky looks like this and casts such a pretty light on everything. These cherry blossoms (or whatever they are technically — I’m far from a garden expert!) are so fleeting that I’ve learned to take my camera everywhere once they appear. These first few shots with the rich blue sky were all taken before eight in the morning. (That ‘sun’ glare in the first shot isn’t actually the sun, but a spot of brightness at the edge of a cloud.) Perfect because the light is amazing and also perfect because only a very few people appear in the park at that hour and they all share an unspoken respect for others who go there at this hour. They are extra polite. The park is extra quiet. And no one will disturb you while you spend nearly thirty minutes photographing a single tree.

photography tips for scrapbookers

That is the sort of thing that could make me a morning person. Shame it really only lasts a fortnight if we’re lucky.

photography tips for scrapbookers

I know the sky isn’t that blue later in the day. And it really was that blue early in the morning — these shots are all straight from the camera, imperfections and all. I have long loved rainy days, but I could get lost in these blue skies for hours, I do believe!

photography tips for scrapbooking

Not long ago, I asked what kind of camera you used and more than half of you replied that you use a digital SLR. Which is both exciting and a little daunting! Exciting because so many of you really have all the options that create a real look or style to your photos, but daunting because we all have a different mix of equipment and every piece has its own look.

photography tips for scrapbooking

All the shots above were taken with a wide angle lens, which isn’t my default lens. It’s so easy to get used to shooting with the same lens almost all of the time, and I fall into that trap just because I have one lens that is easier to pack, lighter to carry and it’s adaptable to lots of situations. If I could only have one lens, that would be the one I would pick, and when I need to pack light I will leave all the others at home. But half the fun of having an SLR is having the ability to change lenses! It’s no good just collecting them and taking them out once a year. I think part of the adventure is to try lenses in situations when they wouldn’t be so obvious. Wide angles aren’t what you think of for shooting flowers; wide angles are for shooting mountains or skyscrapers or other giant scenes that won’t fit in a single frame any other way, right? The last time I really spent time with this lens, I was shooting a gigantic inflated bunny floating in a market building! (No, really.) So trees and flowers were something different, but oh how I loved being able to look past individual blooms and frame them with the greater scene of the sky. Definitely worth zooming out sometimes – even amongst pretty flowers.

photography tips for scrapbookers

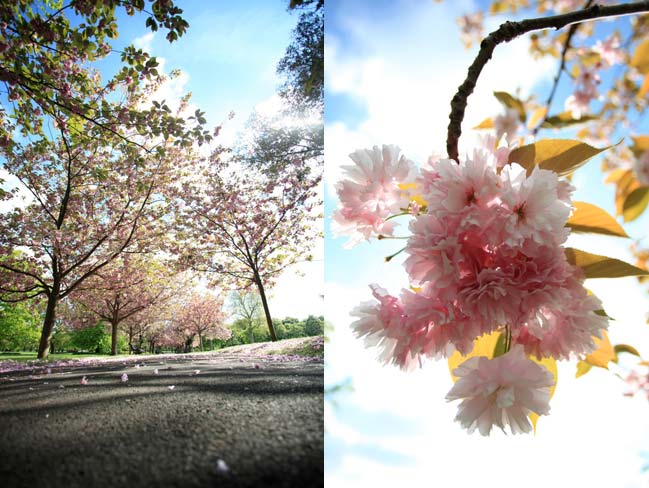
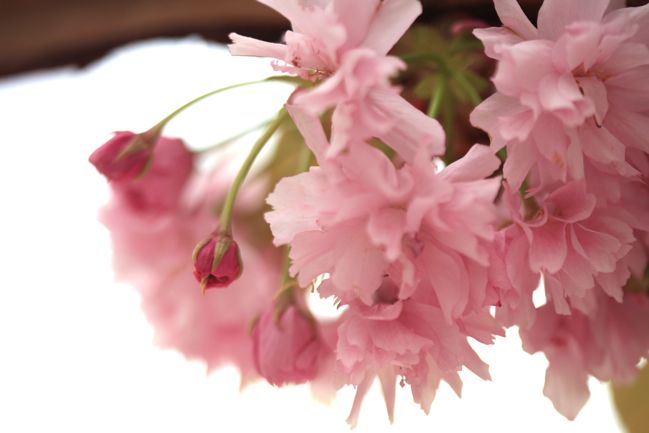
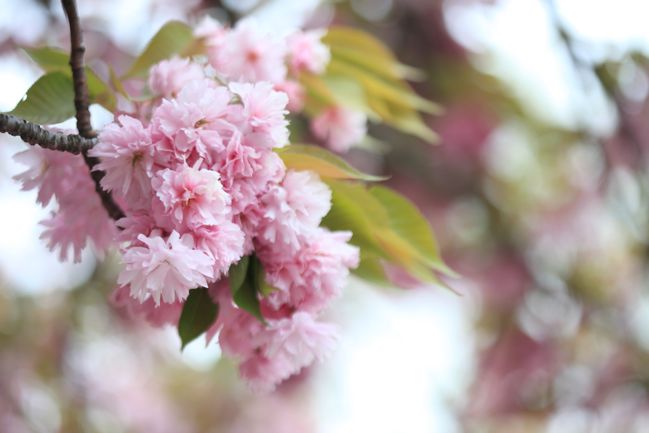
But three photos to show you a little contrast. I headed back to the same trees in the same park with the same camera, but a different lens and a different time of day. In the middle of the day, you still would have described it as sunny, but those gorgeous blues were gone and the sky now appeared just white in the background. Not as much fun at all!

photography tips for scrapbooking

I also used a macro lens this time — exactly what you would expect for photos of flowers and little details. These three images are my favourites from that midday stop, but I can’t help but think they would be so much lovelier with that clean blue edging of the early morning.

photography tips for scrapbooking

So what on earth can I gather from all that rambling?
…I think we can learn a great deal about our photography by looking at the same thing in different ways.
…Sometimes using things against their obvious purposes can create your favourite results.
…There really is truth in that old chestnut that early mornings and dusk have the best light. If it’s enough to make me a morning person, it’s got to be more than just a little bit better.
…And also, that I may have a small obsession with trees that turn fluffy and pink in the spring.

By the way, some of you have heard that I’m teaching a photography-ish course this summer, and that’s true. But it’s not a course based on how to use your camera. (I’ll be sharing more about it soon but I have some things to finish before I start to dish!) If you’re looking for a class that will help you with the mechanics of using your SLR or bridge camera, Cheryl at Feel Good Photos has a class open for registration now that you might find useful.

Have a lovely long weekend and take some gorgeous pictures, won’t you? (Anybody have anything exciting planned?)

xlovesx

Technical details: wide-angle shots taken with a Canon 17-40mm lens and macro shots taken with a Canon 100mm lens, both on a Canon 5Dm2.

Scrapbooking with Hipstamatic

scrapbooking with hipstamatic
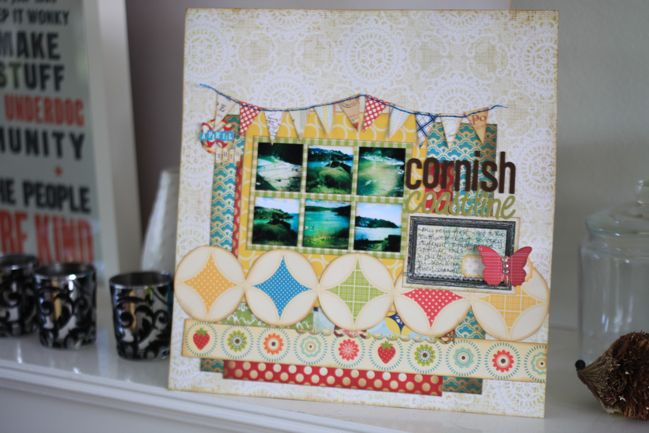
scrapbook page with Hipstamatic photo

So I fell in love with Hipstamatic in early April and started sending pictures to various friends with iPhones, and suddenly I found we were all ignoring all other cameras in favour of Hipstaprints. And then I started promising to blog specifically about scrapbooking with Hipstamatic, but got so inspired actually scrapping with these pictures that the blog post was maybe a long time coming. So without further ado, grab an iPhone and let’s get scrapping, Hipsta-style.


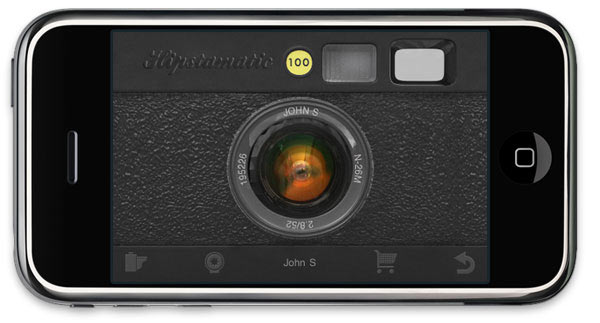
hipstamatic iphone app

About Hipstamatic
Hipstamatic is my favourite of all iPhone apps, and in basic terms it turns your iPhone camera into something that is more like film. Of course, the pictures are still digital, but it uses the technology to give you digital equivalents of several kinds of film, different lenses and a variety of flashes, all which can be switched, mixed and match to get lots of looks. (And it’s seriously a huge number of looks. You can see them all here to get an idea.)

The app is only available for the iPhone and it only works as a camera — you can’t open a photo you’ve already taken and apply the effects like Photoshop. (Well, not without cheating, which we’ll talk about in a minute.) You have to use it as a camera to take your picture and wait to see what you get — like a film camera. Admittedly the wait is shorter than developing a roll of film, but you do have to wait: if you close the app before the developing process finishes, the photo won’t exist! Because you can’t fire off a shot every second or so, Hipstamatic makes you think just a little about how you take the picture — or you learn to get what you’re given! The waiting part of the app is part of the fun more than frustration. A cute little reminder to slow down and stop taking things so seriously.

If you want to scrapbook with your Hipstamatic photos, go straight to the settings and make sure you’re set to save high quality images. Higher quality does slow the app down, but it then saves images that will print without losing any definition. It’s limited by the quality of the camera in an iPhone, but if you think about it, there are just as many megapixels available in the iPhone as in many of the cameras we used for the first few years of digital-camera-mania. And those photos printed just fine.

The app has two main screens – the front and the back of the camera. Swap them by clicking at the bottom right corner. Changing the lens, film and flash is as simple as swooshing across your screen on the front of the camera and clicking the one you want. Or shake your phone to randomly choose a combination. When you view your prints within the application (click at the bottom left on the back of the camera) you can click on any picture and see what lens, film and flash were used, so if you find a combination you love by chance, you can go back to it on purpose. My current favourite is the Float film and the John S lens with no flash, which creates an aged look like this.

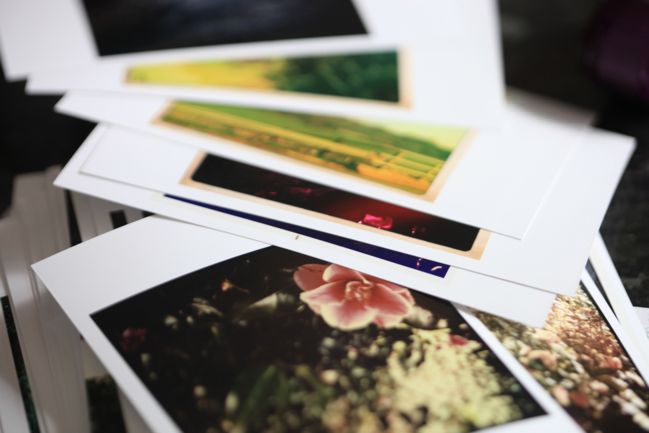
Hipstamatic prints from Photobox
Ordering Hipstamatic Prints
I love ordering photos online and it’s my default way to make sure I have plenty of photos ready to scrap at all times, so printing Hipstaprints online was one of my first big questions. The answer is that they don’t just print – they print so very well! The images from Hipstamatic are square rather than the standard rectangle, so you will need to pay attention to the settings when you order your prints to get what you want.

ordering Hipstamatic prints online
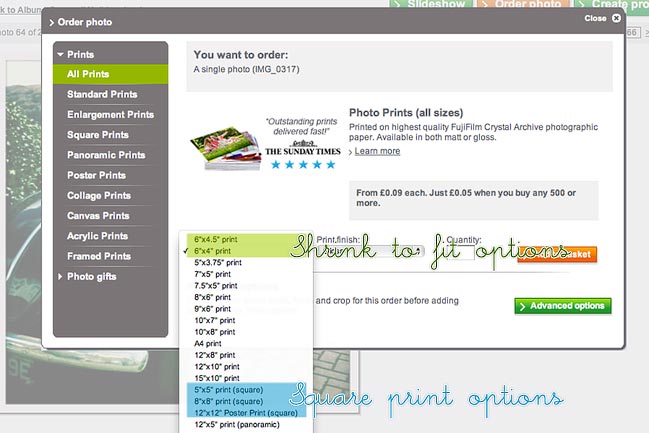
I order my prints at Photobox and it’s super easy once you know what to do to get your square prints. Start by uploading your images, then select what you want to print and add it to your basket. There are a few options for square prints. Photobox offers 5×5, 8×8 and 12×12 print options that already a square format, so you can pick these from the dropdown menu when you choose your photo size and just add it to your basket and be done. (I have ordered them at 5×5 and the print quality is just fine. I haven’t tried 8×8 or 12×12.)

Or if you want a smaller print, select the 4×6 or 4.5×6 size and add it to your basket. But be careful – you need to follow one extra step. The default 4×6 setting will automatically crop your picture to a rectangle.

ordering Hipstamatic prints online
If you want it to be a square, go to your basket and click on Print Options. Your photos will then load as thumbnails and you can see how they are cropped.

Default cropping:
ordering Hipstamatic prints online
Shrink to fit cropping:
ordering Hipstamatic prints online
Click the box that says Shrink to Fit and then Apply Changes at the bottom of the page. This will change your prints so you have a 4 or 4.5 inch square on the print, like the stack of prints above. Then you can just trim off the extra for the square print.

If you’re in the US, Scrapbook Pictures makes it even easier as they offer square prints right down to 2 inches, so you can add the photos to your card then just select your size. Easy!

scrapbook page with Hipstamatic pictures
Printing Hipsta photos at home
Of course, you can print these photos on your home photo printer. I use iPhoto, so I tend to just select a bunch that I want to print and choose the 2×2 size or a custom size for any other size that would fit the project.

If you use Picasa, select your photos then click to make a photo collage, and you’ll be able to print several images on one sheet of photo paper. These photos look great at a teeny, tiny size that is handy for page designs with grids or that use photos as an embellishment of their own.

mini scrapbook with hipstamatic pictures

Hipstamatic cheats
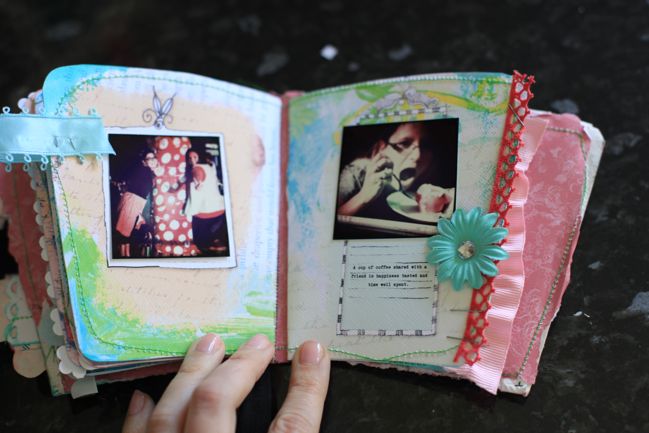
So technically you can’t open an old photo and apply the Hipstamatic effects to a non-Hipsta photo. But you can open any photo on your computer, display it full-screen size and then take a picture of your computer screen with your iPhone. In fact, you can probably do that quicker than you can open it and alter the levels in Photoshop. That’s what I used to create this minibook with photos taken last summer, in life before Hipstamatic.

Or if you have a real preference for rectangular photos rather than squares, just select a film that has a minimal frame and print your photo at the standard 4×6. You’ll get the image and colour effect, minus the frame, in a standard rectangle rather than the square. (I may have done this by accident by missing a few ‘shrink to fit’ buttons and the prints are still definitely scrappable, just with a different look.)

scrapbook page with Hipstamatic photo
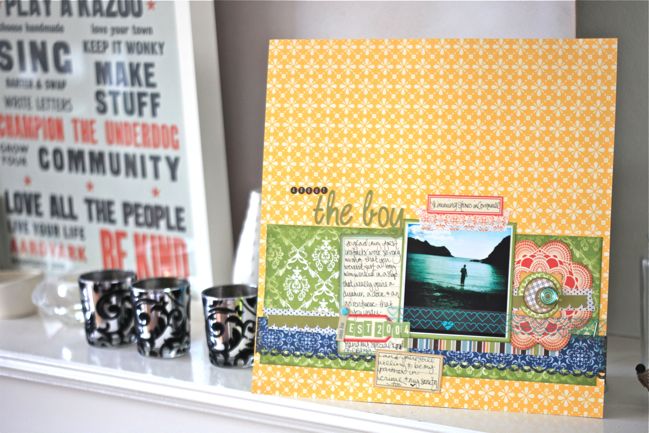
Supplies: Patterned papers by October Afternoon and Pink Paislee. Die cuts and small letter stickers by October Afternoon. Large letter stickers by Bella Blvd. Transparency by Hambly Screen Prints. Tapes by Pink Paislee. Glass bauble by K&Company. Ranger Distress Ink, American Crafts pens and border punch by Fiskars.

Paper scrapping with Hipsta photos
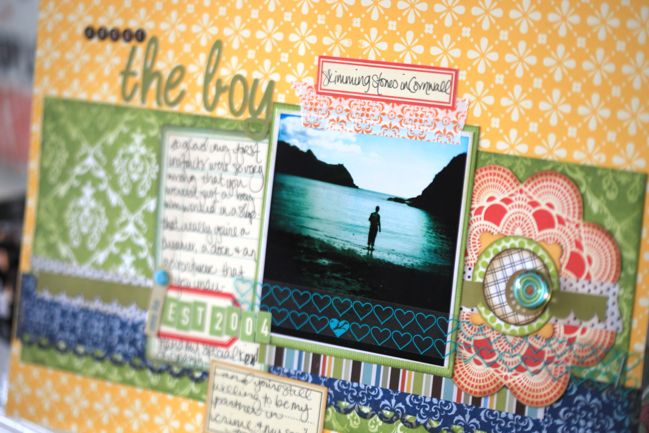
So once you have prints in hand, the scrapbooking is the fun and easy part! If you love lots of pattern and embellishment, you can use just one photo and have plenty of room for open space and journaling. This particular image is one of my favourites so I wanted to give it a page of its own.

scrapbook page with Hipstamatic photo
Supplies: Patterned papers by BasicGrey, October Afternoon, Cosmo Cricket and Girls’ Paperie. Webster’s Pages journaling card. Butterflies and labels by Jenni Bowlin. Letter stickers by Cosmo Cricket, American Crafts and Bella Blvd. American Crafts pens and border punch by Fiskars.

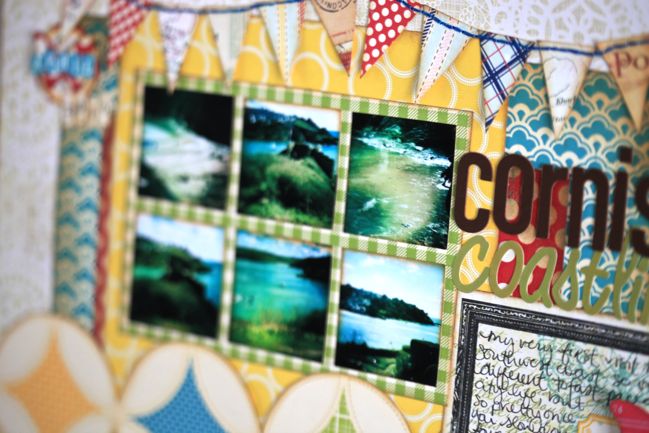
The square nature of the pictures makes them great for grid-based layouts, which can be easily adapted to clean and simple or something more embellished. I printed this particular set of Hipstamatic images at 1.5 inches all on one 4×6 sheet of photo paper and then used a square punch to quickly make them identical in size.

See more examples of paper scrapping with Hipstamatic photos here, here, here, here and here. And if you have more examples in your gallery or on your blog, please leave a link in the comments!

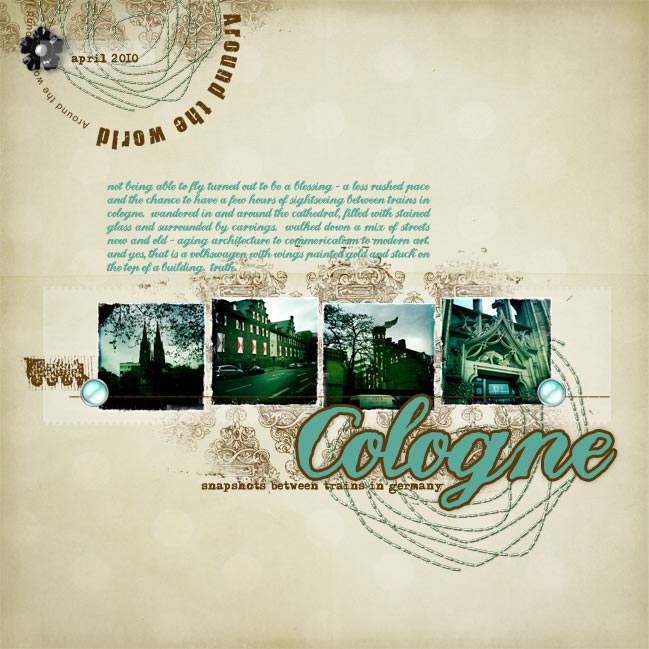
digital scrapbook page with Hipstamatic photos
Supplies: Page template and papers from Shimelle Digitals. Travel and floral embellishments by Vinnie Pearce.

Digital scrapping with Hipsta photos
The images from this app are definitely the right quality for digital scrapbooking. Just open them in Photoshop or your preferred scrapping software and copy and paste them onto your layouts. I love this app for capturing random snapshots when you only have a few minutes or can’t bring along all your camera gear – hence these shots between trains in Germany and the six shots above from a long walk along the Cornish coastline. This digital page is made with a layered page template so it came together in just minutes.

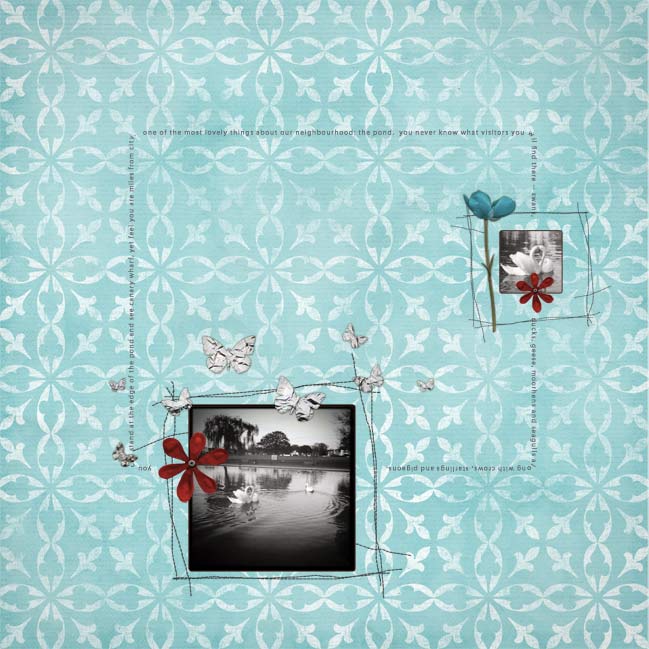
digital scrapbook page with Hipstamatic photos
Supplies: Template, paper and embellishments all by Vinnie Pearce.

Or if you want to draw attention to a favourite image, try a page design that leaves lots of open space on the page, like this template from Vinnie Pearce.

See more examples of digital pages with Hipstamatic prints here, here and here. If you have more examples on your blog or in your gallery, please leave a link in the comments!

So I reckon that’s enough of a resource post for now! I can’t wait to hear your ideas for what you would photograph and scrapbook with Hipstamatic. Please share!

And for those that don’t have an iPhone, please don’t throw too many tomatoes. I promise I don’t make those rules.

Learn more about Hipstamatic for the iPhone here.

xlovesx

Two quick questions

photo taken in Dublin

First question: is it just me, or does this scene make you think you should be watching out for time-traveling Deloreans?

Second question: is your camera a point and shoot or a dSLR? I’m working on a little project that has made me curious as to what our mix is. If you have both, choose the one you would use to capture your best images please.


Thanks for your input!

xlovesx

An easy photography challenge...

sky photography challenge

This week I’m hosting the photography challenge at Two Peas and the challenge is Cloudy with a chance of…. Just point your camera toward the sky and see what magic you can find. It’s a challenge that’s easy to participate (well, as long as it’s not chucking it down with rain at your place like it has been here today!) but there’s plenty of room to get creative too. And one lucky sky-snapper will win a prize too!

You can check out the challenge here and be sure to tick the box for this week’s photo challenge when you upload your images to the gallery so you can be entered to win!

In other news, I’ve set up a Q&A page here and I’ll have a giveaway here tomorrow, so be sure to check back!

Have an amazing week!

xlovesx

Photos from a frozen Friday

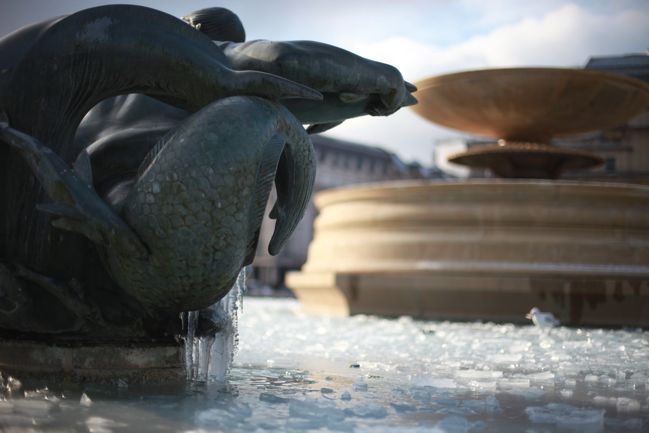
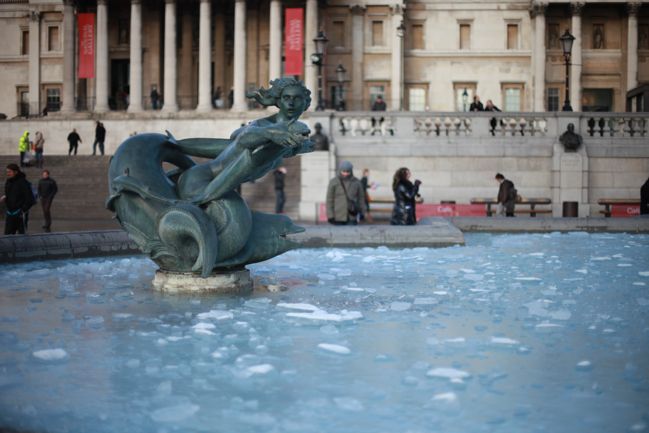
frozen fountains at trafalgar square
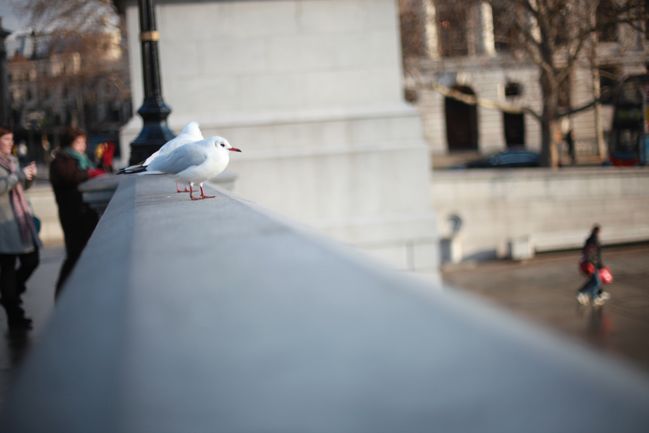
birds at trafalgar square

So apparently it is quite cold here. So cold that the birds don’t quite know what to do, other than stay out of the fountain. Many people were not so intelligent, and Trafalgar Square was overrun with people shouting about their cold feet, for not one but multiple people thought it would be a good idea to stand on that ice for a photo opportunity.

That ice is, of course, merely sitting on top of a very cold pool of water.

Brains: apparently some of them malfunction in cold weather.

In other notes: today’s random celebrity sighting in Covent Garden was an Osmond brother, I was responsible for a panda hat appearing in the background of a London television report on the state of our icy roads, and the total lack of non-iced pavement in my neighbourhood seems to be a wonderful bonding experience wherein everyone is suddenly chatting as we all struggle up or down the hill into the village, mostly stating our dismay that no one has bothered to sort this out but also in an attempt to deflect from the lack of grace we have suffered in our performance of the dying swan from Swan Lake, performed on iced-over concrete whilst wearing casual footwear.

Wishing we had a fireplace this week! Am having to settle for warming cardigans on the radiator, which isn’t quite the ambiance.

Stay warm!

xlovesx

Favourite wintry photographs

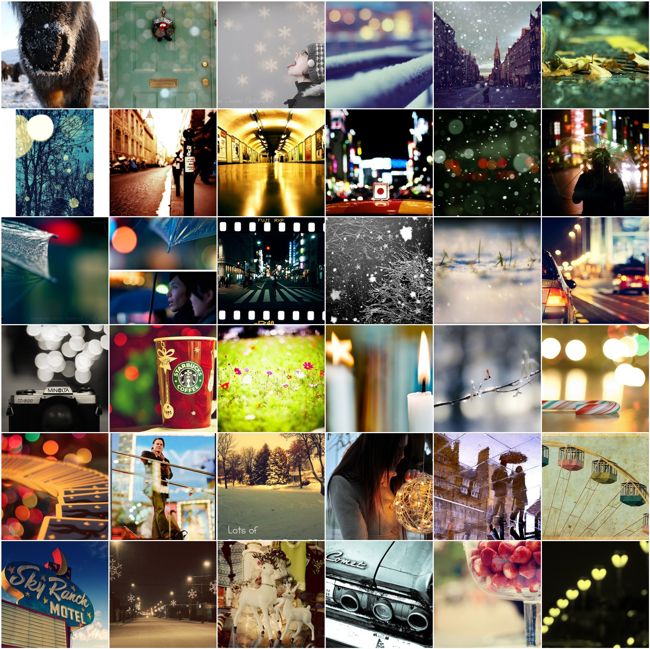
favourite winter photos
1. Iceland Dec 2009, 2. Day 24 – Let It Snow, 3. MMmmm! Snow-keh-licious!, 4. The Eskimos had fifty-two names for snow because it was important to them: there ought to be as many for love~, 5. I miss you, you were like dream., 6. Rain Sinfonia, 7. B is for bokeh (and blue), 8. XA bokehlicious bunny, 9. mind the gap, 10. Toshihiro Oshima Exhibition “Déjà Vu” 4, 11. bokeh snow and christmas lights., 12. Voyage à Tokyo 13, 13. Man in glasses waits at the station with umbrella; Shibuya, Tokyo, 14. Boy Meets Girl + Rain Meets Umbrella; Shibuya, Tokyo, 15. Thank you & good bye Japan, 16. Shaped bokeh experiments – Snow 02, 17. powder, 18. Zagreb by night, 19. beloved, 20. Let it snow!, 21. How to find a swirl, 22. Don’t ‘cha Wish Your Bokeh was a Star Like Me?, 23. Resisting winter, 24. 003/365 ~ The Real Beauty Of The Candy Cane…., 25. Go down gambling, 26. Your Name in Lights, 27. Lots of Snow, 28. [ 154 / 365 ] Close to the Flame, 29. The Ashmolean Museum, 30. Ferris Wheel Revisited, 31. Sky Ranch Motel (Explore #60), 32. my street tonight…., 33. vintage fawn, 34. Keepitlight_Week_6, 35. Sweet, 36. Bokeyh Boulevard

…loving beautiful wintry shots. Share a link to your favourite winter photo?

xlovesx