pretty paper. true stories. {and scrapbooking classes with cupcakes.}

lovely to meet you Twitter Facebook Pinterest YouTube

Take a Scrapbooking Class

online scrapbooking classes

Shop Shimelle Products

scrapbook.com simon says stamp shimelle scrapbooking products @ amazon.com shimelle scrapbooking products @ amazon.co.uk

Reading Material

travel

camera school Category

A Tale of Two Christmas Classes

Online Christmas Classes from shimelle.com :: Share your Christmas

It’s the first of November! Time to start talking about something special. We all need a little glimmer of brightness shining through the holidays this year, and for years my Christmas journal has brought me just that. Some years have been tales of happiness and some have brought more than their fair share of tears, but my journal has always kept me grounded and helped me remember where and how to find my Christmas joy. Part writing, part photography, part crafting, that journal is a little oasis of calm in my December days. But what if making a book isn’t part of your Christmas joy? Could there be a way to take this same spirit and put it in the palm of your hand, no scissors and glue required? So this year, I’m actually offering two Christmas classes: the classic Journal your Christmas scrapbooking project, and a new Share your Christmas project, that lets you document your holiday joy with your phone.
Journal your Christmas online scrapbooking class

Journal your Christmas

This year I will make my seventeenth Christmas journal! If you’d like to join this project for your first time, you can sign up and then participate for as many years as you would like at no extra cost. This way you are welcome to either make a full book each year or to create just a few entries each year that go into one overall Christmas album. There’s no such thing as falling behind and adapting ideas to your style, time, and calendar is most definitely encouraged.

Each day, you’ll receive an email with a PDF that walks you through a topic of the day. These topics are revised every so often and as it’s a very different year, there are indeed several new topics on the calendar. This should keep things relevant and refreshing even if you’ve been keeping a journal since those earliest years of the class. Class runs from the first of December to the 6th of January (the twelfth day of Christmas) though you are welcome to finish your journal on any day that feels like the close of Christmas to you.

There are also near-daily scrapbooking process videos, where you’ll see my album come together one entry at a time. (I don’t post videos on days like Christmas Eve and Christmas Day, so both you and I can focus on enjoying those days with a live first, scrapbook second mentality!) You’re welcome to follow along with any supplies and format you like, and if you want to use similar supplies to mine, I will publish a list of those tomorrow afternoon.

Journal your Christmas online scrapbooking class

Once your registration is processed, you’ll also have access to the full class archive, which includes hundreds of examples from different participants’ journals, assorted printables and cut files, and all the previous prompt topics, should you wish to make an early start. Please note that registrations are not automatic, and I will email you within 48 hours (usually 24 or sooner) with your login details. If you don’t hear from me in that time, please check your spam folder and if nothing’s there, please email me at shimelle@gmail.com.

Just choose your currency and click the button below for your choice of UK pounds or US dollars. If neither of those is your currency, you can still join us! Choose either and the payment will convert automatically when you make your payment.

I donate £1 for every Journal your Christmas class purchase to The Girls’ Fund at Plan, a charity that helps millions of girls who otherwise wouldn’t have access to education or basic survival needs.

Share your Christmas online photo and video class

Share your Christmas

I know that over the years, many who joined the Journal your Christmas project have largely left behind their paper craft hobby, as well as friends who have laughed to me about wanting to join the project but having no plans to make a book or glue any paper to another paper. I know I have come to use my phone for memory keeping right alongside my camera, my pen, and my scrapbooks, and that’s where a brand new class, Share your Christmas, comes into play.

Share your Christmas is not a scrapbooking class and does not include videos about making paper pages. Instead, it is a 24 day journey through finding Christmas joy and documenting it through your phone. You can also use your ‘proper camera’ if you like, but it’s not a requirement. You don’t need a super fancy latest edition phone, but you will need a smart phone that can take photos and short videos.

Share your Christmas begins the first of December and includes daily prompts for 24 days: finishing on Christmas Eve. Just like Journal your Christmas, class includes permanent access so you don’t have to worry about things expiring or disappearing.
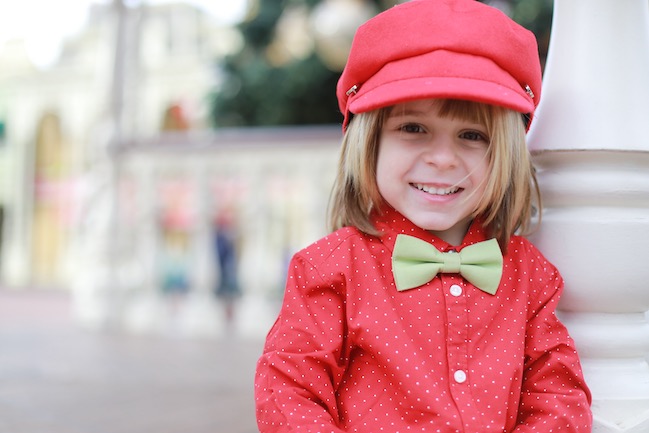
Share your Christmas online photo and video class

The Share your Christmas prompts will take you through five themes: guided photo styling, caption concepts, portrait practice, video challenges, and staying positive. Prompts will be delivered to you by email, and include a mix of PDF and video content. It’s up to you to decide if you would like to share your project with friends and family via social media, and we’ll cover the pros and cons of different options there as we get started. But if you have been looking for a way to bring meaning and positivity to your social media posts, this is definitely a road map for doing just that. If you follow along, you’ll have a range of photographs, videos, and captions that document what’s most important to you this holiday season.

I will donate at least £1 for every Share your Christmas purchase to my local Trussell Trust Food Bank to share Christmas joy with those finding it most difficult this December.

For both classes

You can pay by credit/debit card or Paypal account. If you would like your prompts to come to a different email address than the one on your Paypal account, please be sure to leave a note in the message to seller section with the email address you would like to use. (If you miss that, send me an email to let me know, with both email addresses.) If you’re a past participant and you have changed your email address or forgotten your login details, send me an email for that too. Thanks! If you’re a current pass holder, both classes will be available on your account from this week.

I’ve had to close commenting on blog posts because they just get hundreds of spam messages and I lose the real questions! But you can always email me, or come along to a Facebook Live (Mondays 1:30pm and Fridays 9:30am, UK time) to chat about anything that will help you!

Camera School 06 :: Making it to Manual

camera school 06 :: making it to manual
For whatever reason, someone, somewhere decided to make the manual mode on a camera seem difficult. It’s not difficult in the slightest. It’s just not automatic. You have to rotate some dials and click some buttons now and then. But they aren’t difficult dials and complicated buttons.

For everyday photography, I use manual to set just one thing. I only think about one thing for each shot – because I’ve already finished thinking about the other stuff. That really doesn’t follow the rules of amazing photography, and I’m fine with that. I don’t need amazing for everyday pictures. I want that balance of photography that’s fun and photos with a unified style.

I only think about one thing because I set the ISO and the aperture once, then I can just focus on shutter speed. Because at the most basic level, there are three things that determine how light or dark a photo will be: the sensitivity of the sensor (ISO), the size of the lens opening (aperture) and how long the lens stays open – that’s shutter speed. When I pull out my camera, I set the ISO using 100-400-800 (which you can tweak to the specifics of your camera once you’re used to it) and set the aperture according to how much of the scene I want in focus. I shoot at the widest aperture the majority of the time because that’s the look I like, though there are times when that has to change to accommodate a group of people, for example. So say I am going to photograph a flower on a sunny day. I would go right to the 100 ISO and the lowest number for the aperture – on my 50mm lens, that would be 1.4. Then I stop thinking about those two things. From here on out, I only worry about shutter speed.

camera school :: making it to manual mode
On an SLR, part of looking through the viewfinder is seeing the light meter. Except if you weren’t looking for it, you might not even notice it’s there. The light meter is what made photography make sense to me when I first learned my way around a camera as a kid and it’s what makes it work for me now. It’s just that the light meter today is a little more high tech – but it tells me the same exact information. On an old Canon AE-1 series, the light meter was activated with a half-press – just like the half-press to auto-focus now… except this was still the times of all manual focus. The half-press was just for measuring the light, and a tiny arm would ping up on the side. If it was in the middle, then things were good. If it went to way to one side, the picture would be too dark and way to the other side would mean too light. The reason I noticed it more was partly because it actually moved inside the viewfinder, so it was pretty obvious! But also because a fully manual camera like that required you to look or to know every single setting on your lens… and I found it easier to look.

What’s shown in my viewfinder now is exactly the same information, just more precise and without something flicking around to get my attention. It’s more subtle, but the mechanics are the same: a half-press on the shutter button will read the light and mark a spot along a line. If the spot is near the middle, then the camera things you’re good to go. If the spot moves to the left, the shot will be dark and if it moves to the right, it will be light. Seriously, if you’ve never noticed this before, go get your camera and look through the viewfinder now. I will still be here once you’ve found it.

camera school :: making it to manual mode
So your first step once you’ve moved to M on your dial is realising that light meter is there and being able to set the ISO and the aperture and then adjust the shutter speed with its help. At first, start dialling the shutter speed up or down until you get the marker right at the middle point, then take your picture. Get used to that process, just taking pictures of all sorts of things. Walk around your house or walk around the garden or down the street and focus on adjusting the shutter speed with that dial. Soon you’ll come to remember which way you need to dial. When I looked at the preview screen, I was forever thinking if it’s too light, dial right, and I knew I need to dial left if the opposite is the case. Eventually you will dial without thinking about which way you need to go – it will just come naturally – but it takes time for that to happen. That time is so very much worth it.

But here’s the kicker: if you’re always lining it up with the middle point then you’re really not shooting in manual after all. You’re doing the work of manual, but you’re adjusting the camera to exactly what it would do in aperture priority – because it would adjust the shutter speed until the marker was in the middle. So why not just shoot in aperture priority all the time?

First of all, you can, if you really want to. I use aperture priority for certain things. Some people use it all of the time and get great pictures; some people use it none of the time and get great pictures. There are as many methods as there are photographers.

Secondly – and this is the important part – going against what the camera tells you is how you develop a style for your pictures. It makes sense if you think about it: if you shoot in automatic modes, your pictures will look essentially like all the other photos taken on all the other cameras in automatic modes, and that’s a huge number of photos. If you come up with your own combination of settings that speaks to you, then your photos will look like just your photos because most of the other photos will be in those automatic settings you abandoned. Do you see where this is going?

camera school :: making it to manual
So when I look through the viewfinder, I never aim for the marker in the middle. I tend to like my pictures around two stops to the right – which means the camera things I’m overexposing my photos, just a bit. To me, it lets more light in and creates more glow and softer colours. I don’t always go with the two stops to the right (if I did, I could just set that as a custom automatic setting! How’s that for blowing your mind?) but it’s where I start. Then I go through a little process that couldn’t be done with that beloved Canon AE-1. I look at the picture on the preview screen and check for various things. I can make adjustments and shoot again if needed – provided it’s a subject that is possible to shoot again. Which is why it’s good to try this method on things that don’t move or melt or wilt rather than say… a wedding. There are no do-overs at weddings. Stacks of books allow for endless reshoots.

If you want to give this a try, you will need something like a stack of books (or something that won’t move, melt or wilt while you’re learning) and some time to put your camera through its paces. Even though setting that marker in the middle isn’t getting fully advantage of manual mode, I think it’s an important place to start. It will let you see what your camera ‘thinks’ is right – and part of taking consistent photos is learning exactly what your camera will do in any given situation. (To the point where I think I would choose sticking with an older camera I know really well over upgrading just to have the latest and greatest… but we’ll talk more about that another day.) So start by shooting with the marker right in the middle, then try moving it to the right or the left and see what happens. If you really want to be able to keep track, you can even write notes on cards and put them in the photo so you can later compare and see everything in the shot. (Though you can see pretty much all the information you ever wanted to know about a photo through the digital file, but sometimes post-it notes are just the way forward, right?)

camera school :: making it to manual mode Not to worry: there’s an entire camera school post on photographing water coming soon. We’ll get there.

This isn’t an assignment you can do in a day. This is an on-going process of learning how something works, discovering your preferred style and refining it. Photographers continue to refine their style as they work. Even real photographers. So it’s not something you’ll finish tonight and move on to something new tomorrow morning. Taking the time to really look at your images (both big on your computer screen and printed) will help you find what you like. Your style may be slightly over-exposed because you like light or slightly under-exposed because you like rich colour. You may love shooting at wide apertures with lots of blur or it may drive you crazy and make you feel you need glasses! You may like the colours very cool and crisp or you might prefer warmth to your images – just a tad or a full-on vintage look. Your style will be true to you when you choose it yourself rather than looking at something else and replicating it. Replicating can teach so many things, and it’s very useful in its place, but replicating alone cannot develop your style. Looking at your own pictures and pointing out what you do and do not like about them? That will develop your style.

So no single assignment today. More a collection of things to keep in mind. Find that light meter in your viewfinder and embrace it as a tool that can help you in such a simple and essential way. Remember manual isn’t difficult – it can be just one dial. And look at your very favourite images to see if there is a certain style already starting to emerge. If so, embrace it. If not, don’t sweat it.

It’s only a camera. You’ll be fine.

click here for more camera school posts

Camera School 05 :: Fun with Aperture

camera school :: fun with aperture

We bashed through the basics of aperture in lesson four, and I have to say aperture is way more fun when you just let go of the technical stuff and see what your camera can do. So today let’s do just that.

You may have noticed I have a habit of taking photos of things in the grass. There are a few reasons behind that – partly because that means I can shoot outside with lovely natural light. Also it means I’m getting outdoors for something in my workday, which is nice. As I don’t have a garden, it usually means I’m heading to the park, where I get all my best ideas. And I love how you can see the seasons change just from the grass. I consider grass to be the most lovely of all neutral backdrops and give the chance I will photograph just about anything there.

It’s also the perfect place to have fun with aperture.

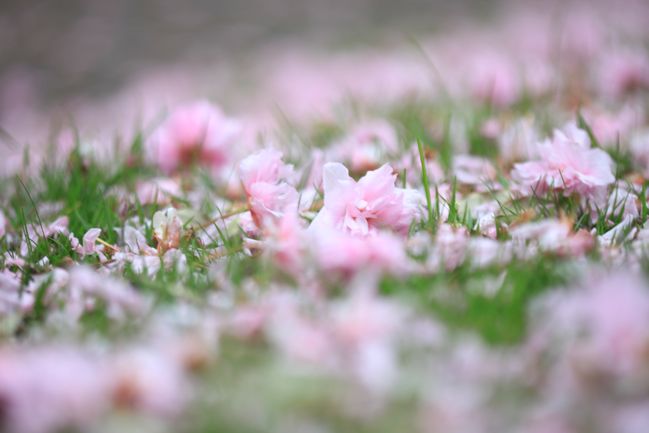
cherry blossoms in the grass
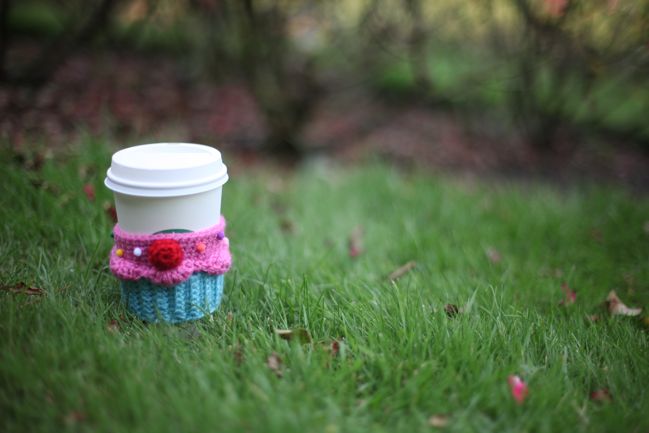
See, the grass can instantly tell you the season with springtime colours like these. The biggest part of this adventure is learning to step away from the viewfinder. All of today’s examples were taken without my eye to the viewfinder and without the preview screen – just trial and error of getting the settings right first, placing the camera on the ground (or perhaps on top of something small, to get an angle) and clicking with your best guess of the framing. Now that’s something that is really easy with fully automatic modes – because you can let the camera decide everything and it will get the lighting pretty much right and put mostly everything in focus. But shots like this are a bit boring with everything in focus, really! There’s something about the selective focus that makes the difference between ‘oh, isn’t that delicate and pretty’ and ‘why are you photographing a bunch of stuff on the ground?’ – at least to me.

coffee cup in the grass coffee cup in the grass
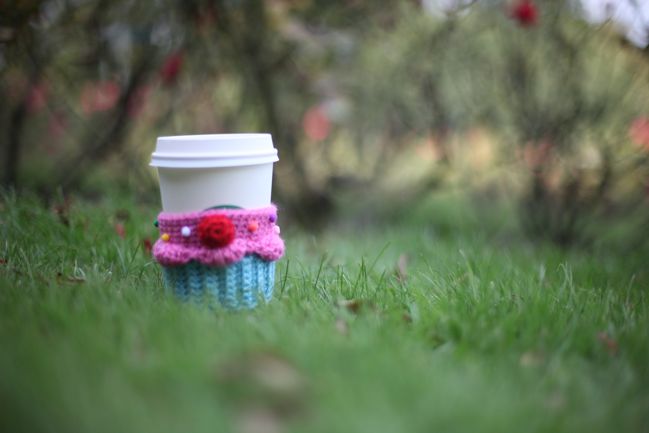
Yes, ‘fun with aperture’ to me often means no looking through the camera. Here’s why – the first of these two shots is taken from a low angle, but I’m still looking through the camera. The camera is maybe eight inches off the ground? The second picture is taken without me looking, and the camera is right in the grass. The perspective is completely different and it changes the idea of size and detail and all sorts of things. Both angles have their place in different functions (like you might notice that the plane of focus in the second shot is actually too shallow to capture all the detail of the adorable stitchery by Twinkie Chan) but if you never try the not-looking option, you’ll never know what stylishness you’re missing!

outtake :: friends in the grass friends in the grass
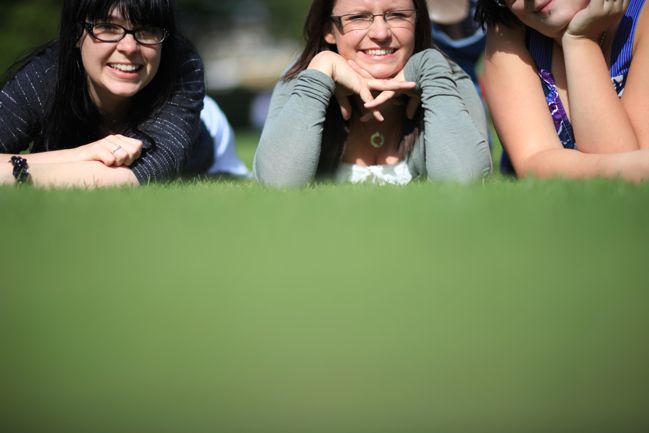
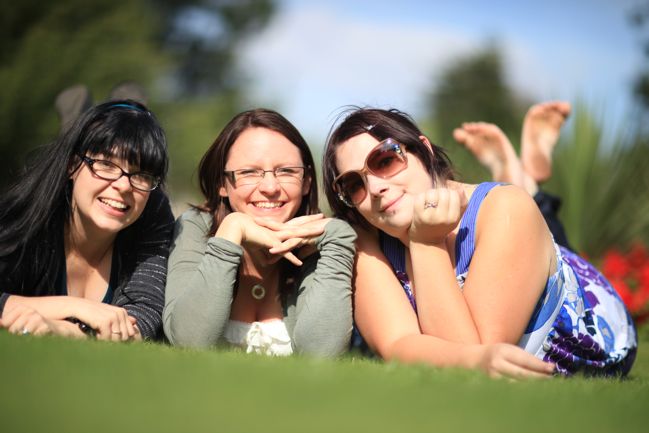
You can shoot just the grass, objects placed in the grass or people laying on the grass, of course. And there is a lot of trial and error involved in this. There are nine shots between the first outtake and the keeper shot here, while we got the angle of the camera right and got ourselves positioned so we didn’t have trees growing from our shoulders or the camera focusing on our elbows rather than our faces. As these were all shot with the self-timer, there’s more hassle involved in getting up, trying to correct what wasn’t right and then getting back in the shot, but still – nine shots is hardly the longest photo shoot in the world. Trial and error will get you there more quickly than you might think.

staged photo in the grass
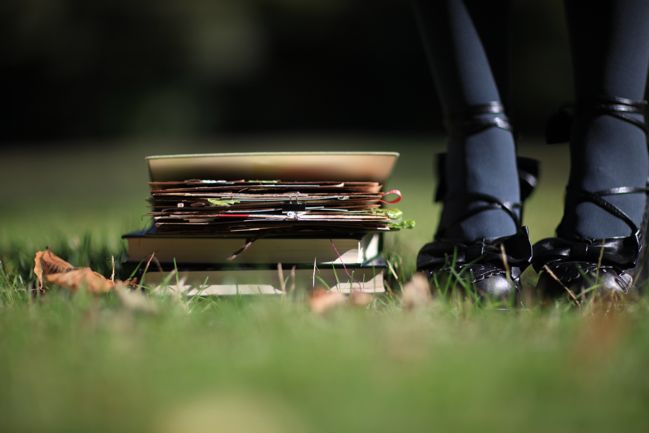
This is a little trick you can use for self-portraits – include something that isn’t you (something that won’t move). For this example, I set up the books and got that shot just how I wanted it then didn’t move the camera and put on the self-timer and jumped in the shot. The first shot I stood a bit too far away from the books, so I tried again and stood closer – this was that second shot. A lot less trial and error. I’ve used the same technique for self-portraits that weren’t just my feet too and I find it way less stressful than just trying to get the focus right without anything else in the frame… though it always takes more than two shots for me to not make a stupid face! (More about that another day… and we can all bond over silly fake smiles we pull for the camera, even though we don’t mean to!)

concrete rather than grass
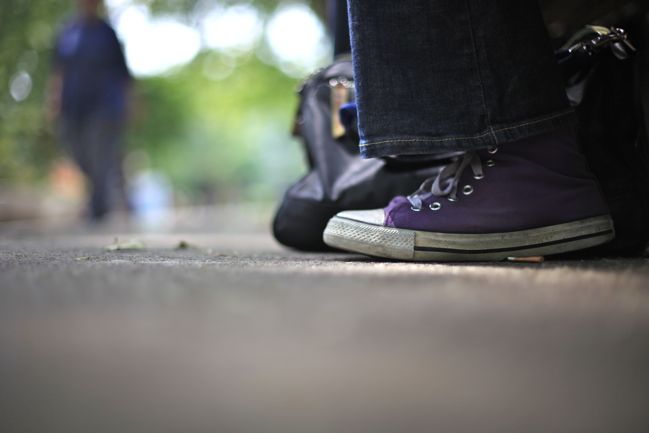
Sadly, sometimes the ground is not covered in grass and you may be confronted with concrete, dust, wood or gravel perhaps. The same ideas apply and you may find each carries its own context in the photo. The same feet in the same purple sneakers look young and playful in the grass, but carry more angst on the littered city pavement. That’s something I love about photography – how you notice some things when you take the picture and some things after. Somewhere in the middle there is a magical combination of the purposeful and the accidental all in the single snap of the shutter.

So here’s a new assignment: whether it’s grass or some other background you love, step away from the eyepiece and see what you can capture with the unique aspect of a shot without everything in focus. Embrace trial and error and enjoy the funny shots where everything is blurred or crooked or off-centre. It’s all part of the experience. If you’re happy to just give it a try with what you already now, then grab your camera and go. If you would prefer a few more steps to make it easy, then try these:

1. Before you leave the house, figure out how to set your camera to its lowest aperture. If you’re not already shooting in full manual, shoot in aperture priority (A or Av on the dial of an SLR) and set your ISO like we walked about here and set your aperture to its lowest setting, then the camera will take care of the shutter speed to give you the right amount of light for the shot.

2. Grab something you want to photograph in the grass and take it outside and set up your little scene. (Or if it’s lovely and autumnal or springlike where you are, you can just use what nature has put there in terms of leaves and flowers!)

3. Just eyeball what you think would be a good distance and angle to place the camera on the ground. Without looking through the viewfinder, press the shutter halfway to focus then completely to take the picture. Now look to see what you got!

4. From there, use trial and error to recompose the shot – closer, further away, better focus, more (or less) centred in the frame – until you get something you like. When you start to get close, you won’t want to move the camera when you review your shots, so even though you’re trying not to look through the viewfinder, you may still want to get down on the ground. So you know… don’t wear your prom dress or anything.

5. Extra-credit for trying a self-portrait! Even if it’s just your shoes. (Extra-extra credit for cute shoes, of course!)

A note for point and shoot users: if you can’t control aperture on your camera, don’t despair. Try this in macro mode (usually a little flower) and you may have some luck, especially if you zoom in to the max available. It won’t blur to the same extent but it will limit the focus more than your fully auto mode.

And one thing just to throw out there: these images – even the ‘after’ examples – are far from perfect. I know it and I’m fine with it, because I find I have far more fun when I don’t worry about perfection in every shot. And bonus: when I have more fun taking pictures, I take better pictures! I can point out flaws in these images, from focus to framing to shadows. But they were all photos that were fun to take and each of them is better than what I would have shot a year or two before, so even if it’s not perfection, it’s progress. That works for me. If it works for you too, consider us instant friends in this adventure.

click here for more camera school posts

Camera School 04 :: Notes on Aperture (or that blurry thing)

camera school 04 :: notes on aperture and blur and stuff
Back in lesson two, I promised no triangles to explain exposure. That’s because memorising ISO gets rid of one point on the triangle (and if you read lesson two you’re remembering your rough settings of 100, 400 and 800, right?) and in this lesson, we’re going to eliminate another point on the triangle: aperture.

First, let’s get over the weirdness of the word aperture and how it applies. Cardmakers, you can come into your own here because aperture is part of cardmaking lingo too! An aperture card is a card with some sort of cut-out in the front, like a window (often a circle) that lets you see inside the card before you even open it. Well, on a camera the aperture is that window – in the lens. Aperture just means opening, and there has to be some sort of opening on the camera or how on earth would we ever take a picture? The real question is does your camera (or lens) allow you to adjust the aperture?

On an SLR, the answer is pretty much always yes. On a point and shoot, the answer used to be always no, but point and shoots (and bridge cameras) have made a great deal of progress lately so now the answer might just be yes. If you don’t know if your point and shoot gives you any aperture control, either look up aperture in your manual now or don’t even get up from your chair – just open a new window and type “Can I adjust the aperture on model of camera here“ into a search engine. The internet knows everything – someone out there will have posted your answer if it’s possible, and probably written a post with example images as part of a camera review! Oh internet, whatever did we do without you? If the answer for your point and shoot is no, then you can skip the shots at the end of this, but if you’re ever thinking of upgrading, this concept will prove quite useful.

Adjusting the aperture just means making that window bigger or smaller. Have you seen a very old photo – maybe of a house in a field – where everything seems to be in focus? Those were mostly taken with pinhole cameras, with the teeniest-tiniest of apertures. If you look through just a pinhole, everything you see is in focus. The reason those photos were often of buildings was because buildings didn’t move. See, if you’re only letting in just a pinhole’s worth of light, you need a fair bit of time to take the photo, otherwise the photo will be too dark. With people or anything else that moves, that just doesn’t work, but buildings are usually happy to stay put as long as you would like!

camera school :: shallow depth of field
Sometimes it’s just not practical to sit there with your lens open for seconds or even longer. The moment will be gone, something will have moved or you will have lost your patience! So we adjust the aperture to let more light into the camera – we make the window bigger. But that means not everything will be in focus any more. It does, however, have a side effect – the bigger the window, the softer the blur in front and behind your point of focus. The example just above is from this post all about my love of that blur. The aperture on this shot was as wide as the lens would go. (In this case, 1.4 on a 50mm lens, for those who like those kind of details.)

camera school :: aperture
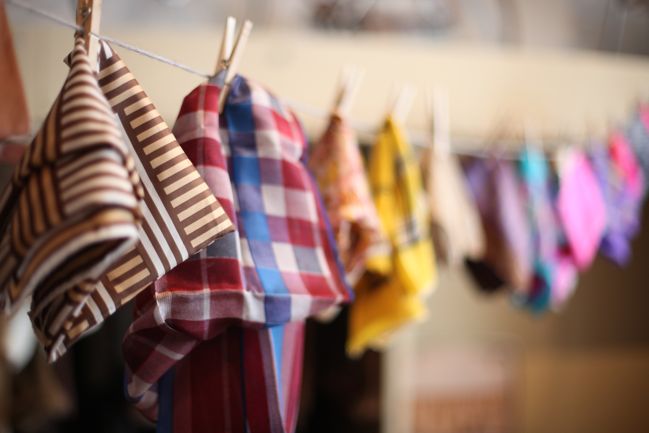
Just like ISO is made easier by remembering just a few rough points, aperture is exactly the same. Take this picture for example: it’s shot with a very wide aperture, which you’ll also see referred to as ‘shooting wide open’ or having the lens ‘wide open’. If I wanted to focus on just that particular handkerchief, then I’m all set. If I actually meant to make all of them visible, then I’ve failed miserably. The wider open the lens, the less of the scene will be in focus. Something small like a pinhole would get everything in focus (provided it didn’t move!) but that wide aperture makes it impossible to focus on everything.

camera school :: aperture for group shots
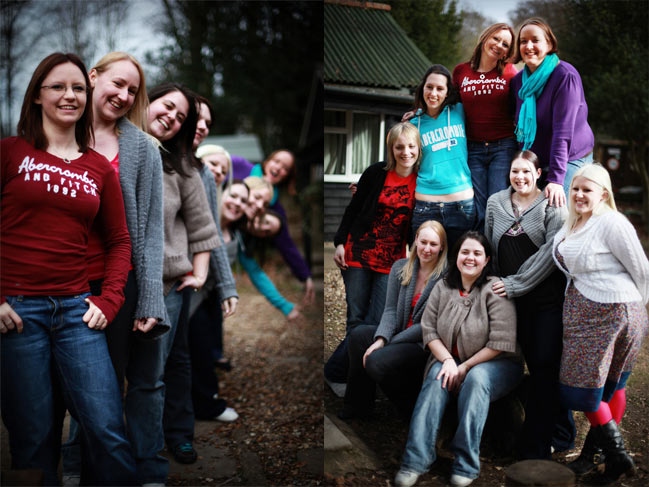
With handkerchiefs and flowers and cupcakes and assorted other objects, a bit in focus and the rest blurred is lovely. But there are times when it doesn’t work – namely with people. If you photograph a group of people, usually you want to see all of them. The shot on the left uses a wide aperture, so when photographing something with depth – like all these girls lined up toward the camera – most of the depth will be blurry and only a bit of the scene will be in focus. It’s an interesting look in this case but it doesn’t help you know all those faces at the back of the line.

There are two solutions to this: move the people or change the camera settings. The image on the right moved the people. Now they are mostly at the same depth, so I could get the girls in focus but the background is relatively soft.

camera school :: aperture for group shots
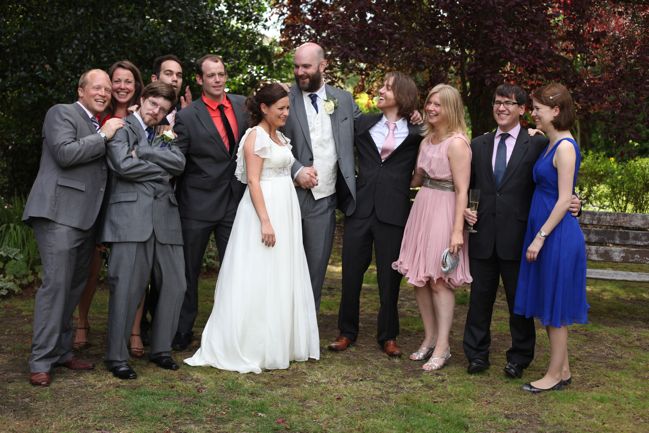
Or here’s the second solution: change the camera settings. While the two photos of the girls were shot at a very wide aperture (1.4), this little outtake with friends of the bride and groom was shot with something smaller (4.5). That makes more of the scene in focus.

I think the real reason why aperture can get confusing sometimes is its measurement in numbers. Numbers for ISO, numbers for aperture – it can look like a lot of maths going into a picture! And at some level there is but we don’t have to get that technical. If we can remember the 100-400-800 guideline for ISO, we can do the same for aperture. Hear me out.

If you have an SLR, look at your favourite lens. The full name of the lens tells you what apertures you have available. It’s usually painted right onto the lens itself, but you can also just look it up on the item description of any camera store site. So say you have a 50mm lens. If you’re a Canon user for example, the most popular options for the 50mm are this 50mm 1.8 and this 50mm 1.4. Those numbers at the end refer to the aperture. The 1.8 lens is much cheaper than the 1.4, and the aperture is a big part of that. (The 1.4 is also made with more expensive and more durable materials in both the lens housing and the glass itself, so the difference is more than just the aperture, just to be clear.) What you need to remember is the lower the number, the more it will blur. Or if it is easier for you, the smaller the number, the smaller the plane of focus. They mean the same thing, but I think one or the other usually sits a bit better so choose the one you like best!

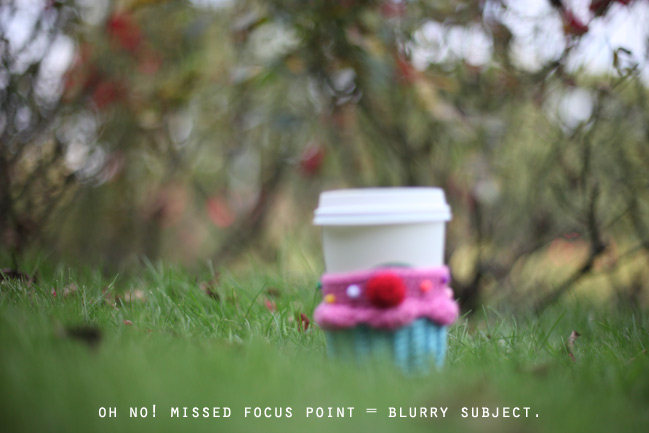
camera school :: wide aperture, missed focus point
Either way, if you’re shooting at 1.4 or 1.8, you have to be careful where you focus because you’re only working with a small area that will be clear. I tried to focus this without looking through the viewfinder and the autofocus thought I wanted the grass rather than the coffee cup. Um, no… not what I wanted. With objects like this it’s easy to just refocus and shoot it again, but what if that were a toddler or a puppy? Yeah, not so much on getting that shot again, right?

Not all lenses go down to numbers that start with one. The 100mm macro goes (for ultra close-ups) to 2.8 and the 17-40mm (for crazily wide shots) goes to 4.0, but both of those lenses will blur a great deal at their lowest numbers. (Especially the 100mm – this is one of the first photos I took with the 100mm macro and it’s nearly all blur!) So you don’t need a really low number necessarily – but you need to know how low your lens can go. (Did you just say that like the limbo chant? I am really hoping you did.) Once you know how low it can go, you just need to remember that lowest number is going to have the most blur (or the smallest plane of focus – whichever you prefer).

If you can remember just that, then the rest is easy. Because if a low number gives you the most blur, what will the highest number give you? The most IN FOCUS. Or the least blur. Same thing. So really this is not complicated math – this is remembering one thing and that one thing will make the rest make sense.

Now let’s actually take some pictures to start to see this happening. Just like ISO, there are two options for this assignment. If you don’t know how to change the aperture on your camera, now is the time to learn! If you have an SLR, it’s probably easier than you think. You can put your camera in Aperture Priority mode (look for A or Av on your dial) and then you’ll be able to set the aperture but let the camera do the rest. You can use your camera manual or you can search for ‘how to set aperture’ or ‘aperture priority mode’ plus the model of your camera and there you will likely find pictures of your exact camera so it’s super-easy to follow. Basically you’re going to use one dial to set it to Aperture Priority then use the other dial to change the aperture to what you want – and the numbers will show up on your screen, but if that sounds problematic, there will be pictures of your exact camera in the manual or online so you can follow that.

Once you know how to change the aperture (or if you already knew that!) then find a scene with some depth – some things closer to the camera than others. Take two pictures – one at the lowest number you can dial to and one at the highest. I have to admit, this is the least original idea for a photography assignment, but this really is the easiest way to see just what your camera can do. Look at the two shots side by side and see just how much range your lens has. Give it a try and then come back tomorrow for something way more creative!

click here for more camera school posts

Camera School 03 :: Fix a photograph

camera school :: fix a photograph
When I flip through my photos, there are two types of pictures that make me happy to be a scrapbooker: photos that are beautiful and photos that tell a good story. Unfortunately these are not always the same images. We all have those photos, right? The kind that capture an amazing memory but they are blurry or washed out or yellowed or whatever else makes them imperfect.

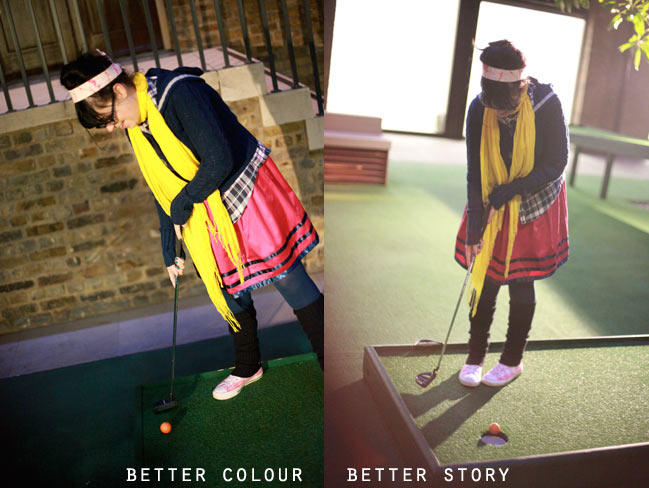
Sometimes, that amazing moment is enough to make the photo perfectly imperfect and I leave those images alone entirely. But sometimes, it’s worth a shot to improve an image. Take these two pictures for example:
sample photographs
Both taken on the same night, when we went to play Q-Golf, which is a bit of a mix of miniature golf and billiards, in which you work your way through a course with both a pool cue and a golf club. It was outdoors at night and the flood lighting was uneven. Which made photos a bit more of a challenge than usual. The photo on the left has good colour and made the best of the lighting, but there’s not much to the story here and the composition isn’t particularly fabulous. The image on the right is loaded with way more meaning – it proves I was actually able to sink that darn golf ball eventually (trust me, I need proof!) and captures my ‘I am really concentrating’ posture. But the lighting is all off so the colour is completely washed. I’d much rather scrapbook the photo on the right, but since it is in focus it’s worth a try to improve it a bit. I usually go with one of three options: cropping, colour-correcting or adding a vintage wash.

fix a photograph
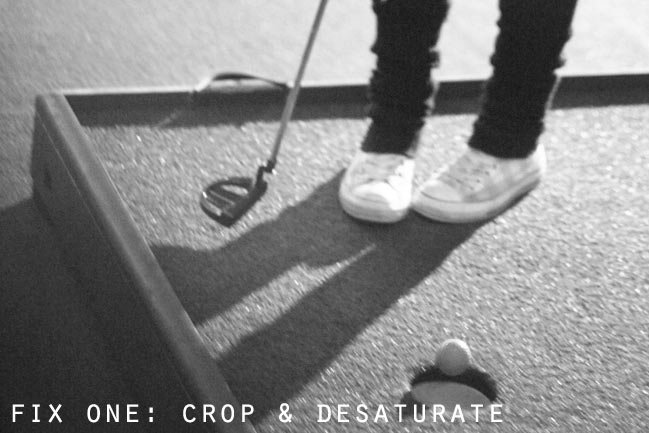
Find a creative crop
Sometimes a crop can help… other times it doesn’t do much at all. Converting an image to black and white can get rid of the colour problem. Here the crop doesn’t really help tell the story and there’s not sharp enough focus for it to be a great improvement, but it’s worth a shot as sometimes it’s the magic fix.

fix a photograph
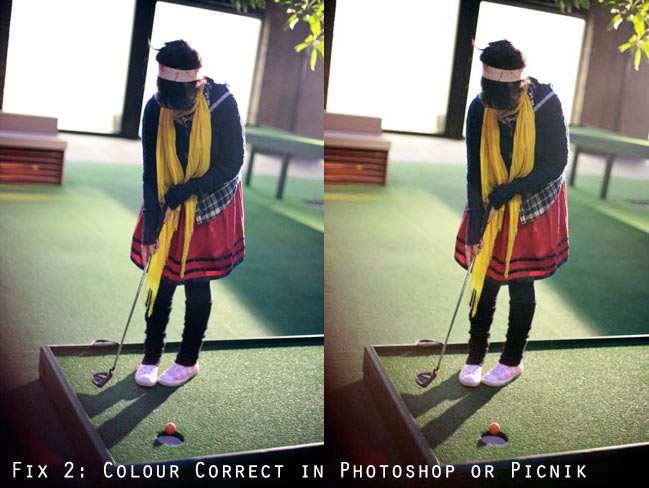
Restore the colours
Oh technology, you can be fabulous. There are plenty of easy ways to try correcting the colours. In this case, the colours were easy to improve with just a few clicks. The image on the left is the result of just the Auto Colour command in Photoshop, but you don’t need Photoshop or any expensive software to edit an image. The version on the right was colour corrected with the auto-fix button on Picnik, a free online photo editor. I would say these are good enough to work now, though more fine edits could improve the colour even more, which might be worth the time for extra-special images.

fix a photograph
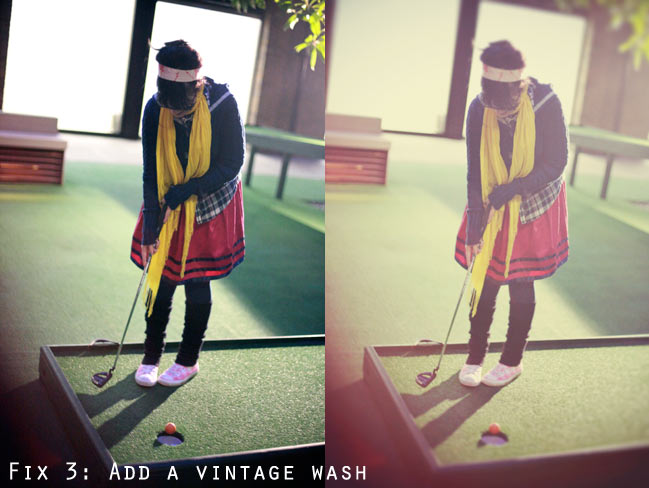
Give it a vintage wash
Or it can be fun to go in the other direction entirely and go with something that is very obviously edited. This is a case of personal preference – love or hate obvious processing! The processed version on the right comes from Rad Lab by Totally Rad Actions, and again you could use Picnik for vintage effects.

Ready for assignment three? Find a photo in your existing library that has a story you like but the quality of the image lets you down. Try any or all of these fixes and see what happens!

Good luck and happy editing!

click here for more camera school posts

Camera School 02 :: Let ISO set you free

photography class for scrapbookers :: setting ISO
I promised I wouldn’t make this technical. I promise to keep that promise. And that’s because my entire process for taking a picture is about stripping away as much of the technical as I can. Basically if you can totally figure out just a couple basics, then the rest gets really easy.

You know what else I promise? No triangles. Hear me out.

Exposure is a fancy photography word that refers to how much light is in the picture – is it too light, too dark or just right? And if you read articles or indeed whole books on exposure, they will inevitably start talking about this triangle where you have to balance three different things on every single shot to get the exposure right. And okay, if you break it down that is entirely true, but the triangle thing just does not work for me. Because it makes it seem like you have to come up with this perfect combination of three different things every single time we click the shutter. Who has time to think about all that stuff on every shot? (Okay, superhero photographers totally do. I am not a superhero photographer and I’m cool with that. Way less pressure to save the world.)

So I would rather think about just one technical thing on each shot. I think that’s an amount of technical stuff I can handle on a shot-by-shot basis. I’d rather get the other stuff sorted and out of the way so I can minimise what I have to consider for each click. I start with the easiest of the three things: ISO.

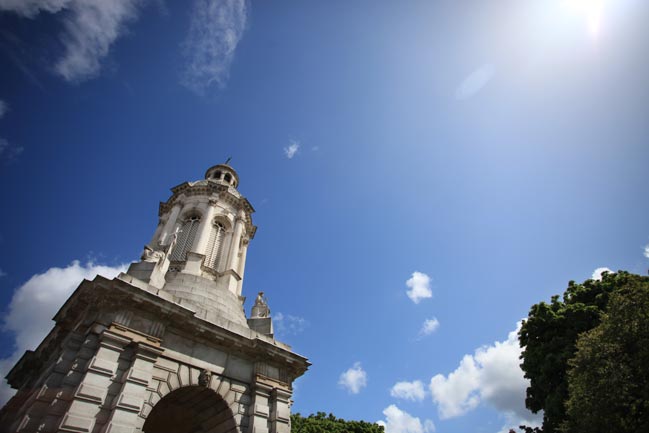
sunny day - low iso Trinity College, Dublin, on a sunny day – shot at 200 ISO. SOOC.
Now don’t even go into worrying about what ISO stands for. There will be no quiz. The IS in ISO has to do with the novel idea that there should be an international standard. Back in the seventies, the various film companies thought it would be helpful if a 100 film was always pretty much the same thing and a 400 was always the same and an 800 was the same, and so on. No matter what brand of film you bought. I love that they did this. So when you had a film camera, you had to look at the conditions, choose the film speed that would be best for those conditions and then you were stuck with that ISO until you got to the end of the roll of film. In general, 100 film was great for bright sunshine, 400 was a happy medium for overcast days or shooting indoors and 800 or higher was what you needed to shoot in low light. I’m simplifying, but this is the overall outline. Three points to remember: 100, 400, 800. There were plenty of other speeds, but those three would get you through the vast majority of all your needs.

But that was film. Now we have digital equivalents and they kept the term ISO except THEY DIDN’T FOLLOW ANY STANDARD. Oh nice one, camera companies. Really. So my 100 may not be your 100 and that’s not super helpful. But the 100, 400, 800 rule is still your best bet. They didn’t follow the standard closely but they did stay in line with the general concept. So if it’s sunny, you can set your camera to 100, if you’re indoors or it’s overcast outside, try 400 and if it’s pretty dark, try 800. Now you might have other options to go much higher than 800 now – it just depends on your camera. And because digital cameras don’t follow a single standard, you may want to try out other numbers around 100, 400 and 800 to see if your camera just likes another number better. But if you can remember those three numbers, you can set the ISO once for your conditions and then stop thinking about it entirely until those conditions change.

I really like it when I can just set something, leave it and not have to think about it.

It can also completely ruin everything. Let me illustrate.

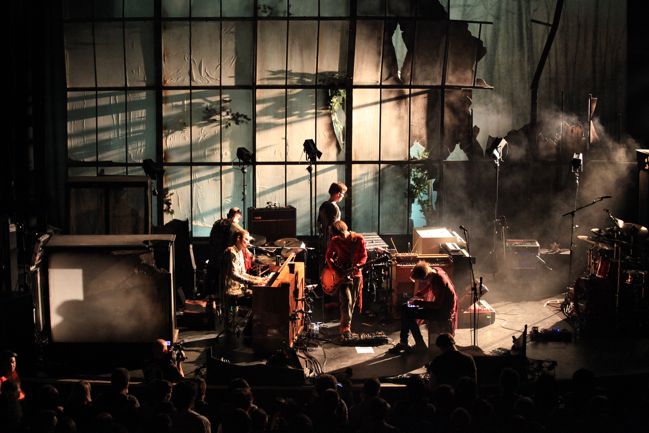
lowlight - high ISO Not the 2006 pictures, but another concert with low light. This is at ISO 5000. Really. SOOC, but this lost a lot of detail in shrinking it for the blog.
In 2006, I shot some concert photos in a dark club with a few stage lights. So my ISO was set as high as I dared since there wasn’t much light at all (and flash and concerts do not mix). No problem – shot the pictures, came home, went to sleep.

Except the next morning we were going on holiday. To Iceland. In summer. WHEN THE SUN NEVER SETS, essentially. Do you see where this is going yet? I was taking pictures in bright sunshine at almost all hours of the day and my ISO was set somewhere around 1200 for four entire days. (You can see a sampling of those shots here.) I think I was just so excited about being there that I forgot how to work my camera.

If you shoot in bright sunlight at a high speed (like 800+) when you really only needed 100 or 200, your photos can still look fine on the view screen of your camera. But when you download them to your computer or print them, you’ll find they aren’t as clean as you would like. There’s lots of grit (often called ‘noise’) and the colours don’t come out as smooth as they should. If you try to zoom in or print those photos at a big size, they will be a bigger mess. It looks similar to when you take a really low quality digital image (like a quick snap from a phone or a really old digital camera) and blow it up – it’s not quite boxy pixels but it’s also not quite right either.

So while I love that I can remember those three numbers, set my ISO and not worry about it until the conditions change, I must worry about it when the conditions change. On the fifth day in Iceland I reverted to my normal habits, turned the camera on and immediately went to set the ISO, which was when I first noticed that giant mistake I had made. Time to set the ISO right and move forward. The photos from the second half of the Iceland trip are so much nicer than the first half. Smooth even. There are a few shots in there that I totally love to this day, and they were taken with my very first digital camera (the Canon 300) and today there are mobile phones with more detail to the images. Oh digital technology: you are so fickle and changing unlike the long life of a film camera!

If you learn from my non-ISO-changing stupidity, you can avoid your own batch of priceless-but-gritty photos and remember the key element here: set the ISO once for your conditions and then stop thinking about it entirely until those conditions change.

shooting indoors - middle ISO Indoors with a mix of light sources, shot at 640. SOOC – though this is the kind of image that would benefit greatly from some additional processing.
Lesson two’s assignment has two options. Option A is for anyone who just read this and thought I don’t even know where the ISO is on my camera. It is totally time to learn. All cameras have different buttons and wheels so there are two places that can help you super quick: your camera manual (look up ISO in the index) or Google (type in ‘how to set the ISO on’ followed by the name of your specific camera). Seriously, seriously, seriously find how to change the ISO. It will set you free.

Option B is what you do once you know how to change the ISO. Take two clicks of the same scene – one with the correct ISO and one with it set way wrong, like a high ISO for a sunny day or a low ISO for darkness. You’ll probably need to do this in a mode other than fully automatic, since many completely automatic modes will set the ISO for you, but for the moment it really doesn’t matter which mode you pick. On an SLR, go for P (program mode) or A/Av (aperture-priority – Nikon and Canon use different notation). On a point and shoot the modes are a bit less standard from camera to camera, but for the sake of this exercise you can pick any mode that lets you set the ISO. Remember that 100-400-800 guideline and take two pictures that are identical except for the ISO. One shot with the right ISO and one with something to another extreme.

Transfer those pictures to your computer and have a look at them full screen. What happens on your camera if the ISO is too high? Too low? Sure, I could just tell you, but it works so much better to see it with your own eyes. Knowing how your camera behaves in different ISO settings will help you and your camera become buddies. I swear your camera will instantly have more respect for you.

And once you can control the ISO, the rest of this stuff is going to get way easier. Like what we’ll cover tomorrow in lesson three. So go take pictures of stuff!

A note about automatic ISO: I use it for one thing and one thing only. Video. I shoot my YouTube videos with the same camera I use for everything else, and almost entirely with natural light. But there is a problem that the darn clouds sometimes cover up the sun WHILE I AM RECORDING. So inconsiderate. It meant some of the video would be lighter and other parts darker. Setting the ISO to automatic means right in the middle of the video, the camera will compensate for the change in the light. That is awesome, and proves that my camera is willing to join me in the battle against the clouds. Or something. But the rest of the time, Camera and I are all about setting the ISO on a real number, not the auto setting. Added bonus of setting the ISO: longer battery life than on automatic.

click here for more camera school posts

Camera School 01 :: Facing your Fear

camera school :: photography tips for scrapbookers
I’ve decided there is really only one important thing when it comes to photography, and that is to lose all fear. Go boldly in the direction of capturing something new to you. Be brave enough to take pictures that fail miserably and can’t be saved. Don’t be afraid to take a picture in a public space or to take a self-portrait or to ask a friend (or even a stranger) to be your model.

I first started to learn about photography for real in a high school journalism class. Before that, I only had instamatic type cameras – point and shoots with 35mm, 110 or even disc film. In fact, I should have learned something from the disc camera, but I’ll come back to that in a bit. In journalism class they threw photography vocabulary words at us, set us loose with Canon SLRs and sent us into the darkroom to develop and print our own images. The darkroom is magical. You know how memorable smells stay with you? I can dream of the smell of darkroom chemicals. I shot everything with a fixed 50mm lens, printed everything in black and white, and ‘everything’ was a mix of indoor school moments and outdoor school football games. A few of us were able to get a tiny bit of work with the local newspaper selling on our assorted football pictures, because Friday night football was a big deal and I think they paid between $5 and $15 per picture. A few of us absolutely fell in love with cameras and I’m pretty sure I could guess from the roll call of that group of teenagers who still shoots on some form of SLR today.

Then there was the rest of the class. As soon as there was vocabulary and technique and procedure, the group split. We hadn’t even gotten to the fun we could have with composition or depth of field or anything remotely creative: they had hit the wall with the technical know-how and suddenly felt photography just wasn’t their thing. Of course I didn’t realise it then, but years (and so many discussions with scrapbookers) later, it all makes perfect sense. The truth is photography is a balance of technical and creative stuff, and no matter what your gut instinct, there is no reason to be afraid of any of it.

LESSON ONE: Let go of all fear.

You may want a notebook for Camera School, by the way. Somewhere you can track things to do, remember things you want to try and note things that inspire you greatly. And to track your progress through a series of assignments. I’m only calling them assignments to match this whole idea of Camera School and I’ve already told you this is school in the loosest sense of the word, so don’t worry. You can pick and choose what you want to take on. You can take all the time you need. You can work out of order. You can do absolutely whatever you would like really – I’m just going to call them assignments because that makes it clear and easy.

So your first assignment is to take a photo that gets over your particular fear. Which means it may help to identify your photography fears in the first place. Do any of these apply to you?

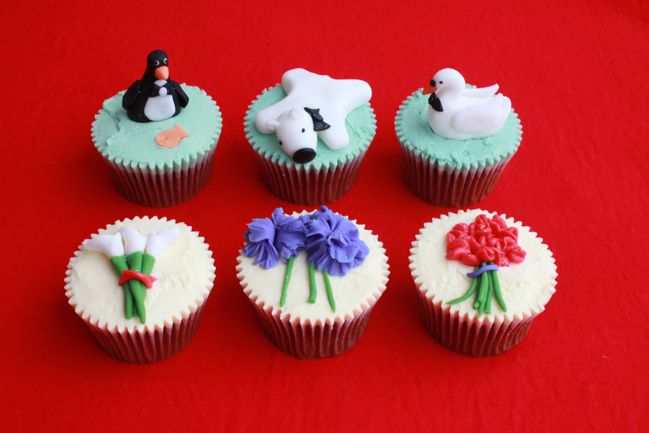
cupcakes Facing my technical fear: shooting cupcakes in an entirely different style for me with some specific technical needs – for this cupcake workshop at The Make Lounge.
Technical fear: When someone starts talking about exposure and aperture and compensation and f-stops and grey cards, you’re convinced it’s another language. If your camera manual intimidates you, this may be you.

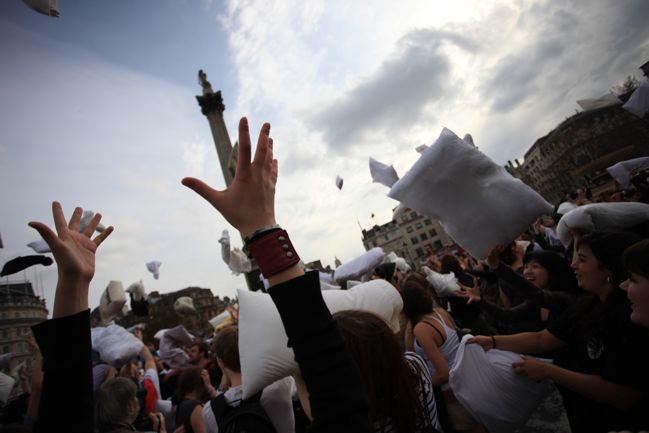
london pillow fight Facing my creative fear: trying to find an interesting angle to shoot for a pillow fight flash mob in Trafalgar Square.
Creative fear: Do you like the safe shot? So most of your images look the same, maybe with the subject right in the centre? Do you always stand straight up to take a picture? Do you see other pictures that look lush but you automatically think you couldn’t take a photo like that? Then creative fear may have captured you, I’m afraid.

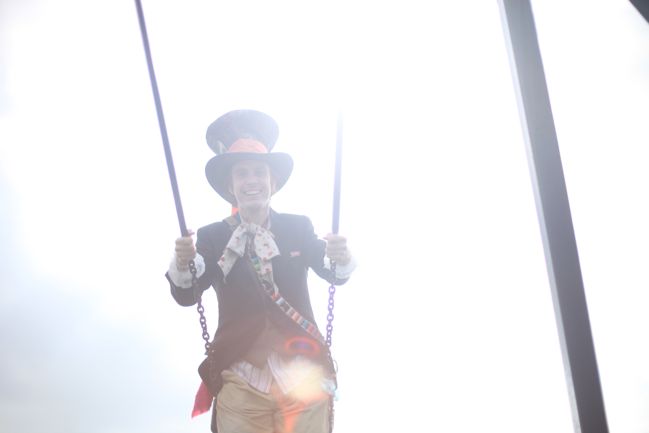
mad hatter Facing my confidence fear: photos, fancy dress and a public playground filled with staring onlookers? Fear definitely faced.
Confidence fear: If you pick up your camera and automatically become shy and overly polite, this is you. You don’t want to get in someone’s way – to the point you will lose the shot. You would be terrified to take a picture in a shop or a library or in front of many people. The idea of asking someone if it’s okay to take a photograph in front of their house absolutely and completely fills you with dread. You want to take pictures of other people so you can learn, but you’re totally lost with how to make that happen.

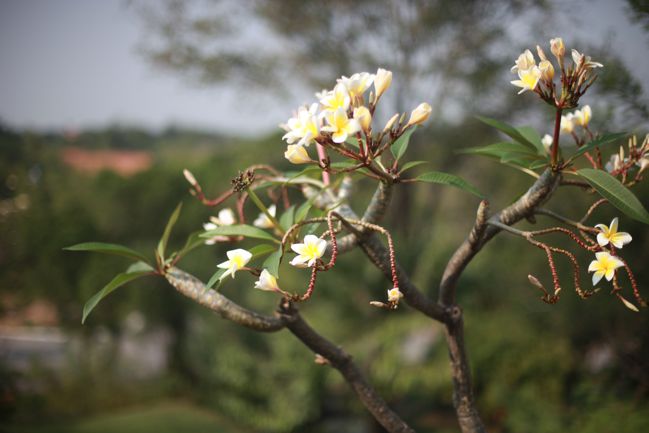
flowers Facing my accuracy fear: a lucky shot grabbed while riding on a golf cart and not looking through the viewfinder.
Accuracy fear: A little like creative fear but more along the lines of specifically knowing that a shot might not work and therefore you would rather not click the shutter button. Trying a something that might not work with the settings you know pretty much freaks you out. The fact that I take a fair amount of shots without looking through my viewfinder in any way makes you think I am a crazy woman. You want everything lined up, perfectly framed and perfectly exposed at all times… because a blurry or ill-coloured photo makes you feel like you totally screwed up.

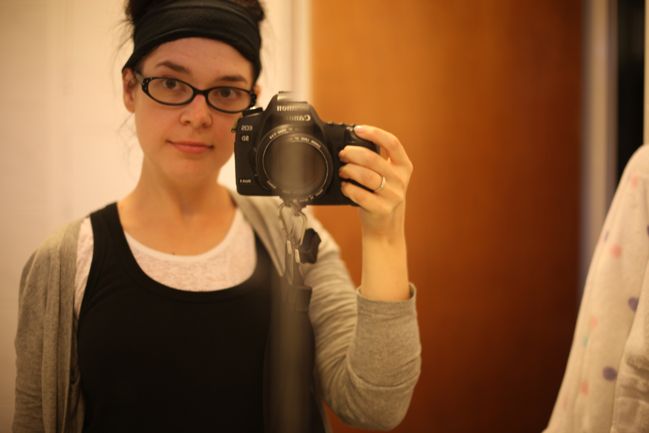
mirror self-portrait Facing my self-portrait fear: trying to capture something very real that I wouldn’t normally photograph, complete with eyes that say I need more sleep and vitamins.
In-the-picture fear: Right now, you’re already dreading me asking you to take a self-portrait. You are absolutely fine with photographs as long as you are not in them. Turning the lens toward yourself makes you want to run and hide like you just saw something dart across the floor that was part rat, part tarantula.

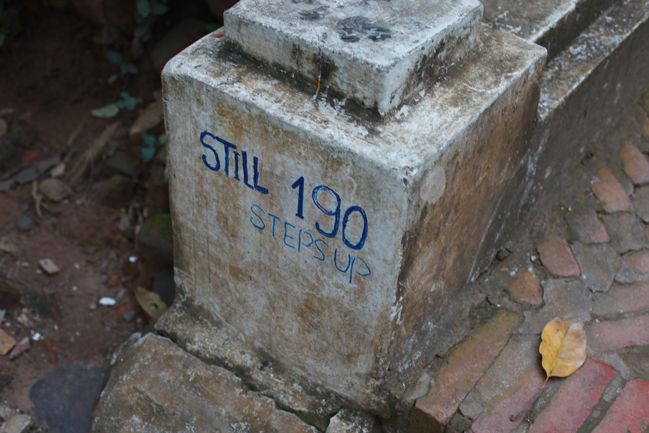
steps in luang prabang, laos Facing a whole bunch of fears at once, but mostly the idea that once I climb a zillion stairs to get the great view, will I make it back down with taking a tumble with my camera?

Can’t-put-my-finger-on-it fear: To be honest, you’re not quite sure why you don’t push yourself to take better pictures. You want to, but you haven’t found the right thing to motivate you to step up your game. You might not feel afraid of anything at all, but in a way, you’re a little bit afraid of just being awesome. Or in general, you’re not too sure what it is that holds you back.

Got it? If you have found something there that applies to you, it’s time to set it aside. Officially. At least until the end of these blog posts. I’ll make you these promises:
You don’t have to share a photo with anyone in the world if you don’t want to.
Your camera will not explode or laugh at you if you try something and the pictures just don’t come out that great.
You won’t have to memorise a list of vocabulary words or read your camera manual from cover to cover. (I have to admit it can be handy for a few things though, okay?)
You don’t have to have any special fancy camera.

But I also hope:
You will give new things a try.
You will let yourself be happy with your work.
You will accept compliments from others.

Because all three of those things make for a lot of good in life, I do believe.

So here’s assignment one: take one photo that proves you can set aside your personal photography fear.

There’s no deadline. You don’t have to share (but if you would like to, please do). You can interpret that assignment in any way you like.

Just let it go and click the shutter, and I’ll be back here tomorrow with something new.

By the way, all of these pictures are straight out of camera (SOOC) without any editing other than resizing and compressing for the web. They are not perfect by any means – but each one represents some bit of progress in my own little journey. Throughout Camera School, I’ll tell you what edits I’ve added to the photos, I promise.