Camera School 03 :: Fix a photograph
When I flip through my photos, there are two types of pictures that make me happy to be a scrapbooker: photos that are beautiful and photos that tell a good story. Unfortunately these are not always the same images. We all have those photos, right? The kind that capture an amazing memory but they are blurry or washed out or yellowed or whatever else makes them imperfect.
Sometimes, that amazing moment is enough to make the photo perfectly imperfect and I leave those images alone entirely. But sometimes, it’s worth a shot to improve an image. Take these two pictures for example:
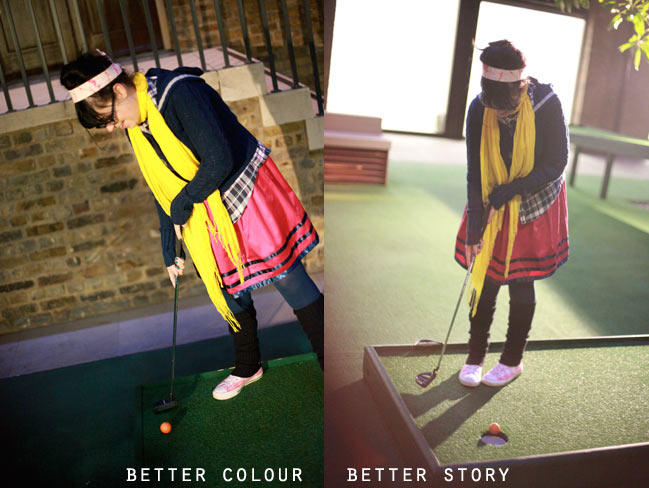
Both taken on the same night, when we went to play Q-Golf, which is a bit of a mix of miniature golf and billiards, in which you work your way through a course with both a pool cue and a golf club. It was outdoors at night and the flood lighting was uneven. Which made photos a bit more of a challenge than usual. The photo on the left has good colour and made the best of the lighting, but there’s not much to the story here and the composition isn’t particularly fabulous. The image on the right is loaded with way more meaning – it proves I was actually able to sink that darn golf ball eventually (trust me, I need proof!) and captures my ‘I am really concentrating’ posture. But the lighting is all off so the colour is completely washed. I’d much rather scrapbook the photo on the right, but since it is in focus it’s worth a try to improve it a bit. I usually go with one of three options: cropping, colour-correcting or adding a vintage wash.

Find a creative crop
Sometimes a crop can help… other times it doesn’t do much at all. Converting an image to black and white can get rid of the colour problem. Here the crop doesn’t really help tell the story and there’s not sharp enough focus for it to be a great improvement, but it’s worth a shot as sometimes it’s the magic fix.
Restore the colours
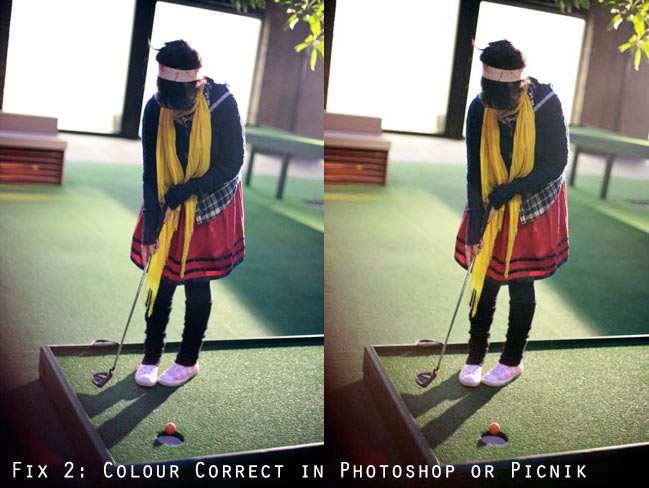
Oh technology, you can be fabulous. There are plenty of easy ways to try correcting the colours. In this case, the colours were easy to improve with just a few clicks. The image on the left is the result of just the Auto Colour command in Photoshop, but you don’t need Photoshop or any expensive software to edit an image. The version on the right was colour corrected with the auto-fix button on Picnik, a free online photo editor. I would say these are good enough to work now, though more fine edits could improve the colour even more, which might be worth the time for extra-special images.
Give it a vintage wash
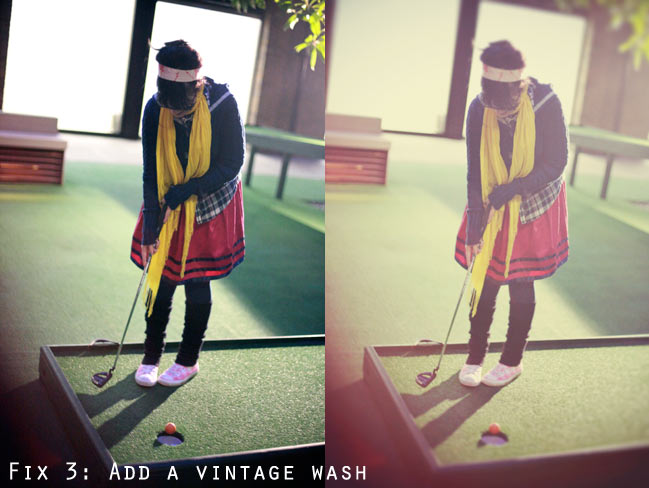
Or it can be fun to go in the other direction entirely and go with something that is very obviously edited. This is a case of personal preference – love or hate obvious processing! The processed version on the right comes from Rad Lab by Totally Rad Actions, and again you could use Picnik for vintage effects.
Ready for assignment three? Find a photo in your existing library that has a story you like but the quality of the image lets you down. Try any or all of these fixes and see what happens!
Good luck and happy editing!
![]() Read more about: camera-school
Read more about: camera-school
Next post: Power of Making - exhibit at the V&A
Previous post: Scrapbooking Sketch of the Week


