pretty paper. true stories. {and scrapbooking classes with cupcakes.}

lovely to meet you Twitter Facebook Pinterest YouTube

Take a Scrapbooking Class

online scrapbooking classes

Shop Shimelle Products

scrapbook.com simon says stamp shimelle scrapbooking products @ amazon.com shimelle scrapbooking products @ amazon.co.uk

Reading Material

travel

online scrapbooking weekend Category

How do you deal with imperfect digital photos?

how to deal with imperfect digital photos
how to deal with imperfect photos
Like with so many things, there has to be a balance with scrapbooking, right? The need to be in the moment has to balance the desire to have photographs of plenty of real life events, both big and small. I will be the first to admit that this very balance creates some very imperfect photos in my collection. Pictures I could certainly compose, focus and light much better with even thirty more seconds of thought. But if it’s a moment that will be gone thirty seconds later, what’s the use?

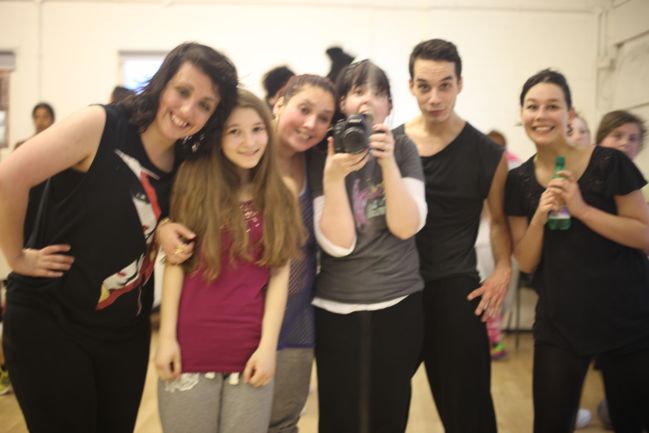
And so I end up with photos like this: this is a picture from this past week taken in a total spur of the moment, straight from the camera (except for resizing) so you can see all its flaws. Like how I didn’t even notice the line in the mirror join went right through my face, how the focus is not sharp (and it was taken with far too shallow depth of field to ever get all six of us in focus), how the colouring isn’t great. But that’s the shot I have from that particular moment: take it or leave it, right? And as a scrapbooker, the keeping is far more likely.

So my question to you this time is How do you deal with imperfect digital photos? Do you delete them except in certain circumstances? Do you try to identify them quickly and recreate the moment as much as possible? Do you try printing them small or large or editing them to look a bit better? Do you include them in pockets or somewhere less obvious than your clearest, most beautiful images? Do you keep meaning to scrapbook but just put them back in the file? Dish the dirt on your strategy and whether it works for you.

how to deal with imperfect digital photos
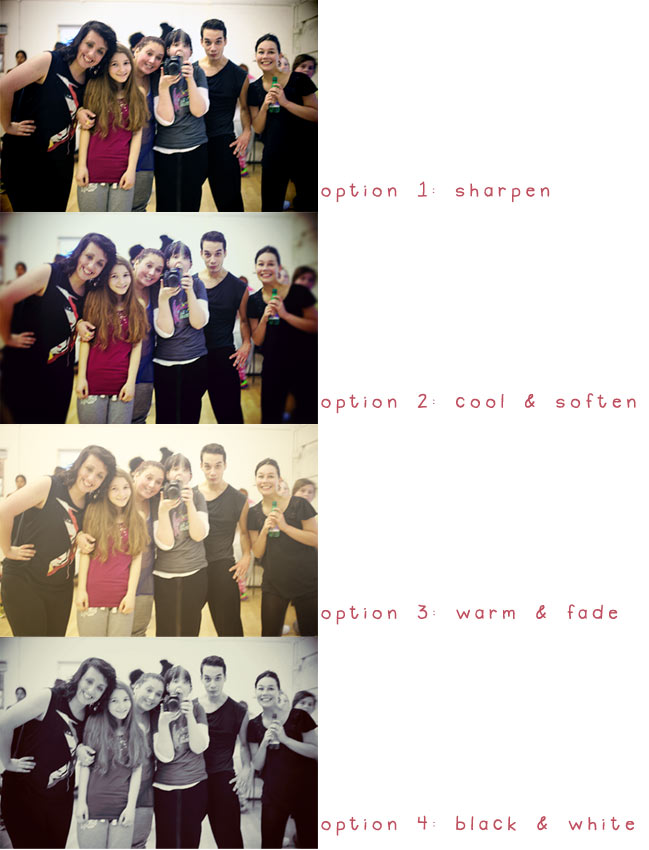
Faced with an image like this, I’m likely to turn to Photoshop and make the best out of an imperfect photo by arting it up just a bit. None of these strategies will take an out-of-focus, poorly composed photo and make it win prizes, but they do make things just a little more clear for me to remember that moment in my albums. The four options I come back to each time are to sharpen the image (to see if it’s possible to crisp up something that is just barely out of focus), to cool the colours and soften the focus even more so there’s an obvious look of something other than digital precision, to warm and fade the image so it mimics an analogue photo that sat on an old roll of film for far too long, or to convert the image to a black and white that captures the right feel.

After a long time using Totally Rad’s separate actions for my photo editing, I switched to their RadLab system, and it is definitely my favourite way to edit images – both the everyday snaps that come out a bit rubbish and the favourite fancy shots too. (If you’re looking for a system like that, I reviewed RadLab here and code 1128SHIMELLE gets you 15% off your purchase.)

I also find the printing small option works wonders for not emphasising an imperfect photo when on a scrapbook page! Easy.

Now… what are your strategies? (And if you’ve been editing with Picnik – have you made any decisions about what you’re going to use after their site closes next week? A bit sad about that!)

Scrapbooking Challenge :: From One to Another

scrapbooking challenge :: from one thing to another
scrapbook page
For your next challenge, I’m delighted to introduce Relly Annett-Baker as a special crop guest. I love her take on the process of how she takes an inspiration piece and makes it her own, which you might see as a unifying theme so far this weekend! I hope you enjoy her story of creating a scrapbook page! Don’t miss her challenge at the end of this post.

I’m what you might call a time-poor, stash-rich scrapbooker. I have mucho mucho paper, embellishments, photos and stickers and maybe an hour or two a week in which I can scrapbook. I travel a lot, work hard and I also have two little boys who fill all my hours with hilarious antics and sweet moments. This means I have a lot I want to scrapbook as well.

After my second baby was born, I stopped scrapbooking for over a year because I wasn’t sure I’d ever have time again but I kept checking message boards and blogs, always thinking ‘I should really …’. Most of all the thought that Thing 1 would have a scrapbook of his baby and toddler years and Thing 2 wouldn’t was what prompted me to start making pages again. Before I had children and much more time to myself, my pages were detailed, distressed, very layered and artsy. When I returned I made a decision – I was going to keep stuff a lot simpler, and I was going to focus on the story behind the pictures. I didn’t have time right now for making miniature artworks. Just for memory keeping.

So, I started by doing something I’d never done a lot previously. I scraplifted. I started by scraplifting myself. I found pages in Thing 1’s album that I could copy (and simplify) for Thing 2’s album. I looked at design team galleries and started copying stuff from there too – sometimes whole pages, sometimes details. One thing I found a lot was that I was drawn to pages with sweet girly details but with two digger-dirt-and-danger little grub attractors at home I needed to do some rework to turn them into a page that fitted my photos. Slowly, this became a challenge to me. Can I recreate this pink and frilly page in a style that fits me? I came up with a process and I’m going to share it here, so please play along!

Click here for more about this album.

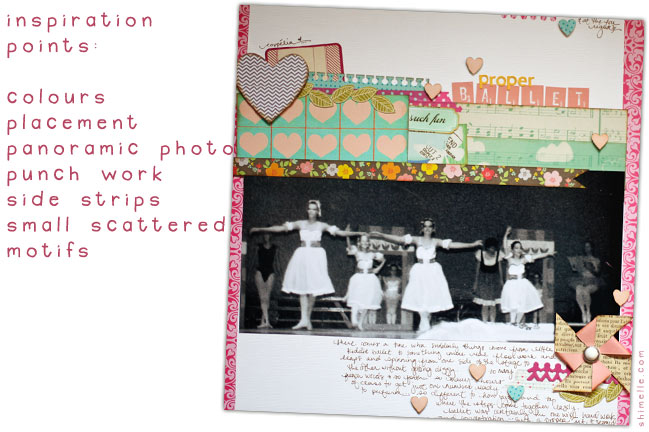
First, I get the original layout up where I can see it – usually on my phone or laptop. Here I took a layout of Shimelle’s (doesn’t she look adorable in her ballet outfit?) with a variety of photo sizes on it and made a start.
scrapbooking
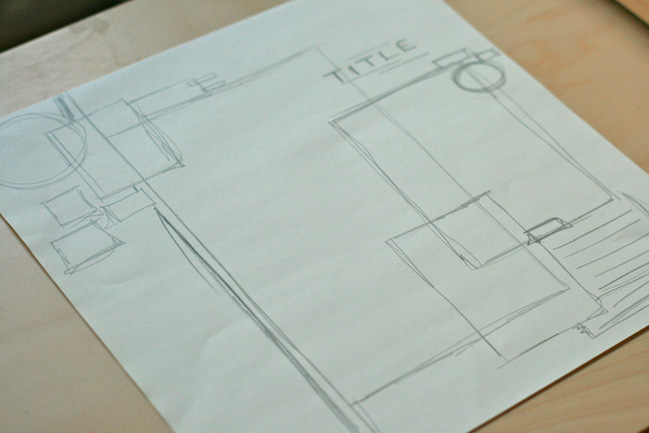
I then take a scratch piece of 12×12 – usually an insert from a page protector – and use that to copy down the sketch. I’m pretty rubbish with proportions so if I do it on actual 12×12 paper I get a better feel for the sizes I’m going for.
scrapbooking with a sketch
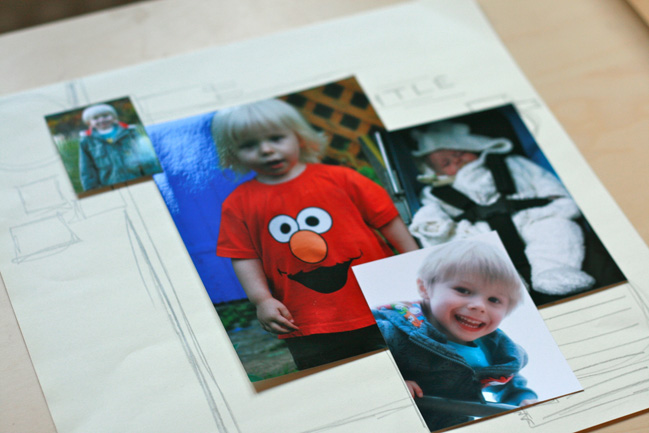
I knew I had a ton of pictures in 3×4, 6×4, and 7×5 of my oldest boy that I had taken over the years. You know the sort, super-cute snaps but no particular story to them. The ones I picked out were all from various times in previous summers, around his birthday, so I decided to tell that story and show him growing like a weed!
scrapbooking
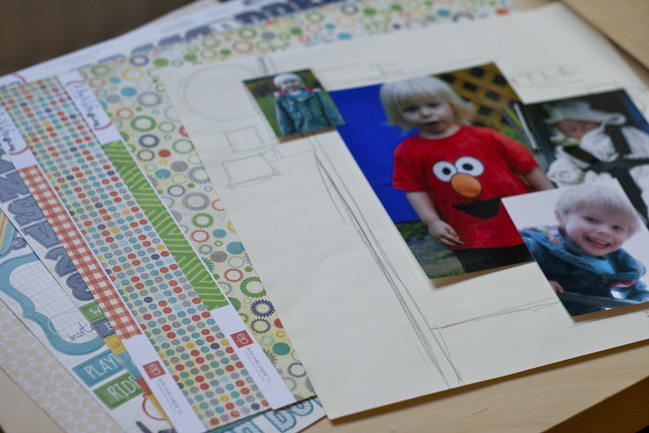
I assembled my papers, looking for at least three contrasting patterns as I wanted to mount my pictures, and one small repeating detail pattern to replace the floral design in Shimelle’s original layout.
scrapbooking
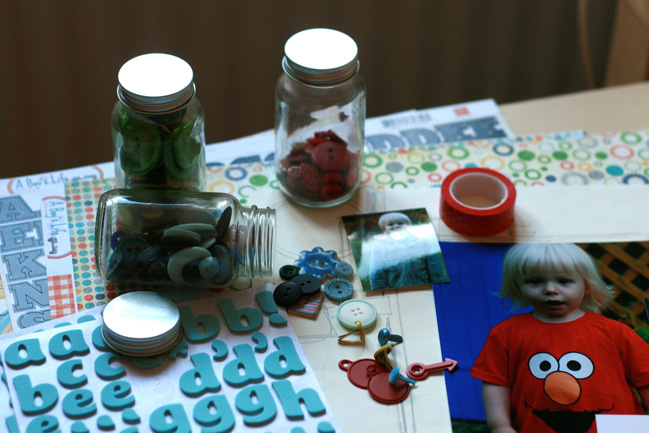
I then chose some stickers and embellishments that I thought would fit. Shimelle’s design had several clusters of small embellishment around the pictures and I wanted to recreate this. I tend to get this stuff out early, so that I can look at what I want to work with, rather than tripping up on boxes round my studio as I rush to finish. I often have to make my layouts in several 15 minute blocks so this helps me remember what I was planning too.
scrapbooking
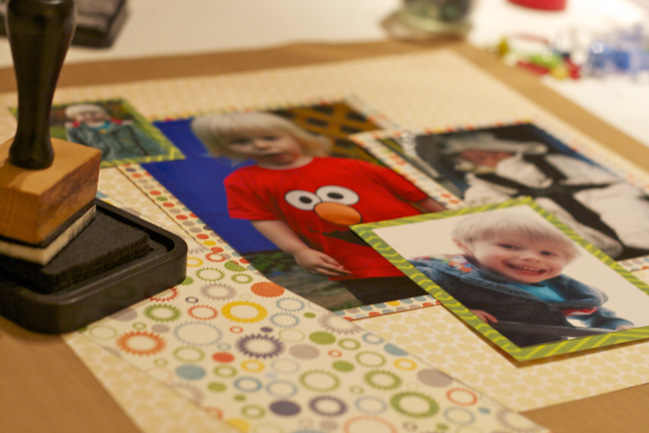
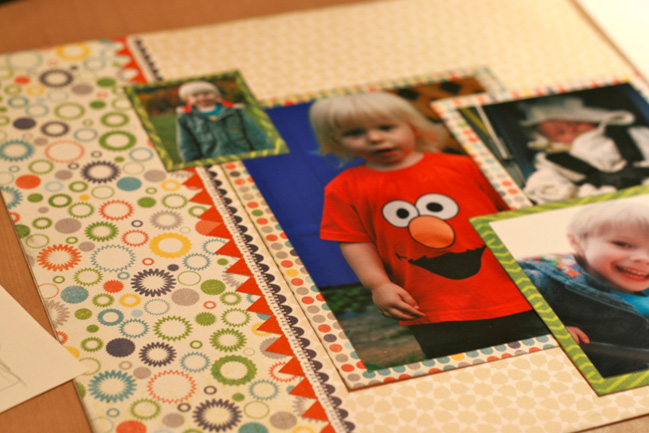
Next I cut the paper, according to my sketch and mounted my pictures. I knew my photo sizes were a little different from the original layout so that some re-arranging would be required. I decided to move the largest photo down a little and move the journalling block to the bottom left. The baby picture would balance it on the other side. I then went ahead and inked all the pieces.
scrapbooking
I also chose two border stickers to put back to back alongside the left-hand strip of patterned paper, like in Shimelle’s layout.
scrapbooking
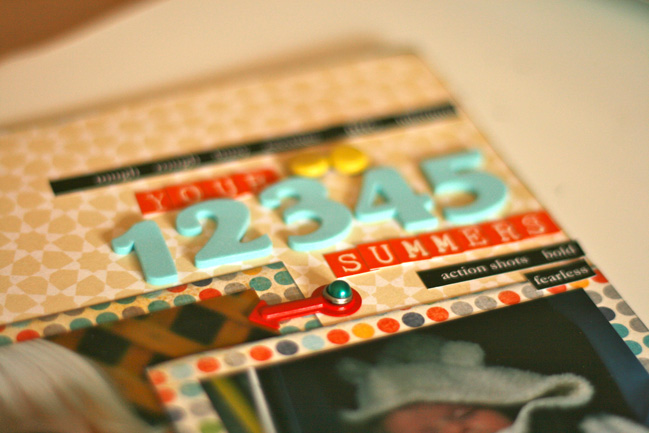
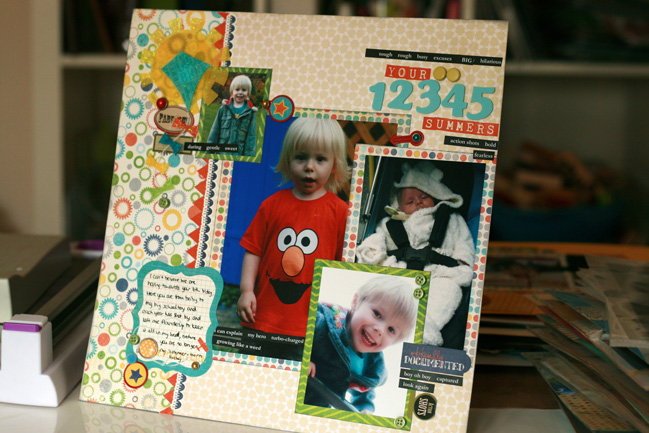
Once the photos are down, I usually create my title next and that’s what I did here. I copied the contrasting small flat stickers and larger dimensional letters for my title from the original layout. I’m plagued by lots of leftover numbers on my sticker sheets, so I decided to use all the numbers up to five. (Although I guess you might assume my son is 12,345 years old! )
scrapbooking
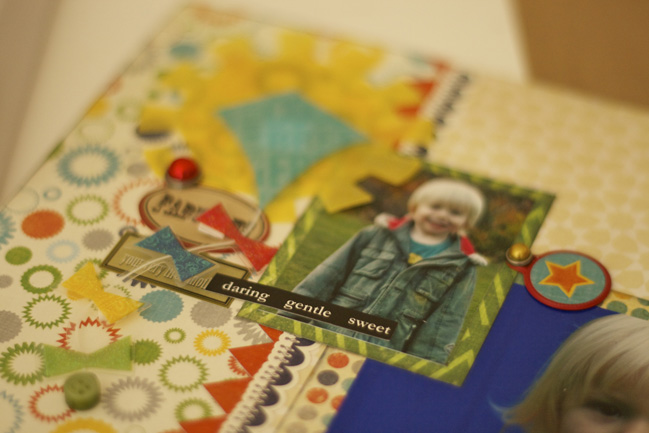
I looked back at the sketch and remembered that there was a large round embellishment top left and a large heart top right. Weighing up my options, I decided to ditch the heart cluster and instead focus on the top-left. This had been a clock but I decided the summer theme needed some sunshine. I also found a matching kite that I mounted on sticky pads for dimension.Finally, I added some sticker clusters to add some horizontal lines to a very vertical layout, and some primary colour embellishments to match my pictures.
scrapbooking
And so, my challenge to you is to find a layout you love that isn’t in a style or colour scheme you’d usually use and scraplift it with a twist that makes it yours.

To enter this challenge create a new project by changing something dramatic – like how Relly started with something very girly and made it a boy page. You can use any page from your pins, bookmarks or favourites – you can even scraplift yourself and adapt a favourite page. If you prefer more direct inspiration you can use these two layouts as your start or take a look at a few favourites I’ve bookmarked recently: one photo, two photos, two square photos, three photos or four photos. Then upload a picture of your project to a gallery or your blog and link to it here! Entries close at the end of next weekend.


By day, Relly is a Content Strategist, helping companies sort out their online content. By late-afternoon until around 8pm, she’s Mummy to two little boys. By 10pm, she’s usually in bed. In the twilight hours between these happenings she scrapbooks, bakes and makes things for her house. She tweets prolifically as @RellyAB and has a new blog, Loves Handmade, which she absolutely promises she will update with some tutorials and layouts. Right after this cup of tea. Zzzzz.
.


Scrapbooking Challenge :: Wilna's Inspiration Points

scrapbooking challenge :: inspired by wilna furstenberg
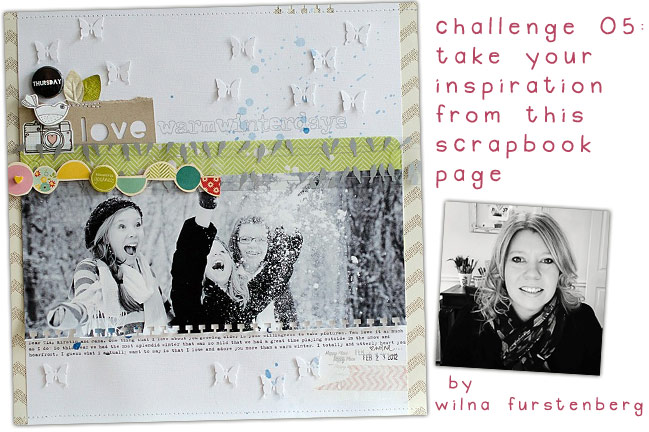
scrapbook page by wilna furstenberg
I love the concept of inspiration points: looking at a scrapbook page you like and identifying different points that could inspire something of your own. It can be anything from something small, like seeing a layout with pink and suddenly feeling like you would love to create a pink project to scraplifting the placement of all the elements of the page.

scrapbooking challenge :: inspired by wilna furstenberg layout ©twopeasinabucket.com
I’ve been coming back to this page by Wilna Furstenberg in my bookmarks, thinking I loved the design but worrying that I wouldn’t like something I might make like this with my own photo because the picture makes it extra amazing. The expression of joy on her daughter’s face is just fabulous! But in coming back to the idea of inspiration points, I thought maybe I could give it a try after all… and I would love for you to give it a whirl with your own choice of points!

See more of Wilna’s work on her blog or in her page gallery.

scrapbook page
There are so many things you can identify on Wilna’s page and use just one, a few or a whole bundle. I started with the combination of the white cardstock, the side strips and the panoramic landscape photo, even though I didn’t have a beautiful picture like her page. (By the way, if you’re starting to see a theme in these layouts, you’re not wrong, and all will be explained before the weekend is out!)

Now it’s your turn: take a little or a lot from Wilna’s page. You could easily adapt this design to include two landscape 4×6 pictures instead of one large print. You could try the tone on tone punches that I didn’t put to use on my page. Adapt as much as you like to make it work with your own style, photos and pages!

To enter this challenge, create a new project taking at least one point of inspiration from Wilna’s scrapbook page. Upload it to a gallery or your blog and leave a link on this post. Entries close at the end of next weekend!


Scrapbooking Colour Challenge :: Yellow, Grey & one other colour

scrapbooking colour challenge
scrapbook page
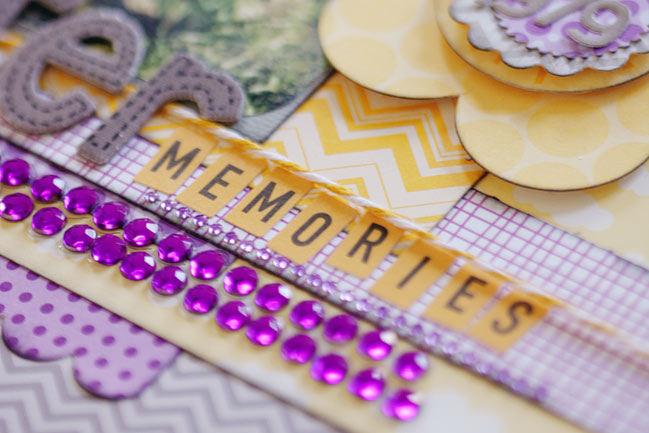
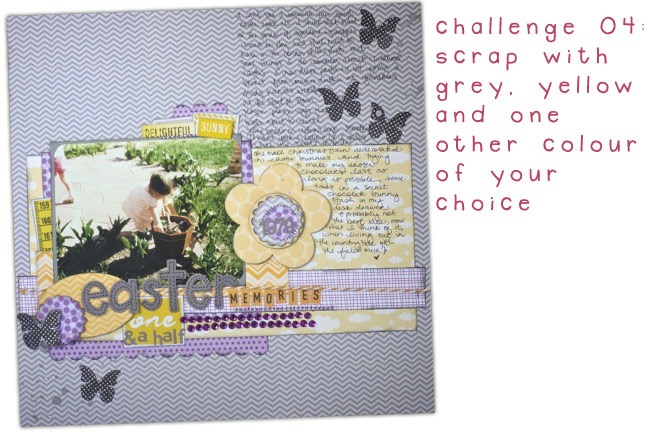
How about a colourful challenge this morning? But instead of giving you a set combination to follow, it’s a bit like a choose-your-own-colour-adventure. So don’t be scared from this little preview: I promise you don’t have to work with purple unless you choose to do so!

scrapbooking challenge
Instead, your challenge is to scrapbook with yellow, grey and one other colour of your choice. Yellow and grey has been a fashionable combination for a couple years, and this year I’m loving how designers have started to inject other colours with this combination to keep it fresh and new. Yellow and grey look great with turquoise, pink, red, navy… so many different looks. For this older Easter photo, I went with purple (you can see the supplies here, at the bottom of the page). As I obviously don’t have a clear memory of the moment captured in the picture – and I also don’t have lots of photos from Easters growing up – I used this page to record a variety of jumbled Easter memories from childhood, even if they didn’t come from this particular year.

For this challenge, you have two chances to win from just one layout! Two Peas are also making this their challenge of the week, so if you upload your page to the gallery there and tick the box for that challenge, you can also be entered to win a gift certificate there.

Speaking of which, how about a special discount for shopping at Two Peas? Throughout the crop, you can fill up your bucket, then when you check out, enter code SHMRCKS to receive a special bonus: you’ll get free domestic shipping off an order of $50, but even more exciting, you’ll get an extra discount for your next offer – $5 of a $50 order or $10 off an order of $100. Perfect to order something now then look forward to more new things later, knowing you can take that discount off the top! (Thank you so much for shopping at Two Peas through my links: it is what makes it possible to hold events like this. I earn a small percentage of the orders placed through my links, and that’s what pays for the hosting costs of the website and for all the prizes and special guests that come as part of the weekend! I love that I can share it back out with all of you who come to read my little corner of the web.)

To enter for a chance to win here, create a new project in yellow, grey and one other colour of your choice, then upload it to a page gallery or your blog and leave a link below. Entries close at the end of next weekend.


How do you use washi tape in scrapbooking?

how do you use washi tape in scrapbooking
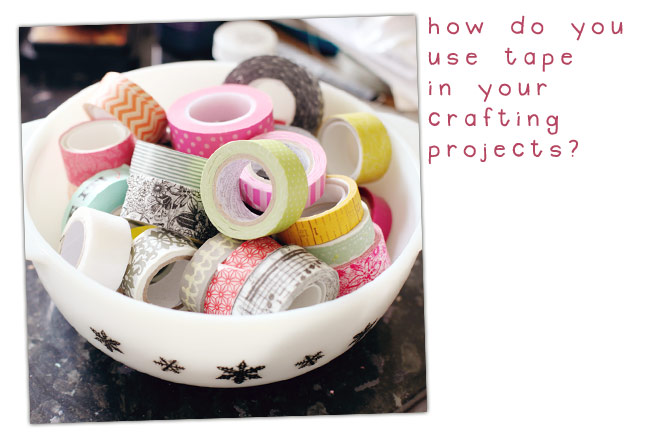
The next question of the weekend comes from a recent discussion on the Two Peas message board: what’s the use of washi tape?. Or indeed, any tape for that matter. Is it something you use in your papercrafting?

I definitely love it and I replied in the original question with these suggestions:
…a photo frame – both over and under the photo look cute! You can square it off to be neat and tidy or leave each piece a bit long and tear it for something more freestyle.
…add a strip along one edge of the page (or both the top and bottom or right and left edges)
…crinkle or ruffle it up and top with a brad or other embellishment.
…take your tapes and alternate strips down the middle of the page, then add photos and everything else on top
…tear a strip and add it to the top of the photo, like you’ve stuck it to the page with the tape.
…add a fold-out piece to your page (either on the layout or on the page protector) using washi tape as the hinge.
…hide your writing in an envelope and use washi to close it (you’ll be able to open and close it over and over again since it doesn’t stick in the same way as normal tape).
…make a noughts and crosses (tic-tac-toe) style grid from washi tape. In each gap, add a photo or embellishment.
…make me a card and seal the envelope then add a strip of washi and send it to me in the post. Okay. I’m kidding on that one but seriously, it does look cute stuck on pretty much anything.

Plus there are some great examples that have been posted on that thread too if you would like some visual suggestions!

Every time I talk about washi tape, I have the same general thought: it’s like a border sticker that never runs out! Admittedly, a roll of washi tape can be more expensive than a single sheet of border stickers, but it’s rarely more expensive than two sheets, and you get yards and yards of the stuff. Because there’s so much on one roll, I tend to choose designs I know I will use over and over again, even as the paper collections change. Before there was so much washi tape specifically, there were some decorative tapes more like a regular household tape but printed (washi is more like a patterned masking tape rather than clear), and my best choices from way back when are still going strong, like polka dots and grids. So I’ve tried to learn from that in choosing washi tapes I’ll be happy to use for plenty of pages to come!

Of course, there’s also another answer to a product that comes with so much packed into that little package: although it doesn’t really work with clear tapes, washi tapes are easy to share with friends, so you can each buy different tapes then get together for a tape swap (or trade by post). Just take a blank tag or another piece of cardstock and wrap the tape around, and it will stick and unstick just like it does on the roll. I’ve also used this technique to take a few tapes when cropping away from home without needing to take the entire bowl of tape! Perfect for travelling light… well, as light as one can travel for a crafting adventure!

So… how do you use tape? What do you choose in terms of designs? If it’s not something you’ve tried yet, what roll of prettiness might make you change your mind?

And… a little shopping fun if you’re tempted. A) You can find lots of washi tape options here. B)I have a very special coupon code to share with you tomorrow morning, so if you’ve been thinking about a little shopping trip, that might be useful for you!

Right: let’s hear your thoughts on tape!

Scrapbooking Challenge :: Mixing Styles

scrapbooking challenge :: mixing styles
scrapbook page detail
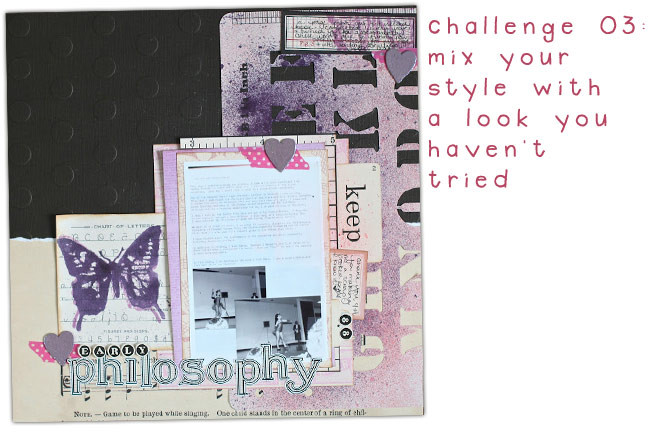
This next challenge was so much fun for me – permission to try something new and just not worry about whether it worked or went wrong. Think you can give that a try? I promise you don’t need to be this inky necessarily – in fact what you decide to try is up to you!

scrapbooking challenge :: mixing styles
One thing I absolutely love about scrapbooking is how there is room for so very much. If you like simple, you got it. If you want to be layered, no problem. If you want to spend hours, if you want to be messy and inky, if you want to stamp or sew or write or type, if you want to use a dozen photos or just one: every single style is completely welcome here. As a result, there are plenty of scrapbookers out there with very different styles to my own, but I still love what they make.

For this challenge, it’s time to choose one of them – either a specific person or a style – and mix it with your own.

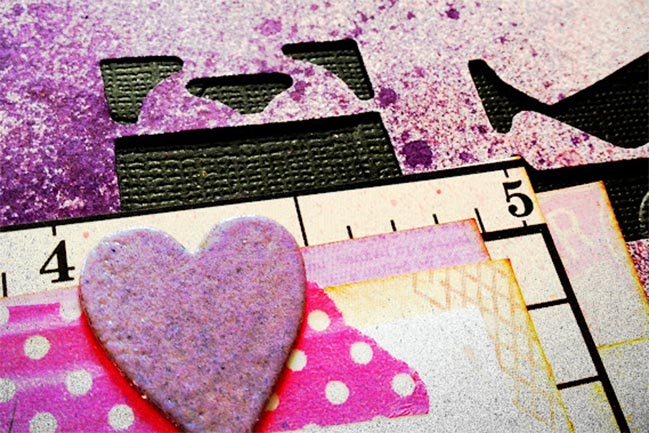
For my page, I took inspiration from Dina Wakley and mixed her inky, artsy style with my own love of layers and butterflies and such. See this post for more details on my creative process learning from Dina and applying her look while remaining true to my favourite things in my own scrapbooking routine.

Now it’s your turn! Choose a style or a scrapper you admire but with a different look to your own pages. Mix something from that with your own style to create something new. Upload it to a page gallery (like Two Peas or UKScrappers) or your own blog and link to it here to enter to win this challenge. Entries should be new projects created in response to this specific challenge and entries close at the end of next weekend!


Where do you find inspiration?

where do you find inspiration
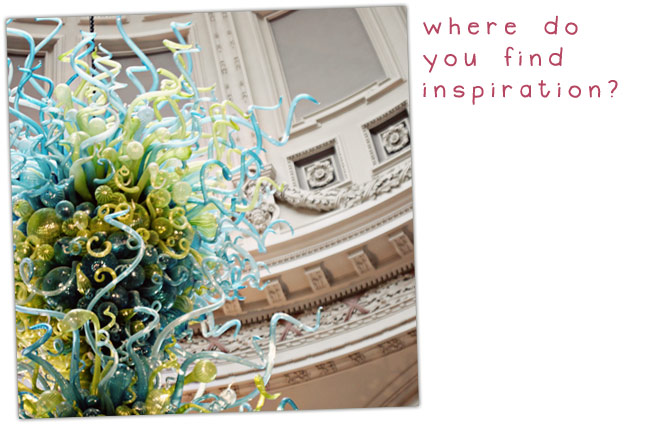
This question came up in the list earlier this week during the 10 Things Q&A, but it was too far down the list to make it into the ten answers. That’s okay, because this is a question that would benefit from all of your input too!

The question: Where do you go to find inspiration?

But we don’t mean taking classes or reading a magazine or browsing a gallery in this case. Those are great ways to find scrapbooking inspiration, but let’s focus on something bigger than that. The kind of inspiration that makes you feel right again, from the tips of your toes to the top of your head. The kind of place that can be your own personal reset button, and when all of life seems to go topsy-turvy, that place will always be there for you.

Here in London, that place for me is often the V&A. There are many museums and galleries I love here, but the V&A is a vast treasure trove of amazement. I have been dozens of times and there are rooms I have not yet entered – something entirely purposeful as I like to ration them so I haven’t worn out the place. I almost always go there alone, though I have been known to meet friends there for coffee or lunch. I start with my favourite rooms and the pieces I’ve seen so many times, like paying a visit to an old friend who can’t leave her house. Then I wander without looking at the signs and just find my way to something I haven’t noticed before and get lost in all the details. I turn my phone off when I’m here. I don’t write or sketch (though I admire the work of many who do). Sometimes I feel like I don’t breathe. It is a beautiful place to be still and imagine all that has been there and what will be there in the future.

And yes, I know I am over the top and it seems cheesy to say I don’t breathe. Clearly I do. In case you haven’t noticed: I am over the top in life. It’s just who I am. Bring me the big, the crazy, the emotional, and I will say yes, yes and yes. So when it comes to finding creative inspiration, I say yes to the V&A.

(Also the Natural History Museum is on the same street and it has something even more over the top than me: DINOSAURS. I love it there. But the V&A wins out because it has never tried to become falsely modern. The Natural History Museum has swapped dioramas for computer screens and modern techno stuff and I prefer my museums to feel a bit… old.)

Other favourites: listening to anything at St Martin in the Fields, sitting at the quiet end of Brighton Beach, walking the South Bank and going into anything that seems lovely that day – like the Tate Modern, the Haywood Gallery or window shopping at the Oxo Tower, and for my little daily boosts, Greenwich Park. It’s right on my doorstep so I go there more days than not, and it’s at the top of a big hill with a view of so much of the entire city, with lots of old and new all there together. And there are deer. And I’m quite worried about what my soul will do while the park is closed to the public for six months this year (it’s hosting the Olympic equestrian events) as I really do find it a place important to my sanity.

So that’s enough of me: share your answer. Where do you find particularly inspiring?

Scrapbooking Challenge :: Mix Three or more paper collections

scrapbooking challenge 02: mixing paper collections
scrapbook page
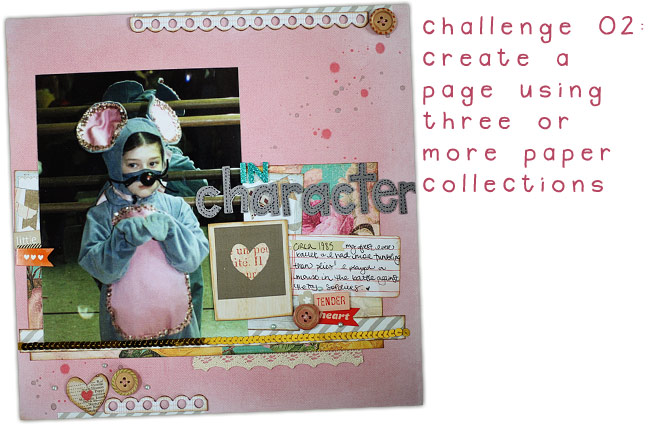
Did you catch the theme in the most recent Glitter Girl Adventure that I may have a habit of mixing manufacturers to create the page kits I like the best? Now it’s your turn to create a project doing just that: mixing it up.

scrapbooking challenge :: mixing paper collections
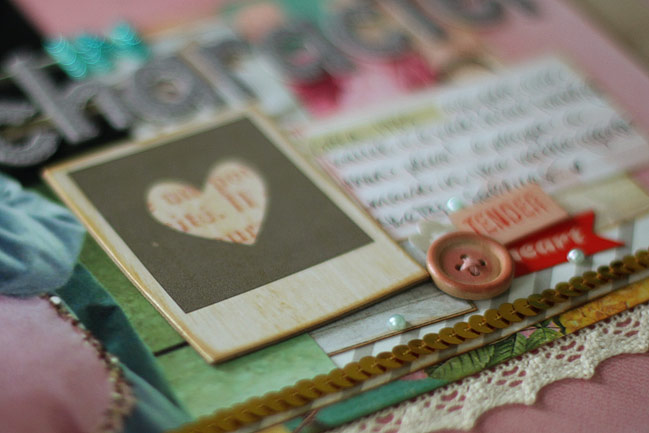
For this page, I started with a background paper from the new Heidi Swapp collection, and the bold floral across the middle is also Heidi paper, so it’s not that I have anything against using more than one thing per collection. But if I break down the rest of what’s there, the grey stripe, the polaroid paper with the bunting and the chipboard border are all from Rhonna Farrer’s Follow your Heart collection for My Mind’s Eye, the buttons, chipboard shapes, journaling sticker, sequins and word stickers are all from Dear Lizzy Neapolitan and the letter stickers are from the two different Amy Tangerine collections. Each of those collections has a signature look and they aren’t an obvious matching, but when I started mixing them on my desk, I came up with a combination I liked and just started cutting and pasting!

By the way: notice how this page really only has a tiny bit of journaling? Two sentences that pretty much tell what is relatively obvious from the photo, given a little bit of context. It’s a start – but I’ll come back to this before the weekend has finished.

For your project, you can scraplift if you like or you can create any design you want! Totally up to you. But you must use products from at least three different collections on your page. Upload it to a page gallery (like Two Peas or UKScrappers) or your own blog and link to it here to enter to win this challenge. Entries should be new projects created in response to this specific challenge and entries close at the end of next weekend!