pretty paper. true stories. {and scrapbooking classes with cupcakes.}

lovely to meet you Twitter Facebook Pinterest YouTube

Take a Scrapbooking Class

online scrapbooking classes

Shop Shimelle Products

scrapbook.com simon says stamp shimelle scrapbooking products @ amazon.com shimelle scrapbooking products @ amazon.co.uk

Reading Material

travel

online scrapbooking weekend Category

How do you sort your scrapbooking papers?

how do you sort your scrapbooking papers
Since we covered what we do with our paper scraps, it seems only right that we discuss full sheets of paper too!

How do you sort and store your scrapbooking papers?

My biggest suggestion with storage systems is always to sort by the way you think when you create. If you think ‘I need something blue’, then sort by colour. If you think ‘Where are my birthday papers?’, then sort by theme. If you wish you had a small pattern to work with, sort by pattern. And if you think in terms of ‘that Amy Tangerine paper would be just right for this’, then sort by brand and collection. If you store things by the way you think, then it’s far easier to go straight to them while you’re crafting or when you’re planning a project.

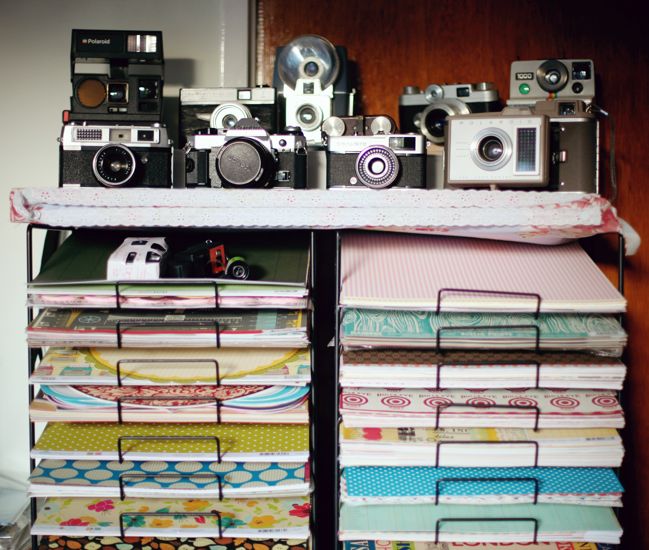
So my answer is that I sort my papers by brand. I keep my full sheets on two wire paper racks, with one brand per shelf, and in a few cases further subdivided if the stack is impractical for one shelf. At one point I had additional paper racks and kept a lot more cardstock, but I found I didn’t use nearly as much cardstock as I was keeping around, so I now only have solid cardstock at the bottom of one rack, over about six shelves. That is plenty, as I tend to use the same colours repeatedly rather than all different shades.

This system works for me because I think by brand, style or collection while I’m crafting, but I don’t suggest this system if you don’t think that way. There’s a funny thing that happens if you gather a group of people who have worked in a scrapbook store at some point – we all memorise papers! And some crafters do too, but plenty don’t, and if you don’t memorise papers by brand, you could miss the very best papers for your project because you can’t remember where they are… making it easier for you to find them by colour, pattern, theme or something else.

I’d love to hear your answer: how do you sort your scrapbooking papers? What does and doesn’t work for you? If you’ve tried various methods over the years, we’d love to hear your evaluation!
Scrapbooking challenge :: Mix two contrasting patterns

scrapbooking challenge :: mix two patterns
scrapbook pages
Throughout this weekend I’ve loved seeing the comments come up in contrast to what I was reading here just a year or two ago. It wasn’t that long ago that I would suggest mixing manufacturers on a layout and there would be sheer panic in the comment section! But now it’s very much routine and oh-so-easy, it would seem. That has made me smile a great deal.

scrapbooking challenge
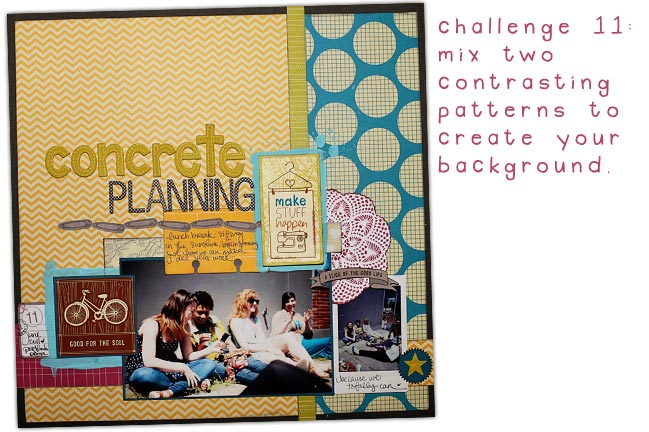
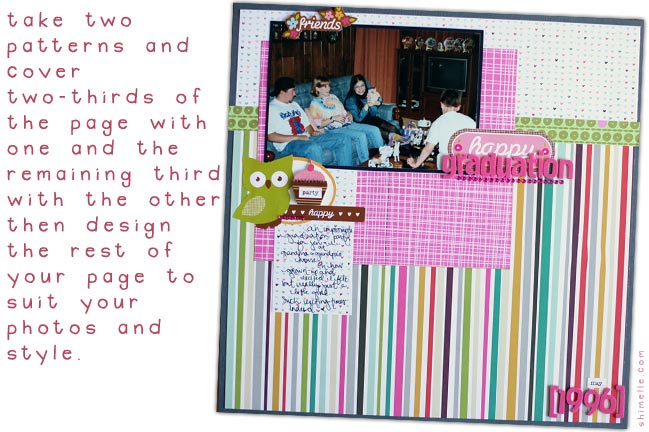
This challenge may be easy, but you need to follow it carefully. Choose two patterned papers with contrasting designs – things that are obviously very different. Chevron and doodles, hearts and stripes, sunshines and polka dots… just make sure they are very different types of patterns. Then use them to create the background of your page: two-thirds one pattern, one-third the other pattern.

scrapbooking challenge
Whether those thirds end up horizontal or vertical is up to you – as is the rest of the design! Keep it simple or layer it up – totally up to you!

If you’re looking for more inspiration to get the most from your patterned paper collection, you might want to check out Pretty Paper Party, which is available in a self-paced format at any time.

To enter this challenge, create a new page with two contrasting paper designs in a two-thirds/one-third design. Upload your project to your blog or a page gallery and share a link here! Entries close at the end of next weekend.


Scrapbooking challenge :: two photos & a bold background

scrapbooking challenge :: two photos and a bold background
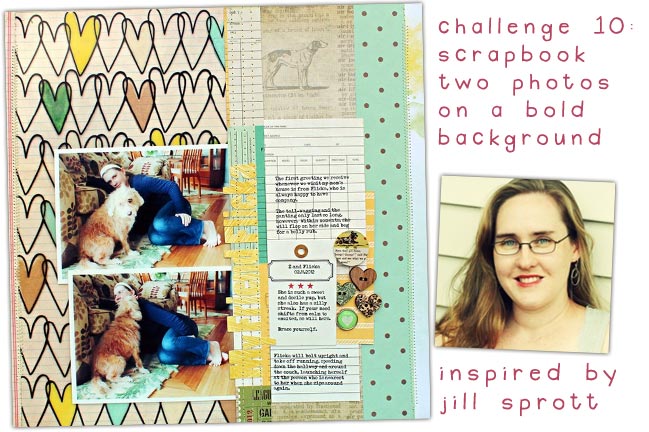
scrapbook page by jill sprott
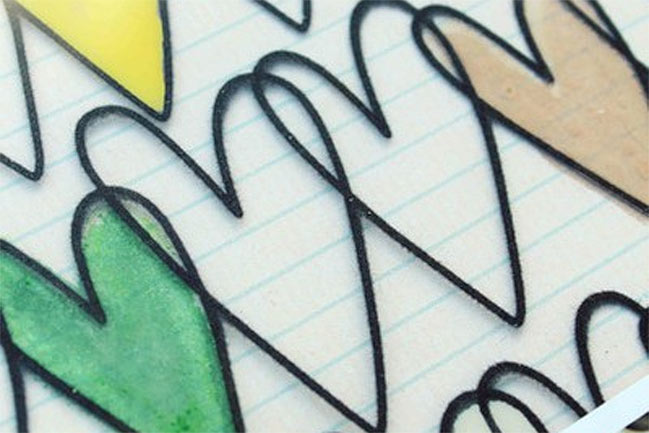
When I saw the bold background of hearts across this layout by Jill Sprott, I thought she had stamped one design over and over then filled in a few of the hearts with markers. I thought this was a great idea and made a mental note to look for a stamp in my own collection that could be repeated in a similar way. And then when I scrolled down to the supplies, I felt really silly. It’s not stamped: it’s a printed and flocked transparency by Fancy Pants. And I only felt silly because I have actually held that very transparency in my hands, yet somehow I just didn’t recognise it on Jill’s page at all. Either way, I love the look. (And I’m still going to try the repeated stamp idea sometime soon.)

scrapbooking challenge inspired by jill sprott layout ©twopeasinabucket.com.

So here’s a challenge for those of you who like something a bit more prescriptive: scrapbook two photos on a bold background! You can scraplift Jill’s page directly or you can create an original design. As long as there are two pictures and the background is something that isn’t fading into the distance, you’re onto a win!

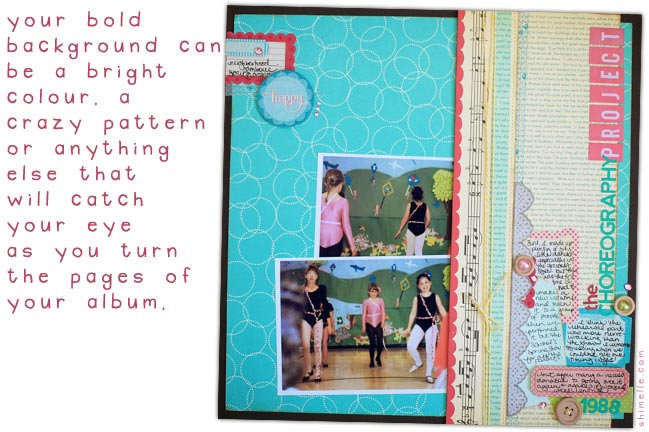
Your background can be a bold patterned paper, a bright and bold colour, a stamped design… just nothing pale and minimal!

See more of Jill’s work on her blog and in her page gallery.

scrapbook page
To enter this challenge, create a new project inspired by Jill’s layout, with a bold background and two photos. The rest of the design is up to you! Whenever you’re finished, leave a link to your project to enter this challenge. Entries close at the end of next weekend.


How do you make a scrapbooking page kit?

how to make a scrapbooking page kit
making a scrapbooking page kit
Earlier this week my glittery friend talked a bit about preparing page kits while she was looking for ways to combine older supplies with new. Page kits are certainly not the only way to gather supplies for a page! But they are exceptionally useful if you want to scrapbook away from home or without making much mess, and they can help with supply economy, either because you want to make sure you use what you have or because you need to get the most from a limited crafting budget.

But what do you actually put in your page kits?

I start with paper – usually a mix of scraps and full sheets (including at least one full sheet for the background but I will often include two so I have a choice). I err on the side of too much paper rather than not enough.

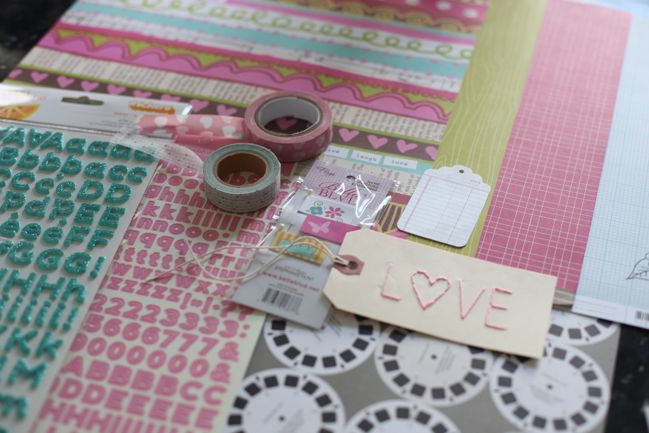
I also need lettering in my page kits. Although I have a die-cutter, I prefer to use that just for embellishments and not for lettering. I nearly always use Thickers and another small flat letter sticker style for my titles, so most of my page kits will have at least two kinds of peel and stick lettering.

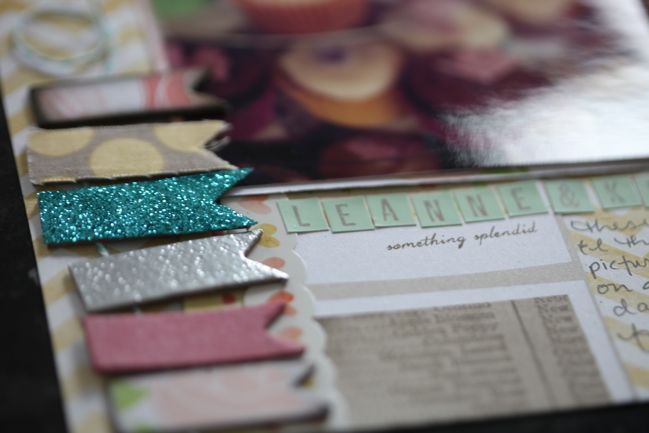
Then I turn to embellishments. Sometimes this includes more paper that can be cut apart to make embellishments (like those viewmaster reels). But it also includes stand-along items like the tag and paper flags here. I’m usually looking for something that includes dimension and at least one texture other than flat paper, so in this case the pins on the flags provide some dimension and the stitched tag includes the texture of the thread rather than just another printed paper. If I don’t have predetermined embellishments I want to include, I might die-cut or punch papers that I can layer to create my own embellishments. If I’m going to crop at home, I just leave the paper in the page kit and use the punches or dies as I come to that step. If I’m going to crop elsewhere I will go ahead and cut the shapes I think I will need and add them to the page kit (just loose shapes in the page protector) so I don’t need to pack so many heavy, bulky items.

My last step is to look to the in-between elements that will tie it all together. These include things that can work as a strip, trim or border, so it will commonly include border stickers or washi tape along with either twine, thread or ribbon. I often use a border punch in that category too, but that would be packed with my tools. I try to plan on using just one or two border punches if I’m cropping away from home so you’ll see designs that are more general and less specific to the page theme. (Or I may borrow a punch from someone else at the crop. If we’re really organised we make a plan of who will bring which punches so we can have the maximum number of shapes with the least weight to carry. No duplicates!)

Then I place that page protector in an album and start to fill the next one! But what about the photos? It depends on my mood and the project as to whether I create the page kit to match the photos (photos first) or create a page kit and then decide on the pictures (supplies first). I do both equally! Whichever comes first, I just pop the photos in the page protector too so they are ready to go. Putting them all in the album makes it easy to transport and the finished pages can go right back into the page protector so they are safe for the journey home. I also really like this format of album planning so I can see a project come together from the beginning even if I haven’t made or sketched out a single layout just yet.

I also pack a separate kit of my basic tools: scissors, adhesive, journaling pens, pop dots, sewing needle, black and brown ink pads and ink applicators, and anything else that I know I want to use but is too bulky for the page protectors, like spools of twine, punches or bottles of paint or mist. That plus my album of page kits and I am ready to go!

Your turn… do you use page kits? And if so, what do you put in them? Do you err on the side of too much or too little? I’d love to hear your process!

Scrapbooking challenge :: take your pick

scrapbooking challenge :: take your pick
scrapbooking challenge
I’m guessing you’re at least partly motivated by scrapbooking challenges or you wouldn’t be stopping by this weekend really! I hope the different challenges have helped you get a few things made that just needed a little push or the permission to sit down and craft. But I know there are plenty of times when I see a challenge that looks like a great idea that totally motivates me, but I just don’t have time to make it happen before the deadline. So guess what? I have a challenge to answer just that.

scrapbooking challenge
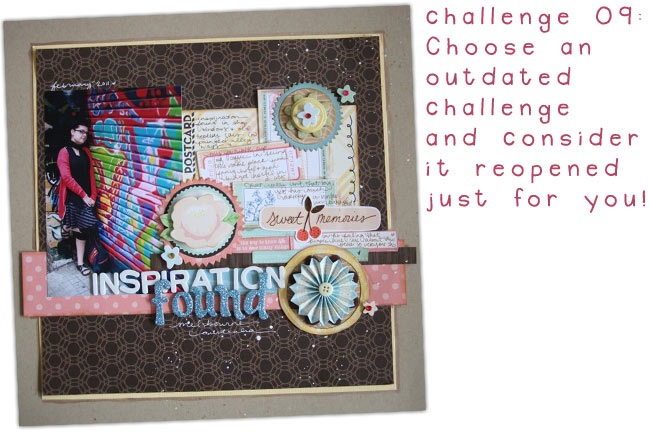
For this challenge, you pick an outdated challenge and consider it reopened for this week. Take your pick from these options:
4×6 Photo Love, which has twelve page ideas for standard-sized prints, from one single 4×6 picture right up to a dozen on a single scrapbook page.
& Now for Something Completely Different, my monthly class for 2012 at UKScrappers (though open to anyone in any country). Each month the preparation notes and supply list are posted on the tenth and the step by step project is posted on the twentieth, with a full page from start to finish in twenty steps. Each month works with a different photo requirement (different numbers or sizes – you’re free to choose any picture theme you like!) and different techniques, but as each page has to be possible in just twenty steps, the pages offer something different but nothing overwhelming. You can find the first three tutorials of the year there already, plus the April project will be posted this week.
The Adventures of Glitter Girl, the weekly series shown at Two Peas in a Bucket. If there’s a Glitter Girl challenge you’ve been meaning to try, go ahead and use this as your motivation!
Scrapbook Starting Points, with plenty of options for ways to just get started with the cutting and pasting.
Scrapbook Page Sketches, with dozens of sketches, many with videos and all with a variety of examples.

So take your pick and set your own challenge, and consider it current again! Create a new project and upload it to your blog or a page gallery, then share a link here. Entries close at the end of next weekend.


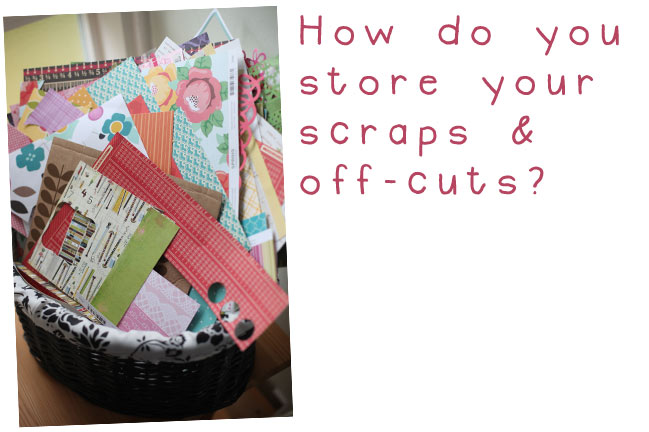
How do you store your paper scraps and off-cuts?

how do you store your paper scraps and off-cuts
storing scraps of scrapbooking papers
Some of the questions that come up in the comments here make me giggle. This is one of them. How do you store your paper scraps? Or rather it is usually How do you organise your paper scraps? and that makes me giggle because there is no organisation of the scraps here. They live in a basket. All mixed together. No rhyme nor reason to size, shape, colour, pattern or collection.

The basket isn’t something special to scrapbooking. It was something I picked up at a department store a few years back without knowing what it would become because I had a few extra pounds on a gift card that was nearly to expire but I didn’t want to spend lots more on something expensive just because I had a few extra pounds of credit. I saw baskets marked down to three to five pounds, and figured there would be something in my flat that could be stored here. At first it was the mail, but that idea was abandoned because it was too easy to just stack it up and not deal with it. Then it became magazines, but I didn’t like not being able to see the spines to go straight to the issue I wanted. And then I went into crazy deadline mode on a project, which is this funny little world I enter when it hits me that I have umpteen million layouts I need to make in the next forty-eight to seventy-two hours and I better not do anything except breathe and scrapbook, and sometimes the breathing is optional. (I realise these conditions sound a little extreme, but it truly is something I do about three times a year and at that amount, it is something that makes me thrive and I do some of my favourite work in those conditions… but any more than three times a year and I think I might develop some serious issues in not being able to cope with life! Know your limits, right?) Suffice to say I am not very interested in tidying up between every single project in this sort of time frame, so I brought the basket to my table and at the end of every project, I swept all the scraps left on the table into the basket for instant clean up.

After about twenty pages and one conquered deadline, I realised this basket had all the makings for plenty of layouts and I could instantly see all sorts of colour and pattern combinations appearing that inspired me to make more things. Ever since, this basket has been my one and only storage system for paper scraps and off-cuts. Everything just gets thrown in there together and I start the majority of my pages by choosing a few things from the basket then mixing with full sheets as backgrounds and so forth.

When the basket gets too full to be able to flip through the papers easily, I take out a big section from the back and spread it all over the table. I pull out any lost favourites that I really must have and the rest goes into a bag that I donate to the hospital crafting club. Presto: basket back to useable again and bonus of kids getting to craft with plenty of pretty paper without their parents having to worry about something so trivial as buying craft supplies.

So that’s my system – if you can call it that! Some scrappers have highly organised systems and that works far better for them. I’ve learned that if I file it away, I’m less likely to use it than if I see it there in the basket. I also find the basket is a great way to create easy page kits if I’m going to plan out an album or scrap away from home. I just dump about half the basket on the table and start making groups of papers. Each group becomes the beginnings of a page and I pop them in page protectors to be combined with whatever else is needed for each page and then it’s easy to make those pages and I know I’m getting good use from all my paper scraps! It encourages me to try new colour combinations and to mix manufacturers and design styles I might not have put together otherwise.

Your turn… what do you do with your paper scraps? Do you use them? Store them? Sort them? File them? Give them away? Leave a comment and share your answer!

How did you start scrapbooking?

how did you start scrapbooking
scrapbooking
Taking another question from the comments earlier this week, we have one posed by Boo, a young scrapbooker who asks How did you start scrapbooking? …and that’s a question I’d love to ask you too!

You can have the short or the long version of my answer. The short version is I started scrapbooking while I was a university student, with a kit I found at a discount store, and I had no idea the larger world of scrapbooking (or indeed the word scrapbooking) existed until I had nearly finished that first book. But I was hooked, and I’m so very happy to have had this outlet to evolve from those humble roots to something that allows me to combine a love of so many little things (like writing and taking pictures and crafting) into one neat little package called scrapbooking.

The long version is something I wrote over the course of several posts called the Time Warp series. You can read that story starting here, then follow the links at the bottom of each post to go to the next part of the story. I wrote those celebrating ten years of scrapbooking… and I’m now closer to fourteen so I suppose I should take a closer look really and consider adding a chapter to cover the years since 2008!

Now… I would love to hear your answer to Boo’s question! You can share your story with a long or short answer too! If your story is short you can leave it in the comments. If it’s something longer that you want to think about and write about at length, you might want to make it a blog post of your own and leave us a link to come check it out!

So… how did you discover scrapbooking?

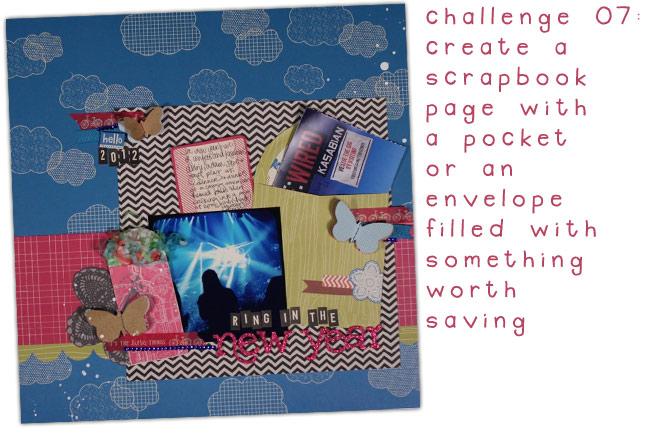
Scrapbooking challenge :: Put it in a Pocket

scrapbooking challenge :: put it in a pocket
scrapbook page with envelope
It may be the last day of the weekend, but today is the day that has me very excited: so many challenges plus this evening, all about the new class! But I’m getting ahead of myself… after all, I have ten whole challenges to share with you today! I better get on it!

scrapbooking challenge :: pockets and envelopes
Although she’s quickly become part of my regular life, it was only fifteen weeks ago that someone extra glittery started taking over my craft desk in the middle of each week. And way back in her very first adventure, she covered ideas for keeping memorabilia, including putting things like tickets and confetti into paper pockets. (You can see more – including that how-to video – here.)

scrapbooking challenge :: pockets and envelopes
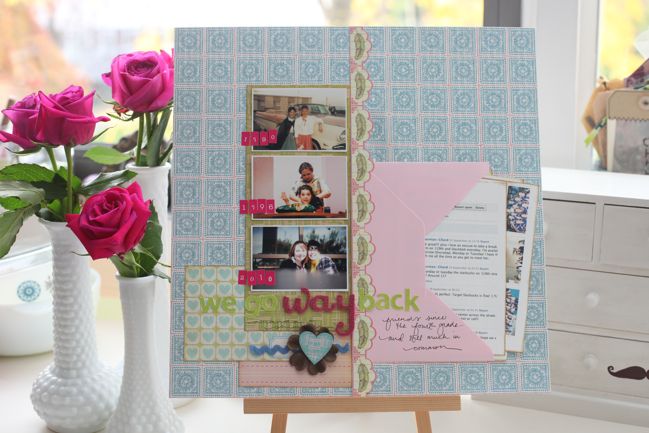
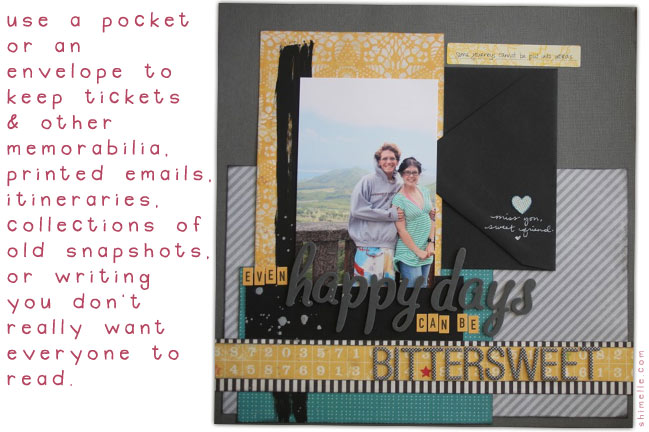
Of course, memorabilia isn’t the only thing you might want to keep on your page. Pockets and envelopes can also keep writing you don’t want to put on show, like the sort of writing that can be very good for the soul and important to you but something you really wouldn’t want just anyone to read as they flipped through your pages. It can be especially useful if a page with quite serious writing fits in your album between several other pages that are quite lighthearted, which is the case with this example.

Envelopes can also be filled with things you print out at a smaller size than your photos. The top page includes printed conversations from Facebook plus a printout of all the image thumbnails from images where both of us were tagged. I love how those printouts include a real mix of just plain everyday things (including me getting lost on my way somewhere… which is really everyday for me) and photos of things that were pretty big events so many years ago.

By the way: if you’re looking for more help on writing on your layouts or finding ways to include evidence like this to capture your stories more fully, the True Stories online class is available at any time in an archived format. Just drop me an email if you want to ask any questions about whether it’s the right project for you.

What will you put in a pocket or an envelope? That’s your challenge, of course! Create a new page for this challenge (sorry, existing layouts in your albums can’t be entered to win, though you are welcome to share them in the comments for inspiration!) and upload it to a page gallery or your blog. Link it up to be entered – entries close at the end of next weekend.