pretty paper. true stories. {and scrapbooking classes with cupcakes.}

lovely to meet you Twitter Facebook Pinterest YouTube

Take a Scrapbooking Class

online scrapbooking classes

Shop Shimelle Products

scrapbook.com simon says stamp shimelle scrapbooking products @ amazon.com shimelle scrapbooking products @ amazon.co.uk

Reading Material

travel

tutorials Category

Autumnal Scrapbooking with Rebecca Moore

Autumnal Scrapbooking with Rebecca Moore @ shimelle.com

Leafy scrapbooking is an entire genre I could happily look through for days and days, so I hope you’ll enjoy all the autumnal and leafy goodness of today’s guest post from the lovely Rebecca Moore! -Shimelle

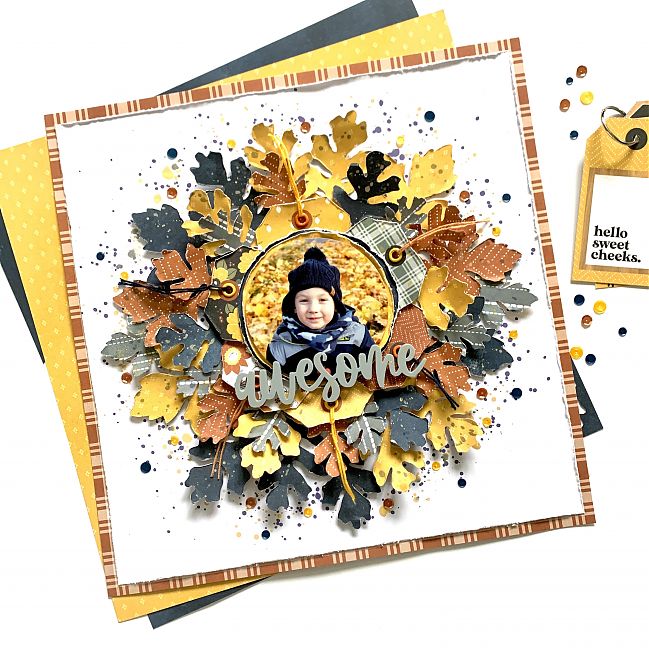
I love scrapbooking – it’s my ‘me time’. I have a busy life with a five year old, so scrapbooking is something I do in the evenings when things are a bit quieter. I love to have lots of dimension and layering on my scrapbook pages. It means I can’t always get as many layouts in an album as I’d like – but it’s my style and it’s what makes me happy so I don’t let that stop me! I recently took my little boy on a walk around a local lake, and we came across an area covered in fallen leaves. They were all dried out and crumpled and I really wanted to replicate this on my layout. I’ve used Simple Stories ‘Hearth and Home’ collection as the colours match my photo really well. I also wanted to draw on the navy in my photo so I’ve pulled in a navy paper from P13’s ‘Soulmate’ collection. I ran these papers through my Silhouette Cameo 4 and cut lots of leaf shapes in various sizes.

Autumnal Scrapbooking with Rebecca Moore @ shimelle.com

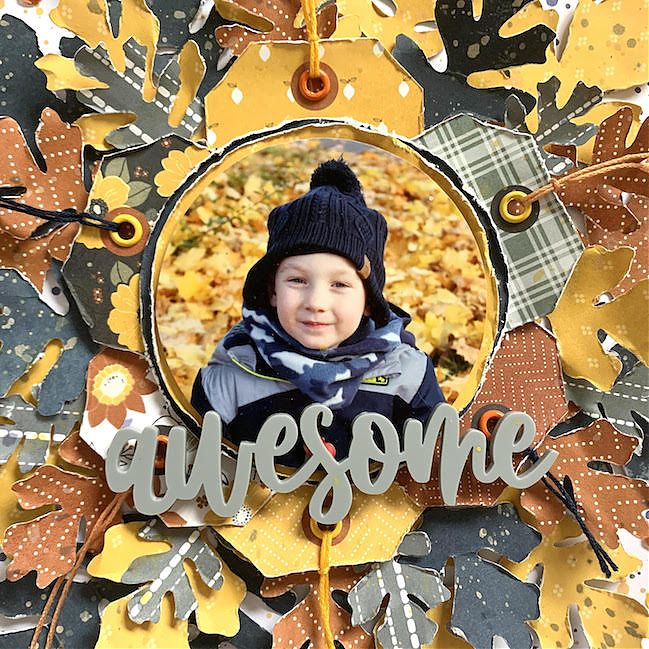
I began with a circular photo in the centre of my layout. I added a couple of layers of patterned papers behind it, distressing the edges to bring some texture to the page. I introduced some dimension by adding foam in between these layers. I then layered six tags under my photo in a circluar fashion. I raised the tops of the tags up using foam pads, but I didn’t stick the top tag down – I wanted this tag to include my journalling so I needed it to be moveable. I used my Crop-A-Dile to add some metal eyelets to the tags, and threaded some embroidery floss through in coordinating colours.

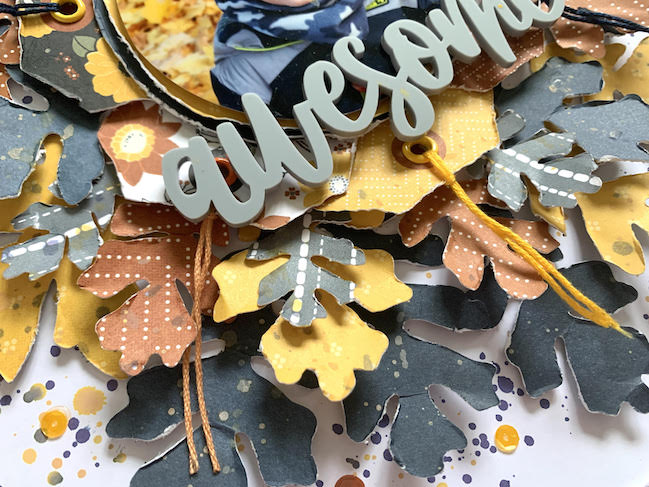
Next came the fun part of layering up the leaves. I tried to distribute the sizes and colours evenly and have used foam to bring more dimension to the layout. I’ve also distressed the leaf edges and curled them up slightly to appear more realistic. I really do love how these leaves look arranged around my circular photo. For my title, I’ve used an acrylic perspextive from Bramble Fox because the colour coordinated nicely with my photo. I placed this central on the page, underneath my photo.

Autumnal Scrapbooking with Rebecca Moore @ shimelle.com

I finished the page off by adding a patterned paper border, some ink splatters and a few sequins to bring in a bit of sparkle. I really love how this layout turned out. The leaves are so dimensional and realistic and really do remind me of our walk every time I look at the layout – which makes me happy and brings a smile to my face. And this design could work with any shapes – you don’t have to use leaves – snowflakes or flowers would work just as well.

Rebecca lives in Buckinghamshire, UK, with her husband and five year old son. Scrapbooking since 2017, she mostly scrapbooks photos of her son and shares her work on Instagram and YouTube. She also works on several design teams and enjoys crafting with a wide range of collections.

Scrapbooking Travels with Kirsty Mansell

Scrapbooking Travels with Kirsty Mansell @ shimelle.com
Today I’m delighted to share a beautiful project from newlywed Kirsty, who is out and about seeing the world on her honeymoon as we speak! Kirsty has been around this corner of the internet for many years and made beautiful Christmas journals and scrapbook pages in a variety of classes, and I have loved seeing her style evolve over the years. Always lovely and always filled with storytelling! I hope you enjoy Kirsty’s work too. -Shimelle

When I’m scrapbooking, I love taking inspiration from my favourite designers, and Shimelle’s layouts are always an absolute go-to. Even though, in some ways, our styles are quite different, I feel like our philosophies are very much in line, especially when it comes to sharing stories and journalling. And when it comes to layers!

Before making this page, I was looking at layouts I had saved on Instagram, and I was struck by the layouts by Shimelle that had been my favourites: I had mostly saved layouts with lots of layering, single photos and lots of beautiful clusters and confetti sprinkles that make Shimelle’s layouts so recognisable.

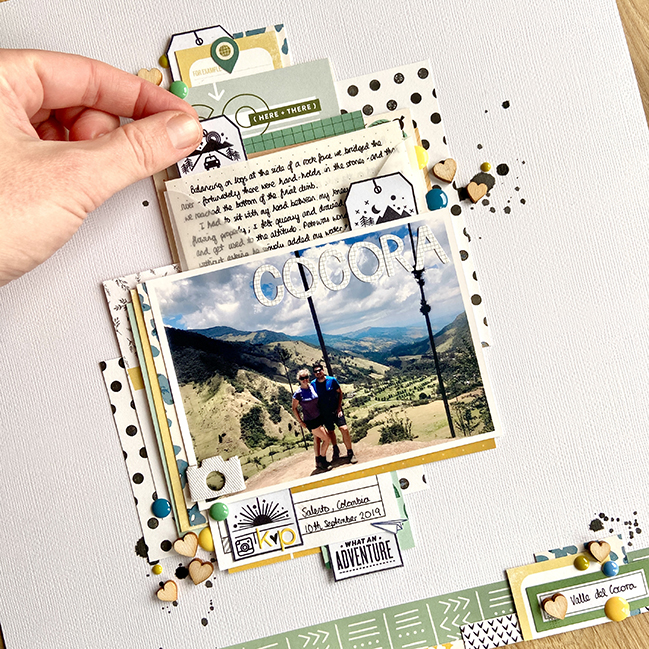
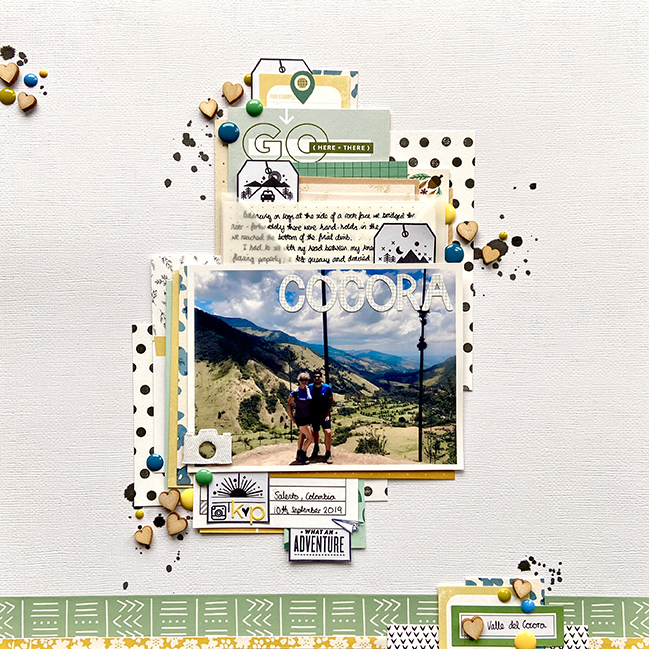
I scrapbook because I want to record and share my memories: big, rambling unedited memories where my story is often lifted straight from a journal entry with tangents and waffle and everything good thing. I like to think these digressions and meanderings are where my thoughts and feelings and personality lies. I almost always start with a story, pull some photos to match it and then pull supplies to complement the photo, and in making this page, my process was no different. I decided to document a day we spent hiking in Colombia, exploring the incredible palms in the Valle de Corcora. Travel scrapbooking is my absolute favourite; spending time with such wonderful memories is a real form of escapism and joy.
Scrapbooking Travels with Kirsty Mansell @ shimelle.com

I had a few strands of inspiration to get me started: the first, as I mentioned, was my journaling which I pulled from my travel journal. I printed the photo which goes with the story of this day and then I cast my eye back over the layouts I’d saved to jump start my creative process.

This layout will sit in an album (or series of albums) I’m working on about our backpacking trip around the world. We spent seven months exploring and I kept a travel journal of all our experiences and took millions of pictures. As I document our adventures in a scrapbook, it’s lovely to have my story already written, and I’ve been pulling out my favourite moments and sections of my diary to drop into scrapbook layouts. As my journaling was all written in the moment, I can make pages about these experiences for a long time to come without worrying about forgetting the details which are important to me.

To give the album coherent and add a bit of flow, I’m doing each layout on a white cardstock background and including an envelope with my journaling somewhere on the page. With these elements already decided, I pulled a whole variety of 3×4 journaling cards in colours which complemented my photo – I don’t work by collection, instead preferring to go on colour and design. Mixing manufacturers can creat so many wonderful new colour palettes and vibes! I set to work shuffling the cards about and arranging them into a slightly messy stack behind my photo. I play around with them, adjusting angles, testing different colours against each other, framing my picture in different ways and once I have an arrangement I like, that’s what I stick together.

This is actually most of my page done: I included my envelope of journaling in my layering so that the story can be pulled out to be read, my photo is the top layer in my stack of cards and the white background is my frame for everything. Time for final details: a phase I really love!
Scrapbooking Travels with Kirsty Mansell @ shimelle.com

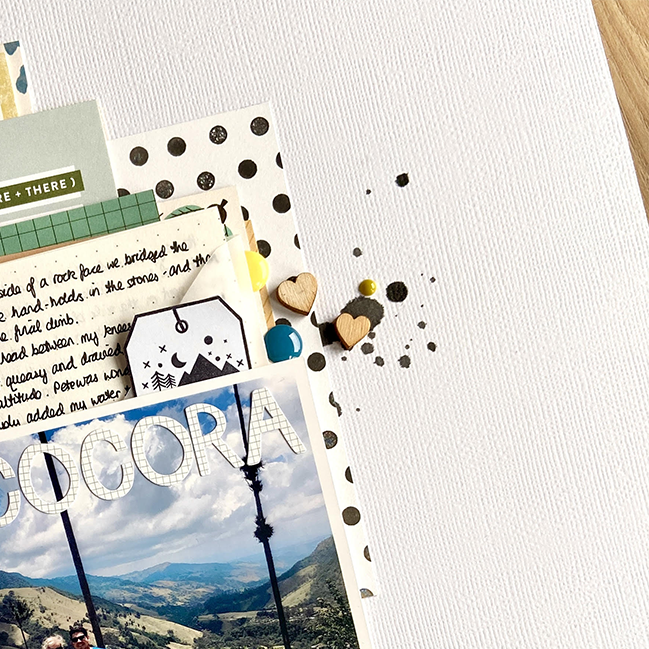
I added my title and a few little clusters of embellishment to frame my design. I using travel themed stamps, so I made myself some little stamped tags, and I added some elements which I repeat on all my travel pages: a camera, a plane, our initials and a geotag. Having watched Shimelle for literally years, I have long since adopted her system of placing embellishment clusters and repeating elements to help your eye move around the page. It’s an absolute go-to technique for me! Finally, add enamel dots. There are few things in life which cannot be improved by added enamel dots. Enamel dots are life.

With the date and location added, that’s my page complete; I love getting travel pages into my album, adding more to the story and building up this beautiful record of our adventures. I have got plenty of extra photos from this day spent hiking in Colombia so my next aim will be to create a pocket page to sit alongside this one so that I can include all my favourite pictures from this experience.

If you’d like to give this idea a try, you can use any 3×4 cards you have, or even trip down bigger sheets of paper into 3×4 blocks. It can be really freeing to do this with a few papers and play around with different orders of patterns and colour in a stack of layers. As a handy tip, I’d suggested keeping your layers close together and any angles small. This helps to create a sense of detail and intricacy. Pulling patterns and colours which mimic textures and tones from your photos will ensure it all looks cohesive.

Kirsty Mansell lives in London and has been scrapbooking for the past 15 years. A maths teacher by day, she uses any school holiday she can to travel and explore the world. She loves to make the most of life, and is currently planning and crafting for her wedding alongside leading her Girlguiding unit, drinking tea and, of course, scrapbooking about her adventures. Story is at the heart of her layouts and she enjoys finding creative ways to include journaling on her pages, making the writing a key element of the design. Kirsty is never happier than when using layers and clustering little details to complete a layout in her signature style, and she shares all her work over on Instagram.

Half and Half with Adam Westwood

Half and Half with Adam Westwood @ shimelle.com

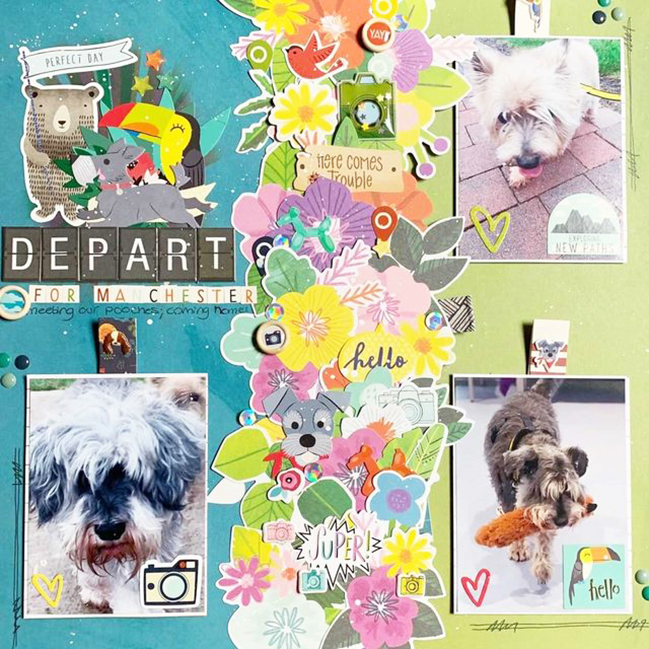
I scrapbook most days and generally scrap about the lives and adventures of my partner, my two best friends who I live with and me. But in January 2022, something very special happened – we adopted THREE dogs! They’d lived together their whole lives and were looking for a forever home. They’re quite old and best buddies. So, Mick, Tom and I decided to go for it and they’re now home with us. Chris, my partner loves to visit regularly – and the pooches love us all so much and have settled incredibly well.

So I now have a whole new topic to scrap – the dogs! We’ve nicknamed them “The 3 Pawmigos” and they really are best of friends. I wanted to create a layout that documented their new adventure and a page all about adopting them so I knew I’d want a lot of journaling and three photos – one of each.

Half and Half with Adam Westwood @ shimelle.com

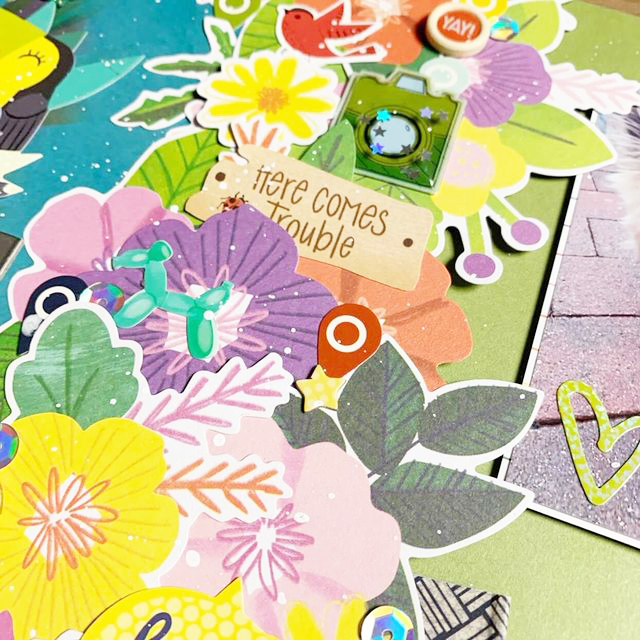
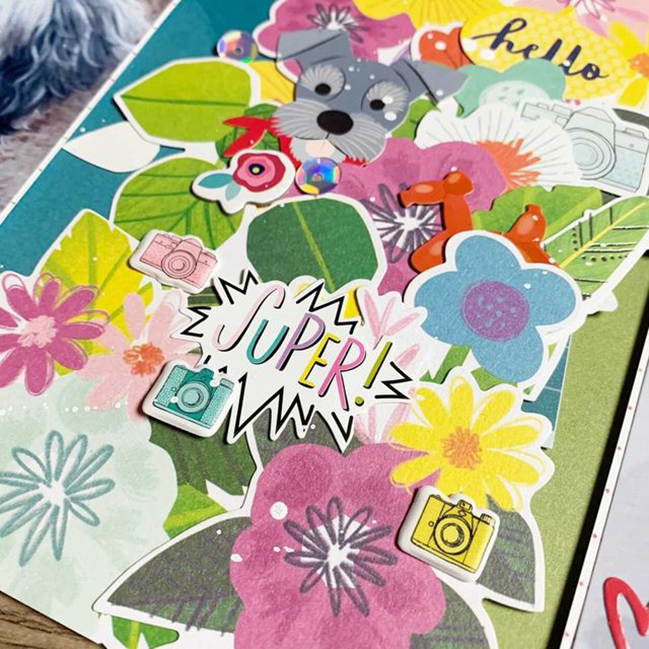
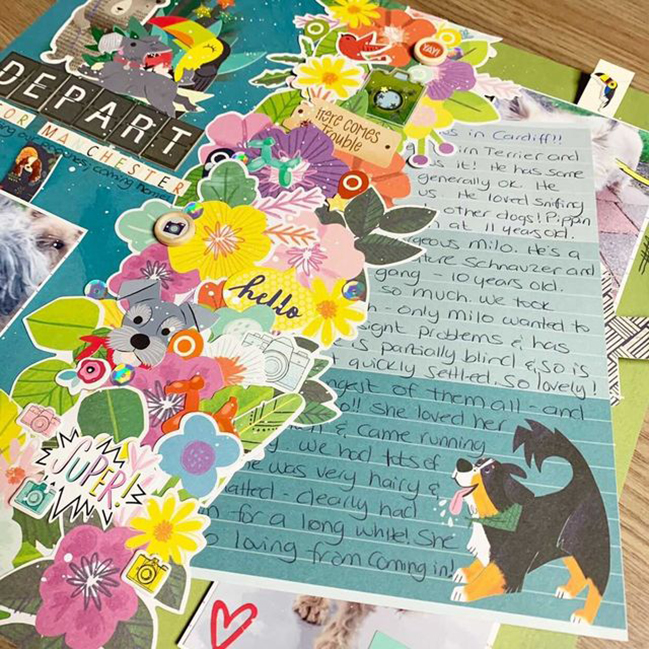
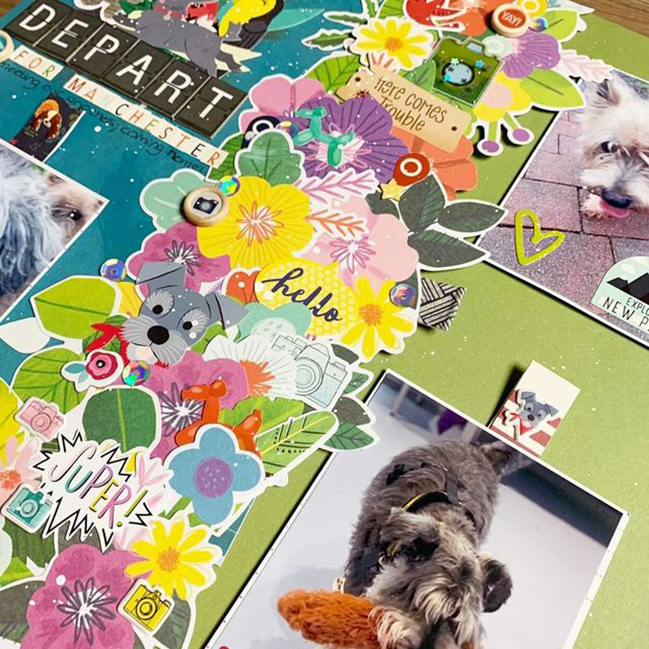
I decided to go with a superb Shimelle design – the half and half! But I wanted to do it a bit different and so I chose my two papers and then adhered them to white Cardstock but on the left, I only adhered the top, bottom and left side, leaving the middle free of adhesive. I then went about layering a ton of florals from Shimelle’s brilliant Never Grow Up from top to bottom in the middle – being careful to only put adhesive on the left sides so it stuck to my left side paper but not the right side.

Half and Half with Adam Westwood @ shimelle.com

Once complete, I was left with a big 6×12” pocket, easy access and ready to hold my journaling! I used two sheets from Shimelle’s Journaling Pads for my main journaling – two full pages – one documents them all individually and their characters and the other the tale of bringing them home from Cardiff, South Wales to Manchester, North of England.

Half and Half with Adam Westwood @ shimelle.com

To make it easy to pull out the journaling, I added a stitched tag from Shimelle’s Go Now Go collection – the perfect addition! Then I went about about matting my photos – each 3×4” and used some rainbow lined paper from the same journaling pads. I used foam tape around three sides of each photo to lift them off the page.

Half and Half with Adam Westwood @ shimelle.com

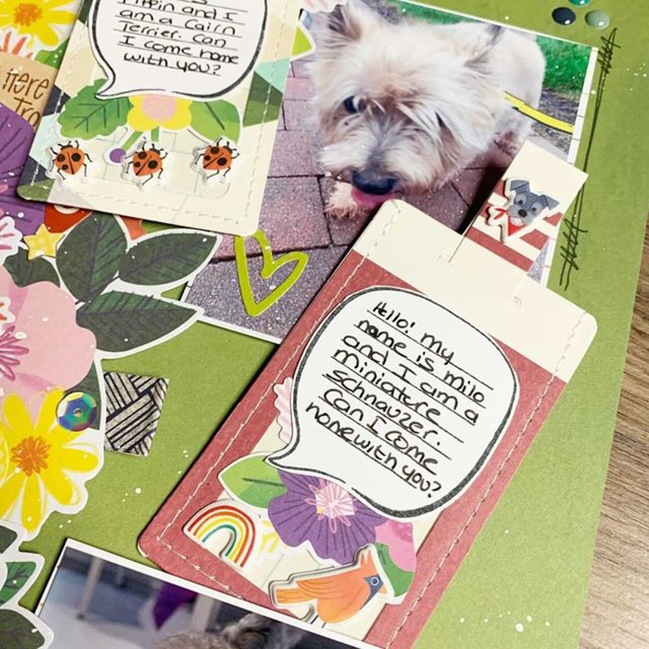
This then allowed even more journaling in the form of three more tags from Go Now Go and a hello from each dog! I also added a cute mini puffy sticker on each tag from Shimelle’s Box of Crayons!

Half and Half with Adam Westwood @ shimelle.com

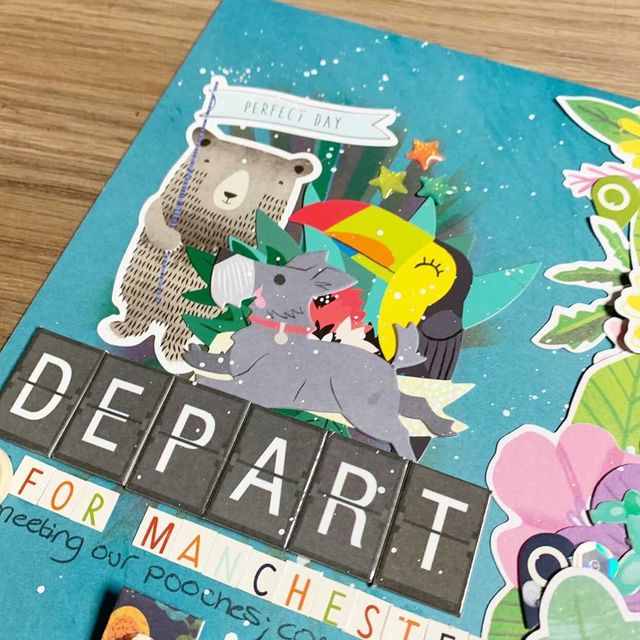
That left me with one quarter of my half and half grid design layout and I knew I wanted a title incorporating multiple words and the awesome travel board letters from Go Now Go. So I decided to use it as an embellishment area, starting with a stencilled sun burst (which I then proceeded to cover most of up, as we do!) and clustered lots of pieces from various collections and added my title – Departing for Manchester.
Half and Half with Adam Westwood @ shimelle.com

This layout was so much fun to create and was really important for me to document – those initial characteristics of our new furbaby’s and how they got here to their new home. I also wanted this layout to be a celebration of my love for Shimelle collections. Because I started scrapbooking only a relatively short time ago, I missed a lot of Shimelle’s collections but I hunted high and low to build up my huge box! Creating this layout, I used pieces (some more than others) from the following Shimelle collections: Never Grow Up, Field Trip, Go Now Go, Glitter Girl, Box of Crayons & Little By Little.

Hi Scrappy Friends! I’m Adam, aka ScrappyAdam in the scrapbooking world! I’ve been scrapbooking almost three years now and it all started with an awesome Disney trip in 2019. Since then, scrapbooking has white literally consumed my life and is firmly a passion, a hobby – and now a job and I couldn’t be happier. It quickly become a hobby to search for all the scrappy goodies and I quickly built up a good stash of goodies – including a huge box dedicated to the wonderful Shimelle! Since then, I’ve started my YouTube channel and quickly passed the first one thousand milestone and my passion for scrapping and the community remains so very much! I own Dotty About Flair, a small UK Based business selling ‘flair’ for the scrapbooking and crafty people out there. I’m also the face behind The Cut Hut, an exciting new venture for 2022 with Paige Evans and myself, bringing pre cut cut files from Paige to the UK and Europe! You can find me on Instagram and YouTube.

Using symmetry in Scrapbooking with Erika Breslin

Using symmetry in Scrapbooking with Erika Breslin @ shimelle.com

I’ve always loved symmetry in designs. There’s a underrated beauty to it. In scrapbooking, I love me a good grid layout. I had just gotten in some Never Grow Up, and once I saw the gorgeous deep and bright colors, I knew I had to make a page with all of them!

Using symmetry in Scrapbooking with Erika Breslin @ shimelle.com

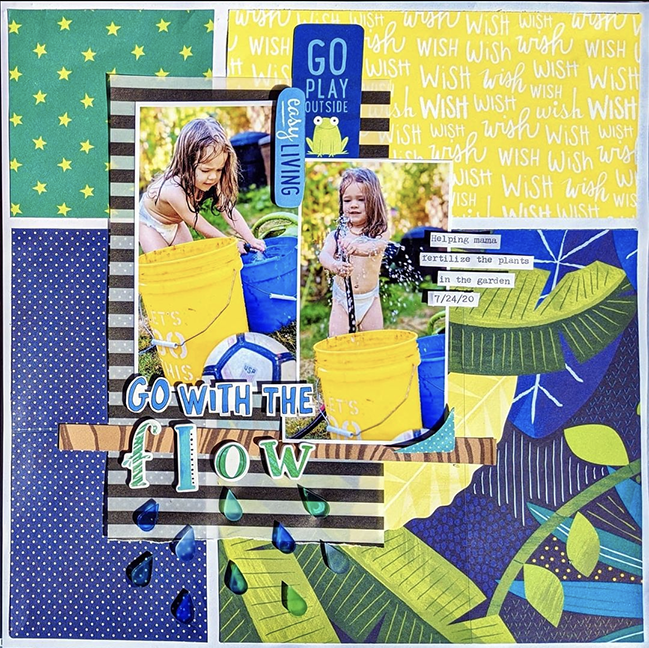
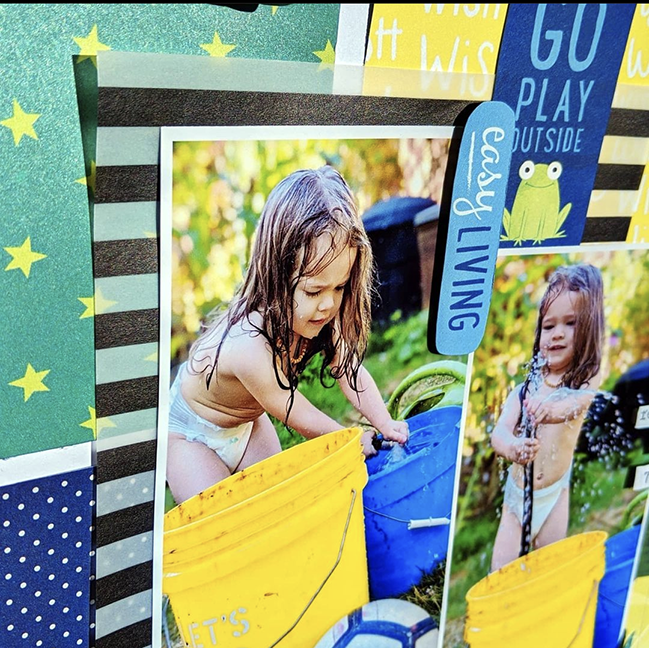
Instead of a traditional grid — I opted for a simpler 4×4, using different colors to create a complementary grid. I used a couple of photos from my kiddo helping me in the garden last summer. She lives any excuse to play with water!

Sometimes, when I feel I’ve used too much color and need help bringing in some balance, black always helps. I backed my photos with some black striped vellum, which did the trick!

Using symmetry in Scrapbooking with Erika Breslin @ shimelle.com

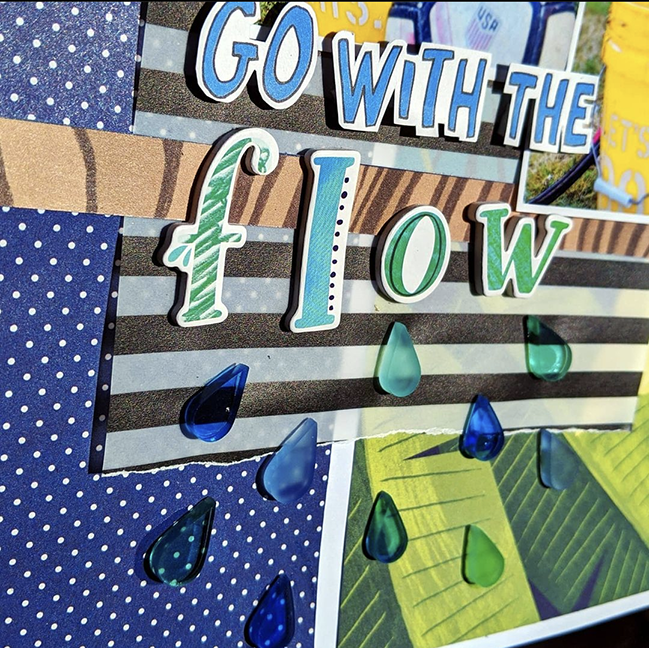
I “fussy bladed” a couple elements from the cut apart paper, as well as “Go With The” to add to my title “Go With The Flow.” Also, I brought in a wood grain branding strip to pull some of the color from kiddo’s skin, and some acrylic water drops from my stash to add movement to the alphas. I hope this page brings you some inspiration today!

Hi! My name is Erika. I’m a San Diego-born, Seattle transplant, rescue animal mama of two girls. I started scrapbooking three years ago after watching Shimelle’s colorful and achievable approach, and have been hooked ever since. I love physical and digital work, and mainly document in 12×12 and 8×6 formats. I’m game for learning new techniques, playing with new designs, and meeting more of our incredibly supportive scrapbooking community over on Instagram and Youtube.

Making the Most of your Existing Scrapbook Stash with Brittany Kielar

Making the Most of your Existing Scrapbook Stash with Brittany Kielar @ shimelle.com

Today’s guest artist is right on board with the Use What You Buy attitude: she’s been making a point to scrap with the stash she’s held onto for a while to make sure it goes from her supply collection to finished pages in her albums! Check out this page design and see if it can come together with things you’ve been stashing too! -Shimelle

I love scrapbooking old and new photos. For me scrapbooking lets me combine my love of photos, journaling and pretty paper into one hobby that helps me destress and be creative. For this particular layout I felt like I hadn’t scrapped any very recent photos lately. I try to balance scrapping older and more recent photos.

Making the Most of your Existing Scrapbook Stash with Brittany Kielar @ shimelle.com

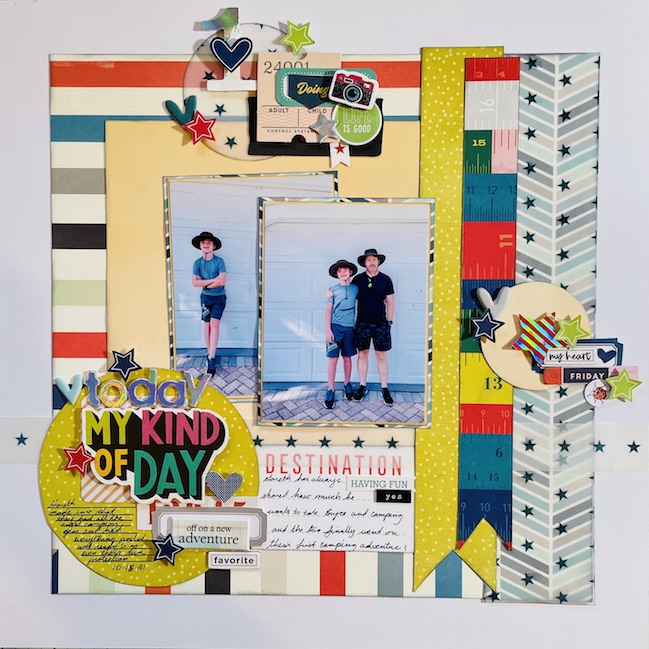
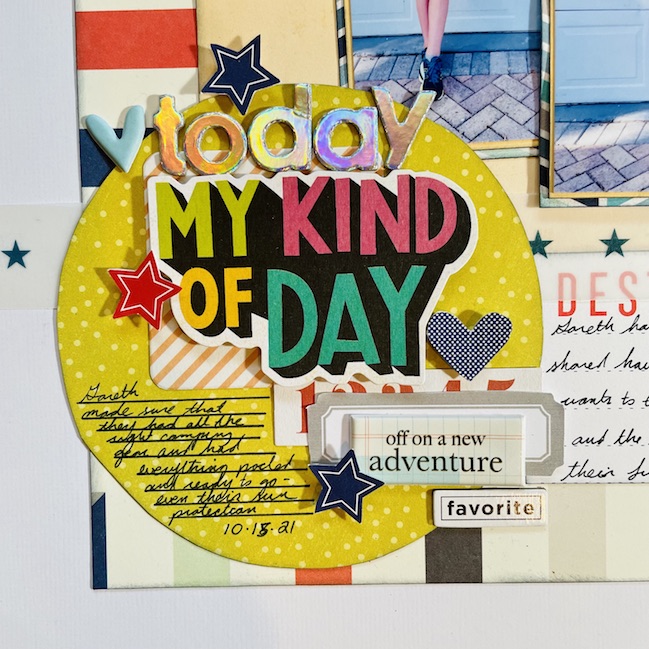
For this layout recent photos won out! I selected and printed out four different prints. Two prints that were of Gareth and Bryce going camping and two prints of Rhiannon and I exploring the Machu Picchu exhibit at our local museum.

The photos with the boys were jumping out to me more than the photos of Rhiannon and I. Gareth has always wanted to take our kids camping and an opportunity came up for him to go camping with Bryce. He went and got all the gear to go camping (including the sun protection)! I was so excited for them to get to go. Got to be honest I’m not a camping girl but glad that he will take the kids so they can see if they like the experience. Spoiler – Bryce really enjoyed the camping experience!

Making the Most of your Existing Scrapbook Stash with Brittany Kielar @ shimelle.com

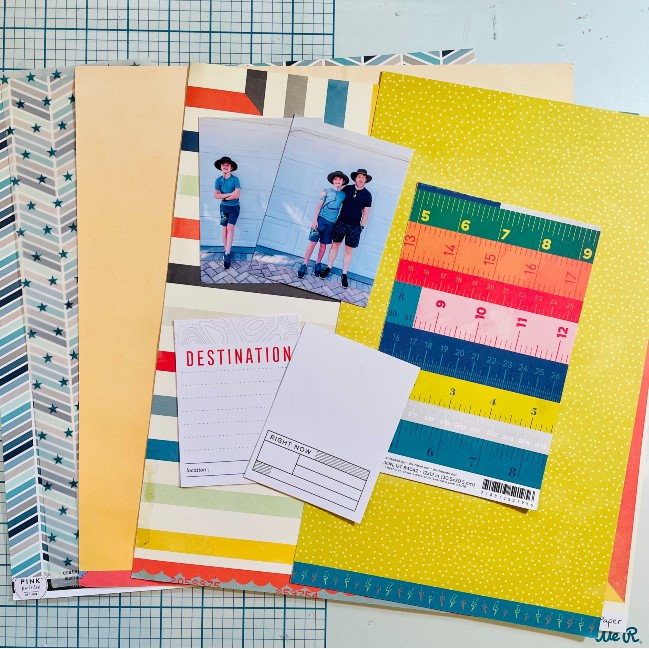
I approach almost every layout I create with one of three approaches as my jumping off point: sketch, photo, or product. Over the past several years I’ve been very conscientious of using my stash up (probably from all of our moving). For this layout I started off with my photos. I then went through my patterned paper looking for papers I felt went with the color and or story the photos tell. I then went through some of my 3×4 cards and pulled a couple that coordinated. My papers are from Paige Evans collections, a Crate Paper collection, and a Shimelle collection. My 3×4 cards are from Citrus Twist. I then went looking through my printed sketches to see if one worked with the amount of photos and papers I pulled. From there I start cutting up my paper and playing with the base layout using the sketch. Then I create my embellishment clusters.

Making the Most of your Existing Scrapbook Stashr with Brittany Kielar @ shimelle.com

I usually like to have a base for each cluster. The base may be circular elements, tickets, labels, frames etc. I chose to have circles as the base for each cluster partially because of the sketch and because it allowed me to use more of my patterned paper. I then went through my embellishment stash and stickers to see what coordinated with the papers and helped to tell my story.

Making the Most of your Existing Scrapbook Stash with Brittany Kielar @ shimelle.com

I ended up using a Vicki Boutin sticker book, chipboard phrases, and ephemera; Citrus Twist puffy stickers, labels, and ephemera; Shimelle stickers; and American Crafts word phrase Thickers. Once I pulled out what coordinated I then start sticked things onto each embellishment cluster base. I try to make sure I have the same colors, icons and word phrases represented in each cluster, which can help all the pieces of different collections feel like they belong together.

Making the Most of your Existing Scrapbook Stash with Brittany Kielar @ shimelle.com

If this inspires you, I encourage you to scraplift the layout using items you’ve kept in your stash for a while. You could use the sketch I used. You could also just be looking for similar papers in your own stash. Another idea is to scraplift the color scheme, the patterns, or the placement of everything! Lastly, you could use my process of selecting photos, then patterned paper, and then embellishments to document your own story.

Brittany Kielar resides in South Florida with her husband, two kids, and two dogs, and enjoys living so near her extended family. Brittany owns an education consulting company. When not working, you can find Brittany unwinding by scrapbooking, reading, and baking. She also loves watching her son in soccer and tennis and her daughter in dance. Her family loves going on walks and hikes, playing pickleball, doing puzzles, watching movies, and exploring. You can see more of Brittany’s work on YouTube, Instagram and Facebook.

Using Paper Scraps in Scrapbooking with Valeska Guimaraes

Using Paper Scraps in Scrapbooking with Valeska Guimaraes @ shimelle.com

We’ve entered a funny time of year in the northern hemisphere: is it summer and school is still out and you’re enjoying the sunshine and the odd adventure? Or is it autumn and school is back in session, life has a more predictable schedule, and you’re ready for the temperature and the leaves to both start dropping? If you’re leaning in to autumn vibes, today’s guest artist Valeska Guimaraes is here for you with a shift to autumnal colours and botanicals. As usual, supplies have affiliate links where possible. Thanks! -Shimelle

Scrapbook page with rainbow paper scrap border by Shimelle

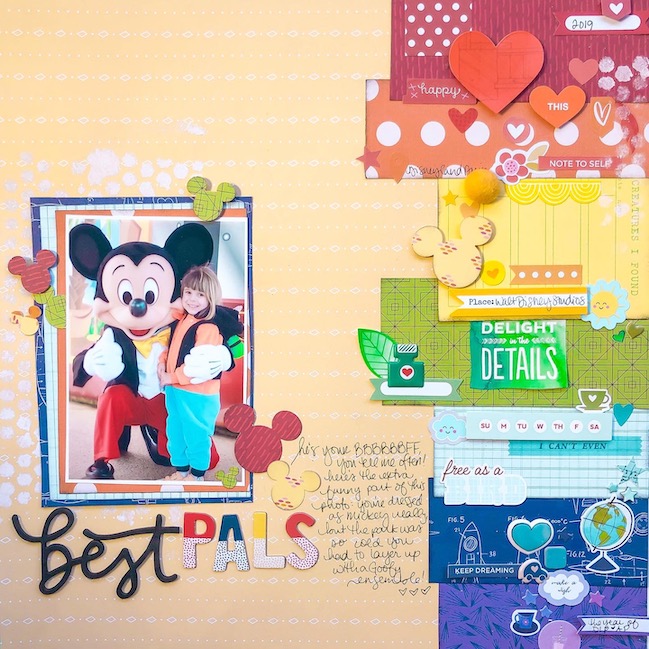
My name is Valeska Guimaraes and I’m so happy to be here with you today. I was inspired by Shimelle’s layout A Border of Scraps (Best Pals), which she used a simple technique that works so well! The composition she explained was to find a rainbow of paper scraps and line them up to make a border on your page. So easy and pretty, don’t you think?

Using Paper Scraps in Scrapbooking with Valeska Guimaraes @ shimelle.com

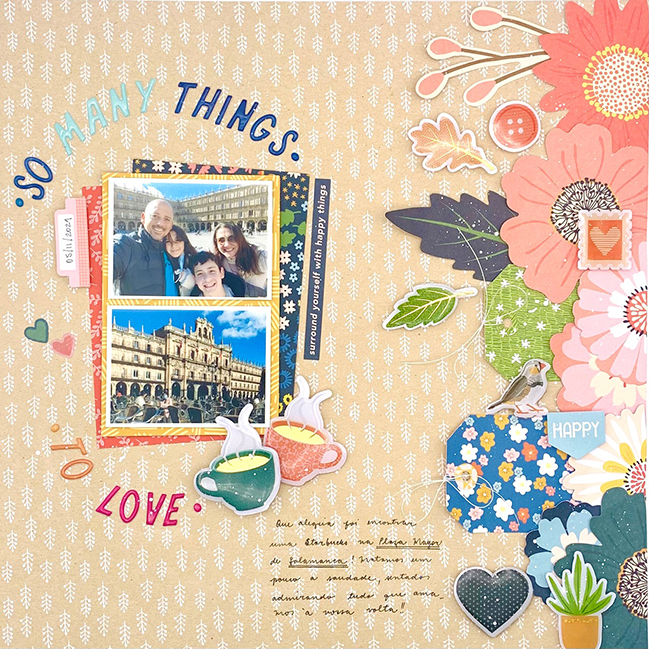
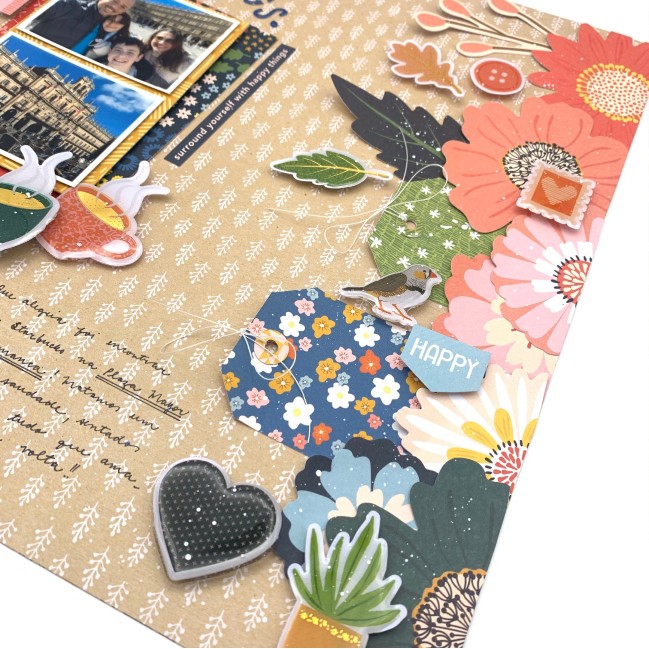
Well, I decided to try this with some flowers, tags and embellishments. It is not exactly a rainbow but I love those autumn colors from Paige’s Bungalow Lane collection. I think it can be easily done with scraps, die cuts or stickers too.

Using Paper Scraps in Scrapbooking with Valeska Guimaraes @ shimelle.com

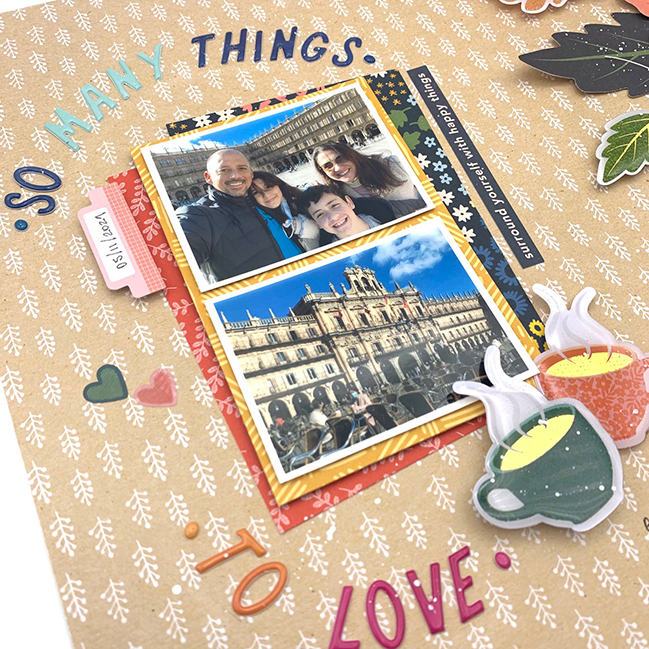
I also used a layering technique with 3D foam adhesive that will give some dimension to my layout. I really enjoy this technique, in fact is one of my favorite and I use it in most of my projects.

Using Paper Scraps in Scrapbooking with Valeska Guimaraes @ shimelle.com

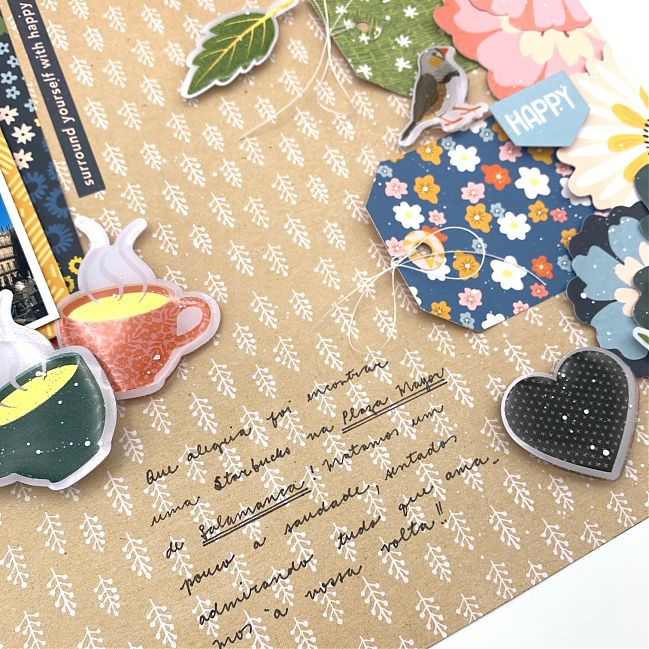
A round title is a very good way to get your attention. I used the colorful alphabet stickers from Paige Evans and I decided to use two pictures of my family. The photos were taken in a sunny autumn day in our trip to Salamanca, Spain. My family loves to travel together and discover beautiful cities around the world. That day we found a local Starbucks which made me really happy! I finished my page by adding some white acrylic paint splatters directly on the paper, but I protected my photos from the paint.

I really hope you enjoy it and get inspired to try this new “technique” and remember to share your work with us, especially if you make some rainbows with any season’s colour palette (#scrapbookrainbows)! It was an honor to be here sharing a little bit of my work and my life with you! Thank you for stopping by!

Valeska Guimaraes is a Brazilian living in Portugal with her family. They have lived in Panama and Peru for fifteen years and have now started a new adventure in Europe. Valeska loves scrapbooking and everything about paper crafts. She is a dentist but stopped working to spend more time with her family and ended up falling deeper into the love of scrapbooking. Valeska loves to spend hours in her craft room, making things and drinking coffee. Mini albums and layouts are definitely her favorite projects to make. You can see more of Valeska’s work on Instagram or tutorial videos on Youtube.

Scrapbooking from the photos with Sheena Rowlands

Scrapbooking from the photos with Sheena Rowlands @ shimelle.com

When you set out to make a new scrapbook page, what comes first: the photos, the story you want to tell, the products you want to use? Today guest artist Sheena walks us through a page she made by choosing the photos first and letting that dictate what she selected through her creative process. Sometimes I find it helpful to remember that the end result doesn’t need to make this obvious: if one thing leads to another on your layout and you’re happy with the end result, it’s okay if no one else clocks whether you started with the photos, the words, or the products, or something else. Paying attention to your creative process can help each of us make more wonderful things, but those who enjoy flipping through the pages of our albums might just appreciate the final project, especially if they aren’t crafty themselves. A little thought ramble for you today, but one that might ramble the right way for some of you as you work on the next project on your desk! Right, onto Sheena, with a reminder that supplies have affiliate links which make all of this series possible. Thanks! -Shimelle

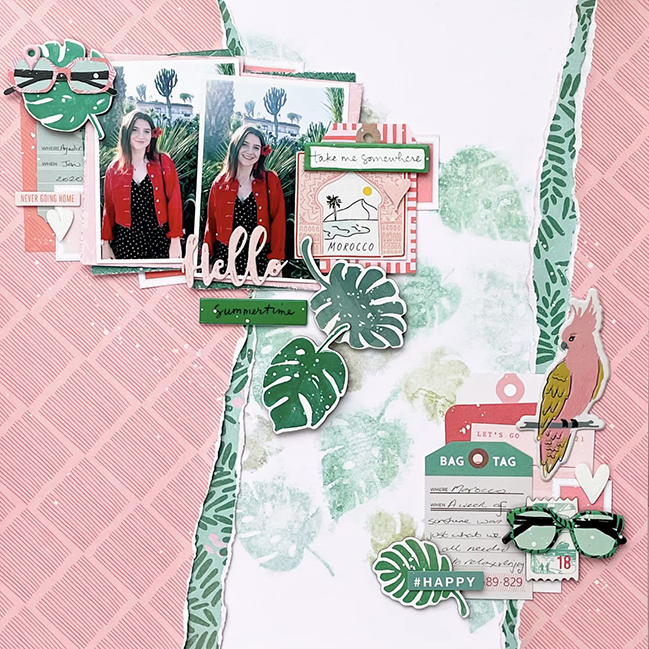
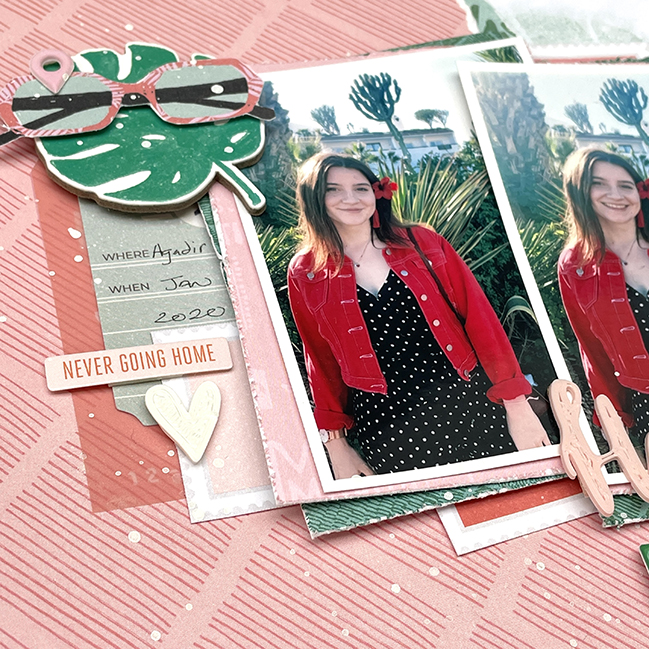
Hello Summertime. This layout began with the photos I, which is not always the case for me, it could be the story or a certain paper, but these pictures of my Daughter are from our last family holiday in the winter sunshine in Morocco and I wanted to scrap them. Exploring the world is something we all enjoy, and I have lots of holiday photos from far and wide.

Scrapbooking from the photos with Sheena Rowlands @ shimelle.com

As I like to scrap our trips, I keep all travel type supplies together in my craft space so I can pull them out and make a start and this way the collections get mixed together and papers and embellishments get chosen more by their colour than the manufacturer. Taking my inspiration from the photos, I picked out everything in pinks, reds and greens. This layout features three different Crate Paper collections, some Pinkfresh Studio, and a Making Memories paper from 2008!

Scrapbooking from the photos with Sheena Rowlands @ shimelle.com

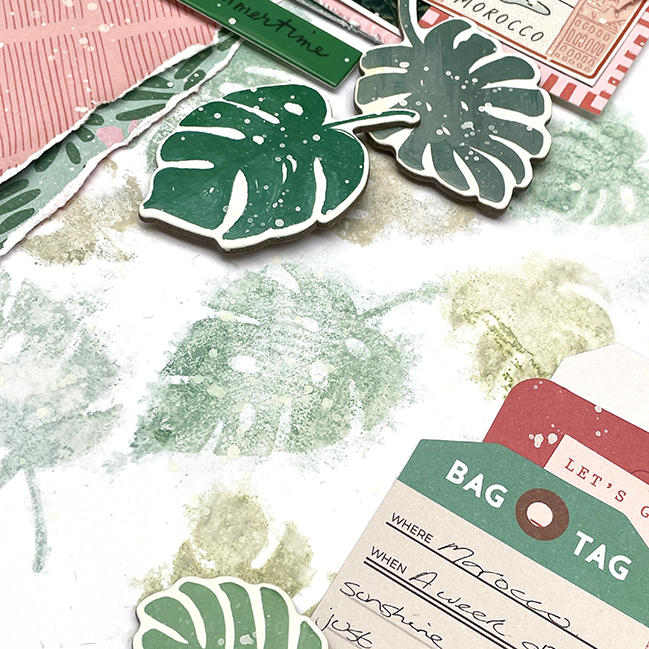
The background was easy to make using gessoed cardstock as my base. Then stamping onto it using four different Ink Oxides – Evergreen Bough, Iced Spruce, Speckled Egg and Bundled Sage using tropical leaf stamps in three sizes. The stamped images were sprayed lightly with water allowing the edges to blur creating a softer effect.

When the background was dry I added my torn papers and created the clusters, around the photos and my journaling on the tag, sticking with my colour combo and creating a diagonal line to lead your eye down the page.

Sheena Rowlands is a UK mum to grown children, part time nurse, and lifelong crafter. Scrapbooking has been her creative release for over sixteen years and for the past twelve years she has also recorded her family’s story using a Project Life format. She scrapbooks her family, travels, and furry grandpup. Her pages often feature machine and hand sewing, ink work, and clustering of embellishments. Sheena runs a small scrapbook embellishment business Sheenanigans and with two friends a retreat and workshop company Birds of a Feather . Presently Sheena designs for the Hey Little Magpie store and Just Nick Studio and have previously designed for shops, magazines and Shimelle. You can find Sheena on Facebook, Instagram, Sheenanigans.

Scrapbooking Disney in a Travel Album with Jennie Ray

Making a Disney scrapbook travel album with Jennie Rey @ shimelle.com

Happy Friday, friends! In a week with ideas perfect for projects with lots of photos, I would love for you to see this oh-so-clever paper contraption beautifully created by guest artist Jennie Rey! -Shimelle

Hi friends, Jennie Rey here! Like Shimelle I love love love everything Disney! I’ve been to Disneyland Paris quite a few times and in 2016 a dream came true when I was able to travel to Orlando, Florida, to go Walt Disney World with my husband and daughter. I can still feel the excitement we felt when we finally drove through the gate and entered the most magical place on earth!

When looking for inspiration on documenting a Disney trip you quickly end up on Shimelle’s blog! I love her use of bold colors and combining different patterns and I decided to challenge myself to do the same and I really like how it turned out!

Making a Disney scrapbook travel album with Jennie Rey @ shimelle.com

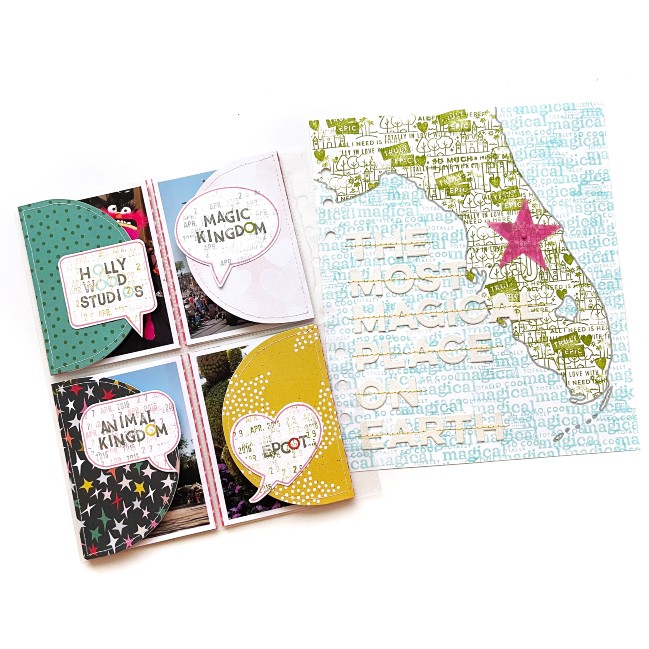
I’ve documented my two trips to Florida in four (!) 6×8 travel albums but I also wanted to include my love of everything Disney in my Stories album so I made a 6×8 spread about our visit to the four main parks. A little problem with documenting Disney is the number of photos you come home with.

Making a Disney scrapbook travel album with Jennie Rey @ shimelle.com

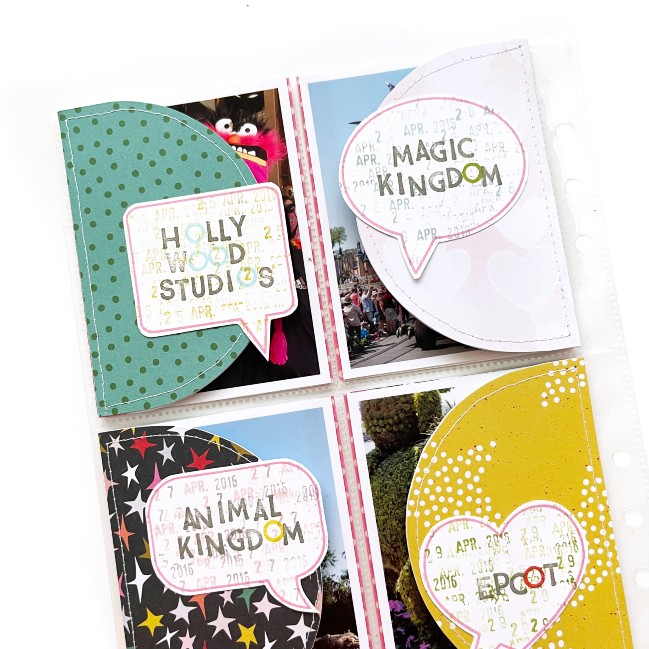
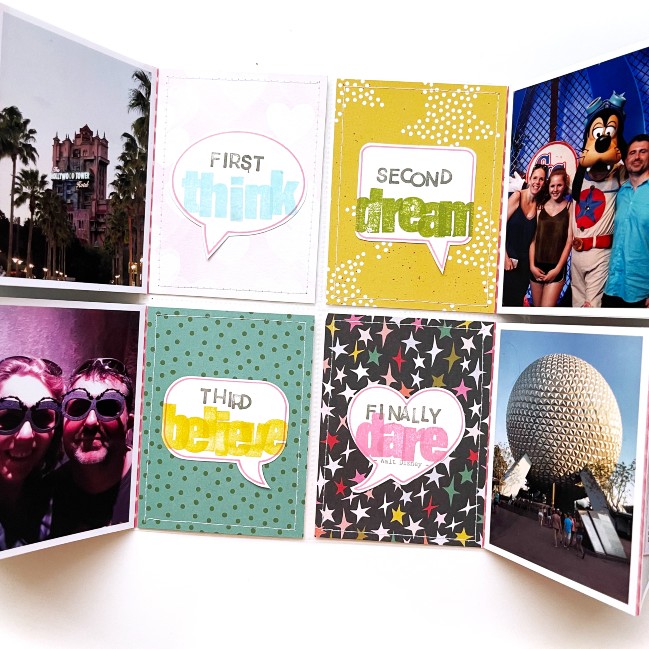
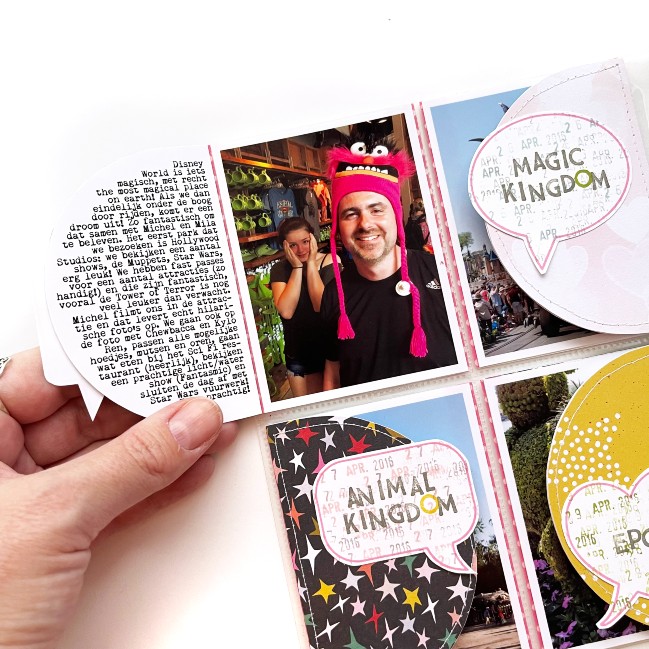
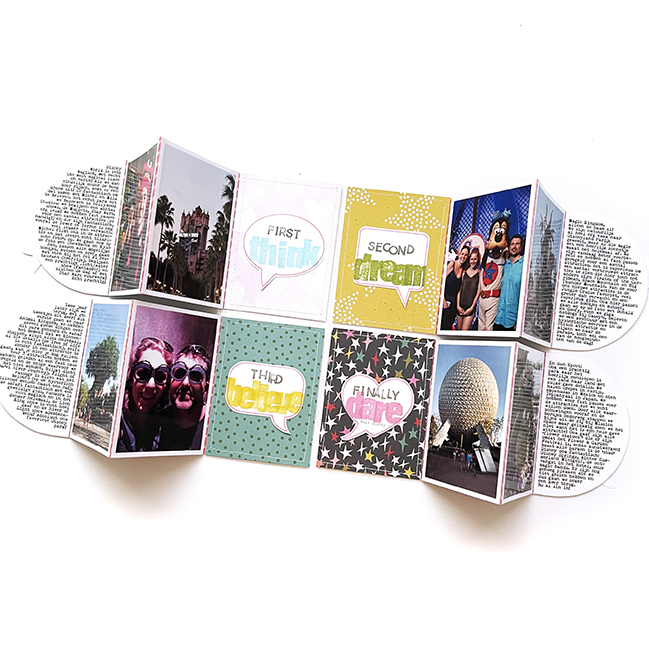
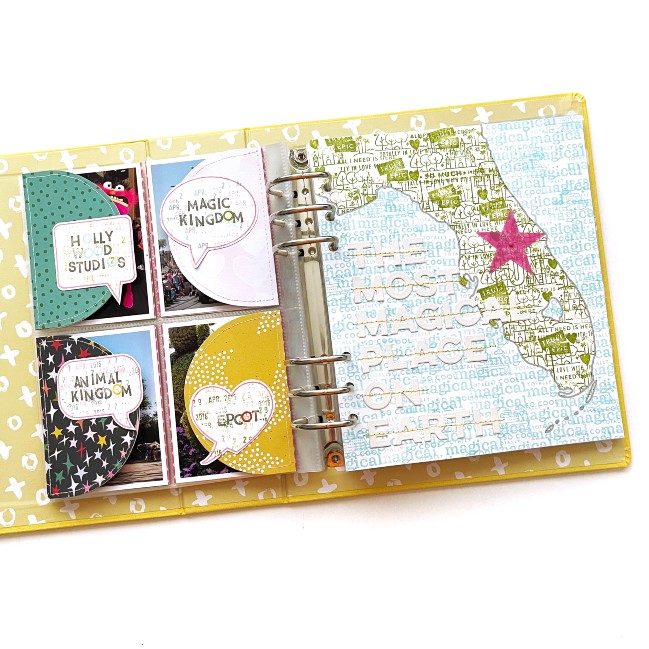
To be able to include a little bit more I decided to make a little mini-album flip-out per park and just stick it to the outside of the page protector.

Making a Disney scrapbook travel album with Jennie Rey @ shimelle.com

Making a Disney scrapbook travel album with Jennie Rey @ shimelle.com

For the mini-album flip-outs I’ve used two 3×4 pieces of patterned paper, 4 3×4 photos and a piece of white cardstock for my journaling. I cut one of the 3×4 patterned papers and my journaling card in a half-circle and attached all the pieces together using washi tape. I stitched around the edges of the patterned paper pieces, just for some texture. I stamped the names of the parks inside a speech bubble (and also repeat-stamped the date) and added those to the front of the flip-outs. I also used speech bubbles spread over 4 3×4 cards to stamp a Walt Disney quote.

Making a Disney scrapbook travel album with Jennie Rey @ shimelle.com

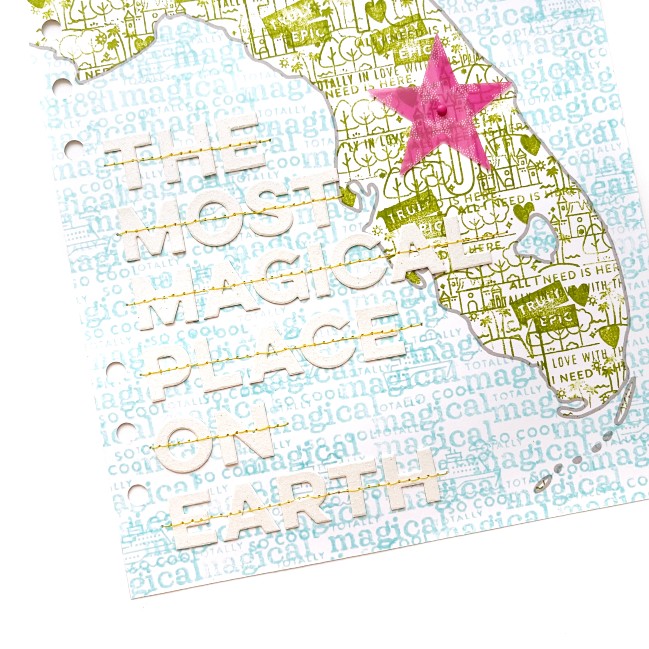
For my right side page I found a map of Florida on the internet and traced it in Procreate on my iPad. I printed the map on regular paper and cut out the Florida piece and used it as a mask so I could repeat-stamp to fill the water part. I did the same with the land part using another color. I added a title using cardstock alphabet stickers and stitched those onto the page and lastly, I added a star to the map to mark the location of Disney World!

Making a Disney scrapbook travel album with Jennie Rey @ shimelle.com

Jennie Rey is lives in The Netherlands. She has been married to husband Michel for twenty-three years and they have two children who are now adults. Hybrid scrapbooking is Jennie’s favourite thing to do and the hobby has kept her grounded through the last few years of unpredictability. Jennie is a member of the Ali Edwards Creative Team and loves the December Daily and Week in the Life projects, and also enjoys documenting her travels and her family’s daily life. Check out Jennie’s class on hybrid scrapbooking via Ali Edwards or find her work on Instagram.