pretty paper. true stories. {and scrapbooking classes with cupcakes.}

lovely to meet you Twitter Facebook Pinterest YouTube

Take a Scrapbooking Class

online scrapbooking classes

Shop Shimelle Products

scrapbook.com simon says stamp shimelle scrapbooking products @ amazon.com shimelle scrapbooking products @ amazon.co.uk

Reading Material

travel

Rainbows and Die-Cut Files with MJ Magnuson

Rainbows and Die-Cut Files with MJ Magnuson @ shimelle.com

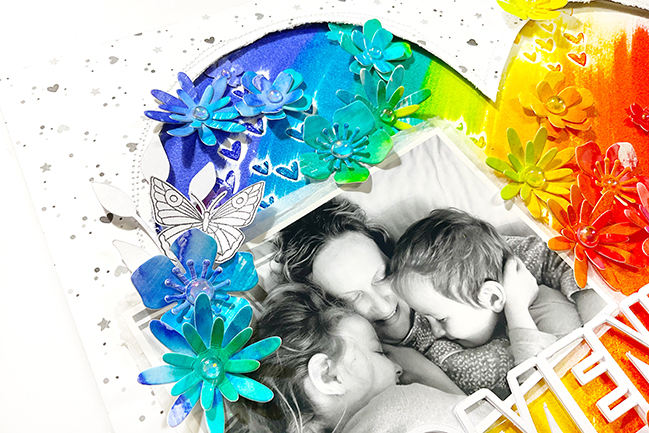
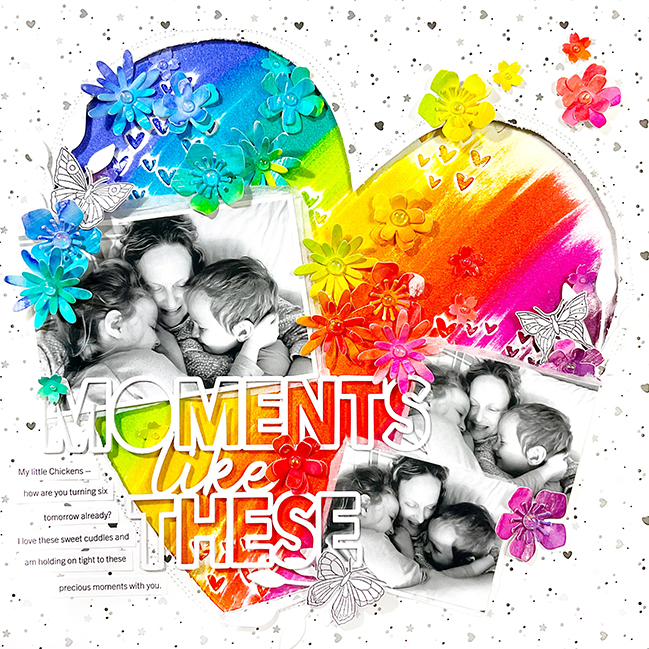
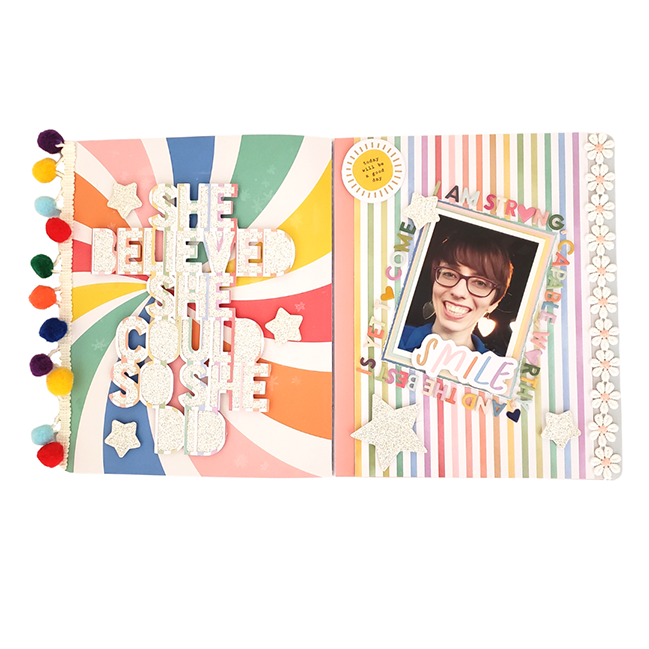
Ready for some more #scrapbookrainbows inspiration? How about a double page layout? Please welcome today’s guest artist, MJ Magnuson! A reminder that supplies have affiliate links to make the guest artist series possible. Thanks for clicking through when you go shopping! -Shimelle

From my perspective, it doesn’t get much better than rainbows! They are so essential to the person that I am, and I wanted to create a project that authentically felt like me. If you were to take a step into my wardrobe (which includes all of my colorful and most cherished scrapbook albums), you would see a bright array of clothing, shoes, hats, and all of the things that make me feel the most like me. I wanted to create that same vibe with this project!

Ideation is one of my favorite parts of crafting, creating, and even when working at my 9-5pm job. I started by laying out some of my most recently purchased rainbow sheets (including some notable patterned papers from the Fantástico collection from Obed Marshall and the Pebbles Kid At Heart collection), and then I just let my creativity fly!

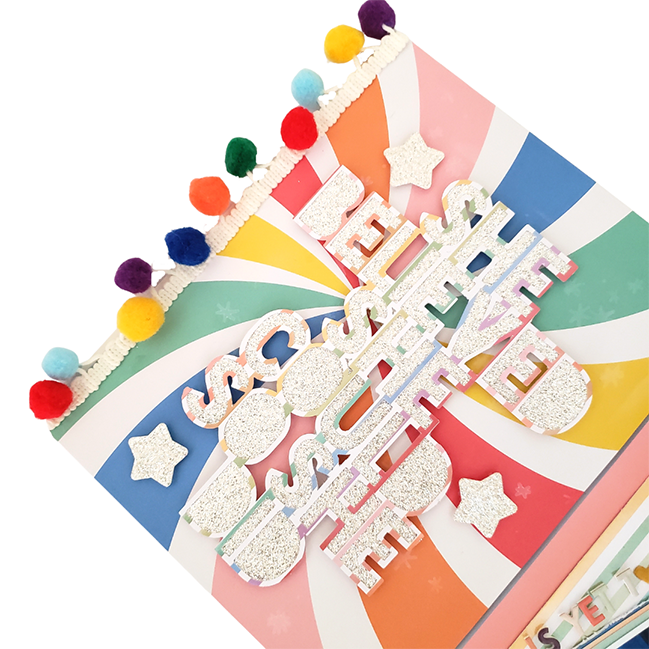
However, I really wanted to strike a balance between adding “all of the rainbows” without it feeling too disconnected. I also LOVE using big bold cut file titles in my projects, and I truly believe that every page could use a little sparkle- so I backed one of my favorite Paige Taylor Evans cut files (which is saying a lot) with some gorgeous Diamond glitter paper from the Stamp Market.
Rainbows and Die-Cut Files with MJ Magnuson @ shimelle.com

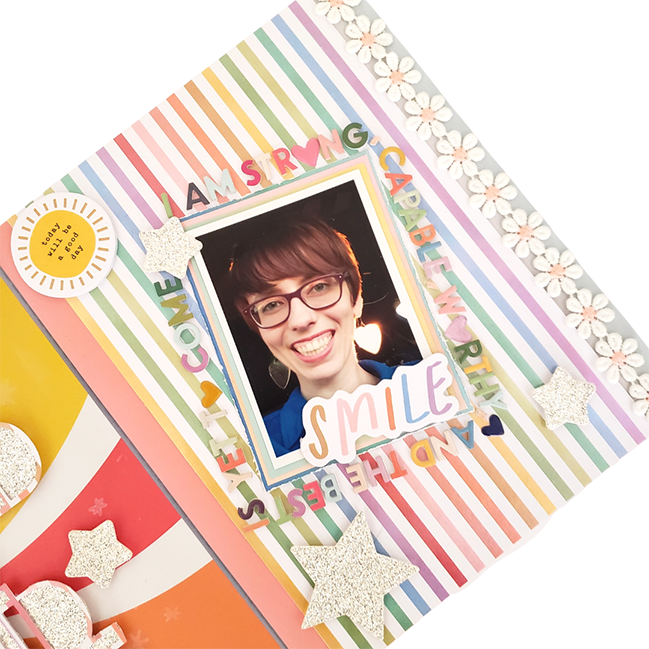
To tie the two pages together, I added a mix of star die cuts from the same glitter sheet to each of the pages and also used the same Pebbles background paper from the right page as the cut file border from the left page. I have been itching to use some pom poms and fabric strips in my crafting, so I added some rainbow pom poms to the left edge and a soft daisy strip of fabric to the right page. I really loved how this softened up the right page, as I knew that I wanted to create a title of rainbow letters on the right page (and I didn’t want to pull too much focus away from the title). I added those colorful alphas, along with a fun mix of stickers, and then decided that this page was ready to roll!

The inspiration behind this page is a bit darker, despite the punch of rainbow that this spread packs. The photo was from my 30th birthday amid the pandemic, and I had recently lost my job. I wasn’t going to let it get me down, though, and I made it a priority to go out and get some fun photos outside- socially distanced, of course ;) This photo was taken on the way back after being stuck inside for 8 weeks due to the pandemic, and after everything I had been going through during that time, this day felt like a burst of sunshine in the darkness.

Despite all of the fear of the pandemic and the uncertainty regarding my job situation, this was a great day. I used the cut file title and the alphas to serve as a reflection of the hope that I tried to invoke during this time, in the face of surmounting obstacles. Documenting memories like this is so important, and I appreciate having this photo and moment to look back on!

Rainbows and Die-Cut Files with MJ Magnuson @ shimelle.com

My biggest hope for creating projects like this is that it inspires other crafters to tell their stories. The tough ones, the fun moments, the goofy, or even embarrassing ones. YOU are worthy of having your stories shared, appreciated, and heard. Who you are deserves to be celebrated, and even if colorful rainbows aren’t your jam- try using pastels or creating a cool monochromatic masterpiece. No matter how you create, you will never regret sharing pieces of yourself in your own crafting projects. I promise you that!

You might know MJ Magnuson as @scrappygolucky on Instagram! If you’re into all things rainbow, authenticity, and finding fun ways to tell your story, then join along with her crafty adventures on Instagram.

Scrapbooking on a small scale with Cristin Howell

Scrapbooking on a small scale with Cristin Howell @ shimelle.com

What size scrapbook pages do you make? With the exception of the Christmas season, I’m all in for 12×12 and have been for a while now. It’s a format that works well for me, but it doesn’t stop me adoring plenty of crafters’ work in other page sizes and album formats! Today’s guest artist Cristin shares a different page style in terms of size and binding but something familiar for sure – #scrapbookrainbows! Enjoy! -Shimelle

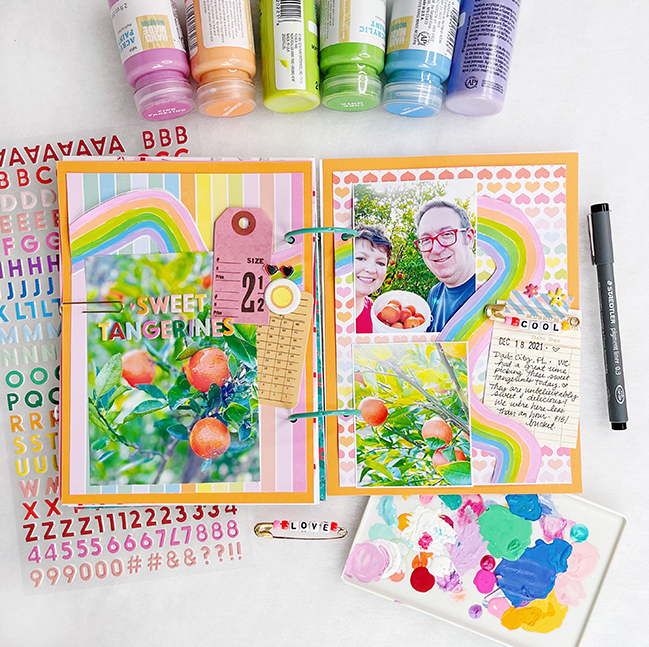
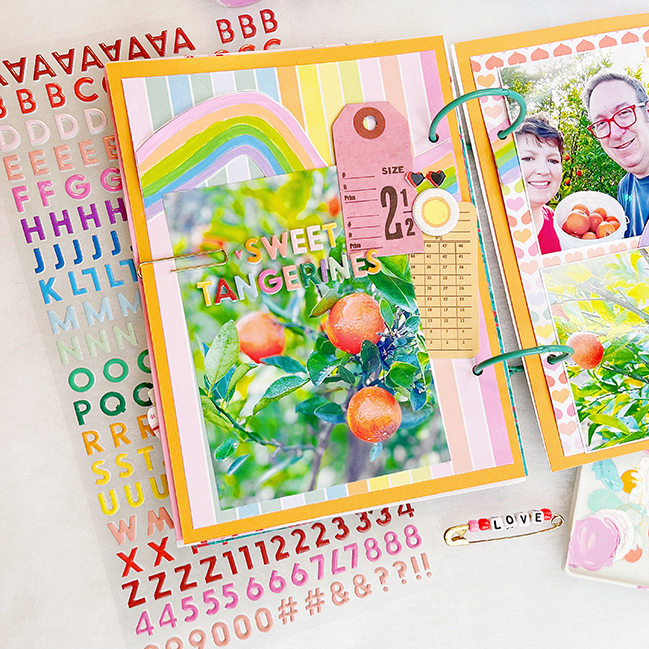
Hi there! It’s Cristin here. First, I’d like to thank Shimelle for having me as a guest on her blog. I’m delighted to share this page with you today. and I love making bright & colorful scrapbook pages on a smaller scale (travelers notebook sized or 6×8). Keeping things in this format helps me keep up with recording my memories and, most importantly, remembering the good times. At the beginning of 2021, I started using binder/loose leaf rings to contain my scrappy albums. It’s an inexpensive, informal way to scrapbook and it’s easy to add in pages and not worry about bulky ephemera. I wanted to share a fun layout with you documenting a trip to a u-pick citrus farm this past December.

Scrapbooking on a small scale with Cristin Howell @ shimelle.com

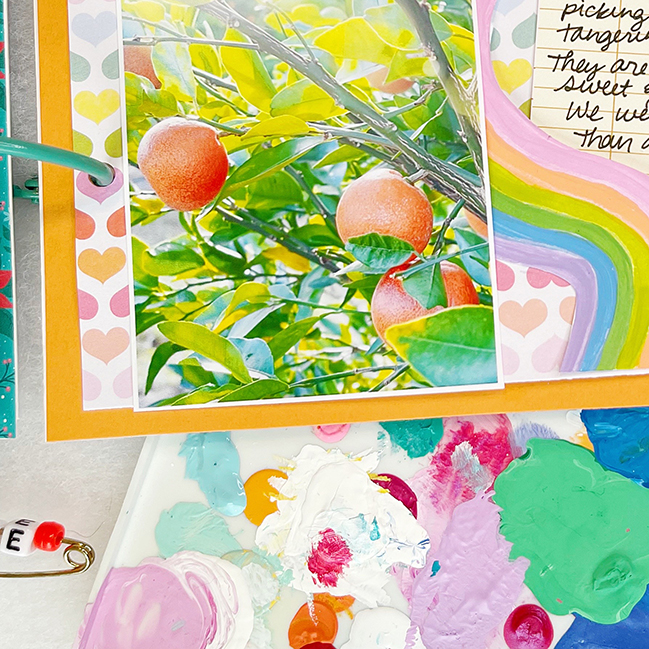
I had never been in a tangerine orchard before! I took lots of pictures of the little tangerines while looking through the branches. Of course I had to include a selfie with my spouse, John, and the “fruit” of our labor (ha!) – our bucket of tangerines. I usually scrapbook with a bright palette and for this occasion, a fun RAINBOW theme seemed perfect. Besides the fun background patterned paper, more rainbows were needed!!

Scrapbooking on a small scale with Cristin Howell @ shimelle.com

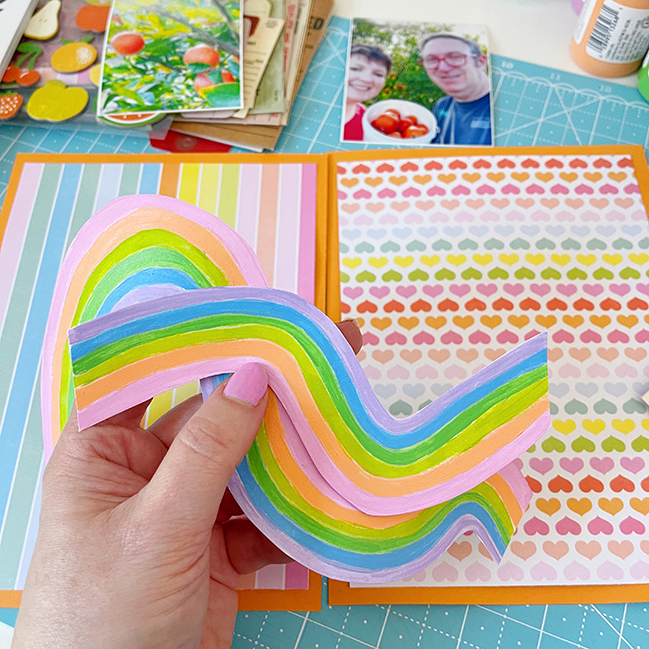
Sketching a curved line on plain white cardstock created the structure for the rainbow shape. Any shape will work fine – I like to cut my cardstock to the page size first. Then, a small paintbrush paired with a rainbow assortment of acrylic craft paints (any brand) followed the line to create the colorful rainbow ribbon.

Scrapbooking on a small scale with Cristin Howell @ shimelle.com

I recommend trying non-traditional rainbow colors and mixing up the color order to match your photos or paper. I like sticking with the same color saturation, though – meaning, the colors are all the same brightness. After drying, I trimmed these pieces from the cardstock and adhered them to the background.

Small letter stickers were used for the title, and since I’m scrapping on a small scale (no room to spare!), I stuck the title right on top of my main photo. I love how colorfully this turned out! Thanks so much for hanging out with me today as I shared my layout with you!

Cristin Howell lives in central Florida, USA. Memory keeping is her passion and she has been scrapbooking on and off since 1999. Cristin loves to create layouts in full color – bright pinks and turquoise are her favorites! This past year, she has been scrapbooking on a smaller Traveller’s Notebook-sized scale.. Find Cristin on Instagram & her website.

Scrapbook Cocktail with Emilie Chamel

Scrapbook Cocktail with Emilie Chamel @ shimelle.com

Today was the first live session in Scrap a Rainbow and I loved the questions that came up and how we were able to work on some concrete answers that I hope will help. I’ve even seen a few pages already from those who like to scrap along in real time, which is always super exciting to me. But here it’s time for a new guest artist! Please welcome Emilie Chamel sharing a colourful project today! A reminder that supplies have affiliate links to make this all possible. Thanks for clicking through when you’re shopping! Enjoy Emilie’s handiwork! -Shimelle

Hello everybody! My name is Emilie and I am extremely honoured to be guesting on Shimelle’s blog today. Thank you for having me!

You will know that if I am here, it means that I love scrapbooking! I fell in love with this hobby back in 2006. There are so many things about that craft that I love: recording memories of my loved ones, playing with pretty papers and sharing with this amazing community. But I love to give myself challenges sometimes, and it often has to do with the cost of this hobby: recreating the look for less, making “dupes” from your stash, and so on.

Scrapbook Cocktail with Emilie Chamel @ shimelle.com

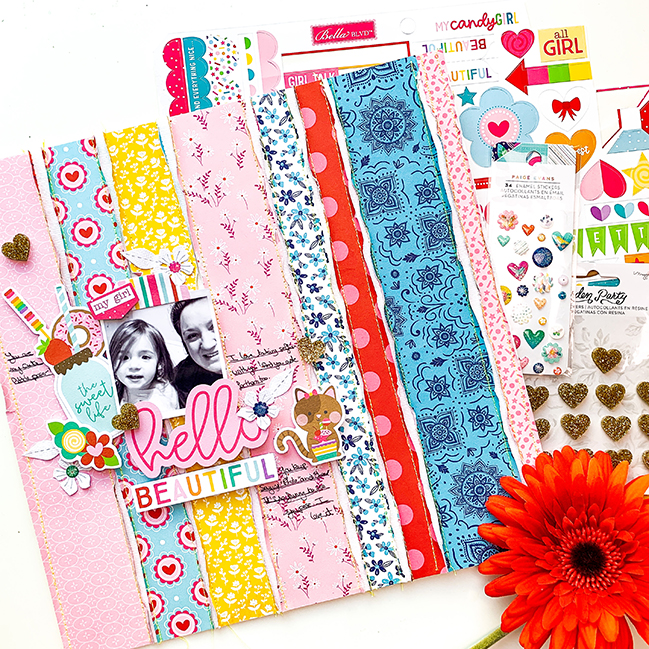
This is where this layout came from. I have several leftover scraps from collections or kits in my stash which seem destined to never be used as not enough is left. But is that really the truth? I challenged myself to go through my boxes of scraps and pull all the papers which I felt would work together without caring about the brands or collections, just the look!

I honestly could have come-up with so many looks and styles and I seriously almost went into a completely different direction but the pinks, red and blues caught my eye. The mix of Bella BLVD Candy Girl, Paige Evans’ Go the Scenic Route as well as Hip Kit Club August kit worked a treat together!

Scrapbook Cocktail with Emilie Chamel @ shimelle.com

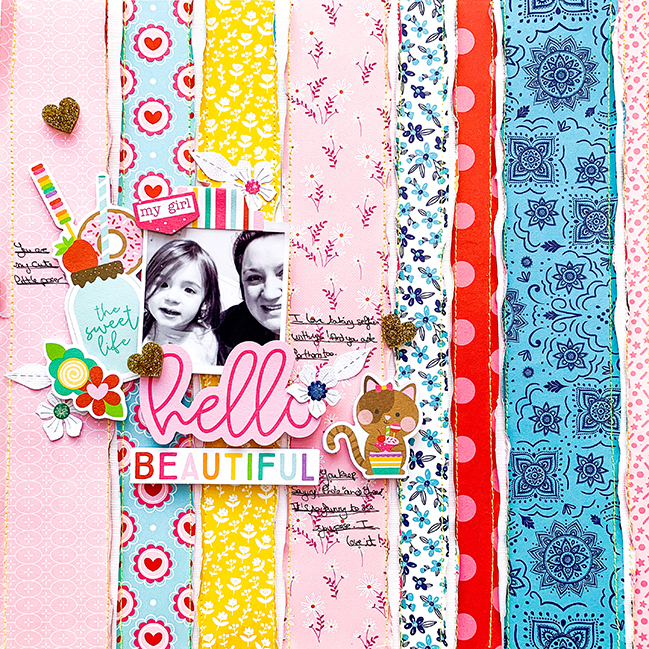
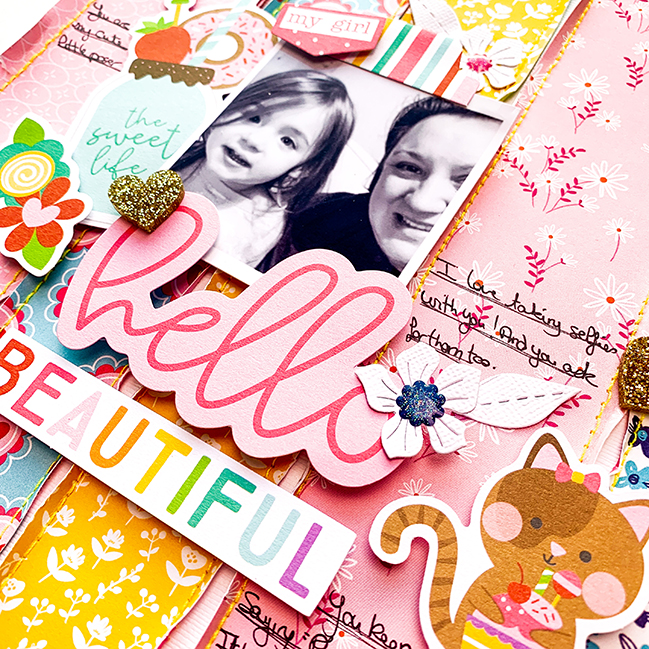
As I hardly had any full sheets, I set out to cut several strips of paper of different widths. They all had to be full 12” length though and vertical. This step in my creative process really helped me edit my selection of papers as I had so many which were no longer big enough. Once this was done, I machine stitched them to my background and ruffled up the edges. This creates such an amazing look that very little embellishments are needed from then on!

Scrapbook Cocktail with Emilie Chamel @ shimelle.com

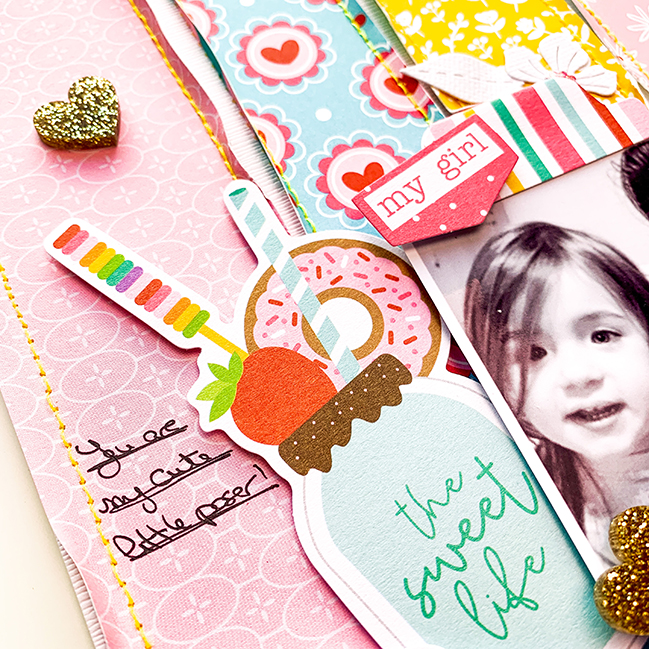
A black and white photograph ensured that no colour would clash with my already busy background and a few leftover ephemeras and enamel dots were enough to finish off the looks. I added an extra touch of bling with the super cute Maggie Holmes gold glitter hearts and it was done!

How satisfying is that?! A brand new, fresh looking layout made from using my scraps, nothing can beat that feeling of accomplishment! I hope that this layout inspired you today and that you will try mixing together your leftover scraps.

Emilie Chamel comes from France and has been living in the UK since 2004. She has always been creative, even from a young age when she used to create clothes for her Barbies with her mother’s scraps of fabric. Emilie discovered Scrapbooking back in 2006 when she made her first layout and she has been on several design teams since such as Simple Stories, PinkFresh Studio, Hip Kit Club and more. She lives at home with her daughter Sophia who is at the centre of 99% of her layouts, her step daughter Lucy, her partner Keith as well as her dog and her cat. You can find her on Instagram, on Youtube and her blog.

Using B-Side Papers with Becki Adams

Using B-Side Papers with Becki Adams @ shimelle.com

Hello friends! I hope you had a lovely Easter weekend, maybe with some new memories to scrapbook. Please join me in welcoming today’s guest artist, Becki, here to share another delightful take on #scrapbookrainbows. If you want to join me for some colourful scrapbooking in class, you can join me for Scrap a Rainbow too! Right, over to Becki!

Often when I’m describing my scrapbooking style to other crafters, I say that I’m a “b-sided” crafter. I love the smaller patterned, tone on tone side of the patterned paper, the “b-side”. I have found that these patterns are much easier for me to work with versus the bold, busy “a-side” of the paper. I had so much fun creating a rainbow background on this layout! I can’t wait to show you how much fun it is to create magic with the “b-side” patterned paper.

Using B-Side Papers with Becki Adams @ shimelle.com

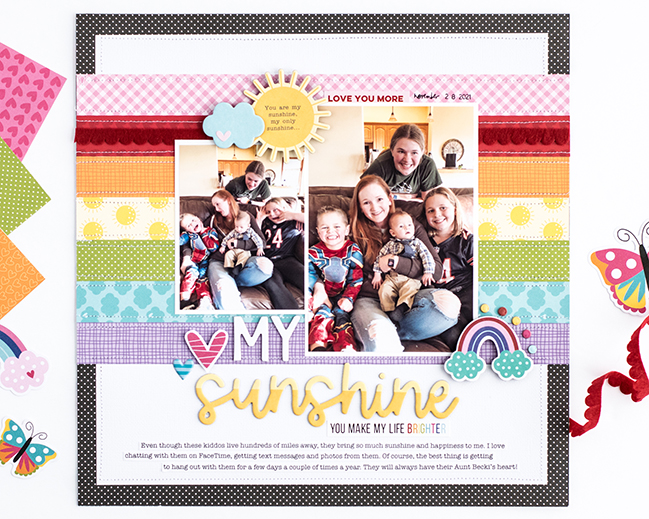
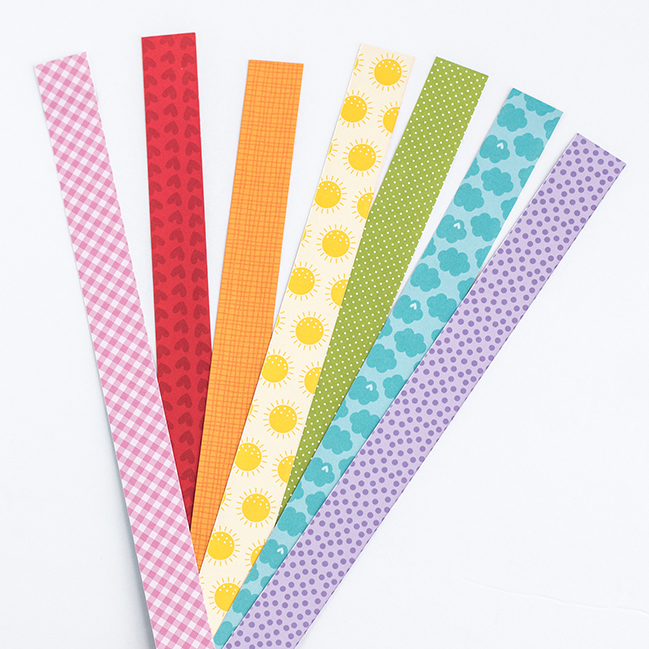
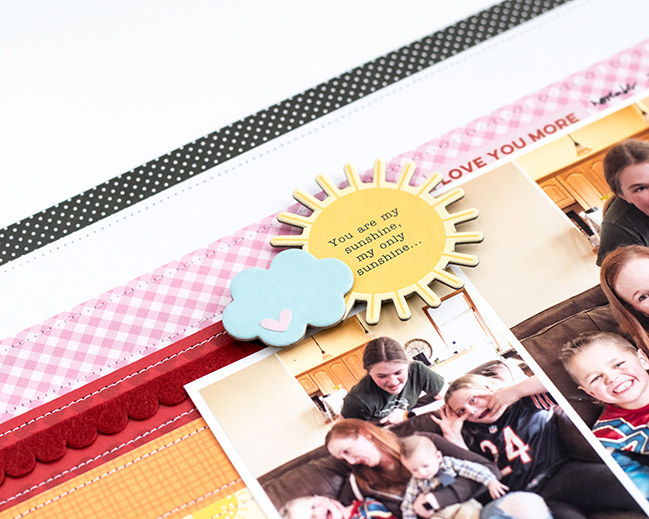
I chose a black polkadot background for this layout because I wanted to add lots of color with my patterned papers. Then I added 11” square of white textured cardstock on the top of the polka dot patterned paper. I used several “b-sides” of patterned papers to create a rainbow across the background of the layout.

Using B-Side Papers with Becki Adams @ shimelle.com

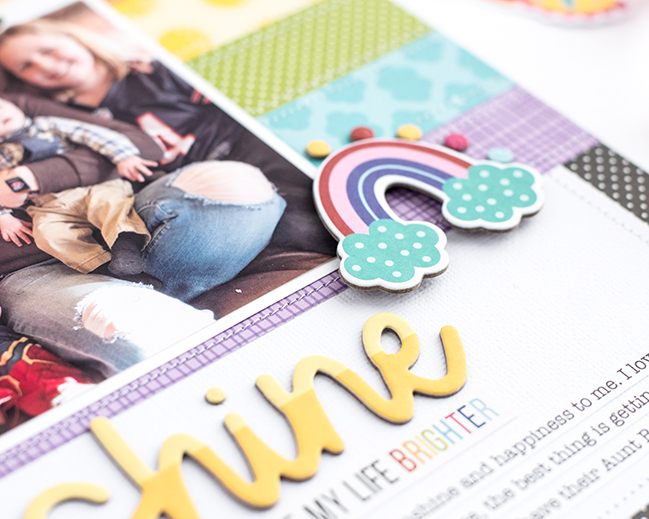
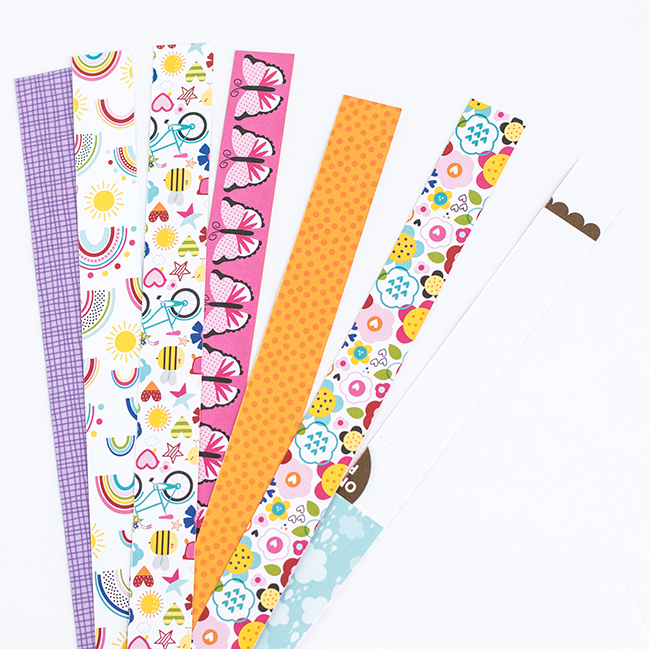
Each stripe on the rainbow measures 1” × 12”. I adhered them slightly off center so that there was more space at the bottom of the page for my title and journaling. Stitching is one of my favorite ways to add texture and interest to my layouts. I stitched along the edge of each strip with my sewing machine and white tread.

Using B-Side Papers with Becki Adams @ shimelle.com

To make my photos stand out against the rainbow background, I printed them with a white border. I love that little extra pop of white to make the photos pop. Because I used the “b-sides” of the patterned paper, the patterns are tone on tone. This also allows the photos to stand out. If I had used the “a-sides” of the patterned paper that are much more bold, my photos would have gotten lost in the busy background.

Using B-Side Papers with Becki Adam @ shimelle.com

This happy, colorful background is the perfect way to tell the story of a recent visit with my sweet nieces and nephews. The journaling on this layout reads:

“Even though these kiddos live hundreds of miles away, they bring so much sunshine and happiness to me. I love chatting with them on FaceTime, getting text messages and photos from them. Of course, the best thing is getting to hang out with them for a few days a couple of times a year. They will always have their Aunt Becki’s heart!”

I have SO much fun playing with the b-sides of patterned papers. I hope that you’ll consider using the b-side of the patterned paper on your next project. Happy scrapping my friends!

Becki Adams has been a designer within the crafting industry since 2007. She has taught numerous in-person workshops and online classes. Additionally, she has worked with many manufacturers and industry leaders, including American Crafts, Bella Blvd, Echo Park Paper, Hip Kit Club, Scrapbook and Cards Today magazine, and Stamp and Scrapbook Expo. Becki shares her work with her Instagram community daily and posts new content to YouTube channel regularly. Throughout her career, Becki has developed a style that is clean, colorful, and classic. Passionate about papercrafting, Becki considers memory keeping more than just a hobby. It is her creative release as well as a way of preserving memories for her loved ones.

Rainbow Lettering & Cut Files with Melinda Sweetman

Rainbow Lettering & Cut Files with Melinda Sweetman @ shimelle.com

You know I love a bit of #scrapbookrainbows joy so today I am delighted to introduce you to Melinda and her rainbow scrapbooking project! Thanks so much for joining us, Melinda. As always, supplies are linked with affiliate links at no extra cost to you and it makes all this possible so thanks for clicking through when you are shopping. -Shimelle

Oh my stars!! I am so excited to be here with you on Shimelle’s blog sharing this scrapbook layout that I created! When I was invited along I just knew that I had to create something with a rainbow. My Master 12 inspired me to truly embrace ALL the colours when he was about two or so when he asked me “But why do I just need to pick one favourite colour Mummy? I love all the colours!!” Now I’ve said that, there is another memory that needs to be added to my “want to scrap” list.

I love to tell the story behind the photo! And that is not always the obvious story. Often, last day of school photos are more about one of my boys’ resilience and what they may have battled that year. Or that photo of me all dressed up will be about how I feel in that moment or what it took for me to get to that feeling. I also love the pretty paper, stickers and paint! When I learned that scrapbooking could be whatever you want it to be (thank you Shimelle!!) all the “rules” went out the window and here I am now, enjoying every minute I get to create and to tell my stories!

Rainbow Lettering & Cut Files with Melinda Sweetman @ shimelle.com

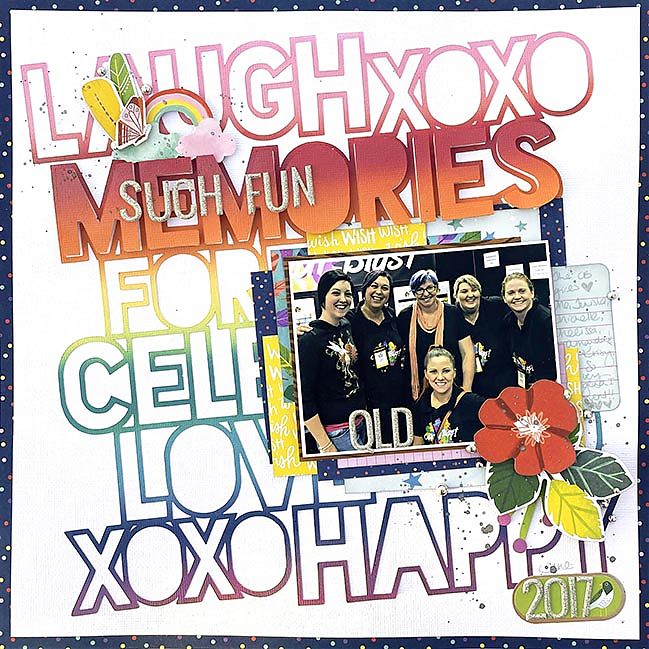
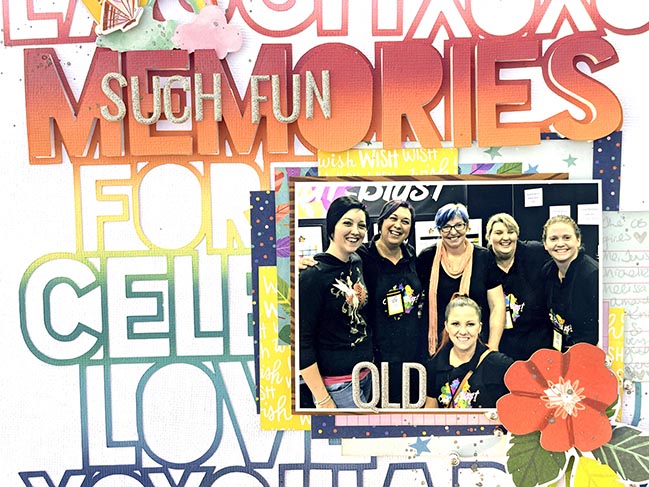
For this page, after I decided RAINBOW, next was a collection to actually choose my colours! I ended up picking a Shimelle collection – “Never Grow Up”:https://shrsl.com/3gfhd – and picked Distress Oxide Ink Pad colours to work with it. Distress Oxides are one of my most fave inky products to use – they are super easy to work with!! So easy to blend and so, so forgiving!! And you can stamp beautifully or watercolour with them – so versatile!! I’ve used (in true ROYGBIV order with a P at the front!!) Kitsch Flamingo, Fired Brick, Spiced Marmalade, Squeezed Lemonade, Pine Needles, Broken China, Chipped Sapphire and Seedless Preserves.

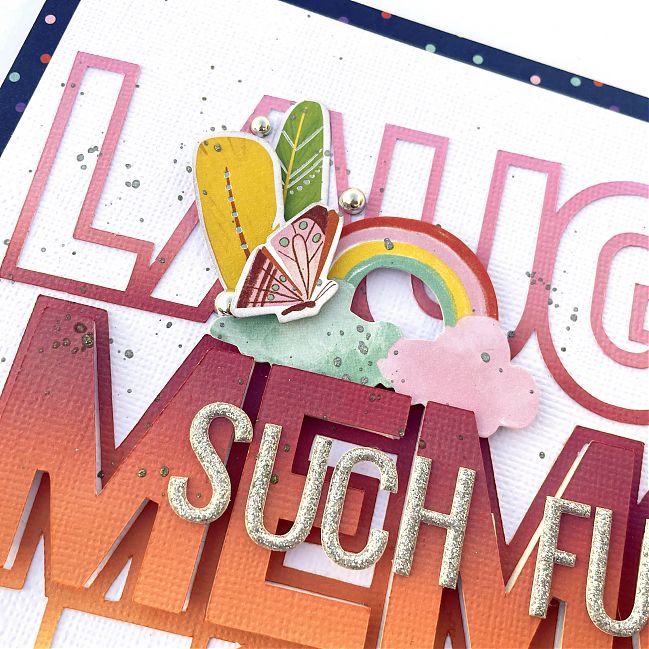
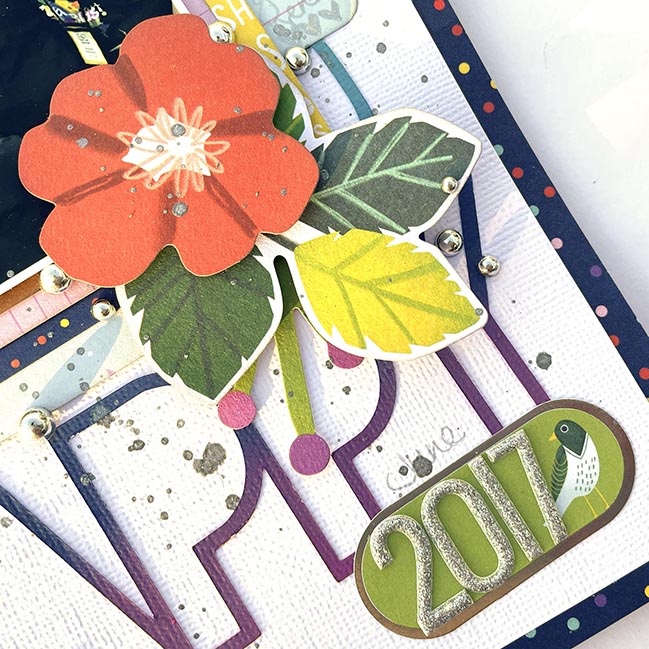
I’ve cut a cut file from white cardstock (from CUT to YOU) and then using my Distress Oxide colours and blending brushes I have added colour straight to my cut file while it was still stuck to my stick mat. Handy Tip: if you want to add colour to a cut file like this, leave it stuck to your sticky mat while you add your colour so it doesn’t move around or get mangled!! I wanted this to be a main feature of my background. I very carefully stuck my cut file to my white cardstock background on an angle and then added my photo on the same angle to keep this page fun and casual!

Rainbow Lettering & Cut Files with Melinda Sweetman @ shimelle.com

I added back in one of the ink blended words to form part of my title and some silver glitter alphas to finish it off. I then added a small sticker for journalling to the right side of my photo – I really didn’t want to design myself out of a journalling space – and then 2 small embellishment clusters. One to the top above the title and one to the bottom right of the photo. Finally I added a small label to the bottom right corner of the cut file to complete the diagonal design and then sprinkled some silver pearls along that same diagonal.

Rainbow Lettering & Cut Files with Melinda Sweetman @ shimelle.com

This photo is one of many that I took a couple of years ago (ok, ok, a few years ago!) at a Craft Show that I attended interstate in QLD, Australia. At the time I was part of a couple of design teams and this particular photo is me with some girls that were also on the same team as me. I had the best fun at that show and met so many amazing, fun, beautiful crafty souls that now, 5 years later, I call true friends and I long for the days that I can easily fly across the country again to hang out with them!!

This design would also be super fun in an ombre/monochromatic design – pick a colour and work with all the shades you have of that colour, working with the lightest shade at the top (for an ombre) working your way through to your darkest shade. Then embellishing with that same colour all across the page! That would be so fun, in fact, I may even add that my list!! Another way you could change this up would be to use the internal letters (and of course, the positive of the cut file!!) that have been inked with a plain coloured cardstock as the positive cut. You could then pop up either the letters or the cut file for some fun dimension. Or leave it flat and have it as more of a background design like I did!


If you’d like, you can watch my video on how I made this layout, over on my my Youtube.

Melinda is an Aussie based in sunny Perth, Australia; surrounded by boys! Alan, aka her husband and biggest supporter, plus sons Jacob and Hunter. One of her favourite ways to spend my time is playing with pretty paper and telling stories. When not in her craft room, she listens to lots of True Crime podcasts and loves to read. If you have enjoyed Melinda’s post today, be sure to check out her social media profiles: Instagram, Youtube, Facebook, Pinterest & her Blog.

Combining Scrapbooking Collections with Melissa Vining

Combining Scrapbooking Collections with Melissa Vining @ shimelle.com

Hello again! Today’s guest artist comes to us all the way from New Zealand, and she’s bringing the pattern mixing love with her! Please welcome Melissa to the blog. Remember, supplies are linked with affiliate links where possible. Thanks! -Shimelle

I’ve always been creative but I started crafting when my now nearly fifteen year old son was eighteen months old. Like many I wanted to make a baby book but couldn’t find a pre-made one that I liked. So I decided to start scrapbooking to create my own. It didn’t take me long to get hooked, and I’ve been creating ever since. I used to say that my reason for creating was to document my four children’s memories, but it’s evolved into so much more than that! I love the process of creating, I love to journal the story behind the photos, and I adore the beautiful products! It’s the one hobby I’ve stuck with and I love looking back and seeing how my style has evolved over the years.

Combining Collections with Melissa Vining @ shimelle.com

For this layout I decided to mix my two favourite collections of 2021 – “Sunkissed” by Cocoa Vanilla Studio (who I’m blessed to design for) and Color Study by Vicki Boutin. Both collections are bright and fun, but mixing them was a little challenging because Sunkissed is very clean, and Color Study is more distressed. In the making of this layout I was totally inspired by the cut-apart piece from Color Study with “The Story” tab. I wanted to feature this, and also lots of other patterned papers (which are always my favourite product)! I selected papers from both collections, distressed the edges and layered them up. I machine stitched with black thread to add extra texture and interest. The mix of beautiful papers already made this a visually busy layout, so I limited my embellishment to tab stickers, word phrase stickers, a fussy cut clipboard with twine, and ephemera flowers that I tucked under my layers.

Combining Collections with Melissa Vining @ shimelle.com

My photo is of my youngest daughter Ava (now five), but I took this photo just before she turned 5. The journaling is about how bittersweet this day was because it was one of our last Fridays together before she started school. I love that I have this moment captured and my feelings recorded. They grow up so quickly!

To recreate this layout let the paper inspire you! In order to mix collections, look for a similar colour palette, which in this instance is bright and happy summer colours. Layering papers horizontally is a great way to feature lots of your favourite patterns. The layers then enable the tucking in of embellishments which makes the layout more interesting! The white borders on the Sunkissed flowers help them to stand out, and by cutting them in half I get more use from them! Don’t forget to keep a space for your journaling, and capture not only the details but your feelings about the photo.

Melissa Vining is married with four children and from New Zealand. She has been scrapbooking for over thirteen years now, and predominantly creates traditional 12×12 layouts, but also Traveler’s Notebooks and mini albums. Her favourite memories to document are moments from everyday life. She loves hand and machine stitching, cut files and dabbleing in mixed media. See more of Melissa’s work on her Instagram feed.

Creating a Scene with Anna Komenda

Creating a Scene with Anna Komenda @ shimelle.com

Happy Tuesday friends! Please welcome today’s guest artist Anna, who joins us from Poland! And of course a reminder that supplies are listed with affiliate links that make all this possible. Thanks! -Shimelle.

We have this saying in Poland that “dirty kids are happy kids” and it totally applies to my daughters. We live in a city but we are lucky enough to have a grandma at the countryside, where girls can run barefoot, catch butterflies, make sand pies and just enjoy being kids. Nothing can ruin the fun – even rainy weather! One day it was raining few hours but they wanted to play in mud so much, that they just took beach umbrella and spread it over the sand pit so they could play with their heads dry. It all ended up with running in the rain. I, of course, as a mamarazzi, was totally prepared with my camera and I snapped some photos safely hidden under the roof.

Creating a Scene with Anna Komenda @ shimelle.com

It was time to finally scrapbook those photos. I used just the perfect collection – Shimelle’s Never Grow Up line from American Crafts. I was so excited when it was revealed while ago as I was sure it will be great for all our countryside adventures. It’s full of colors and fun motifs that my kids can totally relate to.

However I had to add my own special touch by making the background. It was quite a simple process with blending some Distress Oxide Inks onto the background creating sky and grass. I then splashed it with clear water to make it look like it is raining. Last step was to add clear Pops of Color in a shape of raindrops. After everything was dry I made a composition out of photos and some ephemera pieces. Final step was to add title on the sky with a mix of various alpha stickers. It turned out colorful and fun. My journaling is hidden under the photo, written of the tag that can be pulled out. I like to keep it hidden as I am not a fan of my handwriting.

Creating a Scene with Anna Komenda @ shimelle.com

This page can be recreated in many ways with the sky and grass in the background. You can skip the rain and make a layout about some outdoor activities of your kids. You can also change the scene and add more layers with mountains, forest. Change the colors for winter fun in the snow! All the techniques will still be the same, just the motifs used will be different. Simple designs like this gives you so many possibilities. Colorful title is an embellishment of it’s own so I highly encourage you to try making one.


If you’d like, you can watch my video on how I made this layout, over on my my Youtube.

Anna Komenda started scrapbooking in 2009 as a way of documenting her new adventure – becoming a mom. It quickly grew into a bigger hobby. She discovered her passion for mixed media and painting incorporating them into layouts and albums. Scrapbooking became a very important part of Anna’s life. She started sharing her knowledge by teaching live classes and creating her own YouTube channel. You can follow Anna’s work on Facebook, Instagram and blog.

Scrapbooking using Stencils with Brianna Lepper

Scrapbooking using Stencils with Brianna Lepper @ shimelle.com

Hello friends! Please welcome Brianna today as our special guest here to share a stencilled page! Remember supplies are affiliate linked at no cost to you. Thanks as always.

I absolutely love adding mixed media to my scrapbook layouts and one of my favorite tools are stencils! There are several different ways to use a stencil and for this page, I did some ink blending with it. To start, I pulled out a piece of textured white cardstock and a large mandala stencil from my stash. I put the stencil on the cardstock and kept it still by adding magnets to it, since my glass mat is magnetic. You can use washi tape, painters tape, or even pixie spray to keep your stencil from moving around the page too much. I chose a few Pinkfresh Studio ink cubes in blue shades and with light circular motions, began ink blending all around the stencil. I love adding subtle mixed media backgrounds to my pages and ink blending has been one of my favorite go to techniques! To add some sparkle and texture, I pulled out my Nuvo Glimmer Paste and pushed it through the stencil in a few random spots.

Scrapbooking using Stencils with Brianna Lepper @ shimelle.com

This photo is of me and my best friend from a girls weekend trip to Dallas. We had stumbled across this super cute Italian market that had wine tasting, gelato, a bakery and a restaurant all inside of it. It was one of the best weekends I had in a long time and we made so many great memories! I wanted to incorporate more stenciling on my page, so I created my title using the Pinkfresh Inna Alpha layered stencils and hot foil plates to spell out the word “Cheers”. The layered stencils are so fun to use and the gold foil outline really made the letters pop!

Scrapbooking using Stencils with Brianna Lepper @ shimelle.com

I used The Best Day collection by Pinkfresh Studio and embellished the rest of my layout using the ephemera, puffy stickers, 6×6 paper pad and enamel dots. I didn’t want to embellish too heavily since the mandala background was already a big element on my layout. I love how this page turned out and I hope you like it too! If you’ve been wanting to add mixed media to a project but wanted to start out with something simple, I would definitely recommend doing some ink blending with stencils! It’s super simple and when you’re finished, you are left with a gorgeous background!

Brianna Lepper has been scrapbooking for over fifteen years. Brianna’s military family and are currently stationed in Northwest Louisiana. She has two boys, Noah and Elijah, and three dogs, two of which are Corgis. They are the stars of her scrapbook pages. When not scrapbooking, Brianna can be found reading, cooking or doing jigsaw puzzles. You can find Brianna on Instagram, Facebook, Youtube, and Pinterest.