pretty paper. true stories. {and scrapbooking classes with cupcakes.}

lovely to meet you Twitter Facebook Pinterest YouTube

Take a Scrapbooking Class

online scrapbooking classes

Shop Shimelle Products

scrapbook.com simon says stamp shimelle scrapbooking products @ amazon.com shimelle scrapbooking products @ amazon.co.uk

Reading Material

travel

Scrapbook Starting Points Category

Scrapbooking Starting Point :: Just Girls

scrapbooking starting points :: just girls
A beautiful (if rainy!) Monday to you, and a new scrapbook starting point to share. Today I’ve been scrapping with some of the new papers and accents from Crate Paper, including their Storyteller and Pretty Party lines. Just perfect for an older memory here or there.

scrapbook starting points
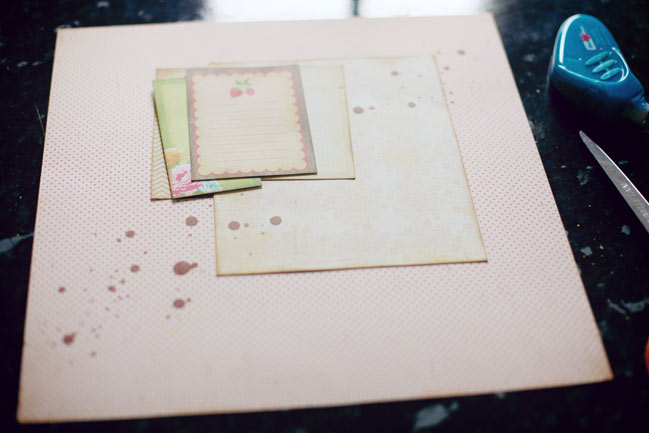
To create this starting point, you’ll need a 12×12 pattern for the background (I used these polka dots), then a 6×7” rectangle (books from Emma’s Shoppe). With just those in place, I added a diagonal line of splattered ink, though you could replace the ink with another element if that’s not your style (sequins, gems, buttons, brads). Then I added three journaling cards from this sheet and a scrap of chevron paper to balance out that stack of papers.

scrapbook page with old polaroid
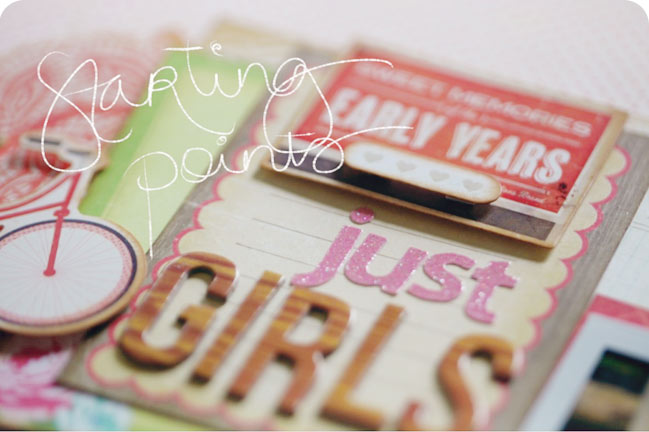
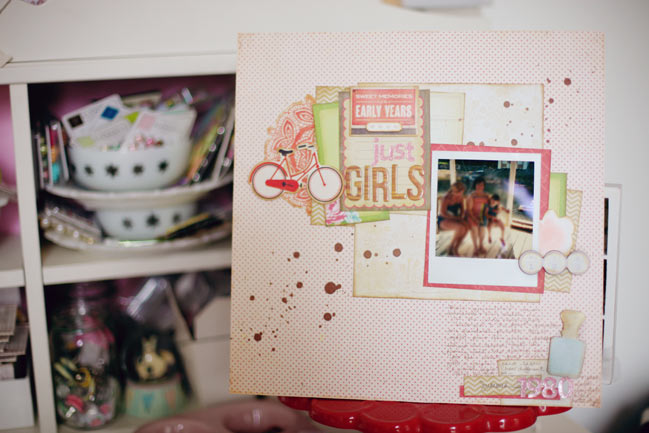
I tried a few different photo options with this starting point and found a 4×6 or two works fine, as does a group of 2×3s, but I kept coming back to something square. I almost used a currently picture printed at 4×4 but the tones of the papers and the motifs on the die-cut sheet made me think this old polaroid was my real answer. I love that the die-cut sheet included that ‘early years’ label, as that’s what I call my childhood albums. I really finished most of the page with the die-cuts from that same sheet – the doily, the bicycle, the date stamp, the 1-2-3 typewriter keys and the flower are all from the same sheet so I just punched them out, inked the edges and adhered them either flat or with pop dots. For the piece that overlaps the actual polaroid, there is a pop dot there but it’s stuck to a square of cardstock that isn’t attached to anything – so nothing is actually glued to the photo. (I know that will help some of you exhale.) Letter stickers from Sassafras and Studio Calico/American Crafts and the scrap of red patterned paper for the photo mat are the only other extras.

scrapbook pages
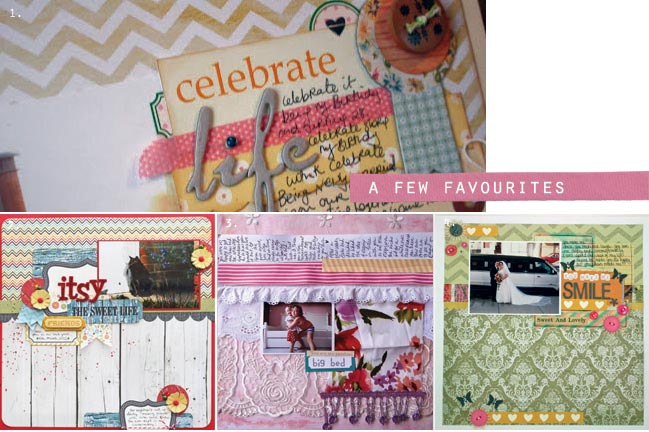
A few favourites from last week’s starting point, and I particularly like how they happened to all choose different photo sizes for their pages! Take a closer look: one, two, three and four.

A suggestion came in this past week for an image that could be used in sidebars or message board signatures, so hey presto – two of those for you! You can find a plain image here and an ‘I’ve been featured’ image here. You’re welcome to use them straight from my server so you don’t need to save them elsewhere, and it would be lovely if you link them here to the page that shows all the starting points.

Last week was also a little extra special with that prize from My Mind’s Eye! The winner is Tammy Lever. Congrats Tammy! I’m sending you an email so we can get your address over to the lovely folks at MME.

And I think that’s all this Monday’s business! Time for you to get scrapping!


Scrapbooking Starting Point :: Set to Music (wedding scrapbook page)

scrapbooking starting points :: set to music
scrapbooking starting point
Okay, all finished so I’m back with the completed page and the round-up. If you haven’t already, read this post first!

wedding scrapbook page
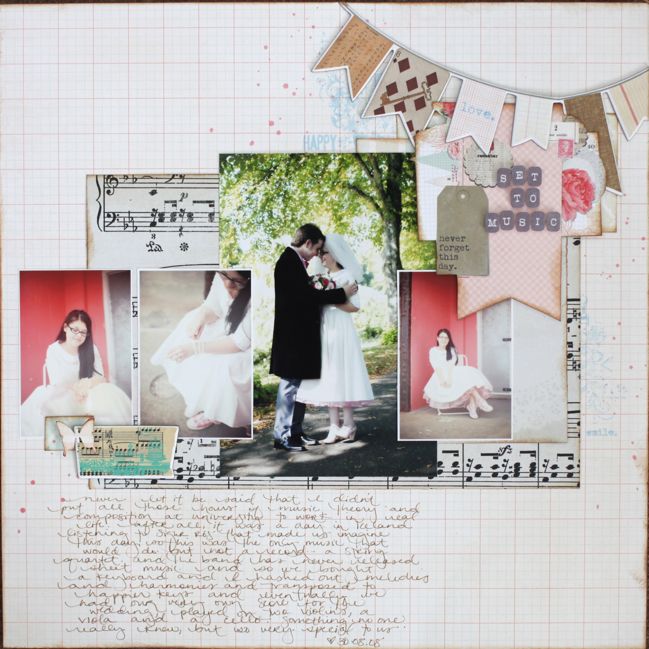
And here it is all finished. With four photographs on a single page layout. This is something that’s been asked a couple times – how do I start if I’m not going to scrap just one or two photos? So I wanted to show that for me, it mostly starts the same. That before version could easily work for just one or two photos, but one of the easiest ways to include more photos per page is to print them smaller, of course. This page includes one 4×6 photo and three 2×3 images, all portrait. That is something that repeats through the vast majority of my pages: either all portrait or all landscape. I just don’t like working with one of each – simple as that! I like the look of everything in the same direction and if that means making more than one layout to incorporate both types of photo, I’m totally okay with that.

The only page format that looks very different at the start is a three 4×6 page – three 4×6 photos in a line is a design I use often and I don’t see any need to waste half a sheet of patterned paper underneath those photos, so in that case I almost always stick the photos to the background paper before I add anything else. You can see that process here, if three photos is something you might find helpful.

scrapbook pages
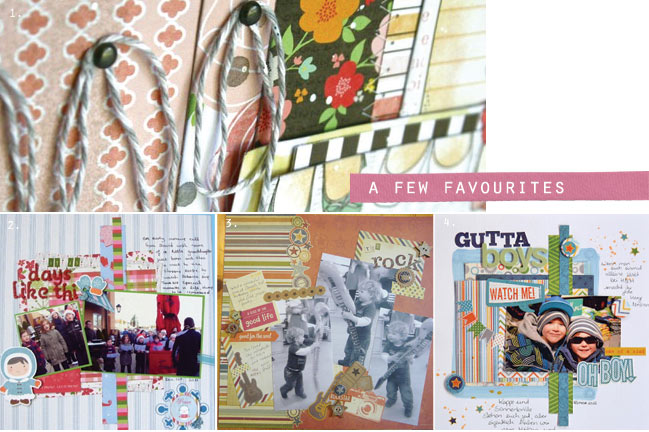
And some favourites from last week. Have a closer look at these: one, two, three and four.

Now it’s your turn! Create a page from this starting point and share it with us. But don’t forget to check out this post for some extra fun this week.


Scrapbooking Starting Point :: My Mind's Eye Blog Hop

a special MME scrapbooking starting points
scrapbooking starting points :: my mind's eye
Today scrapbook manufacturer My Mind’s Eye are launching their new look blog with a little something special: a blog hop celebrating some of the fabulous products MME has produced over the years. As Mondays here in Shimworld are usually dedicated to scrapbook starting points, it seems just right to combine the two.

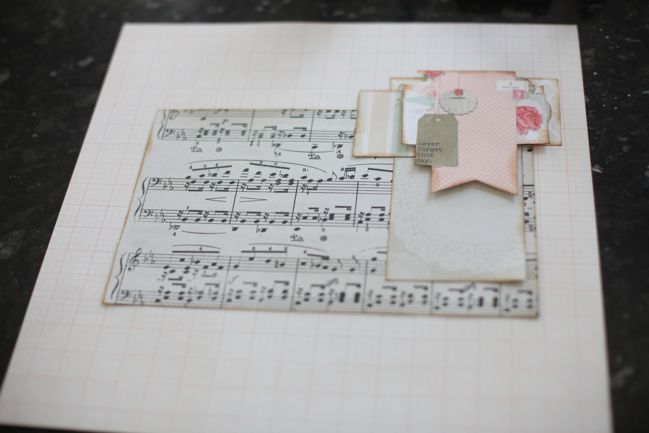
This week’s starting point comes entirely from the Follow your Heart collection designed by Rhonna Farrer for My Mind’s Eye. One 12×12 graph paper design for the background (and the lines are important for where I’m going to take this page), a large box of patterned paper across the middle and a grouping of a few small pieces of patterned paper plus one detailed element cut from the patterned paper at the top right corner of the large box.

For the finished layout and a round-up of favourites from last week’s starting point, please pop over to this post.

my mind's eye scrapbooking blog hop
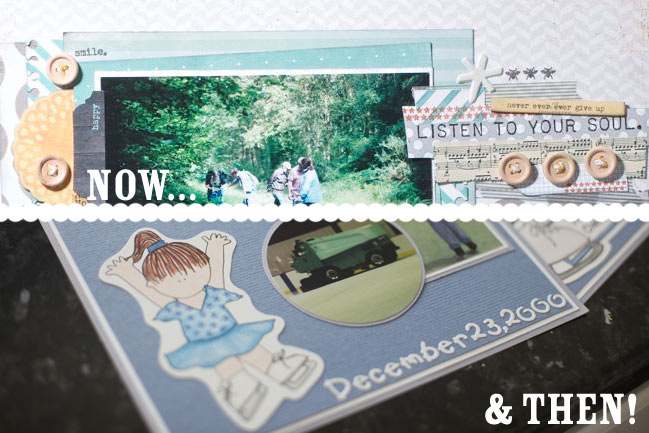
But let’s indulge in a little My Mind’s Eye fun for a bit too! If you’re new around here, there are two recent videos you might want to check out: this one features MME transparencies and this one focuses on patterned paper. But My Mind’s Eye have been around for a long while! I have some of their earliest products in my albums: the Frame-Ups die cuts, more than ten years old!

my mind's eye scrapbook pages :: then and now
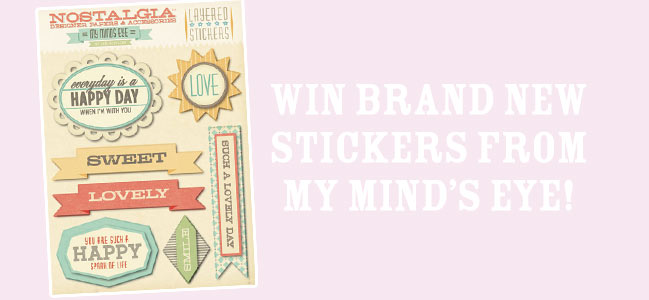
As part of their big launch today, check out the My Mind’s Eye blog, and also their updated pages on Twitter, Facebook and Pinterest. This week they will be announcing three brand new lines. And now the fun part… how about a prize? MME is giving away a sheet of layered stickers to a lucky shimelle.com reader. Look closely, these are a peek at one of the new lines! You can see more from this new collection on the My Mind’s Eye blog later this week.

stickers
To enter to win the new stickers from MME, just leave a comment on this post. Entries close Sunday the 8th of April and I’ll post the winner with the new starting point next Monday!

Your next stop on the hop is Stacy Julian, and if you’ve lost your way, the full hop includes Jennifer, Nichol, Rhonna, Stacy, Stephanie and Studio Calico, plus the new blog at MME!

Scrapbooking Starting Point :: Hard Rock Birthday Cake

scrapbooking starting point
scrapbooking starting point :: american crafts gardenia
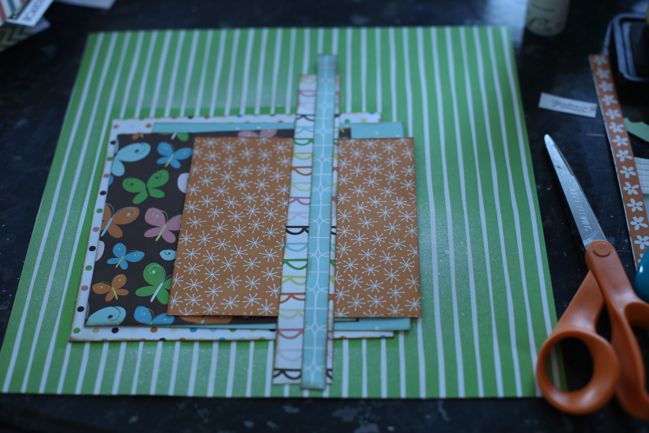
Happy Monday! How about a new scrapbooking starting point to start a crafty week? This week I started with the Gardenia collection and cut a bunch of squares from patterned paper, each a half-inch smaller than the previous. The white polka-dot print is 7×7” and then smaller from there. Plus an extra layer in the background: I cut a 7.5” square from plain typing paper and used that as a mask to spray white mist onto the green striped background. Then there are two vertical elements – one is the branding strip from one of the patterned papers I had already used and the other is an off-cut of the b-side of one of those papers. So surprise surprise: another layout that could come together with scraps!
scrapbook page
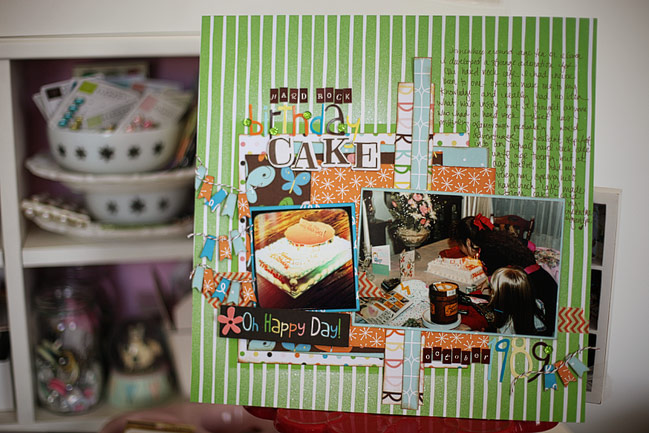
I finished my page with letter stickers and a tag from the Gardenia collection, plus some Amy Tangerine washi tape, tiny letter stickers from My Little Shoebox and gems by Queen & Co. The tiny banner pieces are actually the ribbon portion of this rosette punch by Jenni Bowlin for Fiskars. I just punched it from the little pieces left over by my trimmer and then used a zillion tiny pop dots to put them all in place, and topped them with a bit of baker’s twine.

I actually had both of these photos as 4×6 prints but they are originals and I don’t have the negatives, but things just didn’t work with the cake picture at the 4×6 size, and although the other shot is quite busy, I loved all the little bits and pieces that were in the photo, so I didn’t want to crop that. So I took a picture of the cake photo with my phone and processed it with the Camera+ app so I could get a good balance of quality plus the retro feel and then printed it at 3×3, which was a better size for all things concerned, and no original photos were harmed! (By the way, something you might appreciate in the busier photo: obviously there is cake and ice cream, but there are also birthday presents, cards and some dollar bills that I presume came from the cards… and that week’s sale ad for the local craft store. I think I was actually planning where to go spend my birthday money before we had even had cake and ice cream!)

A note about the writing: this has been coming up in various comments often recently – what exactly do I write about if things are pretty obvious in the picture? Nothing in the writing here says anything like ‘this is my twelfth birthday and we had a family party at my grandparents’ house with cake and ice cream’. It doesn’t need to say that, because that is obvious. I am really, really not a who-what-when-where-why writer. I mean, I understand what those concepts are and that they are basically what is important in creating a timeline of events, sure. That is the sort of thing I want to see in a news report, and I want the most important things to come first, filtering down to the lesser important parts of the news story and so forth. But my scrapbooks are not a newspaper. I reserve the right to ignore those basic keys of journalism. I reserve the right to ramble. I reserve the right to talk about things that are only slightly in the picture or possibly not in the picture at all. I reserve the right to put the most important thing at the end, and maybe even create a little suspense along the way to get there. That’s the kind of writing I enjoy. Journaling is not a task for me. It is an indulgence.

This week, I’m going to work on explaining my thoughts on scrapbook writing a little more each day, but I’ll start with this layout. Although it doesn’t contain the obvious bits about what birthday and where I am, it does explain something that could otherwise be quite a mystery in the photos: why on earth was my birthday cake shaped like a drive-in burger joint with a sign reading ‘Spring Hill Hard Rock Cafe’? And the truth is from around age ten or so, I was strangely fascinated by the very idea of the Hard Rock Cafe. I had never been to one, nor even been near one to my knowledge. I had no idea what was inside such a cafe. But whenever I saw someone with a Hard Rock Cafe shirt, I thought they were completely glamorous and probably a worldwide adventurer with page after page of stamps in their passport. Of course, if you remember the sheer volume of Hard Rock Cafe shirts in the late eighties and early nineties, you will no doubt be completely aware that there was absolutely zero glamour involved in these shirts. But alas, I was a kid and I was convinced. So word got around and my souvenir from family and friends who did venture out of Kansas often became a Hard Rock Cafe t-shirt. I think I owned about a dozen of them at one point, despite never going to one myself. And so my grandparents created this birthday cake as a team effort I think – constructing a cafe out of cake and marshmallows and making a sign to label it as the very own Hard Rock Cafe of the tiny little town where I lived.

And I’m so much happier to have recorded that in my album rather than just ‘this is my twelfth birthday and we had a family party at my grandparents’ house with cake and ice cream’. It is not from ‘news in brief’ and in truth is newsworthy in no one’s life but my very own, but that is what makes it valuable to me. I hope that makes a little sense. But also, the story of my Hard Rock Cafe love is not something that is difficult to tell. It’s just the idea of looking at all the details and remembering that stage of life and thinking what is really worth telling about that. Other things I could have written on the very same page include the detail about spending my birthday money on craft supplies or an explanation of why I’m wearing something different in nearly every photo from that day, as I would want to try on each new outfit before opening the next gift. But for now, the Hard Rock Cafe will do.

I promise I eventually made it to a real Hard Rock. I was twenty and on spring break in Las Vegas (which is as ridiculous as it seems as Vegas is very much a twenty-one-and-over town). I ate a ridiculously overpriced veggie burger and sat next to a collection of Michael Jackson action figures. And did not buy a t-shirt.
scrapbook pages
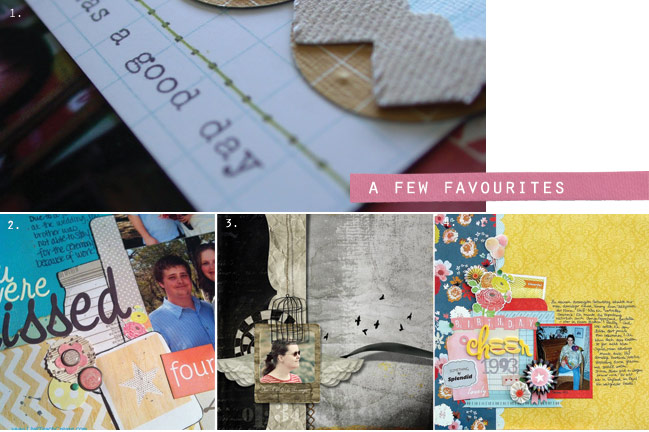
Here are a few of my favourites from last week’s starting point. Go take a closer look and say hello to these four scrappers: 1. Nancy. 2. Jennifer. 3. Lehtipollo. 4. Daphne.

Should you like to give this starting point a try, I would love for you to share! And of course you can write whatever suits you and your page. Of course!
Scrapbooking Starting Point :: You Can Count on the Girls

Scrapbooking Starting Point
scrapbooking starting point
I snagged a Studio Calico kit from a friend this month as a special treat, so I could start cutting and pasting with the new Storyteller collection from Crate Paper. Perfect for a starting point!

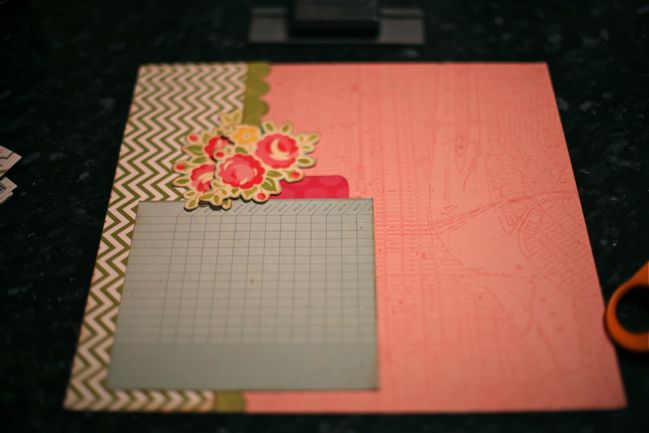
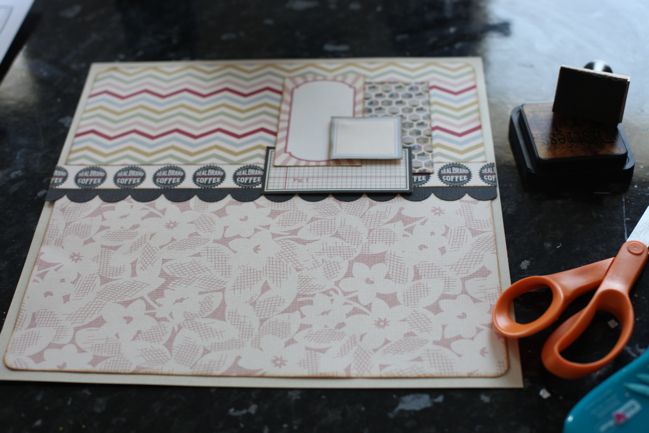
For this starting point, choose a 12×12 single-coloured patterned paper for the background, then cut a 4×12 strip of a double-sided paper. From that, use a border punch and cut that strip apart – so the designs from both sides of the paper are on show on the left side of the page. Then a box just slightly smaller than 6×6 (I picked something with lines here so I could use that for the writing, but in the end I placed it elsewhere) and a die-cut or something cut from patterned paper. Then the rest is up to you!

scrapbook page
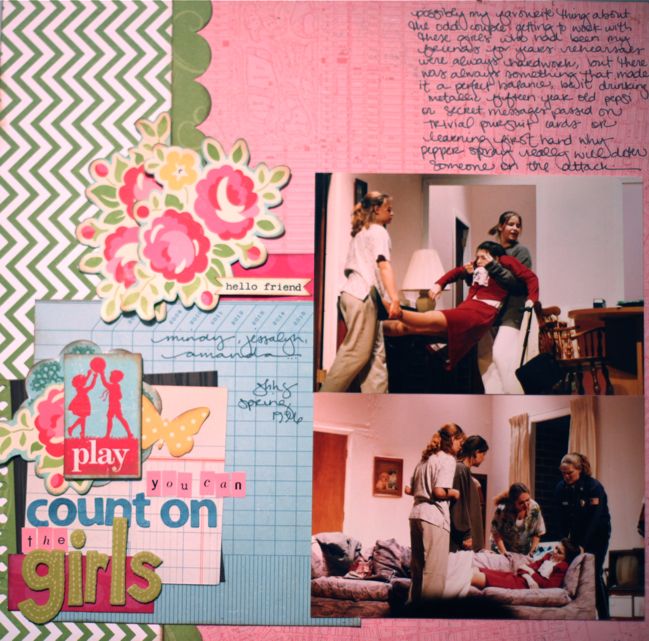
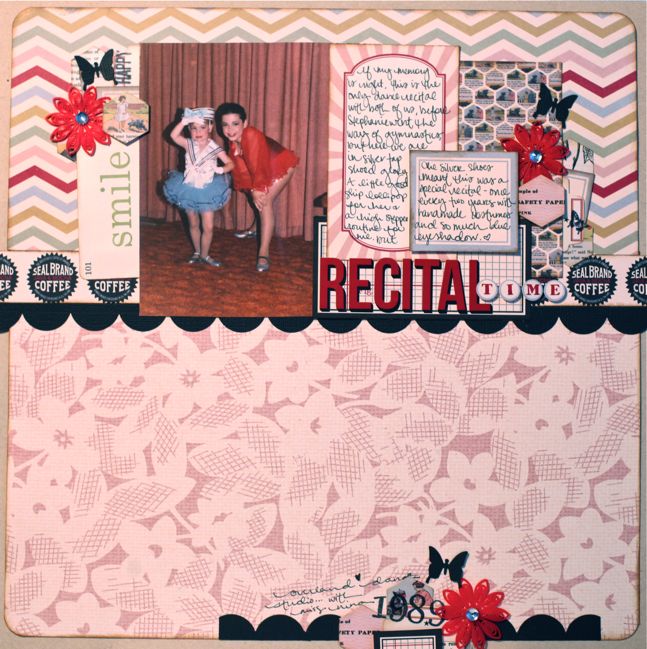
Hmm… I should photograph this again in the daylight tomorrow! But here’s my finished version, with two 4×6 photos a few more die-cuts (Crate and October Afternoon) and letter stickers (My Little Shoebox, Sassafras and Amy Tangerine).

scrapbook pages
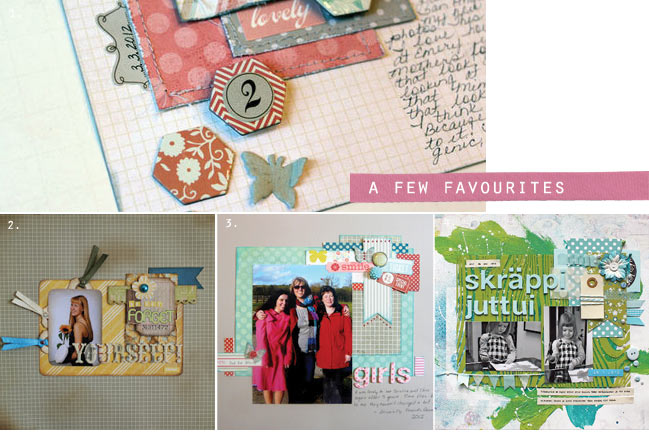
You can see all the submissions from last week’s starting point here, and here are four of my favourites if you want to drop by and share a little comment love!
1. Leanne 2. Daphne 3. Helen and 4. Deb.

Give this starting point a try and share it with us!


Scrapbooking Starting Point

Scrapbooking Starting Points
Hello Monday! How about a new starting point for a scrapbook page this week? This week I could wait no longer to cut into my sheet of that multi-coloured chevron paper and some other goodies from the Magpie collection from Jenni Bowlin Studio.

This starting point includes a multi-coloured patterned paper cut to 4.5×11.5 inches, a single-coloured patterned paper cut to 7×11.5 inches, a border strip about 1×12 and a punched border just below that. Then a group of layers made from a 4×4 square of patterned paper, a journaling card and two labels, the smallest on pop dots for a bit of dimension.

scrapbook page from starting point
Here’s my finished page, with one of those older photos that doesn’t have any additional pictures for a multi-photo page. Complete coincidence that the print was the same height as the two cards to its right, as I didn’t have this photo in mind when I made the starting point… maybe a sign that I work with the same sizes so often that they just fall together naturally? Who knows.

Most of what I added was more Jenni Bowlin: doily flowers, hodge-podge and quilted stickers, letter stickers and the new butterfly punch. Plus an old favourite Fontwerks stamp set for the numbers and a MME stamp set for a couple tiny additions.

Now it’s your turn!

If you want to join in this week, recreate this starting point with any supplies you like, then complete the page in your own style. Upload it to your blog or a gallery and leave a link at the bottom of this post to share your work.

scrapbook pages from starting points
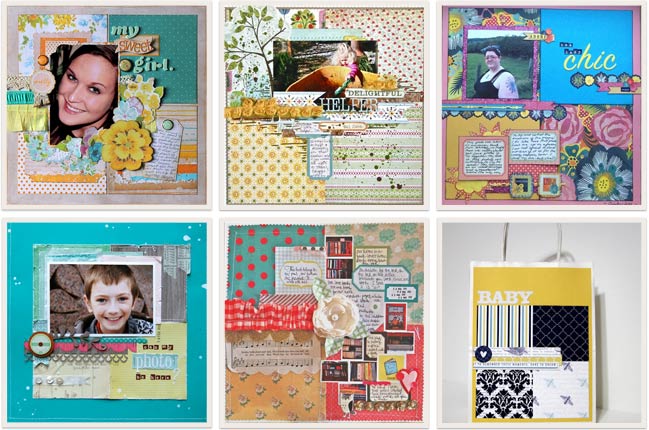
Last week’s layouts were particularly gorgeous, I must say! So difficult to pick, but these are six I found noteworthy. Do take a closer look and leave them some comment love or add them to your bookmarks! Clockwise from top left, they are from Kelly, Soaphousemama, Nancy, Kelly (who cleverly made a gift bag!), Helen and Katherine.


Two quick closing notes for today:
1. If you’re a big starting points fan, consider joining us for True Scrap. See this post for details of an exclusive starting points video series available with this online event.

2. If you’ve been thinking of picking up some brand new scrapping goodies, the deal of the day is a particularly good one today for stocking up on papers and embellishments at 60% off, while they last.

Scrapbooking Starting Point :: Thanks to a Stranger

scrapbook starting points
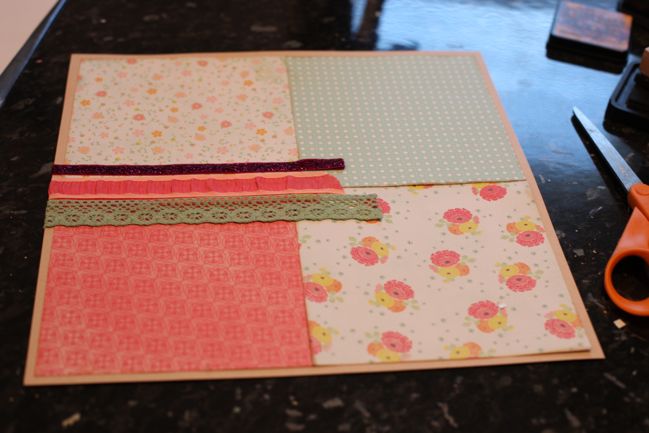
Getting back into the swing of starting points, I thought I’d go with one of my favourite ways to get pasting: four quadrants of patterned paper on a 12×12 cardstock background. In fact, we started all the starting points fun with a similar look way back when, but there is one little difference here to change it up – and of course it looks different with every paper combination you choose.

So in this case, you’ll need four squares of patterned paper about 5.75 or 5.5 inches (depending on how much frame you want around the edge) and three kinds of ribbon or trim… or do you? You could replace the three ribbons with border stickers, paper strips, punched pieces or journaling bars, perhaps!

scrapbook starting points
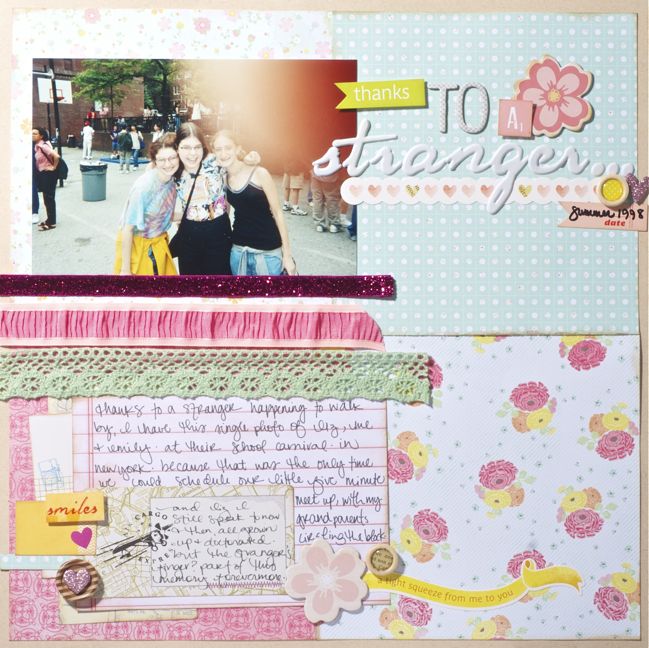
I used plenty of the new Dear Lizzy Neapolitan collection and some Amy Tangerine die-cuts for this page, with a funny old photo that has been in my photo files for years. Like fourteen years. All because it has some stranger’s fingerprint in the shot. It’s the only photo I have from this day and we passed the camera to some random passerby and when I developed the film (remember that experience?), this is what I found with our single photo. Well, at first I was quite annoyed but I have mellowed. Now I am far happier to have an image at all rather than to have nothing, and I figured that random stranger is now part of our story, with his fingertip immortalised in my scrapbook.

scrapbook pages
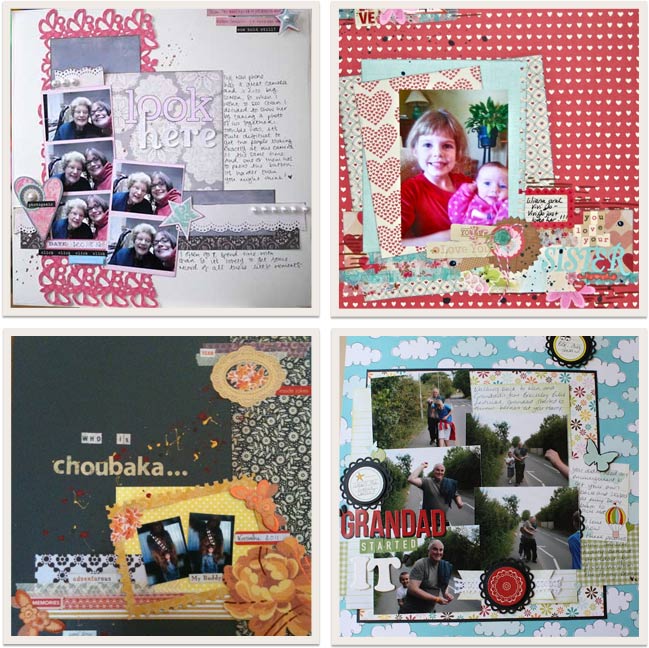
Here are four favourites from the last time we played the starting point game! Clockwise from top left, they are from Kate, Soaphousemama, Louise and Valerie.

Now it’s your turn… what will you do with four squares and three lines?


Scrapbooking Starting Point :: Special Edition

scrapbooking starting points
scrapbook page starting point
Someone glittery is helping me out with not one but two scrapbook starting points this week. She’s prepared a big mission this week, and these starting points are a little sneak of her adventures. But you won’t have to wait very long at all to see how these pages turned out.

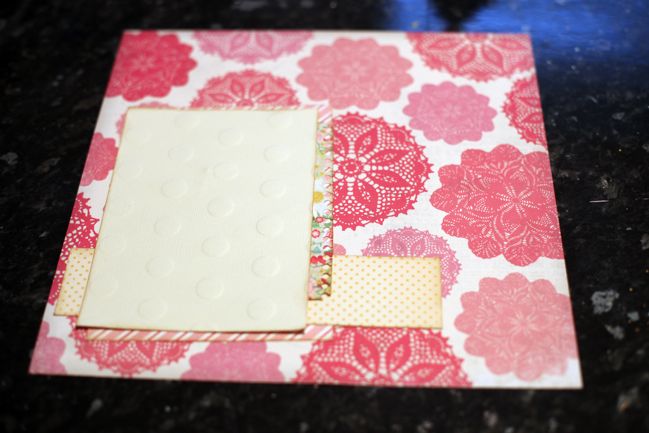
This starting point includes a full sheet of patterned paper for the background, plus a stack of papers just slightly bigger than 4×6, with each layer a bit bigger than the last. One is punched with a notebook edger and a 2×7 strip of paper runs the other direction to all those in the stack.


scrapbook page starting point
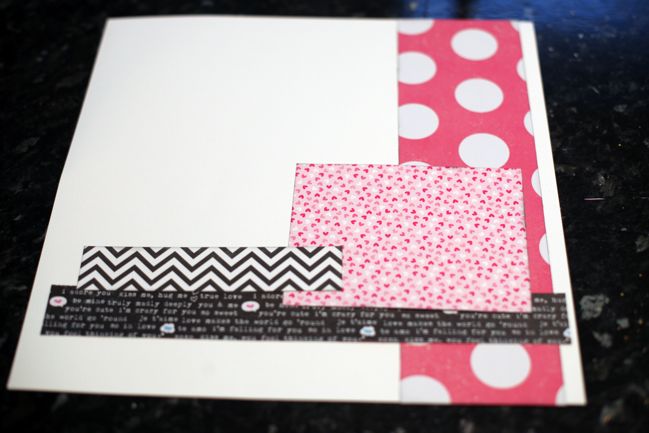
And the second starting point has a white cardstock background, plus patterned papers by KI Memories, Doodlebug and Echo Park. The tall column is 3×12, the longest horizontal strip is about 1×11, plus a smaller strip at 1×5 and a 4×5ish box. If you’re going to scrap a 4×6 photo on this page, you might want to increase the size of the box to become a photo mat.

A little thought about these two side by side, before I can show you the finished pages: the first looks busier, but it’s entirely down to the patterned paper background as there really isn’t any more to the layers on that page than the second. But the clean white background of the second page makes it appear more minimal! Something to keep in mind if one style or the other suits your fancy perhaps.


scrapbook pages
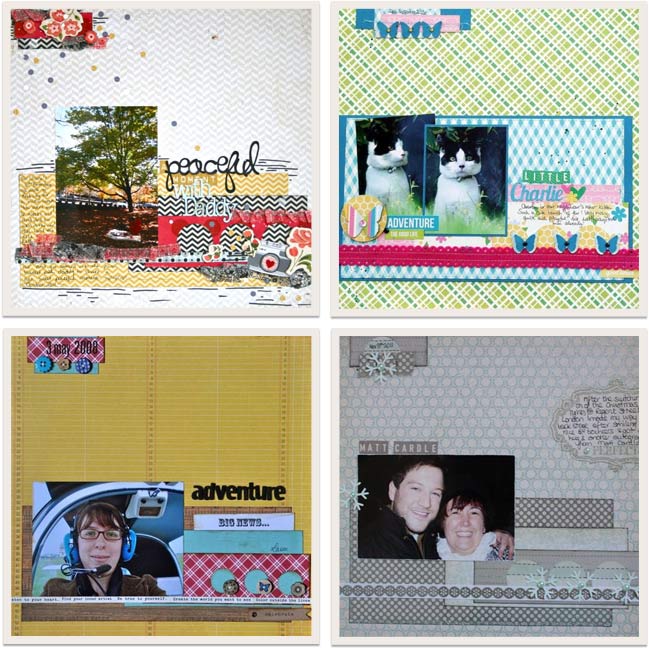
Here are four favourites from the last starting point, which generated everything from minimal to lots of layers! Clockwise from top left, these pages are from Soaphousemama, Dapfnie, Ann and Sabbyscrap.

So… what do these two starting points say to you? Glitter Girl will show you her finished versions very soon!

xlovesx