pretty paper. true stories. {and scrapbooking classes with cupcakes.}

lovely to meet you Twitter Facebook Pinterest YouTube

Take a Scrapbooking Class

online scrapbooking classes

Shop Shimelle Products

scrapbook.com simon says stamp shimelle scrapbooking products @ amazon.com shimelle scrapbooking products @ amazon.co.uk

Reading Material

travel

Scrapbook Starting Points Category

Scrapbooking Starting Point :: Blue Jean Days

scrapbooking starting points
I’ve nearly found a place for papers and stickers and stamps to be happy in their new place without constantly stepping on a box that still needs to be unpacked. So many steps in the right direction! Now just don’t ask me to find anything in the first place I look. Aside from pens and Thickers, most things take me at least two guesses, even though half my drawers and boxes are accurately labelled with their contents. But hey, I don’t even know where the cutlery drawer is in the kitchen either, so apparently it just takes me a while to get my bearings.

But this I remember: scrapbook starting points! It’s back, and it’s on Mondays now, so you can use this starting point any time throughout the week and next Monday I’ll post a new starting point and a round-up of favourites from the previous starter. This week Starting Points is brought to you by BasicGrey and their Picadilly collection. Circle and star punches also came in handy.

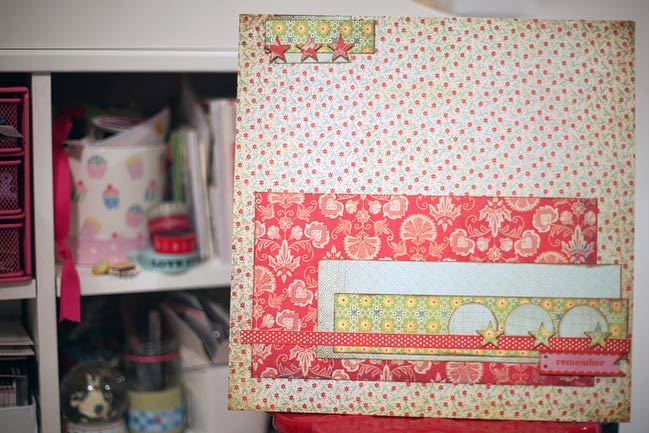
To follow this starting point, you will need a full sheet of pattern for the background, plus rectangles at 4.5×10.5, 3×7, 2×6.5, 1.5×2.5 and 1×3 inches, plus three circles and six stars. You can, of course, swap the stars for any other motif you like.
scrapbook page
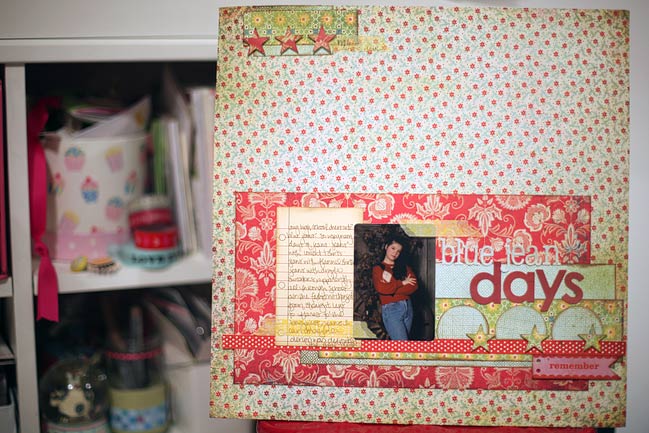
I didn’t add very much to my finished page actually! A funny little wallet-size print that was one of my senior pictures from my last year of high school, some BasicGrey letter stickers and some Hambly washi tape, plus a Jenni Bowlin journaling card.

But you can finish this starting point in any style you like! What do you fancy? Give it a go with your photos and share your end result!


Scrapbooking Starting Point

scrapbooking starting point
scrapbook starting point
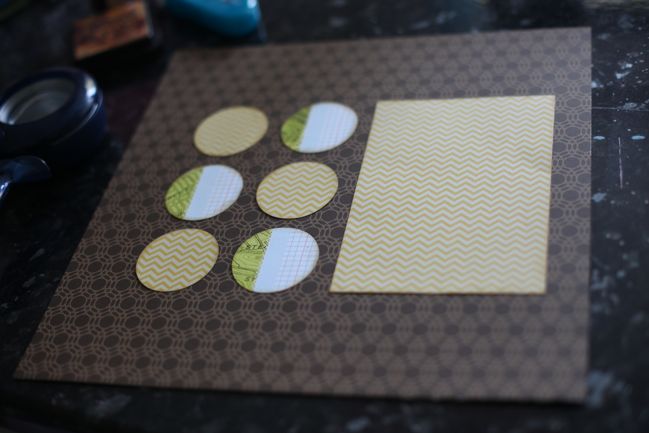
Fancy a new scrapbook page starter? Here’s a starting point for this week! I used three papers: one for the background, one for a 4.5×6.5 inch block (for a photo mat? Or maybe you have other ideas!) then I added six 2” circles – three in the same paper as the box and three from another sheet.

But where will you go from here? Layers of embellishments on those circles? Or a nine-letter title? Will you add more to the top and bottom of the layout or keep everything in the centre? That’s the game: start here but then finish wherever your crafting creativity may take you.


Scrapbooking starting point :: Kansas City Summers

scrapbooking starting points
scrapbook page :: kansas city summers
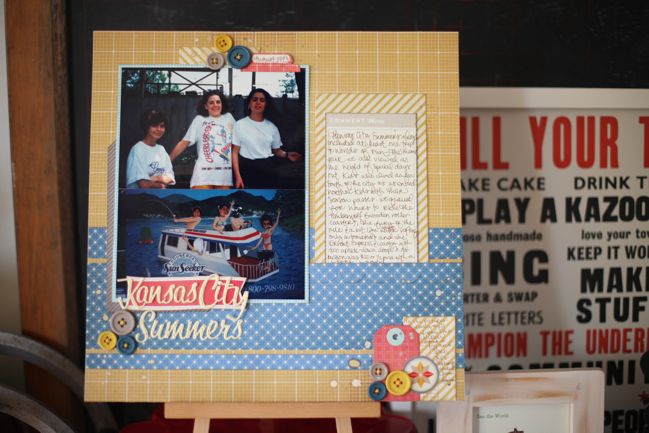
From this starter with a sheet and a half of paper to this finished page, and it goes into the high school section of my early years album! Growing up near Kansas City meant a summer trip to Worlds of Fun, the big amusement park north of the city. This particular summer I took quite a few photos but I was always behind the camera and never appeared in the images, so I’ve started scrapping them anyway and documenting some of the things that made up the day to day back then. I haven’t been to Worlds of Fun in years – actually, my last trip was the day before I moved to England in the spring of 1999. This past summer it came up in conversation and we talked about all the rides that were new and fabulous when we were kids but have since been retired or moved to other parks. I couldn’t quite remember all the names but it turns out there are roller coaster fans who keep track of these things and post them on Wikipedia, so I can now write about how it seemed completely amazing to survive the double-loop of the Orient Express and verify the year the wooden Timber Wolf opened and how naming that coaster was a contest open to all the local school children. More than a few of us are sad that Worlds of Fun decided the Zambezi Zinger was no longer cool enough for the park and sold it. Admittedly, the Zinger was completely tame in comparison to most roller coasters, but it held the novelty that it didn’t require a seatbelt or harness of any kind and somehow this always made you feel you were living on the edge. While it isn’t exciting enough for Kansas City, it is apparently open to ride at a coffee-themed theme park in Colombia. Wikipedia, I salute your ability to fill my head with completely random factoids!

And just to make myself feel old, I looked up the price of a ticket to Worlds of Fun these days. I’m pretty sure it was between $20 and $22 for a day ticket when I was in high school, but they ran special two-for-one deals on certain days if you brought in a Coca-cola can, so we usually arrived in even numbers and full of sugar and caffeine. Today the standard price of a ticket is apparently $48.35! Yes. That does make me feel old and thrifty and I may start calling teenagers ‘whippersnappers’ at any moment.

Let’s quickly move to favourite pages from last week before I feel any older, okay?

scrapbook pages
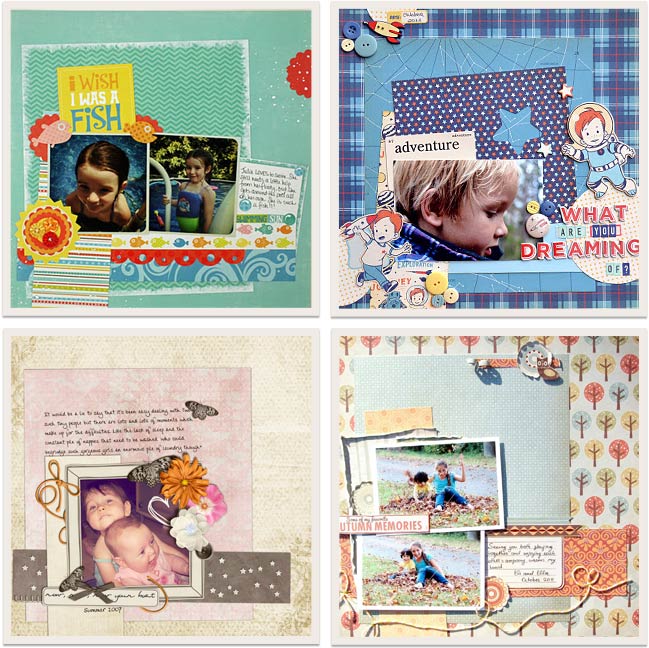
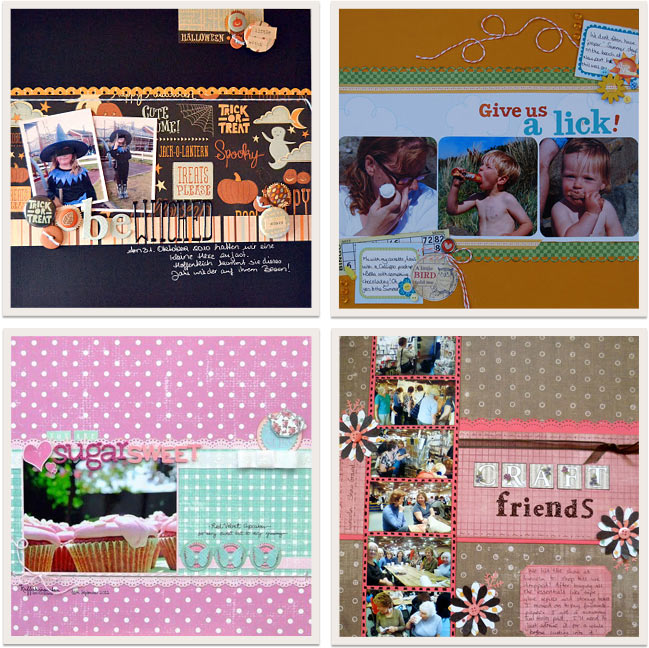
Here are four of my favourites from last week – starting point nine. Clockwise from top left, they are by Deb, Maja, Maya and Jude.

If you give this week’s starting point a try, please share what you create on this post. Can’t wait to see your version!

xlovesx

Scrapbooking Starting Point

scrapbooking starting point
scrapbook page starter
What a funny little week this was – so much fun with Pretty Paper Party and True Scrap that the hours seemed to escape from me. But can’t complain about anything but wishing there were more hours in the day, so that’s okay in my book.

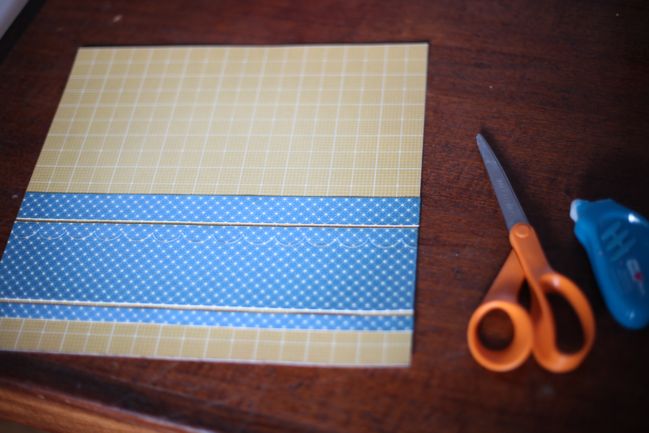
The good news is this week’s Scrapbook Starting Point is super quick and easy! You’ll need two papers – one in a full sheet for the background and another could be a half sheet, as long as it the full width. The papers I used are from the new Chap collection, but of course pick whatever papers you like! From that second pattern, cut three strips: half an inch, one inch and three inches – all the full width of the page. Then grab your favourite border punch and punch the edge of what you have leftover. Take that punched piece and line it up with the pattern in the three inch strip. Small, repeating patterns work best for this – stripes also work really well. Once the pattern is lined up, adhere the punched strip there and cut off the excess so this layered piece is still three inches by twelve (or the full page width, if you’re working in another page size).

Attach the three strips to the full sheet with the smallest strip at the bottom and the largest strip in the middle, and just a small gap between each. When you attach the strips, be sure the pattern is all lined up in the same direction so there’s no jarring reverse of the design.

What you do next is completely up to you! Start here and create your own page, then take a picture and share it with us when you’re finished. Stop back to see my finished version of this page plus some of my favourite submissions from last week. Have a fabulously crafty day… or evening… or whenever this may find you!


Scrapbooking Starting Point :: Lovely to meet you

scrapbooking starting point
baby girl scrapbook page
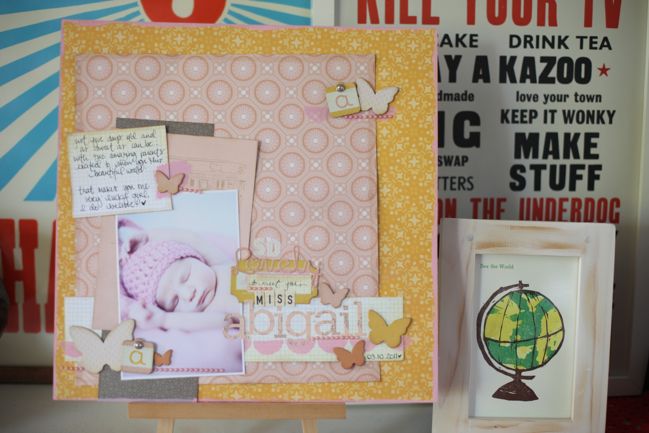
Now I’m curious if anyone guessed this particular page topic when I posted yesterday’s starting point with all that pink and yellow! This new little face is the daughter of a certain scrapbooker so I’m quite convinced her first words will be things like patterned paper and border punch. But seriously, she is super lovely and didn’t make a single peep while we spent an afternoon taking all sorts of lovely newborn pictures of her. If only she would always be such a willing model! We’ll see how that works out, Miss Abigail!

Most things on this page are Studio Calico, including the new chipboard butterflies. I’m now convinced I will need multiple packages of those! There are a couple letter stickers from October Afternoon, some MME pearl brads and pearl strips, then I added pink paint with a border stamp from Jenni Bowlin – but everything else is Calico goodness!

If you create something from this week’s starting point, do leave a link at the end of this post so we can see all the different end results from the same start.

scrapbook pages
Here are four of my favourites from last week’s starting point. Clockwise from top left, they are one, two, three and four. Have a click and see more detail and more posts from each scrapper!

And you know what starts tomorrow, right? It’s Pretty Paper Party time! And it’s not too late to join in – so sign up and join us for four weeks with hundreds of ideas for using that stash of paper you have collected!

Have a great rest-of-Sunday!

xlovesx

PS: The missing post is no longer broken! Find last week’s round-up and finished page here.

Scrapbooking Starting Point

scrapbooking starting point
scrapbook page starter
Oh hello there Saturday! You make me want to jump up and down and glue pretty paper to other pretty paper and possibly bake chocolate chip cookies. Will let you know how that goes. But here’s the beginning of the pasting of pretty paper, and this week it’s all paper from Studio Calico and all things on a wonky angle. Dare to give the wonkiness a try? Embrace the wonkicity, I say! (I really do say because wonkicity is a beautiful word if ever I invented one.)

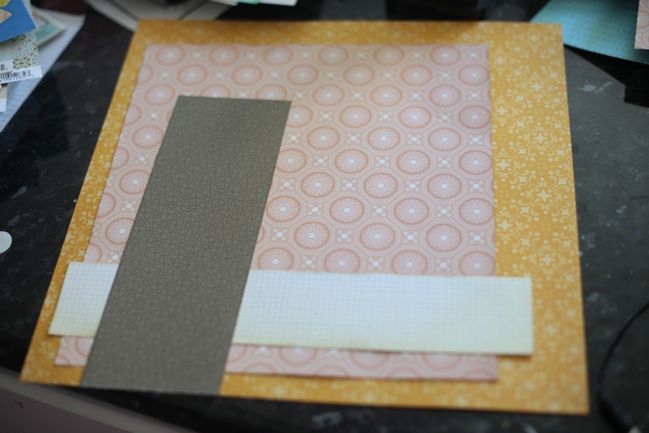
The large box in pink is 9×10 inches, the strip of white grid paper is 2 by just shy of 11 and the grey box is roughly 3×8, but that bottom edge ends up cut at an angle where it goes off the edge of the page.

So that’s your starting point this week! If you’re new to Scrapbook Starting Points, the idea is really easy: you take this placement of papers and replicate it using papers from your own stash. Then you finish the layout in your own style with however many photos in whatever sizes and however much writing and embellishing you want to add. Then upload your page to your blog or a scrapbook page gallery and leave a link here so we can see all the variations made from this same starting point! I’ll post some of my favourites a week from tomorrow.


PS: I only realised this morning that last Sunday’s starting point post isn’t showing? I must have broken something. Will get it fixed asap! And I’ll try my darnedest not to break anything for tomorrow’s post of this finished page! I mean, there’s wonkicity and then there’s just… broken. Broken is way less fun!

Scrapbooking Starting Point :: Instant Imperfection

scrapbooking starting point
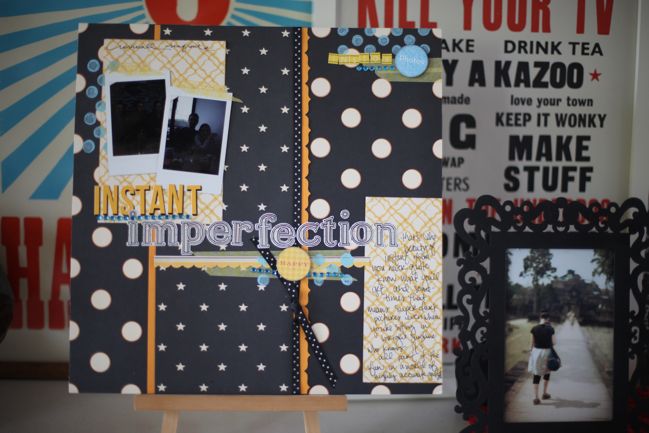
scrapbook page with instax photos
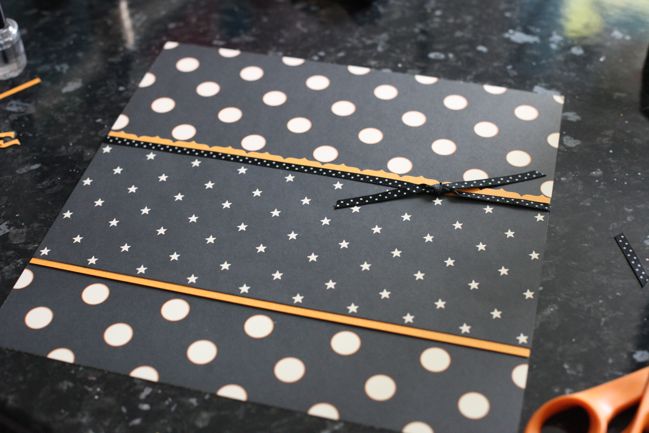
I know: you thought it was going to be a Halloween page, right? But it turns out I have scrapbooked all the Halloween photos in my possession. Sad times. We are seriously considering it time to throw a Halloween party in order to rectify that situation! But it turns out if you throw enough yellow and blue into the mix, you can go from this very Halloweenish start to something not requiring a pumpkin in the embellishment!

This is a bit of a funny page though, and this photo makes it look even more the case. The two pictures are Instax photos from several years ago when I had a pack of film that just didn’t expose very well. On this image, it looks like the photo on the left is completely black – it’s not, I promise. There are indeed three people in the picture and they were sitting in bright sunlight but for whatever reason, the shot came out very dark. But there’s something about instant pictures that makes me never discard the mistakes, and I figured actually that is part of the story: I love that amount of imperfection that comes with instant film in a world full of ever-climbing megapixels and accuracy. I don’t play roulette at a casino, but I do like the crazy gamble of instant film. So out of the drawer and into the album they go, overly dark exposure and all!

scrapbook pages
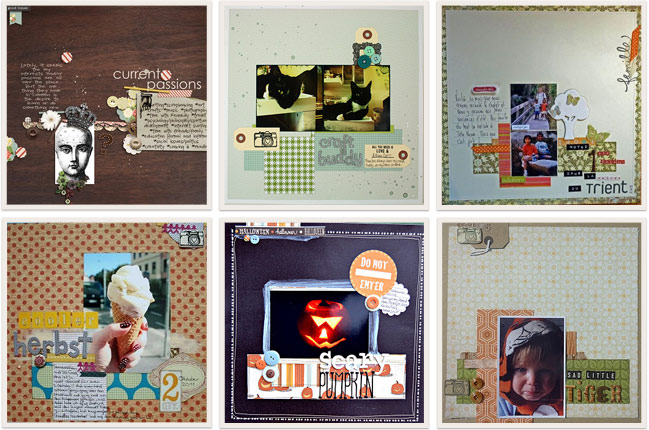
Here are six of my favourites from the scrapbook pages submitted throughout this past week. They started with this starting point but ended in such different layouts! Click the corresponding link to see any of these pages in more detail and get to know the scrapbooker behind the project.
Top row, L to R: one, two, three.
Bottom row, L to R: four, five and six.
Thank you to everyone who participated in this week’s challenge!

So whether you’re scrapping beautiful pictures or something completely imperfect, happy crafting!

xlovesx

Scrapbooking Starting Point

scrapbooking starting point
Not sure it can get much simpler than this starting point! 12×12 for the background, 4×12 for a border piece then add a mat behind that and use a border punch on one side, plus a length of ribbon along that punched border!

But now… where do you take it from here? Make something and let us see!

Back later – feeling better but now off for some birthday fun!