pretty paper. true stories. {and scrapbooking classes with cupcakes.}

lovely to meet you Twitter Facebook Pinterest YouTube

Take a Scrapbooking Class

online scrapbooking classes

Shop Shimelle Products

scrapbook.com simon says stamp shimelle scrapbooking products @ amazon.com shimelle scrapbooking products @ amazon.co.uk

Reading Material

travel

Glitter Girl Adventure 153: Take Away Crafting

Scrapbooking Disney Hollywood Studios // Glitter Girl video by Shimelle Laine

Have you every taken a “scrapbook on the go” kit? Sadly I’m not going to a crop, but as summer arrives my family tends to spend more time away from home. I’d love to be able to scrapbook while we’re there, but I can’t pack everything in my stash. Glitter Girl, can you help?

Of course she can! Using a kit that’s either purchased and ready to go or inspired by one using the inspiration of something like the Counterfeit Kit Challenge can be the perfect way to have just enough to keep you going while you craft away from your usual home.

If you have the March 2017 kit from Gossamer Blue, then you can basically follow along! I didn’t change much at all because I had most of it to hand, but I did swap one sheet of patterned paper, one sheet of embellishments (I didn’t have the puffy stickers from Oh My Heart so I used a sheet of chipboard stickers that were in my field of vision), and some wood veneer pieces. The kit is largely my Little by Little collection along with Paige’s Oh My Heart collection. If you don’t have those to hand, no problem! Check out the different combinations created by the design team for the Counterfeit Kit Challenge, who all put together something similar from the supplies they had on hand, new and old!

Scrapbooking with a Counterfeit Kit // Glitter Girl video by Shimelle Laine

I’m really looking forward to making the facing page for this now, with lots of aqua to pull out that tiny bit of accent in the enamel dots. I need to figure out what photos those should be, then I’ll get that committed to paper. I’ll also be using the rest of this kit, so I look forward to making more and sharing soon!

If you’ve tried the Counterfeit Kit concept or if you have made packing your scrap supplies into a art and a science, do share! We’d always love to hear from you here or at Scrapbook Like a Superhero. Happy scrapping!

A Bit of Real Life: How we designed a stamp set together in about a day

how we designed a stamp set together in about a day
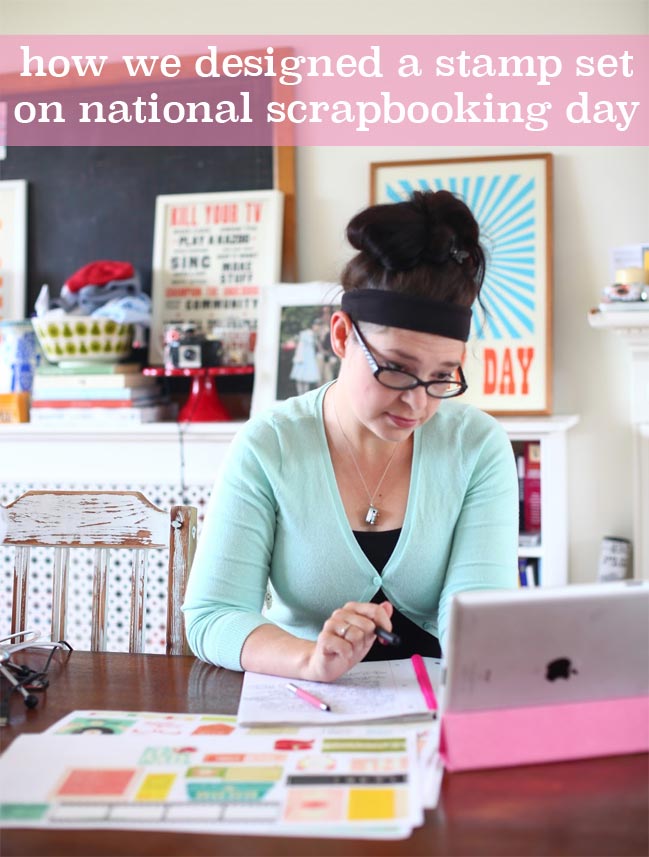
I did not think to make this entire adventure beautifully photogenic, so have a photo from working on the first collection I did with AC. I’m told I make this face a lot when I’m trying to fix something I don’t like.

With so many scrapbooking challenges around on National Scrapbooking Day, this year I wanted to do something a little different, something a little bit behind-the-scenes and choose-your-own-adventure. With plenty of input from the members of the Scrapbook Like a Superhero Facebook group, we made a product in just a bit more than a day, and at the end of this post you can even place a pre-order! (Feel free to skip right to the end if you’re not interested in my long-winded description of how we got there. I promise that’s fine.)

We started Friday night with a simple request: name a word you would like to see on more scrapbooking products. You can see the full list of answers here but the list was long and varied. Several suggestions of words like ‘really’ and ‘seriously’ stuck out to me at the beginning, and I read those in a slightly sarcastic tone, like really?? and seriously??, which I later realised may not have been the intended interpretation, but at any rate it gave us a starting point that is pretty much the same starting point I use when we put together whole collections at American Crafts: choosing a word and playing with its shape and style until I feel like there is more potential for all the other designs to come.

Admittedly I don’t work on a 24 hour time frame when we do an AC collection, so I scaled everything back a bit. For a collection, I’d choose a word and then write it many ways myself – on different papers, with different pens, brushes, and paints – and then I’d also gather a few dozen fonts and look at the styles there and how they might mix and match with either the other fonts or the handwritten examples. We probably look at at least a hundred versions of that one word when we start a collection but for this project, we started with nine iterations of the word ‘seriously’, all written by hand but in a digital form.

As it goes, eight of them were script (with three different brush pen styles represented) and only one of them was printed. I’ll admit that comes from my own style at the moment: I prefer script to print, especially when it’s my print! But we can all be hard on our own writing. Putting it to a vote on the Facebook group, the printed version had the most votes by far – but if you added all the script options together, more people preferred script of some sort to print. It’s also interesting to note that there was no universal NO answer: each of the nine versions was picked multiple times and two people stated they didn’t like any of them and would prefer a typed font. Which is fine and illustrates perfectly one of the biggest things I’ve had to learn about design over the years: it is impossible to please everyone all the time.

While I mulled over what the long list of words and the styles choices might mean, I put the product type to a vote: I wanted to limit us to something I could actually make real on my own, so I wasn’t looking for us to create an entire line of paper or embellishments that need factory equipment. Our options went up in a poll: clear stamps, cut files, printable paper, or printable stickers. Clear stamps was the run away winner from the outset. Once that was clear, we needed to put the theme to a vote, and I thought we might see whether or not I had been misjudging the sarcasm in the word list: would a ‘real life’ option be preferred over something more aspirational? Yup. By a mile.
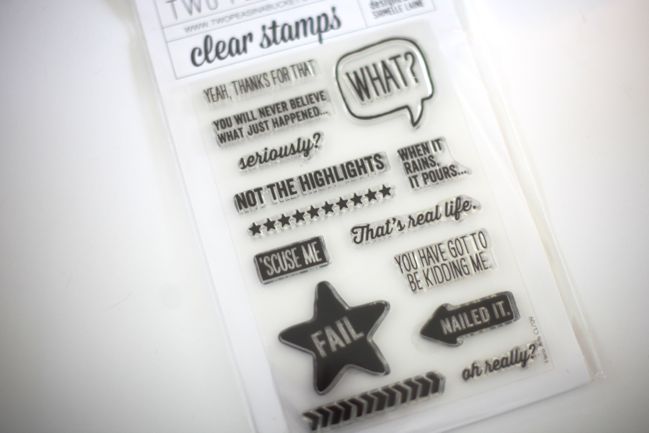
nailed it stamp set by shimelle for two peas in a bucket

Funnily enough, I’ve made a set of real life clear stamps before – but it was a long time ago and they haven’t been available for years. They were quite simple in design but that seems to have worked in their favour because I hear often that they are still in heavy rotation on crafters’ desks, and that is an awesome feeling. Obviously I don’t want to make exactly the same thing again, so before this stage in the process I thought we might be mixing some handwriting, some drawing, and some typed lettering, and I’ll be honest: I was worried about the time frame with any drawing because that takes me far longer! But with ‘real life sayings’ as the favourite, and having done that typed before, making it all handwritten made perfect sense. Most, if not all, of the remaining words and phrases came from that original list, which is something I find myself doing with collections too: even when we are in the final stages, I go back to the original notes and style board to keep checking that I haven’t lost my way and to find something that might be just right but had fallen off my radar. I’d totally forgotten about ‘worst day ever’ as a suggestion, and as much as I love Rapunzel for her best day ever, I think even she would approve of needing a worst day stamp to counter the dozen best day stamps I have in my stash.

There is also practicality in the design process, so one poll asked if a set price seemed right on or too high, which is helpful before everything is finished because I cannot describe how annoying it is to make up the most amazing thing in your head and then find out it’s retail price would be one million pounds. It’s really, really annoying. Good to check that early on then.

Then as I drafted more, I could ask for more specific feedback: do these two lettering styles look good together? Should this phrase have a box around it or just words? Is this better with or without punctuation? There are some times when going with the majority vote doesn’t seem like the best option and the punctuation was one of those: more people preferred the phrase ‘I really need a do-over’ without a full stop at the end than with the punctuation, but it’s super easy to cut the dot off the end of a clear stamp or just not ink it. If you’ve ever tried to correct imperfect stamping with a pen, you know it can be really difficult to get a good match if you wanted to add that dot. So the dot stayed. I hope no one is heartbroken about that.
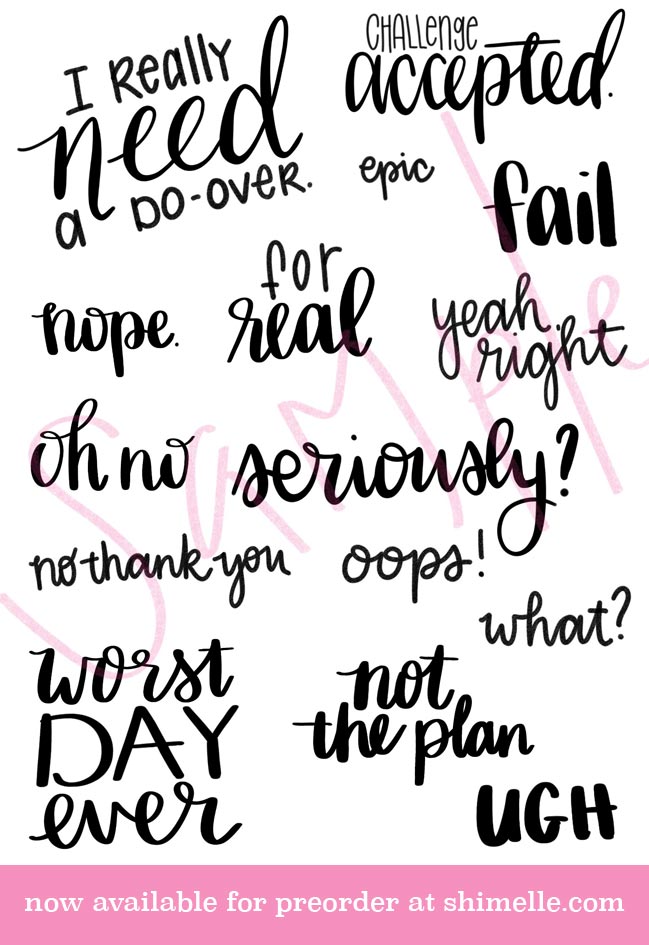
real life stamps available for pre-order

And eventually, we got to a finished draft! There will be a tiny bit of fine tuning to come: there are a few letters that are a little uneven and I’d like to take the time to do that individual pixel work to get them just right, and I will need to move things around a bit to make sure the stamp lines with cut properly. I’m also going to order a few different versions of the word ‘seriously’ in stamp form and use them a bit so I can see what is most legible before committing to a single version, and all of that is stuff that is definitely part of the design process but best not to rush into a one day window. Then I weighed some stamp sets and envelopes of the same size so we could get postage prices and here we are: an actual product to pre-order!

It will take four to six weeks for these to ship, as I’ll submit the plates this week for testing, get them back from the stamp maker and test them plenty, then put in the order. They will be made in the UK with high quality photo polymer. Once I receive it, I’ll package them into envelopes and send them out. With that time frame in mind, I’ll offer two options for the pre-order: pay a deposit now and the remaining total when your stamps are ready to ship, or go ahead and pay the full amount now being aware that there is not an exact shipping date on these since they need to be produced. Absolutely your choice of which you’d prefer! For UK address, the stamp set is £12 including shipping (that’s UK pounds). For addresses anywhere in the world outside the UK, the stamp set is $16.50 including international shipping (that’s US dollars).

And that’s everything! You can go ahead and place your preorder now, and I estimate preorders will be open for about two weeks. I’ll close them when I have the test stamps back and I’m happy that everything is working as planned. (I’ll post on the Facebook group when I’m ready to close the preorders, but go ahead and order now if you’re worried you’ll forget!)

UK address, full payment – £12.00 GBP
Non-UK address, full payment – $16.50 USD
UK address, deposit of £6 GBP (£6 more will be invoiced when ready to ship)
Non-UK address, deposit of $8.25 USD ($8.25 more to be invoiced when ready to ship)

Thanks so much to everyone who took part in this adventure! It was lots of fun for me and I hope the stamps are something you will love and use for a long time to come.
Glitter Girl Adventure 152: Getting Unstuck

Getting Unstuck with your Scrapbook Style :: Glitter Girl Scrapbooking Process Video by Shimelle Laine

I feel like my layouts all follows the same design, even though I try to make them different. I wish I created pages that always looked fresh and exciting. Is there some special trick I can remember? Glitter Girl, can you help?

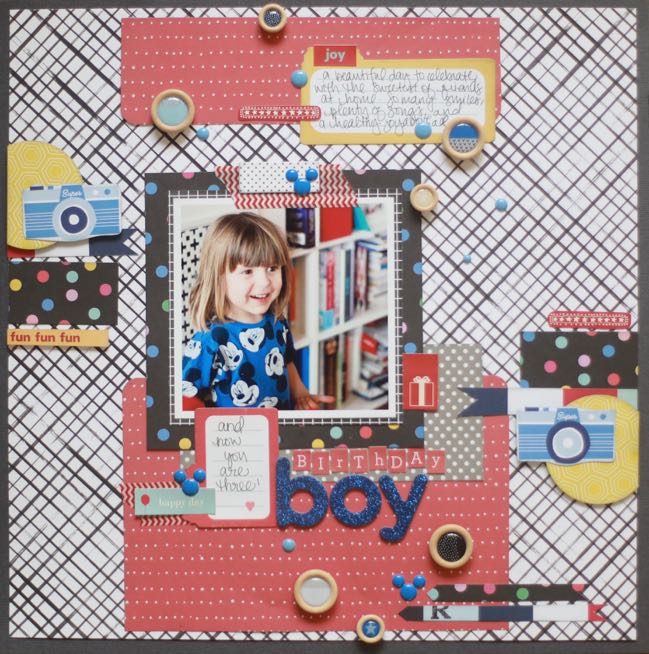
Of course she can! Start with a layout you made that you love but you haven’t made recently, so you have some visual inspiration that isn’t conforming to your most recent design habits. From there, we can create a new page that will look new by changing three specific things but keeping the rest the same. Glitter Girl starts with this page from NSD 2012, which came from a challenge to scrap lift a beautiful page by Jaime Warren. (There are so many beautiful interpretations of that challenge on that post!) Jaime works in photography these days and you can see her beautiful work here, but her archive of scrapbooking inspiration is still online as well.

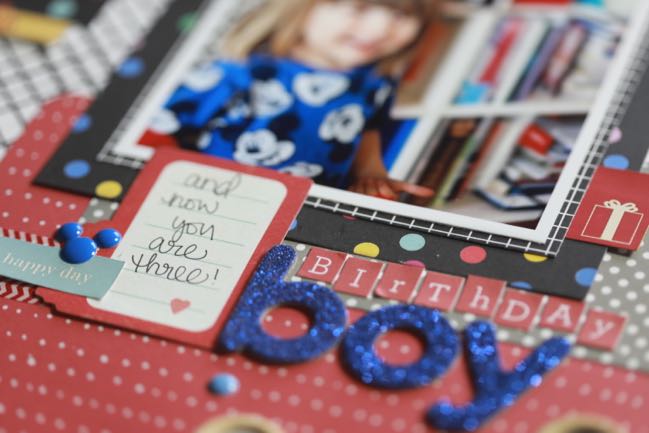
This page includes a fair amount of ‘vintage’ scrapbook supplies, including Love Elsie papers from 2007 and my favourite blue Thickers that are at least six years old. There are a few more recent things though, I promise! The black and white patterned paper from Crate Paper’s Heart Day, a few things from Amy Tangerine’s On a Whim collection, and the colourful grid paper and wood buttons from Little by Little. Those enamel dots are by Doodlebug (and were a good mix of sizes to make the Mickey heads).

Getting Unstuck with your Scrapbook Style :: Glitter Girl Scrapbooking Process Video by Shimelle Laine

And Happy National Scrapbook Day 2017! This weekend I’m going to develop one product from start to finish and take you along for the ride, and you can help decide what we make and how it looks. Join in the fun at Scrapbook like a Superhero.

Plus I’m pinning the NSD sales, challenges, and excitement I can find to this Pinterest board. Feel free to let me know about anything I should add and I’ll get it pinned!

Happy scrapping!

Glitter Girl Adventure 151: Faces in a Crowd

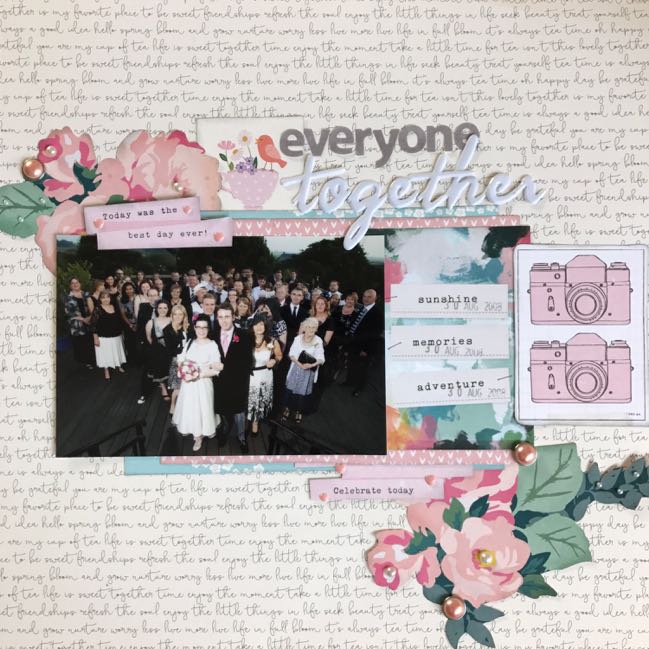
Scrapbooking group photos // scrapbook page and Glitter Girl video by Shimelle Laine

I have a photo from a wedding where there are literally 100 faces in a single 4×6 landscape print. I keep looking at embellishments, but I’m not sure what to use that won’t overwhelm the photo. Glitter Girl, can you help?

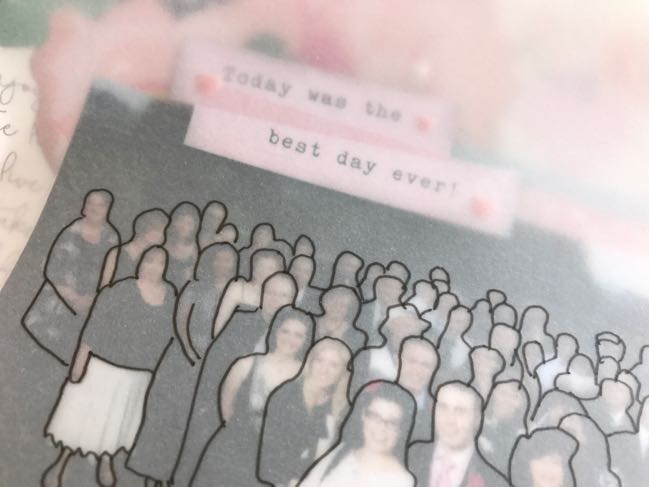
Of course she can! Try using mostly paper for your embellishment and an overlay of vellum to preserve a roll call for your crowded group photo.

Supplies for this page include plenty of patterned papers from the Tealightful collection from Pebbles and Chasing Dreams by Maggie Holmes. Both letter sticker sets are older (grey Sassafras letters and white puffy Thickers from Dear Lizzy), and the only other embellishments are enamel dots, pearl dots, and pearl brads. You’ll need a sheet of vellum to make the overlay, of course.

As always, Glitter Girl would love to see what you’re making and hear your questions! Please stop by our Facebook group Scrapbook like a Superhero and say hello.

Scrapbooking group photos // scrapbook page and Glitter Girl video by Shimelle Laine

Have you scrapbooked a group photo that made you think twice about your usual embellishment process? We’d love to see your solution! Please join the link up below to share what you’ve made – you can link to your blog, social media account, or scrapbooking gallery OR just upload the photo from your computer. Happy scrapping!


Folding Circle Punches :: Two Looks on Scrapbook Pages

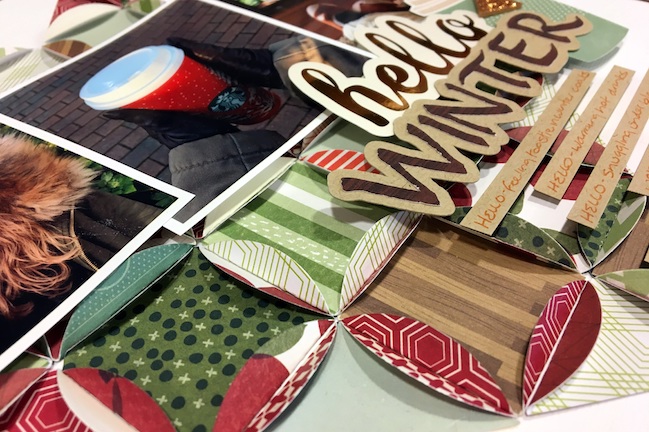
Folding Circle Punches // scrapbook page by Sheena Rowlands

Contributing Designer Sheena Rowlands created this beautifully layered and folded page over the winter, and as much as I’m ready for spring to arrive, her winter crafting has me inspired! Today we’re each sharing a page we’ve made with the same technique: folding circles punched from double-sided patterned paper. We hope it inspires you too!

Folding Circle Punches // scrapbook page by Sheena Rowlands

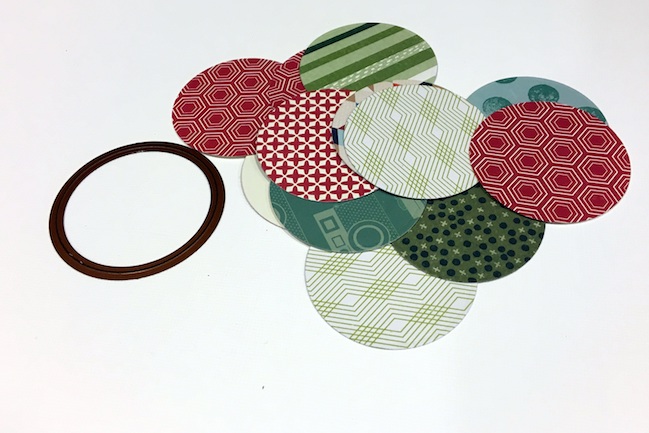
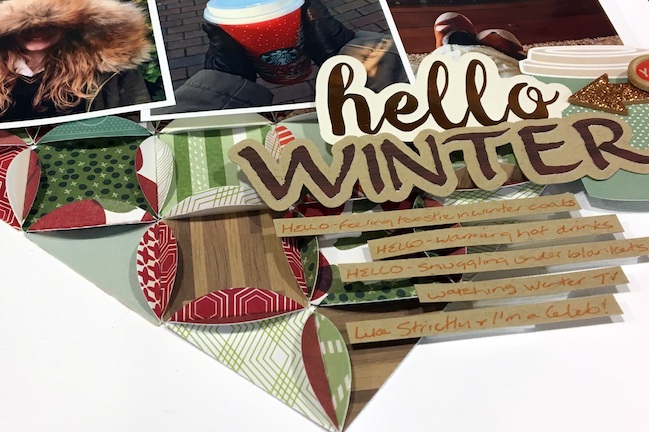
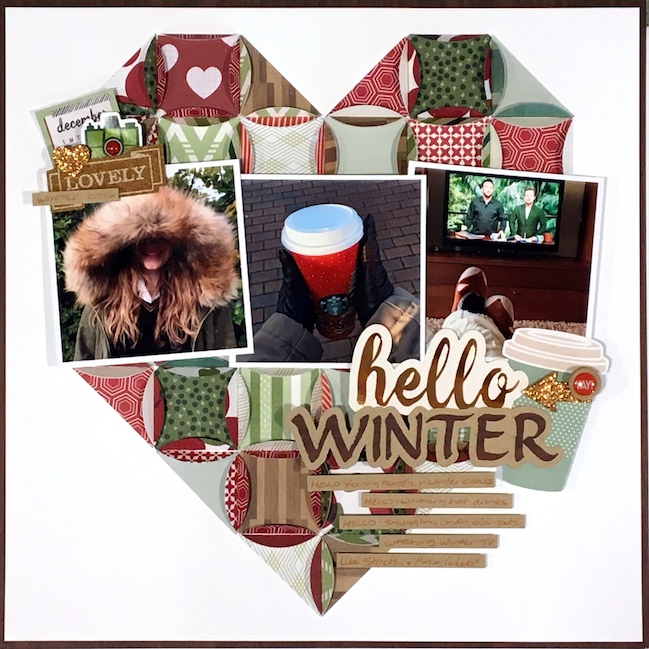
I wanted to make a page focusing on some of life’s little pleasures from this time of year and give it a warm and cosy feel. I could create a quilted look to the background of my page so I cut lots of 2 inch circles using a die, but a punch would work just as well, from off cuts and scraps in tones of red, green and brown.

Folding Circle Punches // scrapbook page by Sheena Rowlands

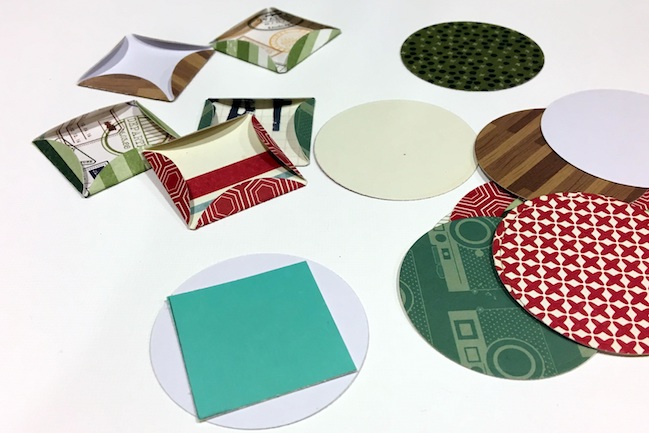
I cut a square from scrap card which fitted within the circles, then whilst holding it in place I folded over all four sides. Don’t worry if the papers you chose aren’t double sided just cut a few patterned paper squares using the template as a size guide to pop inside your folded circles.

Folding Circle Punches // scrapbook page by Sheena Rowlands

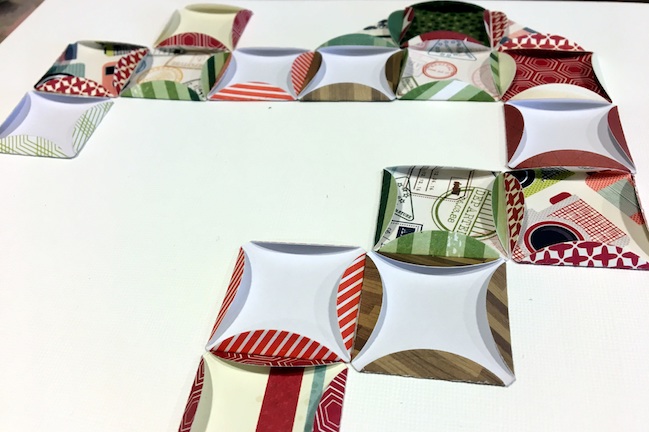
I then had fun moving them around trying to find a design I liked and I cut a few of them in half after I settled on a heart design. Starting in the centre I stick them down butting them up against each other.

Folding Circle Punches // scrapbook page by Sheena Rowlands

I used the title to kick start my journalling, welcoming winter coats, takeaway drinks and watching TV from under a snuggly blanket as some of my favourite things about this season.

Folding Circle Punches // scrapbook page by Sheena Rowlands

The patterned papers and embellishments used are all from ranges by Shimelle from the past year and I loved how well they sit together with the copper highlights from the Go Now Go collection.

Folding Circle Punches // scrapbook page by Shimelle Laine

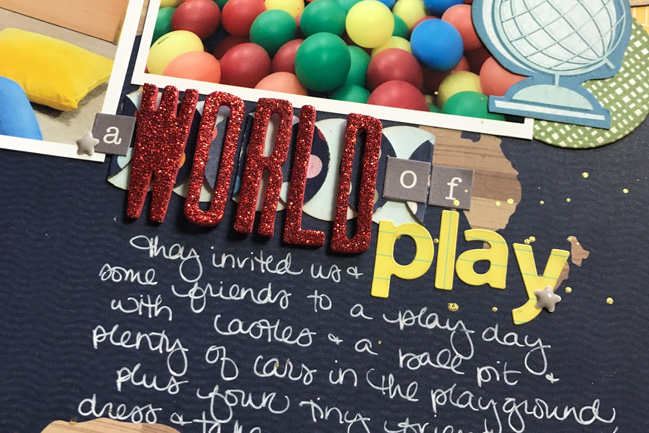
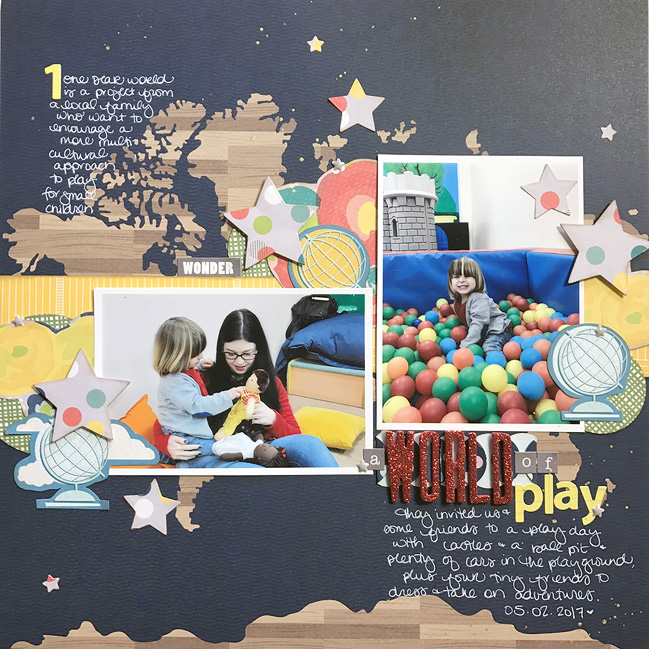
I love Sheena’s design, but wanted to use the folded circle idea as a much, much smaller detail, so I punched just a few circles and lined them up behind the title on this page.

Folding Circle Punches // scrapbook page by Shimelle Laine

The rest of the design includes papers from Go Now Go and True Stories, with plenty of big dot patterns to play off the colourful balls in the photo. I love adding stars to designs that have plenty of circles, since the shape has such a contrast with all its points and angles next to the calm of circular curves.

As an aside, this page documents a day we went to play with a project from a family in our neighbourhood: they have designed a set of multicultural dolls for small children. They are currently fundraising and spreading the word about the toys, and you can find a video and more information at One Dear World, should it be relevant for you!

We’d love to see what you’re making with circles, so don’t be shy to show your own projects in the comments. Have a happy and creative Friday, won’t you?

Scrapbooking a few more hot beverages

scrapbooking coffee // scrapbook page by Kirsty Smith

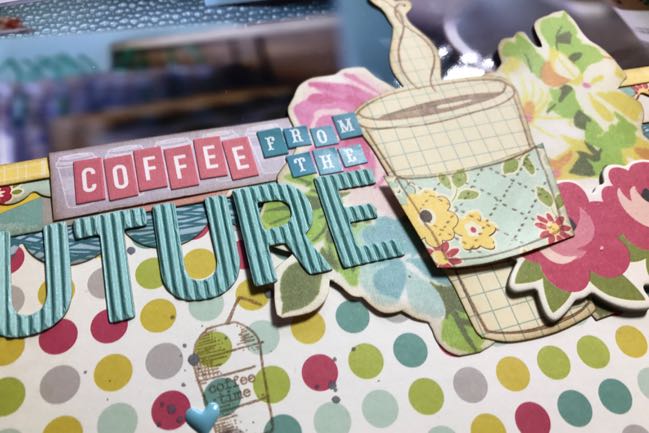
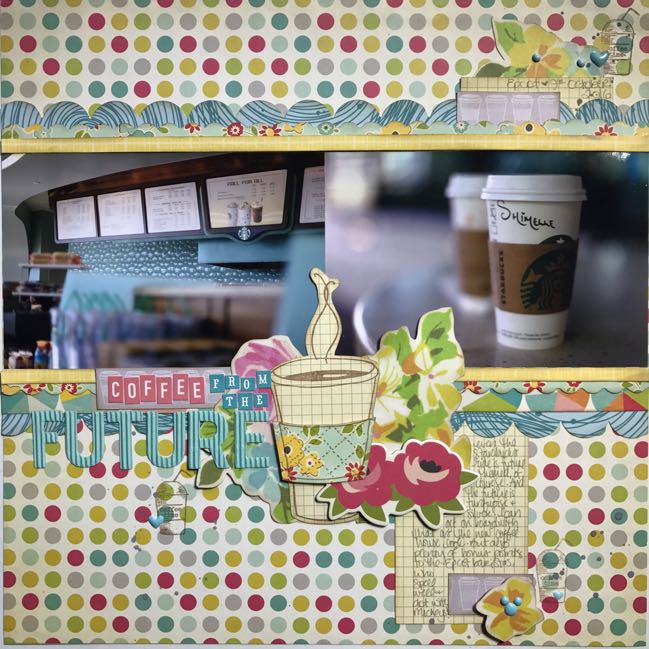
Maybe the last episode of Glitter Girl just got me into some sort of hot beverage trend, but it turns out it’s not the only page on that topic to hit my desk recently. I’ve been inspired by Kirsty Smith, so today we each have a hot mug and a layout to share with you! Kirsty’s first!

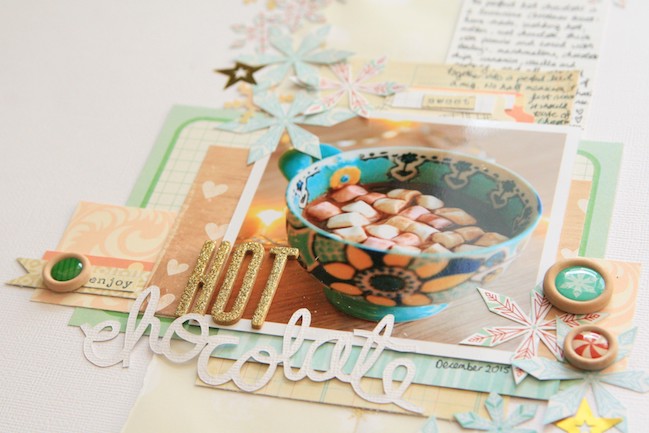
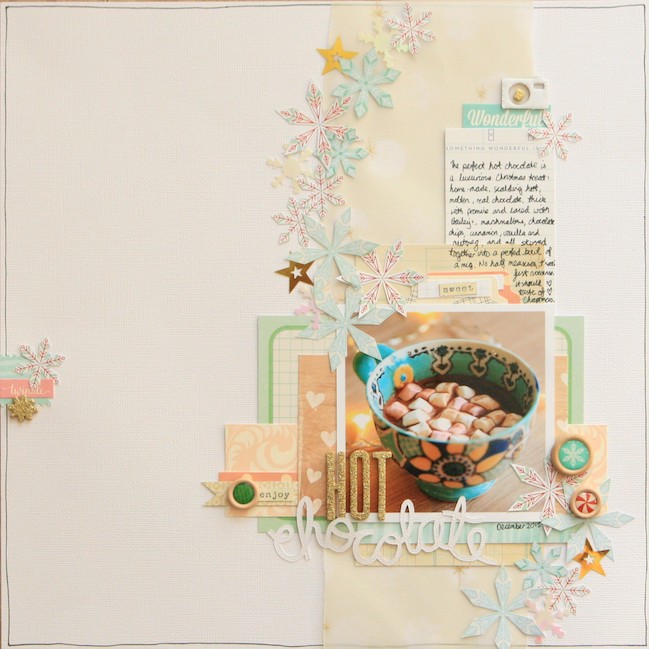
I LOVE Christmas. And by extension, scrapbooking about Christmas. I made this as my first Christmas page of the year last December and it was so exciting to dive in with sparkles and stars and all things twinkly. I like to make my own hot chocolate during the festive season, rich and spiced with wintery flavours of cinnamon and ginger, and this Christmas tradition was perfect for the subject of my page. I drew inspiration from the structure of one of Shimelle’s older pages, using a vertical column to anchor the design. As I typically like to keep areas of white space when I scrapbook, I used the beautiful vellum from Shimelle’s Starshine collection to keep the structure of the page soft, and to introduce a little gold sparkle.

scrapbooking coffee  // scrapbook page by Kirsty Smith

I layered up my photo from there, replacing two photos in the design with one slightly larger photo of my own, framing it with layers of patterned papers from the Christmas Magic line. Cut-apart journaling cards a lovely for this, and I added in anything that fit with a colour scheme of pale greens and aqua, soft pinks and flashes of gold. This is a great colour palette for Christmas as it’s a more delicate take on the bolder reds, greens and golds that feel like traditional Christmas colours.

scrapbooking coffee  // scrapbook page by Kirsty Smith

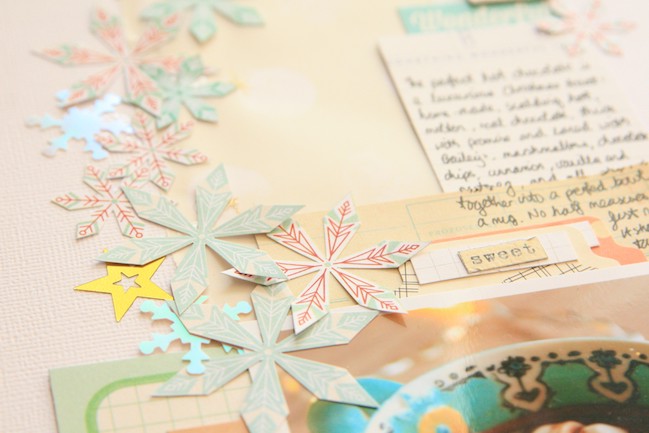
Embellishing this layout was my favourite part of the process: I hand cut lots of snowflakes out of patterned papers from Shimelle’s Christmas Magic collection, swirling them around the page, and tucking in snowflake sequins for a touch of shimmer. I finished off the design by adding in an extra-Christmassy golden sparkle with the glitter Thickers and a star or two. Merry Christmas; I hope this is the first of many a Christmas page this year!
- Kirsty

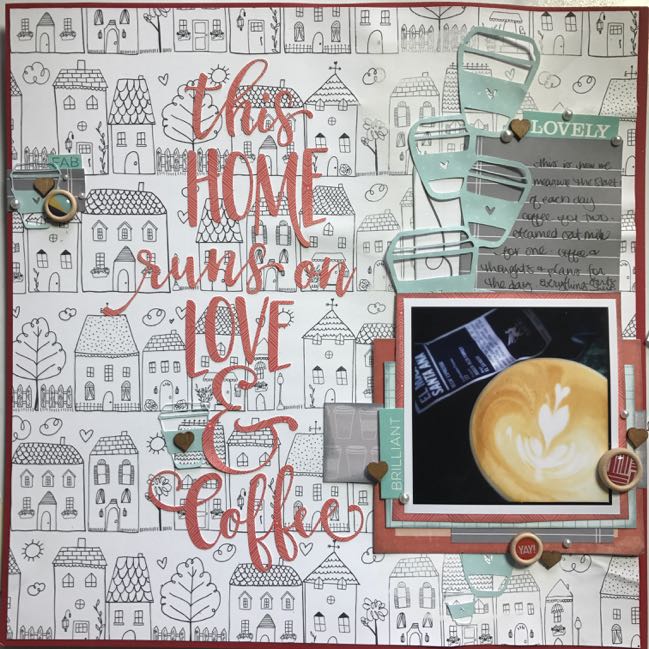
scrapbooking coffee // scrapbook page by Shimelle Laine

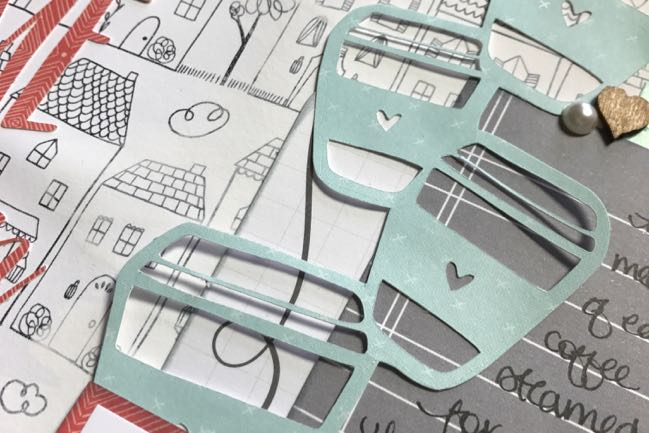
I love Kirsty’s page but of course I just had to start with a patterned background. No matter how many pages I bookmark on a white background, it’s just not what’s right on my own desk. I compromised with a black and white patterned paper from Dear Lizzy’s latest collection, and added some white paint in the vertical column on the right to tone down the pattern behind the coffee cups.

scrapbooking coffee // scrapbook page by Shimelle Laine

I definitely didn’t have Kirsty’s patience with scissors this time around, and both the coffee cups and the title were cut files found in the Silhouette store – they both came up when I did a search for ‘coffee’ there, and I promise you’ll find plenty of options if you have a look there. Then I took more inspiration from Kirsty in choosing wood buttons (from Go Now Go) and wood veneer shapes (by Studio Calico) to scatter across the page, plus a few adhesive pearls as a finish touch.

I try to include at least one coffee-at-home layout in each year’s family album because it is such an ongoing theme in our home. I like trying to include the bag and the cup in the photo so I can document what we are drinking from where and how long we stick with favourite cups and such. It’s something we do at least once a day, so one or two layouts a year doesn’t seem over the top at all really.

Thanks so much Kirsty for helping me get this in my album – and reminding me that my Silhouette machine still works if I plug it in! We’d love to see what these designs inspire you to scrap – be it hot beverages or something else entirely. Happy crafting!

Glitter Girl Adventure 150: Stamped in the Centre

Scrapbooking with Stamps - Glitter Girl video 150 - scrapbook page by Shimelle Laine

I try to use my stamps when I scrapbook, but I find I’m just using something faded into the background and then maybe a small design scattered here and there. I would love to make my favourite stamps more of a feature on my pages, but I’m not sure how to compose the rest of the page. Glitter Girl, can you help?

Of course she can. Try a simple composition of two photos and one stamp that you can put right in the centre!

Unfortunately the Hero Arts coffee cup stamp I used is quite old and I haven’t found it online with a quick search. There are many coffee stamps currently available though, from Hero and other manufacturers, like this selection. The papers are all old too, I’m afraid! Cosmo Cricket, October Afternoon, and Sassafras, though the grey coffee cup paper is still available in the True Stories 6×6 pad. You might find you have these older items in your stash, but if not, don’t fret: it’s easy to substitute the types of patterns that are there: find a dot, a small and a large floral, and some single colour patterns like a check or swirl design, and they will go together in exactly the same way.

Scrapbooking with Stamps - Glitter Girl video 150 - scrapbook page by Shimelle Laine


A little old, a little new, and a bit of Harry Potter for good measure

Harry Potter scrapbook page with process video // by Shimelle Laine

I should have planned this post for World Book Day last week if I’d thought ahead, but of course I didn’t. There’s never a bad day for Harry Potter scrapbooking, is there? I have an entire album of layouts from one day at the studio tour, so I better make a start on the photos from our trip to the Wizarding World of Harry Potter!

I will admit upfront that we visited Universal Studios entirely for the Harry Potter element. Universal doesn’t cater for the super young in the same way that Disney does. Their target audience is older and even the Dr Seuss and Minion rides have height requirements. We managed the Dr Seuss carousel, but the rides here are more fabulous if you love the twists and turns of serious roller coasters, and well… that is not my jam. But I wanted to see all the details of Hogsmeade and Diagon Alley, brought to life in a way you could just be fully immersed. And it is pretty amazing.

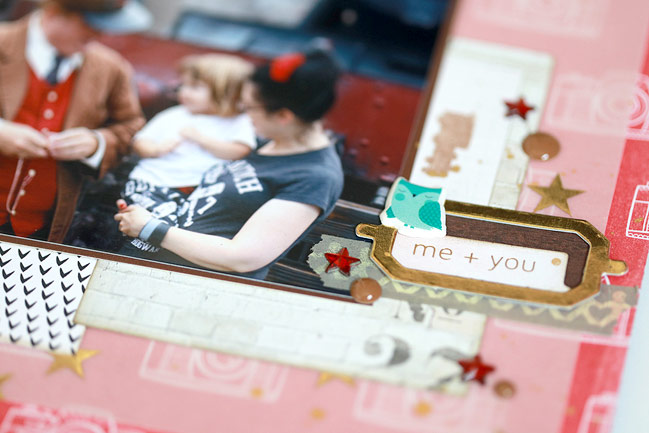
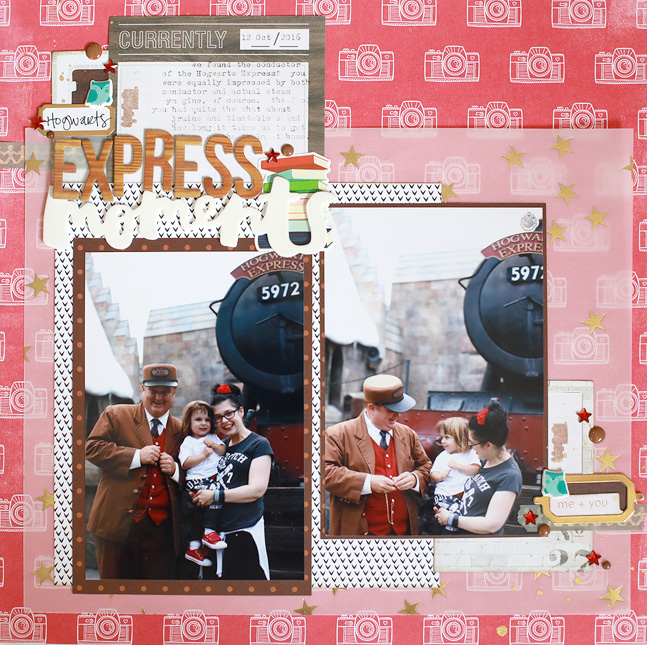
But the youngest member of the party was most excited by the train. Of course.

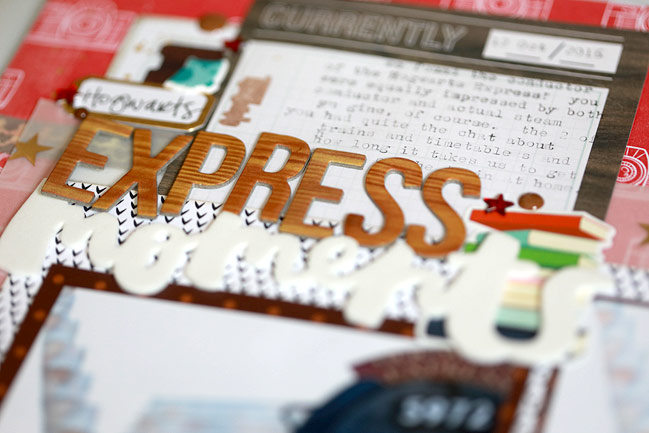
Some of the supplies on this page are far, far too old to be in stores (like that 2009 paper!) but you can find the newer stuff, I promise. Red camera paper and white foam Thickers by Amy Tangerine, train stamp from Go Now Go, stickers and patterned paper from Little by Little, star vellum from Christmas Magic, die cuts by Pink Paislee, enamel dots by Doodlebug, and Typecast journaling paper by WeR Memory Keepers. And seriously, someone needs to make those star-shaped rhinestones like Jenni Bowlin did back in the day. They are so lovely! The woodgrain Thickers were a Studio Calico exclusive about five years ago. I may have rationed them.

Harry Potter scrapbook page with process video // by Shimelle Laine

If anyone sees steam train washi tape, please let me know. For today I went with this grey Amy Tangerine tape from her first collection for its colour and cuteness. But I have a lot of steam train photos and I don’t see this obsession ending any time soon. So steam train washi: it needs to happen.

Harry Potter scrapbook page with process video // by Shimelle Laine

Thanks for taking a look! And not rolling your eyes too much at the sheer number of Harry Potter scrapbook pages I have made over the years.