paper: pretty paper. true stories. {and scrapbooking classes with cupcakes.}

lovely to meet you Twitter Facebook Pinterest YouTube

Take a Scrapbooking Class

online scrapbooking classes

Shop Shimelle Products

scrapbook.com simon says stamp shimelle scrapbooking products @ amazon.com shimelle scrapbooking products @ amazon.co.uk

Reading Material

travel

A Last Minute Easter DIY + A Special Sale
Easter decor by Gina Lideros
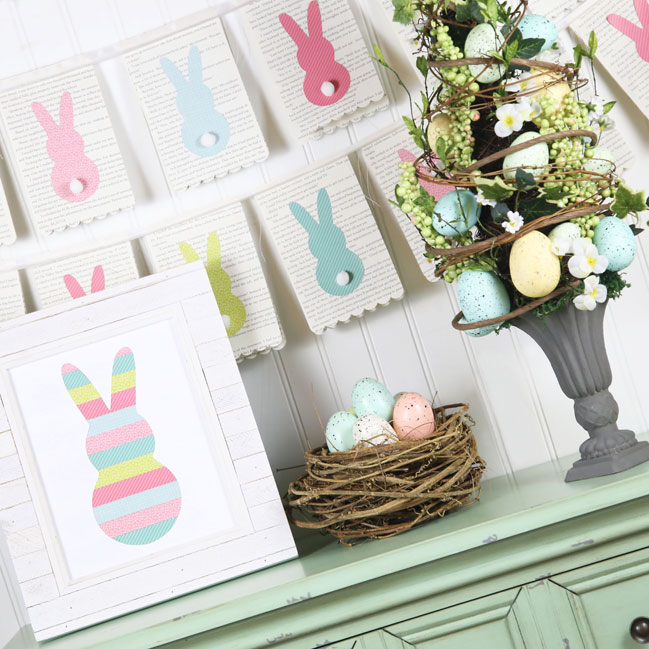
Two little extras today for your Easter weekend: first, it’s not too late to do a little Easter decorating, and Gina Lideros has a project that is quick and easy and perfect to do either by yourself or as a collaborative family project. Then something just for you: a sale on some classes so you can have a calorie-free Easter treat!
Easter decor by Gina Lideros
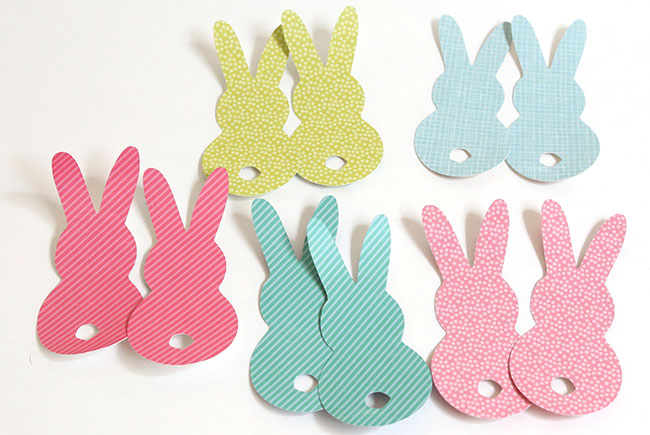
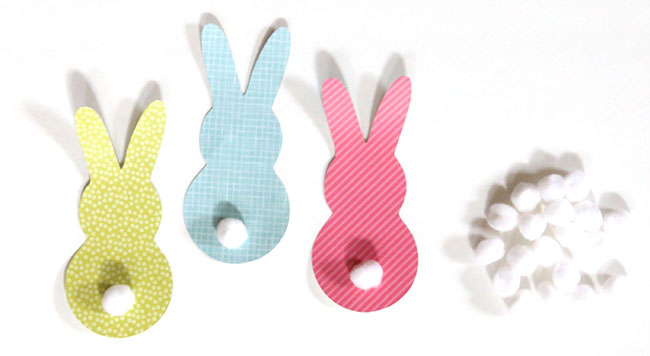
To start creating my banner I used my Silhouette Cameo to cut little bunnies out of patterned paper. This file in the Silhouette store works beautifully, but there are plenty of different Easter shapes so you can choose something to your liking.
Easter decor by Gina Lideros
I thought that the little bunnies could use cute cotton tails, so I applied a small fluffy tail to each one for a quick and easy detail.
Easter decor by Gina Lideros
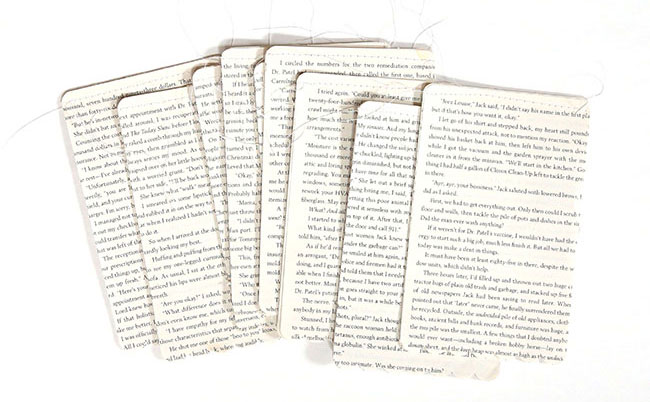
I used old book pages for the background of each piece of the banner, sewing them together for a bit more strength and using a border punch at the bottom for a cute scalloped edge. You could easily use patterned paper for this step too – select a small pattern in a pale color or a color that gives you a good contrast with your bunnies.
Easter decor by Gina Lideros
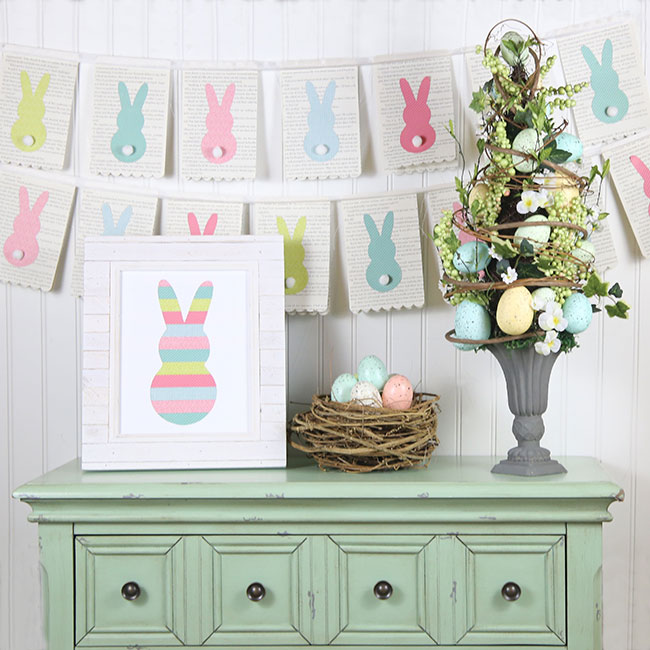
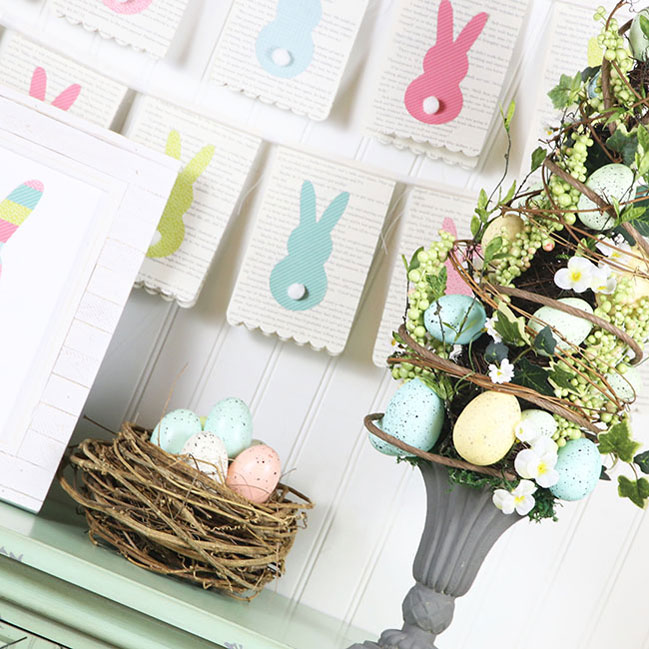
I added seam binding to the top to bind the banner together. Then I just adhered a bunny to each piece and my banner was ready to hang. I also created a small bunny framed piece by taking strips of patterned paper and adhering them behind a bunny that I cut out using my Silhouette Cameo. It’s the remaining piece from when I cut the bunnies for the banner, so it’s nice to have the potential to use both the positive and the negative when cutting the design!
- Gina
Easter decor by Gina Lideros
I’m very happy to say I’m in the final stages of a new class – finally! So this weekend I’m offering a special price on some existing courses that complement the new one coming up so soon. Chief among them is Cover to Cover, the course that covers how I went from treating every page like an individual project and just stacking the pages up in endless piles of disorganised craft to putting the book back in scrapbooking and finding an album system that absolutely changed this hobby for me. This is something I also discussed in the audio course format with Noell Hyman in the Story Centred Album recordings, but Cover to Cover is a course of PDF and video content that goes into step by step detail of how I made my photo storage work, how I got all those stacks into albums that made sense to me, and how keeping things really, really simple lit a flame under my creativity to keep making pages that told my stories. This course is normally $30 USD, but over the Easter weekend, it’s just $22. You can read all about the course here, but be sure to come back to this page to pay, as the sign up button on that page will charge you the normal full price.
Sorry this offer has now expired. The class is still available at the full price on the link above.

Next up is Inspired By, a group video workshop where several of us chose something as our inspiration piece then shared how we went from that inspiration to a new finished layout in a start to finish process video. The class includes ten videos plus a reference PDF, and normally costs $15. This weekend, it’s just $10. Again, you can read about the class details here, but be sure to return to this page to purchase so you get the discount!
Sorry this offer has now expired. The class is still available at the full price on the link above.

And the third and final special offer is slightly different. Glitter Girl’s Scrapbooking Survival Guide is a course I originally taught at Two Peas in a Bucket and it hasn’t been available since their closure. This is another thing finally reaching that point where I get to cross it off the list! If you took this class at Two Peas, you do not need to purchase it. We will be adding your access here, but it takes some time as there isn’t an easy way to transfer the list from their site to mine. But those names will start to be added on Tuesday and I will post here when we are through the full list so you can get in touch then if you should have had access and aren’t seeing it in your class list. But for those who have never taken the class, it’s now available for signing up! At Two Peas, the course was broken into two purchases – the ten video Survival Guide class for $25 and an additional extended video (Glitter Girl’s Guide to Stretching your Stash) was an additional purchase. Here, it will all be together for the $25 price on an ordinary day, which is already a saving since you basically get an extra mini workshop for free. But this weekend, you can purchase the full set for $18. That’s eleven videos (including one that is significantly longer than the rest) and five accompanying PDF files to break it all down. Class access for this course will be sent on Tuesday and Wednesday, the 29th and 30th of March.

Some important things
…Class access for Cover to Cover and Inspired By can take up to 24 hours. Class access for Glitter Girl’s Scrapbooking Survival Guide will take place on Tuesday and Wednesday. You should receive a welcome email in that time frame, and if it’s your first class purchase here, you’ll also be sent login details in a separate email. They can sometimes go to your spam folder, so keep an eye if you don’t see it in your inbox.
…These classes are all archived and you will access the materials online. They include permanent access and you can access them any time, at any pace, and in any order you fancy, as long as you have an internet connection. If you already have an account and want to check what classes you already have, you can find that here, but remember your classes won’t be visible until you sign in with your username and password.
…Sale prices end at 6am UK time, Tuesday 29th March 2016.
…You can always contact me at shimelle@gmail.com if you have any questions with your purchase.
Easter scrapbook page by Heather Leopard
That’s enough blather from me! Have a beautiful Easter weekend and do not miss the fabulous Easter crafting tutorials from Heather Leopard while you’re here!

Easter Scrapbooking with Starshine and some clever cutting

Easter Scrapbooking with Starshine and some clever cutting // layout by Heather Leopard
We have more Easter fun here for the holiday weekend, starting with this amazing combination of Starshine papers and shape cutting with the Silhouette or a craft knife from contributing designer Heather Leopard. We can’t wait to see how you scrap this Easter!

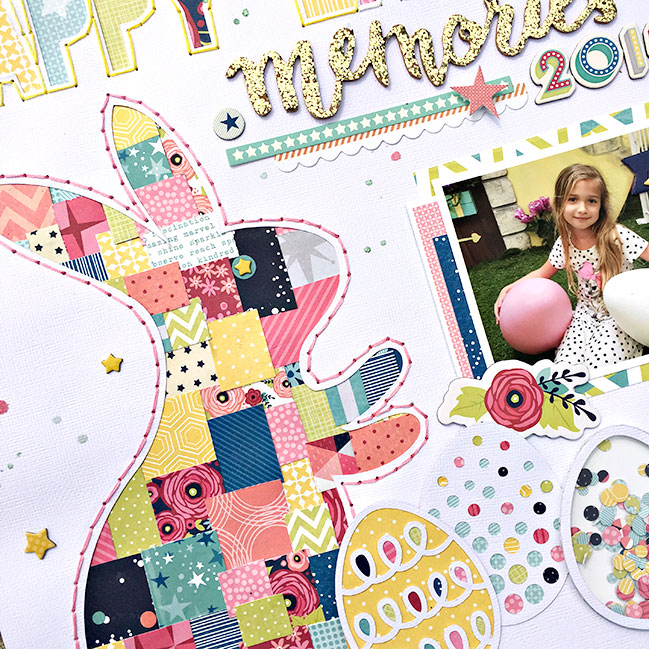
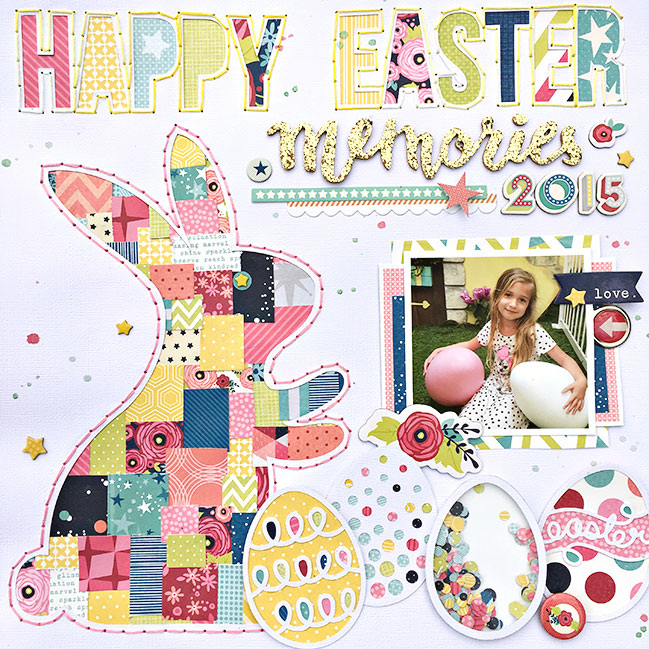
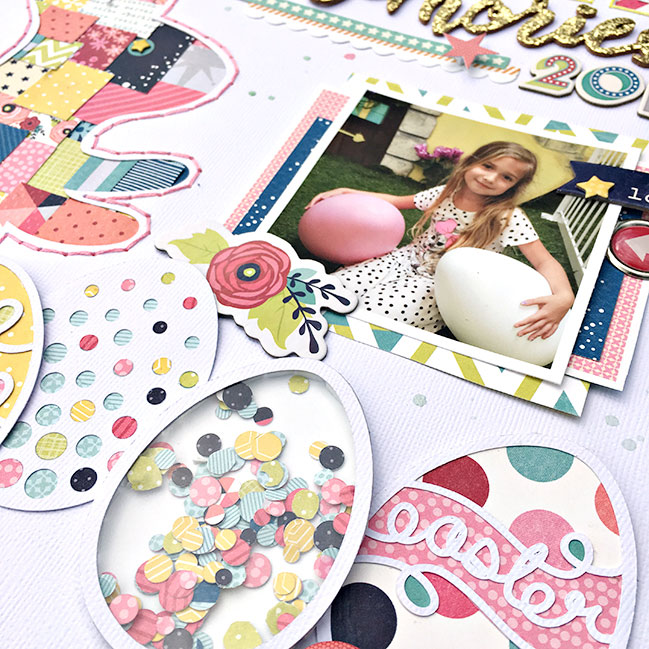
Happy Good Friday everyone. I hope you all are ready for a fun-filled Easter Weekend. In honor of this wonderful holiday, I created an Easter layout about my daughter’s trip to visit the Easter bunny last year. I thought it only fitting to include an actual bunny on the layout but not just any bunny would do…it had to be a patchwork bunny ‘cause how cute are patchwork stuffed animals?!

I have a few photo tutorials I want to walk through with you today. First is the patchwork, then the process for how I created the eggs and lastly is the shaker confetti egg. Let’s take a look…

Easter Scrapbooking with Starshine and some clever cutting // layout by Heather Leopard

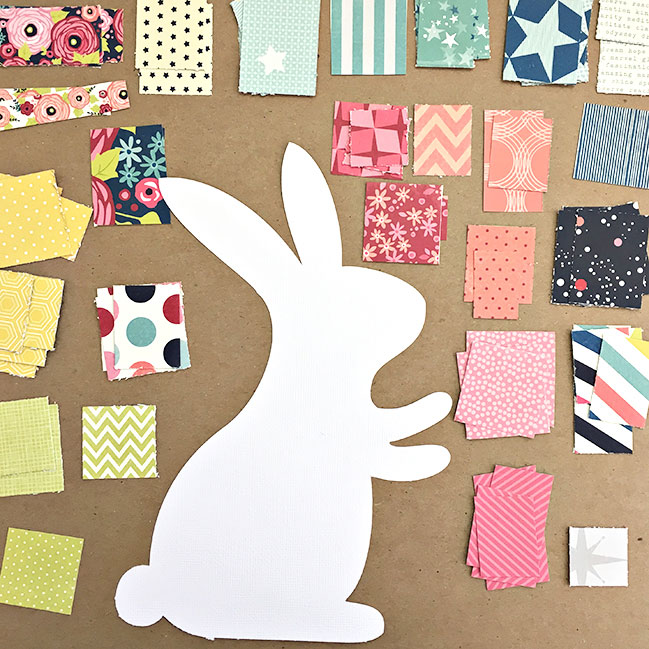
To create the patchwork bunny, I cut the bunny from the white cardstock. I actually thought I would just back the negative space with a fun pattern paper but as I was looking at the bunny that was about to be thrown away or go to my scrap pile I realized I had to use it as part of the design. I had cut it out just to add it right back and that’s when the idea to add a bunch or rectangle and squares hit me.

Easter Scrapbooking with Starshine and some clever cutting // layout by Heather Leopard

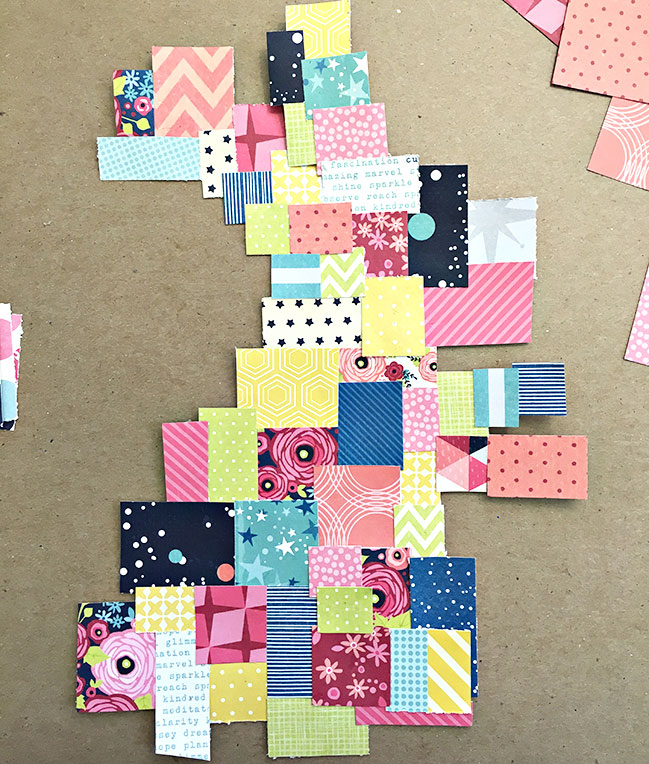
First I cut a bunch of different sized squares from various pattern papers and arranged them by color around the bunny. I literally went color by color and adhered them to the top of the bunny, overlapping them with no rhyme or reason. The only thing I was concerned about was that I didn’t put the same pattern next to itself.

Easter Scrapbooking with Starshine and some clever cutting // layout by Heather Leopard

You can kind of still see the shape of the bunny after all the patterns have been added. Tip: don’t trim the edges around the bunny. Leaving it untrimmed will help ensure you won’t have any open gaps when you add the cardstock overlay.

Easter Scrapbooking with Starshine and some clever cutting // layout by Heather Leopard

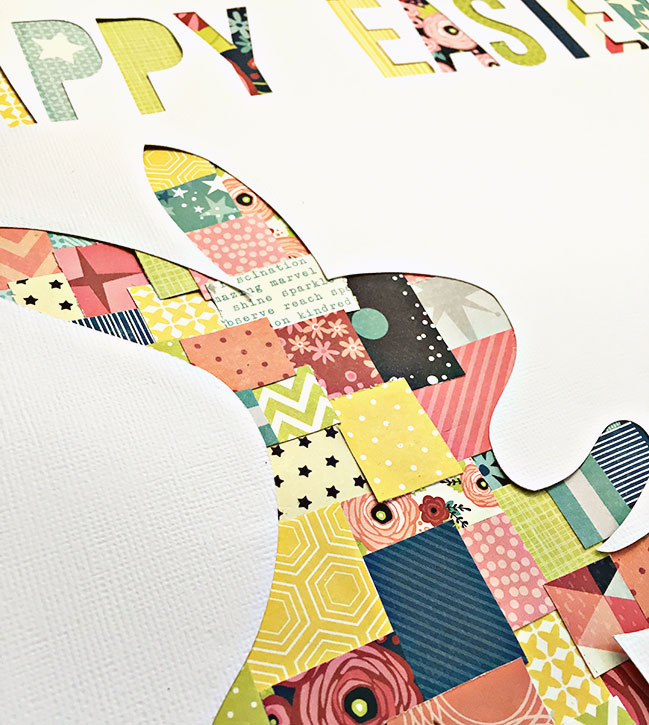
I also cut a big title at the top of the page so before adding the overlay to the top of the patchwork bunny, I added patterns to the back of the letters. I opted not to use the patchwork pattern for this and simply used 1 pattern per letter so as not to get too crazy. Once the title was complete, I added the overlay on top of the bunny. Tip two: make sure to use good adhesive to get all those little edges to stick down. You can see them popping up here before I adhered them together. To finish off the bunny and title, I handstitched around them.

Easter Scrapbooking with Starshine and some clever cutting // layout by Heather Leopard

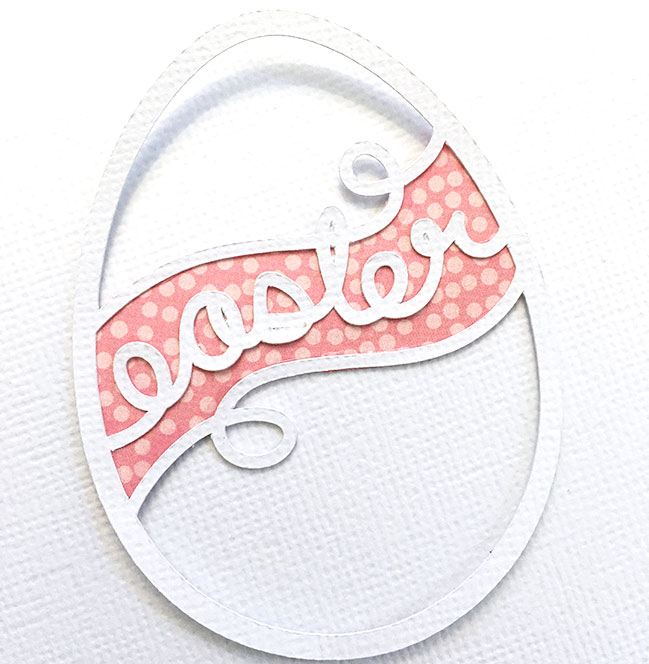
I figured that an Easter layout cannot be complete without a few Easter eggs. I will walk you through the process for how I customized them. The first egg has a cute little banner and word in the middle. I could have traced this in Silhouette Designer but I hand cut it by simply tracing it on the pattern and then cutting it out. I then cut little bits for the loops and then backed it with a coordinating pattern paper.

Easter Scrapbooking with Starshine and some clever cutting // layout by Heather Leopard

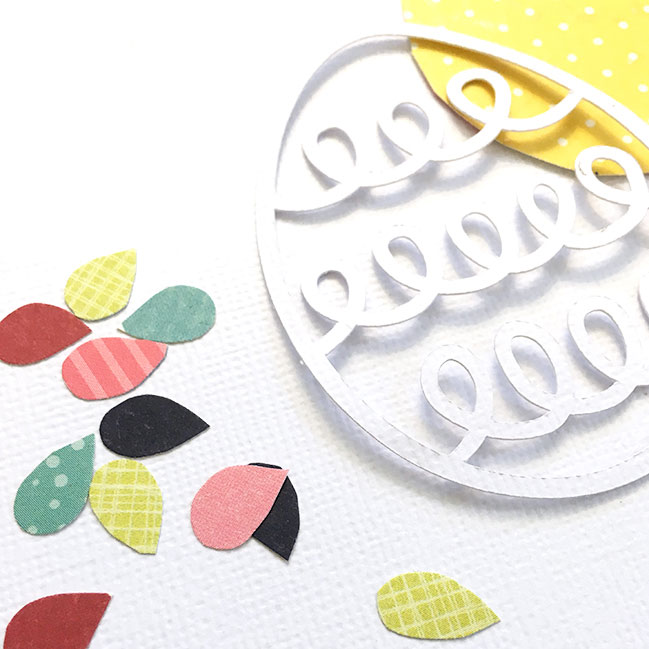
The next egg had a ton of loops. Again, I could have traced and cut them on my Silhouette Cameo but that’s too easy. I simply eyeballed the design and hand cut them. If they were too big, I just trimmed them down and then adhered them to the loops. Then I backed it with a bright yellow pattern.

Easter Scrapbooking with Starshine and some clever cutting // layout by Heather Leopard

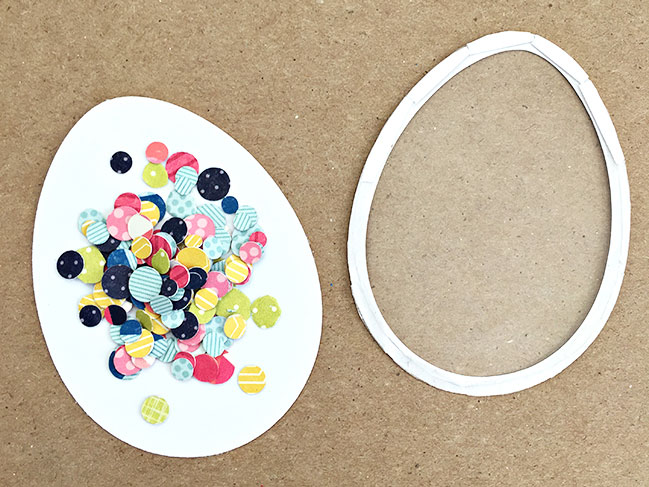
The last one I’m showing today is a shaker box egg. I traced the outside of one of the other eggs for the back of the egg and then did an offset trace on the inside to create the top of the egg. I then used some leftover packaging material to create the clear front of the egg, adhering it with skinny double sided adhesive. I cut a few circles from the pattern papers and placed them on top of the solid egg background. Lastly, I cut some foam adhesive in half and applied it to the back of the top layered egg. Does that even make sense? I placed it on top of the solid egg with the confetti and voila, a shaker egg. I used some of the leftover confetti for the fourth egg.

Easter Scrapbooking with Starshine and some clever cutting // layout by Heather Leopard

All that was left was to finish off the title, add the all-important photo and embellishments and last but not least the journaling, which you don’t see here. I plan to add that under the bottom left bunny ear or maybe between the bunny and the photo. Decisions, decisions. Where do you think I should journal?

Glitter Girl takes on scrapbooking with minimal supplies

Glitter Girl takes on scrapbooking with minimal supplies // layout by shimelle laine

Glitter Girl has been avoiding one particular question for a while. It came from so many different people. Students with zero scrapping budget. Overseas scrappers crying from the cost of shipping and import tax. Scrappers with no space for stash or no cash for stash. And a scrapbooker who just turned her craft room into a nursery for twins balancing the emotion of probably not having time to scrapbook much for a while while also having an innate need to create in order to feel just right.

That challenge was to scrapbook without much in the way of supplies. No stickers. No purchased embellishments. No big stack of patterned paper and drawer of punches.

One sheet of white cardstock and whatever is left in a 6×6 paper pad that has done a fair bit already. Nothing else.

This is the most intimidating challenge Glitter Girl has ever taken on, I do believe!

And she cheated. That washi tape and the hole punch are totally cheating. Disappointing, really.

Glitter Girl takes on scrapbooking with minimal supplies // layout by shimelle laine

That toddler painting technique is something that needs to appear more in my albums, but it was only after I finished the page that I realised it needs to involve an actual toddler. I’m going to pull out some cardstock the next time he is painting and see if anything might make a nice background. I might as well put him to work, right?

But truthfully: this challenge has made me look like a deer in the headlights every time it has been asked in any wording, and yet I am so, so glad I tried it. You can too: grab a 6×6 paper pad and one sheet of cardstock for your background and go. If you end up needing to cheat a smidge, so be it, but the victory of getting to the end and realising the whole page was basically made with leftovers from a 6×6 paper pad? That feeling is pretty fabulous indeed!

I hope you enjoy watching this adventure!

Scrapbooking on a black cardstock background

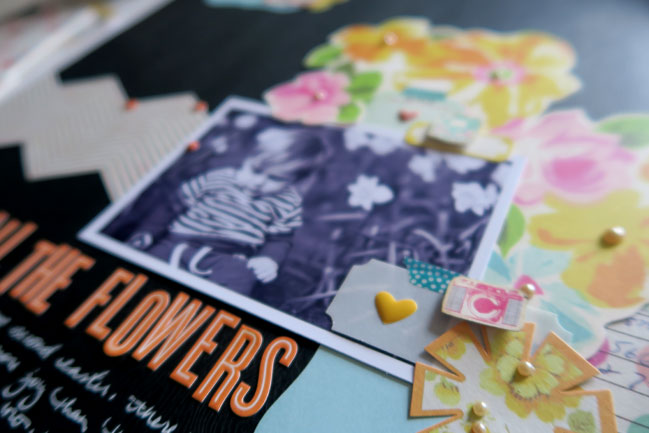
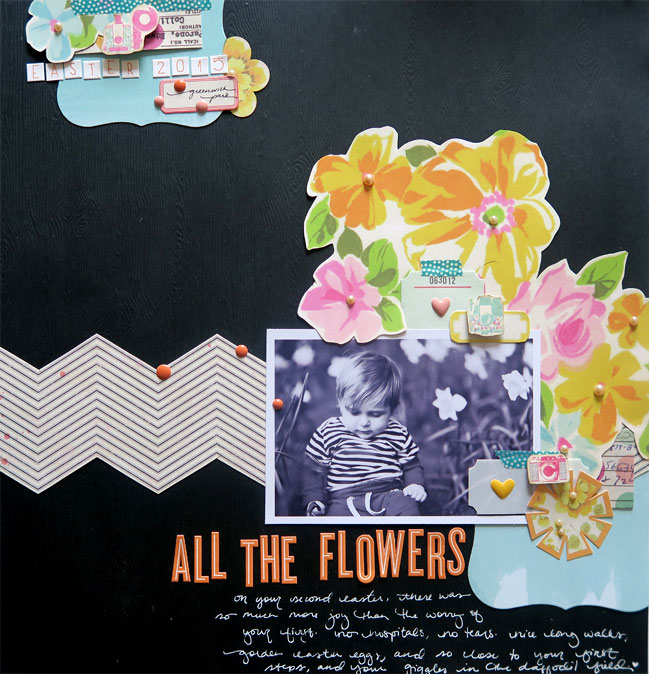
Easter scrapbook page on black cardstock background // layout by shimelle laine

Last week’s Glitter Girl Adventure has a lot to answer for when I look at my desk this week. I didn’t put that floral paper away. I found myself working from the edge of the paper into the middle again rather than the other way around. And in a further quest to switch up a few things to add some variety to what I’m making at the moment, I turned around to my paper and realised although I have significantly less plain cardstock than I used to keep, I do still have some. If I was going to take on this week’s black and white photo challenge, why not try it with black cardstock in the background and get all the colour from the other elements of the page?

Because black cardstock: it’s the first thing you go to for scrapbooking Easter photos.

Yeah, I was a little worried it might all go horribly, horribly wrong and I was totally going to blame Glitter Girl if it did. Sometimes having an alter ego is handy like that.

Easter scrapbook page on black cardstock background // layout by shimelle laine

But actually, I’ll give her credit. I love this photo on that floral paper. And I love the floral on the black background. And I love that simple things like enamel dots can save the day when you’re cutting chevron patterned paper and multitasking sends you cutting in the wrong place. And actually, I am really loving not just the black but also the orange on this page. Black and orange on an Easter page.

Easter scrapbook page on black cardstock background // layout by shimelle laine

I think this means I might need to make bunny costumes for Halloween.

Still time to grab a black and white photo for this week’s challenge!

Weekly Challenge :: Scrapbook your Black and White Photos

weekly challenge: Scrapbook your Black and White Photos

Happy Monday! Have you been up to any crafting over the past weekend? Or looking forward to some time to create over the Easter holiday weekend? Whenever you find the time, I have a new challenge for you to stretch your scrapbooking muscles, whether you choose an Easter theme or some other photos from your desk!

This week, embrace colour, but only in your supplies. I challenge you this week to scrapbook your black and white photos. Go ahead and change that photo with every clashing colour imaginable, print it in black and white, and enjoy using any colour scheme you choose rather than struggling to make everything match. Or you might have photos that were originally taken in black and white, perhaps! Everything in style and theme is completely up to you. In recent years, this photo is my favourite in black and white, going from ho-hum in the original colour version with the tinge of hospital lighting to soft and dramatic in monochrome. (There’s a video of that page too!) To get you started on this week’s challenge, take a look at these examples from contributing designer Gina Lideros and guest artist Melinda Sweetman.

weekly challenge: Scrapbook your Black and White Photos // layout by Gina Lideros

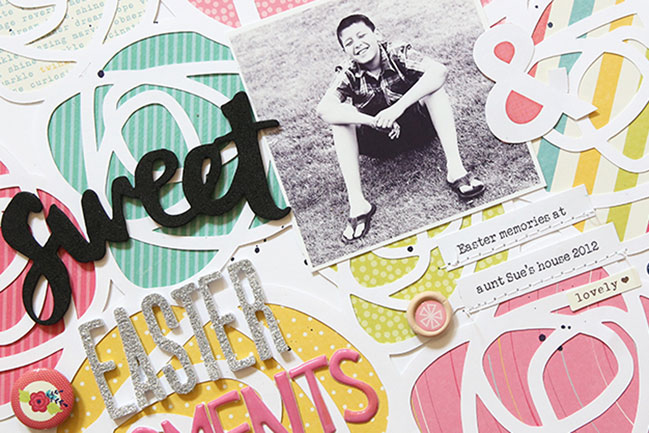
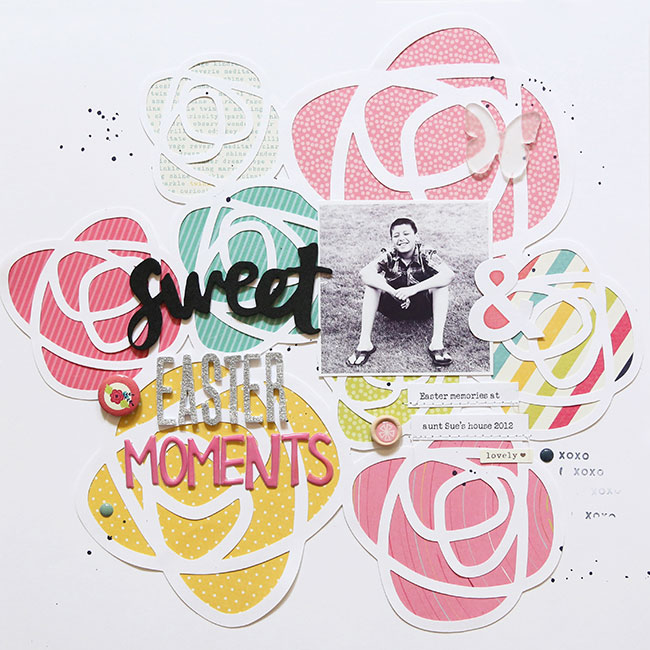
Since this week’s challenge is to create using black and white photos, I dug deep into my photos from past Easter events. I found this photo of my son that I loved taken on Easter a few years back. I wondered at first if I could make it work with a flower background and lots of pinks, not unlike Glitter Girl’s latest adventure!. Have you ever used a masculine photo before on a feminine layout? I wasn’t sure at first, but I love it now. I’m glad that I tried something that was a little out of my norm.

weekly challenge: Scrapbook your Black and White Photos // layout by Gina Lideros

Because of the Easter theme, I specifically chose candy-colored papers from the Shimelle Starshine collection, and paired it with a few older embellishments from the Shimelle True Stories collection. I also added a few bits and pieces from other American Crafts collections. To start creating my layout I used my Silhouette Cameo to cut out my background and then backed each piece with patterned papers. I topped it with Thickers and just a few small embellishments.
- Gina

weekly challenge: black and white photos  // layout by Melinda Sweetman

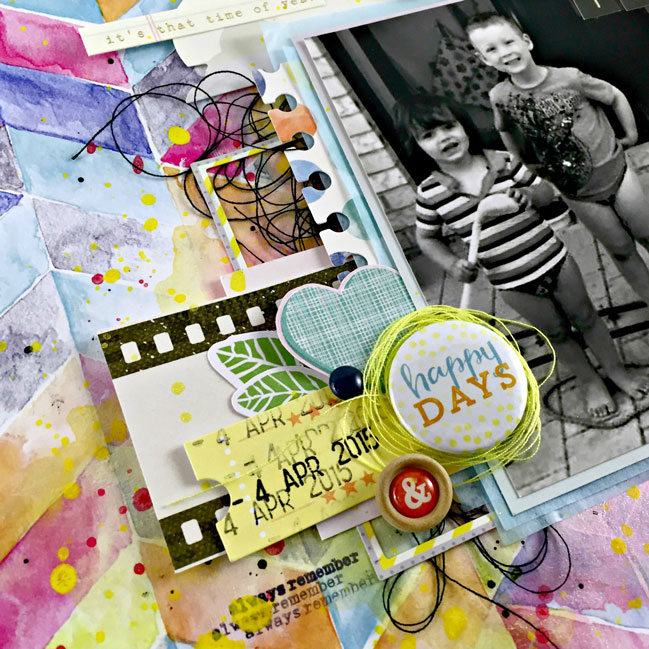
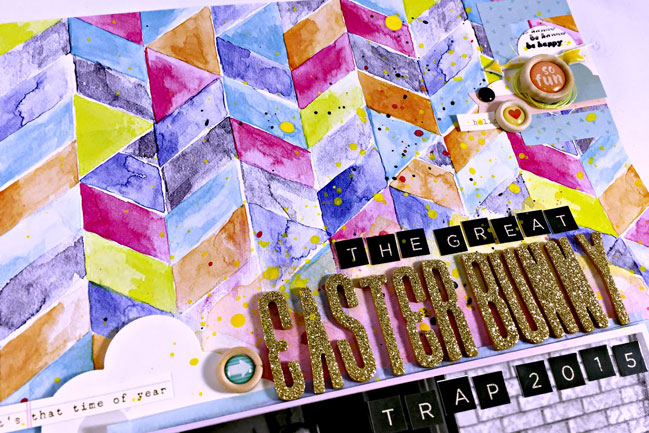
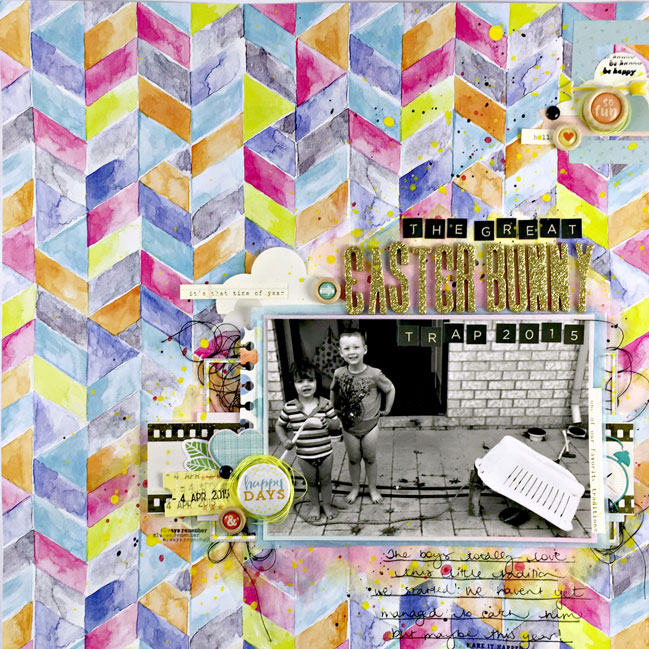
This page documents a little family tradition that started back in 2013 when my littlest guy was not even a year old! I have yet to scrap most of these fun memories but figured I would start with last year’s photo as my boys were posing so nicely next to the bunny trap! I wanted to use a lot of bright fun colours so the black and white photo was perfect!

weekly challenge: black and white photos // layout by Melinda Sweetman

This annual event started when my husband came up with the idea of a trap inspired by Wile E Coyote, grabbed a washing basket, some rope, found a piece of wood from his stash and a plate with a carrot on top and voila! It was such a hit the first year that my big guy asked about it the following year and this Easter coming up we will do it again for the fourth year. Our family got a pet rabbit named Olaf in 2014, but not once did it cross my boys’ minds that perhaps we would catch the “wrong” bunny. Even when I suggested it they both laughed at me!

weekly challenge: black and white photos // layout by Melinda Sweetman

I pulled that fun paper from my stash, did some water colouring after a light coat of gesso and then matched some paper, stickers, rub ons, and Thickers from the very first Shimelle collection with the roller stamp from the True Stories collection and also some of the Life Is Beautiful and Hello Sunshine collections by Cocoa Vanilla Studios. I love the vibrant and fun look of this page and can’t wait for my boys to look back at this when they get older and laugh!
- Melinda


You have a week to complete the challenge and share a link – but of course you’re welcome to set your own time schedule. Whatever keeps you happy and creative!

Today’s Guest Artist: Melinda Sweetman loves coffee, her family and pretty paper.. You can find more from Melinda on Instagram, Facebook, and her blog.

Glitter Girl Adventure 132: Boy/Girl Adjustments

Glitter Girl scrapbooks boy photos with floral papers // layout by shimelle laine

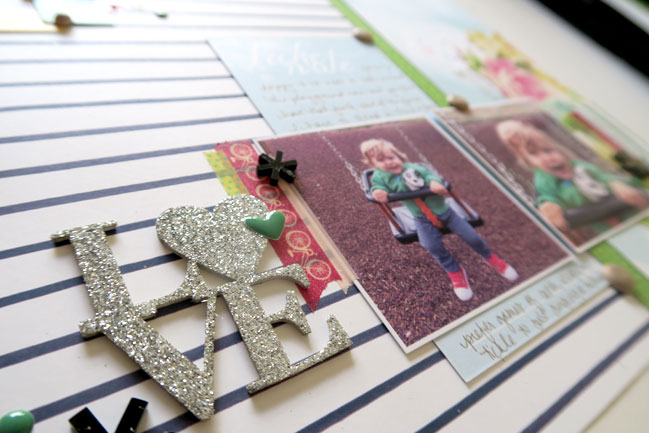
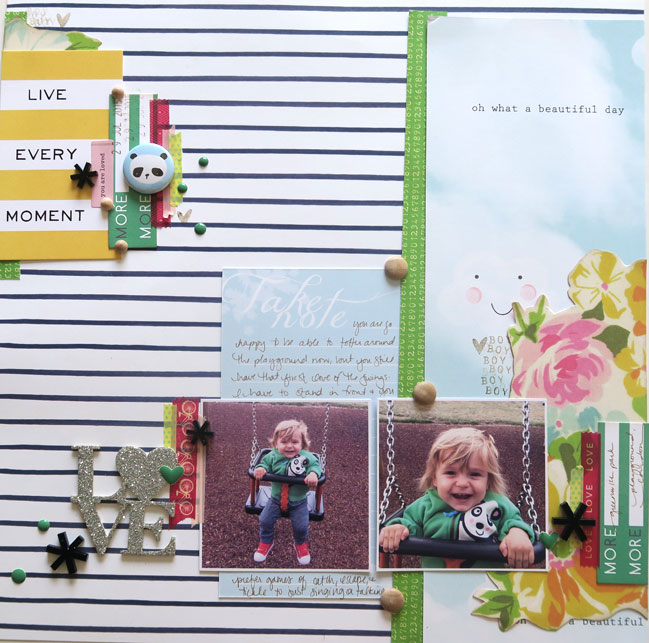
This week, Glitter Girl’s quest comes from a mother and grandmother of all girls who is expecting her very first grandson any time now. What’s a scrapper to do with years of feminine stash accumulated and a new challenge of how to make it work with boy photos? Embrace a bit of pink and floral with all things baby boy, I think. Unless you purely want an excuse to go shopping for new stash, and that’s perfectly acceptable too!

Glitter Girl scrapbooks boy photos with floral papers // layout by shimelle laine

I haven’t really changed my buying habits on adding a boy to the family and this adventure made me stop and think about why that is the case. I think it’s largely down to not tending to buy themed papers, so I have stacks of dots and stripes and chevrons but very little in the realm of princesses or tractors. Of course there are some themed papers that capture my eye and I will still pick up, but as a rule of thumb, I go with patterns I know will be versatile no matter what photos I feel like scrapbooking on any given day.

Of course, if you’re going to challenge me to use some florals, I’m not going to waste an opportunity to pull out those Sassafras floral papers that remind me of the soft sheets on the guest bed whenever we visited someone as a child. I think large florals with a more organic shape like this (be they truer to an actual flower or quite abstract like a watercolour) are easier to work with on a boy page than something very graphic, orderly, or closer to a cartoon style, but you may find otherwise.

I also wanted to try a different composition on this page as I’ve been in a bit of a repeat mode lately with my boxes of paper. I love my boxes, but it is so refreshing to change it up now and then, so I wanted to work from the edges of the paper into the middle rather than the other way around. I really enjoyed this composition and the next page I picked up, I went straight to an edge without thinking about it, so soon you may need to remind me to work some other way again.

Glitter Girl scrapbooks boy photos with floral papers // layout by shimelle laine

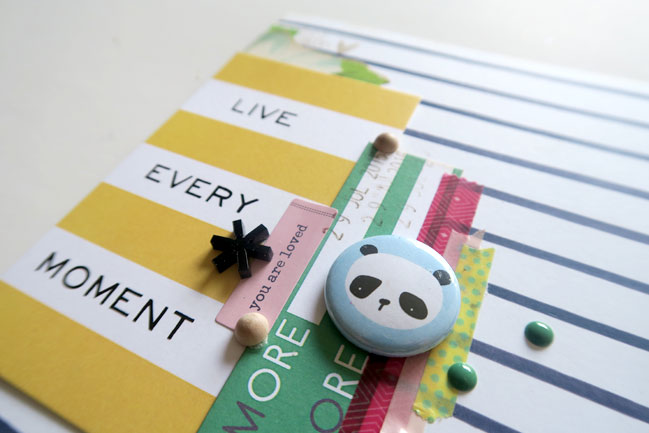
Jessica at Scraptastic spotted my love of pandas on Instagram and sent me their February kit that includes the adorable panda flair. I really liked how the cards had square corners and the cardstock is nice and thick! (It was a lovely gift and there was no obligation for me to use it, share it, or review it, but I was very impressed with the quality and the designs. I’m going to try it in Wonder Boy’s baby book next, I think.)

My last thought on this whole idea of ‘girl’ or ‘boy’ papers and supplies: it is totally up to you. Personally I have no problem using pink or florals or whatever on a page for the boys of my life, but that’s me. I also feel okay with it being a way to show that my pages are something I made and florals and pink are very me, so that’s okay. But if the boys of your life would be offended or it doesn’t feel right to you, then do what does work! Obviously! I enjoyed the challenge though, and you could always try it once and make your decision going forward for what does and doesn’t work for your albums. Happy scrapping either way!

Weekly Challenge :: Scrapbook with Lots of Letters

weekly challenge: use lots of letters @ shimelle.com

It has been such a delight and an inspiration to see the pages posted from our weekend of challenges! These have now closed, and 353 layouts were posted. Hurrah for all that crafting and creating and memory keeping. If you posted your work, you’ll receive an email over the next week with a little something I hope will help you with further pages too. If you want to mark your calendar for the next time, then that’s easy – the 7th of May for (Inter)National Scrapbook Day! (And again there will be two days of challenges and they will remain open until the end of the following weekend.)

Anyway! It’s Monday so there is a new challenge here right now and you don’t need to wait for weekends or crafty holidays! You just need letters. You have letters, right? You need letters!

This week, I challenge you to scrapbook with lots of letters. Use letter stickers, stamps, or pens; spell actual words or just use all your leftovers as a design element. Everything else is completely up to you, so you can take your inspiration in any direction you like! A few years ago, the page above was a letter-sticker-dominant design I liked so much I used it twice, and it might actually be one I return to for this week’s challenge, now that I think about it! To get you started with all these letters, take a look at these examples from contributing designer Meghann Andrew and guest artist Tracy McLennon.

weekly challenge: use lots of letters // layout by Meghann Andrew

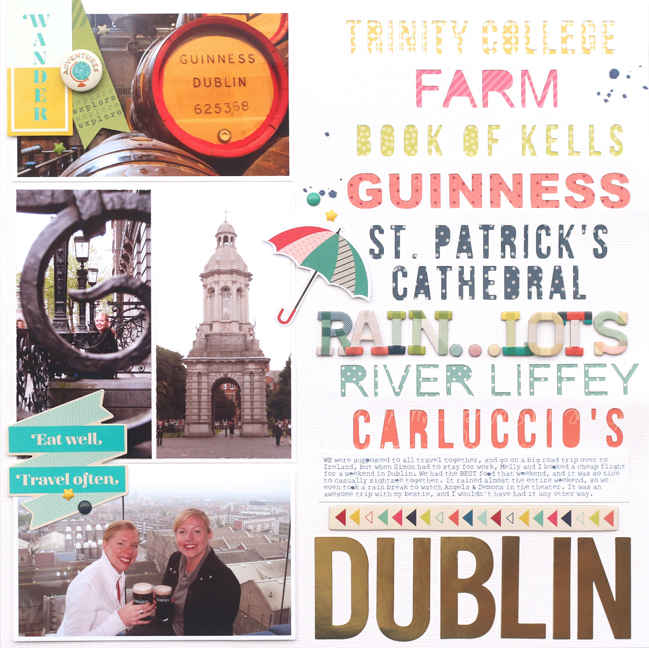
Ireland is such a lovely place in which to travel- its beauty is astounding and people are so welcoming. I had originally planned on sharing a layout about my first trip to Ireland, when I was 17, however, I greatly overestimated the quality of photos back in 2000. To spare you having to view blurry pictures, I’m sharing a layout about my most recent visit to Ireland, for a weekend trip to Dublin with my best friend.

weekly challenge: use lots of letters // layout by Meghann Andrew

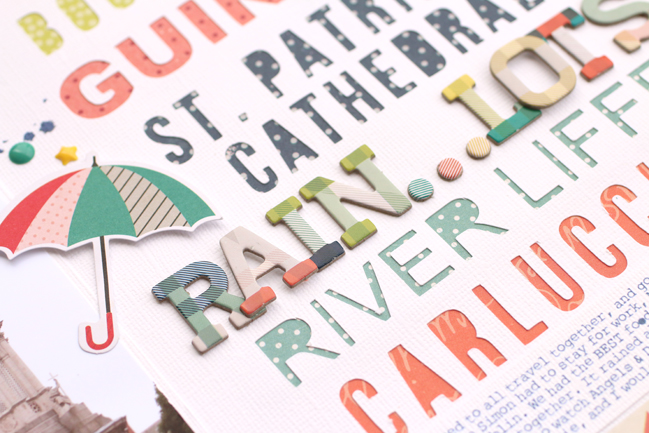
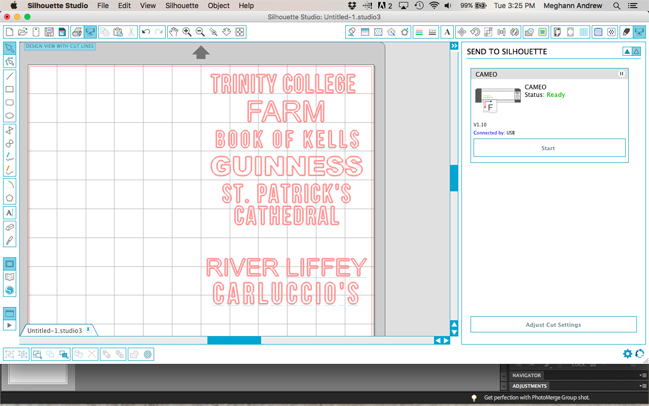
Since this week’s challenge is to use a lot of letters, I’m here to show you how you can get the same effect without breaking into your most-cherished packs of Thickers, using a die-cutting machine. I chose words from our trip- the things that stood out to me the most, including places we toured, restaurants we ate at and even the weather. After I printed my photos, and arranged them neatly in a grid on the left side of my layout, I began typing and placing all of my words in Silhouette Studio, keeping them in the same sans-serif font family, and leaving spaces to add Thickers from the True Stories collection for extra dimension, my journaling and my title.

weekly challenge: use lots of letters // layout by Meghann Andrew

Each individual line was then backed with patterned paper from Starshine, True Stories, and the Shimelle collections to add a lot of color to my mainly-neutral photos. I love how easy it is to mix and match the three collections on my projects! Using such bold colors and patterns on the right side allowed me to keep my embellishment fairly simple, and just a few elements finished off my page.
- Meghann

weekly challenge: use lots of letters // layout by Tracy McLennon

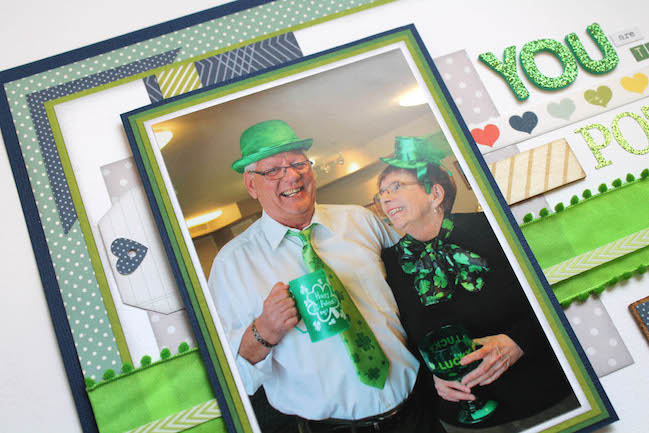
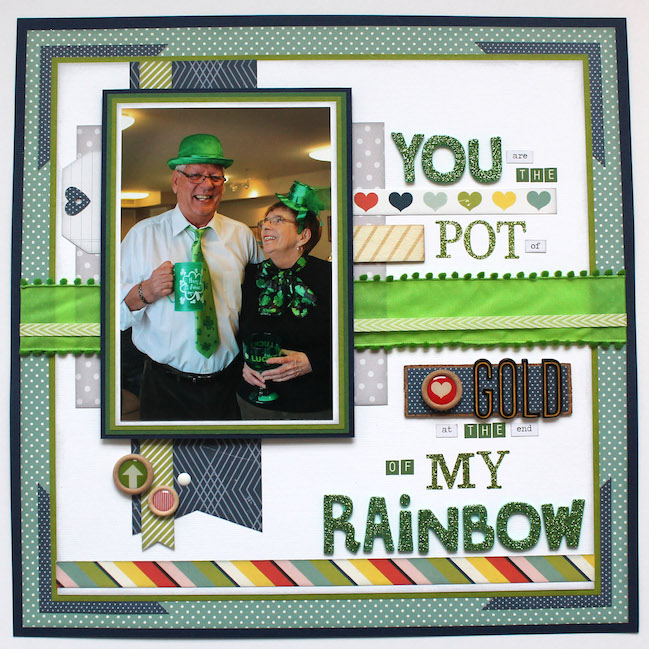
It’s not often that I have great photos to scrapbook for St Patrick’s Day, but last year was the exception for sure. I got some beautiful photos of some equally beautiful people…my in-laws. With their Irish blood, they love to celebrate St Patrick’s Day and last year we just happened to be with them to celebrate and capture how sweet they are.

weekly challenge: use lots of letters // layout by Tracy McLennon

I used a hodge podge of different letters to create my title and I just think it suits the photo and their love for each other perfectly! I love mixing lots of pattern, texture and colour, this layout and it’s super fun nature let me do that with a rainbow of colours.
- Tracy


You have a week to complete the challenge and share a link – but of course you’re welcome to set your own time schedule. Whatever keeps you happy and creative!

Today’s Guest Artist: Tracy McLennon loves papercrafting, vanilla milkshakes, and musicals. You can find more from Tracy on Instagram, Twitter, and her blog.

Resizing and editing photos with a phone app

resizing photos with a phone app - page by Nicole Nowosad

Contributing designer Nicole Nowosad joins us today for one more perspective of phone camera fun for scrapbooking! And success – her editing app of choice is something different! I’m going to download it this weekend to give it a try.

In this busy world, I will admit that I often don’t bring out my ‘big girl’ camera. I often rely on my iPhone photos to capture those everyday moments that I really do want to remember the most.

I actually find that I take fewer ‘staged’ photos using my little old phone and when I use my camera, things are much more posed and less everyday. I really want to be able to share the normal, everyday moments more with my family so that’s why I appreciate my phone photos so much more than I had ever thought I would.

There are so many great apps out there for phones so that we can edit, resize and even print without moving to another device. I really love being able to resize my photos easily while waiting for a soccer game to start while I can also take a quick photo of how my daughter keeps busy while her brothers are out playing ball.

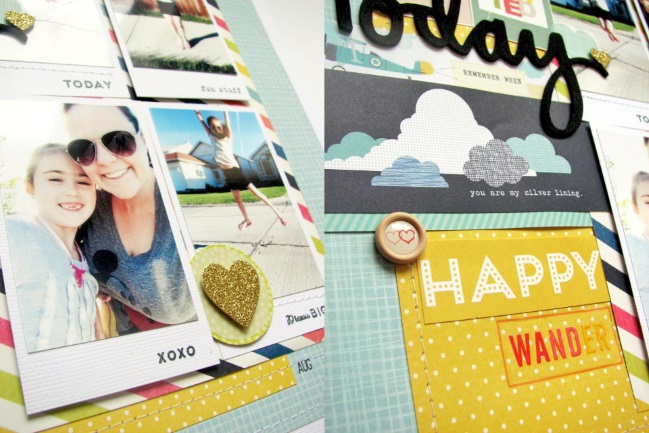
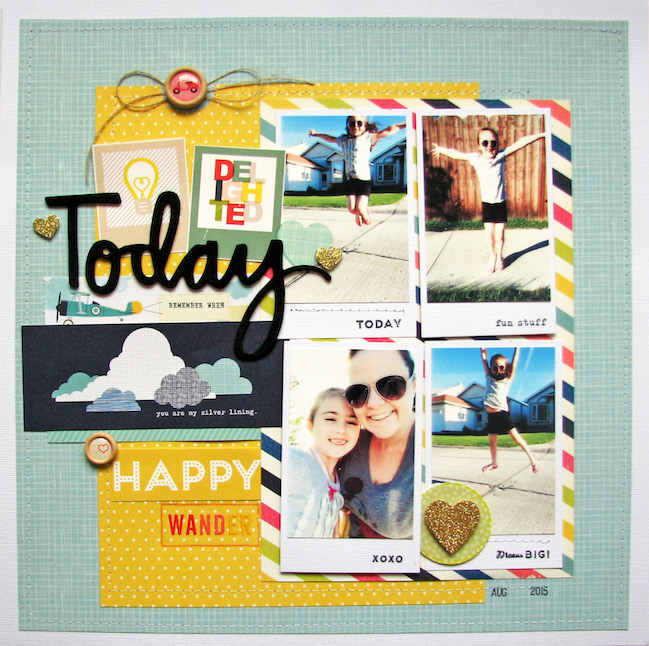
The concept for this scrapbook page came from just some simple photos I came across on my phone. I wanted to use a fun way to document these moments and decided to edit my photos in an app called PicFX and mount on cardstock cut so that the resemble Instax photos or mini polaroids. I added some small detail to each frame with my Starshine roller stamp and then created my page around the grid of photos.

I chose to do a few different edits to these photos. Originally there was lots going on in some of the photos. I used the app to zoom in and crop the photo of my daughter jumping so lots of the busy-ness was removed and there was more of a focus on the action in the photo and not so much all the other ‘stuff’ that didn’t apply to my final design. I also used the app to choose the size for all my photos, so they would all crop down to the same size, even though they are a different size originally.

I also love using this app to filter my photos if they are less than desirable! The way the sun was moving during the walk we took on this particular day, even though the photos were taken in a relative thirty minute timespan, cast very different shades in the photos. I used PicFX to choose a common filter and applied it to all the resized photos and now they are more cohesive and work. Changing photos to black and white would have the same effect if you have a mixture of odd color or pattern in a set of image you want to feature on the same scrapbook page.

resizing photos with a phone app - page by Nicole Nowosad

I didn’t add a lot of journaling as I really do feel that the photos tell the story of the happy fun time we were sharing out walking in our neighbourhood and just spending time together. I chose embellishments and a title that highlight the theme of the photos from the Shimelle and Starshine collections.

Do you have a favourite page with photos you snapped on your phone that you probably wouldn’t have taken the time to photograph with your camera? We’d love to see those pages so please share them in the comments! Or tell us about your favourite photo editing apps in case we haven’t discovered something we absolutely need to download.