Catching up with Document:2010 Scrapbooking

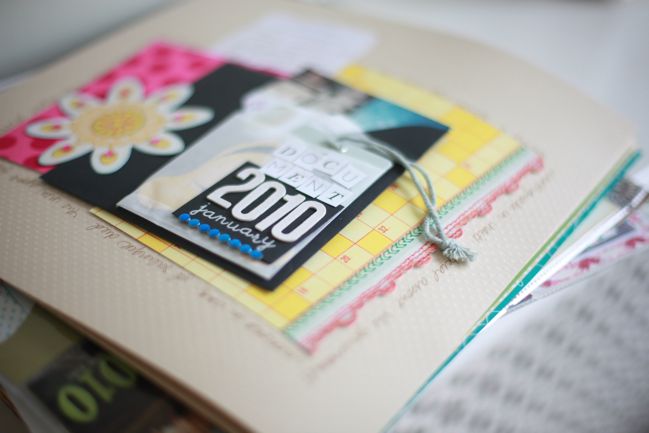
Document:2010 is a year-long project I’ve worked on with UK Scrappers. It’s free to follow along and includes a PDF download each month with notes and a page of printable journaling boxes. The idea is very simple: scrapbook the year by creating four pages for each month. One evidence page includes an envelope of things you have collected that month. Two divided pages (one page or page protector, front and back) highlight up to a dozen things from your calendar. One highlight page shows a key event in more detail. Nice and simple, right?
Except somewhere in late spring, my personal album derailed. Now you know why my online classes are normally four to six weeks! That’s the length of time I can keep a project in working mode. Longer than that becomes a real challenge to keep up with something as other projects need to be on the table. It’s always there in the back of my mind, creating a huge amount of guilt and this feeling that there must be a way to get caught up, but life keeps steaming ahead with new deadlines and events and so it goes.
So here we go and you can mark my words: this week I am getting up to date with Document:2010, and I’m going to share the entire process with you over the next four days. If you’re behind, you can join in. If you never started but think it sounds like a cool idea, this is a great time to get started. If you’re totally up to date and have been cursing my name for not being able to keep up, well then I salute you and hope by the end of this week we can be friends again. Sound like a plan?
Today we’re going to start with the photos to get this big catch-up session rolling. I need to complete my pages for May, June, July, August and September. Why yes, I did just admit that in view of the entire internet. And now I exhale. I haven’t kept photos aside especially for this project, so I’m using iPhoto for this part of the process. If you’re a PC rather than a Mac, you could use Picasa or ACDSee — both are photo management tools that will help you navigate your photo library with ease. If you don’t use any sort of photo manager and instead keep all your photos in separate folders as you upload, I would highly suggest checking out these options, as they will save you a million headaches as a scrapbooker. I use iPhoto and I seriously would hate to go without it.

Once you’ve opened your photo library, give yourself some structure so you’ll be able to select and sort your photos easily even though we’re working on more than one month at a time. I created a folder called Document:2010 and within that folder made a new album for each month I needed to complete.
Now view your photos by date. I normally use my library to view by event, but clicking on ‘Photos’ at the top left gets rid of the events and lets you sort your images by date, file name, keyword and so forth. Sort by date and scroll to the first month you need to scrap. As you look through those images, you’ll start to get a picture of what you did that month. In May, I taught two scrapbooking workshops, spent a lot of time at the park while the cherry blossoms and tulips were in bloom, spent a few days in Dublin (then got stuck there when the airlines were all grounded), spent a day with SJ thrift shopping in Hastings, printed about twelve million (okay, two hundred) Hipstamatic photos, went to a concert, tried to find elephants in London, snapped a family photo shoot for a scrapbooker and went to the Southend Air Show with The Boy’s family. Some of those things I could tell by looking back at my calendar but others I wouldn’t have noted – and when I review the photos it’s all pretty obvious. The trick at this point is to take one to four photos from each event that month and drag them to the album for May. (By the way, in iPhoto, when you’re dragging the pictures to that album, you aren’t removing them from anywhere else — the album is essentially a collection of bookmarks, so you can add and delete with no worry about losing something from your full photo library.)
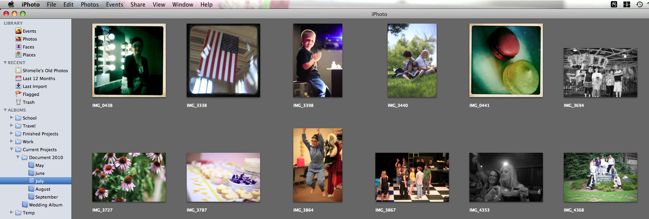
Repeat this process for each month. Don’t pay all that much attention to the number of photos you’re dragging to the folder, but keep that rough idea of one to four photos per event in mind. When you finish your first pass, go look at your monthly collections and see how many pictures you have selected. At first, I was okay for May through July but I had forty for September and only half a dozen for August. We want a happy medium in between those two, so I removed some of the September images and added to the August collection. This left me with 28 photos for May, 13 for June, 13 for July, 13 for August and 21 for September. (Apparently I like the number 13?!) I know this sounds like a ton of photos to scrapbook, and with the regular process of making pages, it would be. But for Document:2010 or similar ideas of scrapping a month over a few pages, this number is totally achievable.
Now there’s an optional editing step if you like to mix up things like colour and black and white or the size of the images in your albums. I altered two or three images per month to black and white, mostly chosen by just picking the images that didn’t have the truest colour or the highest quality, because black and white is a lovely instant fix to that. It’s far more forgiving than colour! I also made a note of some images that I wanted to print at a smaller size than my standard 4×6 format.
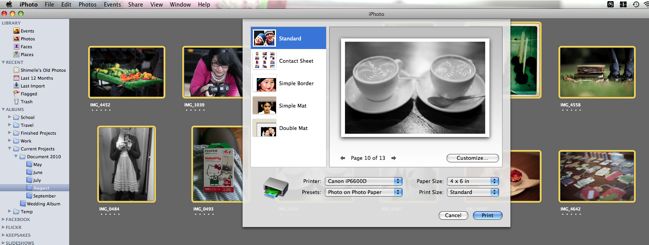
Which leads us to printing time! You can print your images at home or upload them to an online printer – whichever you prefer! I love my at-home printer, but it is more economical for me to order prints from Photobox, so it’s a decision I make with every project about whether I can wait the extra day to get my prints in the post. Some stores also offer an in-between option that lets you upload your photos to their website but pick them up in-store, like using the one-hour photo with the first step still being at home. I used this option a few times while I was visiting the States because there was a Walgreens just around the corner, but in my little corner of London there’s nowhere nearby that offers this service. It’s worth checking though! You could always put these images on a memory card or a CD and print them in store through a kiosk too. Anyway, I’m off the topic now — print those pictures. That’s what I’m saying.
Once you have them printed, stack them up by month and label them so you’re good to go, and tomorrow we’ll pick up from there!
If you’re new to this project, you can find the monthly downloads for Document:2010 on the UKS homepage and there is a forum to chat about the project too.
xlovesx
![]() Read more about:
Read more about:
