pretty paper. true stories. {and scrapbooking classes with cupcakes.}

lovely to meet you Twitter Facebook Pinterest YouTube

Take a Scrapbooking Class

online scrapbooking classes

Shop Shimelle Products

scrapbook.com simon says stamp shimelle scrapbooking products @ amazon.com shimelle scrapbooking products @ amazon.co.uk

Reading Material

travel

Scrapbooking Giveaway Day

scrapbooking giveaway day

This weeks giveaway comes to you from the sewing room of Patchwork Jack.
One GORGEOUS plush owl could be winging its way if you are lucky enough to win! PatchworkJack specialize in accessories for the home which are unique and lovingly handcrafted. Jeanette says “I’ve always loved all things vintage & can often be found on a Saturday at the crack of dawn rummaging around like a mad woman on the hunt for that long forgotten treasure that I simply must have. What initially started as a modest pile of found vintage fabrics was starting to look more like a mountain and I decided it was time to do something with them!”

To enter, just leave a comment on this post telling us where one of these adorable owls would go in your home!

Entries close at midnight Sunday UK time and the winner will be posted Monday evening, so be sure to check back to see if it’s your lucky day!

Good luck!

xlovesx

Five ideas with border punches

scrapbooking ideas with border punches
scrapbooking ideas with punches
Please welcome the always bubbly and creative Sally to the blog today – she has five ideas to help you get the most of your border punches!

I am such a fan of punches right now!

Honestly, a year ago, I would not have guessed I would utter that phrase, but seriously they are so useful, so versatile, so easy to store, quick to use and they can create something so very different to the norm.

I have had a relatively sized collection for a while now, but since the re-birth of the punch I just had to acquire a few more. One of my favourites is the Fiskars border punch. It has all the attributes I love about punches, its easy to use (you don’t have to be the worlds strongest person to use it!) it cuts clean shapes, it’s quick and you can see where you are punching right away. Oh and it only cost £10 (about $15) which is awesome, right? Check out just how many different designs you can get with a border punch now – such an amazing variety.

scrapbooking ideas with punches
Make a border-punched rosette
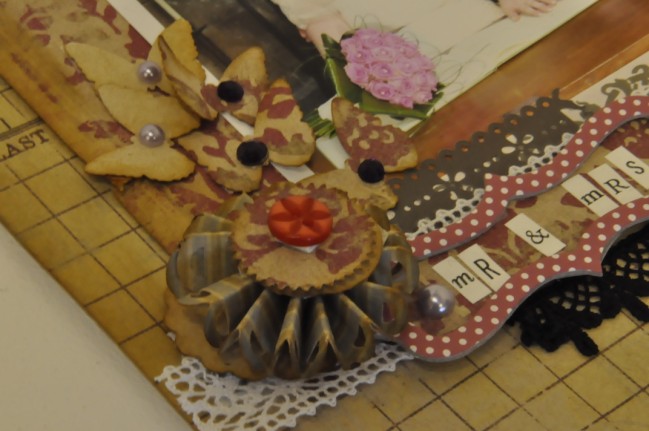
I love to make my tools work in different ways for me, you know, to get the best out of them and see what special tricks you can create. Well a few months ago I spent some quality scrapping time with a new bunch of lovely friends , and I learned what I think is such a really cool technique, it’s probably been seen like a million times now, but for me it will never get old and I have the lovely SJ to thank for this. Who doesn’t love a pretty rosette and you really can’t resist one with a scalloped edge hey?

scrapbooking ideas with punches
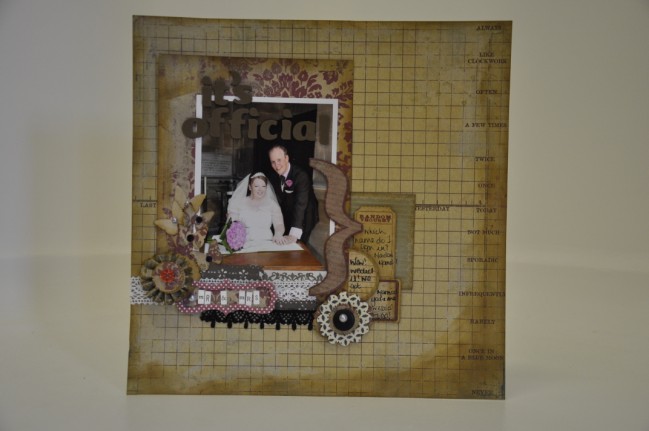
I love this picture, my wedding was so special (obviously) and I find I want to scrap it over and over again now enough time has passed since the day. Finding new ways to add extra special touches to the pages really sings to me. Adding a rosette to this page made it work, the clustering, the small detail, the girly feel, these factors all remind me of aspects of our day, man I love scrapbooking! Click here for a video tutorial to create paper rosettes with a border punched edge.

scrapbooking pages with punches
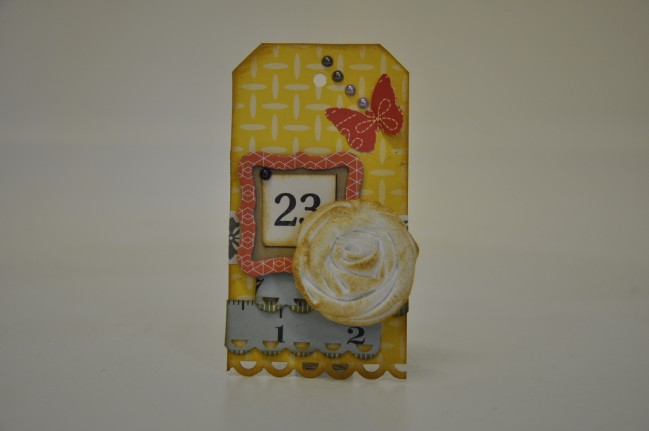
Make a tag more feminine with a simple border punch
What do you think about tags? I like them you know! They add that extra special touch, that depth to a page. I love that they can be used on cards too, I don’t make many cards, but have done more since the ease of popping tags on them crept into my life.
I love that you can prepare these little beauties when you don’t have much time and then pop them on your page. You can make garlands too, I saw some fabulous examples by Shimelle at Christmas, how inventive? So pretty, and yet use very few supplies! You can find them here.
You know what? I pick my tags up in the stationery aisle at the supermarket. Is that a bad thing? Nah! I believe all scrappers are lifelong stationery lovers, how can you not be?

scrapbooking pages with punches
Add depth with layers of border punched strips on a scrapbook page
I love to layer, it’s a staple in the production and evolution of any page of mine and adding many pretty scalloped, fluted like layers of sassafras papers to any page makes me smile lots, who doesn’t love Sassa?

scrapbooking pages with punches
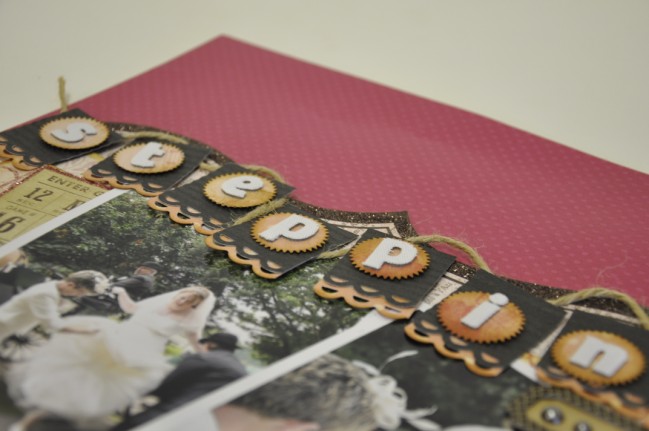
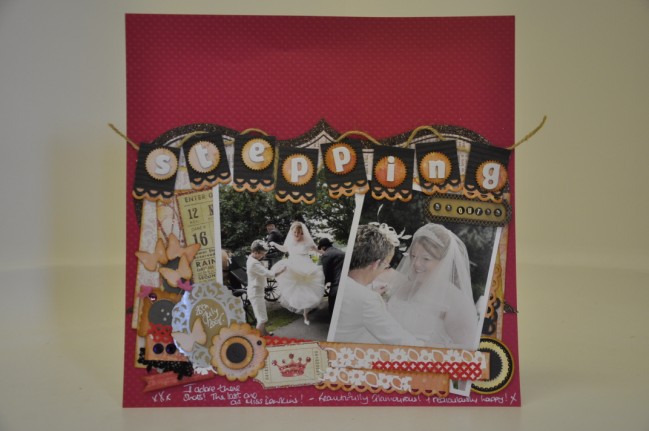
Make a bunting title with punches and stickers
Bunting cracks me up, it’s as old as your granny, but as cool as a cucumber. Everyone loves it, it can be pretty, funky, bold and cute. It comes in all shapes and sizes and looks neat with a scalloped edge, do you not think?

scrapbooking pages with punches
Trying new ways to add a title is something I am working on and I think this will be a new path for me, I adore this page. Again, these pictures were ones that I was finding hard to scrap, they mean so much to me, and I can feel the emotion of the day just looking at them. But with time and feeling, I achieved a result I am very proud of.

scrapbooking pages with punches
Punch and layer whole sheets of patterned paper for a unique background
Using more than two sheets of patterned paper – how could I? Well I have made a vow (to myself) to scrap with lots of textures, lots of patterns and not hoard older papers. There is no need, and this page helped me through that.

I have found that I like to add interest in other sections of the page every so often, even though clustering is my new thing, this was such a simple way of doing drawing the eye to another feature. I kinda feel like it says “Hey, come over here look at me. I am the lesser spotted top right corner, and I am super pretty with scallops, you like?”… I do. Oh and to tie it all in, I added a few extra scallops around the page. I really do have a thing for those scallops! LOVE


Sally Danes is a happy, crafty soul. By day she is a design teacher and by night she is Mummy to a beautiful little girl. She lives in Nottingham with her daughter and her extremely understanding darling husband, who actually ‘gets’ her obsession with paper! She is into most things handmade, but really can’t get into the knitting scene. She can usually be found with a pair of scissors in hand, reading blogs, snapping pictures of her cute girlie, whilst loading the dishwasher, writing lesson plans and playing with Happyland. She is a firm believer in her hobby and frequently chirps the phrase “you know, you could make one of those rather than buy it”.

Scrapbooking sketches: to follow or to reinterpret?

scrapbook sketches: to follow or to reinterpret?
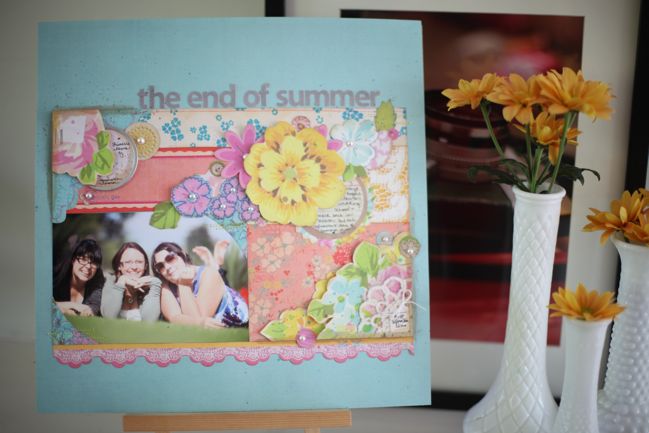
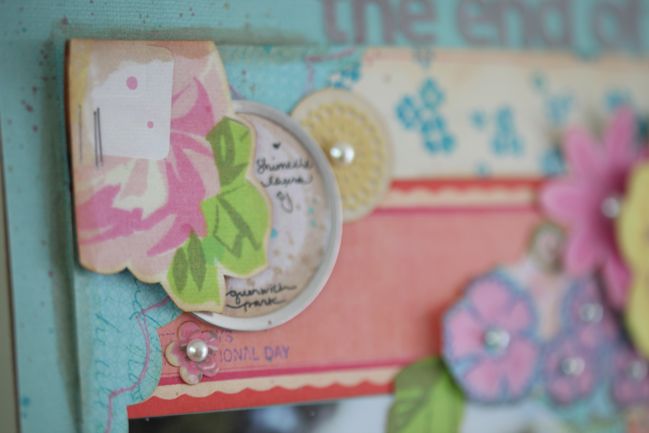
scrapbook page with sassafras foldies + sweetly smitten supplies: everything except the pearls and the tags is from Sassfras – a mix of Sweetly Smitten, Paper Crush and Mix & Mend, plus those grey letter stickers which I love so much it’s crazy.

If I remember correctly, the first time I started drawing sketches for scrapbook pages was about a million eight or nine years ago when I worked on this ‘Use your Stash’ challenge for store customers. They were printed on index cards, so you could keep them in a recipe file, which was novel. And ‘Use your Stash’ seemed like a revolutionary phrase back then and now it’s more a mantra of the whole hobby. Funny how little things change!

But what hasn’t changed is how I work with a sketch. Way back then, I was a really linear scrapbooker. Straight lines. Barely any embellishment. I remember asking myself ‘would stitching on this layout be too much?’ when that was the only embellishment I planned on adding. Today, stitching would never be too much, even if I’d already added stickers and patterned paper and gems and so forth. So when I followed a sketch then, my page looked just like the sketch. Completely and totally – never, ever making a change.

scrapbook page with Sassafras Sweetly Smitten
I have a little secret to tell you about Kelly Purkey’s Sketchbook 3 class. I contributed a layout and when she gave me the sketch, I started making some changes. I was a little worried… her photos were angled, mine were straight. Her sketch had a grouping of papers in one spot; I had spread my grouping across the full page. I moved one of the page elements 90 degrees and added an extra area of embellishment. And although I liked the layout, I was really worried that when I sent the page to Kelly, she would think I had ignored too much of the sketch. But she said she liked the page and then I just waited to see how it would look with the other interpretations of that page. My face must have been a picture when I read her commentary: Shimelle stuck closely to the sketch… and to think I had been worried I had taken too much liberty!

scrapbook page with Sassfras Sweetly Smitten
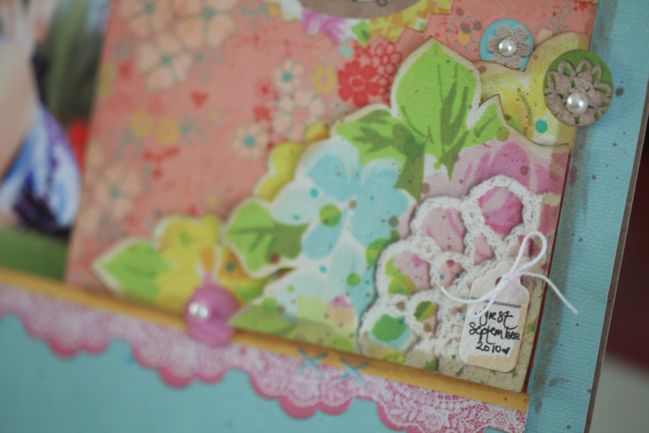
So while some things change, others stay the same. If I follow a sketch, I just don’t go too far away from it. And this page follows that rule too: it started from this sketch challenge over at the Sassafras blog. That sketch caught my eye and made me wonder if a sketch that is quite square and streamlined could still work with lots of flowers and layers… and it gave me another chance to put the Foldies to use! (If you missed that last weekend, see this post for more info and a video.) The collection of blossoms below the title – with the big yellow flower – is a foldie accent; the floral pieces in the corners are cut from Sweetly Smitten patterned papers and layered with the matching stickers.

I think it’s just time I embrace that if I do follow a sketch, I’m really into the following part. And that’s okay, because the layout still looks like I made it… at least I think so! Curious though: do you really follow a sketch, just use it as a starting point then never look at it again or frankly can’t fathom starting a layout with a sketch at all? (If you do like a sketch, you can find all the weekly sketches from my blog here, in one place.)

I hope this week is treating you well. How did we get to Thursday already?

xlovesx

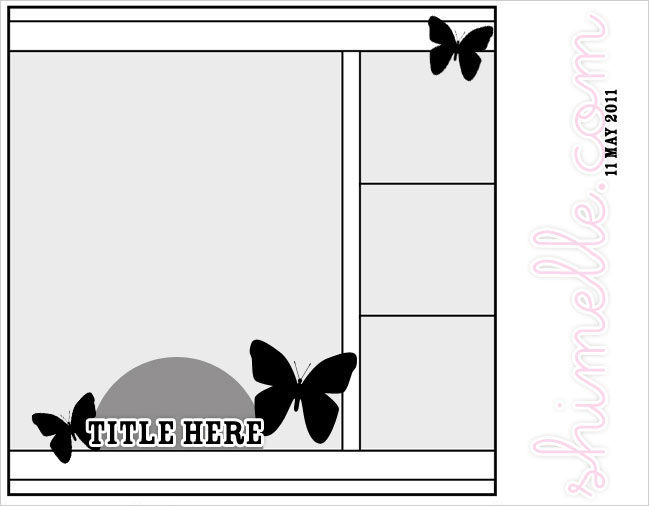
Scrapbooking sketch of the week

Scrapbooking sketch and page ideas
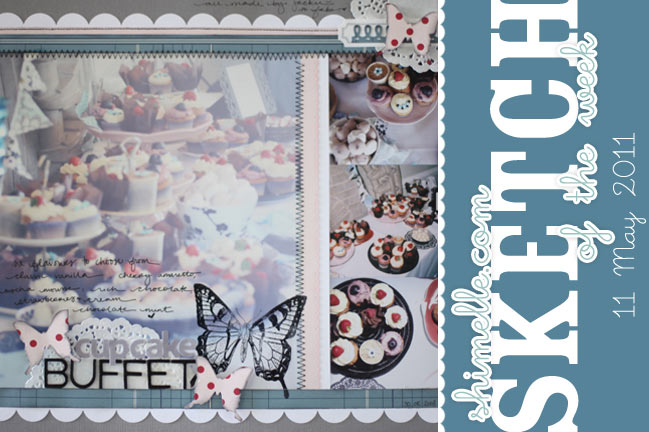
scrapbooking sketch and page ideas Supplies: Butterfly stamp and patterned papers by Jenni Bowlin Studio, letter stickers by Sassafras and American Crafts, doilies by Little Yellow Bicycle, border punches by EK Success (small and large) and Martha Stewart Crafts and butterfly die by Sizzix.

Lest you think I was exceedingly organised when I ordered those 691 photos a couple weeks back, I have to admit that part of that ordering frenzy was a case of clearing the decks. I found I actually had a bunch of photos uploaded that I had never printed… for quite some time. Like our honeymoon, and even some photos taken by friends and family at our wedding. So that works out well as something to break up all that kraft cardstock with the travel photos! What better to break it up than cupcakes? Exactly.

scrapbooking sketch and page ideas
This week’s sketch has four photos and none of them are 4×6, shockingly! Three are cropped to 3×3 inches and the fourth shot is a larger print (this was an A4 print that I trimmed a bit), but you could substitute patterned paper here if you preferred. We had vintage cameras on all the tables at our wedding and this was a film shot taken with a camera older them I am… and I love the fade and the grain it produced. Just perfect for adding some journaling too – I used a precision pen to write right over the top.

I want to do a page just about the lovely friend who made all our 300+ cupcakes – Jackie, do you have a blog?! Seriously, she is amazing. And I have some photos of her all decked out at the wedding so that definitely needs to get in my album. Soon!

As always, the weekly sketch is no-stress and just for fun! If you use it, I’d love to see, so please leave a link in the comments.

scrapbooking sketch and page ideas
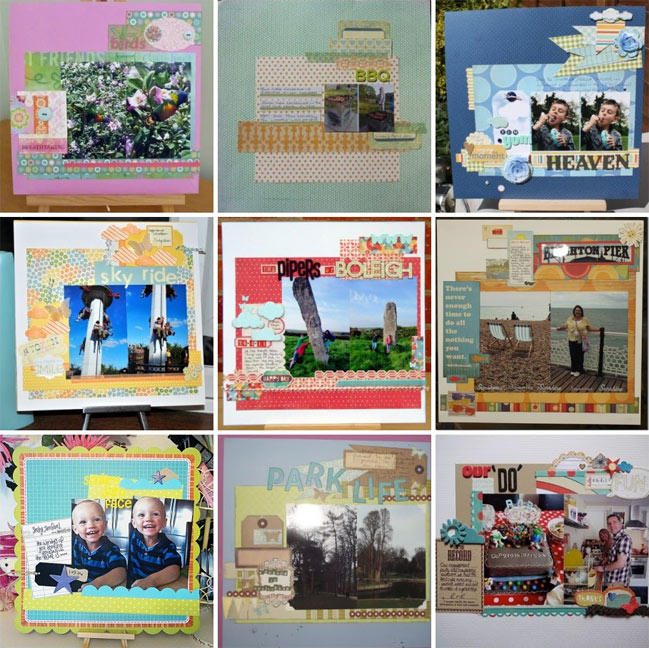
So many lovely layouts from last week that it was so difficult to choose! I stopped at nine… but they are all lovely.
Top row, L to R: one, two, three.
Middle row, L to R: four, five, six.
Bottom row, L to R: seven, eight and nine.
Click on any of those to see and read more and say hello.

Thank you to everybody who took part last week! Now it’s your turn – everyone is welcome! Upload your layout to a page gallery or your blog and link it up here to share. Happy scrapping!

xlovesx

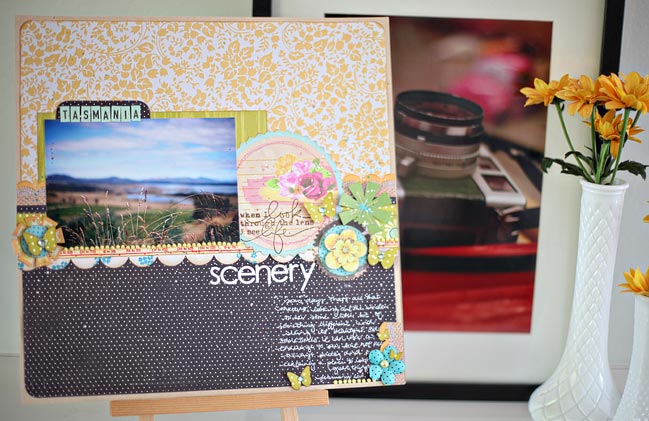
Outlook - scrapbooking travel photos

travel scrapbook page - outlook
scrapbook page
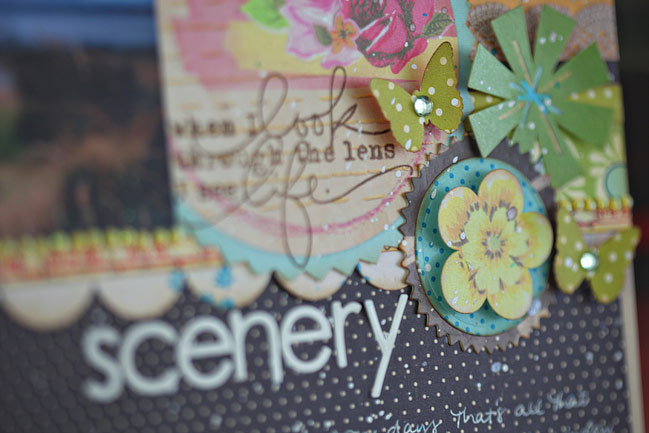
Sometimes it’s all about the outlook. Over the weekend, I was enjoying scrapping quickly, getting lots done and flitting to and from my desk as I mixed crafting in with all the other things that normally happen on a Saturday and Sunday in our little corner of the world. Choosing supplies helps me work quickly but it doesn’t always help me create my favourite pages. I always find if my outlook is to aim for speed, then I take the same shortcuts. It doesn’t mean the pages are bad… it just means I can look and know if I was working quickly or taking my time.

photo from scrapbook page
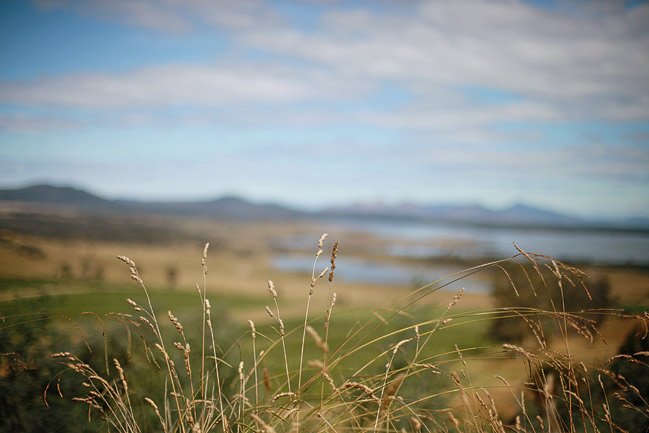
Then I came to this photo in the stack. Perhaps it’s a picture that could be overlooked – there’s nothing particularly vital in focus. It might be hard to recognise without knowing where I snapped that image. In a way, it’s nothing more than some neglected grass at the side of the road.

Except I remember taking that exact picture for a reason. For that tall grass grown to dried grain was something I very much remembered from growing up in the countryside. Of course that’s not what I called it then. I called it The Sticks. It’s only grown-up citygirl me who uses words like countryside. But for as many times as I have seen grain at the side of the road, it was not usually against a backdrop of sea and mountains. So that was what made me take the picture: capturing something familiar and something foreign, all in that little moment of scenery at the side of the road.

scrapbook page
So yesterday I scrapped that photo. Same supplies still out on my desk but no need to rush. A change of outlook while I stayed put at my desk and didn’t mind if I pondered for ten minutes over which flower or which punch. Making this page made me quite happy indeed. And that’s always a good outlook anyway.

Two little notes: Today is sketch day and it shall be online later today (and it’s not a single photo layout). And all the weekend challenges are still open until this Sunday, so do check them out if you have crafting time this week.
Getting started (just comment to enter)
Challenge one (patterned paper as a background)
Challenge two (create a triangle of embellishments)
Challenge three (add a border between two photos)
Challenge four (scrapbook a photo that needs an explanation)
Challenge five (try a photo edit – with or without the tutorial included)
and my challenge for Two Peas (to create an embellishment with bits and pieces) is open until Sunday too. All the challenges have prizes, so enter as many as you like.

xlovesx

How to travel light

how to travel light
how to travel light
When we were headed out of Laos and catching a plane to Hanoi, The Boy had this great idea to go via this old rickety bridge that a few people had mentioned and then catch a tuk-tuk to the airport from the other side. This was a lovely idea and I was actually quite excited about the bridge, because I love heights. Weird, I know. And the bridge truly was an adventure, as the footpath is in pretty bad condition and we crossed as school was getting out and dozens of children came running from the other side, despite it being very much a single-file bridge. But adventure accomplished and on we went.

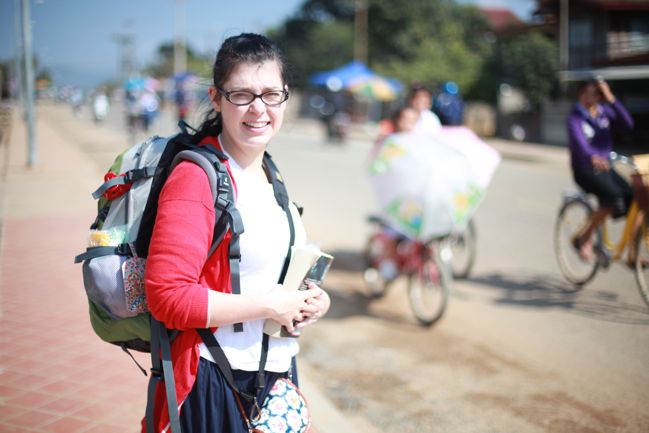
Except there are not really any tourists on the other side of the bridge. So there are not really any tuk-tuks on the other side of the bridge. So we had to walk to the airport. It was only a few miles. And it was only something ridiculously hot. And at some point along the trek I may have said it was perhaps not his best decision that we should walk all this way, and as a compromise, he ended up carrying my stuff. So in this photo, you see everything both of us took for our fourteen week journey, with the only exception of the clothes I am wearing and the camera I used to take the picture. Right there in those two bags – that’s everything, right down to the book I was reading at the time.
how to travel light
Here is my share, and why it seemed so ridiculously hot. It was very cold that morning so I was wearing a long-sleeved shirt and a cardigan. By lunchtime it was baking but we’d already checked out of our accommodation, so I was kinda stuck in all those bulky layers. But there we go.

I promised I would share how I lived out of that one little bag for all that time, so here is the play-by-play on what I packed!
how to travel light
The Overview
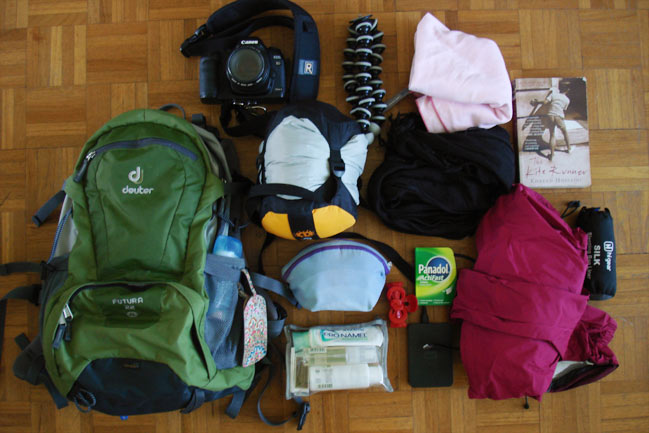
This is my bag and all the major stuff that lived inside for the entire trip. At the top is my camera, with the Black Rapid camera strap, which I really recommend. It’s a shoulder strap rather than a neck strap, so it takes the weight off your neck and it keeps your camera at your hip so you can grab and shoot really easily. I also took a GorillaPod as a smaller and lighter alternative to my full-sized tripod.

Carry on to the right and there’s a pink microfibre towel – useful for budget accommodation that doesn’t include towels as well as water activities. Below that, the black thing that is hard to make out is a black pashmina – like a big scarf. Bought for £2 from a London street vendor right before we left. I was worried this would be a waste of space because it’s a bit bulky, but I am so glad to have taken it. It served as a belt, a blanket and an air filter as well as being useful when we hit the odd day of unexpectedly cold weather. And I loaned it to a few girls who arrived at various temples with their shoulders bare – tank tops and temples do not mix. Also at the top right corner, I had a book on the go for all of the trip. I started with one book and when I finished it, I would just find a used book store that did trades or I would trade it with another traveler. Worked perfectly, aside from when I read The Girl with the Dragon Tattoo and really started to wish I was carrying a book that was smaller and thereby easier to pack!

Continuing clockwise, we each packed a silk sleeping bag liner even though we weren’t carrying sleeping bags. The liner was perfect for places that were cold or had too many mosquitos. And it weighs almost nothing. The pink thing is my rain jacket. For several weeks of our trip we had beautiful sunny weather and I started to think packing a rain jacket was a waste of space and money, but then we arrived in Bali where it did nothing but absolutely pour with rain the entire time we were there. Rain jacket – with a fitted hood – is a requirement, definitely.

Basic first-aid stuff included pain killers, stomach settlers, some bandages and some mild antibiotics, which we also took as anti-malarials for the part of our tour that went through mosquito trouble. We used everything we took but didn’t really need anything more, so that was just right.

The black rectangle is a small external hard-drive. We bought this along the way and used it to back up our photos as a just-in-case measure.

A red hairclip and a blue make-up bag – contents revealed later in this post! And my clear bag of liquids. Since we weren’t going to check any bags on any planes, we couldn’t take anything sharp nor any liquids over 100ml. I bought a bag and 100ml bottles from Muji, and that held shampoo, conditioner, perfume, toothpaste, lotion and sunblock.

Which brings us to that funny looking bag in the middle, which held all my clothes. While The Boy went with the option of three special shirts that would work for everything, be easy to wash and dry and wouldn’t wear out, I knew I would get sick of whatever I was repeatedly wearing and want to change it for something else, so I did that a few times, but the total contents of my clothing bag remained pretty consistent: two short-sleeved tops, one long-sleeved top, one cardigan, one pair of hiking trousers, two pairs of leggings and two skirts/dresses, basically. All that plus my pajamas and stuff would fit into this bag and then get seriously, seriously smooshed by pulling all the straps tight on the compression sack. Basically, without the compression sack, my clothes would have filled the entire backpack. But with the compression, they just took up the room you see here. I had never heard of these bags before but am now a total convert.

What’s not shown: whatever pair of shoes I wasn’t wearing – either sandals or Converse All-Stars. And hilariously, one of these because I cope well with neither disgusting public loos nor fifteen mile hikes in the middle of nowhere.
how to travel light
The Little Blue Bag of Looking Beautiful
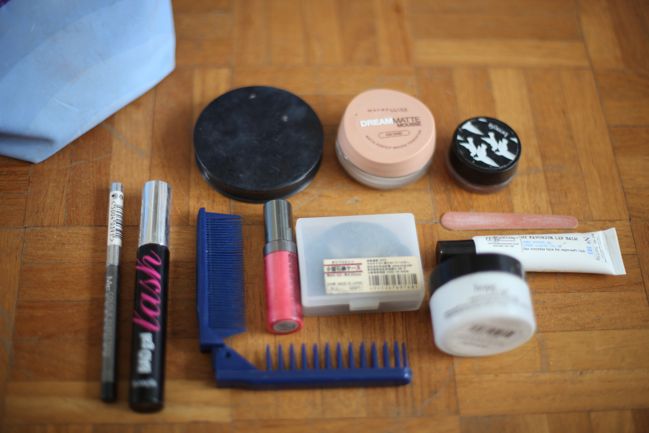
Some girls can just stop wearing make-up when they travel, but I am not such a person. When I am in some place where I’m not settled, I can be really harsh on myself. I just feel I am in more control if I can pretend I have a lovely complexion even when I’m on the road. Plus, more layers of spf on my face are totally welcome. But I couldn’t take very much, so I narrowed it down to the contents of the little blue bag:
Eyeliner – the one thing I stopped wearing pretty quickly, as it was so hot it would run.
Mascara.
Powder.
Foundation – I am still in a funk because my favourite foundation was discontinued and I haven’t found one I like yet. I’m not singing the praises of this mousse stuff but that is what I wore, so there we go.
Eyeshadow – one little pot in the most neutral colour imaginable.
Lip balm – my favourite lip balm is actually called My Favorite Lip Balm. Hilarious.
Moisturizer.
Lip gloss.
Plus an emery board, a teeny box for keeping bobby pins and hair bands from going astray and the most high-tech of all brush/comb hair implements in the world. Yes, I got that free on an airplane. Yes, it is the only thing I used to style my (nearly waist-length) hair for the entire trip. Yes, I am very proud of that but no, I do not care to see that brush again for the rest of my life really!

What’s not shown: nothing really for this one. I did pick up one big hair clip at a market, and it’s in the first photo.
how to travel light
The ‘It would be nice to SEE you’ collection
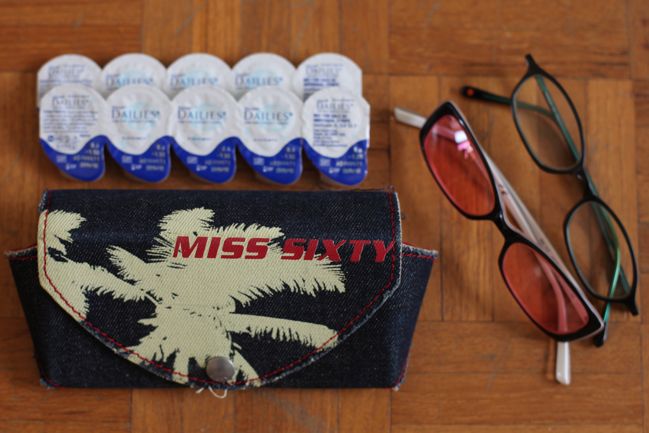
Let’s just say I do not have 20/20 eyesight. I’m also a little paranoid at being without my glasses. So this is my little bit of extra gear to take that into account. At the far right is my spare pair of glasses. I actually carry these with me all the time, pretty much. Not just when I’m on the road. It’s just an older pair of glasses and they fall off less than my everyday pair, so they are good for more active days. But really I just carry them in case my regular glasses break. Even though in twenty years of wearing glasses, I’ve never had a pair break. I think it might just be a paranoia I developed from too much Harry Potter exposure.

I also have a pair of prescription sunglasses. I very rarely need them here in England and I actually bought them a few years ago for skiing, because the glare on the snow is harsh, and that’s why they are pink. But they still work for sun – just not as well as a pair of dark lenses – and I wear sunnies so infrequently that I just couldn’t budget a different pair. These were fine in the end. And also some contact lenses. Contacts and I don’t really get along, but they are more sensible for things that involve the sea or running or whatever. I use the daily lenses so I don’t have to worry about jars and solutions and stuff. I took a whole box of lenses but only used one strip of each (oh – my eyes can’t even agree on being equally blind, so I have different lenses for right and left).

What’s not shown: the other set of glasses were on my face. I didn’t have to pack them. If they weren’t on my face, I wouldn’t be able to find them to pack them anyway.
how to travel light
The paperwork pile
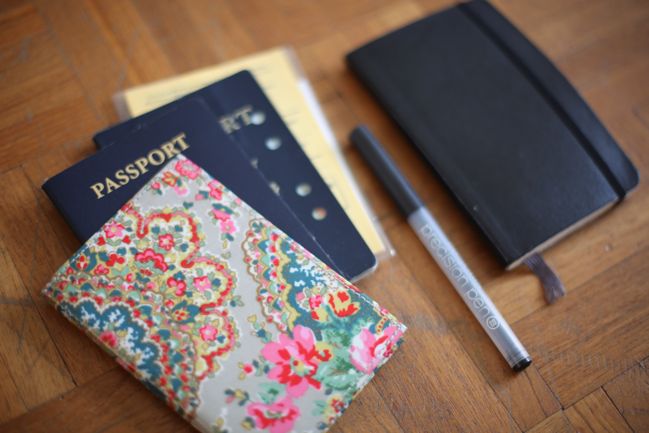
Of course a passport is required for a trip like this. I actually have to travel with two passports – my current passport and an older passport which has my visa that explains that I’m a UK resident and I’m allowed to stay here as long as I like. (I’ve been in the UK for twelve years as of this week, but I keep leaving the country too many days in a year to apply for my UK passport.) So there are two passports in my passport case – and mine have stayed in quite good condition with a case. The Boy doesn’t carry a case and his passport looks like it’s been through the wringer!

The yellow booklet is a vaccination record. Partly for our own medical info so we would be able to show a doctor outside our own medical system in case of an emergency, and partly to show at immigration in some countries. We’ve now been through areas that have yellow fever, and some countries won’t let you in if you’ve been exposed but not vaccinated. But we had those jabs before we left, so we can just show the yellow book if needed. (By the way, vaccinations are probably the only thing that made us not be able to leave immediately – it’s a three to four week process to get the basics, so make sure you plan those ahead of time.)

And I packed a small moleskine notebook and an American Crafts precision pen (of course). I added all the contact details for everyone along our journey and a list of addresses for sending postcards so we wouldn’t have any extra bits of paper but we would also have a hard copy with some emergency numbers in case our phones or computer were stolen or something. Then I still had plenty of space to take notes along the journey and collect a few stamps, stickers and ticket stubs.

What’s not shown: my driver’s license and debit card, which were on me at all times via zip pockets in my clothes.

…And that is it. Since there were two of us, we split some things, like I carried the camera and the hard drive, but he carried a laptop and my other lens. He carried a Kindle with all our travel guides so we wouldn’t need paper copies. But otherwise, it was pretty much the same!

We did manage to pass the dress code at a few nice restaurants (I think I got away with more casual shoes because I could wear a dress) and we didn’t have any trouble with theft. We had to refuel a few consumables, namely shampoo, toothpaste and sunblock, but those things were easy to purchase everywhere. I may have even bought hair dye once or twice.

I had never packed lightly in my whole life so I didn’t really think this would work, but it did… and I was very grateful for that every time I saw someone trying to get somewhere with multiple wheeled suitcases in the middle of the jungle, the desert or the beach. I had days when I struggled with missing nail varnish and hair dryers, but really that was pretty minimal. It was much easier to just enjoy the moment without having to worry about having so much stuff to carry, plus it was always fast to pack and we couldn’t accidentally leave something in the hotel room, because we would notice any gap in our bags!

And just last week, the dress I posted home from Singapore in January? It arrived here in London when I had totally given up hope! When I sent it home I was positively sick of wearing it every second day, but now I’m thinking it looks quite cute again. Amazing what a little time apart can do.

For the record: there is no way I could pack this lightly for anything crafty. I carried this one bag for more than three months. Last weekend I took this, a suitcase and two shoulder bags on the train to go away for three days. One bag with these essentials and everything else? Craft supplies. Well, craft supplies and cake.

Priorities.

xlovesx

A scrapbook page and a giveaway winner

scrapbook page and giveaway winner
scrapbook page
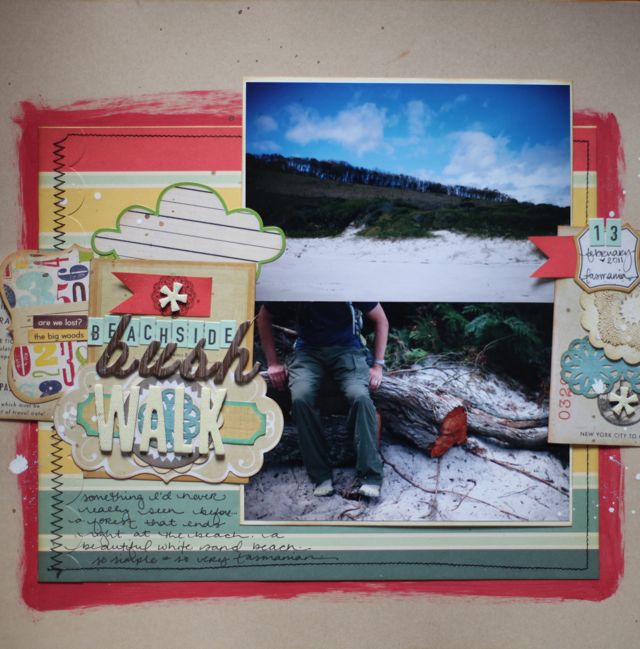
After all that kraft cardstock over the weekend, I think I need to do a few non-trip pages to embrace some colour. But I have this page to share with you today, and it’s not so much about colour. It’s kraft. At least it’s kraft with a liberal addition of red paint. It’s a start.

It also features something else that I can’t fully explain: photos with somewhat abstract cropping.

Abstract cropping. Yes, that’s what I’m going to go with. It sounds a lot better than ‘chopping people’s heads off in pictures’. Abstract cropping it is then.

scrapbook page layout ©twopeasinabucket.com. Click here for supplies and details.
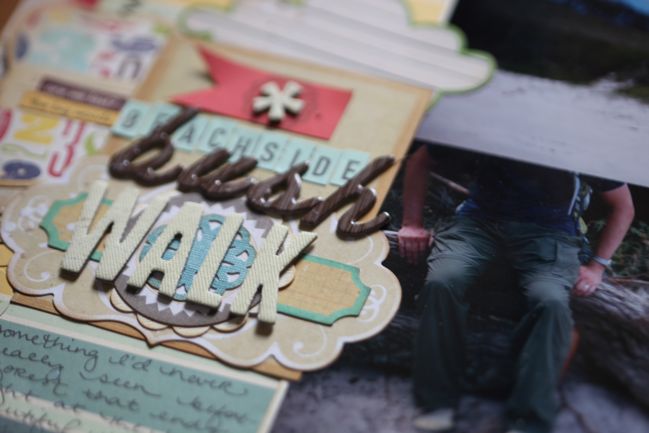
I vaguely remember composing the shot like this so I could journal about The Boy’s shoes. But I didn’t journal about that here. And I think I may have already journaled about his crazy footwear on another layout. Perhaps I should check. Do you ever do that? Forget what you have and have not included in your scrapbooks? Sometimes I think it’s quite funny to tell the same story on two separate pages and then realise that the way the story flows is a little different depending on the mood in which it was written. Instead, the journaling here is about how amazing I found it that the forest goes right up to the beach. You’re hiking through the woods (going on a bush walk!) and then suddenly there’s a white sand beach. It amazed me a bit. Of course, it also made me worry a bit about smoke monsters and time travel and well, that’s a discussion for a different day. I’m not sure I’m quite ready to write the journaling for the page entitled Why I still feel cheated after six years of Lost. It’s decidedly easier to scrapbook about lovely days at pretty beaches, even if they seem to come from nowhere.

sparklehen art prints
And time for a giveaway winner! Many thanks to Sparklehen for offering a set of adorable prints for a lucky reader. She’s also offering a free print when you purchase any two, so please visit her shop and have a look at her lovely goodies – perfect for yourself or for giving as gifts!

And our lucky winner is…
scrapbooking giveaway winner
Congratulations Sarah! Please email me (shimelle at gmail dot com) with your posting address so Heather can send you your Sparklehen prize!

Have a lovely week, everyone! Any good plans?

xlovesx

Bringing scrapbooking weekend to a close

scrapbooking day challenges
scrapbooking challenge
Here’s my final challenge, and it’s my contribution to all the NSD celebrations at Two Peas this weekend. Build an embellishment out of bits and pieces. I think this might be my favourite way to scrapbook, and it feels like scrapbooking in a traditional sense – a bit of this, a bit of that, put it all together to make something lovely. Yep, sounds like scrapbooking to me. You can find the challenge on the Garden Girl blog here.

As this post goes live, I’m also hosting a chat on the Two Peas message board for an hour or so. Find us here and say hello! UK girls, you should definitely pop by – I think I may be a bit lonely in the chat room with so many of the American scrappers out for lovely Mother’s Day lunches and such.

scrapbooking challenge
All of the challenges here and at Two Peas are open till next Sunday, so there’s still time to join in, even if you were busy this weekend. There are also two giveaways here that only take a comment to enter. This one closes today so go comment now! And this one is open until next Sunday.

It’s been so lovely to scrap with all of you this weekend! I finished eight layouts and think it’s probably time I tidy up my scrapdesk. How about you?

xlovesx

PS: The big NSD sale at Two Peas closes tonight, so don’t forget to finish your order if you want to pick something in the sale!