pretty paper. true stories. {and scrapbooking classes with cupcakes.}

lovely to meet you Twitter Facebook Pinterest YouTube

Take a Scrapbooking Class

online scrapbooking classes

Shop Shimelle Products

scrapbook.com simon says stamp shimelle scrapbooking products @ amazon.com shimelle scrapbooking products @ amazon.co.uk

Reading Material

travel

More scrapbooking challenges from Two Peas

scrapbook pages
scrapbook page
And so my weekend-long scrapping spree continues… with so very much kraft cardstock!

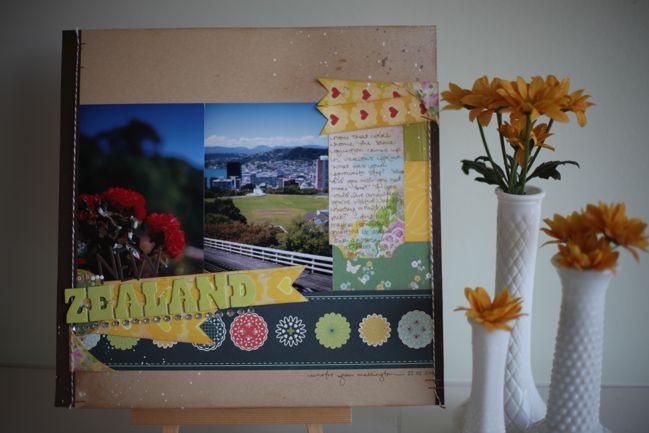
Jamie’s second challenge is all about questions and answers. I was stumped for a bit, I have to admit! It led me to interviewing someone for journaling and well, there wasn’t an obvious candidate around for an interesting interview. Back to the drawing board and a flip through some pictures and I realised there is one question that keeps coming up, and that would work for a page. And actually be something quite sweet to record now, because who knows where the future will take us.

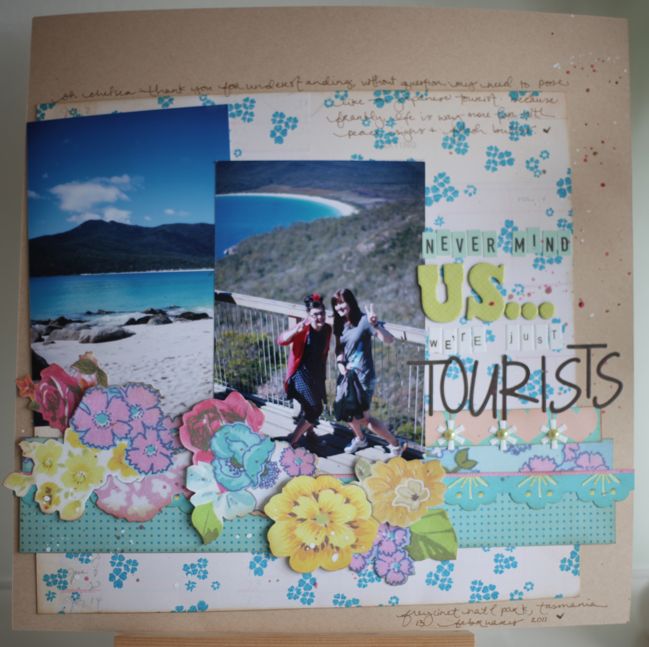
The Boy grew up in several different countries and generally thinks it was a pretty amazing and defining experience. So although I already live in another country than where I started, he looks at new countries with the question Could we live here?, which can be funny. Sometimes we agree. Sometimes we disagree. But of the dozen countries we visited, there is one that we agree we could happily call home for a few years, should the opportunity present itself. And that was New Zealand. It’s our answer to all the ‘Where was best?’, ‘Where do you want to go back to?’ and ‘Where should you have stayed longer?’ questions.

scrapbook page
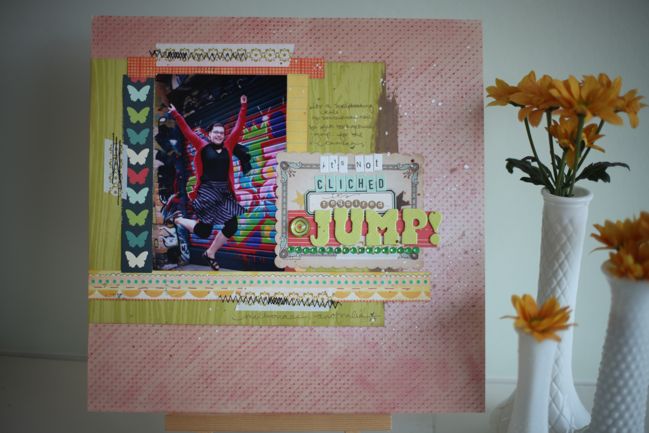
And then for something completely different… the next challenge is scraplift a Garden Girl. I chose this layout by Chelsea Parsons. Chelsea’s style is so different to mine, but I always love her pages – both paper and digital. So I gave it the old What Would Chelsea Do try. I tried her technique for the background paper and rubbed lots of red chalk over a sheet of kraft dotted swiss. I think the background is lovely fun but then I had a hard time getting it to look right with my patterned papers and such. I wished I had started with a big photo like Chelsea did! But I used a few other things that come up in Chelsea’s albums, like lots of tape and stitching. And then splashed it with a bunch of white paint. I’m not sure if our styles work together or not! But it was fun to try all those new things… and I have plenty of photos in front of that wall, so a bit of variety is a great thing.

Three challenges down, and there are currently four more on the Garden Girl blog, plus I will be setting my own challenge at the start of my chat session today. So there is plenty to pick from, all week long!

xlovesx

Take the scrapbooking challenge :: sassafras foldies

sassafras foldies embellishments
scrapbook page with sassafras foldies
Instead of just yesterday, Two Peas is celebrating Scrapbooking Day for a full weekend, so today I’m focusing on the challenges there. Just like the challenges I set here yesterday, all the Two Peas challenges are open until next Sunday the 15th of May and there are prizes to be won, of course! So you’re invited to join in. I’m hosting a chat there today – 8pm UK time, 2pm US Central time – and I’ll post a direct link here when that starts so you can come say hello!

If you are not a member at Two Peas, create an account and join in the fun. They have a great community and so much inspiration. Plus fabulous shopping! But you can join in the community without shopping if you need to save your pennies. One tip for creating an account if you don’t live in the US: the registration process asks for your address, including a state. Of course, not every country has states, but if you leave it blank, sometimes it says your address isn’t valid. Type XX in that box if you don’t have a state, and that usually does the trick! You don’t have to give any payment details to join and you can choose which newsletters you would like to receive by email.

Jamie is the community manager at Two Peas and she manages all the cool things like events and also takes care of the message boards, the design team and all the fun stuff that goes on at Two Peas. On Friday, she set three challenges to kick off the weekend. The first challenge is all about folding. Include some folded element on your layout! That means you could even do this month’s 4×6 Photo Love and enter for both challenges if you fancied following that project this week! Or of course, anything else that involves folding… so I’ve pulled out the new Sassafras Foldies. I love these embellishments but I don’t think their full potential is obvious when you see them on the sheet, so here’s a quick video that lets you see how they work.

Really loving the foldies on my pages and hoping Sassafras continue to make them with their new collections. (They are showing a new sheet in their Sunshine Broadcast collection that will hit stores soon, so I think it’s a good sign!) Michelle used them here in her guest post last month too.

scrapbook page with sassafras foldies
So that’s one challenge done for the Two Peas weekend event… now I’m on to challenge two – Questions and Answers – and hoping I can come up with something clever!

I hope you’re having a lovely Sunday!

xlovesx

Scrapbooking Day Challenge 5 :: Try a new photo edit

scrapbooking challenge :: photo edit
scrapbooking challenge :: photo editing tutorial
The other day when I shared my day in photos, one of the big questions that came up was the editing process for creating that look. Was it a Photoshop thing? Was it a camera thing? And the answer is… it’s a little bit of both.

One of the nicest things about a camera with manual control is you can decide what you like rather than just the camera making the decision. In many cases, I actually prefer my photos a bit over-exposed. Not immensely so – just a bit lighter than usual, and definitely lighter than what I would get by following the camera. When I look at my light meter, I normally aim for one or two points to the right, and I just like the colour better there. It works well with shallow depth of field and it provides a way to pretty up a sky that isn’t very blue. So that was the first step: all those photos were a bit lighter than you would expect – right from the camera.

If you have an SLR, you can try this. Go get it and set it to Manual and choose a low number for your aperture – so your lens is wide open. I shot all those pictures at f1.4 on a 50mm lens. (This is the lens I use on a day-to-day basis and it makes it pretty easy to make things beautiful.) Set your ISO to something appropriate to your surroundings. I still use the same ISO reminders that I learned in high school: 100 for sunshine, 400 for cloudy, 800 for I wish someone would turn on some more lights! And if your camera goes higher than 800, you can adjust for darker conditions with higher numbers. Now that you’ve set the aperture and the ISO, all you have worry about is shutter speed. And that makes shooting in manual a lot easier than it seems. Once those two steps become second nature, you’ll wonder why it ever seemed intimidating.

With those two things set, look through the viewfinder and half-press your shutter to focus on something. Look at the viewfinder to find your light meter. On a Canon, there’s an a ruler from -2 to +2, with an arrow pointing down on the very centre. On a Nikon, there’s a – at the left and a + on the right and a zero at the very middle. They both work the same way, and if you’ve never paid attention to them before, they can be very useful indeed! When you half-press, you’ll see a little marker come up to show you where you are with your current settings. Try turning your wheel to adjust the shutter speed and you’ll see the little arrow move (or if you don’t see it move, half-press again and it will be in a different place and if that doesn’t work, get out your manual because you’re turning the wrong wheel, probably). So the point in the middle? That’s what your camera thinks is the best exposure for these settings (so the best shutter speed, since we’ve set the other two things already). Take the picture so you can see how that looks on the screen. Now move the wheel again so your shutter speed changes — move it so the arrow moves a bit to the left and snap again. That picture should appear darker than the first shot. Move it several clicks the other way so now you’re a couple lines to the right of the middle and snap again. Now your picture should be lighter – even lighter than the first image. And that is what shooting in manual is all about, really. For me, anyway. So I snapped all those shots with the arrow one or two lines to the right of that middle point. (By the way, you can also do this in Aperture Priority and let the camera set the shutter speed while you tell it to shoot lighter rather than right in the middle – but I think we’ve covered enough technical trickery for this single blog post, so we’ll leave that for another time.)
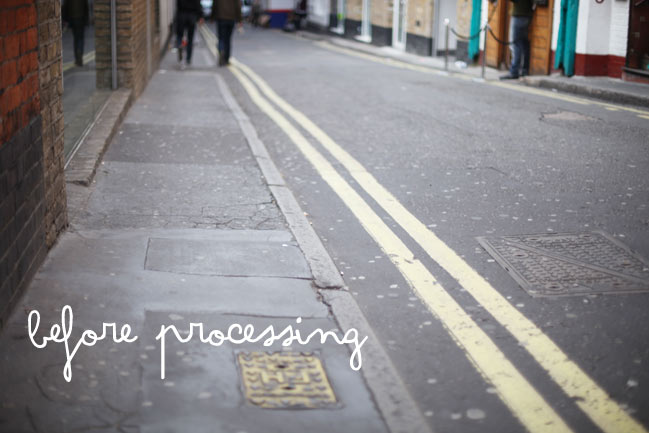
photo before edit
But then that wasn’t quite what I wanted either. I loved that the images were light, but I also wanted them warmer in tone. And to an extent, I could have done that in camera. But I didn’t. So I turned to Photoshop for the warm part of the glow.

I use Totally Rad Actions for most of my photo editing. If you do a lot of editing, then I totally recommend them. If you only edit every once in a while, then it’s a pretty big package to get if you’re not going to use it much, if you know what I mean. Plus they only work with full Photoshop – not Photoshop Elements, so I’ll tell you that right from the start. (They also have a Lightroom product, and I’ve seen people request an Elements product, but I haven’t seen anything about them bringing that out just yet. Also, if you’re an Elements user, please don’t switch off now, because in a couple paragraphs there will be an answer for you, I promise.) Okay, so anyway, if you go here, you can get an idea of all the different looks that these actions create (and if you follow many photo blogs, you may start to recognise some looks, as there are plenty of people out there using these same sets). So basically, I ran one action and that was it. It’s called Flare-Up Golden. It adds a warm, orangey flare over the top of the photo. In most cases, it’s far too warm and orangey for my liking at the 100% opacity, so I dial it down to 50% or less. For that set of photos, that was it. Now… technically, yes, anything that exists in an action can be created by your own tinkering in Photoshop. But in just that one action alone, there are nineteen steps. With the action, I just push one button then adjust the opacity when it’s done. Without the action, I have to go through a million things. Plus here’s the truth: the people who make awesome actions know more about Photoshop than I do. There are whole portions of Photoshop I have discovered just by a step in an action that made me wonder what exactly was happening. I’m convinced that program has an infinite number of settings and the people who make fab action sets? They know almost all of them.
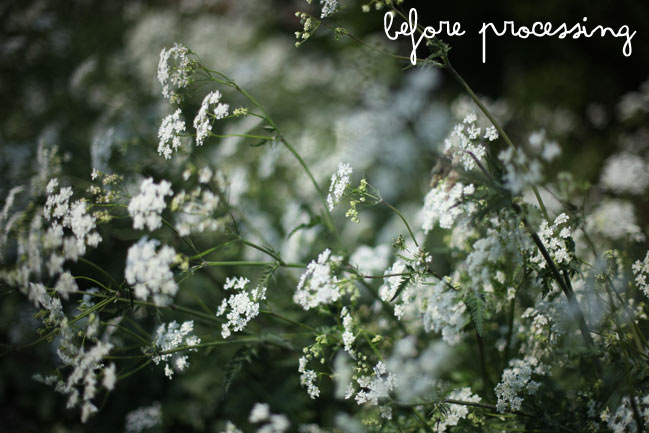
before processing
But I also realise that may be no use to you at all if you don’t have Photoshop or that set of actions. So how about some alternatives to achieving a warm glow without all that? Even with a picture from your phone or point and shoot. Picnik can do this for you in just a few easy steps. Choose a picture and go upload it there now.

Starting with the ‘Edit’ tab, make two adjustments. Click ‘Exposure’ and move the top slider to the right to lighten the photo. Click OK when you’re happy that it’s light enough. Then choose ‘Colors’ and move the temperature slider to the right. Stop when it’s warm enough and click OK again.

Then move to the ‘Create’ tab and select ‘Effects’ and scroll down to ‘Lomo-ish’ which is under the Camera heading. Click that effect and for the settings, move the top slider to about 70% for blur and the bottom slider to to about 40% for fade. Adjust as necessary for your image and then click at the top to save your newly edited photo!
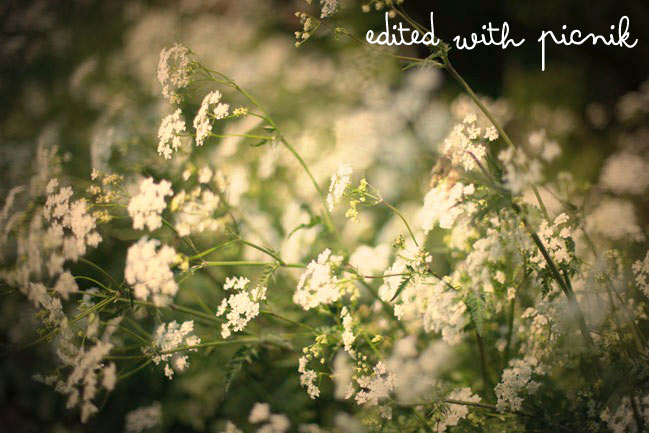
photo edited with Picnik
Of course, there are plenty of ways you can edit your pictures – not just to make things lighter and warmer! So that’s challenge five for this lovely day of scrapbooking: Try a new photo edit. You can just follow these steps in Picnik or you can try something completely different! Just take an image and try a new look! You can upload it to Flickr, the photography gallery at Two Peas or your blog. Whatever works! And if you find something you think we should all try, let us know in the comments!

A note about all the Scrapbooking Day challenges here: You can enter any time between now and Sunday, 15th May, so you have a full week to do as many challenges as you like. Unless otherwise noted, winners have a choice of prize – an online class pass or a gift pack of scrapbooking stash. I’ll also be choosing three winners from all the links and comments left today (Saturday the 7th of May) on any post, so just participating and saying hello gives you another chance to win!

xlovesx

PS: While this is my last post of today, this happy day of scrapbooking, Two Peas is celebrating all weekend. So tomorrow I will be focusing on their challenges – continuing with the supplies I started with this morning – and tomorrow I’m hosting a live chat there. It’s at 8pm UK time and 2pm US Central time, so perhaps you can stop by to say hello. And all the challenges at Two Peas? They have prizes and they don’t close until next Sunday too. So just in case you’re looking for even more to keep you creative this week, I think they can help! See you tomorrow, and thank you for joining me for such a happy Scrapbooking Day 2011.

Scrapbooking Day Challenge 4 :: The Story behind this Photo

scrapbooking challenge - story behind the photo
scrapbook page
I love photos that take a bit of explanation. Because normally the explanation is just as good – if not far better – than the photograph, right?

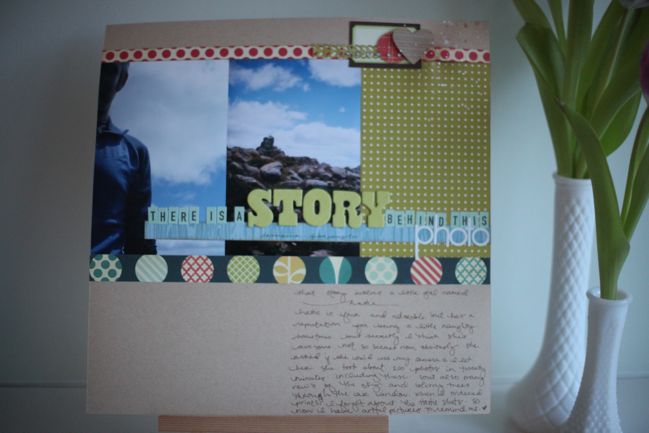
When I ordered those 691 prints, I got a bit bored of picking individual photos and I had a couple folders that I may have just clicked ‘order all’. Then when the prints arrived, I found I had a lovely collection of photos I didn’t remember taking. They were certainly from my camera and I recognised the people and the scenery, but surely I didn’t take three dozen photos of trees out the window and various clouds and rocks? And then I remembered: I let someone else use my camera for a bit.

She just happened to be four years old.

I kinda love this picture of one-quarter of The Boy. But it does take some explaining. Portraiture by Miss Hattie, Age 4.

Do you have a photo that needs explaining? That’s scrapbook day challenge numero quatro: Create a page with the story behind a photo. Find something that has way more story than what you first see, and get explaining!

A note about all the Scrapbooking Day challenges here: You can enter any time between now and Sunday, 15th May, so you have a full week to do as many challenges as you like. Unless otherwise noted, winners have a choice of prize – an online class pass or a gift pack of scrapbooking stash. I’ll also be choosing three winners from all the links and comments left today (Saturday the 7th of May) on any post, so just participating and saying hello gives you another chance to win!

xlovesx

Scrapbooking Day Challenge 3 :: Add a border between the photos

scrapbooking challenge :: border between photos
scrapbook page :: border between photos
I once had a college professor who had a simple rule for choosing a hair salon: nothing that involves a pun. That ruled out such adorably named establishments as Shear Madness, Blown Away and The Cutting Edge. Actually, if you’re faced with a surplus of hair salons, it’s a pretty quick way to create a short list.

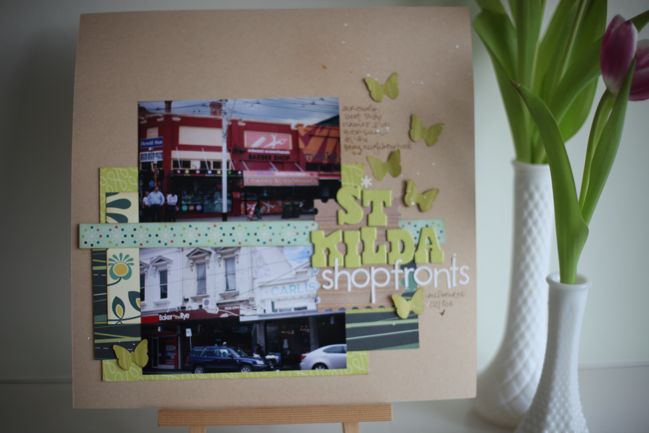
I don’t think Edward Scissorhands the barbershop counts as a pun. It’s a reference. THat’s different. There’s no second meaning of Edward Scissorhands. It’s just someone who is confident enough with cutting hair to say Oh yes, I am willing to put myself up there with Johnny Depp and frankly, that is the sort of confidence I would want in a barber. You know, if for some reason, I needed a barber. (I realise now it’s kinda hard to see what’s in the pictures, so take my word for it: a barber shop called Edward Scissorhands and a bakery called…)

Then there are literary-referencing bakers: the Baker in the Rye. Now that is both a reference and a pun. But I don’t think my professor applied the pun rule to baking establishments. Just places that groom hair. JD Salinger may not have had much sense of humour about it, but as a lover of Catcher in the Rye and not so much a fan of rye bread, I loved it enough to take a photo.

But the best bit is these two shops are just a couple blocks apart. And that alone gives you a feel for the adorably kitschy neighbourhood of St. Kilda in Melbourne. It was a little bit Camden meets Brighton meets Vancouver, and yet nothing at all like any of them really.

I’m thinking this layout isn’t finished. But I’ll be honest: I was also thinking I had to catch a train. So I’m going to post the challenge and then come back to it in a little bit, because the trains in my neighbourhood are a little too busy to bring along a 12×12 page and finish it. (As opposed to the time when Mary Anne set eyelets with a hammer on the floor of the train on the way home from a crop, if I remember correctly.)

So the challenge then: Use a border between two photos. You can include more photos (and more borders!) if you wish – but the border has to go between the pictures rather than to the side or elsewhere. Make sense? The border can be as simple as a strip of paper or as ornate as something you create from many layers! Totally up to you.

A note about all the Scrapbooking Day challenges here: You can enter any time between now and Sunday, 15th May, so you have a full week to do as many challenges as you like. Unless otherwise noted, winners have a choice of prize – an online class pass or a gift pack of scrapbooking stash. I’ll also be choosing three winners from all the links and comments left today (Saturday the 7th of May) on any post, so just participating and saying hello gives you another chance to win!

xlovesx


Scrapbooking Day Special Offer on Online Scrapbooking Classes

scrapbooking day special offer on online scrapbooking classes
scrapbook pages
Something a little special, just for today.

Sign up for any online class at shimelle.com today, and you can invite a friend for free. That’s Buy-One-Get-One-Free on online classes!

To take part in this offer, sign up for any class as usual. Click the buttons in the sidebar there —-> to find a class! During the checkout process, there’s a ‘message to seller’ box, and you can leave the email address of your friend there. If you miss this step, you can also email me (shimelle at gmail dot com) with your friend’s email address.

All classes include permanent access to all the materials, and classes that run annually (like Journal your Christmas and Learn Something New) include participation every year at no extra cost – so you could do some early Christmas shopping or treat a friend to a back-to-school class and get the ‘live’ experience at the Buy One Get One price.

This offer is valid today only and orders will be processed within 24 hours. There is no limit on how many times you can use the offer today, so you can sign up for as many classes as you would like, but you’re getting two places on each class – not one place on two different classes. You can pay by credit/debit card or from your Paypal account. Please make sure your Paypal account has a valid email address or I can’t get in touch with you!

Of course, you could also plot this out with a friend and pay half the price each… so feel free to ask around, but don’t wait as it’s a special for Scrapbooking Day only!

…and for those of you who celebrate Mother’s Day tomorrow, you could always choose a class to do together!

Happy Scrapbooking Day!

xlovesx

Scrapbooking Day Challenge 2 :: Create a triangle

Scrapbook challenge :: Create a triangle
scrapbook challenge :: create a triangle
Two things you should know about The Boy and I.

We really like coffee.
And we really like, well… knowing stuff.

The Boy is probably more dramatic about this than I am, but it’s a little contagious. You take something that’s a passing interest and then you have to become as much as an expert about it as possible. That’s why I don’t just like Kit-Kats, but I can bore you all day with amazing Kit-Kat trivia. And The Boy couldn’t just watch Heston Blumenthal cook with a water-bath thingamy – he had to crack open an electronics kit and build one in our kitchen. To a point where it would keep a more stable temperature than one he could special order from some sort of special restaurant supplier. Of course.

So we don’t just like coffee. We’ve studied beans and origins. We (he!) hacked a grinder to get it just right. We watch the World Barista Championships. So for his birthday, we took an all-day intensive course in making coffee. Doesn’t everyone get an Australian culinary qualification as a birthday present?

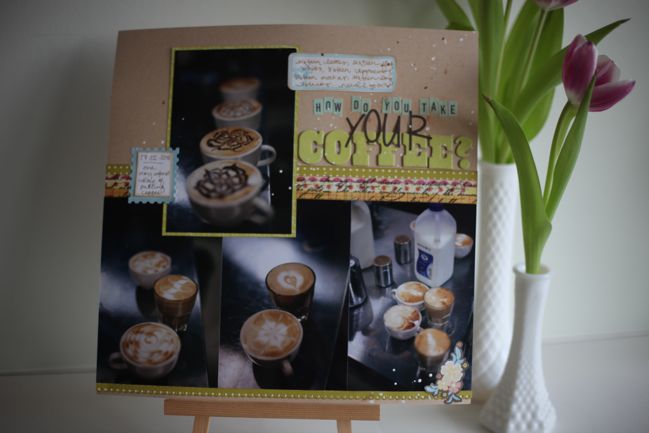
During the beginning of the class I could take some pictures, so these were some of the first drinks we made that day, including learning the different designs favoured by various coffee shops in Melbourne. It was a crazy amount of coffee.

But this doesn’t have a crazy amount of embellishment. Just three things really: the label above the title, the stamp shape to the left of the top photo and the flower sticker in the bottom right corner. Together they make up a triangle – three things of a similar colour, size or shape placed in three different parts of the page so if you drew a line connecting them, you’d have a triangle shape, ideally with your photos inside the lines. When I first started teaching scrapbooking workshops, this was the biggest design concept we used. Now it seems so simple, but I thought it was worth bringing back today and seeing how you would interpret it in your own style. So there’s Scrapbooking Challenge 2: Create a triangle. What will you scrapbook?

A note about all the Scrapbooking Day challenges here: You can enter any time between now and Sunday, 15th May, so you have a full week to do as many challenges as you like. Unless otherwise noted, winners have a choice of prize – an online class pass or a gift pack of scrapbooking stash. I’ll also be choosing three winners from all the links and comments left today (Saturday the 7th of May) on any post, so just participating and saying hello gives you another chance to win!

xlovesx

Scrapbooking Day challenge 1 :: Patterned Paper Background

Scrapbook challenge :: Use patterned paper
scrapbook challenge :: patterned paper
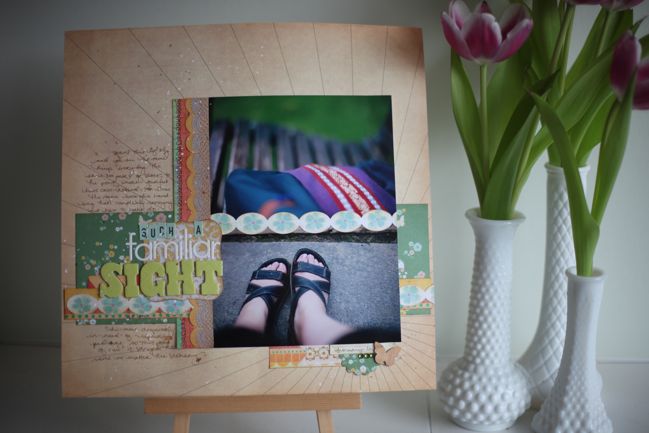
When I went back over some of our photos, these two made me laugh. I remember sitting on a bench in Melbourne, just too tired to walk or think straight for a bit because we had just taken part in a ‘cycle for power’ thing where you got on a bicycle that was hooked up to a power generator and the energy from all our pedalling got pumped straight into the city’s power grid. It was kinda crazy sprint cycling (even though we weren’t actually going anywhere) and about three minutes later we both looked at each other and realised we had to sit down. Now.

So these two photos were really me being exhausted and a bit silly, but they are the only two images in all those thousands that show something I saw every single day. With just two pairs of shoes, I was always looking at either these sandals or a pair of red Chucks. And that handbag joined our journey from Phnom Penh, after my first handbag (a completely fake Cath Kidston bag from a street market in Bangkok) fell to pieces. This green bag was horrible, actually. It was so uncomfortable to carry, it always got in the way… but I was determined to just make do rather than go shopping for a day bag yet again. We were both sick of the sight of this bag by the time we came home!

So now my feet have criss-crossed tan lines (despite covering them in sunblock every day) and I can sort out nail varnish rather than just leaving it to crack and I can carry a bag that I actually like. Two of the three are kinda fun. Also fun: scrapbooking with patterned paper!

So here’s Scrapbooking Day Challenge 1: Use patterned paper for your page background. Pretty simple! You can follow this page if that helps or you can create something completely unique – as long as the background is a sheet of patterned paper rather than solid cardstock, then you’re all set.

And there’s a prize for this challenge! To enter, create your page and share it online – on Flickr, in a page gallery or on your blog. Then leave a link to your page via the Mr Linky box below – or you can leave a comment if you prefer.

A note about all the Scrapbooking Day challenges here: You can enter any time between now and Sunday, 15th May, so you have a full week to do as many challenges as you like. Unless otherwise noted, winners have a choice of prize – an online class pass or a gift pack of scrapbooking stash. I’ll also be choosing three winners from all the links and comments left today (Saturday the 7th of May) on any post, so just participating and saying hello gives you another chance to win!

xlovesx