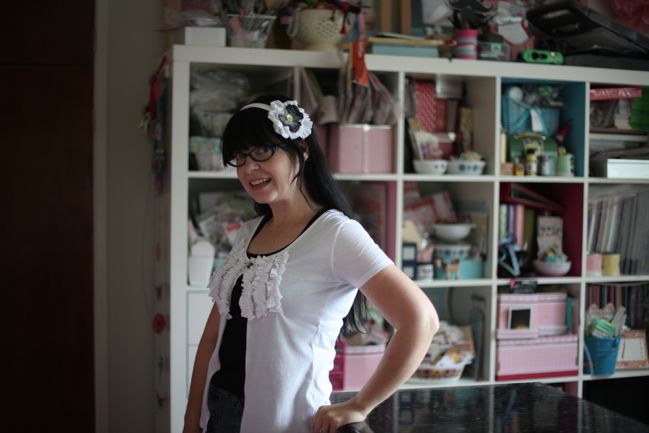

I’m going to warn you right now: this is a ridiculously long post. But I’ve taken all the travel questions from the comments, email, Facebook and Twitter and put them all here and answered them all… and lo and behold, one mammoth travel Q&A post! So thanks for the questions – and here are the answers I learned from our round-the-world trip!
PLANNING
How did you plan the trip? How much time did it take to pull together?
We planned this much more quickly than you might expect. We decided in the first week of November, and we left five weeks later. We actually wanted to leave in three weeks, but we needed four weeks to complete all our travel immunisations and I had a work obligation in December, so we left a few days after that. And that wasn’t five weeks of non-stop planning. It was more like a weekend of serious planning, a few different sessions of a couple hours to get all the best prices on flights and such (more on that later) and then the time of running around to get injections, backpacking gear and tie up loose ends. We were missing Christmas, so we did all of this around our regular December schedule, which included meeting up for as many Christmas get-togethers as possible, running Journal your Christmas, giving presents… all that stuff.
We actually only planned our trip outline: the flights were the biggest thing, so once we figured out where to go and when we would fly from A to B (and that decision was often made by ticket prices and availability) then we worried about filling in the gaps later.
How did you decide where to go?
The Boy had a few places he really wanted to go. I had a few places that fit with that, and then we went from there. I have to say this trip was led by his choices of destination rather than mine really – none of the countries we visited were in my top five places I really want to go next. But that was okay! Partly because I just like going somewhere new and partly because he has really endured my obsession countries and gone there just because I wanted to go there. We went to Japan on our honeymoon mostly because I am obsessed with Japan… and he happily drove us all around Iceland to follow a band… and last year all our travel was to visit my friends and my family – so I totally owed him his choice of destinations. I pretty much let him make a list and look at flights to see what was possible. He wanted to start in Thailand, because he had been there before and really enjoyed it (he went with his Dad, brother and uncle before I knew him) but he hadn’t been to the other countries in that corner of Asia. From there, we had a mix of countries that were new to just me or new to both of us. He lived in a few different countries when he was growing up – including Singapore – so he travelled a fair bit of Asia when he was young and wanted to go back to a few places. But neither of us had ever been to Australia or New Zealand, and that would be a big shift from the Asian section of the trip… and although he lived in Venezuela, both Chile and Argentina were new countries for both of us. For Asia in particular, our travel route was inspired by some itineraries posted on Travelfish. If you travel to that part of the world, Travelfish is a necessity. It’s a travel site specifically for Southeast Asia on a budget.
How much did you book beforehand vs when you were there?
Before we left, we had booked our flights that outlined the trip and one hotel. We were staying with a friend for our first stop, so we didn’t have to worry about transport or a hotel for those first few days and that was a huge help. The hotel we booked in advance was actually for February. I learned a few years back when I tried to book a hotel room for a work trip and couldn’t figure out why I was having so much trouble, only to realise my travel dates included Valentine’s Day. The one day when people will not uncommonly book a hotel room in their own city. Ever since, I have made it a rule to book rooms for the 14th of February as soon as I know I am travelling so I don’t end up in a panic or paying over the odds. (The Boy’s birthday is also that week, so it worked out well as something to look forward to – a few days in a nice hotel!) Everything else we booked as we went, including trains, buses, accommodation, excursions, meals and two additional flights. That sounds a little crazy but we never found ourselves on the street, lost, hungry or bored.
What about the financial side of things?
This is the part that I cannot emphasise enough: going around the world does not cost as much as you assume! Our biggest expense was actually something we were not using: our flat back in London. If you own your own home or you rent and your landlord is more flexible, you could eliminate the lost expense of rent/house payment by charging someone else to live there while you are away. We rent and couldn’t do that, and we did think seriously about packing up all our things, cancelling our lease and finding somewhere new when we came back… but it took us more than four months to find the place we have now and we really like it, so in the end we just swallowed hard on paying for almost four months of not using our home. We did work out one good thing, which was our landlord finally agreed to replace all the broken tiling in our bathroom while we were away, and we came back to that all shiny and refurbished… which was a big change.
Actual travel expenses vary depending on what you want to spend – of course it can be expensive if you want to splash out! But there are definitely ways to make things more affordable. Normally we book all our flights online and look for the best prices ourselves, but with a big itinerary of flights, we called a few travel agents who could see more information more efficiently than we could. We originally looked at the StarAlliance round the world site, because all our existing frequent flyer miles are on a StarAlliance airline. This site gave us a ridiculous price for our planned trip – but it let us know it was possible, so then we called a few travel agents and gave them the rough outline and asked them for quotes. They all came back considerably less than the website had quoted. But one travel agent came back with some suggested changes – like ‘if you leave London two days earlier, you can save £800 each’. Really? Done deal. That agent then looked at each flight like that for us and we took all the options we could to get the best prices, and in the end the price for the fare was less than 25% of the original quote from the website. Seriously. The only annoying thing was it was a Oneworld fare, which means our existing frequent flyer status meant nothing and our miles had to go on a new program with airlines we don’t really use. For the price, this was definitely the better option than collecting miles.
Then there are the expenses that vary from country to country. The pound, the euro and the dollar all go very, very far in SE Asia. I had the most amazing meal of my life at the fanciest restaurant in Siem Reap, Cambodia, and it cost me $8 – US dollars. True story. But after that, Australia was a shock to the system. The Aussie dollar is very strong right now after a long while of not being strong. So to the locals, the prices look like they always have. To an outsider, the exchange is crazy – like a standard sandwich and drink out of a chiller that would run you three or four pounds from M&S here is going to be the equivalent of ten pounds and change. And the same goes for hotels – cheap in SE Asia, ridiculously crazy in Australia right now. So we had to budget with that in mind and it was still hard to go a day in Sydney without spending a small fortune. It made me miss the all-you-can-eat-for-eighty-pence dinners in Laos, for sure.
It’s worth noting two things about how we managed to afford this: before The Boy’s job ended (the company he worked for closed its doors), he had been working up to a sabbatical, so we had been planning in some way for him to take a break and not have his regular income… we just thought he would be going back to a job at the end of it! And I never stopped working – I work for myself and carried on working as much as I could while we were on the road. We also met many people who took the same trip but much slower, knowing they would need to find work along the way in order to pay their way to the next stop. That’s a little too adventurous for me, but Australia aside, the entire trip was much more affordable than one might think. It was considerably cheaper than the same length of trip in Europe or North America, and in fact I have spent more on a roundtrip ticket from London to Kansas City than I did for my full round the world fare.

I would love to know which places would be kid-friendly. My family and I are moving to Okinawa this summer. We are hoping to do a lot of traveling around Asia. Thanks!
In the weeks before we left, lots of people said the same thing to us about this trip: ‘Oh, it must be nice to be able to do things like that since you don’t have kids.’ And I have to say, the more I heard that, the more angry it made me. I really don’t believe that kids should prevent travel (though I totally get there are additional hassles and expenses) and The Boy traveled to more countries before he was ten than I have ever been to, and my passport has run out of pages. So he certainly doesn’t think travel is a thing you only do without kids. And all along our trip? We met families doing trips just like ours but with babies, toddlers, little kids, teenagers… and it made me so very happy.
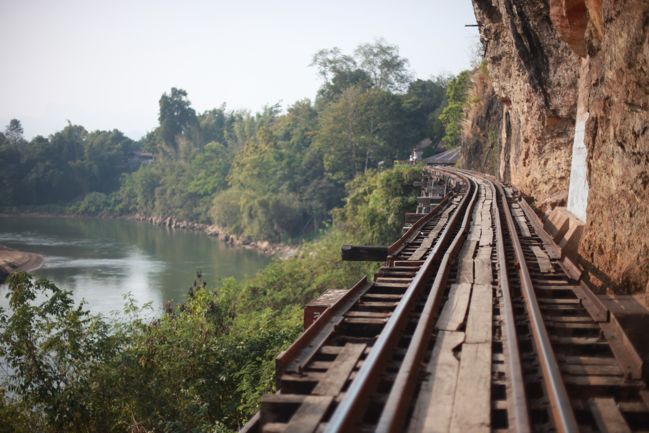
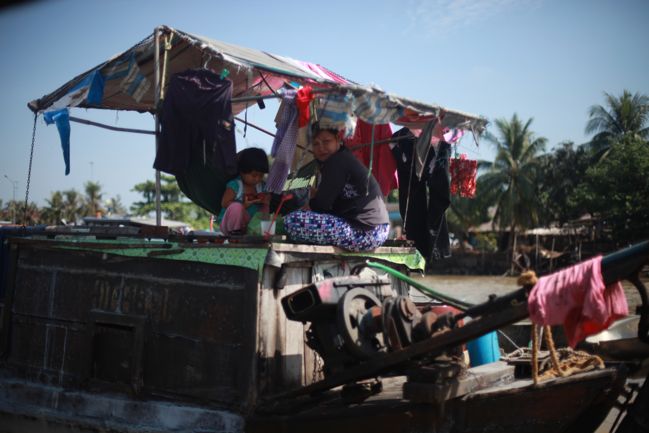
As far as specific locations that stand out, Luang Prabang in Laos is very family friendly. This is where boys from the age of five study to become monks, and I found it so interesting to watch tourist kids watching these boys who are all at once calm and collected but also very much kids. Plus it’s just a very friendly town with lots to do. Hoi An in Vietnam and Siem Reap in Cambodia would both be pretty amazing. Most of Thailand is child-friendly, with the only immediate exception being central Bangkok, as it’s very busy and crowded and the air is full of fumes. But the same could be said for certain parts of London and I would definitely say London is child-friendly! The Boy had been to Bali as a child and loved it then. Although we didn’t go to Japan on this trip, I found Japan to be a very child-friendly culture.
Place I would skip with children would probably be Vientiane, Laos (just not so much for them to do or appreciate there), Hanoi, Vietnam (this is the only place where I didn’t feel safe) and probably Phnom Penh, Cambodia (because much of what’s to see here is too depressing really – this is where schools were turned into concentration camps). But all three of those are close to somewhere else that is child-friendly, so that works out well.
The thing we noticed about family travel through Asia, is just that the children that make good travellers are very aware and, of course, well-behaved. We ran into one family in Vietnam travelling with two boys, about eight and ten, and they were very disrespectful to the local culture. Hoi An is all about handmade things (fabrics, clothing, ornaments, boats) and these boys just ran through shops filled with fragile hand-carved things and they couldn’t keep their hands to themselves or stand still. The school teacher in me really wanted to say something but their parents just let them do whatever they wanted and never once warned them about how breakable things could be. The reason these two boys stood out from all the other kids we met was that they had no understanding of the different culture – no idea that people worked twenty hour days for pennies, no idea that school was something special rather than required, no concept of the importance of a memorial or a religious site. I know that sounds like a bunch of grown-up ideas, but the vast majority of the children we met really did understand all that – and I think that’s where they were gaining from the experience. The two boys who didn’t take anything in might as well have been dragged around their local shopping centre instead of a market in another country. But most children we met were exceedingly polite, listened with intent and took everything in. They carried their own bags, read travel guides, took pictures, kept journals and could introduce themselves and have a conversation with fellow travellers, even if they were the only kids around and they had to talk to adults. I guess that means it’s not for everybody and I know some families would find it such a challenge – and I certainly taught children who I think would have trouble falling in ‘respect other cultures’ category at eleven, much less five – but we definitely met families who did this well and I think the kids will have such a rich experience from their journeys. I wish you and your family very much fun in Okinawa and beyond!
PACKING
I would love to know exactly what you packed!
You are in luck! You can see that here if you missed it earlier.
Did you take a picture of the backpack you lived out of? I love to travel light and I hope to see how/what you packed.
That post has a picture of both our backpacks. Both our bags were 22 litres. Mine was this bag from Deuter and his is a slightly older model of this bag from Osprey. I would really recommend being fitted for a bag at a shop rather than just buying online though, as it’s important that something like that be comfortable for your frame. I had a lot of trouble finding something narrow enough for my shoulders, but after almost an hour with a fitter in a shop, there was a clear winner. Remembering how awkward some of the first bags were for me, it was truly an hour well spent.
How did you manage with one bag? (I think that is amazing.)
Well, it was easier than it seemed. There just comes a point when you get over not being able to make choices about what to wear and it became easier to not buy souvenirs because there was nowhere to put them. As a scrapbooker, it was hard not to keep every piece of paper that crossed my path, but I did manage to keep some tickets and tokens without any trouble. I think much of it could be explained by looking in my bathroom cabinet. Inside, you’ll find everything for everything occasion, but I only use five or ten percent of it on a daily basis. So only that five to ten percent came with me, and the same applied to my wardrobe and so forth. Knowing that you will do laundry on the road makes a big difference to what I would normally pack – and also getting over the idea of wearing the same outfit twice even for pictures or in front of the same people. On a one week trip, I would want something different for every day. On a fourteen week trip, I was fine with doing laundry every second or third day. It’s all in the perspective!
The two backpacks were impressively small – where did they live during the day or did packs do a lot of sight seeing too?
I tried to avoid carrying my bag all day if I could. If we had already checked into our accommodation for that night, then we only took a few basics out with us during the day. But on days when we were moving from A to B, the bags went sight-seeing right along with us. We do have evidence of this, as my camera body looks as though it has been through a cycle in a tumble dryer (works fine though) and The Boy’s laptop has one corner thicker than the other where a seal was bashed at some point. For the time being, that is working fine too.
How did you handle the “lots of currencies” problem/need for banknotes/small change etc with such a teeny purse?
I mostly only carried two currencies at a time. We carried US dollars at all times because in a jam, most countries will accept dollars as they are easy to change, plus several countries charge your entry visa in US dollars. Other than that, we tried to be very good about not ending up with extra cash when we left a country. So that helped… and it also helped that many countries don’t use coins! Paper money is so much lighter. When we did have change, we would pop all the leftovers into a charity collection at the airport for Unicef or the Red Cross. As a rule, we never get our currency before we travel. Instead, we go to an ATM machine in the airport when we arrive, and trust me – ATMs are pretty much everywhere. Though in some towns they are hidden and you’ll need to ask a local for their location, but you’ll always find several in even the tiniest of airports.
Was there anything you took & found you didn’t need or anything you wish you had taken?
We made one rookie error and had to pick up nail clippers on the road! It had honestly just slipped my mind because on a regular weeklong trip, a nail file would be just fine. There were other times when we bought something that we needed at the time but I wouldn’t have taken it with me for the whole trip. The only thing that we continually wished was perhaps that we had an iPad or a Macbook Air instead of a Macbook Pro, but we had decided from the beginning it wasn’t worth the spend just for the trip so we would take what we had. (The Boy has a 13” Macbook and that’s what we took with us. I have the same laptop but in the 15” size and now it seems huge and heavy!)
I’d also love to know your hairstyle tricks! lol
Awww. The biggest thing I found was that with long hair, it was easier to wear it up, so I piled it on my head in some way or another pretty much every day. Some days just a regular bun, or perhaps two. I have a funny obsession with watching hair style tutorials on youtube, so I often wear my hair like this, this, this or this and all of those worked on the road without fancy hairbrushes, straighteners or hair spray. They are really all quite similar! I also braided my hair a lot – either in a French braid or in all different braids piled up, a bit like this tutorial from Elsie. On the odd occasion where I thought I’d wear it down, I ended up stopping during the day to put it up again – it was just easier to have it up so it wouldn’t get in the way, plus it was one little creative thing to do each day really. Although I’m not so sure that the day I got fed up with my fringe and bought a cheapie pair of scissors and cut my hair using the wing mirror of the van is really in everyone’s safe zone of ‘little creative things’, but it worked out just fine.
ACCOMMODATION
I’m curious about how you found places to stay – did you do hostels? hotels? Any tips on finding not really really skeezy places!
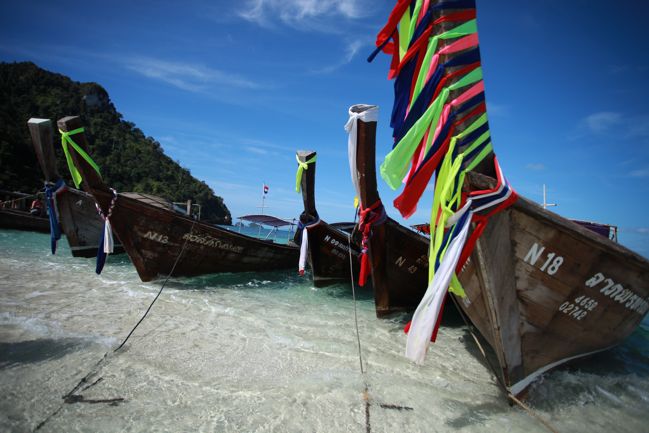
Oh, all of the above! We stayed with friends, friends of friends, lovely hotels, plain budget hotels, hostels, b&bs, a camper van and a place that was pretty much a commune. Throughout Asia, Agoda was our friend and helped us get good deals on last minute rooms almost every day. Laterooms is good for big cities but not many small towns. For hostels, we booked through Hostelworld. And when we got to Australia, the hotels were so expensive that for the most part, we used Airbnb, which lets anyone list their spare room or their sofa (we didn’t stay on any sofas) – so it’s like a bed & breakfast, but it’s actually someone’s home and you just stay with them for a while. You can see all the reviews right there on the site and pictures of the places, and we had fab luck with those bookings. We used them three times in Australia, once in New Zealand and in Argentina we actually used the same site to book a private apartment for a full week, and all of those places were good experiences at better prices than hotels. As for avoiding somewhere skeezy, Tripadvisor is your friend. Tripadvisor will not steer you wrong! I always read reviews there no matter where I’m travelling, because even a good hotel will have info there that is useful to you – like rooms to avoid because they are near something loud or which floors to request when a hotel is partway through renovation. But if a place is skeezy, you will know from those reviews. No one will hold back if the place was smelly, dirty, dubious or different than the pictures on the website. I know because I don’t hold back when I leave reviews there either! We had one hotel that wasn’t itself unacceptable but their customer service was horrible and they refused to help us with something that was a very basic problem they could easily correct. After they were rude and refused to put it right, I sat down with the laptop right in front of them and wrote the review on TripAdvisor then and there. Emotional review? Indeed. But sheesh, if only they had been nice I would have left them something that said so – and most of the reviews I left on our trip were lovely.
The other thing to check for good hotel deals is your airline website if you are a frequent flyer. Even though we weren’t flying with the same airline as usual, I checked the frequent flyer offers to find us a hotel in Kuala Lumpur, just to see if there was anything good. They had a fab discount on a room at the Shangri-La, which made a standard room in a lovely hotel the same price as any other budget hotel in town. But then the airline gave us an upgrade for being frequent flyers. And when we checked into the hotel, they had upgraded us too. It was seriously amazing and because we had booked and paid in advance, I don’t think anyone there realised how crazy our good deal was… and I’m pretty sure they didn’t expect us to be backpackers who promptly did our laundry in the sink of their fancy corner suite either! (Though let me say this about frequent flyer programs: I live about five thousand air miles from where I grew up. My family all lives there. I have lived here for twelve years now. And it’s only in the past year or so that my miles actually racked up to a point where I’ve enjoyed a few perks. So I guess it was all about the long-term!)
Also – tips for doing laundry in sinks? lol. I have before, and I don’t know what I was doing, but it took waaaay too long to dry! :) Thanks, lovely!
We used Dr Bronner’s concentrated soap, which comes in about every scent imaginable, but it’s an all-purpose soap that is super concentrated, so a sink full of laundry only takes a couple drops. (You can also use it as shampoo but don’t try it on coloured hair! What a mess.) The easy part is the washing everything out – just fill up the sink, add the soap and slosh everything around as needed. Soak things if you’ve been out for some muddy adventure or whatever. Repeat the water and sloshing process as many times as needed until the water is clear, then just rinse everything a bit under plain water from the tap so you get all the soap out of the clothes. Wring and squeeze as much water out of each item as possible. Lay a towel down and take the squeezed clothes and pop them on the towel. Once everything is there, roll up the towel with the clothes all inside, then stand on it. Jump up and down, dance a little – whatever you can do to squeeze all the water out! Then hang everything with as much room in between as possible in a place with good ventilation and it will dry. Some things just take longer to dry than others, so you can get pretty good at feeling a fabric and knowing if it will dry quickly. And if you like to multi-task, some bathrooms make it easier to do the laundry while you’re in the shower rather than the sink.
Did you have a restless, “unsettled” feeling the entire time, being on the move so much? Or did you find a way to make each place a bit of home? I think the stress of that long on the road might do me in!
Neither of us felt unsettled for the entire time. We each had our moments. I had more trouble at the end of the trip – I think once we got to South America we were so tired that I was ready to be done, and because we had started lots of communication along the lines of ‘we’ll be back soon, so let’s arrange…’ so once that started it no longer felt like we had that same freedom. I am sure there is a personality element to it, as we both just like to go places and I know that’s not everyone’s feeling. When I was finishing my degree in Kansas and said I was moving to the UK for grad school, lots of people said it was a ‘brave’ thing and I found that a funny word. For me it was just a different school in a different place – ‘brave’ would have been actually getting into the real world, but I didn’t have a clue what I wanted to do in the real world so I was just going to school again. The moving to a new country thing really didn’t phase me, so that has to be a personality thing, right? But really, since we were together it didn’t seem unsafe or foreign or unsettled because there was always that bit of normalcy for us. I don’t think I would want to do a solo round the world trip, though I do quite like solo trips to just one or two locations. And we did meet plenty of solo travellers doing similar journeys, so there you go: another personality difference that shows what is fine for one person is really stressful for another. It’s also easier in this day and age to not feel cut off from home, because there was always internet access (though often hit and miss) and a phone signal, so we could email or call if we wanted to. I sent lots of postcards. I liked that part of not feeling like we were on a different planet!

OUR EXPERIENCE
Where exactly you went and for how long in each place.
Oh goodness! We started in Thailand then went to Laos, Vietnam, Cambodia and back into Thailand but headed south this time. Then Malaysia, Singapore, Indonesia, Australia, New Zealand, Chile, Argentina and home (with a few hours at the airport in Brazil, but that doesn’t count). The longest we stayed in one country was three weeks (New Zealand) and the shortest was two days (Singapore – we’ve been there before and it was really a plane stop), with the average around the ten day mark.
What were the biggest challenges you faced?
The language barrier was tough at times, but we got by with just knowing how to say ‘thank you’ in most languages and then miming anything else was fine. My Spanish is rusty but almost passable, which helped in South America. Many restaurants have English menus or you can see what you want and point to it. We bought a phrase dictionary in Vietnam but their language is so subtle that it did us more harm than good! (It’s a tonal language, so one word said with an an inflection going up at the end can mean ‘mother’ and with a falling inflection means ‘soup’. That makes ordering dinner a bit interesting.)
I would say my own biggest challenge was just getting up and going when I didn’t feel well. It was really exhausting to go somewhere every day, but then if I sat and did not much in the hotel, I felt it was a total waste of being in another country. Being able to get a decent night’s sleep made a huge difference to my mood from day to day.
Was there anything that surprised you in a “good” way?
So many things! Laos, as a entire country. It was a total surprise and I loved it so much. But also some personal lessons, like my own strength and ability. Some times you don’t know you can do something until you’re stuck between ‘communicate or go hungry’ or ‘cross the road or be run over by a million motorbikes’. I definitely came back more confident in little things like that but also very humbled by seeing the ways in which people thrive when they have what we would say is ‘very little’. Very little doesn’t mean things like cars, houses and clothes. We definitely met people with very rich lives and strong families who don’t have purpose-built houses, vehicles or more than one change of clothes. Family, community and hope all seem much more important now.
If you could revisit just three of the places you went to (could be a particular town, city, event, landmark etc…) which three would that be and why?
New Zealand was our very favourite country, and we would love to return there for much longer. Especially as the earthquake meant we spent most of our time in just half the country. The other two spots would be a challenge to choose – I adored Luang Prabang so very much. Melbourne was my favourite of all the cities (rather than towns) and Siem Reap was the most awe-inspiring. So I guess I’m cheating by one there!
What did you get up to in New Zealand?
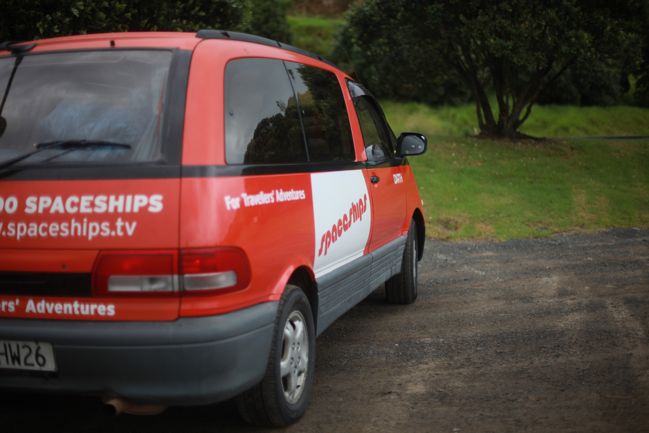
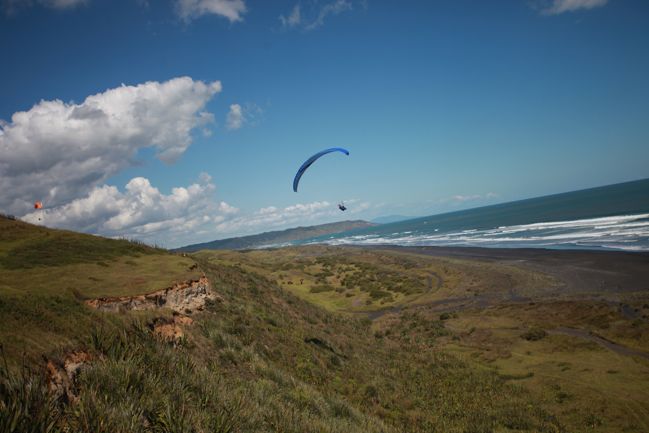
We started in Wellington, where we met up with Leah and Jason (Leah is a scrapbooker and they have just recently left NZ for their own year of travel), took the cable car up to the planetarium, visited Weta to see how they made the Lord of the Rings films and wandered around Te Papa and were very disappointed that its famous squid was off on holiday! We were touring the parliament building when the earthquake hit Christchurch, where we were headed the next morning. We already had our ferry and train tickets, so the next morning we still headed to the South Island but the trains were not running. We decided we would stay a few days in beautiful Kaikoura while things settled a bit, then popped in for a day with another scrapbooker, Cathy, and headed back north. We just felt we were taking up accommodation that was needed by those who had been displaced during the earthquake and we wanted to help but didn’t have any expertise that was useful, so it just seemed better to get out of the way. That put us in Auckland, where we picked up a spaceship and spent the rest of our time driving around in our bright orange camper van! It was such the highlight of our trip and I didn’t expect to like it because I really hate caravan trips – but with a camper van we mostly stayed at holiday parks with kitchens, clean bathrooms and even wifi. The weather was a bit hit and miss so we could just drive somewhere with a better forecast, which was awesome. We did the usual tourist loop that included Hamilton, Taupo, Rotorua, Waitomo and Hobbiton… then we tried to see the loveliness of Coromandel but the rain never stopped so we headed up to the Bay of Islands, where we stayed for a few days and The Boy went scuba diving on the ship wrecks and quickly proclaimed it to be his favourite place ever, I do believe. New Zealand was also were we did our craziest of adventures, including cave tubing and paragliding. Seriously, it is an amazing place.
Any random cultural differences from various countries to share?
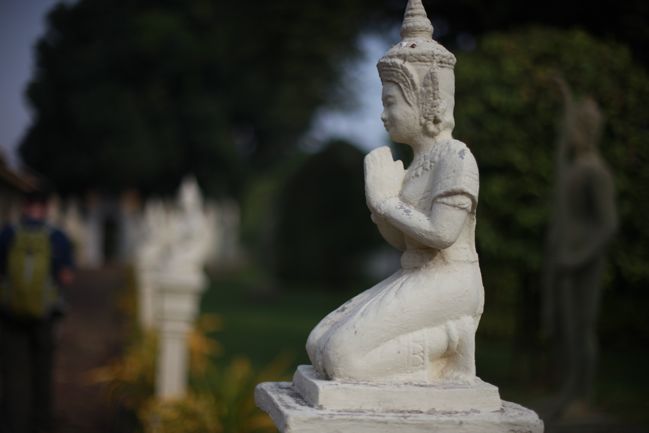
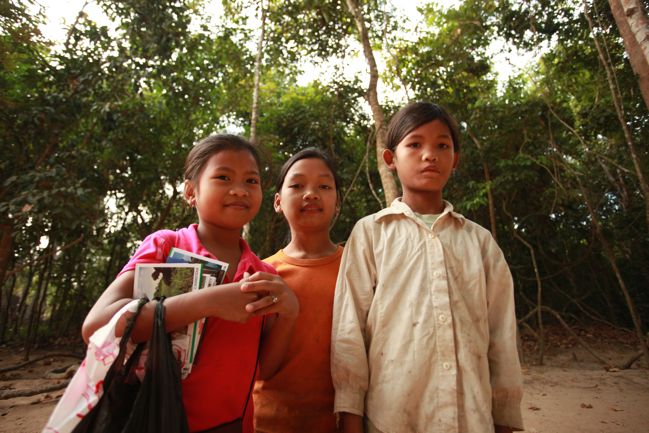
Cambodia probably has the most cultural differences. It was hard to get used to the idea of children selling things instead of going to school (and there are far more children than adults there, so those that do go to school only go for half a day). But it was one girl in particular who really caught us off guard. We walked into a temple and she was selling bottled water – which we didn’t need. We said no thank you several times but she continued to press and The Boy did something that would be very normal here – he said ‘Maybe later’. Here that is a polite way of saying no or probably not, right? Well, when we left the temple she spotted us and ran right over saying it was later and now we needed to buy our water. He tried to explain that he had said ‘maybe’ and that meant maybe yes, maybe no, but she went from sweet little girl to very angry woman in a flash. ‘In Cambodia, what may be, MAY BE.’ and goodness, we couldn’t get out of there fast enough! (And don’t worry – she’s not in the photo. But can you guess which of these three is currently happy because I bought some postcards?!)
And of course food is always a funny one – it never failed to make me giggle that at breakfast in Thailand, the porridge pretty much always has meat in it!
How you managed to stay on top of blogging etc. when you were away.
Oh goodness, I didn’t really. I struggled to keep going with a post or two a week most of the time. But in the two or three weeks before we left, I scrapbooked non-stop to meet as many of my deadlines as I would hit while I was away, so I continued to have layouts going live while I was away, which was a bit funny. Guest posters helped me have more crafty content while I was away from my supplies. And then whenever I had time to write and an internet connection, I would try to transfer thoughts from my notebook to my blog! Sometimes I stayed on top of it, but mostly I fell behind on that part. The funny part was internet connections were easy to find in some tiny towns in the middle of seemingly nowhere, but try to find free wifi in Sydney, Australia? You’ll be walking all day. In cities where everyone has internet at home and at work, it’s not such a big deal to have it in cafes and such. Though there is free wifi on the ferries in Sydney, so sometimes I blogged on a boat!
You favourite place and where you would like to emigrate to!!
Oh, definitely New Zealand – on that we agree. Not a permanent emigration, but we would quite happily live there for a few years if the opportunity presented itself.
SCRAPBOOKING & MEMORY KEEPING
Did you do a scrapbooking journal as you went?
I had no craft supplies with me at all, but did carry a small journal and a pen, plus my camera. I took many, many pictures. Around nine thousand. And I wrote lots of notes in my journal. Sometimes just a list of what we did; other times more heartfelt. I know with the laptop I could have scrapped digitally, but I journal much better with a pen in my hand, and really we were hard pressed for hard-drive space as it was!
How will you record the trip?
I’m creating scrapbook pages just as I fancy them – no particular order, no overall game plan. Just flipping through photos, remembering stories and creating pages as I feel inspired. I have no deadline on this and no worry about it fitting into one album. I’ve done about twenty single page layouts so far, and those really only cover a couple different locations.
Then I’m also working on a big, hardbound photobook for our coffee table with a few hundred of the very best photos from the nine thousand. I’m hoping to have it finished in the next month or so.
TRAVEL ADVICE
I’m going to California in the summer (woo hoo!!) which I’m just a tad excited about, but it’ll be my first ever long haul flight – four hours has been my max so far! Any tips for surviving a long flight and adjusting quickly to a vastly different time zone?
Biggest tip: stay hydrated. You need far more water than they give you on a plane, and sometimes it seems like they give you water quite frequently! Take a bottle, refill it on the plane (most long-haul planes have fountains but if it doesn’t, a flight attendant can refill it for you) and the more hydrated you can stay, the less jet-lagged you will be when you arrive.
Then get yourself into a schedule as fast as possible. I always try to make concrete plans for the next morning after I arrive, so I can’t be tempted to just stay in bed on my old time zone. My favourite thing about flying from Europe to North America is that I suddenly end up a morning person, which never happens at home. I have more trouble coming back, and it can sometimes take a couple days to hit me and then suddenly I feel like jelly. I know many people who swear by sleeping pills on planes, but they cause me more trouble than they are worth – I think they need to be something that would work for you on the ground without side effects to consider taking them on a flight.
Enjoy California and have a fabulous time!
What’s the best way to handle the “knackered at 3pm must have cup of tea” feeling whilst traipsing through cathedrals/temples/etc?
Give in or power through. We did a lot of afternoon stops for a drink. It just wasn’t always a cup of tea. We tried whatever local fare was on offer, which meant something that sounds a bit disgusting (like a watermelon milkshake or sweet beans on ice with condensed milk) actually turns out to be so amazing you seek it out later. Sometimes it’s not amazing and that’s okay too. We are not above afternoon naps, early nights, reading in parks or just looking at each other and knowing that we’ve had enough. Some of the most amazing things are the very quiet activities too – paragliding was cool, but I wouldn’t trade it for watching the sunrise over Angkor Wat. And I kinda have a reputation for falling asleep whenever I stop. Every time we went on a day trip that involved going somewhere in a van, they would have to wake me up when we were back to the hotel. On our honeymoon we sat down to read in a park in Tokyo, only to wake up a few hours later and find we had been joined by most of the neighbourhood’s homeless population. So yep: definitely feel that feeling and I’ll give in if it’s practical and if not, power through then have an early night! Is that the most unglam answer or what?
What would your #1 tip be for anyone thinking of doing something similar?
Treat every day as something unique. Don’t overplan from the beginning – because you’ll inevitably see something you haven’t planned and want to do that but then you can’t because you already have a booking with something else. Or the weather will be rubbish and you’ll wish you could wait it out or move ahead. Or you will misjudge the spots you love (and want to stay longer) or the spots you’ll hate (and you will want to get out). Flexibility was what made this all work for us – but I know some others who would really hate the idea of not having rooms booked or a set itinerary. But I wouldn’t trade that for seeing something and just saying ‘how about that?’ and heading there straight away. We literally spent Christmas Eve walking down a street wondering what to do for Christmas and an hour later we had decided on elephant trekking, a walk through caves and a waterfall hike, and someone would pick us up from our hotel on Christmas morning!
Any regrets? Things you wish you had done or places you feel you perhaps wouldn’t have gone in hindsight?
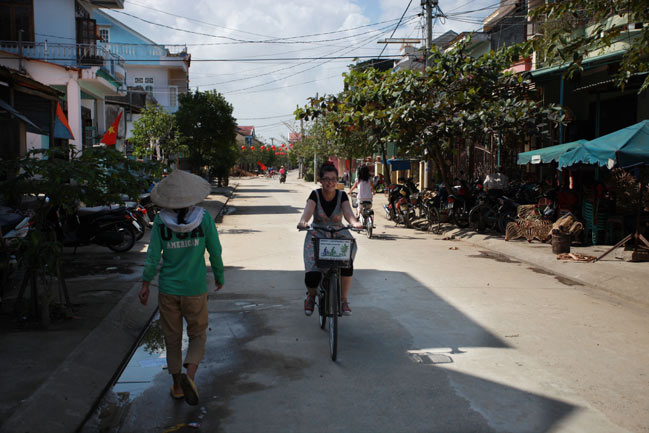
We just wish we had spent more time. Fourteen weeks was too quick for all those places, and it meant sometimes we had to skip something or be exhausted. We met many people doing the same list of countries over five, six or twelve months. They seemed a bit more put-together than we did! But fourteen weeks was what we had on our schedule so we worked with that and don’t regret it. We wish we would have visited Sapa perhaps instead of Hanoi, but that’s a minor quibble. Neither of us can pinpoint anything we would change other than perhaps the fanciful idea of just leaving on a journey without so much as an end date in mind… maybe one day.
And so far, that’s everything! If you have another question, by all means ask and I’ll answer you by email or here on the blog. Thanks to all those who asked – it really made me think about a few things in particular and I am very glad I did. And if you managed to read all this, well frankly you deserve some frequent flyer miles yourself!
xlovesx


![]() Comment [13]
Comment [13]


