pretty paper. true stories. {and scrapbooking classes with cupcakes.}

lovely to meet you Twitter Facebook Pinterest YouTube

Take a Scrapbooking Class

online scrapbooking classes

Shop Shimelle Products

scrapbook.com simon says stamp shimelle scrapbooking products @ amazon.com shimelle scrapbooking products @ amazon.co.uk

Reading Material

travel

two peas in a bucket Category

Glitter Girl and the sewing machine solution (scrapbooking video)

glitter girl adventure 11: the sewing machine solution
glitter girl adventure 11: the sewing machine solution Class content ©twopeasinabucket.com.
This week, Glitter Girl is out to find a sewing machine solution! If you have a sewing machine, there’s no reason not to use it on paper, so don’t worry that paper can mess things up. There are a few things worth knowing though…

…Paper dulls needs faster than fabric (same goes for scissors, which is why it’s useful to have separate fabric shears if you do much sewing at all), so be sure to keep extra needles on hand. But you don’t need anything special – just the standard needle size for your machine.

…Adhesive is the only thing that can be problematic. It’s not a big problem, but if you’ve ever tried to clean adhesive off a table or other surface, you’ll be familiar with those stages of stickiness and residue and how it can see almost impossible to get right back to square one. Well… sewing through lots of adhesive will get all that residue on your needle and eventually it can transfer to the other working parts of the machine that surround the needle… or it can end up on the presser foot (the bit that clamps the paper/fabric down) or the feed dogs (the bits that move the paper/fabric along as you sew) and then you can wind up with glue on your next sewing project… which might be paper. Or it might be a wedding dress. Oh goodness. So less is totally more with adhesive on layouts you will stitch. You’re going to stitch things into place, so all you need is a little bit to hold things in the right spot while you sew.

…The tension might be different on your machine for paper versus fabric. Because paper is thinner and rigid, which could cause your stitches to look wonky on one side (or both) even when they look fine on fabric. No big worry: just adjust and try again on a scrap of paper. Or don’t stress and if it looks fine on the front but messy on the back, just don’t worry about it since that part won’t show anyway. Which is one nice thing about sewing on paper!

Anyway, time for a video adventure! It starts with some beginner sewing info then goes through three scrapbook pages, so if you already know how to use your machine and just want to skip to the layouts, zoom over the first six minutes and you should be on track.


If you think your sewing machine is broken, do yourself a favour and stop before you do anything else and change the needle. Needles are weird. They might look the same and you’ll swear it’s still sharp if you stick your finger with it, but it may be slightly bent, bowed or blunt. Any of those things can make your stitches a total mess or even make your machine stop sewing or show error messages. Yes, sewing machines need to be serviced now and then and sometimes they need actual repairs. But sometimes a new needle fixes all woes, and that only costs thirty pence. So try that first, okay? (Then if it still doesn’t work, head to an expert. A service will make your machine run like new again and it’s not all that expensive for most machines.)

Local friends, if you have never stitched and want to try before you commit to the idea of buying a machine, there are regular workshops at The Make Lounge and you can use their machines to get an idea of the experience. That’s for sewing on fabric, of course, but you’ll come away with a finished project like a patchworked pillow or a dress, so lots of good things in a couple hours in Islington.
scrapbook page
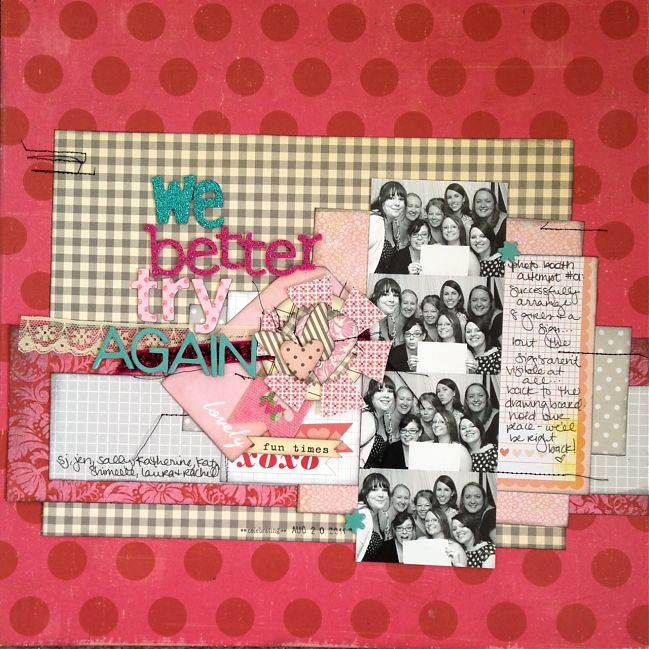
For getting started, sewing each layer separately and then gluing it together like any other layout works well. If you’re worried that something will go wrong, you’re only working with one piece at a time – so the worst that could happen is you need to replace that single piece rather than fix a layout that’s nearly finished. Not that you’ll have any trouble with the stitching! But just in case you’re nervous. For this page, everything is stitched separately then adhered like anything else. Plus you can combine stitches and pop dots with this technique – and I do not recommend sewing through pop dots. I may have tried that out for experience in the past. It’s not the wisest move.
scrapbook page
If you love layers, you can add stitching to each layer as you go. This is the same technique I used on this minibook cover and it works really well on cards too. That repeated stitching can transform a stack of scraps into something extra special.
scrapbook page
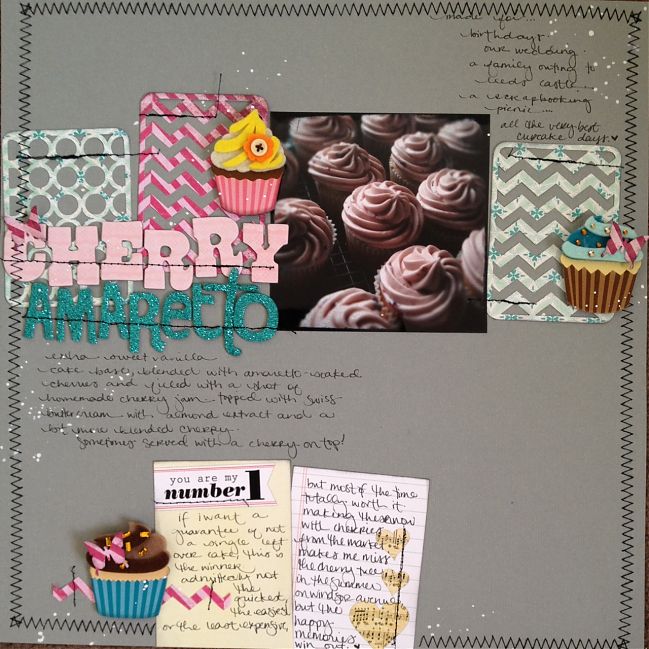
Sometimes stitching is a great finishing touch to a layout that is just lacking a bit of something. In this case, I started with everything here except the stitching, but the lack of contrast made the page fall flat. The stitched frame and details in the high-contrast black thread help take it from in between to definitely finished.
(Also, don’t freak out but that is two weeks in a row that I have used themed supplies for their theme. Bicycles last week and cupcakes this week. Whatever will happen next?)

If you’re interested in more projects and information about using your sewing machine on your scrapbook pages, check out the Sew Happy Scrappy workshop at Two Peas – it’s self-paced, available any time and it’s just five bucks. (It’s taught by Jen Johner and you’ll find it listed with all the other supplies if you scroll down past the video here.)

This week Glitter Girl challenges you to sew on a project of your own! Upload it to Two Peas and check the box for the Glitter Girl challenge in step four of the upload process to share it with us all – and you’re also welcome to share a link in the comments here if you fancy!

Onward, covered in glitter, my dear scrapbookers!

adventures of glitter girl

The Adventures of Glitter Girl is a weekly series on Two Peas in a Bucket, and goes live every Wednesday. I’ll share each adventure here shortly after that. I hope you enjoy her quests for crafting happiness, and if you ever have a scrapbooking dilemma yourself, you can always call her to action on the message board. She’s currently looking for a topic for next week. What should it be?

Glitter Girl and the tricky transparency (scrapbooking video)

Glitter Girl and the tricky transparency scrapbooking video
Glitter Girl and the tricky transprency scrapbooking video Class content ©twopeasinabucket.com.

This week Glitter Girl tackles the Tricky Transparency, after a member of the Two Peas community posted that she was flustered with what to do with all these clear supplies she had collected.

The basic trick with transparencies comes in how to write or stamp on them and how to attach them – but once you catch those tricks, you are good to go! For writing, you’ll need a permanent pen that can write on that surface, like an American Crafts Slick Writer or a Sharpie. For stamping, Staz-On ink is your friend for working with the acetate material – and have the cleaner on hand, as if you slip while stamping on the transparency, you can remove the Staz-On and try again once the transparency is dry.

As for attaching, you need something that won’t show through – so you can use your regular adhesive only if you’re going to cover it up with another layer on top. But other options will hold it in place without that worry: staples, brads, stitches, paperclips and washi tape are all easy answers. Or use it with pockets, like a 4×6 transparency over a photo or index card in a divided page protector… or possibly on the 12×12 scale too, as Glitter Girl discovered this week.

And if you pop over to this adventure at Two Peas, you can scroll down to see all sorts of transparent products for your stash, including some special offers like discounts on Hambly overlays and more. (And check the new stuff while you’re there – BasicGrey, Lawn Fawn, Hero Arts, Jenni Bowlin Studio and October Afternoon are among the new things this week!)

scrapbook page
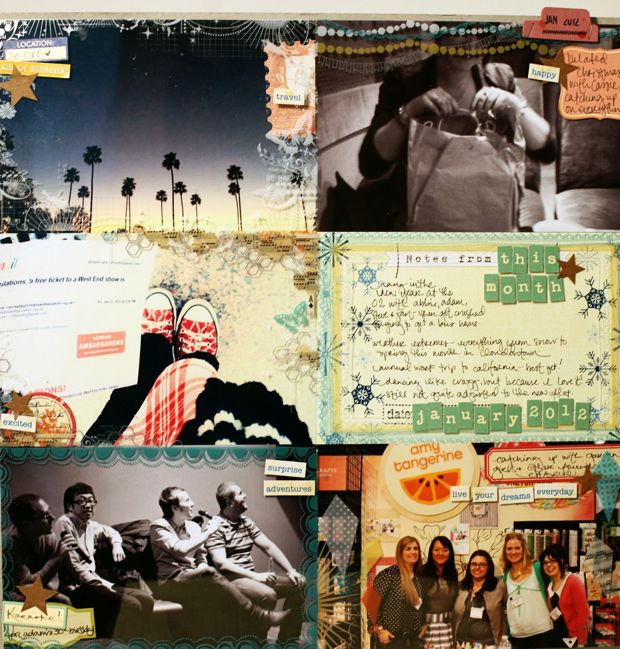
This 12×12 transparency sheet can be cut into separate frames for six different pages, of course, but I liked the idea of giving it a try as a 12×12 sheet and making it act a bit like a divided page protector. This is my January-in-Review layout for 2012, with five photos plucked from my library and an Elle’s Studio index card to write a bit more about what isn’t in the pictures. (By the way, I’m loving the happy accident of the photo at the middle-left. I had an email to say I could go stand in a queue at a certain place and certain time and perhaps have a free ticket to see a play that night – but I wouldn’t know what it would be or what my chances were. But I could make it, so I queued up and snapped that picture with my phone while I was waiting. I was early enough in the queue to get a ticket, and I drew a free ticket to Legally Blonde the Musical, so definitely an interesting day all told!

scrapbook page
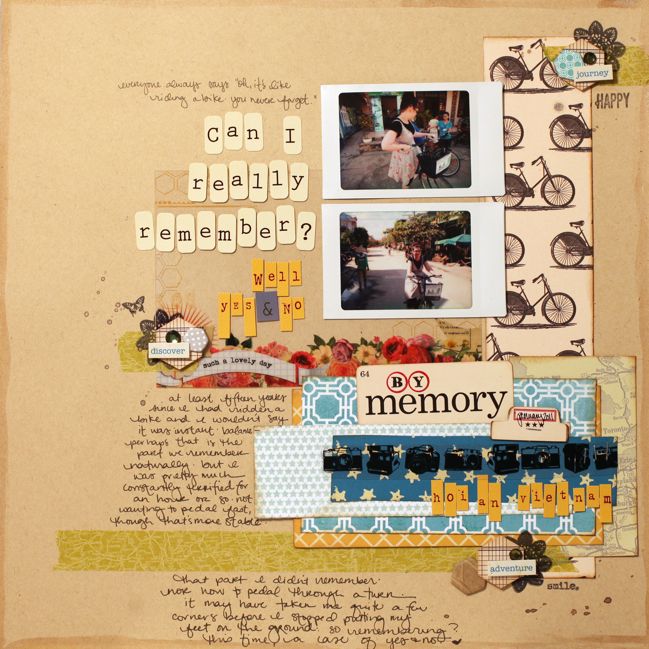
This version is a bit more like the majority of my pages, but includes two transparency elements: one 4×6 frame and a strip from a 12×12 Hambly overlay. But the 4×6 frame can still work as a separate element rather than over the obvious 4×6 photo. In this case, I had two Instax shots, so it was never going to work as a frame for those, but I loved how the design looked on kraft cardstock so just went from there. In my album, this page is opposite the only other bicycle picture we snapped, which I printed at the full page width, and I love how the two extremes work together across the double page. In supplies, the only thing they have in common is the kraft cardstock and the small doily stamp.

This week Glitter Girl challenges you to use a transparency in your work and share it! If you would like to share a link in the comments here too, that would be fabulous!

Onward, covered in glitter, my dear scrapbookers!

adventures of glitter girl

The Adventures of Glitter Girl is a weekly series on Two Peas in a Bucket, and goes live every Wednesday. I’ll share each adventure here shortly after that. I hope you enjoy her quests for crafting happiness, and if you ever have a scrapbooking dilemma yourself, you can always call her to action on the message board. She’s currently looking for a topic for next week. What should it be?

Glitter Girl scrapbooks photos from the 70s, 80s and 90s

Glitter Girl scrapbooks photos from the 70s, 80s and 90s
Glitter Girl and the vintage photo dilemma Class content ©twopeasinabucket.com.

Quick reminder: today is the last day to enter to win a free pass to my new workshop, The Hitchhiker’s Guide to Scrapbooking! Click here for the post where you can enter. Thanks!

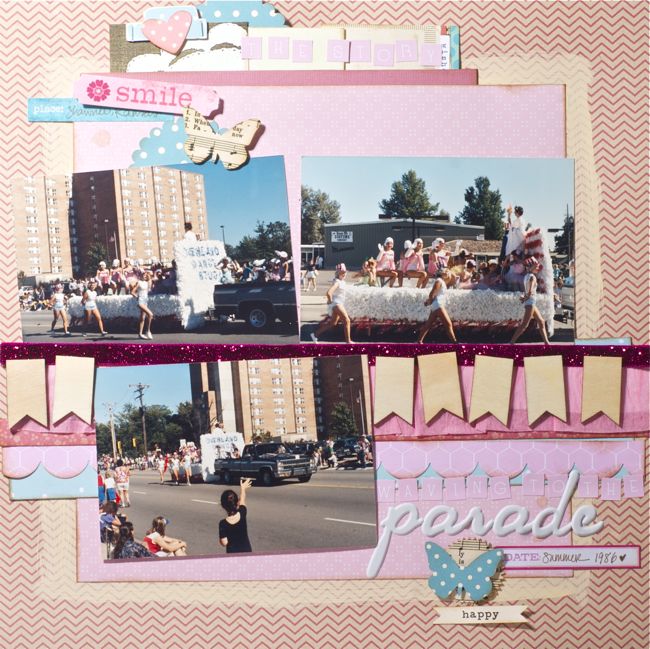
This week Glitter Girl was quite excited to see a discussion about photos from the seventies, eighties and nineties on the message board, and the adventure of the Vintage Photo Dilemma was born. This week’s adventure includes a look through some pages including older photos, a breakdown of how to look for papers that complement the warmer film tones of older colour photos and of course, a scrapbook page (complete with photos from 1986) right from beginning to end. The page construction in this week’s video might also be useful for you if you have a page on any theme with more writing that you have room for or want to show.

Come along for this scrapbooking adventure, won’t you?

Supplies to note this week include the Country Picnic collection from Pebbles (that’s what I used for the papers), journaling cards from Elle’s Studio, wood veneer pennants from Studio Calico and Glitter Tape from American Crafts. Oh, glitter tape. Or glitter ribbon. I’m not completely sure which name is the official name, but what I do know is that it sparkles like lots of glitter but with absolutely no mess. Which is cool. The first few colours are available now with lots more to come. And the large scallop border punch I love is back in stock too. All the supplies are listed here so you can add them right to your bucket if you see anything you need would like.

Scrapping the Eighties is something I’ve discussed in a different format before – we recorded an entire episode of the Paperclipping Roundtable about just that, last November. You can find that here if you like. You can also find more photos of the Early Years album featured in the video here, though of course I have added more pages since that post. But quite a lot of it you can see there.

By the way, just to put things into perspective, I have more photos from that parade in 1986 and one of them includes the local full-service petrol station in the background. Gasoline was sixty-six cents per gallon that week – and that was with someone else pumping it for you! Last I checked, the price at our nearest pump equates to something like $8.45 a gallon, which goes a long way to explaining both why petrol is not sold by the gallon in this country and why we do not own a car! Anyway, little things like that in the background of older photos always remind me of how the stories of our lives have so many layers and things hiding in the back of snapshots help all that come to life. I love getting a fabulously framed shot but I love just clicking without too much regard too, because otherwise the background might not be there. Even in these three images there are some posters for businesses in the background that sent me down memory lane, and I ended up searching for one online to see if it was still around, and sure enough Kansas City Costume is still in business – since 1925, except now with a website, Twitter account and a Facebook page.

scrapbook page with 80s photos
This week, Glitter Girl challenges you to scrap one or more photos from the pre-digital era, especially the seventies, eighties or nineties. Then share the results in the gallery! Don’t forget to tick the box for the Glitter Girl challenge in step four of the uploading process. Feel free to share a link here too – you can leave one in the comments if you want to share.

Onward, covered in glitter, my dear scrapbookers!

adventures of glitter girl

The Adventures of Glitter Girl is a weekly series on Two Peas in a Bucket, and goes live every Wednesday. I’ll share each adventure here shortly after that. I hope you enjoy her quests for crafting happiness, and if you ever have a scrapbooking dilemma yourself, you can always call her to action on the message board. She’s currently looking for a topic for next week. What should it be?

Glitter Girl picks a pack of patterned paper (scrapbooking video)

Glitter Girl picks a pack of patterned paper scrapbooking video
Glitter Girl picks a pack of patterned paper scrapbooking video class content ©twopeasinabucket.com.
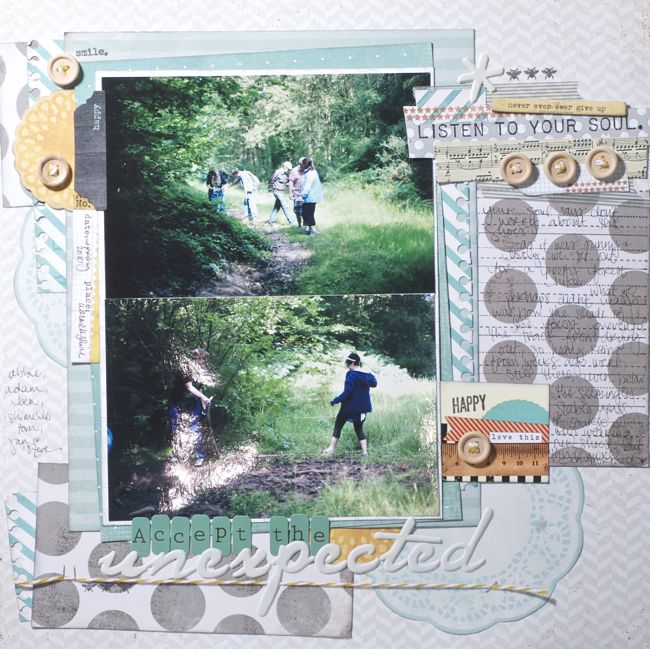
This week Glitter Girl takes on an adventure in picking a pack of patterned paper – something currently being discussed on the message board here at Two Peas in a Bucket. Her adventure takes her through a thoughts on choosing a less-than-obvious colour scheme from photos, picking the patterned papers and embellishments, then creating a page from start to finish.

Come along for the adventure, won’t you?


By the way, the notebook paper stamp I mention in the video is this one, and you can find all the other supplies here. (It appears Glitter Girl sometimes leaves the most important supplies off the list. Last week she forgot to list the chipboard pennants. Silly Glitter Girl!)

Glitter Girl picks a pack of patterned paper scrapbooking video
This week, Glitter Girl challenges you to pick a pack of patterned paper and put it to work! Then share the results in the gallery! Don’t forget to tick thebox for the Glitter Girl challenge in step four of the uploading process.

Onward, covered in glitter, my dear scrapbookers!
adventures of glitter girl

The Adventures of Glitter Girl is a weekly series on Two Peas in a Bucket, and goes live every Wednesday. I’ll share each adventure here shortly after that. I hope you enjoy her quests for crafting happiness, and if you ever have a scrapbooking dilemma yourself, you can always call her to action on the message board. She’s currently looking for a topic for next week. What should it be?

Introducing a new workshop :: The Hitchhiker's Guide to Scrapbooking

online scrapbooking workshop :: hitchhiker's guide to scrapbooking
online scrapbooking class :: hitchhiker's guide to scrapbooking
One day you’re happily crafting along and the next a bulldozer arrives on your doorstep, ready to build a by-pass straight through your creativity. Wouldn’t it be useful to have some sort of guide for moments like these? A reference manual ready to snap you out of a creative slump and help you pick up those pieces of paper with ease and style?

Enter The Hitchhiker’s Guide to Scrapbooking.

Over five chapters, the guide covers ways to pick papers, formulas for getting started (and looking like you totally know what you’re doing even if you feel you haven’t a clue), sketches and ways to adapt them, ways to take inspiration from your favourite pages and how to embrace and develop your very own personal style.

online scrapbooking class :: hitchhiker's guide to scrapbooking
This is a little something different to my usual workshops. There is no set schedule and you won’t receive daily emails or feel you need to keep up (not that you really have to follow a schedule with any of my projects). Instead, the guide has been prepared much like a book – but a book plus a great deal more. As soon as you sign up you can access all the materials – in any order you fancy and at any pace you like. The workshop won’t disappear. It will remain available so you can sign up now or later (though do keep reading for a reason you might want to sign up soon).

But I said there was more than just a book, right? That extra stuff includes a video to accompany each chapter. In each video, there’s a review of all the layouts in that chapter and one layout shown and discussed from beginning to end. The book also has an easy-to-print reference section with colour combinations, starting points and sketches, ready to get you scrapping in seconds. Plus there is the interactive part: the forum.

online scrapbooking class :: hitchhiker's guide to scrapbooking
On the class forum, you’ll already find a fun challenge and a few in-depth discussions, and this will continue throughout the year. Have a question? Ask away. Pick up a challenge if you don’t know where to start or just need a little motivation to make the most of your crafting time. Or join in any conversation you find. Right now we’re already discussing theme papers and how you usually choose papers for your layouts, for example. And all that has happened in just two days. I’m definitely excited to keep talking scrapping on the class forum, and I have a whole calendar filled with little extras that pop up there – challenges, writing prompts, maybe even some photography fun and special days in the bag.

Now I did say this class was a little different and that includes a different location. Rather than my own class forum, the guide is hosted at Two Peas in a Bucket, and everything can be viewed just like a layout in the gallery. There is even a new feature they have added for our private forum so you can easily attach pictures and share them just with other participants – perfect for days when you want a second opinion on a layout you haven’t finished, because you won’t have to show it to the whole world via the main gallery.

(By the way, don’t worry: my own classes aren’t going away. I’m just adding this self-paced option to the line up, and Two Peas have a great set up for that. I’ll still be teaching scheduled classes via shimelle.com. In case you were wondering.)

The Hitchhiker’s Guide to Scrapbooking includes 42 brand new scrapbook pages – including both single and double layouts. There are plenty of 4×6 photos, with a few other sizes thrown in here and there. The guide gave me the chance to take all the things I really love when I’m scrapping – starting points, paper combinations, sketches, 4×6 photos, layering – and combine them into a single project with everything in the same place. So that might explain why I’ve been a bit absent with scrapping here on the blog: I’ve truly been scrapping like never before. And if I’m allowed to say this, this is my favourite group of layouts I have ever put together for a class. I hope you love them even half as much as I do!

So in summary, that’s five chapters with forty-two brand new examples, five in-depth videos, an easy-to-print reference section and a private forum with challenges and chat. All available as soon as you sign up, with permanent access. And it’s $25, by the way.

online scrapbooking class :: hitchhiker's guide to scrapbooking
Now yes, you can sign up any time you like, but what about a little extra incentive to sign up now? Happy to oblige! If you sign up now, via this link, you can also receive an exclusive extra video called Layering for Hitchhikers. It’s a closer look at layering techniques, with new pages that are not included in the guide. To receive this video, you must sign up by following a link from shimelle.com, no later than the 8th of March 2012. Then forward your Two Peas receipt, including the order number and date of purchase to me by email. (You can delete the rest of the info if you like – I don’t need your mailing address or anything else that might on there – just the order number and date.) The video will sent to you via email on the 9th of March. (If you already signed up, you may very well qualify already! Go ahead and forward the receipt. I’ll let you know if your order isn’t on my list and otherwise, look forward to that bonus on the 9th.). So yep, that’s a free exclusive additional video for you, but once the 8th of March is gone, so is your chance. Don’t forget!

I think that pretty much covers it! Don’t panic: just join in and enjoy plenty of ways to be a froody scrapbooker, cropping at home, with friends or when visiting Magrathea!

ETA: The same comment is coming up several times below and I’m guessing I just rambled too much and you missed something! If you already signed up before you saw this post, go ahead and forward your receipt. I’ve made that bold above now! :)

Gardeners' Digest :: Scrapbooking News from the Garden Girls

Gardeners' Digest :: Scrapbooking News from the Garden Girls
scrapbook page
A little digest of news from the Garden Girls – on the twenty-second of the month, we bring you Gardeners’ Digest, a blog-hop style wrap up of our favourite projects and products at Two Peas in a Bucket. If you’ve just arrived from Shannon’s blog, then hello hello! (And if you’re just starting here, you can following it around, of course!)

First a little look at something you’ll find shortly at Two Peas – a peek at what’s coming up in this week’s glittery adventure! You don’t have to wait long to see that adventure though – it will be live for you later today.

(Random aside: yesterday I had a missed call on my phone from a number I didn’t recognise, so I Googled the number and it came up as the London Mayor’s office. Intrigued, I asked for theories on Twitter and Facebook. My very favourite was the suggestion that the mayor is creating a butterfly symbol to shine into the London sky in times of need. Oh goodness that sounds like a lot of responsibility!)

coffee cup minibook by wilna furstenberg
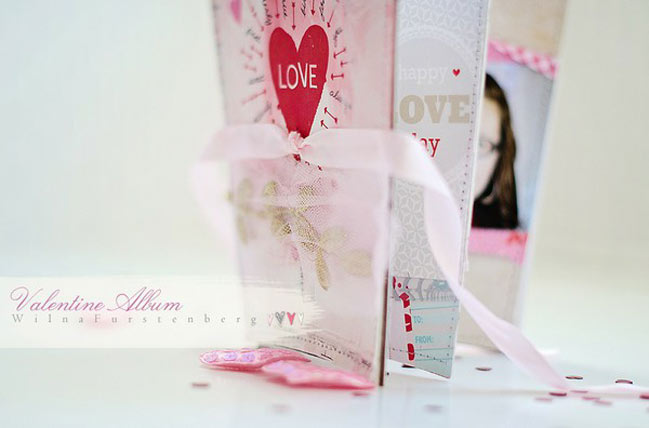
This month I have found my jaw dropping at the layouts from one particular Garden Girl: Wilna is on fire this month! She is so inspired by hearts and the lovey-dovey themes of February and her gallery is filled with such beautiful work, including this new coffee cup album and several 12×12 pages. I love every single thing she is making right now. Definitely one for your bookmarks.

scrapbooking supplies
Since our last digest, I have to admit I have received not one but TWO boxes from Two Peas! As the new releases roll in they sell out quickly so I end up ordering more often to make sure someone else doesn’t pinch what I want in my albums. (Selfish, I know!) My orders have included letter sticker collections from Prima, plenty of the new Dear Lizzy Neapolitan collection, Rhonna Farrer’s new line with My Mind’s Eye called Follow your Heart, plus papers and a few embellishments from the Country Picnic collection by Pebbles. Since last month Two Peas has also added a bunch of printable designs, especially for journaling cards. I’m particularly loving these from Polka Dot Pixel. Love that splash of bright colour!

Two things for you:
First, leave a comment on this post to be entered to win a $10 gift certificate to Two Peas. Easy! Enter before the end of Thursday and the winner will be posted on Friday.
Second, your next stop on the way is Wendy Sue. Go, go, go!

Gardeners' Digest :: Scrapbooking News from the Garden Girls
Gardeners’ Digest is a monthly update from the Garden Girls, the design team at Two Peas in a Bucket. To keep up with the Garden Girls throughout the month, check out the garden gallery, find us on Twitter or subscribe to all our blogs with just a couple clicks.

Glitter Girl and the challenge of the chipboard

Glitter Girl and the challenge of the chipboard scrapbooking video
Glitter Girl and the challenge of the chipboard class content ©twopeasinabucket.com.

This week Glitter Girl takes on the challenge of the chipboard – something currently being discussed on the message board here at Two Peas in a Bucket. Her adventure takes her through a quick look at chipboard product options, several different ways to embellish raw chipboard and a scrapbook page using those altered chipboard pieces and the brand new Dear Lizzy Neapolitan collection from American Crafts.

Come along for the adventure, won’t you?

If you click through to the project page and scroll down, you’ll find plenty of ideas for supplies, including some special sale items.

For more chipboard ideas, check out two more videos from the Two Peas channel:
the chipboard episode from Shannon Tidwell’s Products you Love series
and Jamie Sorenson’s altering ideas for chipboard embellishments in the Tricks & Treats series.

This week, Glitter Girl challenges you to put some chipboard to work then share the results! Create something to share with the Two Peas community and in your project description, tell us how you got creative with chipboard. Be sure to click the challenge box when you upload a picture to the gallery. You can also leave a link here in the comments to share what you have made.

scrapbook page
Join us every Wednesday for the Adventures of Glitter Girl, helping the world one crafting dilemma at a time. Each week Glitter Girl joins Two Peas via video to solve a problem posted on the message boards. Don’t miss out as she shares project tutorials, product comparisons and technique tips throughout the year.

Dear Lizzy scrapbooking supplies
BONUS CHALLENGE: If you’re a fan of the new Dear Lizzy line and already have some in your hands, don’t just admire it – get scrapping! Five lucky crafters will win a happy prize pack of American Crafts goodies! To enter, create a project with the new Dear Lizzy Neapolitan collection and upload it to the gallery, being sure to give it at least five relevant tags and three related products, then tick the box for the Dear Lizzy Project Challenge in step four. (You’re welcome to tick the box for the Glitter Girl challenge too if you’ve used both Dear Lizzy and chipboard!)

Onward, covered in glitter, my dear scrapbookers!
adventures of glitter girl

The Adventures of Glitter Girl is a weekly series on Two Peas in a Bucket, and goes live every Wednesday. I’ll share each adventure here shortly after that. I hope you enjoy her quests for crafting happiness, and if you ever have a scrapbooking dilemma yourself, you can always call her to action on the message board. She’s currently looking for a topic for next week. What should it be?

Glitter Girl and layer upon layer of scrapbooking embellishment

glitter girl and layer upon layer of scrapbooking embellishment
glitter girl and layer upon layer of scrapbooking embellishment Class content ©twopeasinabucket.com.

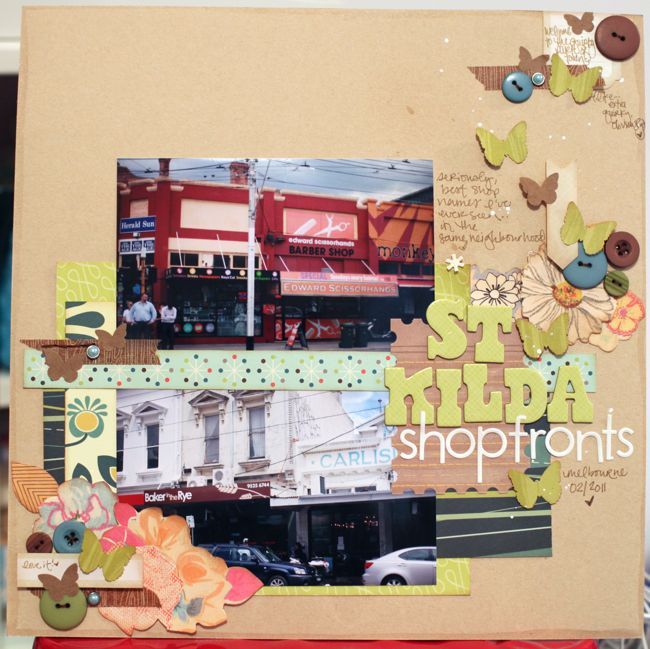
In this week’s adventure, Glitter Girl takes on the question of how much ‘stuff’ is enough ‘stuff’, an issue currently being discussed here on the General Scrapbooking message board at Two Peas. Her adventure takes her the completion of three layouts this week: one layout that just didn’t feel finished in the album and two pages from a basic starting point to the end result. Plus a review of products that make layering and grouping embellishments very simple – many of which are on sale right now at Two Peas, but more about that in a minute.

About those products… if you have a look at this page you can see a big shopping list at the bottom – it includes the specifics from the three layouts plus a bunch of products I turn to again and again for layering. Some of them are ridiculous bargains at the moment – like some colours of the Studio Calico label stickers are just 87¢, and the stamp set with that lovely woodgrain background is $2.99 – but keep in mind that the big trade show starts this weekend. That means two good things: big sales and new things on their way, but also a bad thing: if you miss something you want now, it probably won’t be restocked. I have learned that lesson the hard way more than once, so there you go!

scrapbook page makeover
This layout might look slightly familiar, depending on how much you pay attention! You can see it in its original form here and even then I made a note that it didn’t feel finished, but I added it to my album it has been there ever since, not nearly as dressed up as the other pages in the book. There’s actually nothing wrong with it, of course. It shows the photos and documents the story and it fits the colour scheme I was working with in that section of the album. It’s not a case of right and wrong. It’s a case of being happy with what’s in the album, and sometimes that means I go back and make changes. I am sure there are scrappers out there who would prefer the before with its cleaner design as well as scrappers who would like neither – but I prefer the made-over version and am happy for it to be in my albums. So for me, that was a good use of time and energy.

scrapbook page
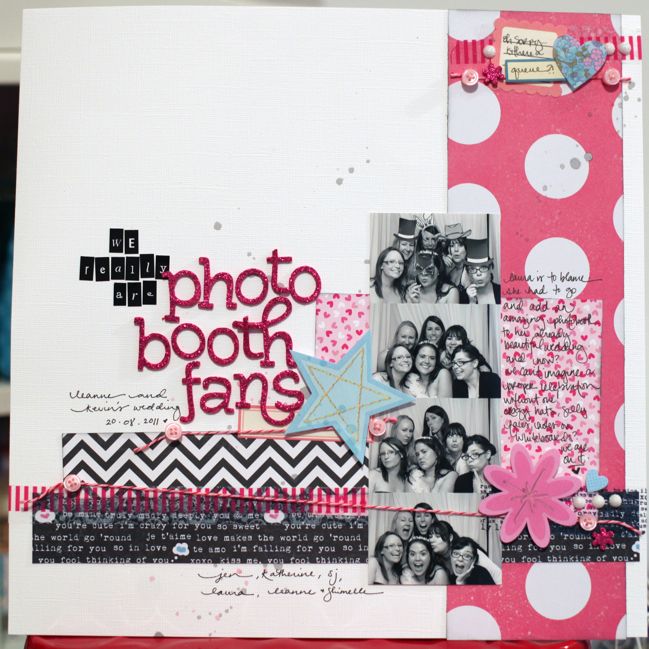
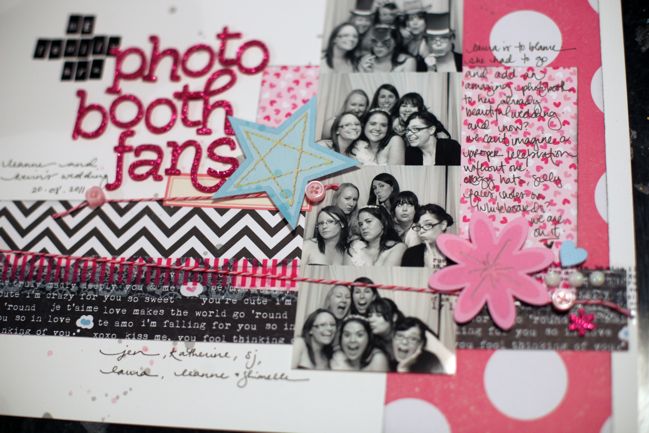
There’s a chance this page may look a little familiar too – but this one isn’t a makeover. It is, however, a bit like this page, which is also a wedding photobooth page on white cardstock with pink and black and glitter! Some similarities, but certainly not the same layout, which is fine by me.

scrapbook page detail
Proof that I put my stash to use straight away: the Sassafras stickers and the KI Memories tape I mentioned in the recent digest are both here on this page. I have to admit I feel a bit victorious when I manage to do that! (Though not as victorious as I will feel one day when I magically use every single letter on a sticker sheet in genuine words.)

scrapbook page
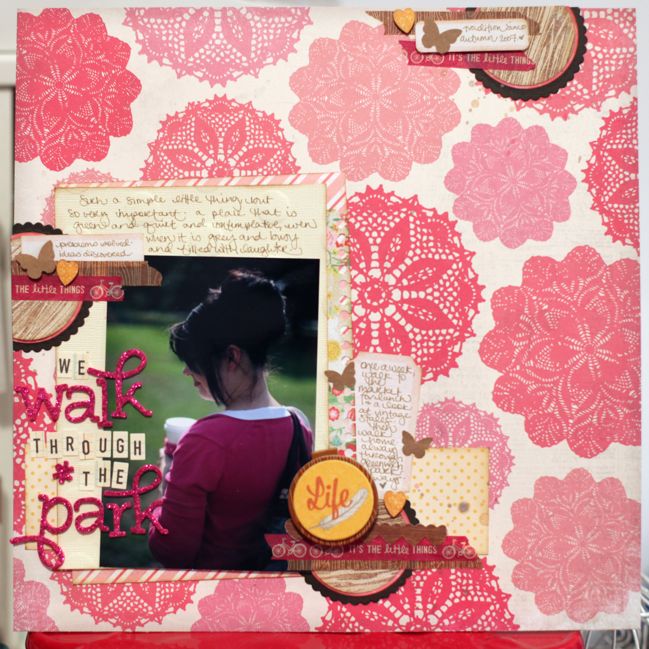
Doily paper is just amazing, right? I love it as a full sheet (like this) or cut into separate doilies to layer and embellish (like this). But I think it’s the title placement that is a bit of a surprise here. It’s not what I normally would expect from this starting point, which makes it seem like all that room on the right is just waiting for a title. But part of what makes layering details work is to keep things very close together, so with the photo facing that corner of the page, it created a little window of space just right for the title, meaning layers of embellishment can go to the right. And because the background is a pretty overwhelming pattern, lots of empty space doesn’t look empty at all.

scrapbook page detail
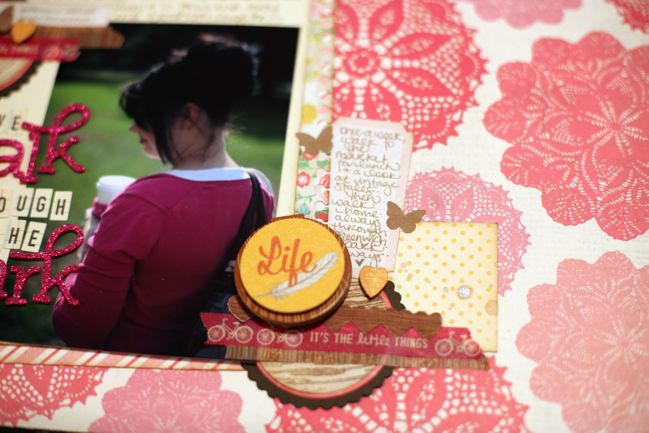
This idea of adding an extra colour quite near the end is something I do more often than I care to admit. It sometimes feels like a lack of planning when I’m working on a page – I was just going along thinking ‘pink and kraft and cream’ and it just wasn’t enough. There needed to be some sort of visual contrast without adding something that was going to take over the page. So I started with the embroidery hoop embellishment, then added the punched hearts and presto: the addition of an entirely unplanned colour, and it brightened the page and kept it from falling into a dreary bit labelled ‘lack of tonal variety’. Don’t be afraid to add something entirely different when you feel a page is almost – but not quite – finished.

This week Glitter Girl challenges you to make a page with ‘stuff’ too. You can add more to a layout in your album that didn’t make you happy or you can start from scratch. Create something to share with the Two Peas community and in your project description, tell us about how you found inspiration there. Be sure to click the challenge box when you upload a picture to the gallery. You can also leave a link here in the comments to share what you have made!

Onward, covered in glitter, my dear scrapbookers!
adventures of glitter girl

The Adventures of Glitter Girl is a weekly series on Two Peas in a Bucket, and goes live every Wednesday. I’ll share each adventure here shortly after that. I hope you enjoy her quests for crafting happiness, and if you ever have a scrapbooking dilemma yourself, you can always call her to action on the message board.