Glitter Girl and the tricky transparency (scrapbooking video)

 Class content ©twopeasinabucket.com.
This week Glitter Girl tackles the Tricky Transparency, after a member of the Two Peas community posted that she was flustered with what to do with all these clear supplies she had collected.
The basic trick with transparencies comes in how to write or stamp on them and how to attach them – but once you catch those tricks, you are good to go! For writing, you’ll need a permanent pen that can write on that surface, like an American Crafts Slick Writer or a Sharpie. For stamping, Staz-On ink is your friend for working with the acetate material – and have the cleaner on hand, as if you slip while stamping on the transparency, you can remove the Staz-On and try again once the transparency is dry.
As for attaching, you need something that won’t show through – so you can use your regular adhesive only if you’re going to cover it up with another layer on top. But other options will hold it in place without that worry: staples, brads, stitches, paperclips and washi tape are all easy answers. Or use it with pockets, like a 4×6 transparency over a photo or index card in a divided page protector… or possibly on the 12×12 scale too, as Glitter Girl discovered this week.
And if you pop over to this adventure at Two Peas, you can scroll down to see all sorts of transparent products for your stash, including some special offers like discounts on Hambly overlays and more. (And check the new stuff while you’re there – BasicGrey, Lawn Fawn, Hero Arts, Jenni Bowlin Studio and October Afternoon are among the new things this week!)

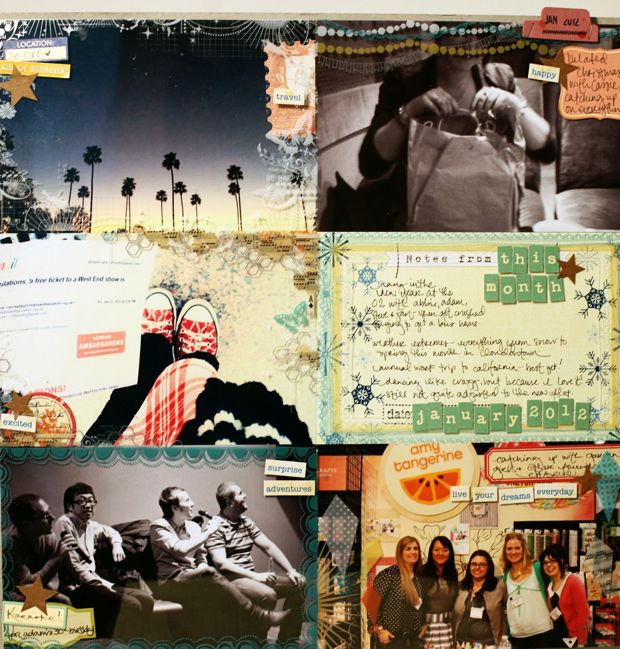
This 12×12 transparency sheet can be cut into separate frames for six different pages, of course, but I liked the idea of giving it a try as a 12×12 sheet and making it act a bit like a divided page protector. This is my January-in-Review layout for 2012, with five photos plucked from my library and an Elle’s Studio index card to write a bit more about what isn’t in the pictures. (By the way, I’m loving the happy accident of the photo at the middle-left. I had an email to say I could go stand in a queue at a certain place and certain time and perhaps have a free ticket to see a play that night – but I wouldn’t know what it would be or what my chances were. But I could make it, so I queued up and snapped that picture with my phone while I was waiting. I was early enough in the queue to get a ticket, and I drew a free ticket to Legally Blonde the Musical, so definitely an interesting day all told!

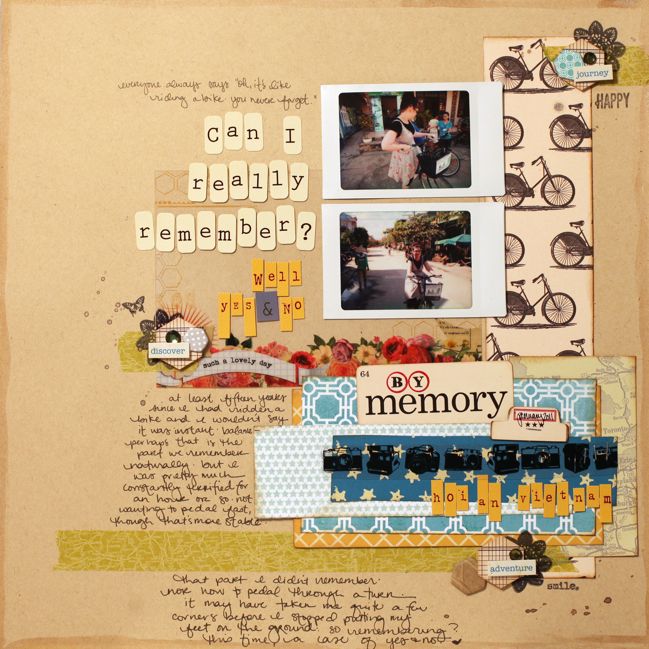
This version is a bit more like the majority of my pages, but includes two transparency elements: one 4×6 frame and a strip from a 12×12 Hambly overlay. But the 4×6 frame can still work as a separate element rather than over the obvious 4×6 photo. In this case, I had two Instax shots, so it was never going to work as a frame for those, but I loved how the design looked on kraft cardstock so just went from there. In my album, this page is opposite the only other bicycle picture we snapped, which I printed at the full page width, and I love how the two extremes work together across the double page. In supplies, the only thing they have in common is the kraft cardstock and the small doily stamp.
This week Glitter Girl challenges you to use a transparency in your work and share it! If you would like to share a link in the comments here too, that would be fabulous!
Onward, covered in glitter, my dear scrapbookers!
The Adventures of Glitter Girl is a weekly series on Two Peas in a Bucket, and goes live every Wednesday. I’ll share each adventure here shortly after that. I hope you enjoy her quests for crafting happiness, and if you ever have a scrapbooking dilemma yourself, you can always call her to action on the message board. She’s currently looking for a topic for next week. What should it be?
![]() Read more about: adventures-of-glitter-girl two-peas-in-a-bucket
Read more about: adventures-of-glitter-girl two-peas-in-a-bucket
Next post: 10 Things :: March 2012
Previous post: A scrapbooking update: classes and other good stuff!


