pretty paper. true stories. {and scrapbooking classes with cupcakes.}

lovely to meet you Twitter Facebook Pinterest YouTube

Take a Scrapbooking Class

online scrapbooking classes

Shop Shimelle Products

scrapbook.com simon says stamp shimelle scrapbooking products @ amazon.com shimelle scrapbooking products @ amazon.co.uk

Reading Material

travel

Creating for happiness

handmade cards

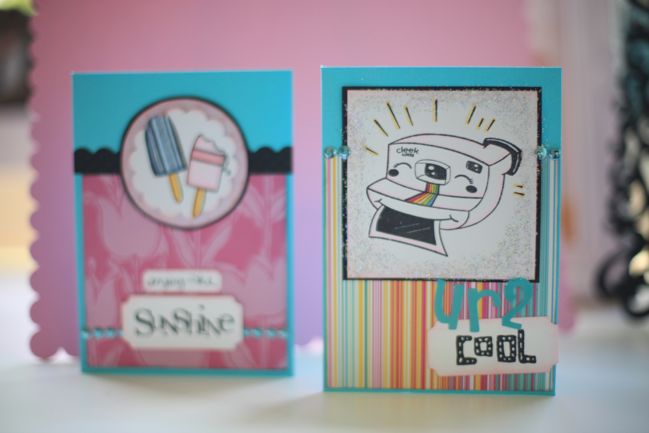
Cards for Kids is such a good cause for creativity, and it’s so easy to get involved. Make a card (or several) and send it in, and it will be delivered to someone who needs a bit of sunshine in their day. Cards for Kids is currently sending paper joy to thirteen seriously ill youngsters and their families, including brothers and sisters too young to understand situations that involve so many doctors and hospital visits and challenges that we all wish no one ever, ever had to face.

handmade cards

And as scrapbookers, I just know we all have extra bits of paper waiting for a purpose. And stamps and stickers that aren’t getting used. Even some extra glitter, perhaps. Adding some sparkle to the day for any of these kids and their parents would be such a perfect way to put those supplies to use. Cards for Kids even has several generous sponsors that give prizes to randomly selected cards sent in, just as a bit of happy karma for spreading sunshine.

Whether you send a card to Cards for Kids, to someone you know personally, or just leave one at your local hospital or doctor’s office, please remember that handmade and handwritten thoughts really can make a difference for someone else. If making stuff makes you happy, this is just an entirely win-win ordeal.

Find all the details for Cards for Kids here, including names and the address where you can send your cards.

If anyone knows of a similar effort here in the UK, could you let me know? Thanks!

Think happy thoughts today! Why not, right?

xlovesx

Stamping, resist and old-school templates

scrapbook page with stamped title

For the third tutorial video in the Stamped Titles for Scrapbook Pages series, I dusted off a lettering template that is probably ten years old to cut these letters. But don’t worry — you can use a die-cutter if you prefer to stay up to date. I did find it quite therapeutic to return to what used to be a technique I used on every single page but with an updated twist. I used to spend hours cutting letters from paper to create titles on my pages.

You can find the stamp details here on the Banana Frog blog!

On another note, are you ready to party? All this weekend — the 13th, 14th and 15th of August — we’ll be hosting the second-ever shimelle.com online crop, right here on the blog! Challenges, prizes and goodies galore! I do hope you’ll stop by whenever you are free! Consider yourself invited to the party! I can’t wait!

xlovesx

Loving the retro scrapbook supplies

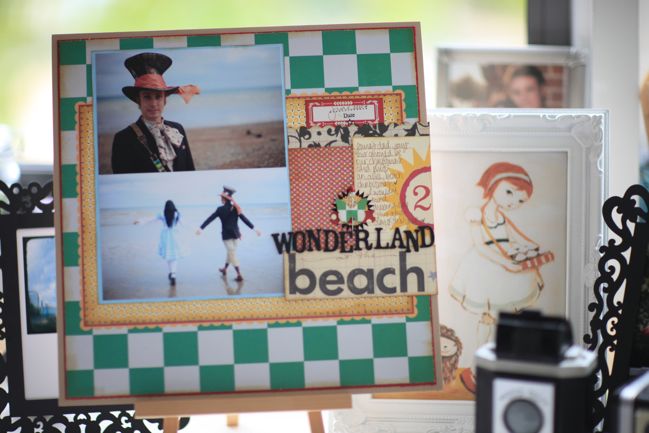
scrapbook page Supplies: Green check and yellow floral patterned papers, journaling card, mini papers and stick pins all by Jenni Bowlin. Thickers letters and brown pen by American Crafts.

We went to see The A-Team this weekend — and it wasn’t because we thought it would be amazing, critically-acclaimed cinema. It was for the retro fun of it all! We both watched The A-Team as kids and it wasn’t exactly critically-acclaimed then, but it was fun to see the old characters come to life again, with a bigger budget and even a plotline that wasn’t that far removed from some of the most politically-charged films of the last few years. But it was the return to something old that made it entertaining, most definitely.

older scrapbooking papers

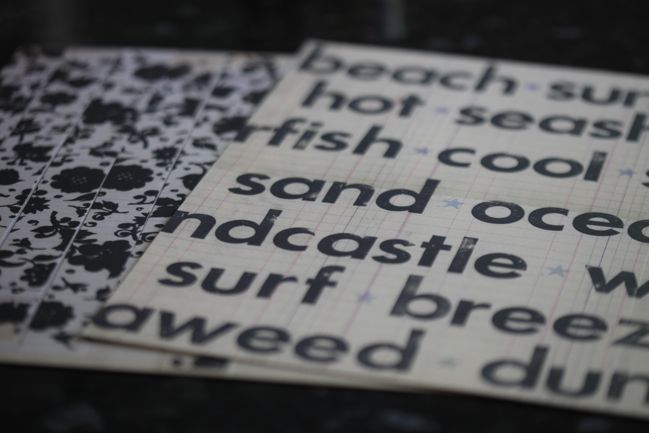
I’m in the middle of a huge clear-out of my crafting supplies, and one of fun parts of such a job is going through a big stack of papers and sorting them into piles of yes, no and maybe. And these two showed up in that stack of older papers — does anyone else still have these in their collection? They were designed by Jenni Bowlin as a collection for Lil Davis Designs — before Jenni had launched her own company. But oh goodness I had to put them in the yes pile because they are still so pretty and timeless. That’s my favourite thing about her designs.

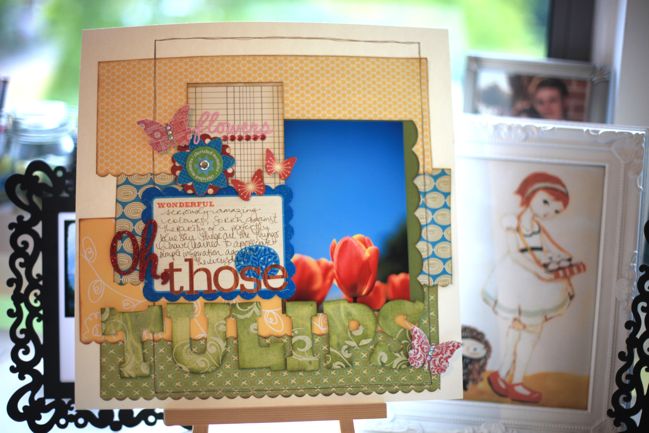
scrapbook page Supplies: Die-cut and patterned paper, stick pin, butterfly and bingo card all by Jenni Bowlin. Glitter letters by American Crafts, mini letters by My Little Shoebox and border punch by EK Success.

I love that about my favourite KI Memories collections too — the baby blue paper on this page is from 2004 and I’ve used it so many times even though I only bought one sheet. It’s so perfect to add just a touch of a certain colour here or there, so I keep this one and what’s left of the other colours in that collection in a folder together as a go-to spot for basic colours with just a bit of pattern. Perfect!

What are your favourite older supplies? I’d love to know what you make sure to keep around years after it has passed the latest and greatest status!


On another note, I’m working on a project that will highlight several small businesses that are both online and feature handmade items. Does this describe you or someone you know? If you have an online shop selling handmade items of any kind and would like to be considered for some extra promotion, please send me an email (shimelle at gmail dot com) with a link to your shop and a summary of what you make and sell. Thanks so much!

And before you go, how about a winner of the last giveaway! Here’s the winning comment:

Sinead Says:
4 August 2010, 12:00
Hi Shimelle,
The secret phrase is Circus Stories:)
Love the video, have never tried heat embossing before but am really tempted to invest in all the stuff now! Your layout looks great. Thanks! x

Sinead, send me an email (shimelle at gmail dot com) with your address so I can get your prize pack in the post! And thank you to everyone who entered!

Have a beautifully crafty week, won’t you?

xlovesx

TTV Photography for Scrapbookers

TTV photography tutorial for scrapbooking
No matter how much I fall in love with new technologies and improvements in digital photography, my nostalgic heart loves imperfect imagery just as much. Give me photos with colour casts, grain, hot spots and scratches and all I see is character rather than mistakes. I love having a selection of pictures in my scrapbooks, from the crystal clear images I can get from my digital camera to film photos from vintage cameras. TTV photography puts both to use by using your digital camera to capture an image through the viewfinder of a vintage camera, complete with scratches and distortion. Admittedly, it may not be a look that everyone loves, but if you fancy something that looks a bit like the older photos in your collection, this can be such a fun technique to try.
TTV photography tutorial for scrapbookers
What is TTV?
TTV stands for Through the Viewfinder, because the basic idea is to capture an image of just what you see through the viewfinder of another camera. The viewfinders on modern cameras are quite tiny, but they were considerably bigger on older cameras that weren’t designed to be held right up to your eye. Twin Lens Reflex cameras typically have a large viewfinder on the top of the camera, that you can see even when the camera is held at arm’s length.

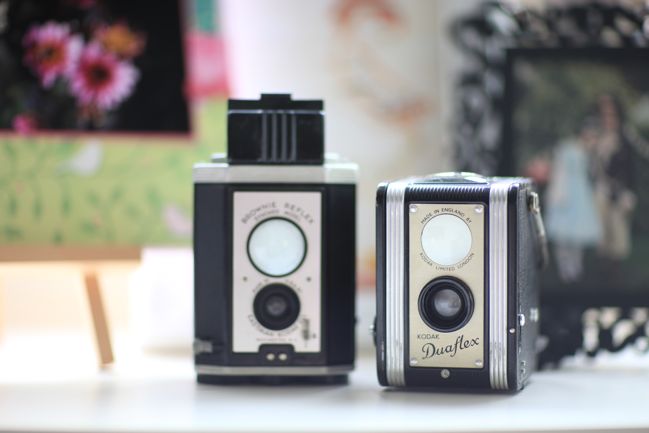
A variety of Twin Lens Reflex (TLR) cameras are available today — some are such collector’s items that they are far too pricey to try on just a whim, but others are widely available on Ebay, on market stalls and at boot sales (garage sales for those of you on the other side of the Atlantic). You’ll find a variety at both ends of the price scale on Etsy to give you an idea of all the types available. There are also brand new versions of these cameras, such as the Blackbird Fly from Japan. I use a Kodak Duaflex that I found for less than a fiver from the camera stall at nearby Greenwich Market.

If you find a Twin Lens Reflex camera in good condition, you can actually still use it with film. Most of them take medium format 120 film (some take 127), which you can buy at a camera shop and you can have developed at most photo processors — just know that they will likely send it away to be processed rather than developing it in the same way that they do 35mm on the hour. Most developers take a week to ten days to process it, including the time for sending it to and from the shop. Just something to keep in mind if you are curious about the film option when looking for a vintage TLR camera – but definitely not required for TTV photography. You don’t even need it to be in working order as long as you can see an image in the viewfinder!
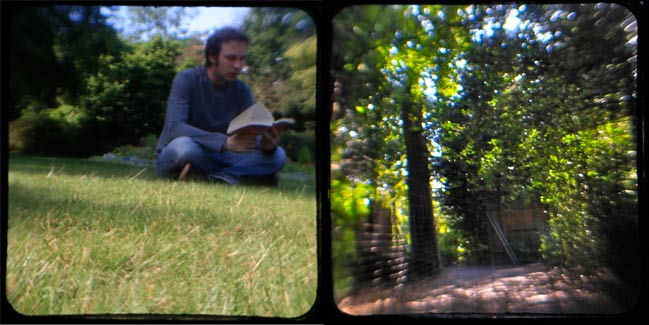
examples of TTV photography
How to take TTV images
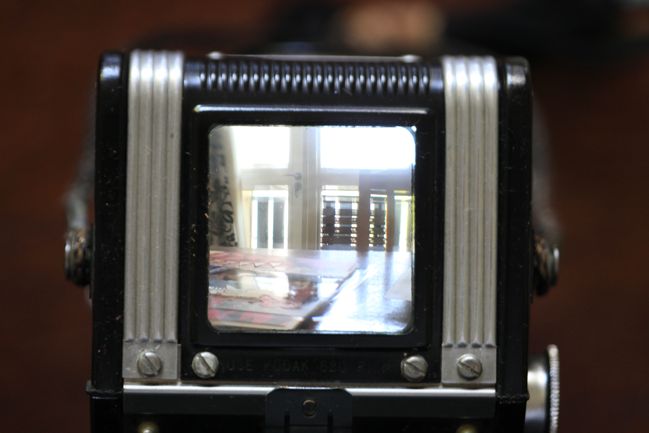
The basic premise of TTV photography is simple: use a vintage camera to compose your shot, then use your digital camera to photograph the actual viewfinder of the older camera. That can be as simple as setting the vintage camera on the table, then holding your digital camera as you would normally and focusing on the top of the vintage camera. The resulting image would look something like this:
TTV tutorial for scrapbookers

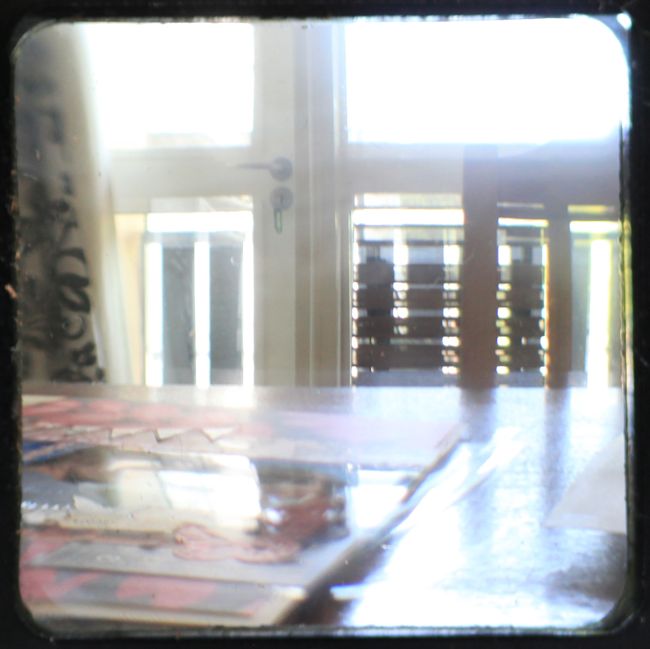
Once you have loaded this image onto your computer, you can crop it into a square to eliminate the rest of the camera and the table. (It’s okay if your image wasn’t perfectly straight, as you can straighten it at this point too.) That brings us to a picture like this:
TTV photography tutorial for scrapbookers

But we can make improvements on this by controlling the light a bit more. Right now, the image is filled with light because the same light source is coming into the picture twice – once into the TLR camera to make the image appear in the viewfinder, but then again into the lens of my digital camera because there is plenty of light available in the room between where I’m holding the camera and where I’m focusing. Eliminating that light will create a more accurate image. And everything you need can be found in your scrapbooking stash: black cardstock and adhesive! Roll the cardstock into a tube that will fit around the lens of your digital camera, making sure the other end of the tube will fit around the top of your vintage camera. There’s no exact science to this — it’s just a case of rolling the cardstock until it fits your set up, then taping it in place when you get a good fit. You can attach it to either camera – whichever you prefer – with a rubber band and then the cardstock tube will stay in place for as long as you want to take pictures but it won’t be any trouble to remove either.
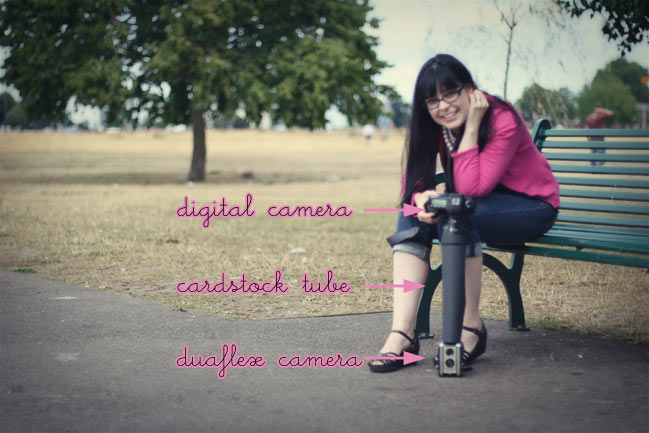
TTV photography tutorial for scrapbooking
You can do this with any digital camera, including a point and shoot. If your point and shoot has a macro or flower mode, that may give you the best focus on the viewfinder. If you are using a DSLR and have a range of lenses to choose from, you’ll want to choose something that will give you the best macro focus while also having a distance range that makes it easy enough to focus on the the older camera — you don’t want something that requires you be several feet away from the camera, because the further away you have to be, the longer you’ll need to make that black cardstock tube! I use the Canon EF 100mm f/2.8 Macro USM Lens but please don’t feel that you have to have that lens to try this technique. Use whatever camera or lens you have available and adjust your cardstock tube to be shorter or longer as needed.

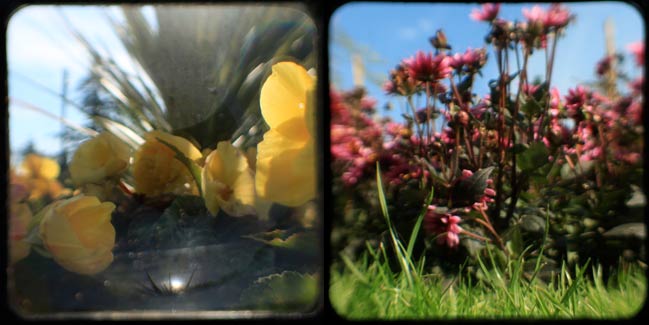
Adding the black tube to your set up will prevent excess light and also eliminate any reflections that appear on the glass of the viewfinder. This is especially useful when taking photos outside with overhead sun. You can see the difference in these two images taken in the same conditions but with and without the black cardstock tube.
TTV photography tutorial for scrapbooking
The image on the left was taken without the tube, so you can see reflections, glare and a great deal of light on the picture. The image on the right was taken with the black cardstock tube, eliminating the reflections and allowing for much brighter colours to appear.

All you need to do in post-processing is possibly straighten the image if it’s not perfect and then crop it into a square. You can do that with pretty much any basic photo software. I do that in iPhoto, and it’s also possible in Picasa, online with Picnik or with Photoshop/Photoshop Elements too of course.
TTV photography tutorial for scrapbooking
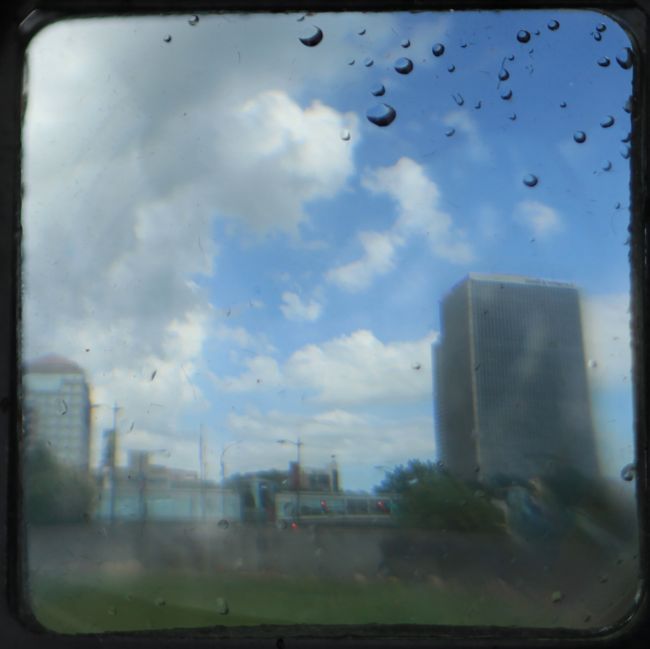
You can also try getting a little creative by adding a little something right on top of the viewfinder. I got a bit too close to a fountain and the end result of these water droplets on the glass is quite cool! Of course I’m a little fond of sprinkling some glitter on the viewfinder for something festive!

By the way, you can also take some interesting images with the black tube and your digital camera without the vintage camera. That’s how I captured this picture (see it on a scrapbook page here) and it’s something I fancy trying a bit more for the unique look.

How to fake TTV images
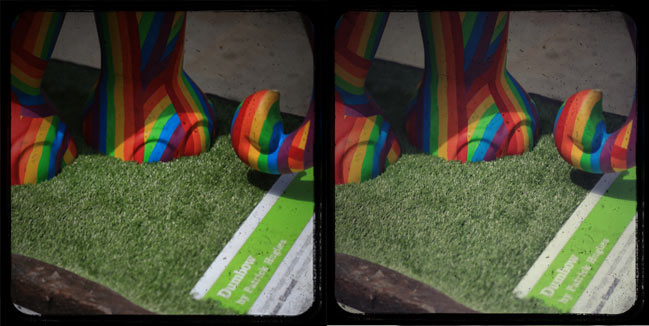
If you like the look of TTV but the DIY aspect just doesn’t sound fun for you, you can fake the look of a TTV image by taking any digital photo and adding an overlay with the square black frame and scratches. You can find some of these made specifically for scrapbookers, like these toy camera frames by Tia Bennett, and you can also find a selection of frames on Flickr, where photographers have taken a picture of something neutral to leave you with just the black frame, which you can copy and paste over another image.
TTV photography tutorial for scrapbookers

For these pictures, I pasted this frame by Flickr member Toke Nygaard over a digital photo. On the left, I kept the original colour from the digital picture, while I added a filter layer on the right to soften the image a bit for a more vintage feel. For both, I pasted the frame over the image in Photoshop, then set the frame layer to multiply mode so the photo would show through the frame.

Faking TTV images by pasting a frame is easy but it is limited to just adding the frame and scratches — it won’t skew the focus of your image like you get by using an actual vintage camera. It’s just a choice of how much degradation you want to your image.
scrapbooking projects with TTV photos
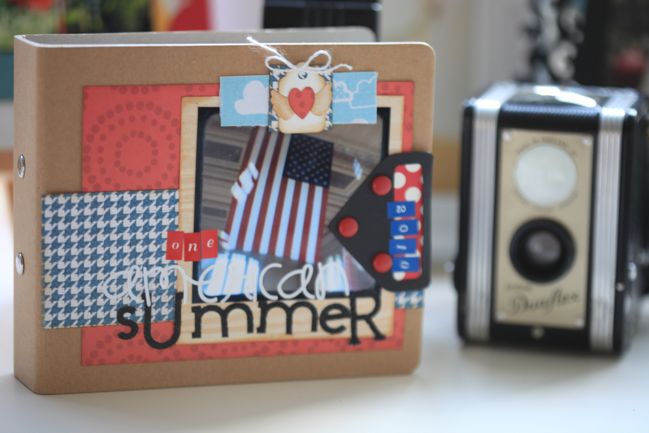
Scrapbooking and papercrafting with TTV images
Printing TTV images follows the same process we covered for printing Hipstamatic photos as it’s just a case of printing square images. You can achieve that on your home printer or with an online printer, so just pick whichever you prefer.
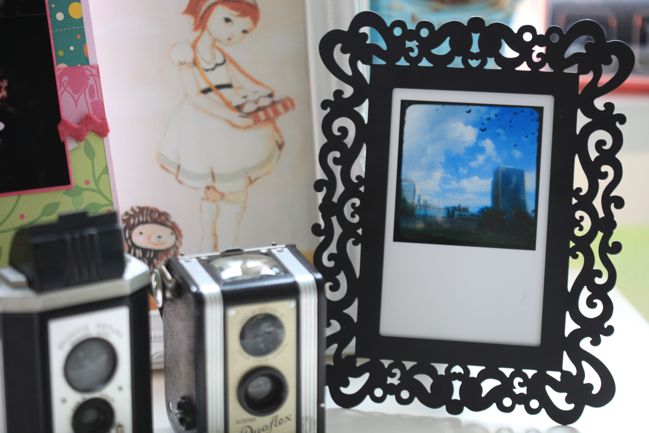
scrapbooking projects with TTV photos
Unlike your Hipstamatic images, you can print these at any size that would be appropriate to your digital camera, so if you could normally print your digital images at 8×10 or larger, you can do that with your TTV photos too. They are great for framing and popping on the wall — see examples here and here.

Last year, I printed one photo with a TTV frame at 8×8 for each day of my Christmas Journal. For each day of the holidays, my album had one 8×8 scrapbook page with an 8×8 photo print opposite and I loved the mix. I printed the first few at home until I knew I was happy with the settings and such, then I saved up the rest of the images in a folder and printed them all at once just after Christmas so I could save money by printing them online. (Especially since I could take advantage of the after-Christmas sales! Bonus.)
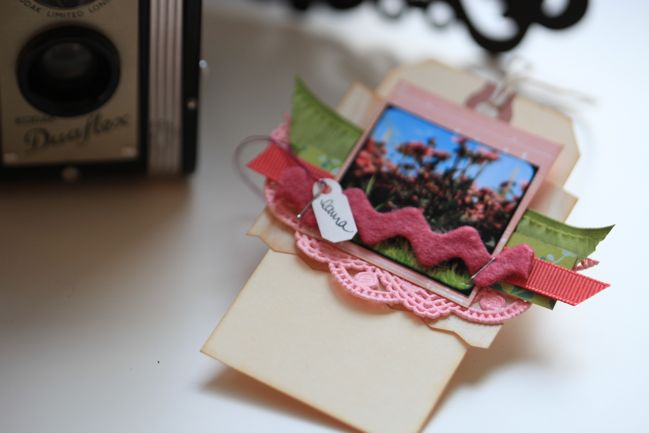
scrapbooking projects with TTV photos
They can also be printed at teeny-tiny sizes perfect for adding to cards and gift tags. These will definitely be making an appearance on my holiday wrapping later this year, but it is far too early to be talking so much about Christmas, I do believe! Until then, it’s a great way to personalise your gifts and cards by using a TTV image of something the recipient loves or even an image of the actual person. They also make great place cards for a party.
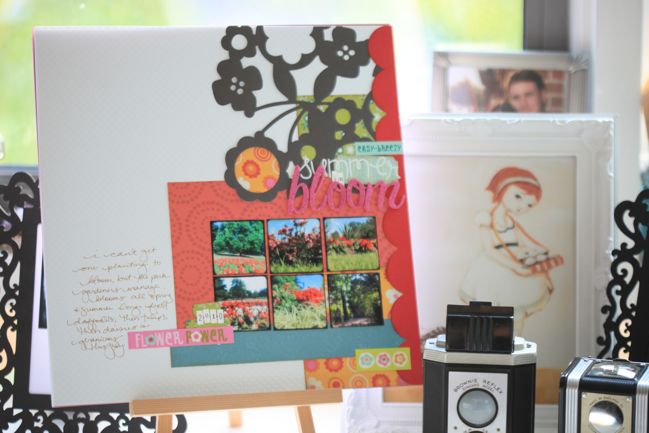
scrapbook pages with TTV photos
Of course, squares make grid-based scrapbook pages a flash, so that’s a natural design choice for scrapbooking a group of TTV images. While many of the TTV photos I’ve taken this summer are of flowers, there’s no reason why you couldn’t use TTV photography with things that are a bit more traditional scrapbook material. I think it would add a beautiful twist on some summer photo opportunities with children, like blowing bubbles in the garden or visiting a local fair or carnival.

If you give TTV photography a try, be sure to link up your images in the comments here — I’d love to see what you’ve been snapping with any old camera you find!

xlovesx
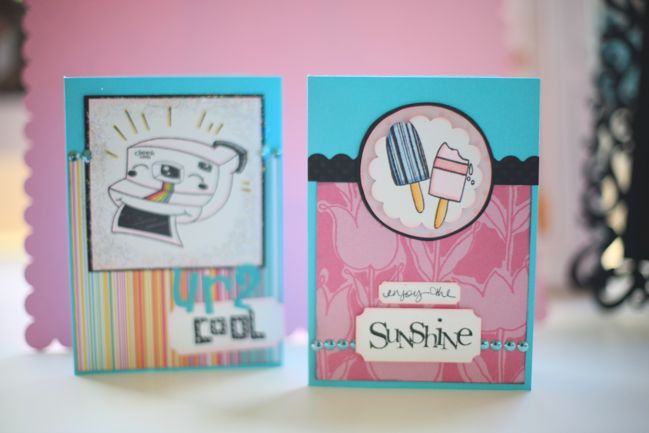
Stamped titles for scrapbook pages :: heat embossing

scrapbook page with stamped title

The second video in the stamped titles series has been long overdue (and in fact has been sitting here on my computer waiting for me to get with the program!) so we’ll skip the drumroll! Here it is — a five minute guide to heat embossing a title for your scrapbook page.

If you’ve already heat embossed, then you’re an old pro at this, but I often meet scrappers who haven’t tried it, so I wanted to make sure we included this core technique early in the series. In future editions we’ll be building on heat embossing with other techniques like resist and adding other products too. If you’ve never heat embossed before, it is super easy so you’ll be an embossing superstar in no time.

So have a watch of this… but also, don’t miss the giveaway at the bottom of this post!

Giveaway time! If you go to this post on the Banana Frog blog you will find details of a mystery phrase. (It will only take you a couple seconds to find it, I promise!) Go find the mystery phrase and come back here and leave the mystery phrase in a comment on this post. (You can say other things in your comment too, of course! Saying hello is always lovely!)

You have until the end of this Sunday to find the mystery phrase and leave it in a comment on this post. I’ll pick one poster at random to win a fab prize pack of Banana Frog stamps and some handmade stamped goodness from me too.

Good luck!

xlovesx

A scrapbook page and a song

scrapbook page ©twopeasinabucket.com

It was a little over a week ago when I was trying to see if I could remember how to scrapbook, and that layout is live now over at Two Peas. I love how these supplies wouldn’t necessarily shout vintage individually, but together they have the mood of a lovely summer’s day… maybe many years ago.

As I type this, I’ve just heard a beautiful acoustic version of Rainbow Connection come on someone’s radio, and I love that song so very much that I felt the need to share.

What song would make you delightfully happy to just hear by accident?

xlovesx

And the ten winners are...

Here are the ten randomly chosen commenters who will win one of the prizes from the giveaway.

Dee Cummins Says:
24 July 2010, 04:59
One of my favorite pages is for the birth of my granddaughter. The biggest picture is of her and her mom seeing each other for the first time. Smaller pictures are of my son holding her up for us to see and of her getting weighed and measured in the nursery. The last picture is her asleep in that little striped hospital cap. What a lovely day to capture! Also, I finally get to use pink flowers after having three sons!!!
Congrats Shimelle! I love your classes.

Stef Says:
23 July 2010, 17:36
Congratulations on your well-deserved nomination – what an honor! One of my favorite layouts is an older one I did of my first daughter with her first pigtails – she was younger then than my third daughter is now, but I remember thinking how big she was. And she’s laying on my dog that has since passed away, so it brings an extra smile to my face to look at it.

Manda Says:
24 July 2010, 00:41
Congrats to you!! A page I recently scrapped included my whole family, husband and two kiddos…summer time fun!

Kimber-Leigh Says:
23 July 2010, 14:53
i recently finished a page that has a very special picture on it…sometimes i am so hesitant to scrap those pictures since i want the layout to be just as perfect and special. i was very pleased with how this one turned out :) thanks for the chance to win…and congrats for the well-deserved honor!

Karen S Says:
23 July 2010, 15:36
Congrats! Recently I made a page with no photos. It is titled “No, Thank you!” and has a place for all of us in this family to write down the things in life we’d rather do without. I decorated with a cute grasshopper because my husband is not a fan of them. At all. :)

Dora Says:
23 July 2010, 22:18
Hiya! Looking forward to LSNED in September – my very first online class ever! The last layout I made, on Tuesday, was of my kids at the state fair last year. There were some shots of my son, then 14 months old, climbing the animal pens to try to get closer that we thought were pretty funny! Since the fair comes up again in a few weeks, I thought it would get me in the mood. HERE are the photos – I don’t have my camera here to photograph the pages I made. My husband was recently sent to the US Gulf Coast with the Coast Guard to work on the oil spill clean up, so we (my 3 babies and I) moved in with Mom until he returns. I don’t have my regular set up here, so I am just trying to make do! Congrats on your prize – you have a unique voice and style. Keep up the good work! Dora :)

Antoinette Says:
23 July 2010, 20:12
Hey there, I am a student in your current “LYP” class and absolutely adore it :-) Congrats and wishing you many more successful years influencing us!
The most recent page I made was with journaling spots for my husband to list his Top 5 fav songs he’s been listening to this year :-) What a fun way to get him involved don’t you think?

carol in seattle :) Says:
23 July 2010, 18:10
So nice to “meet” you Shimelle. I’ve been hearing about you for a long time, but never really explored your site. I can’t wait to find out more about you!
One of my favorite pages is this It’s one of the first pages I did when I started scrapping. And I still love it!

Kristin O. Says:
23 July 2010, 17:06
Yahoo for you!!
My favorite page is one I did recently but the photo is years old. It is a photo of my two big boys as very little boys reading a Spiderman book together. Just thinking about those boys and that book makes me feel all mushy inside!!

Bonnie Says:
24 July 2010, 01:17
Congratulations !!! So well deserved Shimelle. I have loved taking your classes, they make us think, and that’s a good thing !!! My favourite page right now is that where I made a comparsion of my daughter and her Great-Grandma.

Congratulations!
If your name is above, please email me at shimelle@gmail.com and Ella Publishing will be in touch with your prize details! Thanks so much for entering, everybody! It was great to read about all the different pages you love!

Have a lovely Saturday!

xlovesx

Influential Scrapbookers Giveaway Day!

Influential Scrapbookers

An extra special welcome to everyone who stopping by today as part of the Ella Publishing blog tour. It’s such an honour to be named as one of their most influential scrapbookers, alongside such lovely ladies that lead this industry. Every day I am beyond thrilled that I can do something I absolutely love as a job, so it is even more fabulous to know there is a whole community of crafty types out there joining me every day. So before I go any further, thank you from the bottom of my heart. It is an absolute pleasure to know you (or meet you if this is your first visit)!

If you are new to shimelle.com, let me give you a quick exploration guide:

Start by watching this, which explains my reasons for scrapbooking. Over the years I have been happy to see the view of childless scrappers change from one of sheer disbelief to one of acceptance. Whether you have no children or several, you’ll find our reasons for scrapbooking really aren’t that different. But that video puts my perspective into words.

Then have a browse here to see all the classes on offer here at shimelle.com. Online classes are what I’m all about, and I’ve been teaching online since 2004. All of my classes include permanent access to the class materials and you can join at any time, so you can take things at your own pace and make them fit with your schedule. And for this weekend only, enter the code MISA and you can take 15% off any class purchase via the shopping cart. That includes the current class, Love your Pictures, Love your Pages. Again, this is via the shopping cart only — discounts will not apply if you sign up via an individual blog post.

online scrapbooking classes You must use the shopping cart to apply the discount code – it will not work on the individual paypal buttons. Thanks!

If you’re ready for something comical, start here for a look at my personal scrapbooking journey, right from the beginning. (It’s a series of posts and you can follow the next button at the bottom to keep reading.) Be warned: it contains paper dolls. For a more recent laugh, read this post about my partner-in-crime, The Boy, a long-suffering scrapbooking bystander who gives his views on this crazy hobby.

And one last post to check out here gives you all the details on ordering a copy of the idea book I recently edited, in case you fancy having something lovely to leaf through rather than just read on a computer screen.

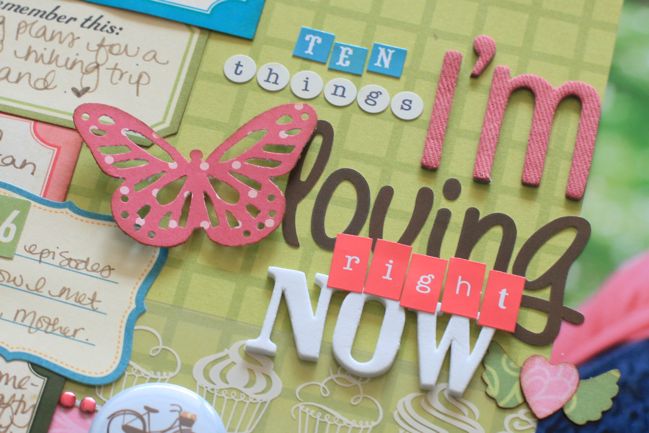
scrapbook page

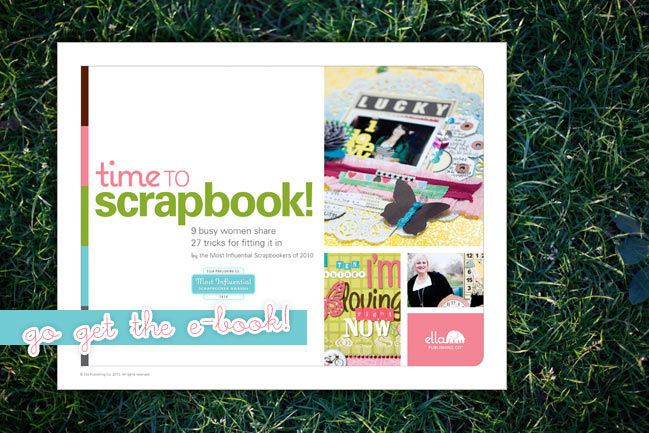
All of the MISA nominees have contributed to this new e-book from Ella called Time to Scrapbook. That’s a little sneak peek at the layout I contributed, plus you’ll find tons of ideas about how all of us make time for this craft that we love.

scrapbooking ebook

Now… how about some PRIZES?!
There are ten fabulous giveaways to win right here, on this post, for 24 hours only:
A $20 gift certificate from Ella Publishing Co.
Two digital-scrapbooking template packs (20 templates) from Cathy Zielske
A six-month Paperclipping membership from Noell Hyman
A “Play Date” product pack from Jenni Bowlin
A place in either a beginner photo-editing class or a beginner digital-scrapbooking class from Jessica Sprague
A spot in the “Beginner/Intermediate Online Photography Workshop” from Maggie Holmes
“Paper Girl” and “On Holiday” product packs from Margie Romney-Aslett
A $50 gift certificate toward any class on reneepearson.com from Renee Pearson
A place for you and a friend in both “Love Your Pictures, Love Your Pages” and “Journal Your Christmas” from Shimelle Laine
A place in either Elizabeth Dillow’s “Inspiration Defined” or Karen Grunberg’s “Book of Stories” from Stacy Julian

There will be ten winners – each will receive one of these prizes. To enter, leave a comment on this post and tell me about a scrapbook page you have made. It can be a page you love, a page that makes you laugh, a recent page or an older page — just tell me about a page. You can even link to it if you would like to share with everyone. You have 24 hours to comment and you must mention a page in your comment to enter, okay? (By the way, click the preview button first if your comment doesn’t seem to go through. Sometimes the preview button is all you need.)


Today the blog tour also visits Stacy Julian, who indeed was the other Influential Scrapbooker in the limousine a few years back! You’ll know her from Simple Scrapbooks and Big Picture Scrapbooking. She has a great philosophy for scrapbooking without stressing about whether things are exactly perfect and ready for an art gallery — throwing away your own inner critic and just enjoying the process of creative documentation. She also adores colour, which is always fabulous in my book. Visit her blog today for more chance to win!

Don’t forget: just 24 hours to enter and you need to tell me about a scrapbook page in your comment. Go!

xlovesx