Scrapbooking Sketch of the Week


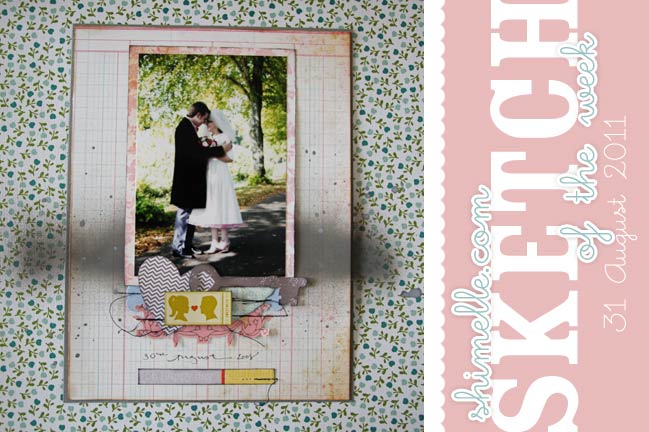
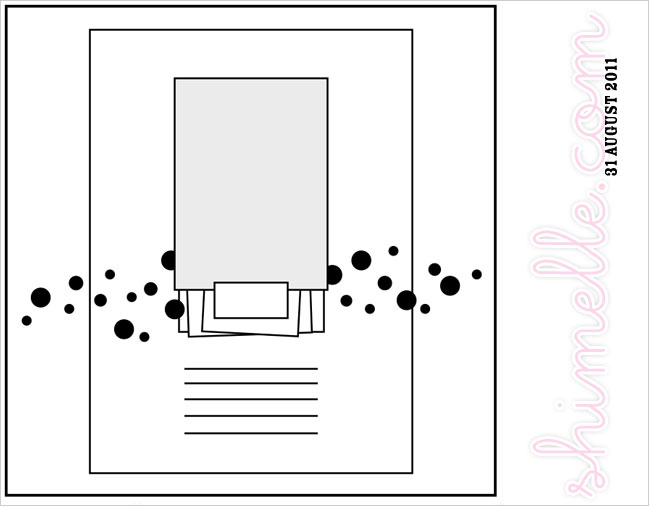
How about a wedding layout for this week’s sketch, since it’s wedding week and everything? But not to worry: you don’t have to create a wedding layout to follow the sketch. This week’s sketch is a way to give a special treatment to any 4×6 photo you might have.

There are some definite similarities between this week’s sketch and the last sketch. Don’t worry – they won’t all look like this from here on out! But I wanted to show two in this style in a row to illustrate how you can take one sketch and adapt it to work for you. I always find the feedback from different sketches interesting. A few people told me last week’s sketch wasn’t for them because it used too much paper on one layout and a few others said they didn’t like the idea of splashing paint over all those layers once they were in place in case it all went horribly wrong. I totally understand both of those comments, though neither of them worry me too much: there is a huge amount of paper in my scrap bin that should be used rather than just stored, so I don’t mind the extra paper on my pages. If I didn’t have a bunch of paper sitting there staring at me, then I’d most likely think differently about that! And as far as paint or ink messing things up at the end, I will assure you yes, this happens. I have plenty of layouts that just don’t work in the end the way I imagined them at the beginning. I either find a way to fix them (usually by adding more layers) or by salvaging what I can and starting over on a new layout. It’s not the end of the world. So I say err on the side of wild and brave and use your supplies and throw paint as you may.
But also, feel free to look at a sketch and reinterpret to make it work for you. That’s why these two sketches have similarities. Last week, my basket of scrap papers was making me think using a stack of paper would be a good idea. Then I looked at my bowl of die-cuts and had the same feeling, so I added a smaller stack of things to this week’s layout. Last week I added the paint midway through the layout, this time it’s pretty much right at the beginning. That way if it goes wrong, I can just add more paper over the top and no one needs to know anything ever happened. So that sketch became this week’s sketch and you can move things around again to make it work for you – add more photos, give it a title, turn things around. Replace paint splatters with punched shapes, replace a stack of embellishments with one bold motif. Hurrah for a craft that doesn’t rely on following an exact pattern – I love that we each make something unique.
Here’s a look at how this week’s page came together and notes on the supplies I used. Have a watch! (You can subscribe to all the videos here, by the way.)
As always, the weekly sketch is no-stress and just for fun! If you use it, I’d love to see, so please leave a link if you post your page online.

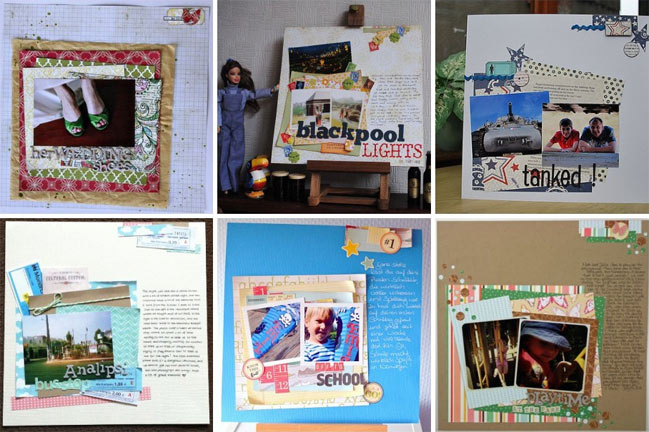
Though last week’s sketch was a different style than the usual, a bunch of scrappers gave it a try and I loved the results. These are six of my favourites.
Click the corresponding link to see any of these layouts in more detail and get to know the scrappers behind the pages.
Top Row, L to R: one, two, three
Bottom row, L to R: four, five and six.
In that last page, Deb replaced the splattered ink with confetti made with circle punches. I love the look it created and it’s something that could be useful for this week’s sketch too.
Now… are you up for some sketchy scrapping this week? What photo will you pick for a bit of special treatment? Give it a go and share it with us!
![]() Read more about: sketch-of-the-week
Read more about: sketch-of-the-week
Next post: Edwards Wedding photos
Previous post: Our romantic anniversary plans


