


Getting your album ready for Learn Something New
Getting ready for a month of Learning Something New

For an album with page protectors, you can start by cutting your paper to size – you’ll need a sheet for each day plus you will probably want a sheet to start and one to finish, so that’s thirty-two pages cut to size. 6×6 is a great album size for this project and allows you to get all that background paper from eight sheets of paper or cardstock.
Once you have your backgrounds cut to size, you can assemble a kit of everything else you want to use. None of them will need to be larger than your page size, so you might as well go ahead and cut any larger pieces to the size of your pages. Scraps and papers cut into small blocks will be much easier to use and make your entries come together quickly. So cut away until you have a variety of small pieces that you would be happy to use together. Grab a bag or a basket to hold all these pieces.
Make sure you have something in the mix that will be good for writing. That might be journaling cards or lighter coloured papers or it might be a bunch of strips of white or kraft cardstock. Just be sure you have a fair amount of paper in your basket that is suitable for writing.
Add everything else you’ll need to complete the project to your basket – pen, adhesive, scissors, any embellishments you might want like a stamp and ink pad or brads, punches or flowers – whatever works with your style. Pop everything in the basket so you have the whole project together and don’t need to look for anything on a daily basis.

If you’re working with page protectors, you can go ahead and put all the background pages into the book and even scatter the papers throughout the album… or you can just add each completed page as you go. Whichever is best for you!
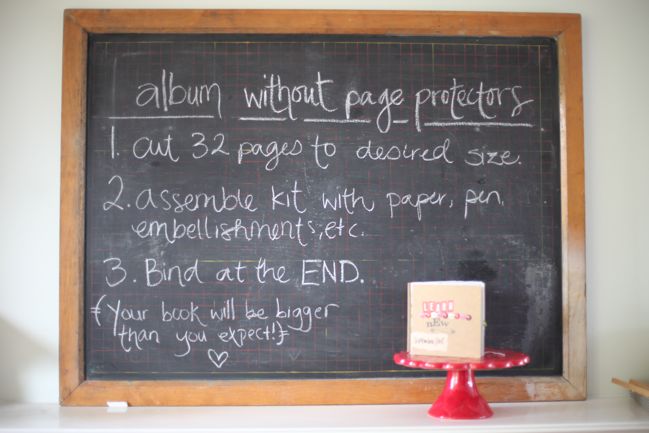
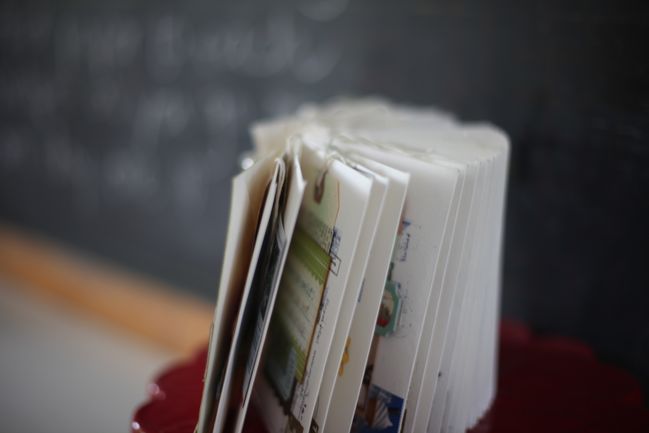
For an album without page protectors, the same stuff applies for cutting your pages to the desired size and gathering your supplies into a central location, but it’s the binding that is key here. If at all possible, plan to bind your book at the end of the project. I know that sounds somewhat unorthodox and even clumsy to have all these individual pages that won’t actually be held together until the end of the project, but the experience from many scrappers participating in this class tells me your finished album will be bigger than you expect. If you bind it at the start, it is very possible that your album will grow too big for the binding and leave you with a real conundrum before the month draws to a close. Binding at the end eliminates that problem.

If you do need to bind your album at the beginning, err on the side of as much room as possible and think about flatter embellishments to keep the thickness of the pages under control. It can work! And if your book outgrows its binding, that can work too – it can just be a bit of creative learning when you set about finding a solution. That’s not the end of the world!

For an envelope album, you’ll need an envelope for each day and possibly two more – one for the start and one for the end of the project. Punch two holes in all of the envelopes (in the same place) and hold them together with ribbon or two large book rings so there’s plenty of room.
With an envelope album, you’ll add each day’s writing to the envelope, so you can choose to add paper to each envelope at the beginning or you can keep your paper in one place and then add each completed entry to the envelop as you go. As far as the outside of the envelopes, you can attach a photo each day or embellish them. For this envelope album, I made a tag each day and attached it to the front of the envelope with the day’s lesson summarised in one sentence.

For a 4×6 sized book, you have plenty of options! This year, I’m using a 6×12 album but making my daily entries 4×6 in size. That’s one option for 4×6 entries, but you can also create a book that’s actually 4×6 in size or you can create 4×6 digital pages and print it either at home or as a photo book. 4×6 entries can fit into divided page protectors and then go right into a regular 12×12 album. So many options!
And that is why when class starts, you can download a printable 4×6 set. Just print the pages on your home printer on white cardstock, trim them to size and you can complete your album by writing straight onto the cards. To complete your album, print any corresponding photos at 4×6 and you have everything you need to make it into your own minibook!
Of course you don’t have to use paper and glue to participate in this project. You can write a blog post about your lesson from the day. You can write them in a diary or a notebook. You can call yourself and leave a voice mail each day. You can write it on a blackboard and take a photo of it. You can do whatever works for you. Making it work for you is the ultimate key.
One last reminder: you have to live the day before you can scrapbook it. That means you might be making your entries in the evenings or you might make them in the morning – but about the previous day. Don’t feel like you’re ‘behind’ by lunchtime on day one – you can’t be! If you can write one sentence somewhere – even if it’s just on a scrap of paper – then you are not ‘behind’. And even if you can’t, just keep going. Every day can be a fresh start.
Have an amazing September filled with the very best kind of learning.
Click here to access the forum.
(You will need your username and password to access the class materials and discussions.)
Click here to access this article as an easy-to-print PDF file.
![]() Read more about:
Read more about:
Next post: Learn Something New :: Printable 4x6 Cards
Previous post: 4x6 Photo Love :: August 2011


