pretty paper. true stories. {and scrapbooking classes with cupcakes.}

lovely to meet you Twitter Facebook Pinterest YouTube

Take a Scrapbooking Class

online scrapbooking classes

Shop Shimelle Products

scrapbook.com simon says stamp shimelle scrapbooking products @ amazon.com shimelle scrapbooking products @ amazon.co.uk

Reading Material

travel

Scrapbook Starting Points Category

Scrapbook starting points :: This Place is Magical To Me

scrapbooking starting points
scrapbook starting points :: this place is magical to me
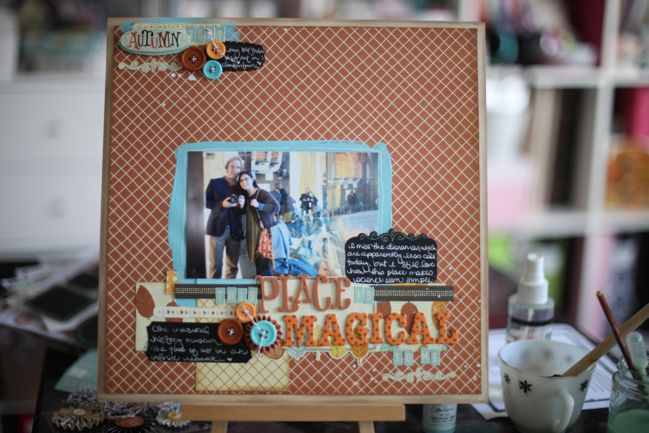
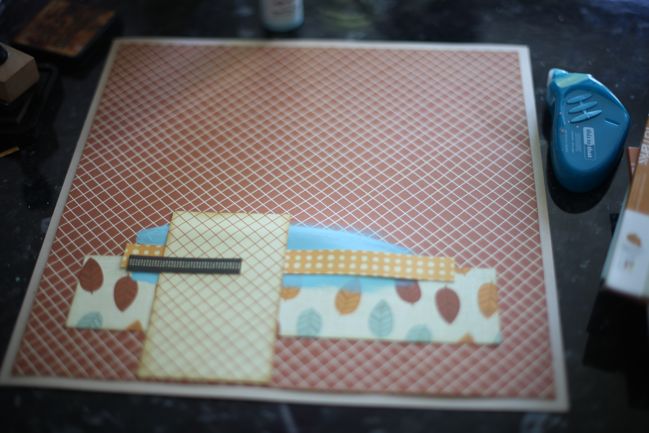
From this starting point to this final page. I stayed with even more from Nightfall (including those blackboard label stickers that are just beyond cool) and added a bit more of the blue paint. It’s Speckled Egg, which is one of the new colours in the Jenni Bowlin collection of paints and inks for Ranger. (It hasn’t arrived at Two Peas yet but I would think it would be there soon.)

I’m not sure why this photo really said autumn to me since it was taken indoors, but it was an autumn day and we’re wearing what is very much our autumn uniform, so perhaps that is it. I’m not sure if you can make it out from the photo so small, but this silly self-portrait is in a hall of mirrors so it’s a bit like we’re on repeat ad infinitum! A big group of school kids had just stepped out and for about thirty seconds we were the only people in the mirror so we grabbed a shot quickly before the next group came in the door.
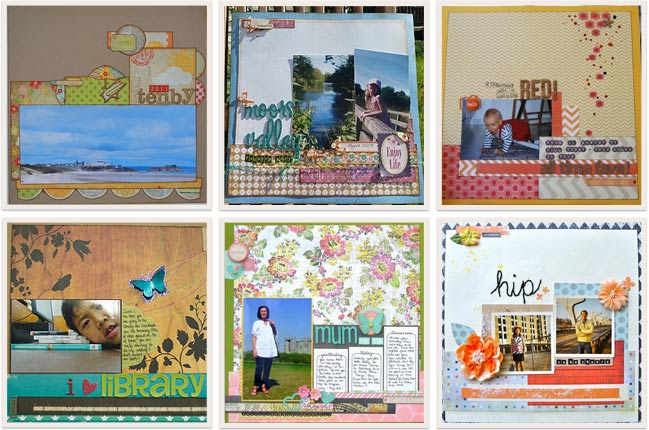
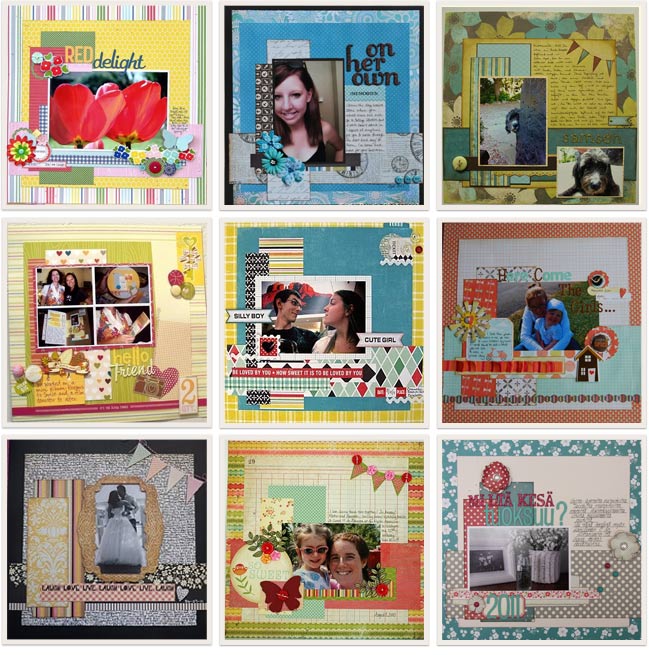
scrapbook page ideas Top row, L to R: one, two and three. Bottom row, L to R: four, five and six. Click the corresponding link to see the page in more detail.

Thirty-five pages posted so far for last week’s starting point and they are all so very different! Anywhere from one to four photographs, some have lots of writing and others just a little. These six are just a few of my favourites. See all the pages here.

Find more Scrapbook Starting Points here or follow the board on Pinterest here.

Happy scrapping!
xlovesx

Scrapbooking Starting Point

scrapbooking starting points
scrapbooking starting point
Happy Saturday! Here’s a new starting point for a scrapbook page. I threw in a layer of paint this week, but obviously you can leave that out if you prefer. But if you have plenty of paint and you’re not using it, consider this a kick to give it a try!

This week I’ve started my page with the Nightfall collection and I’m thinking of something autumnal, despite the sudden burst of summer weather we’ve had in London this week. (Definitely not complaining – it has been lovely to leave my jacket on the coat rack for a few more days!) What colours and themes are speaking you you lately?

You can definitely put your scraps to use, and perhaps show off one full sheet of patterned paper you particularly like. If you like to follow measurements, this starting point uses papers cut to 11.5×11.5, 2.5×9.5, 3×5, .5×8.5, .25×3 (all in inches). Or you can estimate and use what seems to work.

I’m curious to see if you add lots of photos to the empty space of focus on one or two photos right in the middle of the page. If you create a page this week, please link it up below and share it with everyone!

Tomorrow I’ll be back with my finished page from this Starting Point plus some favourites from last week’s challenge. There is still time today to add your layout there.

Have a beautiful weekend! Oh, and don’t miss this weekend’s giveaway either!


Scrapbook Starting Points is a weekly challenge. Click here for more Starting Points inspiration.

Scrapbook starting points :: Hello from Hobart

scrapbooking starting points
scrapbook page
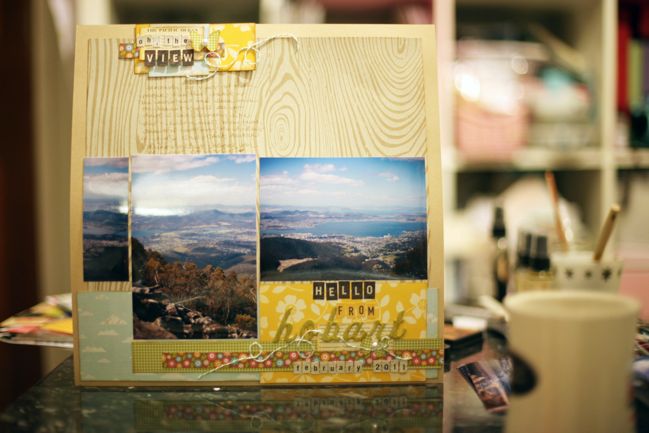
I have to say I surprised myself with this page. In my head, this starting point would have ended in one of three options:
…a large photo covering most of the top of the page with title, writing and embellishment all in the bottom border of the page.
…a group of small photos in the bottom right corner and extended writing across most of the page.
…two 4×6 photos facing the same way, close to the title in the bottom right.

Instead, there are three photos here – all started at 4×6 but only one is still that size now. One is cropped a little, the other a great deal. It just happened that when I flipped through these photos on the table I found they almost-but-not-quite lined up, and it seemed like it might work. I’m really not a big fan of mixing portrait and landscape images, so it’s something a little different for me. (I don’t have any real reason to dislike the mix – some scrappers make them look fabulous, but they just tend to give me headaches when I’m trying to balance elements!)

So now I’m extra curious as to how you’ll complete this week’s starting point! If you create a page, please share your link on this post so we can see!

scrapbook pages
It’s always tough to choose my favourites, so this week I could only bring it down to nine! I love reading the blog posts too – I love that starting points are useful and I grin to see scrappers using their leftover papers. Thank you to all of you who join in each week. I love this little corner of the internet and all the pretty-paper-pasting we do. (I think I just sighed audibly, thinking about it, actually!) So here are nine of my favourite scrapbook pages from this starting point – do click the corresponding link to see the page in more detail and discover the scrapbooker who created it.
Top row, L to R: one, two, three.
Middle row, L to R: four, five, six.
Bottom row, L to R: seven, eight and nine.

And if you’re reading this on Sunday, go enter this weekend’s giveaway, of course!

xlovesx

Scrapbooking Starting Point

scrapbook starting points
Here’s a little something different for this week’s Scrapbook Starting Point: something with most of the page wide open. I’m curious as to whether you would fill that big space with a large photo, several smaller photos, or leave quite a bit of the patterned paper on display? I also love that it creates plenty of room for potential writing space, should you not fill that space with photos. This is the before, and you can create whatever after works for your supplies and your style!

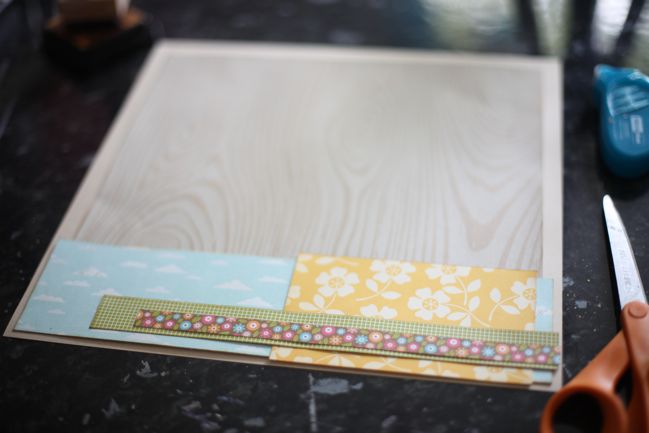
Fancy following the measurements? You’ll need a 12×12 background sheet plus these five sizes for your papers:
11×11 (though you could cheat one side of this a bit as the bottom is covered)
3×11.5
3.5×5.5
1×10
.5×9 (this was actually a branding strip design – that part that we tear off a 12×12 sheet)
All measurements are in inches. Of course you can just estimate if you prefer, and certainly use whatever you have handy in your own basket of scraps!

Find more Scrapbook Starting Points here or follow the board on Pinterest here. I’ll be back on Sunday with my own after page and some favourites from last week’s starting point!


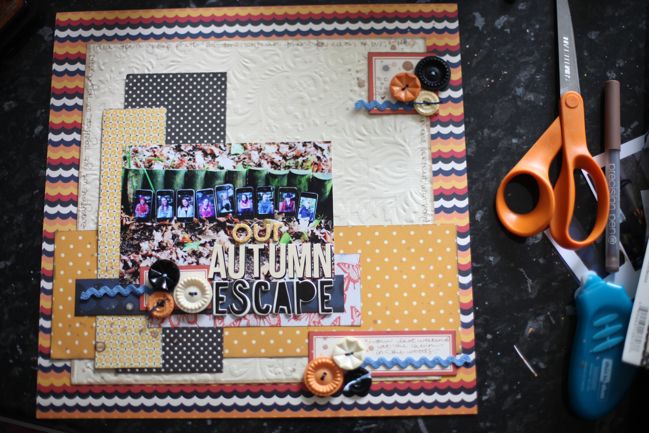
Scrapbooking Starting Point :: Our Autumn Escape

scrapbooking starting points - scrapbook page ideas
scrapbook page :: our autumn escape

From this starting point came this page, with so much and so little in common with this layout. Both with the same arrangement of papers and the same idea of boldly striped backgrounds, both with three groupings of buttons (which wasn’t purposeful, but perhaps just something that seemed worth repeating) and both with a single 4×6 photo, but completely different colour schemes and patterns, different placement for the title and the journaling. In the end they look pretty different, which is useful since I didn’t think about the fact that these photos are only six weeks apart chronologically, so the two pages will fall quite close together in my album! But this may be my favourite of the starting points so far.

If you make something from this week’s starting point, please share a link here so we can see even more ways to create something unique from that same background.

scrapbook page ideas
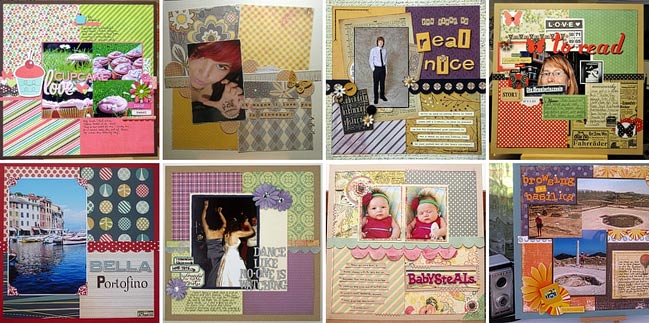
Top row, L to R: one, two, three, four. Bottom row, L to R: five, six, seven and eight. Click the corresponding link to see the layout in more detail and get to know the scrapper behind the page.

Here are eight of my favourites from last week’s starting point, but it was so very tough to choose from all the submissions! If you have more time, do check out even more pages from that same design.

I hope the rest of your weekend is lovely!

xlovesx

PS: There are two giveaways open at the moment! This one closes tonight and this one is open until Wednesday. Good luck!

Scrapbook starting points

scrapbook starting points
Oooh, hello there Saturday. You’re looking rather lovely indeed! And just because, I have a little twist for this week’s starting point.

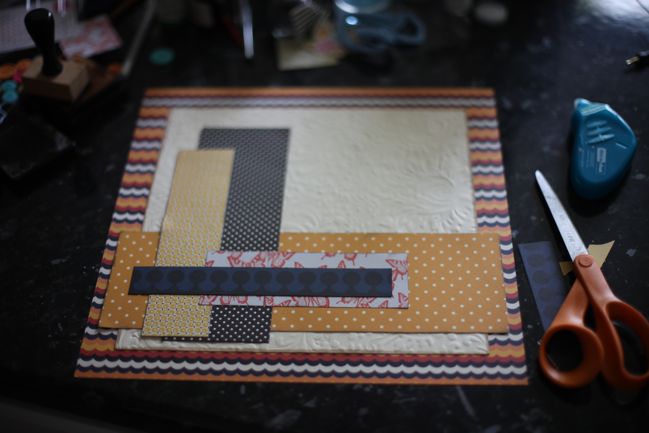
Recently I noticed I love striped papers when I’m shopping and I often use them in small pieces but I still have a sizeable stack of full sheets and I wondered if maybe I should use them as backgrounds more often. Trouble is, a full sheet of 12×2 stripes is quite a statement – either you can go with that or find something to give it a bit of balance – and lately I’m loving the idea of layering a 10×10 box of something more subtle over a boldly striped 12×12 background. So much so that I’ve actually made two layouts from the same starting point this week.

This first example includes papers from the Jenni Bowlin Studio Halloween collection, but the finished layout isn’t actually Halloween-themed. I’ll show you that finished version tomorrow with my favourites from last week’s starting point. (There is still time to add your link to that if you’re scrapping today!)

For those of you who prefer measurements, the only piece I really measured was the 10×10 box, but the others are roughly 4×11.5, 3.5×8, 2×7, 2×6 and 1×8 (all in inches). Is that helpful? (Let me know if you think I should always include the measurements with the starting point.)

The second example is something a bit brighter in colour… and it’s part of a bit of Saturday fun from the American Crafts design team. That will kick off in mid-afternoon UK time, so I hope you’ll pop by to see what those girls have up all their sleeves!

I hope Saturday is looking lovely for you too – and maybe lovely for crafting!


Scrapbook Starting points :: Our Crafty Halloween

scrapbook starting points
scrapbook page idea :: our crafty halloween
So the bad news is that I fell behind and then I broke the internets. Turns out it takes a lot of effort to break the internets, hence the falling behind. But there is good news: if you can see this (which apparently you can), then I have fixed the internets and this is a happy, happy thing. For the longer the internets remain broken, the further behind one can fall, in this case.

If you followed all my logic right there and only had to read it once to understand, I think I should probably give you a golden ticket and welcome you to my world. Enjoy your adventures here, won’t you?

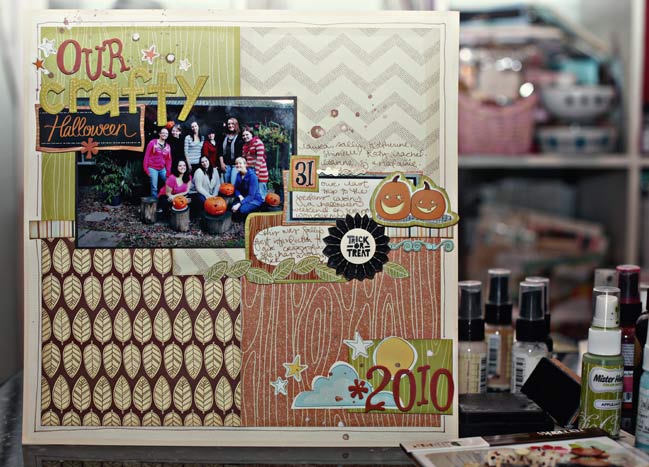
So back to this scrapbooking stuff! This starting point became the layout above, with papers from the Amy Tangerine collection and embellishments from Nightfall and a photo from last Halloween. (Even if you’re not a Halloween person, you may like Nightfall as an autumn collection. The papers are designs that could go either direction, then they’ve done separate embellishments so you can add on the Halloween-themed things or the autumn-themed things. Just in case you like leaves but not jack-o-lanterns.)

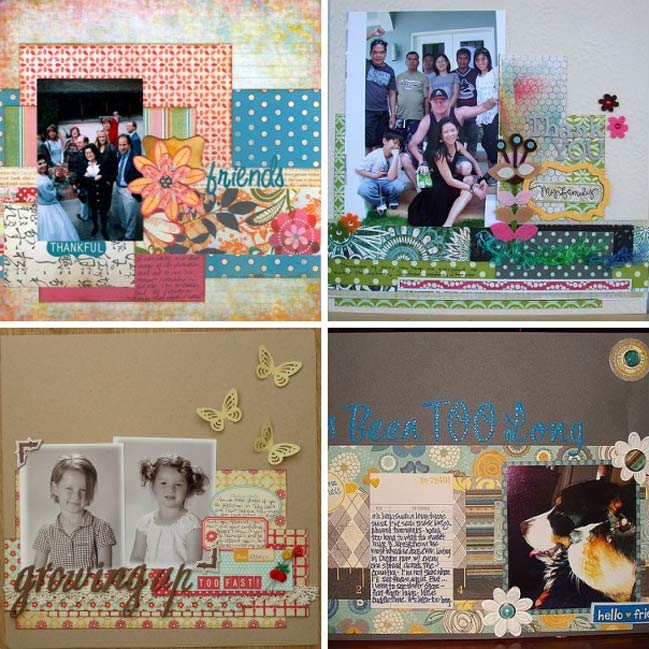
scrapbook page ideas Clockwise from top left: one, two, three and four, all from this starting point.

Here are four of my favourites from all the layouts posted for the last starting point! I may have giggled reading various comments on your posts about how many scraps were layered on that page before a single photo was stuck down! But I promise that giggling was not what broke the internets.

Assuming I can go through the next twenty-four hours without breaking those internets again, there will be a new Camera School post and a sketch video tomorrow!

Now I shall leave you while I calmly repeat to myself, ‘Do not upset the technology. Do not upset the technology.’

xlovesx

PS: Don’t forget, you can find the current starting point here. Post your link by Saturday!

Scrapbooking Starting Point

scrapbooking starting points
scrapbook starting point
Doing any scrapping this weekend? Here’s a new Scrapbooking Starting Point for you. It’s an easy start with four boxes of paper (patterned or solid) cut to 5.5” square plus one narrow strip across the middle (I used a barcode strip from a sheet of patterned paper).

Now it’s your turn: take this starting point and recreate it (or something similar) with your own stash of papers. You can work in any theme or colour scheme. Finish the page from there and share it with us!

Stop by this evening to see the finished layout and some of my favourites from the last starting point too. (If you’re reading this on Sunday morning, you have a few hours to post your link for last week’s challenge!)