pretty paper. true stories. {and scrapbooking classes with cupcakes.}

lovely to meet you Twitter Facebook Pinterest YouTube

Take a Scrapbooking Class

online scrapbooking classes

Shop Shimelle Products

scrapbook.com simon says stamp shimelle scrapbooking products @ amazon.com shimelle scrapbooking products @ amazon.co.uk

Reading Material

travel

inspiration party Category

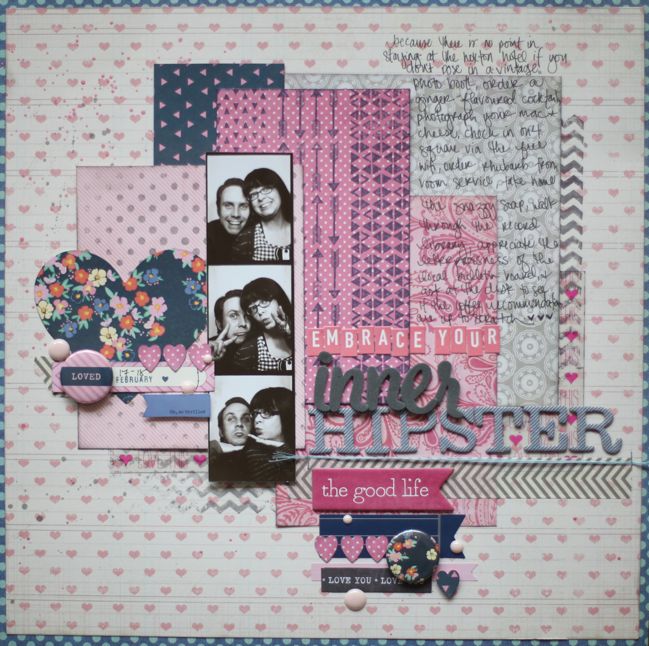
An easy & effective way to write your scrapbook journaling
scrapbook page by shimelle laine @ shimelle.com
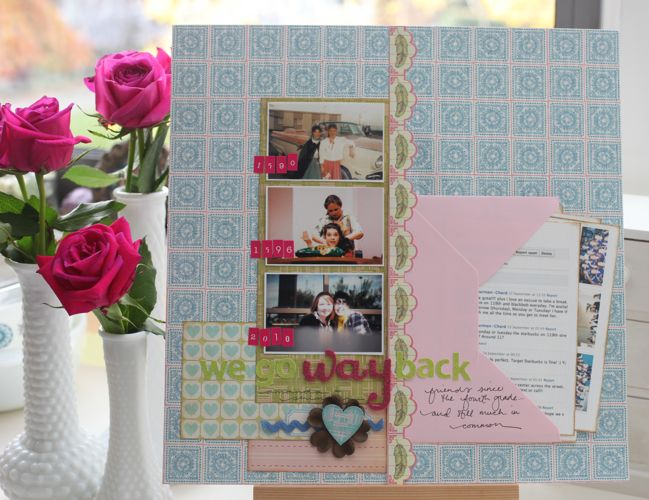
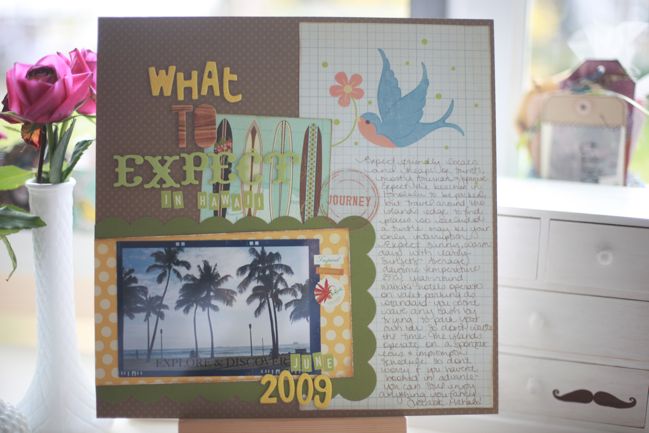
It says something to me that the pages I created for my journaling workshop, True Stories are actually some of my very favourite pages even now that they aren’t the newest pages added to my albums. The True Stories pages reminded me that I love scrapbooking best when the story, the photos, and the design all work together in one happy world, each taking a little inspiration from the rest rather than forcibly existing in the same space.
scrapbook page by shimelle laine @ shimelle.com
Specifically, using repetition in writing is something I find really helps scrapbooking journaling take on a new importance and a clearer voice. I wrote about a particular bit of repetition here that makes things really simple for daily writing, which might be helpful if you keep a Project Life album but wish it was easier to write something about each day. This take might be useful reading too. But really, any word you repeat takes on greater importance, while at the same time it’s taking away a decision you have to make at the start of each sentence, so repetition is scrapbook journaling actually makes your writing sound better while being easier to write. What’s not to love about that?


Glitter Girl has a few notes for making journaling a little easier too, just in case you’re interested. (See this page for further details on this Glitter Girl Adventure.)

And now for our guest artist, Lexi Bridges, who has made me remember the typewriter should be the next thing I unpack.
scrapbook page by lexi bridges @ shimelle.com
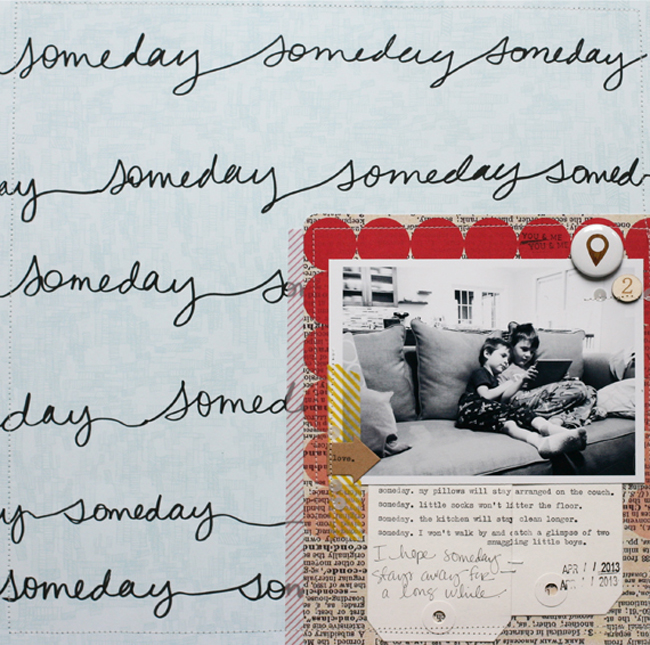
The challenge for journaling with a sentence starter that repeats had me excited because I had this idea of creating a repeated word background for awhile. I thought it would be a perfect time to try it out for this challenge. I could have gone with several words…remember, this, love, but I went with “someday”. I used a galaxy marker from american crafts to write on the patterned paper. I practiced a few times on scrap paper because I’m not really a fan of my own handwriting. With a marker and only one sheet of the background paper I wanted to use, there was no turing back, but I liked the imperfect, organic feel it had. I altered where I started the words so they wouldn’t be all lined up in columns.

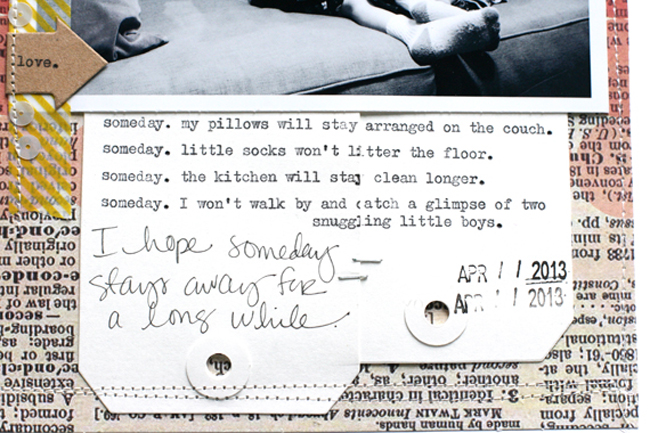
The base of the photo mat is actually an album insert from studio calico. The ombre circles on the dictionary paper make it look like a paint/ink job, but without the mess or time to create it. I used two white office supply tags tucked underneath my photo to journal on. I almost always use my typewriter for journaling and I like how it looked combined with the handwritten background.
scrapbook page by lexi bridges @ shimelle.com
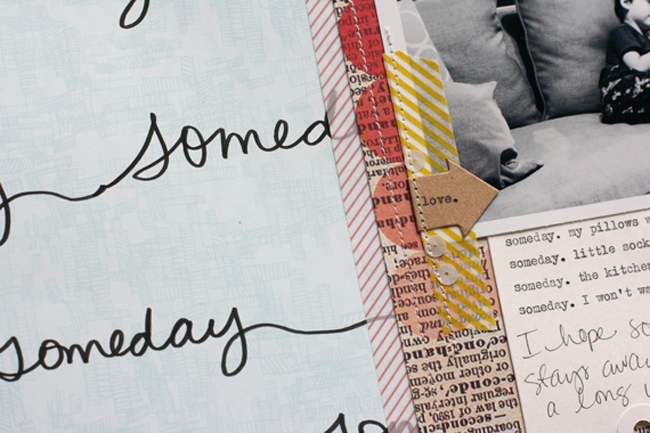
I’m usually all about the embellishments, but with this layout wanted the focus to be more on the words and the story in the photo. I typed “love.” on a Maya Road arrow which is sewn with a splash of yellow washi tape and a few sequins. The upper corner of the photo almost has a photo corner created with embellishments: a geo tag badge marking where we are at this moment in our lives with these two boys, a number 2 veneer piece for the two of them, and a few more sequins to tie in the sequins that go on the side.

And the story behind the photo? I happened to notice it was quiet in the house…and if you are a mom like me you know that usually it means someone is into something. Instead I walked into the room to find these two little guys snuggled together playing a math game. When I took this picture I noticed the messy kitchen in the background and the pillows all crazy-like. You can’t see the socks laying in the floor or the school books scattered here and there. And I thought…it won’t always be like this. Someday my house will be quiet. And clean. And I will long for days of mess and noise and two little guys snuggled side by side. So I am choosing to ignore the mess and embrace the moment…and, as my journaling says, hoping that the “someday” of quiet and clean stays away for a while longer.
scrapbook page by lexi bridges @ shimelle.com
About the Artist
Lexi Bridges is a Garden Girl at Two Peas in a Bucket. You can see more of her work on her blog, Prone to Wander.

Your fourth challenge is to write with repetition! Entries close at the end of next Sunday, the 12th of May. Please check back on the 14th of May to see if you have won a prize.


Scrapbooking with Spray Inks and Mists

scrapbook page by shimelle laine @ shimelle.com
A few of you may remember the days when flowers for scrapbook pages came in glass milk jars by colour. And that buying such an item then gave scrapbookers a compulsion to buy every other milk jar of coloured flowers available and stack them up in rainbow order on the shelf, creating something that was gorgeous – but possibly destroyed your decor if you actually used half a bottle of the flowers on a project. I didn’t ever feel the need to collect every jar of flowers, but I can tell you I now understand the phenomenon, because as much as one side of my mind tells me I don’t need every single shade of yellow under the sun and one or two will do nicely, I tend to look at this page of mists and sprays and think it could be oh-so-pretty to have them all! So far I have remained only slightly more practical and have a cake stand filled with mists of quite the assortment of colours and shades, but I do fall in love with a new colour very easily!

scrapbook page by shimelle laine @ shimelle.com
I do use my mists often but I use so little at a time that they last pretty much forever. I love spray ink as simple droplets to add to a design, adding either a little or a lot to the space of the page.


One of Glitter Girl’s earliest adventures was to demystify scrapbooking mists! This video includes both her notes on comparing different brands and a project from start to finish. (See this page for further details from this Glitter Girl Adventure.)

And now for our guest artist, Céline Navarro, who does way more than just a droplet or a spray here or there!

Scrapbooking with Spray Inks & Mists by Céline Navarro @ shimelle.com
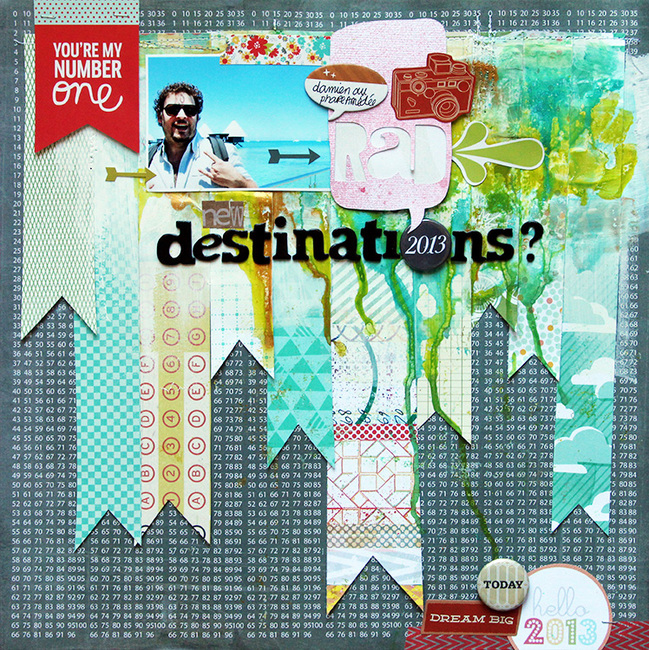
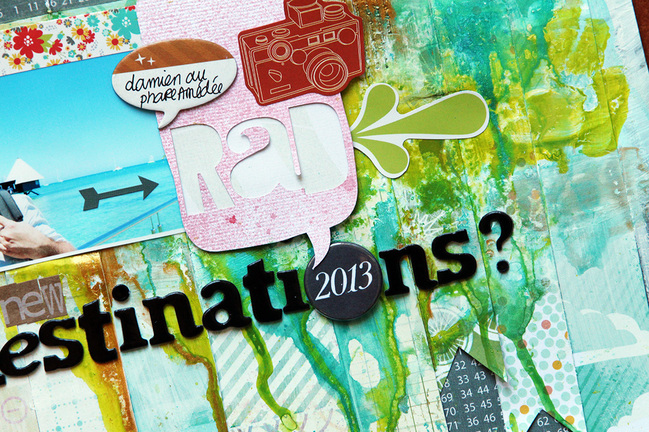
For this layout, I started like a ‘regular’ no-mist layout: I cut some stripes of papers, turned them into pennants and glued them on my patterned paper. I then wondered how I could add a little pop of colors on this background. Even if the patterned papers I used are very colorful, I wanted something more… artsy. My only concern was that, if I used mists directly on the paper, they won’t be seen as the paper would soak in the ink. So I decided to apply a thin layer of gesso on my paper pennants, and let it dry (you can use a heat gun if you’re as patient as I am). Then, I sprayed some water on the gesso – don’t worry about doing that! The gesso, when dry, is like a thin layer of plastic, so the water won’t get through the paper.

After the water, add some different mists here and there, move your background around and use your heat gun to dry them right away. If you don’t like the result, simply grab a paper towel and get rid of the color before it dries!

There you go! Your background is ready! Wasn’t it fun? Then you can embellish in the style you want.

Scrapbooking with Spray Inks and Mists by Celine Navarro @ shimelle.com
About the Artist
French scrapbooker and mixed-media artist Céline Navarro keeps busy with plenty of crafty jobs, like designing for Studio Calico and Two Peas in a Bucket. You can find more of her work on her website, celinenavarro.com or see Celine’s passion for print at Entreartistes Magazine.

Your third challenge is to use mist! Entries close at the end of next Sunday, the 12th of May. Please check back on the 14th of May to see if you have won a prize.


Scrapbooking with 4x6 photos

scrapbook page by shimelle laine @ shimelle.com
Maybe I’m a little old fashioned, but I still prefer 4×6 prints. I love printed photos and really don’t think you can have too many! I love this size for scrapbooking and it appears on my pages more than any other size – so much so that I have a twelve step programme for scrapbooking with 4×6 pictures – or a free class, if you prefer. But it does have twelve lessons, really.

scrapbook page by shimelle laine @ shimelle.com
I order photos every two to four weeks by uploading everything to Photobox and ordering it all in 4×6 prints. They work out an excellent price in bulk and they are printed ‘properly’ as in with photo paper and development, not just a fancier version of a home photo printer. I prefer the gloss finish for the colour clarity, but they certainly offer matt finish as well and they do plenty of sizes. I order most of my square photos printed as 4×6 images too – I just check the ‘shrink to fit’ box so they come as a 4×4 image on a 4×6 photo card, and I crop the excess. (Photobox does square prints at 5×5, but I prefer the smaller and even-numbered 4×4 size. Welcome to my world.) Then I store all my 4×6 prints in the drawers of a dresser divided by index cards so I have all my scrappable events ready and waiting for inspiration to strike. It’s a key part of my process because going to the computer at any point in making a layout spells disaster for me. It spells ‘you should be doing something other than crafting’ and my email and other to-do list items suddenly fill my head. Going straight to the prints rather than the printer helps me get things done.


I had to choose just one video from the 4×6 Photo Love series and it’s the eight-photo project that won out. I love page-and-a-half designs and I need to remember to make them more often. They are far more fun to me than standard two page layouts and yet still have plenty of room for more photos. (See this page for further details and a printable PDF for this edition of 4×6 Photo Love, or the entire series is always available by scrolling to the bottom of this screen.)

And now for our guest artist, Diana Besemer, who has much in common with me for all things 4×6.

Scrapbooking with 4x6 Photos by Diana Besemer @ shimelle.com
For me, this size is the easiest to work with because two pictures are in the correct proportion of 1/3 of the whole layout. And with only one picture there is enough space to get some extra use of your favourite paper, an extra long title or journaling. Every two months I‘’ll order all my new pictures in this same size so I’‘ll always have a stack of pictures ready to scrap. My new favourite paper and embelisshment is also right next to me. I‘’ll like to use them right away, because I love how they look on my layouts more then how they look in my closet.

Scrapbooking with 4x6 Photos by Diana Besemer @ shimelle.com
About the Artist
Diana, who is married and a mother of two children, lives in a small village in The Netherlands.
For the last ten years scrapbooking has a big part of her life. Occasionally she loves to make cards with the scraps laying around on her desk. She designs for Card and Scrap, and has a blog where she posts on a regularly basis.

Your second challenge is to use 4×6 photos! Entries close at the end of next Sunday, the 12th of May. Please check back on the 14th of May to see if you have won a prize.


Scrapbooking in Pink

scrapbook page by Shimelle Laine @ shimelle.com
And it’s officially here: a very happy NSD to you! That’s National Scrapbooking Day, of course. Of which nation is completely up to you at this point! I’m celebrating on this time zone, so it’s officially the 4th of May and that means all systems go – and that will be the way right through to the end of the day! There are plenty of challenges and guest artists to share their ideas with you, and the challenges are open until the end of next weekend so you have more time to participate than just NSD itself. A prize winner will be drawn from the participants on each challenge, so by enjoying some crafting in honour of NSD, you might find yourself with a gift certificate to go shopping, a class pass, or a box of scrapping goodies on your doorstep. Sound fair enough?

There are a range of challenges to take us through the day, and they are designed so they can be followed in one of two ways: if you are so inspired, you can pick and choose from each challenge and create one page per challenge for as many challenges as you like, or you can follow them in order, with four challenges per layout. The challenges follow an order that takes you through supplies, design, technique, and theme, so you can take the first four challenges and put them together to get a complete page, then start on the second four challenges for layout two and so on. I hope that provides a happy medium of creative freedom or practical structure, whichever suits your crafting personality!

scrapbook page by Shimelle Laine @ shimelle.com
I don’t think it’s a secret that I like to scrapbook with pink. I haven’t exactly tried to hide this fact, and I’m more than a little aware that some scrapbookers would like to hurl a tomato at Glitter Girl with a shout of ‘enough with the pink and turquoise!’ but pink still inspires me to create. As such, it appears on plenty of pages! I wanted to start us off with something relatively simple, so here we go – pretty in pink!


In truth, there are plenty of videos I could have chosen for this pink theme, but just one with hot pink right there in the title! Brightly coloured Cosmo Cricket from their Upcycle collection. I’ve realised in putting my papers away that I still have a few sheets of that… perhaps it needs to come out and get put to use in something very pink indeed!

And now for our guest artist, Louise Fortune! She may have found pink a somewhat greater challenge.

Using Pink Supplies by Louise Fortune @ shimelle.com
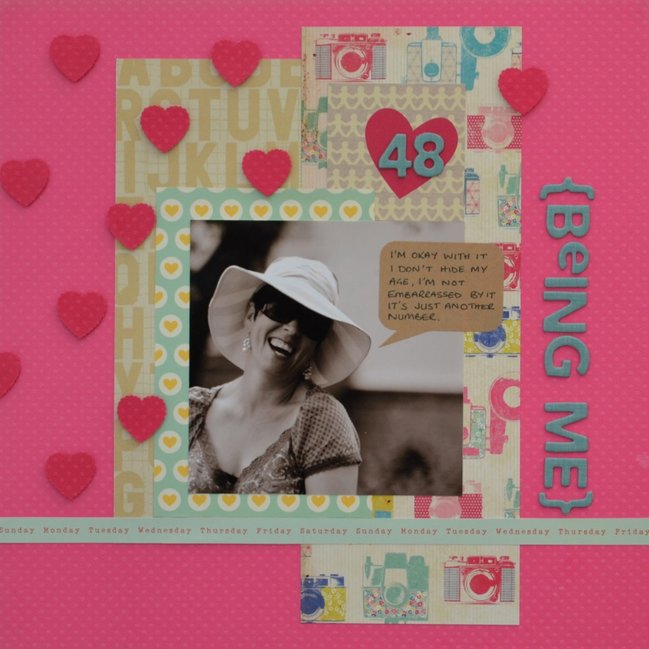
The dictionary definition of a challenge is ‘a task or situation that tests someone’s abilities’. It is also an invitation to work outside of your comfort zone. so when that is related to scrapbooking that could be using a supply, a style or a subject matter that you would never normally use, exactly why I opted for the ‘using pink supplies’ as my Shimelle NSD challenge. I am not a girly girl and since my entire household is male (including the dog) I very rarely use pink in any of my projects, I can in fact be heard to groan, very loudly, when my scrapbook kits arrive and they are pink and/or floral. My scrapbooking style is very simple, usually quite graphic and type orientated and I usually use more than one photo and I normally put a design together and then leave it unstuck on my desk, for several days, coming back and looking at it, a lot, before I commit to sticking everything down and calling it done.

This layout was done in 90 minutes. I began with the photo, converting it to black and white to eliminate any colour clashes, then I picked the cardstock and papers, straight in there with the bright pink swiss dot card, next the papers. With no time to faff I opted to cut all three of my paper choices down to four inch strips, enough to play with, not too much to be overwhelmed by. These were placed more or less centrally. Next letter stickers, I was limited in choice here as I tend to cut most of mine on my cricut, luckly I had some that were the right co-ordinating colour and size. Got to have the title going sideways, a quirk of mine. finally embellishments always used sparingly, I don’t do fussy, I chose a kraft sticky speech bubble, great place for my token gesture journalling, the manufactures strip from my patterned paper (thank you manufacturers for making these usable) adds another typographic element. some punched out cardstock hearts, in a darker pink (more pink !) randomly placed, something else I don’t normally do. Ta Da its done in record time without compromise!

Using Pink Supplies by Louise Fortune @ shimelle.com
About the Artist
Louise has been familiar with scrapbooking as a hobby since 1996; when she was introduced to it by a friend in the states and has been scrapping seriously since 2004. She is a work-from-home-mum who puts her “drawing and colouring-in degree” to good use designing simple graphic printables. She regularly designs cards for Papercraft Inspirations and has been published in Scrapbook Inspirations. She was a member of the scrapagogo design team and also designed the bespoke GoGo kit hybrids and stamps. Louise also has a blog where she shares some of her freebie printables.When she isn’t scrapping, taking photos, designing or eating chocolate, Louise can be found working in an admin capacity for an association of private school doctors.

Your first challenge is to scrap in pink! Entries close at the end of next Sunday, the 12th of May. Please check back on the 14th of May to see if you have won a prize.


Scrapbooking Day Challenge 5 :: Try a new photo edit

scrapbooking challenge :: photo edit
scrapbooking challenge :: photo editing tutorial
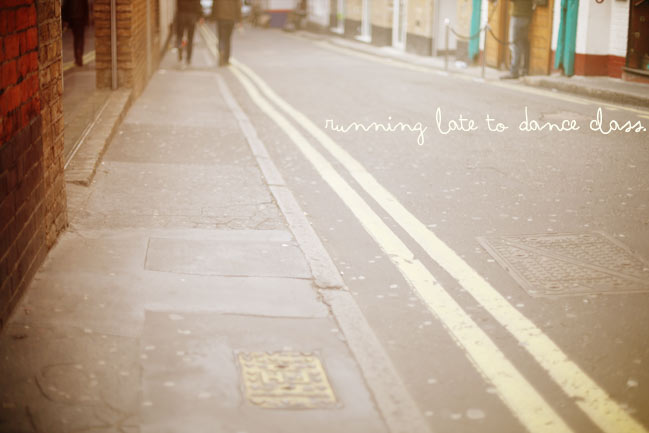
The other day when I shared my day in photos, one of the big questions that came up was the editing process for creating that look. Was it a Photoshop thing? Was it a camera thing? And the answer is… it’s a little bit of both.

One of the nicest things about a camera with manual control is you can decide what you like rather than just the camera making the decision. In many cases, I actually prefer my photos a bit over-exposed. Not immensely so – just a bit lighter than usual, and definitely lighter than what I would get by following the camera. When I look at my light meter, I normally aim for one or two points to the right, and I just like the colour better there. It works well with shallow depth of field and it provides a way to pretty up a sky that isn’t very blue. So that was the first step: all those photos were a bit lighter than you would expect – right from the camera.

If you have an SLR, you can try this. Go get it and set it to Manual and choose a low number for your aperture – so your lens is wide open. I shot all those pictures at f1.4 on a 50mm lens. (This is the lens I use on a day-to-day basis and it makes it pretty easy to make things beautiful.) Set your ISO to something appropriate to your surroundings. I still use the same ISO reminders that I learned in high school: 100 for sunshine, 400 for cloudy, 800 for I wish someone would turn on some more lights! And if your camera goes higher than 800, you can adjust for darker conditions with higher numbers. Now that you’ve set the aperture and the ISO, all you have worry about is shutter speed. And that makes shooting in manual a lot easier than it seems. Once those two steps become second nature, you’ll wonder why it ever seemed intimidating.

With those two things set, look through the viewfinder and half-press your shutter to focus on something. Look at the viewfinder to find your light meter. On a Canon, there’s an a ruler from -2 to +2, with an arrow pointing down on the very centre. On a Nikon, there’s a – at the left and a + on the right and a zero at the very middle. They both work the same way, and if you’ve never paid attention to them before, they can be very useful indeed! When you half-press, you’ll see a little marker come up to show you where you are with your current settings. Try turning your wheel to adjust the shutter speed and you’ll see the little arrow move (or if you don’t see it move, half-press again and it will be in a different place and if that doesn’t work, get out your manual because you’re turning the wrong wheel, probably). So the point in the middle? That’s what your camera thinks is the best exposure for these settings (so the best shutter speed, since we’ve set the other two things already). Take the picture so you can see how that looks on the screen. Now move the wheel again so your shutter speed changes — move it so the arrow moves a bit to the left and snap again. That picture should appear darker than the first shot. Move it several clicks the other way so now you’re a couple lines to the right of the middle and snap again. Now your picture should be lighter – even lighter than the first image. And that is what shooting in manual is all about, really. For me, anyway. So I snapped all those shots with the arrow one or two lines to the right of that middle point. (By the way, you can also do this in Aperture Priority and let the camera set the shutter speed while you tell it to shoot lighter rather than right in the middle – but I think we’ve covered enough technical trickery for this single blog post, so we’ll leave that for another time.)

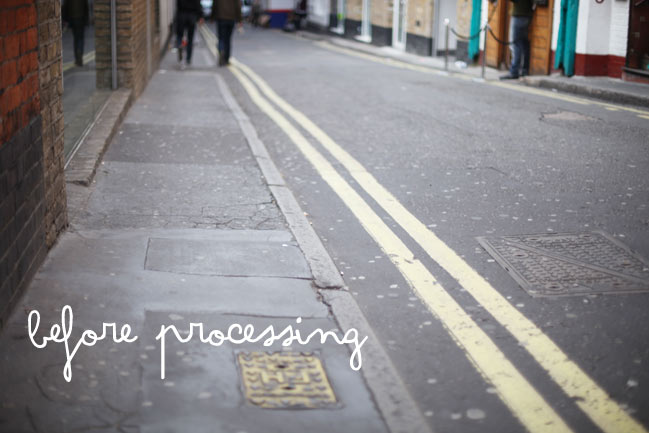
photo before edit
But then that wasn’t quite what I wanted either. I loved that the images were light, but I also wanted them warmer in tone. And to an extent, I could have done that in camera. But I didn’t. So I turned to Photoshop for the warm part of the glow.

I use Totally Rad Actions for most of my photo editing. If you do a lot of editing, then I totally recommend them. If you only edit every once in a while, then it’s a pretty big package to get if you’re not going to use it much, if you know what I mean. Plus they only work with full Photoshop – not Photoshop Elements, so I’ll tell you that right from the start. (They also have a Lightroom product, and I’ve seen people request an Elements product, but I haven’t seen anything about them bringing that out just yet. Also, if you’re an Elements user, please don’t switch off now, because in a couple paragraphs there will be an answer for you, I promise.) Okay, so anyway, if you go here, you can get an idea of all the different looks that these actions create (and if you follow many photo blogs, you may start to recognise some looks, as there are plenty of people out there using these same sets). So basically, I ran one action and that was it. It’s called Flare-Up Golden. It adds a warm, orangey flare over the top of the photo. In most cases, it’s far too warm and orangey for my liking at the 100% opacity, so I dial it down to 50% or less. For that set of photos, that was it. Now… technically, yes, anything that exists in an action can be created by your own tinkering in Photoshop. But in just that one action alone, there are nineteen steps. With the action, I just push one button then adjust the opacity when it’s done. Without the action, I have to go through a million things. Plus here’s the truth: the people who make awesome actions know more about Photoshop than I do. There are whole portions of Photoshop I have discovered just by a step in an action that made me wonder what exactly was happening. I’m convinced that program has an infinite number of settings and the people who make fab action sets? They know almost all of them.

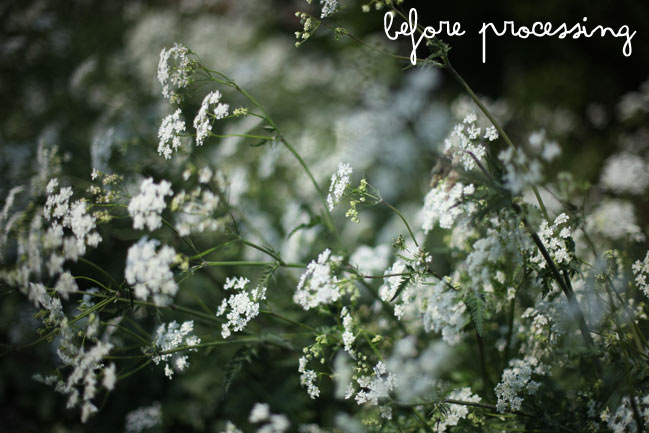
before processing
But I also realise that may be no use to you at all if you don’t have Photoshop or that set of actions. So how about some alternatives to achieving a warm glow without all that? Even with a picture from your phone or point and shoot. Picnik can do this for you in just a few easy steps. Choose a picture and go upload it there now.

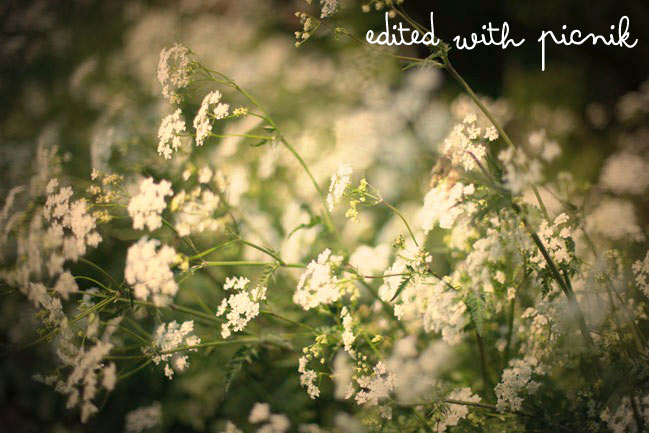
Starting with the ‘Edit’ tab, make two adjustments. Click ‘Exposure’ and move the top slider to the right to lighten the photo. Click OK when you’re happy that it’s light enough. Then choose ‘Colors’ and move the temperature slider to the right. Stop when it’s warm enough and click OK again.

Then move to the ‘Create’ tab and select ‘Effects’ and scroll down to ‘Lomo-ish’ which is under the Camera heading. Click that effect and for the settings, move the top slider to about 70% for blur and the bottom slider to to about 40% for fade. Adjust as necessary for your image and then click at the top to save your newly edited photo!

photo edited with Picnik
Of course, there are plenty of ways you can edit your pictures – not just to make things lighter and warmer! So that’s challenge five for this lovely day of scrapbooking: Try a new photo edit. You can just follow these steps in Picnik or you can try something completely different! Just take an image and try a new look! You can upload it to Flickr, the photography gallery at Two Peas or your blog. Whatever works! And if you find something you think we should all try, let us know in the comments!

A note about all the Scrapbooking Day challenges here: You can enter any time between now and Sunday, 15th May, so you have a full week to do as many challenges as you like. Unless otherwise noted, winners have a choice of prize – an online class pass or a gift pack of scrapbooking stash. I’ll also be choosing three winners from all the links and comments left today (Saturday the 7th of May) on any post, so just participating and saying hello gives you another chance to win!

xlovesx

PS: While this is my last post of today, this happy day of scrapbooking, Two Peas is celebrating all weekend. So tomorrow I will be focusing on their challenges – continuing with the supplies I started with this morning – and tomorrow I’m hosting a live chat there. It’s at 8pm UK time and 2pm US Central time, so perhaps you can stop by to say hello. And all the challenges at Two Peas? They have prizes and they don’t close until next Sunday too. So just in case you’re looking for even more to keep you creative this week, I think they can help! See you tomorrow, and thank you for joining me for such a happy Scrapbooking Day 2011.

Scrapbooking Day Challenge 4 :: The Story behind this Photo

scrapbooking challenge - story behind the photo
scrapbook page
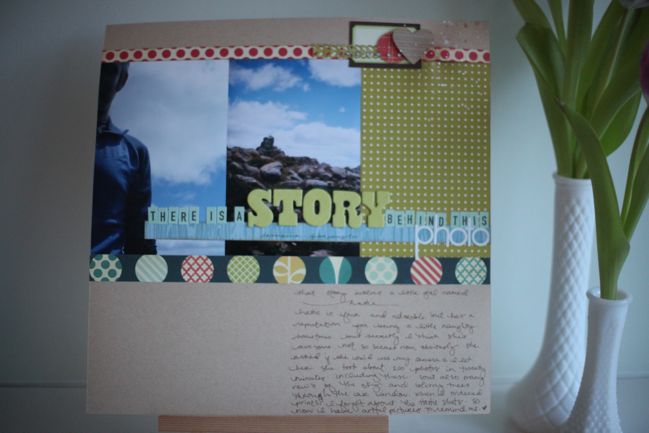
I love photos that take a bit of explanation. Because normally the explanation is just as good – if not far better – than the photograph, right?

When I ordered those 691 prints, I got a bit bored of picking individual photos and I had a couple folders that I may have just clicked ‘order all’. Then when the prints arrived, I found I had a lovely collection of photos I didn’t remember taking. They were certainly from my camera and I recognised the people and the scenery, but surely I didn’t take three dozen photos of trees out the window and various clouds and rocks? And then I remembered: I let someone else use my camera for a bit.

She just happened to be four years old.

I kinda love this picture of one-quarter of The Boy. But it does take some explaining. Portraiture by Miss Hattie, Age 4.

Do you have a photo that needs explaining? That’s scrapbook day challenge numero quatro: Create a page with the story behind a photo. Find something that has way more story than what you first see, and get explaining!

A note about all the Scrapbooking Day challenges here: You can enter any time between now and Sunday, 15th May, so you have a full week to do as many challenges as you like. Unless otherwise noted, winners have a choice of prize – an online class pass or a gift pack of scrapbooking stash. I’ll also be choosing three winners from all the links and comments left today (Saturday the 7th of May) on any post, so just participating and saying hello gives you another chance to win!

xlovesx

Scrapbooking Day Challenge 3 :: Add a border between the photos

scrapbooking challenge :: border between photos
scrapbook page :: border between photos
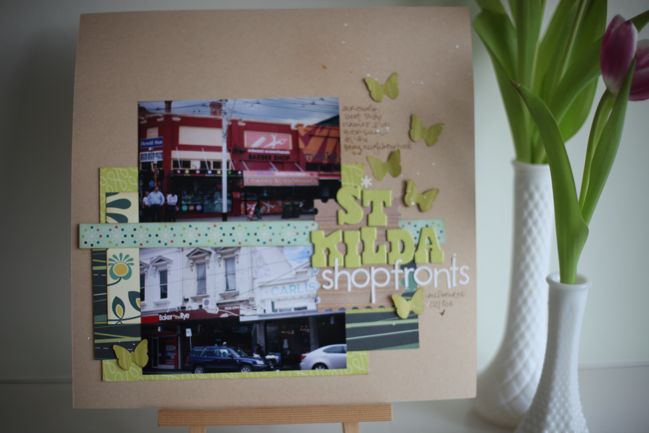
I once had a college professor who had a simple rule for choosing a hair salon: nothing that involves a pun. That ruled out such adorably named establishments as Shear Madness, Blown Away and The Cutting Edge. Actually, if you’re faced with a surplus of hair salons, it’s a pretty quick way to create a short list.

I don’t think Edward Scissorhands the barbershop counts as a pun. It’s a reference. THat’s different. There’s no second meaning of Edward Scissorhands. It’s just someone who is confident enough with cutting hair to say Oh yes, I am willing to put myself up there with Johnny Depp and frankly, that is the sort of confidence I would want in a barber. You know, if for some reason, I needed a barber. (I realise now it’s kinda hard to see what’s in the pictures, so take my word for it: a barber shop called Edward Scissorhands and a bakery called…)

Then there are literary-referencing bakers: the Baker in the Rye. Now that is both a reference and a pun. But I don’t think my professor applied the pun rule to baking establishments. Just places that groom hair. JD Salinger may not have had much sense of humour about it, but as a lover of Catcher in the Rye and not so much a fan of rye bread, I loved it enough to take a photo.

But the best bit is these two shops are just a couple blocks apart. And that alone gives you a feel for the adorably kitschy neighbourhood of St. Kilda in Melbourne. It was a little bit Camden meets Brighton meets Vancouver, and yet nothing at all like any of them really.

I’m thinking this layout isn’t finished. But I’ll be honest: I was also thinking I had to catch a train. So I’m going to post the challenge and then come back to it in a little bit, because the trains in my neighbourhood are a little too busy to bring along a 12×12 page and finish it. (As opposed to the time when Mary Anne set eyelets with a hammer on the floor of the train on the way home from a crop, if I remember correctly.)

So the challenge then: Use a border between two photos. You can include more photos (and more borders!) if you wish – but the border has to go between the pictures rather than to the side or elsewhere. Make sense? The border can be as simple as a strip of paper or as ornate as something you create from many layers! Totally up to you.

A note about all the Scrapbooking Day challenges here: You can enter any time between now and Sunday, 15th May, so you have a full week to do as many challenges as you like. Unless otherwise noted, winners have a choice of prize – an online class pass or a gift pack of scrapbooking stash. I’ll also be choosing three winners from all the links and comments left today (Saturday the 7th of May) on any post, so just participating and saying hello gives you another chance to win!

xlovesx


Scrapbooking Day Challenge 2 :: Create a triangle

Scrapbook challenge :: Create a triangle
scrapbook challenge :: create a triangle
Two things you should know about The Boy and I.

We really like coffee.
And we really like, well… knowing stuff.

The Boy is probably more dramatic about this than I am, but it’s a little contagious. You take something that’s a passing interest and then you have to become as much as an expert about it as possible. That’s why I don’t just like Kit-Kats, but I can bore you all day with amazing Kit-Kat trivia. And The Boy couldn’t just watch Heston Blumenthal cook with a water-bath thingamy – he had to crack open an electronics kit and build one in our kitchen. To a point where it would keep a more stable temperature than one he could special order from some sort of special restaurant supplier. Of course.

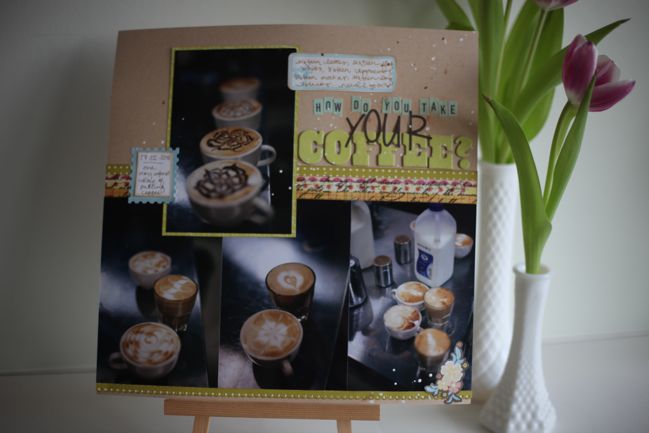
So we don’t just like coffee. We’ve studied beans and origins. We (he!) hacked a grinder to get it just right. We watch the World Barista Championships. So for his birthday, we took an all-day intensive course in making coffee. Doesn’t everyone get an Australian culinary qualification as a birthday present?

During the beginning of the class I could take some pictures, so these were some of the first drinks we made that day, including learning the different designs favoured by various coffee shops in Melbourne. It was a crazy amount of coffee.

But this doesn’t have a crazy amount of embellishment. Just three things really: the label above the title, the stamp shape to the left of the top photo and the flower sticker in the bottom right corner. Together they make up a triangle – three things of a similar colour, size or shape placed in three different parts of the page so if you drew a line connecting them, you’d have a triangle shape, ideally with your photos inside the lines. When I first started teaching scrapbooking workshops, this was the biggest design concept we used. Now it seems so simple, but I thought it was worth bringing back today and seeing how you would interpret it in your own style. So there’s Scrapbooking Challenge 2: Create a triangle. What will you scrapbook?

A note about all the Scrapbooking Day challenges here: You can enter any time between now and Sunday, 15th May, so you have a full week to do as many challenges as you like. Unless otherwise noted, winners have a choice of prize – an online class pass or a gift pack of scrapbooking stash. I’ll also be choosing three winners from all the links and comments left today (Saturday the 7th of May) on any post, so just participating and saying hello gives you another chance to win!

xlovesx