pretty paper. true stories. {and scrapbooking classes with cupcakes.}

lovely to meet you Twitter Facebook Pinterest YouTube

Take a Scrapbooking Class

online scrapbooking classes

Shop Shimelle Products

scrapbook.com simon says stamp shimelle scrapbooking products @ amazon.com shimelle scrapbooking products @ amazon.co.uk

Reading Material

travel

digital scrapbooking and hybrid scrapbooking Category

Scrapbooking challenge :: Free Printable

scrapbooking challenge :: free printable
printable scrapbooking cards for project lift
There are so many things about Project Life that have had an impact on the scrapbooking industry this year, but one that has made me smile is the new surge in scrappers considering printable options for their albums. All sorts of different journaling cards and photo backings and other things to make pages attractive while remaining affordable, since you can use them plenty of times. Very cool. And extra affordable is when they are free, right?

I may have a little something for you in that case.

free scrapbooking printable
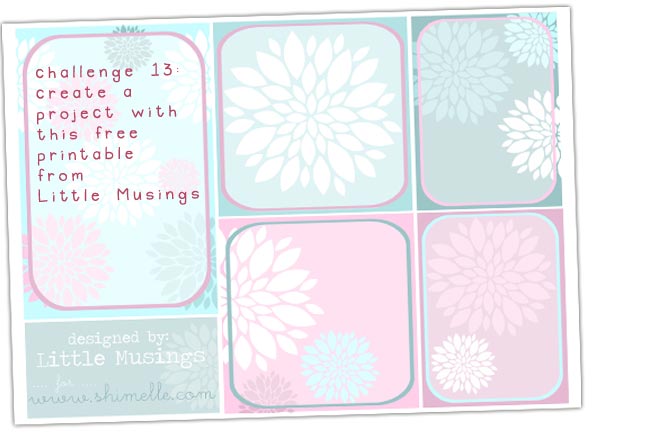
Click to download the free printable.
This challenge is that simple: download this free printable designed by Little Musings and use it on a project of your choice – traditional scrapbook page, something digital, your Project Life album, a card, whatever you fancy. It’s a JPG file so you can print it exactly like a photograph – you can add it to your photo library, you can digiscrap with it in Photoshop, you can open it in your word processor and change it to whatever size you want and print from there. All of those options will work.

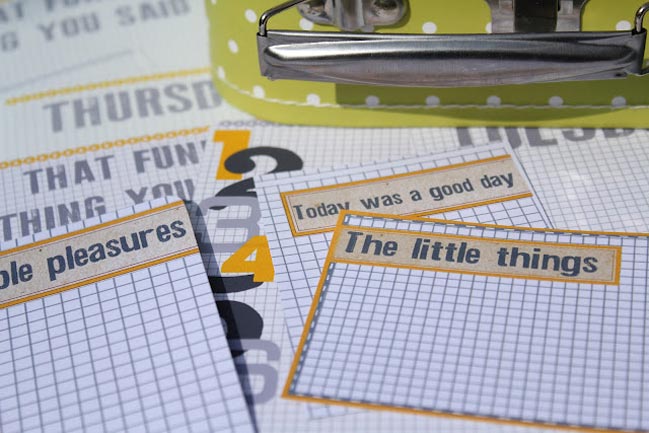
You might also want to check out the set of cards in the top photo – they are available here, from Little Musings.

To enter this challenge, create your project with the free printable and upload it to your blog or page gallery, then link it up here. Entries close at the end of next weekend.


Digital scrapbooking kit for a halloween party

digital scrapbooking kit for a last-minute halloween party
last minute halloween party cupcakes

If you find yourself needing something to dress up a last-minute Halloween party at home or school, you may want to grab this printable. Just bake some quick cakes, print the PDF pages and use double-sided tape to attach the cupcake flags to toothpicks and you’re all set! (The kit includes printable Halloween cards and posters to match too, with orange, pink and blue all included.)

That said, I should go get my pumpkin cupcakes out of the oven right about now! Happy almost-Halloween!

xlovesx

Hybrid scrapbooking project :: Halloween Shadow Box

Hybrid Scrapbooking - Halloween Challenge
hybrid scrapbooking project - halloween shadowbox ©twopeasinabucket.com

All through October, Two Peas is hosting a SpookCRAFTular Halloween event, filled with projects, special guests and prizes. Today it’s my turn to share a project and start a challenge that is open to anyone who would like to participate.

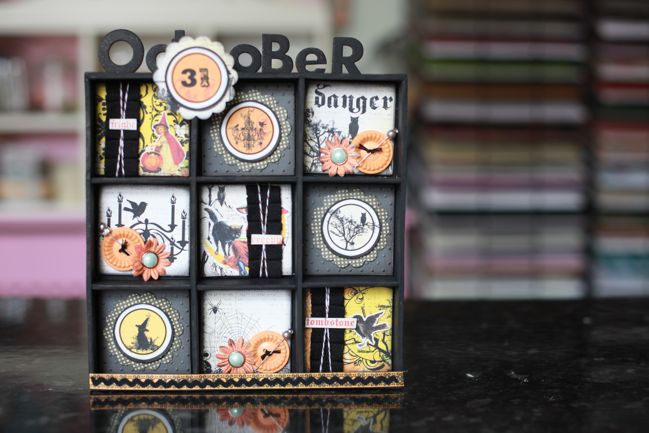
This Halloween shadowbox is made with the Maya Road Trinket Box and a digital kit by Rhonna Farrer that is available for download at Two Peas. I also used buttons and pins by Jenni Bowlin and pleated ribbon by Pink Paislee. You can find all the details about this project here, including a full supply list and a PDF instruction sheet to download. Or if you prefer to watch rather than read instructions, you can watch a full video of the project from start to finish.

Your challenge is to create any Halloween-themed project that includes at least one Two Peas digital kit. There are plenty of Halloween kits available so you can find something right up your street. Print something out and make a scrapbook page, card, decor project, cupcake topper, tag or anything else — as long as it’s Halloween-themed and you’ve included something printed from a Two Peas digi kit, then you’re in. Upload your project to the gallery at Two Peas and remember to check the box for this challenge in step 4 of the upload process so you’ll be entered for a chance to win a prize!

In other news…
…The brand new online class will make its first appearance on the blog later tonight and you’ll be able to sign up any time from then! ETA:The class details are now here and registration is open!

…The last of the prizes from the last online crop (and some Banana Frog giveaways) will all be sent this week – the last of the boxes will hit the post on Friday and several others have already been posted this week. So if you have been waiting, I promise it will be with you very soon.

…If you fancy a bit of a scrappy bargain, there are some great Halloween deals here, tons of BasicGrey is marked down and today only, the Greenhouse collection is 50% off — it’s one of my favourites, filled with hot pinks and mod flower illustrations.

…I’m interested to know what you think about videos shot like this rather than from overhead. Does it just depend on the project, or would you in general like to see everything from one vantage point? And would you want to see longer videos like this regularly or better to stick to things that are short and sweet? Just curious as to what you would find most useful!

Have a lovely Wednesday!

xlovesx

Ten looks with a new digital scrapbook page template

digital scrapbook page

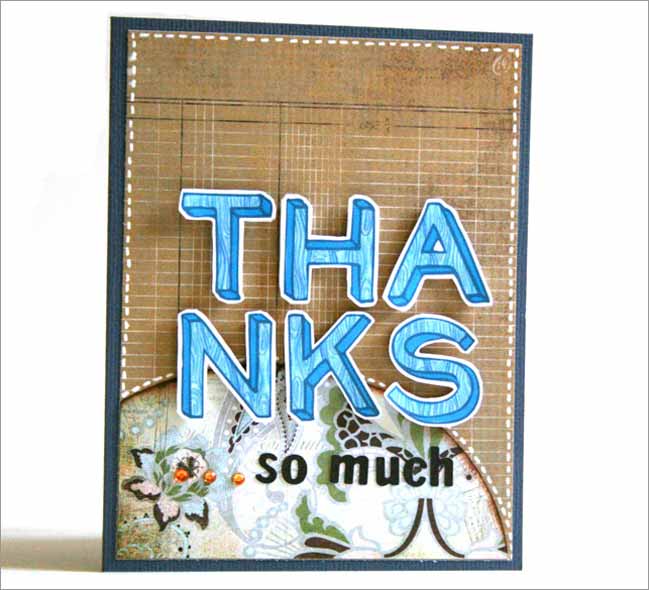
A little something new in my divi shop today…this template and alphabet set featuring some of my favourite things: blocks of four patterned papers, zig-zag stitches and woodgrain-filled letters.

digital scrapbooking kit

Click to make this set your own for just two bucks! And that alphabet can be printed out for hybrid projects and you can change the colour to match your papers, like the green title in the first example.

digital scrapbook pages

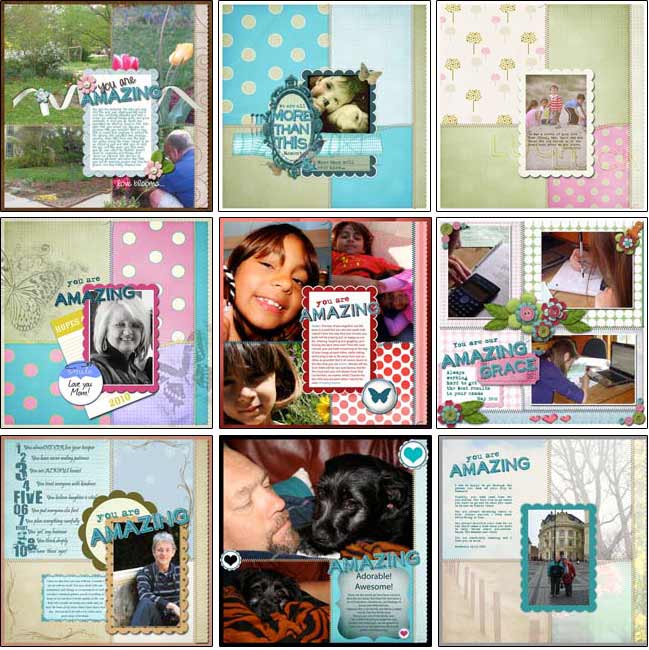
The Baker’s Dozen have been putting their own touches on the page template over the last few days, and I love how they’ve created pages with so much variety in the mix of photos and papers.

hybrid handmade card

Here’s what this alphabet looks like all printed out for a paper project! Love this card by Avital.

winner of Banana Frog stamps

Thanks for all the comments from the Banana Frog Birthday Hop. The random number generator pulled an actual birthday girl! Alissa, Bev from Banana Frog will be sending you some stamps — email me with your mailing address so I can get that all set for you!

I hope everyone had a lovely long weekend and these four days are good to you too! I have a bit of a special scrapbooking project to share with you later this week, if you’re up for that? It’s in its final pieces on my desk right now!

xlovesx

Scrapbooking with Hipstamatic

scrapbooking with hipstamatic
scrapbook page with Hipstamatic photo

So I fell in love with Hipstamatic in early April and started sending pictures to various friends with iPhones, and suddenly I found we were all ignoring all other cameras in favour of Hipstaprints. And then I started promising to blog specifically about scrapbooking with Hipstamatic, but got so inspired actually scrapping with these pictures that the blog post was maybe a long time coming. So without further ado, grab an iPhone and let’s get scrapping, Hipsta-style.
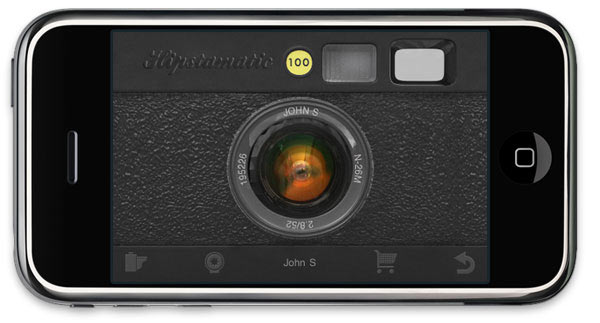

hipstamatic iphone app

About Hipstamatic
Hipstamatic is my favourite of all iPhone apps, and in basic terms it turns your iPhone camera into something that is more like film. Of course, the pictures are still digital, but it uses the technology to give you digital equivalents of several kinds of film, different lenses and a variety of flashes, all which can be switched, mixed and match to get lots of looks. (And it’s seriously a huge number of looks. You can see them all here to get an idea.)

The app is only available for the iPhone and it only works as a camera — you can’t open a photo you’ve already taken and apply the effects like Photoshop. (Well, not without cheating, which we’ll talk about in a minute.) You have to use it as a camera to take your picture and wait to see what you get — like a film camera. Admittedly the wait is shorter than developing a roll of film, but you do have to wait: if you close the app before the developing process finishes, the photo won’t exist! Because you can’t fire off a shot every second or so, Hipstamatic makes you think just a little about how you take the picture — or you learn to get what you’re given! The waiting part of the app is part of the fun more than frustration. A cute little reminder to slow down and stop taking things so seriously.

If you want to scrapbook with your Hipstamatic photos, go straight to the settings and make sure you’re set to save high quality images. Higher quality does slow the app down, but it then saves images that will print without losing any definition. It’s limited by the quality of the camera in an iPhone, but if you think about it, there are just as many megapixels available in the iPhone as in many of the cameras we used for the first few years of digital-camera-mania. And those photos printed just fine.

The app has two main screens – the front and the back of the camera. Swap them by clicking at the bottom right corner. Changing the lens, film and flash is as simple as swooshing across your screen on the front of the camera and clicking the one you want. Or shake your phone to randomly choose a combination. When you view your prints within the application (click at the bottom left on the back of the camera) you can click on any picture and see what lens, film and flash were used, so if you find a combination you love by chance, you can go back to it on purpose. My current favourite is the Float film and the John S lens with no flash, which creates an aged look like this.
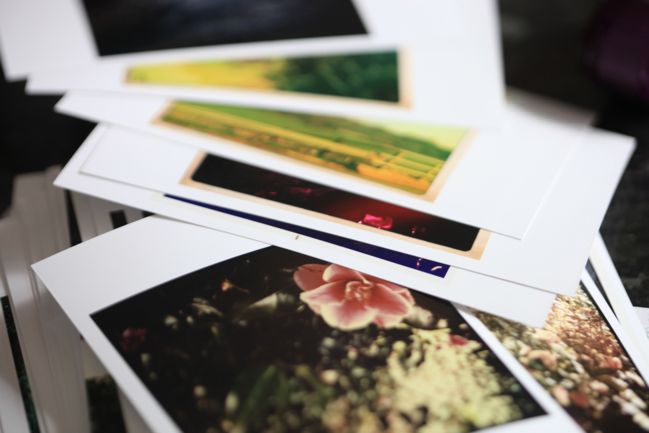
Hipstamatic prints from Photobox
Ordering Hipstamatic Prints
I love ordering photos online and it’s my default way to make sure I have plenty of photos ready to scrap at all times, so printing Hipstaprints online was one of my first big questions. The answer is that they don’t just print – they print so very well! The images from Hipstamatic are square rather than the standard rectangle, so you will need to pay attention to the settings when you order your prints to get what you want.
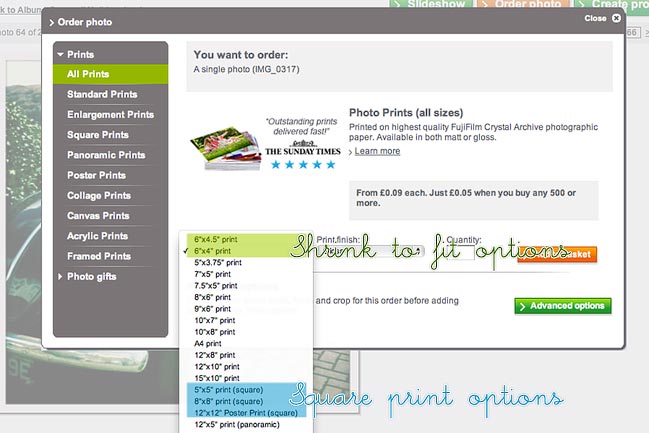
ordering Hipstamatic prints online
I order my prints at Photobox and it’s super easy once you know what to do to get your square prints. Start by uploading your images, then select what you want to print and add it to your basket. There are a few options for square prints. Photobox offers 5×5, 8×8 and 12×12 print options that already a square format, so you can pick these from the dropdown menu when you choose your photo size and just add it to your basket and be done. (I have ordered them at 5×5 and the print quality is just fine. I haven’t tried 8×8 or 12×12.)

Or if you want a smaller print, select the 4×6 or 4.5×6 size and add it to your basket. But be careful – you need to follow one extra step. The default 4×6 setting will automatically crop your picture to a rectangle.

ordering Hipstamatic prints online
If you want it to be a square, go to your basket and click on Print Options. Your photos will then load as thumbnails and you can see how they are cropped.

Default cropping:
ordering Hipstamatic prints online
Shrink to fit cropping:
ordering Hipstamatic prints online
Click the box that says Shrink to Fit and then Apply Changes at the bottom of the page. This will change your prints so you have a 4 or 4.5 inch square on the print, like the stack of prints above. Then you can just trim off the extra for the square print.

If you’re in the US, Scrapbook Pictures makes it even easier as they offer square prints right down to 2 inches, so you can add the photos to your card then just select your size. Easy!
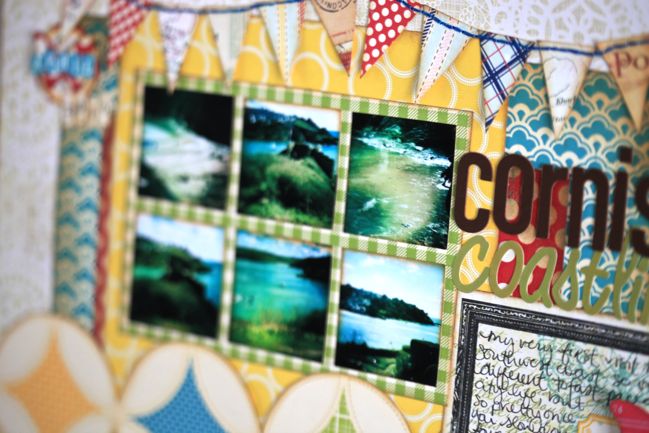
scrapbook page with Hipstamatic pictures
Printing Hipsta photos at home
Of course, you can print these photos on your home photo printer. I use iPhoto, so I tend to just select a bunch that I want to print and choose the 2×2 size or a custom size for any other size that would fit the project.

If you use Picasa, select your photos then click to make a photo collage, and you’ll be able to print several images on one sheet of photo paper. These photos look great at a teeny, tiny size that is handy for page designs with grids or that use photos as an embellishment of their own.
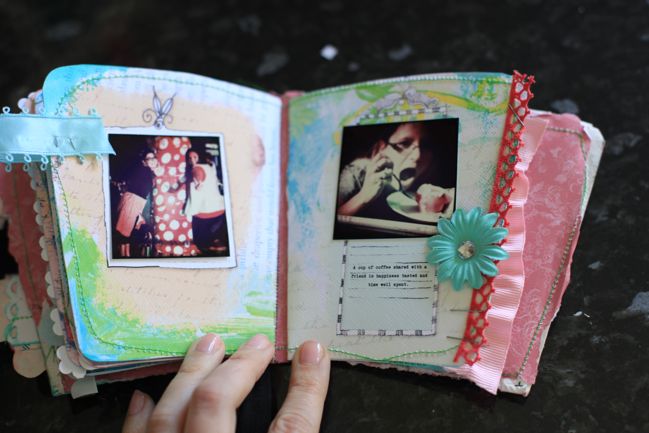
mini scrapbook with hipstamatic pictures

Hipstamatic cheats
So technically you can’t open an old photo and apply the Hipstamatic effects to a non-Hipsta photo. But you can open any photo on your computer, display it full-screen size and then take a picture of your computer screen with your iPhone. In fact, you can probably do that quicker than you can open it and alter the levels in Photoshop. That’s what I used to create this minibook with photos taken last summer, in life before Hipstamatic.

Or if you have a real preference for rectangular photos rather than squares, just select a film that has a minimal frame and print your photo at the standard 4×6. You’ll get the image and colour effect, minus the frame, in a standard rectangle rather than the square. (I may have done this by accident by missing a few ‘shrink to fit’ buttons and the prints are still definitely scrappable, just with a different look.)
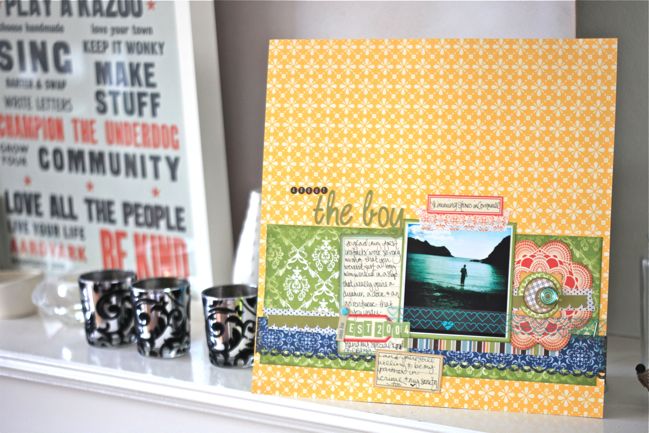
scrapbook page with Hipstamatic photo
Supplies: Patterned papers by October Afternoon and Pink Paislee. Die cuts and small letter stickers by October Afternoon. Large letter stickers by Bella Blvd. Transparency by Hambly Screen Prints. Tapes by Pink Paislee. Glass bauble by K&Company. Ranger Distress Ink, American Crafts pens and border punch by Fiskars.

Paper scrapping with Hipsta photos
So once you have prints in hand, the scrapbooking is the fun and easy part! If you love lots of pattern and embellishment, you can use just one photo and have plenty of room for open space and journaling. This particular image is one of my favourites so I wanted to give it a page of its own.
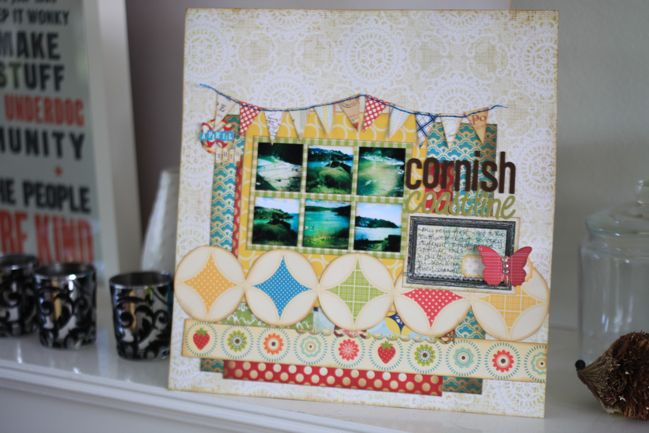
scrapbook page with Hipstamatic photo
Supplies: Patterned papers by BasicGrey, October Afternoon, Cosmo Cricket and Girls’ Paperie. Webster’s Pages journaling card. Butterflies and labels by Jenni Bowlin. Letter stickers by Cosmo Cricket, American Crafts and Bella Blvd. American Crafts pens and border punch by Fiskars.

The square nature of the pictures makes them great for grid-based layouts, which can be easily adapted to clean and simple or something more embellished. I printed this particular set of Hipstamatic images at 1.5 inches all on one 4×6 sheet of photo paper and then used a square punch to quickly make them identical in size.

See more examples of paper scrapping with Hipstamatic photos here, here, here, here and here. And if you have more examples in your gallery or on your blog, please leave a link in the comments!
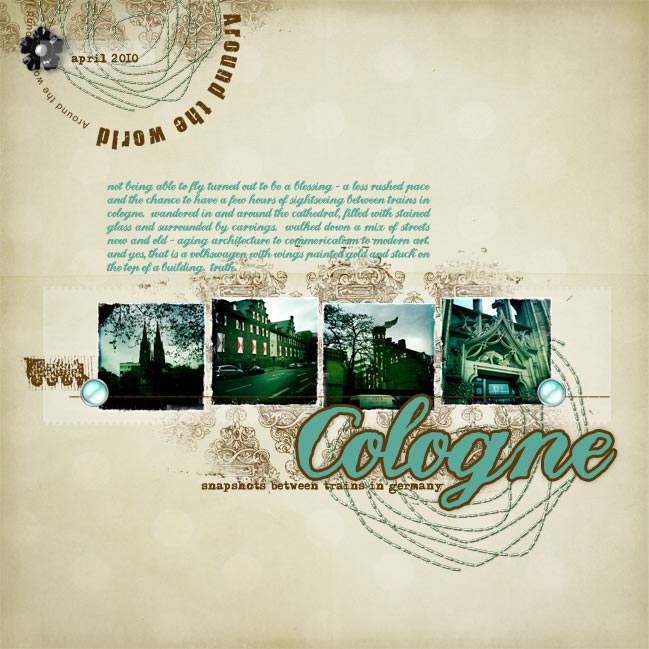
digital scrapbook page with Hipstamatic photos
Supplies: Page template and papers from Shimelle Digitals. Travel and floral embellishments by Vinnie Pearce.

Digital scrapping with Hipsta photos
The images from this app are definitely the right quality for digital scrapbooking. Just open them in Photoshop or your preferred scrapping software and copy and paste them onto your layouts. I love this app for capturing random snapshots when you only have a few minutes or can’t bring along all your camera gear – hence these shots between trains in Germany and the six shots above from a long walk along the Cornish coastline. This digital page is made with a layered page template so it came together in just minutes.
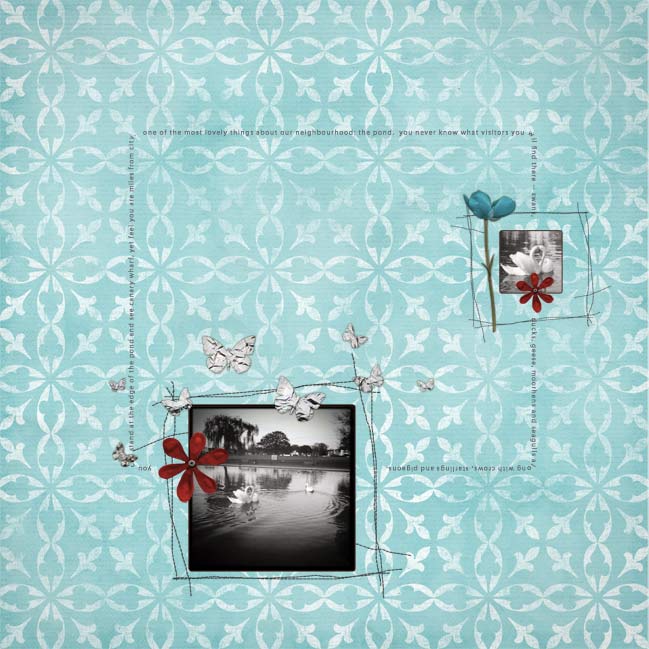
digital scrapbook page with Hipstamatic photos
Supplies: Template, paper and embellishments all by Vinnie Pearce.

Or if you want to draw attention to a favourite image, try a page design that leaves lots of open space on the page, like this template from Vinnie Pearce.

See more examples of digital pages with Hipstamatic prints here, here and here. If you have more examples on your blog or in your gallery, please leave a link in the comments!

So I reckon that’s enough of a resource post for now! I can’t wait to hear your ideas for what you would photograph and scrapbook with Hipstamatic. Please share!

And for those that don’t have an iPhone, please don’t throw too many tomatoes. I promise I don’t make those rules.

Learn more about Hipstamatic for the iPhone here.

xlovesx

A free digital scrapbooking kit plus a challenge

free digital scrapbooking kit

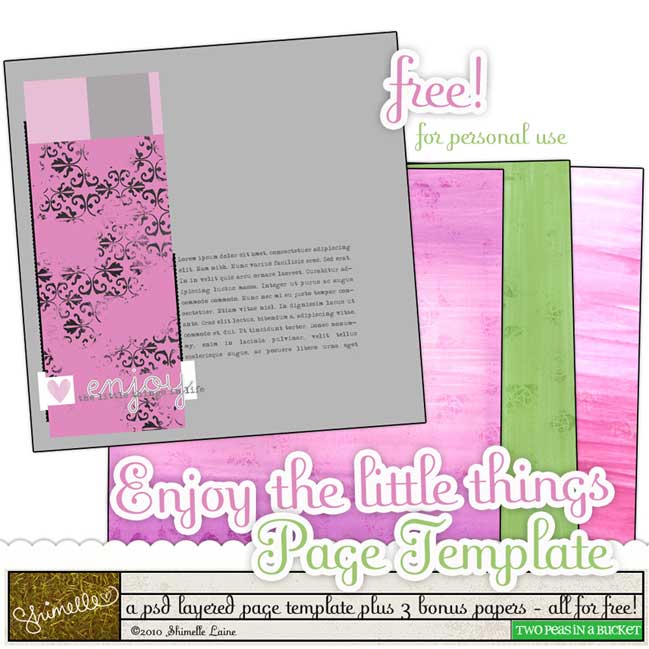
There are five new free digital scrapbooking kits available at Two Peas this weekend in celebration of National Scrapbooking Day, including this template and set of three papers from Shimelle Digitals.

Download this free kit and use it on a page this week and you can win your choice of any three items from the Shimelle Digitals store. Your project can be digital or hybrid.

To enter, create your project and upload it to the Two Peas Gallery. To upload a project there, click on ‘Member Gallery’ at the top and choose ‘upload a new project’ from the pull-down menu. In the final step of uploading your project, it will ask if you want to add products to show what you used when you made your page. Click yes and add the kit (it’s called Enjoy the Little Things). Then complete the upload. This will enter you in the challenge!

You can leave a link here as well if you would like to share what you made — plus please note the uploading process above is how you’re formally entered to win. Thanks!

This challenge ends next weekend at 11:59pm on the 9th of May. The winner will be posted here on shimelle.com.

Happy scrapping!

xlovesx

Scrapbooking with a free printable kit

scrapbook from a coffee cup

I loved this project so much that I had to make another coffee cup scrapbook with this free printable kit by Wilna Furstenberg.

scrapbook from a coffee cup

These kits make everything so easy — you just print out the pages, paste on your photos and add any extra embellishments you like. There’s even a free printable coffee cup included in case you don’t have one to hand. There are full instructions included too.

scrapbook in a coffee cup

Your next challenge is to find out just how easy it is! Make a coffee cup book using Wilna’s kit and then take a picture of it and upload it to your blog or a page gallery. Post a link in the comments on this post to enter for a chance to win.

scrapbook from a coffee cup

One randomly selected entry will win a Starbucks gift card OR some of my favourite coffee beans sent straight to you — the winner can choose depending on which suits her best!

You have until 6am UK time on Monday morning to enter!

Happy scrapping! And don’t forget some happy music to keep your creativity jiving!

xlovesx

Scrapbooking with Photoshop Brushes

photo with digital brushes

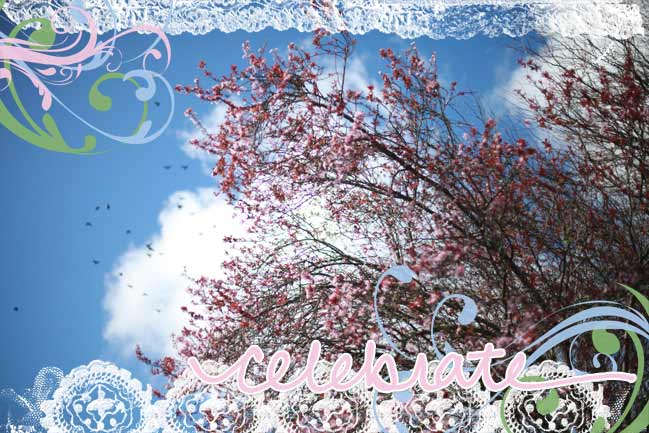
Digital brushes constantly amaze me: they can dress up a so-so photo and make it something extra special and they make it possible to do things like draw a perfectly straight line with a scalloped edge or repeat a handdrawn design exactly the same way but in another size or colour. It’s just like stamping and yet I never worry about making a mistake or dropping my inkpad, because the handy undo button saves all.

Rhonna constantly amazes and inspire me with what she does with brushes. Her digital pages are fabulous but I also love what she does to individual photos, like how she dressed up the pictures in this post with a little brushwork. Definitely check out her blog – she posts so many pretty things. And she’s going to send the winner of this challenge a prize! Thanks Rhonna!

If you have Photoshop Elements (or full Photoshop), then brushes are so easy once you get the hang of how to turn them on and make them go. This video tutorial by Sande Krieger shows exactly how to install and use brushes in Photoshop Elements. Or try this written tutorial from Rhonna if you find written instructions easier than the video. If you have full Photoshop, those tutorials will work too – it’s just that some of the menu options may be in a slightly different place.

If you don’t use any Photoshop software, not to worry! You can still use digital brushes as individual PNG images. Just open them in any image-editing software and you can copy and paste them onto an image. When you open a digital kit of brushes it will usually have a .ABR file (that’s the brush file) and a set of .PNG files (those are the individual pictures you can use in any image-editing suite).

Your 10am challenge is to create something with brushes, and you can download a free set of my hand-penned words brushes to get started. You can use any brushes (or other digital elements if your editing software of choice doesn’t include brushes) to complete the challenge so if you have a collection you can take your pick.

This challenge can be a digital or hybrid challenge. If you scrap digitally or want to give it a try, use the brushes on a digital page or element. If you are a strictly-paper scrapper, why not try adding a brush to a photograph and printing it out, then using the photo on a traditional paper page? If this is something you’ve never tried, then consider that the reason why it’s called a challenge and give it a whirl!

Whatever you make, post it to a gallery or your blog then leave a comment on this post with a link to your entry!

One project will be randomly chosen to win digital brushes from Rhonna Farrer. You can enter until 6am UK time on Monday 19th April.

Oh, and don’t think I forgot the tunes either!

xlovesx