pretty paper. true stories. {and scrapbooking classes with cupcakes.}

lovely to meet you Twitter Facebook Pinterest YouTube

Take a Scrapbooking Class

online scrapbooking classes

Shop Shimelle Products

scrapbook.com simon says stamp shimelle scrapbooking products @ amazon.com shimelle scrapbooking products @ amazon.co.uk

Reading Material

travel

A free mini-class to say thank you

scrapbook page

Back in January 2007, I found myself with the overwhelming desire to do something to say ‘thank you’ for all the fabulous things that had come my way from this crazy scrapbooking thing. Going places, meeting people, and later that year actually stepping away from a job that was partly amazing, partly immensely frustrating and taking a chance at taking this crazy scrapbooking thing full-time.

Now all I wonder is how I ever did this part time. I love doing this and all I want is more hours in the day to do more of it. I learned some very hard lessons in 2008, but by the end all I could think was that same feeling: I feel like I am so lucky. And since I’m never going to win an Oscar, I have to settle for my little spot in blogland to say my big thank you.

And I’m doing that with a free mini-class. It’s open to everybody, whether you read my blog all the time or you’re brand new, whether you’ve taken a class or you’ve never heard of me, I don’t mind. You don’t have to do any formal signing up, you don’t have to join anything, you don’t have to give me your name, address or first-born child. The class materials will be right here on the blog for you to download with a click. Easy enough? Shall we get on with what this class is actually about?

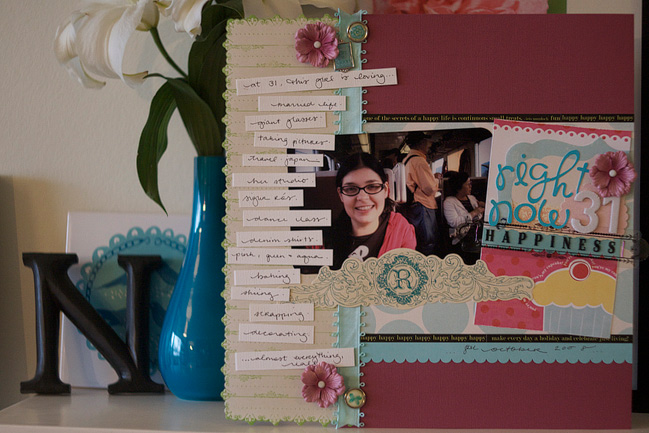
For the last seven years, I have made a layout called ‘Right Now’ during the week of my birthday. This year’s layout is above and you can see more about that here. The Creating Garden is filled with ideas for scrapping yourself this month and I was excited to share my little ‘Right Now’ tradition. But the current time of year also got me thinking…we do a lot of plotting out plans, hopes and resolutions in January, but not as much documenting of what just is. One of my favourite teachers from my youth used to start lessons with a brainstorming session and she encouraged us to ‘piggy-back’—which meant to listen to the other ideas that classmates shouted out, think about them and build a unique twist that makes a new idea that can be contributed to the group. That’s how these two projects are linked…an idea that has worked for seven years of layouts (so I’m obviously pretty happy that it’s worth continuing) that has been rethought and reinvented into something a little more complex that I’d like to share with anyone who is interested. And you’ll probably put your own unique spin on it too, and the cycle starts over. Are you in?

Here’s our class schedule:
15.01.09: Download the supply checklist so you can get your stash and your photos ready to go.
16.01.09: Kick-off party with a prize giveaway
18.01.09: Download the journaling worksheet so you can make a start with your notes.
21.01.09: Download part one of the construction instructions.
23.01.09: Download part two of the construction instructions.
25.01.09: Download the finishing notes.

All you have to do to download the prompts is click—the supply checklist is already there for you to download now so you can go ahead and start getting organised. ETA: Not sure why the links in the file decided to break half way through last night! Nevertheless, I’ve updated the file with fixed links now, so you can download it again if your links weren’t working. Sorry about that!

Thanks for so much in 2008. Now I hope you’ll join me for a fast start to a happy, scrappy 2009.

Who’s with me?

xlovesx

PS: Be sure to stop by tomorrow so you don’t miss out on prizes!

Looking back at Project 365 :: Part Three

Project 365 album samples
PART THREE :: Projects and Products for a scrappy 365

Once I started taking all these Project 365 photos, I wanted to find a way to scrapbook them, but there were a few obstacles that came to mind straight away. The logic went something like this:

...These photos are a mix of a little bit of nothing, a little bit of something. Like balancing a picture of the bookshelf with a picture of The Boy’s birthday cake. It needed to be something that worked for the ‘unimportant’ photos just as easily as the bigger occasions.

...As much as I wanted to participate for a full year, I knew there was every possibility that I could stop at any point, and I didn’t want a big album that was left half finished.

...To match my attitude of ‘digital shots don’t cost money’, I didn’t want to spend on the scrapping side. I have enough stash to build a new city out of paper, then wallpaper that. So there had to be enough there to make stuff.

...I wanted to create this for me, but I didn’t want it to control me. It needed to be quick and simple and something I could pick up and put down with ease rather than something I needed to complete all in one scrapping session.

From there, my crafty process involved twelve minibooks, each holding one month of scrapped 4×6 photos. Each one is different, and I like that, though I know many people would prefer for a year long project to have the same style from day one to day 365. The smallest book is 4×6, and you have to turn the book as you go to accommodate both portrait and landscape photos. There is nothing more to the ‘page’ than the photo itself, some with embellishment on top, some without. The largest book is about 8×8. Most are around 6×8 in size, as I decided after the 4×6 books that I wanted to be able to include both portrait and landscape without turning the book.

Project 365 album samples

These books are pretty much entirely made from stuff I had on hand. Cardstock, book rings, and bits and pieces of other stuff. When I scrap, I almost always cut up my patterned paper, and then when I finish a 12×12 layout I have all this extra paper left sitting on my desk. If I’m not going to use it again on the very next layout, I shove it into a box. In past years, that box has been a wasteland and eventually it’s ended up donated to somewhere who could get more use from it. This year, it became the ingredients for these minibooks. Once a month I would go through the box and cut the big pieces to 6×8 and throw the small pieces back in the box. Offcuts are just as good as full sheets of paper in this case, and it gave me the opportunity to use more of a paper I liked. That always makes me happy. As I completed each page, I kept the box handy and used the smaller pieces I had thrown back in. I didn’t worry about making the pages from one month match. I figure each day has its own agenda and each page can have that unique identity too. I repeated the overall feel of a page (much like a sketch) several times, because let’s face it—there are only so many geometric ways one can put a 4×6 photo on a 6×8 sheet of paper. That combined with the pull-from-the-box supply technique made these books super easy and quick to put together.

I have one left to complete—December—and then I am going to display them all together in my house. I’ve been keeping an eye out for the perfect basket to match our living room. When I find it and put all twelve there together, I’ll share the whole shebang. For the moment, here are a few little looks at bits and pieces.

Project 365 album samples

If you scrapbook digitally—or want to give it a try—there are plenty of things out there to make the scrapping side of Project 365 even easier than paper. Digitally, you can choose to scrap one photo per page, one week per page, one month per page or one month over two pages…and so forth! Check out this template and this template for one photo per page, this one and this one for a week per page or download a free template for one month all on one page. If you haven’t used a page template in Photoshop just yet, check out this tutorial or this walk through. Once it clicks, you’ll be amazed at how easy it makes scrapping. There is just no paper equivalent for making everything magically snap into the perfect place!

ETA: Brand new digi stuff for Project 365. Seriously cool.
One kit that would work for the entire year
A kit that will have a new edition for each month of the year
Date overlays to go right over your photos (cool for digi or paper projects, as you can print your photo with the design over the top)
Templates for 8.5×11 pages so you can print at home

Project 365 album samples

One other thing I discussed briefly in the magazine is the idea that you can take on lots of other projects that have the same focus as Project 365 without being an every-single-day event. Scrap your Day is one day per month—we’ve been taking pictures on the 25th every monday rather than every single day. Ali’s Week in the Life project lets you focus on one concentrated week of snapping pictures rather than just one picture every day. Both of those include support on the scrapping side too, with flickr groups and example pictures, sketches, product lists and anything else you might need. Digitally, you could start with a page like this with just one picture from each month of 2008. It’s like a trial size version of the full project. Or focus just on the photography side and join in with a weekly photo topic like Happy Bokeh Wednesdays, Corners of my Home Thursdays or Macro Mondays. There are plenty challenges out there that would result in one lovely photo every week, and fifty-two lovely photos is a pretty big accomplishment by the end of the year.

trafalgar

Which leads me to declaring my photography plan for 2009, just for the sake of saying it in public and holding myself accountable. Roughly, I’m planning to carry on with taking a picture every day at least until our first anniversary. It’s part of my routine now and doesn’t feel like a hassle…it feels more like breathing so I think that’s okay to carry on. But I needed something new as well. Something with focus. So in 2009, I plan to photograph fifty different London landmarks. And I mean photograph them as best I can, not get on a tourist bus and snap all fifty in one day. There are so many beautiful places in this city and so many are free and allow photographs. So that’s the idea—get out and about and take pictures. We’ll see what happens with this project…it’s still quite loose in my mind. I need to take the first few sets of pictures before I decide what I will do with them. We shall see!

Happy New Year to you, no matter how much you do or do not plan to put your camera to work! May it be a fabulous 2009 for us all.

xlovesx

Looking back at Project 365 :: Part Two

last look
PART TWO :: Ideas to keep things interesting

I will be honest: in January, I found Project 365 to be pretty easy, even though the lighting is pretty dire with the short days of winter and the traditional layer of regional cloud cover. The energy from the new year and joining a project that thousands of others were also participating in made me happy to bounce about with my camera and take shots of things I normally wouldn’t. The first month was easy.

February started to kill me. It was a busy month with a fair bit of going here and there, which made it seem like it should be easy to always have something to photograph. And when I was away, it was pretty easy as long as I wasn’t so jetlagged that I forgot what day it was. But it was a month that left me feeling pretty drained and exhausted, so on the days when I was doing my normal drill, working from home, I had more trouble picking up the camera. I missed my first day of taking a picture and immediately thought maybe I should drop the entire project. I didn’t want to call it quits, but it seemed like I was already a failure if I missed a day so early in the year. After much thought, I decided I could carry on with the project by implementing two things: the fake-a-day shot and a weekly personal challenge.

10.01.08

The fake-a-day shot is what I used for those five days I missed in the year. Faking a day is easy: it means taking a picture of something that did not move from yesterday to today. Missed taking a picture yesterday? Today take two. And let one of them be a still-life in your house. A stack of books on the shelf. The inside of your medicine cabinet. Photographs displayed on the wall. Just take a picture of something that was the same yesterday as it is today and don’t worry about it any more. No one will know. And if they do know for some reason, it’s hardly like they can criticise you for it. It’s not like forgetting to pay your taxes. It’s forgetting to take a picture. How exactly can anyone be upset by that except you? So tell you that it’s absolutely fine, fake the day and move on. Disaster averted and you’re still on the wagon.

from the window this morning

There is also the cousin of the fake-a-day shot…the lazy-way-out shot. I found it quite helpful to find a few shots that would be easy to the point of extreme laziness but would change throughout the year. There is a tree outside the window of my studio that seems to change almost daily. I think I took eighteen pictures of it in 2008. They all look different, so that’s fine by me. My favourite place to take my camera to get out of the house without going too far is the pond across the street. It’s home to ducks and geese and swans and it’s a peaceful little spot in the middle of the big city. Plus, there are ducklings in the summer! This is grand. The birds at the pond and I have a standing agreement: I give them my stale bread; they pose prettily for my camera. So they appear often in my Project 365 photos, and yet again they are completely different shots. I’m quite tempted to take their picture today as well actually—the pond is mostly frozen and they are all walking on the ice, which is quite sweet, though it makes my toes cold to watch them!

mixing

The weekly personal challenge is something I set myself, though there are also places online that will give you challenges if you prefer to take on a challenge with others. The idea is pretty simple—set a theme for the week and snap that in particular for the next seven days. One week I only took pictures of shadows. One week I took seven shots of my feet (something else that is in the January issue). One week I only took photos in the kitchen. One week I put my digital camera away and shot with film. Just little things to keep it interesting. You might thing one week of shooting similar shots could make things even more repetitive, but I found they led to finding creative approaches to each topic, so actually they became more interesting than the free-for-all ‘shoot anything’ approach. The week in the kitchen shocked me the most. Our kitchen is teeny-tiny with a giant florescent light bulb, complete with odd hum. Is that description enough to make you understand why I would be hesitant about taking pictures in there? We have much nicer light and windows in our living and dining room, so even if I need to take pictures of food, I usually take it out of the kitchen and into one of those spots to get things in a better light. I just assumed the kitchen set up wasn’t a good one for photos, and really I assumed this before I ever tried. In forcing myself to take a week of photos in the kitchen, I found that the light in this room is totally different and in the morning, it is actually some of the best light in our home. Never would have realised, but it has just the right angle to be very photogenic. Definitely a week when I learned something new.

As I mentioned yesterday, doing more with Photoshop was also a goal for me and this project gave me plenty to work with. One week the challenge I drew was to create a digital layout from the seven photos. I used this template and finished in a flash. Another week, I added these digital frames to my pictures. In both cases, the end result was way easier than I expected. If you haven’t tried simple digital alterations like this, it’s definitely worth doing one week this year.

jar

To set my weekly challenge, I printed up a list of a bunch of different aspects, cut them up and put them in a jar. Then when I felt like things were getting stale, I just drew a challenge from the jar and did as I was told! You wouldn’t need to do that challenge for a whole week—that was just what suited me. You could just draw a challenge when you had a day when you felt like you needed one. If that seems like something that would make the project interesting for you, you can download my challenge sheet in the format that is best for you—download the challenge list for point and shoot cameras or download the challenge list for dSLR cameras. Just save the file, print it out, and cut into strips. Super easy. The difference is that the point and shoot sheet doesn’t include anything technical—just challenges based on themes and places. The dSLR sheet includes those challenges plus additional tasks that include various technical abilities on your camera.

Of course, taking a year’s worth of photos for me instantly translated in my brain to scrapbooking a year’s worth of photos, which is more than just a challenge to my poor little head. But I came up with something that worked for me—more about that in part three!

xlovesx

Looking back at Project 365 :: Part One

aftermath
PART ONE :: Overview and lessons learned

This time last year, I decided I was taking enough pictures throughout the year that it wouldn’t be that much harder to take one every single day. Not of anything in particular, just making sure to snap the camera every day for an entire year. And somehow I made it through. Not perfectly, but well enough to make me pretty happy. In 2008, I took just over 9000 photos on my camera that represent 361 days of the year. Five days missing, but all in all, not a bad record. I’m happy to call that a completed Project 365.

This time last year, I also obsessed by searching the internet for information from others who had taken on similar projects to take photos every day, and I spent hours and hours reading the notes of those who had been there and done that. I learned a lot from those people. So it seems only right to share my experience now for those of you who are considering the project this year. Everything I can think of right now is represented here in three parts: Lessons Learned, Keeping Things Interesting and Projects for a Scrappy 365. I also wrote an overview article for Scrapbook Inspirations Magazine in the January issue, which is on newsstands in the UK now. (Go get it! What are you waiting for?!) You can download the article here. Right then…lessons learned.

When I started this project, my logic was mostly that I was already taking thousands of photos a year, but there would be a few stretches of the year that wouldn’t appear in pictures at all. I used a great many excuses to be lazy about taking pictures…excuses like ‘the lighting is rubbish’ or ‘I’ll see all these people again next week’ or ‘people will think I’m a freak if a take a picture right now’. With that new year resolution energy in my head, I decided 2008 would be a year to get rid of those excuses and take even more pictures. I was pushed along by the wedding concept…it seemed like snapshots leading up to the wedding would be interesting, as would a photo a day for the first year of marriage. With the changes and challenges that the last few months have given to pretty much everyone, we’ve found ourselves going through lots of things that we joke will make good stories to tell grandchildren. The kind of stories that keep you humble and grounded and thankful for what you have. Not quite walking barefoot in the snow to school, uphill, both ways…but things we will remember. Things that people weren’t thinking about so much a few years ago: strategy plans for the ‘what-if’, budgeting more and more carefully, paying more attention to the news and letting it all make some sort of sense. So the lessons learned start there: these are things I couldn’t have predicted at the beginning of 2008, but they are life-changing moments that I now have documented in pictures. I’m sure 2009 will be no different and things we can’t even fathom right now, both good and not so good, will happen to many of us between today and the thirty-first of December. Committing to a picture every day—no excuses—means capturing all those details and remembering more from our own meager meanderings through life. It’s not like the idea of daily photo documentation of one’s life is a hard sell to a scrapbooker anyway, really. This is what we’re all about, isn’t it?

broken

The other lesson is one that makes perfect sense but I still didn’t really see coming: it’s just how much I came to know how my camera works. I’m not saying that those 365 photos made me into some superstar behind a camera. They didn’t. But they changed the way I looked at my camera itself. My first photography instruction came in a part time course through my high school’s journalism program, so we are talking a little bit of instruction and a long time ago! Of course that was film and film had an expense, so the idea was to learn to shoot safely, so no shots on the roll were wasted. It made sense with film, and I learned things that were and still are very important—an understanding of exposure, of ISO, of aperture. But this was well before the days of cameras that do things for you—we shot on all manual then because it was the only option on the camera! (Yes, typing this is making me feel very old.) Somewhere between those days and 2007, I still had a limited understanding of how to use all that on my modern day camera. I wasn’t using the fully automatic mode, but I had a tendency to lean on the modes that gave me partial control and let the camera do the rest. After Cheryl’s masterclass gave me a bit of a kick, I found myself wondering why I was doing that lazy thing at all. I wasn’t happy with the photos that I was getting from that, so why hadn’t I changed earlier? It’s that old adage—if you do what you’ve always done, you’ll get what you’ve always got—my pictures weren’t going to change until I got over the fear of fully manual. And tell me, what exactly was I afraid of? It’s digital—so there’s no expense of shooting extra pictures. With a photo every day, I had plenty that were shots that could easily be recreated, rather than needing the perfect timing of a once-in-a-lifetime moment. So who knows why I was afraid. So 2008 was the year that I started learning the ins and outs of my camera by trial and error. Take a picture, change a setting, take it again and compare. With every dial, every button, every combination I could find. I had read my camera manual before all this but the trial and error approach is what really made me learn what everything would do. Once I got confident with all that, this was (and is) the same approach I’ve applied to learning Photoshop. I could do the basics. I paid for way more than that. For both Photoshop and my camera! So it was time to starting working both for what they really were worth, and this attitude has really paid off. I remember those shots from the first week of January, like this one, and thinking they were great. Now almost make me cringe. And if today’s photo makes me cringe a year from now, that’s good in my book. It’s all about progressing and learning and getting better and better at something you enjoy. It’s the kind of learning that has no pressure, because really there is nothing wrong with that shot from last year. I don’t have to be upset that I ruined a photo opportunity. I’m just happier now, and this entire concept makes Project 365 worth it.
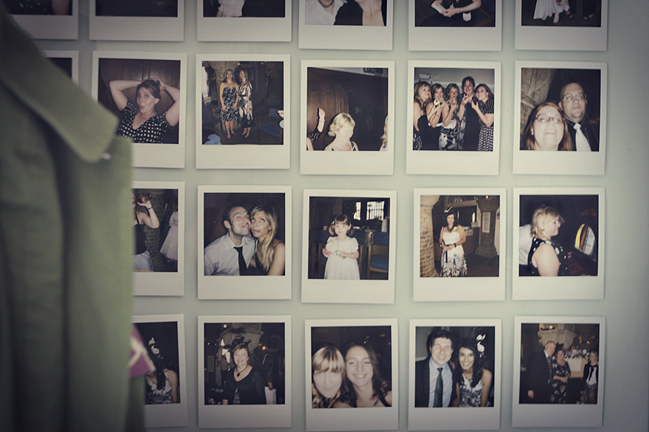
polaroid wall

The last lesson was a practical one: I needed a system to make this project work for me. I think the ideal system would be different for all of us, so I’m sharing mine just as an idea. The important thing is to have something that works for you…this is what worked for me. I needed a workflow that kept things from piling up and kept the energy and fun of the project, so I separated it into daily or near daily, weekly and monthly parts.

Daily
Take a photo. Well, obviously.

Near Daily
Transfer photos from camera’s memory card to my computer. I organise my photos in iPhoto, so it automatically sorts, orders and groups the photos by date.
Immediately delete anything that is rubbish or entirely duplicated. (Repeat to self: I do not need thirty-seven photos of that coffee cup today.)
If I took more than one photo for the day, choose the picture that will be the photo for the day and mark it by using the star ratings in iPhoto.
The photo file will automatically have the date attached in the exif data, so you don’t need to do anything to save that. But I also used iPhoto’s description field to add any additional information I would be likely to forget—locations, names of people if I hadn’t met them before, that sort of thing. If you haven’t discovered this field in iPhoto, it can be a lifesaver—click on any picture to select it, then look at the bottom left corner of the screen. That’s where all the info is displayed and you can type straight into it.

Weekly
Do any editing to the seven photos of the week.
Save them in a special folder on my computer so I have them backed up and all in one place.

Monthly
Upload the images from that special folder to an online printing service. I have a photo printer at home that is perfect for how I scrap because usually I like to print the photo and scrap it straight away once I’ve had an idea, but with these photos I knew what I was going to do…it wasn’t an spontaneous layout exercise. And my photo printer is lovely but not economical. Ordering pictures in batches online is far, far cheaper and it’s super easy. I use Photobox, and if your photos are ordered before 3 to 4 in the afternoon, the pictures arrive the very next day by first class post. Can’t fault that in any way! I ordered one copy in 4×6 of these photos, one month at a time. (If you’ve never used photobox, send me an email and I’ll send you an invitation email that earns each of us fifty free prints! Ace!)
Scrap them in a low-stress way. Each month would take me a handful of hours to scrap. I wanted a format that would be easy and not cost me much. (More about the specifics of this in part three.)

And that was (and is) my system. It works for me because things don’t build up to a point where I feel like I have to dig myself out. No part of this process involved hours and hours and hours of catching up. Everything stayed nice and light, which made it all doable.

littlehampton seafront

There is one step that I tried to implement and I didn’t keep—that was uploading to Flickr. I love Flickr and thought I could easily upload a photo a day there, but that part just didn’t make it into the time I wanted to spend on the project. I still uploaded a lot of photos to Flickr in 2008, but my set of images for Project 365 looks like I gave up pretty early on. It is still something I’d like to do and it doesn’t take a lot of time, but it was just enough that I decided I could cut it free from my workflow for the sake of keeping things on my terms. It worked for me.

I’m not saying there weren’t moments where I was close to giving in. I had to do some things to keep things from getting old and boring. So more on that in part two: keeping it interesting.

xlovesx

Merriest of Scrap your Day days!

Christmas morning

A very merry holiday to you and yours! We’ve been having a lovely day so far with The Boy’s sister and her other half…off to see more family this evening, then we are also looking forward to Faux Christmas, as various members of the family have seen fit to do exciting things like spend their fiftieth birthday and Christmas on the beach in Australia or cruise around the Caribbean. We promise not to hold it against them when we are all back together for a big meal and more gift exchanging in the new year.

I’m happy to report that The Boy has continued his lifelong tradition of polishing off his selection box before Christmas breakfast, while I will try to make mine last until January.

Scrap your Day girls—you can download the December album prompt here. Happy scrapping!

New to the project? You can still join in. For more Scrap your Day information, check out:
About this project
Sign up for reminders
Getting Ready
Photo Fact Sheet #01
April Album Prompt
Photo Fact Sheet #02
May Album Prompt
Photo Fact Sheet #03
June Album Prompt
Photo Fact Sheet #04
July Album Prompt
Photo Fact Sheet #05
August Album Prompt
Photo Fact Sheet #06
September Album Prompt
Photo Fact Sheet #07
October Album Prompt
Photo Fact Sheet #08
November Album Prompt
Photo Fact Sheet #09
December Album Prompt
Our Flickr group
UKScrappers discussion thread
Small image for signature files
Blinking image for blog side bars

xlovesx

Christmas Eve greetings

December Reminder

Well, December has thrown a lot at our house that we weren’t expecting! The loveliest in ongoing spam attacks (hopefully now to a point where I can publish this!), Hotmail deciding that I am a spammer, a ridiculous winter bug that totally wiped me out and various other bits and pieces to be filed under ‘Stuff you really don’t need to happen in December’. But here we are, just in time, with Christmas decorations and a kitchen of food ready to cook.

Of course this month the 25th falls on a day when you are likely to be taking quite a few photos—so Scrap your Day will probably be the easiest yet! This month’s photo challenge is a review of all the little tricks we’ve tried over the last eight months, and you can download it here.

For Journal your Christmas participants, you’re welcome to join in Scrap your Day this month and then decide whether you’d like to keep going with the project in 2009. Scrap your Day is a free project—it’s basically the idea to photograph the same day every month (most of us are snapping on the 25th) and scrap all those photos in an album that shows a year in your life. Every month there are photo notes and a sketch for the album format many of us are using…but you are free to make the project your own!

So much more I want to share but will leave it here for now, as present wrapping calls!

New to the project? You can still join in. For more Scrap your Day information, check out:
About this project
Sign up for reminders
Getting Ready
Photo Fact Sheet #01
April Album Prompt
Photo Fact Sheet #02
May Album Prompt
Photo Fact Sheet #03
June Album Prompt
Photo Fact Sheet #04
July Album Prompt
Photo Fact Sheet #05
August Album Prompt
Photo Fact Sheet #06
September Album Prompt
Photo Fact Sheet #07
October Album Prompt
Photo Fact Sheet #08
November Album Prompt
Photo Fact Sheet #09
December Album Prompt: online tomorrow – the 25th
Our Flickr group
UKScrappers discussion thread
Small image for signature files
Blinking image for blog side bars

xlovesx

Crafty Christmas :: Canvas Ornaments

ornament made with scrapbook supplies
©twopeasinabucket.com

I am forever passing this fabulous art store and going in just to see what odd little bits and pieces they have. They have the loveliest paints and super nice staff who always ask me if I am a student, which makes me sigh and dream for two seconds about how lovely that would be. But there is always some treasure to be unearthed in there, like super tiny stretched canvas. And a bargain!

So I’ve decided to decorate a Christmas tree in little canvas ornaments. They are super easy…acrylic paint, a bit of glitter, a scrap of patterned paper, a snowflake and then the super cute paper doll from Kitschy Digitals. Did I just suggest using a paper doll? Um. Yes, I did. I promise I am still firmly in 2008…she’s just supercute! You can download her in a set made easiest for paper artists or digital artists, which is extra cool. You can see the rest of the gifty stuff that matches this little canvas in the 36 days of Christmas countdown.

Now I just need to finish about a dozen more of these little ornaments and I’ll have enough to make it look like I decorated the tree that way on purpose.

What are you putting on your tree this year? I love hearing ornament stories!

xlovesx

Crafty Christmas :: Advent Calendar

advent calendar

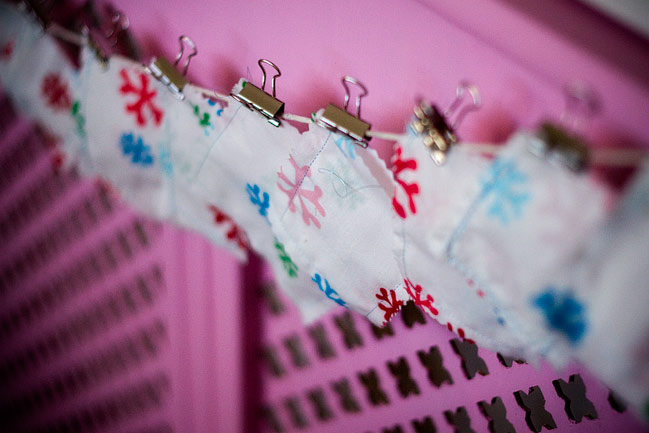
Here’s the thing. It’s all well and good finding adorably cute pajamas at Gap Kids that would fit no one you know but are on sale making them cheaper than buying fabric by the yard. It’s all well and good cutting them up a few days later and sewing them into little pockets. It’s all well and good having plans to find a quiet evening sometime in the future to make them cuter with all manner of little buttons and things. It’s all well and good to have plans to fill them with chocolates. Tiny, tiny chocolates.

What’s not at all well and good is to hang them in front of the radiator.

So now they are empty and the chocolate is mostly eaten.

When good crafts go bad, I tell ya.

xlovesx