Christmas Eve Scrapbook Pages
A very happy Christmas Eve to you! I hope today is truly magical wherever you may be!
xlovesx
![]() Comment [6]
Comment [6]
A very happy Christmas Eve to you! I hope today is truly magical wherever you may be!
xlovesx
![]() Comment [6]
Comment [6]

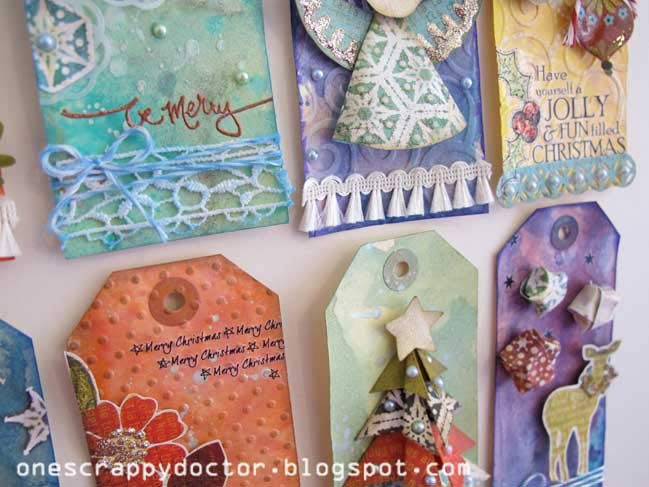
A very warm welcome to Natalie Elphinstone, our special guest today. I love the tutorial and project she’s created – I hope you do too! And if you do, please take a moment to tell a crafty friend. Take it away, Natalie!
Tags are becoming very popular to make these days – especially in the holiday season. But apart from using them on your gifts, have you ever considered what else you might do with them? A very easy way to use up any leftover tags is simply to include them in the way we know and love best…. a scrapbook page! So today I’ll show you how to both make some simple tags that look impressive, as well as how to effortlessly integrate them into a Christmas layout.
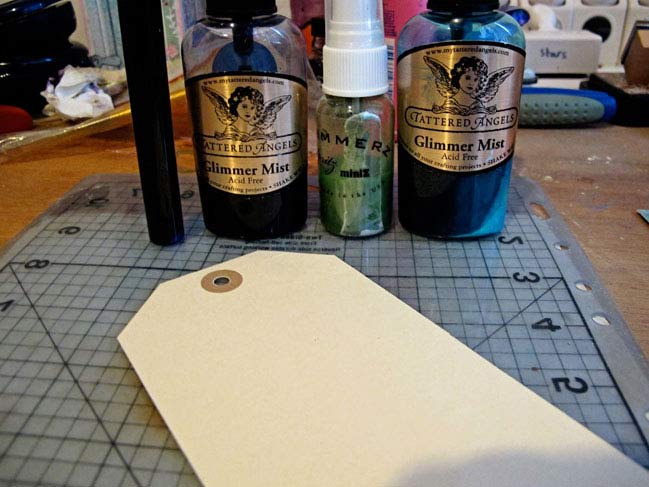
The key to these tags is creating an interesting background. You’ll need a few different shades of coordinating spray inks and a basic manilla shipping tag. You can see I’m not too picky when it comes to any particular brand of spray ink as here I’ve got Smooch Spritz in Grape Burst, glimmer mist in Midnight Blue and Turquoise Blue and Shimmerz Spritz in Olive Branch (which I didn’t end up using).
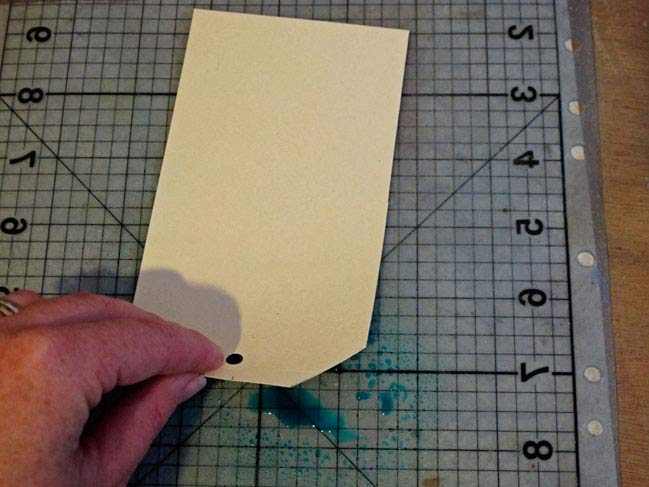
Start with your lightest shade of mist first (I chose Turquoise Blue) and spray it a couple of times onto your craft sheet. I also spray some water into this mix too so that each layer of colour is reasonably sheer. Then simply swirl your tag through the mix and speed up the drying process with a heat gun.
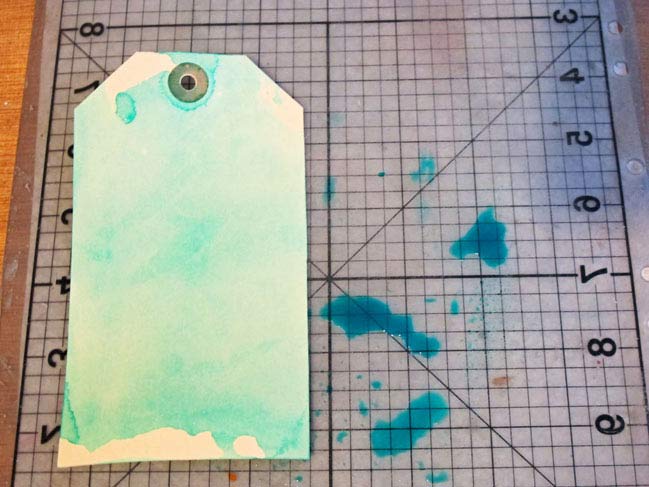
The trick here is to make it as imperfect as you can allow yourself to be! Embrace the fact that not every area of the tag is coloured, and that it’s pooling in certain areas and looking quite blotchy.
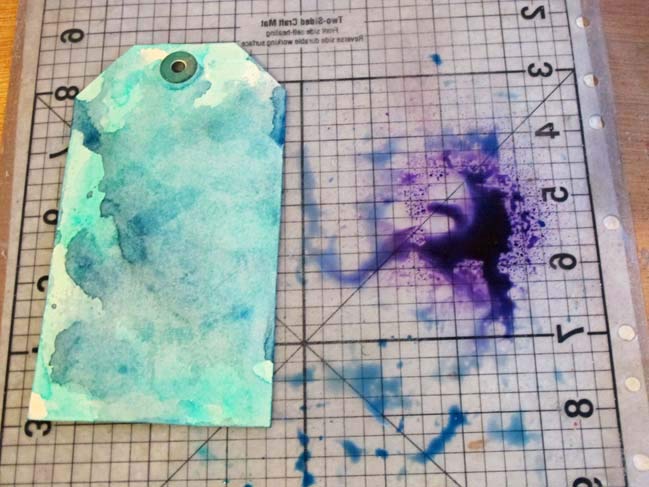
The picture above is what my tag looks like after I’ve given it two coats of Turquoise Blue, one coat of Midnight Blue and I’m ready to go ahead with my first layer of Grape Burst. As you can see – it’s all about the layers! This gives it a lovely shimmery water-colour effect.
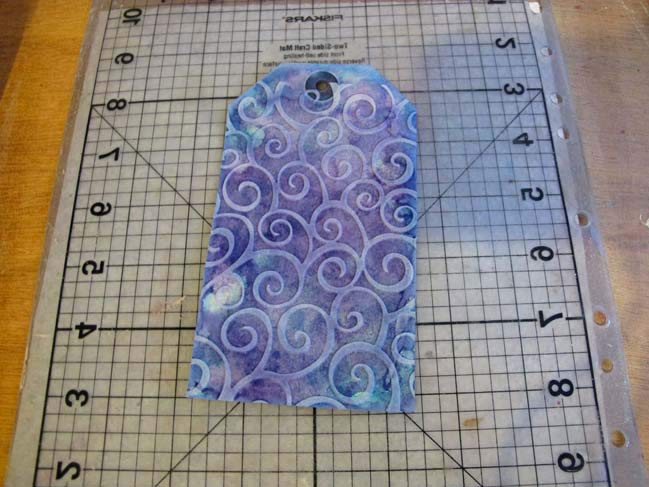
Next I inked the edges of my tag with a similar turquoise colour as my glimmer mist, then ran it through my Cuttlebug using the Divine Swirls embossing folder. I used a white ink pad to rub over the top to highlight the embossing – and doesn’t it just look as Divine as the name suggests?!
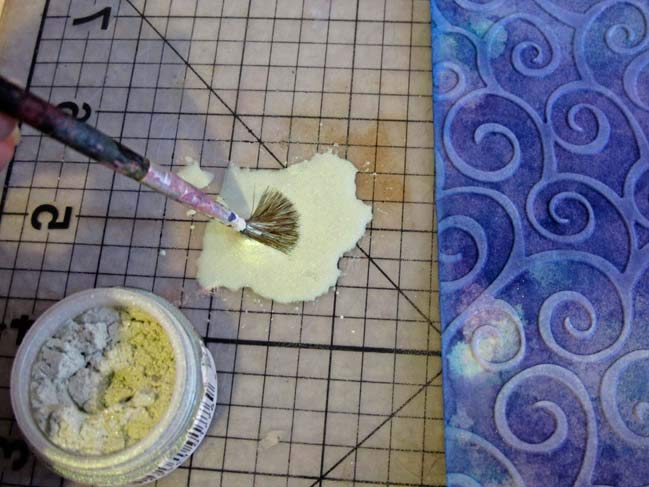
This last step was a little gem I picked up from doing Tim Holtz
12 tags of Christmas last year. I mixed a ‘scoop’ of Perfect Pearls with a little water and then flicked this over the tag.
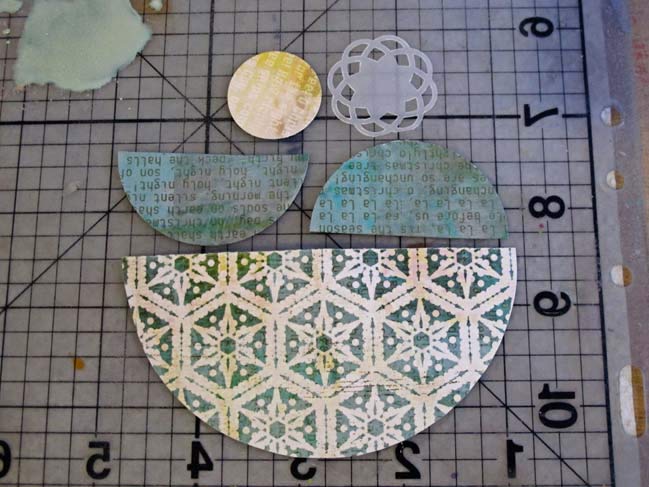
To make the angel you need one half-circle for the dress, and two smaller half-circles for the arms. Mine measure approximately 4 inches and 2 inches respectively. You also need a smaller circle for the head, and I used my Martha Stewart Medallion punch for the halo.
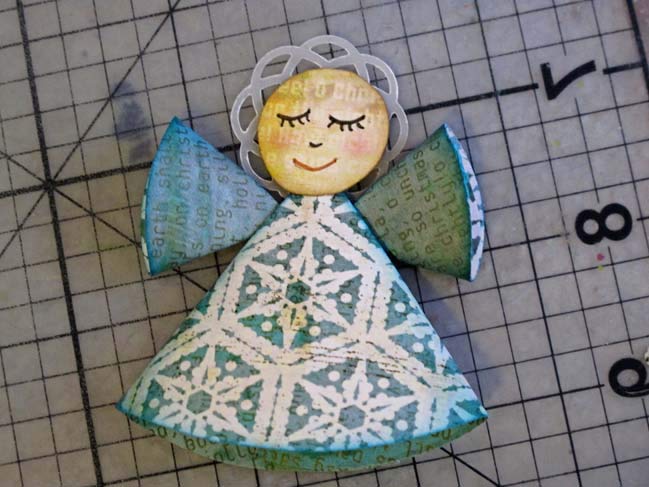
Roll each half-circle into a cone and assemble your angel. Simply glue the smaller cones on as arms, and attach the halo behind the face with some foam tape. I tried my hand at drawing some angelic facial features on mine!
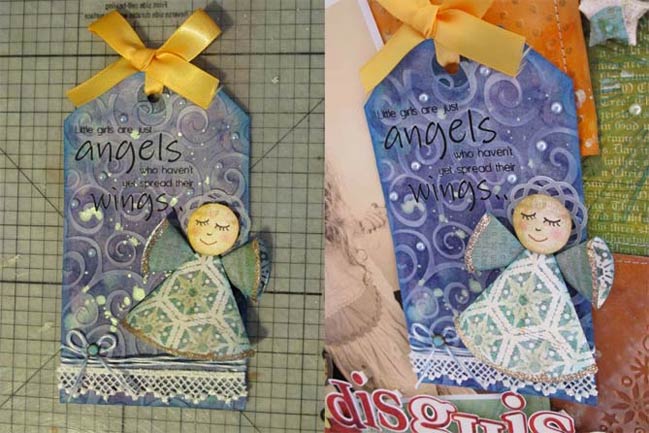
To finish off my tag I added a Kaisercraft rub-on, Prima lace, bakers twine and pearls. I added some more detail to the angel by trimming her dress and sleeves with glitter and highlighting the snowflake pattern with Dimensional Magic.
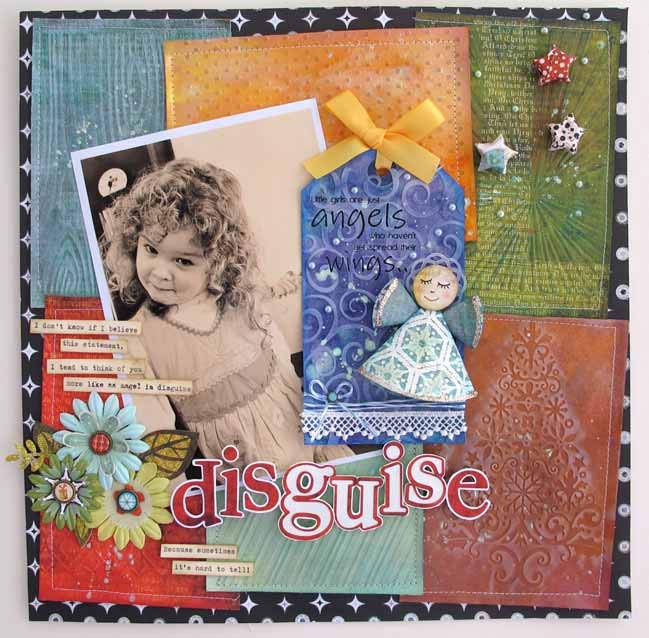
The tag looks great by itself – but if you include it on a layout it suddenly becomes the main focus. It adds lots of detail and really is the central attraction (well…. perhaps second only to my cheeky daughter of course!)
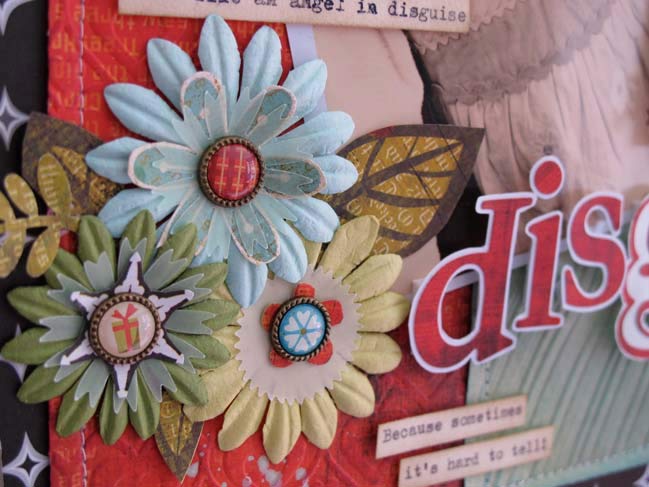
The rest of the layout is fairly straight-forward by comparison. Just some embossed colour blocks (I know Shimelle is a fan of this method of scrapping!) and a few other embellishments. I’ve used the stunning Jovial collection by Basic Grey, intermixed with plain cardstock that I’ve glimmer misted in the same method as above.
This is such a cheeky photo of my 4-year-old girl, but this is a face we see quite a bit. The sentiment on the tag reads “little girls are just angels who haven’t yet spread their wings”. But I couldn’t leave it at that and added some journaling “I’m not sure how much I believe this saying. I prefer to think of you more as an angel in disguise. Because sometimes it’s hard to tell”.
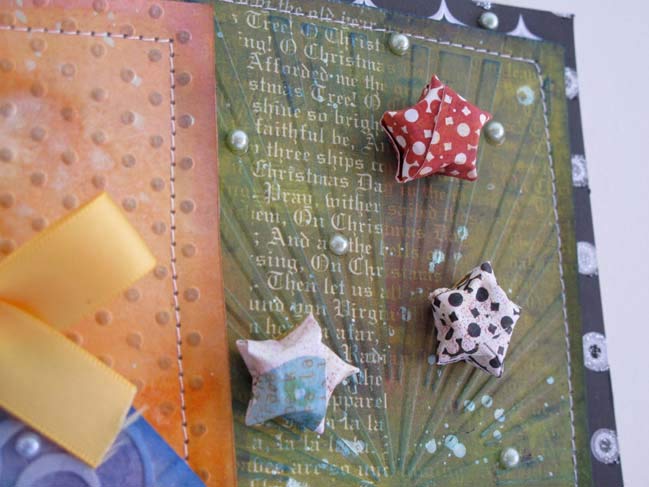
If you are interested in seeing some of the other tags I’ve created in this series, or to learn how to make those origami stars you see in the photo above then I would love it if you stopped by my blog
| Natalie Elphinstone is a busy doctor training in Obstetrics and Gynaecology. But in her time off when she’s not enjoying quality time with her wonderful husband and two gorgeous daughters you’ll find her tucked away in her ‘scrap-room’ crafting up a storm. She currently designs for Handmade by Suzanne and From Screen 2 Scrap You can read more about her life and her art on her blog Scrap Doctor |
 |
![]() Comment [10]
Comment [10]


From the older ruins of Ayutthaya, we headed to something much more sparkly and new: the Grand Palace in Bangkok. Its construction started in 1782 and new additions have continued to be built. Indeed, we saw a few towers of scaffolding while we were here.


This is an expansive place, yet the tiny details are what I found most amazing. Tiny reflective tiles hand-cut and placed in mosaic patterns to make up a rich picture, at times in the way that individual brush strokes can be beautiful both in close scrutiny and upon stepping back to see everything as one full picture.


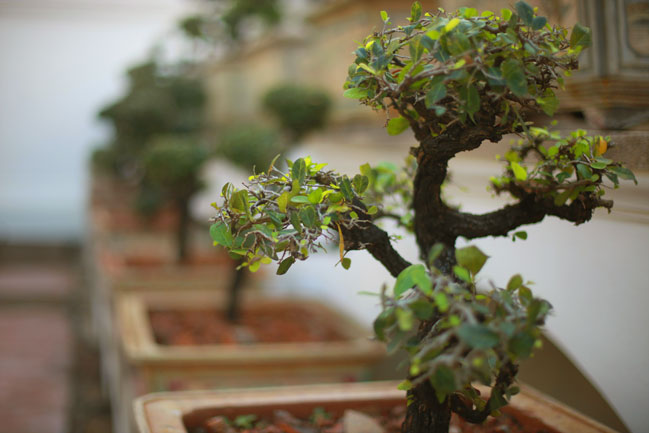
While our last stop showed styles that were consistently Thai, at this palace there were bits here and there that reminded me of other cultures. The bonsai trees and a few of the guard statues reminded me of what we saw at the palaces in Kyoto, Japan. Whether there is a real connection there, I’m not yet sure – I’m making this note here so I can look up the influences and political connections of the time and find out! (We arrived a bit late in the day to meet up with a tour guide, who probably would have known, so I’ll ask the powers of the internet when we have a better connection than today.)
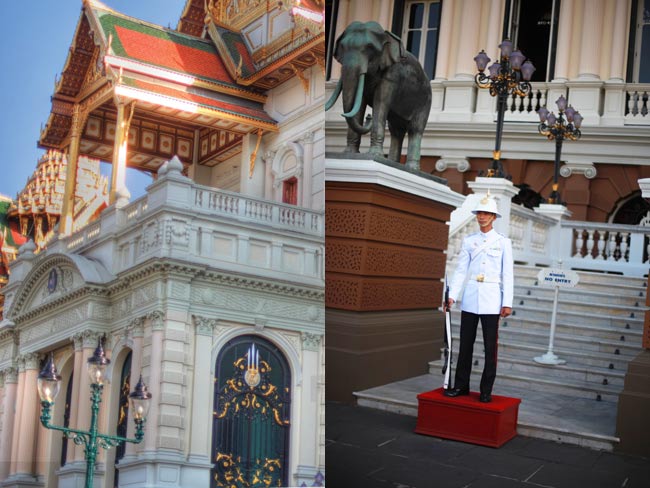
The palace has a smart dress code – our first time to test what we chose to pack in our small bags. The Boy had no problem, but I was stopped at the door for something that surprised me entirely! I was wearing a knee-length dress with short sleeves (but not sleeveless) and three-quarter length leggings. I would always think that was more modest than the same dress without leggings, right? But no – I was asked to either remove the leggings and wear the same dress with bare legs or to wear a full-length sarong, which anyone who doesn’t meet the dress code can borrow while they walk around the grounds. So no problem at all and I happily borrowed a pretty blue sarong, but it left me perplexed that bare legs would be preferred to covered! One of the ladies explained it was because anything tight would be disrespectful. Learn something new every day!


When we walked around other areas of Bangkok, there was an interesting mix of old and new, where modernisations have been added right on top of the existing culture, so you get interesting scenarios like elderly shopkeepers selling the latest in modern technology and very old buildings with signs for Western fastfood restaurants – that sort of thing. But at the palace that was notably absent. I think if you took photos here thirty years ago and compared them to today, they would look remarkably similar.
Probably something else I should try to find out, I’m sure!
xlovesx
![]() Comment [9]
Comment [9]


After a long flight, we made it to Bangkok, Thailand, where we are staying with a friend I haven’t seen since college. She has been an absolutely amazing host and helped us see so much in our time here. Our first stop was the ancient city of Ayutthaya. I am somewhat obsessed with seeing UNESCO World Heritage Sites (and I live just a short walk away from one!) so starting here made me giddy to check another site off the list.

Ayutthaya dates back to 1351, which means the buildings we saw were actually younger than places like the Tower of London, but earthquakes and a Burmese takeover that burned the town to the ground really didn’t help preserve things. As a result, there are many headless buddha figures found here – hundreds, if not more.

The different sites here are spread all over the town, so after walking through a few that are right across the street from each other, we bought some postcards of things that looked interesting so we could communicate to the driver where we wanted to go. It worked a charm, and we were able to see different areas of the city, from old and unrestored to shiny and new.
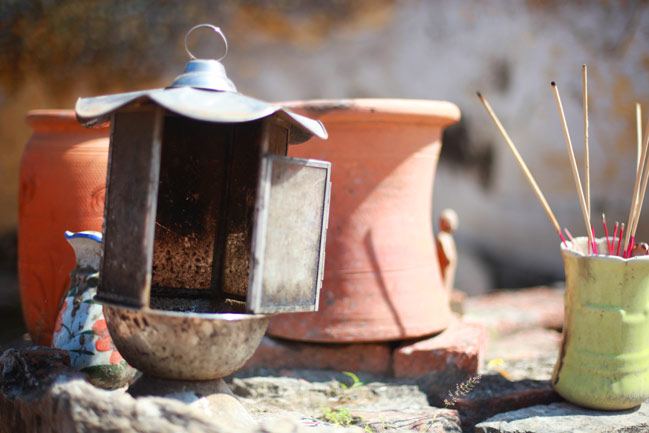
One of my favourite aspects of going to places like temples and shrines is looking at the objects that are part of the rituals. Candles, flowers, offerings – there is a personality to what is left at each monument. Here it was basic and often worn, but beautiful in its balance.

Rubbing gold leaf on a buddha helps build good karma, as you’re helping to keep the monument at its best, as we were told. I love that making things glittery is seen as a way to do good!

One thing I never imagined I would see: monks with mobile phones. And they posed for pictures with each other, as these monks were visiting from another area of the country. They had an amazing way of being happy and something I would describe as excited but in this completely calm way.

Heck, I was jumping up and down and clapping my hands just to have such a pretty blue sky as a backdrop to the pictures. Calm excitement? Clearly not in my nature.
xlovesx
![]() Comment [15]
Comment [15]
Today I’m happy to introduce Louise Fortune as a special guest blogger. She has five fabulous ideas for crafting with printables – great ways to add new designs in just the style you want by using your home printer.
Printables are one of the most versatile scrapbooking products to have in your crafting arsenal. It doesn’t matter if you are a died in the wool paper only scrapbooker or if you dabble a little in the hybrid, printables can be a untapped resource especially as there are some great sites offering a huge selection (try here for a start) not forgetting the scrappers to numerous to mention, who offer great freebie versions of their designs. A whole page can be created from printable products without even moving from your scrapping space from papers and journalling cards to embellishments and accents.
The card above features one printable design – it’s a great printable and amazingly simple to use. The stand alone design could be adapted to use in a mini book – I’m thinking JYC here girls – as a printed background on a seasonal layout or as is intended on a card.
Although clean and graphic in looks it the overlapping type gives it a lively feel. The colours are simple enough that it could be matted (wow! I haven’t used that word in a long time.) and then added to a patterned background without it looking too busy.
Once printed onto your card blank all it needs is a pretty matching ribbon on the side, voila ! bespoke Christmas card. I used a 5 ×5 inch cream card blank for this design.
Two tips to help get the most from your printable design: Remember to adjust the paper settings on your printer for card to get a nice deep crisp ink resolution. If you want the design smaller or larger, adjust the scale settings (percentage) from your print preview screen.
This design is available free from Scrapbook Printables. Find it here and print at any size you fancy.
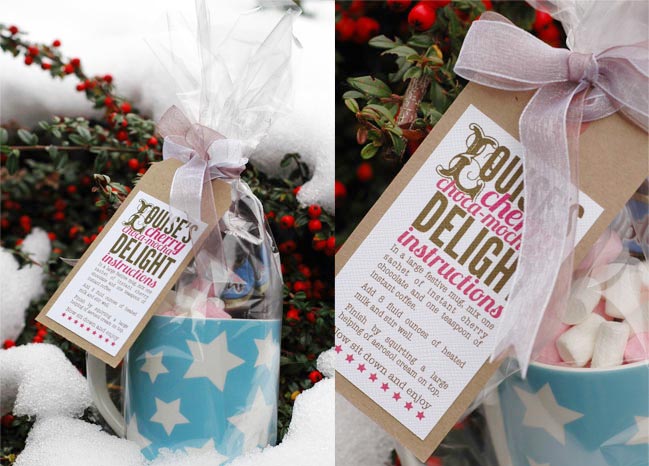
I love, love, love this design! My inspiration for this came from my favourite American coffee shop (you know who you are!) discontinuing the cherry chocolate christmas drink this year. I decided to create my own version and as I have friends who miss their seasonal cherry, choc, coffee beverage too I decided to do a few gift mugs, this tag with the instructions finishes off the package perfectly.
One seasonal mug, three sachets of cherry chocolate mix and a generous helping of mini marshmallows, wrapped generously in clear film and tied with sheer ribbon and the tag, one fast, thoughtful, designer, handmade gift.
I used a standard manilla luggage tag from a stationary store (WHSmith, Staples or Paperchase) printed the design off onto white card and then adhered it to the tag.
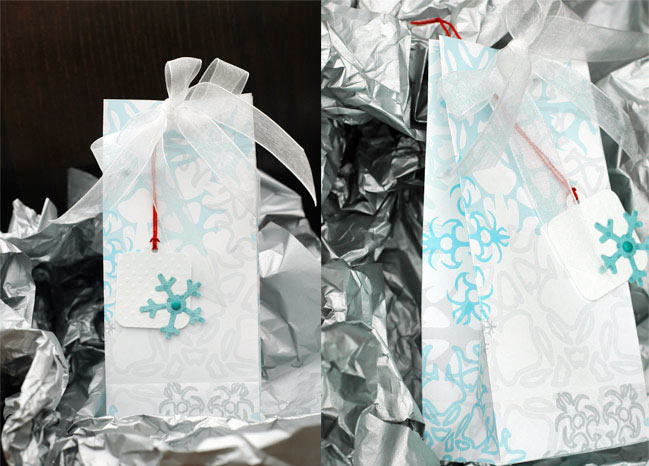
To create this gift bag I downloaded a template from the web, there are hundreds of options out there. This one fits perfectly onto an A4 sheet of paper and makes a 6×3×2 inch bag (approx). Choosing which paper to download and print is the only difficult option with this project there are SO many available and as you get to pick the design it can be tailor made for your gift and the occassion.
This one is obviously seasonal and I used this free snowflake design available here. The paper design is printed on one side and then the paper was put back through the printer and the template was printed on the opposite side.
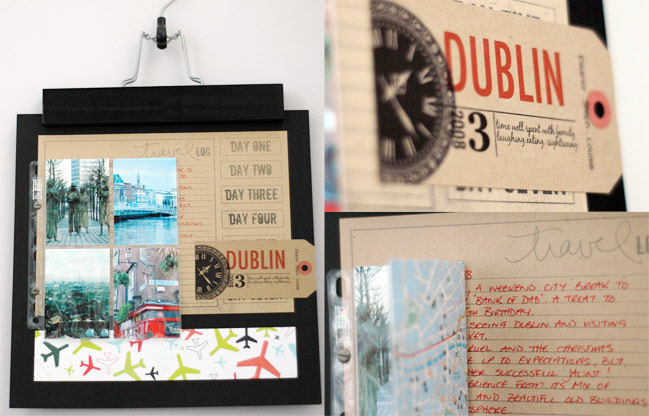
As this scrapbook page is about a city break, I used Shimelle’s travel journal printable, but instead of creating a book with it I used it as a background and a journalling option for my LO. It is printed on kraft cardstock and then the design is left whole, trimmed to a 1/4 of an inch of the outside edges and then adhered to the cardstock.
I wanted the journalling to be read, and I hand wrote it, which is rare, so I want it accessible! A trading card protector sheet was trimmed down to 2×2 pockets and fixed to my page with brads over the travel log. on the back of the photos I adhered a street map of Dublin, but you could opt for four more photos to make it an 8 photo layout. finally I added a manilla tag printed with some details and a rub on clock face and a strip of American Crafts travel paper.
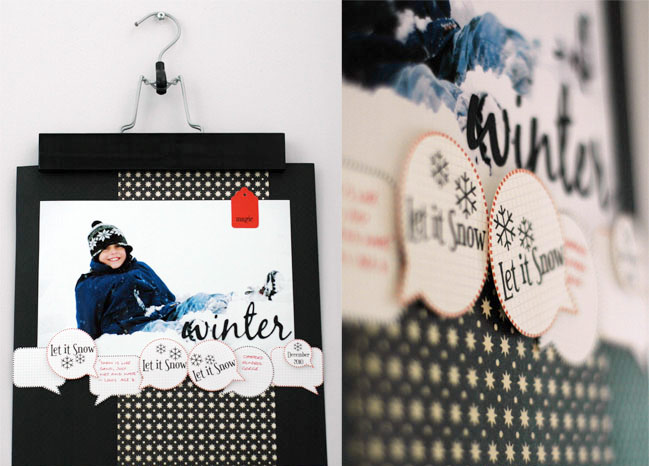
This scrapbook page uses a bunch of printable journalling cards. They serve two functions here, as a journalling option but also as a design element, creating a great undulating border across the photo. These were created using the speech bubble option in shapes on my word processing package, I changed the outline to dots adjusted the size and then printed them out onto graph lined card.
The only tricky bit was cutting them out by hand, not my strong suit! I added a wide strip of patterned paper behind the photo a small printed red tag to the top edge to tie in the red on the journalling tags and a title cut out on my Cricut die-cutting machine. I ran a few of the cut out speech bubbles back through the printer to add the lettering.
Do you have any projects with printables you’d like to share? Leave us a link in the comments and share the printable love!
Thanks for joining us Louise!
| Louise is a 40 something work from home Mom, her professional background is in graphic design, her hobbies are all creative, as long as you don’t count chocolate eating. Since writing her first travel journal at 13yrs old,she has always scrap booked. Documenting and photographing the events that make up her life along with the associated ephemera. Louise recently entered the blog world where she randomly rambles on about life and her creative pursuits or lack there of and occasionally shares her various typographic designs. |
 |
![]() Comment [8]
Comment [8]

Is this you? If so, you’re the winner of the gift box of scrapbooking supplies from Hambly Screen Prints and Jenni Bowlin Studio!
Email me your mailing address so I can post this to you tomorrow before we leave!
And oh my goodness, the comments you left yesterday – I have loved reading them. Some of them places I have been and it made me happy to remember; others places I haven’t seen and would love to visit. Even some we’ll see on this journey!
Colour me excited.
xlovesx
![]() Comment [9]
Comment [9]
It’s our last weekend at home before we take off! Oh my! Seeing as I can’t take these lovely Christmas scrapping supplies in my backpack, I’m going to give them to one of you!
One randomly chosen commenter will win:
6 sheets of 12×12 paper from Hambly Screen Prints
4 12×12 screen-printed overlay transparencies from Hambly
Green vintage buttons, paint dabber and memo pad of journaling papers, plus Christmas mini bingo card set and die-cut journaling pad in polka dots, all from Jenni Bowlin Studio.
To Enter: Leave a comment on this blog post telling us one place in the world you would like to visit (daydreams totally allowed – don’t worry about the cost, time or anything else).
Enter until 10am Sunday, UK time. Please note you will need to check back for the winner tomorrow so you can give me your mailing address quickly – I’ll need to post this Monday morning! Thanks! International entries are certainly welcome, though I can’t guarantee the post will get it to you before Christmas. We’ve just passed the suggested last posting date for many countries on Friday – so it might make it, or you can scrap after the big day of course!
Good luck!
xlovesx
![]() Comment [251]
Comment [251]

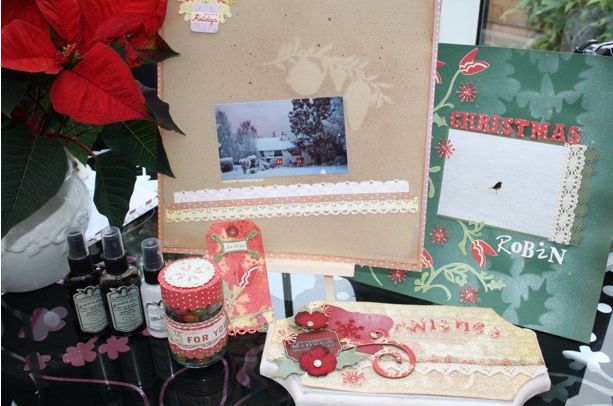
Today I’m happy to welcome Christine Emberson to the blog to share five ideas for misting on scrapbook pages and other craft projects. Enjoy!
I’m really excited to be doing a guest post for Shimelle, in fact you could say I’ve gone a little misty eyed with the delight!
I discovered Tattered Angels Glimmer Mists fairly recently and I have to admit I was instantly hooked. Initially only purchasing one colour I soon realised that was just plain silly and that I would definitely need the whole rainbow (there are so many colours available!) Also seeing all the Glimmer Mist bottles lined up along my desk truly gives me a thrill – am I the only one to get so excited about co-ordinating products?
So, what is it? It is a water-based, archival safe, acid-free and non-toxic product! That’s the chemical/technical bit but the excitement is that it delivers a touch of glimmer in a fine mist for all your projects. You can use it on paper, acrylic, metal and fabric (it also adheres to cats and children if they happen to be passing by the craft table!)
And, what did I make? I made all five projects with Cosmo Cricket’s Mitten Weather papers. These papers manage to combine traditional with modern, using a palette of red and green with lilac and pale blues – I love them!
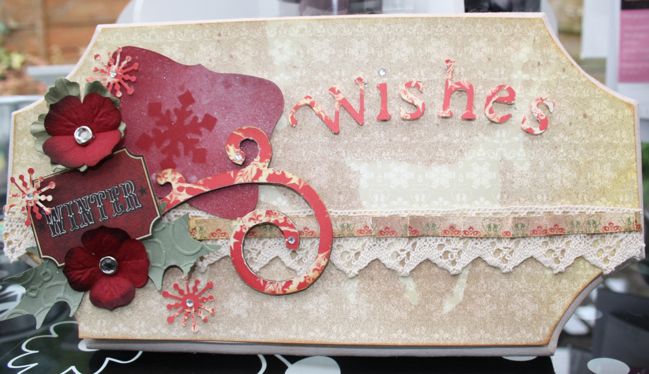
Winter Wishes Christmas Plaque
I’m a very lucky girlie in that my darling Dad is a keen woodworker. I can show him a picture of something and like lightening he rushes to his workshop and makes it! One example of his talent is these wooden plaques. They make a perfect base for projects. Here, I’ve opted for a Christmas theme – the background paper is ‘Winter Frost’ and I’ve used a chipboard reindeer as a mask and sprayed lightly with Glimmer Mist in Crème de Chocolat. Even though the reindeer is fairly faint I love the effect. There is also a bit of misting on the red die cut.
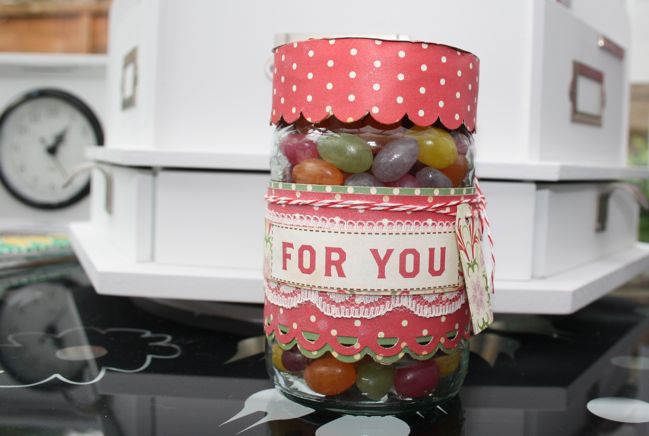
Festive Jar of Jelly Beans
Recycling! We are encouraged to be greener than green now and this is one little way we can all help. Altering a jam jar is fun and makes a lovely gift. I have used the spotty side of ‘Deck the Hollies’, ‘Woolens and ‘Festivities’ and one of the ‘Elements’ die cuts. A crafty bit of scallop punching makes a cute lid. Before adhering to the jar, liberally spray (yourself included if you wish!) with Chalkboard Mist in White – it gives everything such a sparkly frosty feel.
PS: I think this would be a great project to adapt for crafty youngsters who want to make Christmas presents too – fill jam jars with each friend’s favourite sweets and decorate to suit! -Shimelle
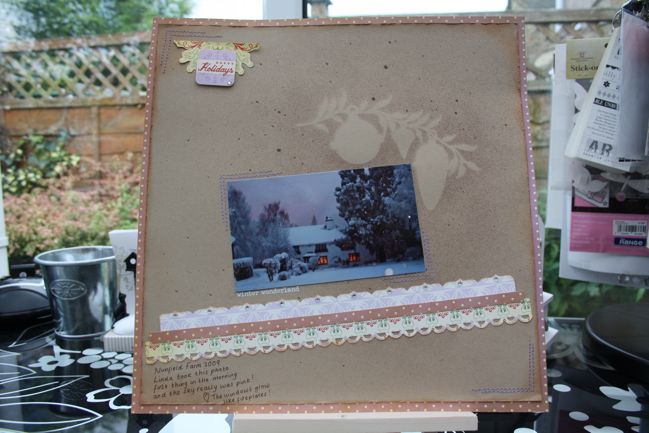
Winter Wonderland Scrapbook Page
I have had this chipboard die cut for some time and had grand ideas about covering it with paper but to be honest the thought of cutting out all those intricate little curves made my knees quake! I decided keeping it as a festive mask was much more stress free. I kept this layout very simple, some misting and inking, a bit of sewing, some strips of paper and tiny gems.
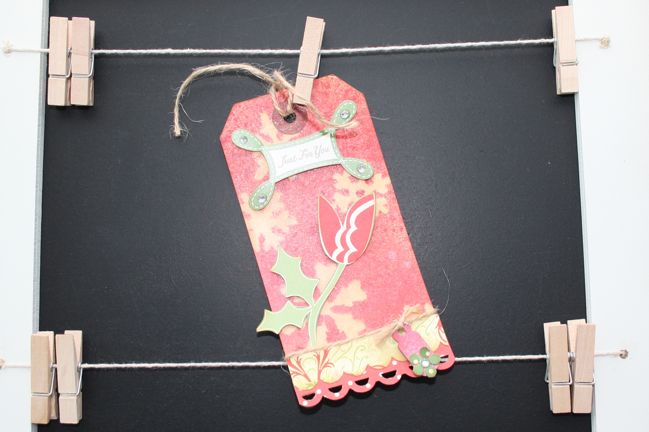
‘Just For You’ Snowflake Tag
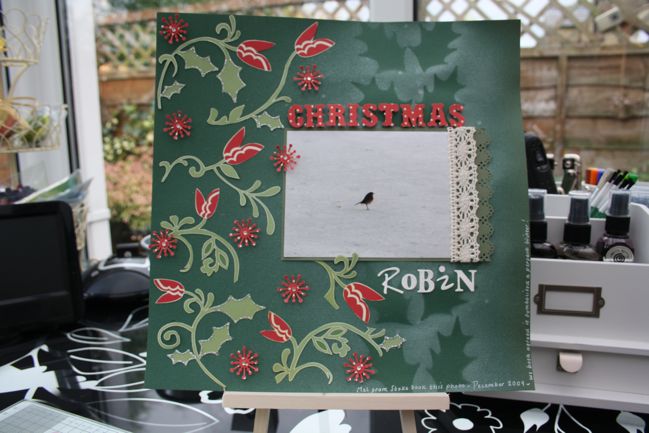
Christmas Robin Layout
I punched holly leaves to arrange as a mask and I then using the Tattered Angels Chalkboard Mist in White. I love the floral side of the ‘Woolens’ paper and spent quite a while cutting out the holly and flowers! This photo depicts a true winter’s day to me.
I hope you’ve enjoyed my five ideas! Life does not feel complete without a bottle or two.. of Glimmer Mists!
| Christine Emberson works in the City for a London law firm. Luckily this job only takes her away from scrapbooking a couple of days a week. She happily works from her craft desk in Kent where her style is critiqued by two teenage sons and far too many cats! Christine’s scrapping style is to mist, punch, distress, sew and wherever possible lavish everything with butterflies! She maintains she is at her happiest and most relaxed with a piece of 12 × 12 in her hand!
You can read more about Christine and her creations at her blog, Hope Chances. |
 |
![]() Comment [8]
Comment [8]