pretty paper. true stories. {and scrapbooking classes with cupcakes.}

lovely to meet you Twitter Facebook Pinterest YouTube

Take a Scrapbooking Class

online scrapbooking classes

Shop Shimelle Products

scrapbook.com simon says stamp shimelle scrapbooking products @ amazon.com shimelle scrapbooking products @ amazon.co.uk

Reading Material

travel

Scrapbooking Sketch of the week

Scrapbooking sketch and page ideas
Layout ©twopeasinabucket.com. Click here for supply list.
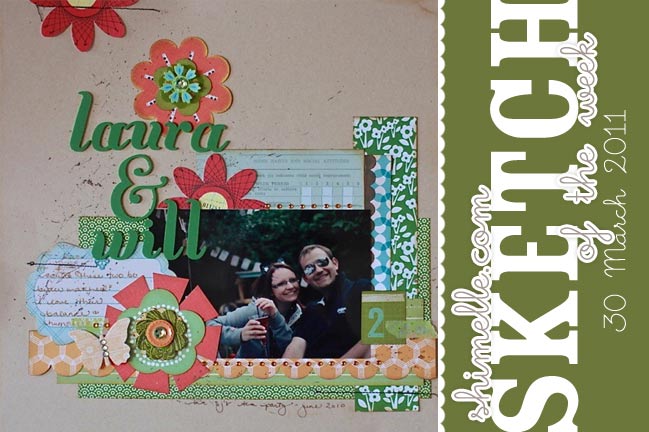
It’s Wednesday, so time for a page and a sketch! This sketch is not completely removed from the design concept featured in the January edition of 4×6 Photo Love – it’s one 4×6 photo and a loose line of embellishments. But from there things are switched around, with layers of patterned paper and a different placement on the page. (By the way, that’s Laura and Will, who recently announced something lovely!)


Here’s a very quick look at how the page came together.

scrapbooking sketch
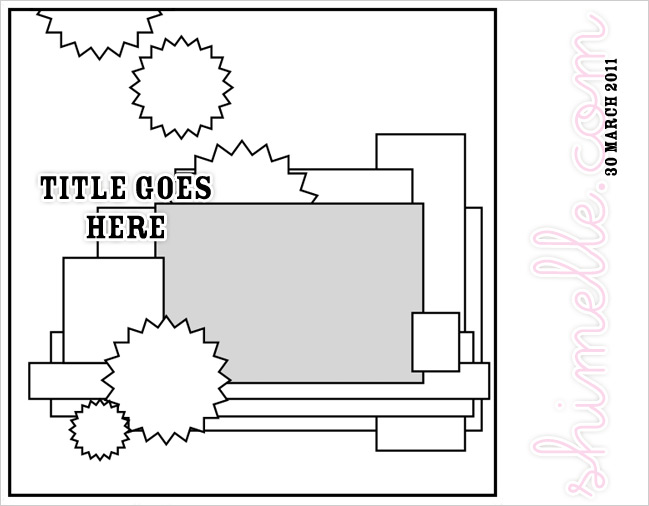
Here’s how it breaks down, with one landscape photo and lots of blocks of patterned paper. You can simplify easily by replacing all those layers with just two or three. And you can swap out flowers for any other motif – snowflakes, butterflies, footballs, cupcakes, doilies… do you like how I threw in one that I don’t tend to use on my pages? I’m sure you can think of others as you probably don’t suffer from repetitive embellishment injury like I do! (Or maybe we all do!)

As always, the weekly sketch is a no-stress challenge to create something if you fancy! If you do, I’d love to see what you make – leave a link in the comments!

scrapbook page ideas
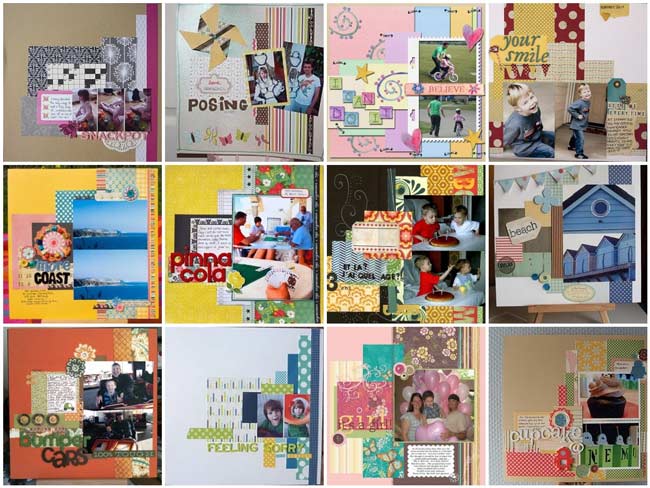
How about a dozen pages from last week’s sketch? Click through to see any of them in more detail!
Top Row, L to R: one, two, three, four.
Middle Row, L to R: five, six, seven, eight.
Bottom Row, L to R: nine, ten, eleven, and twelve.

Thank you to everyone who has joined in or is saving the sketches for future crafting time. I love seeing what you’ve made and I’m so honoured that you like them!

And one little note from Monday – several people said a Q&A sounded cool, but there are only a few questions so far! If there’s anything you want to know about our crazy round-the-world adventure, let me know so I can include it. Thanks!

Have a lovely Wednesday!

xlovesx

Tulle Headband Tutorial

tulle flower headband tutorial
Today I’m happy to welcome Betsy Sammarco to the blog to share her technique for tulle flowers. They are perfect for wearing in your hair or adding to a layout! I hope you enjoy – let us know if you give this technique a try!

I was so happy when Shimelle asked if I’d share a technique with her blog readers. I was browsing around a handmade gift store where I saw little tulle flower barrettes. It looked like the edges were melted and I tried to recreate the effect myself.

tulle flower headband tutorial
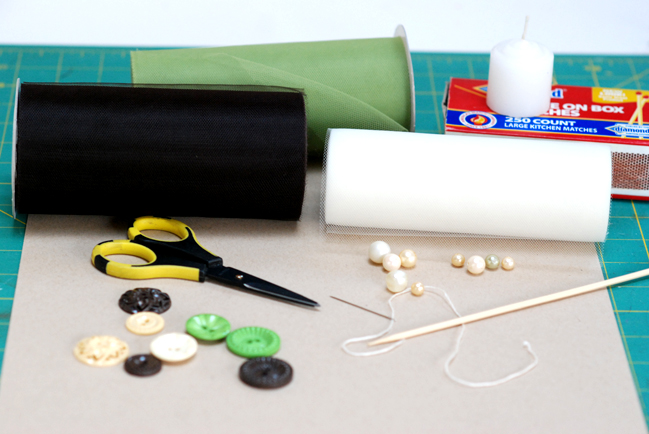
Supplies: 3 rolls of tulle in coordinating colors, buttons and pearls for the flower centers, scissors, needle and thread, barbecue skewer, and small candle. I’m using tulle from Celebrate It, buttons from Jenni Bowlin Studio, and pearls from grandma.

tulle flower headband tutorial
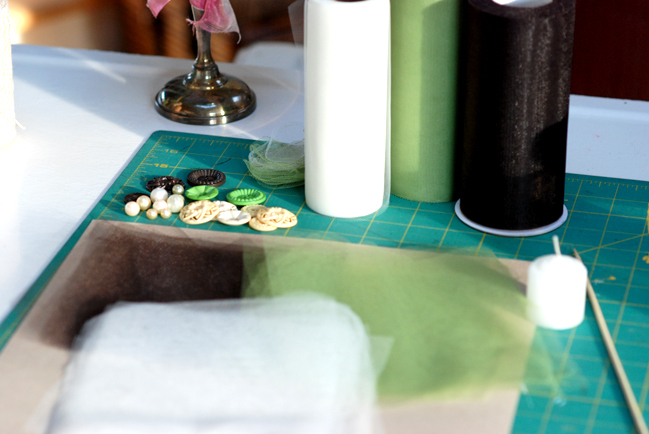
1. Cut the tulle into pieces about 6 inches square.

tulle flower headband tutorial
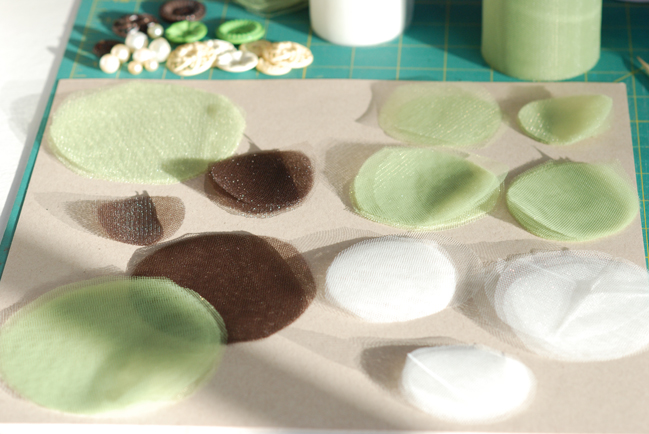
2. Cut various sized circles from the tulle. To do this quicker, cut a couple pieces of tulle at one time.

tulle flower headband tutorial
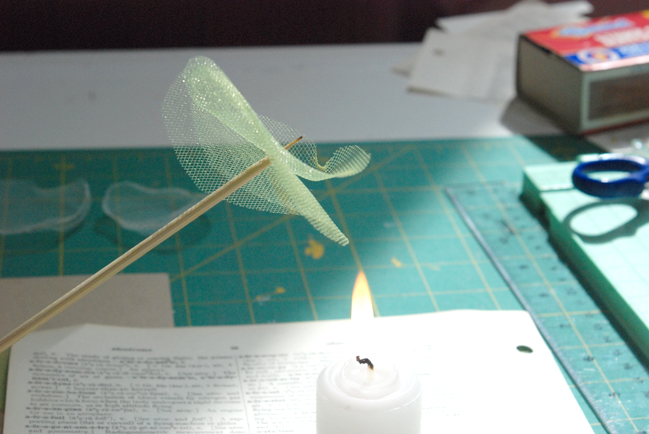
3. Stick 2 or 3 circular pieces onto the end of a barbecue skewer. Hold the tulle close, but not directly into, the candle flame.

tulle flower headband tutorial
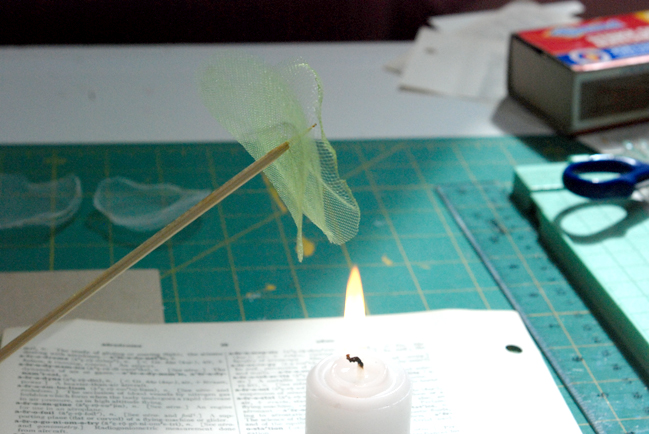
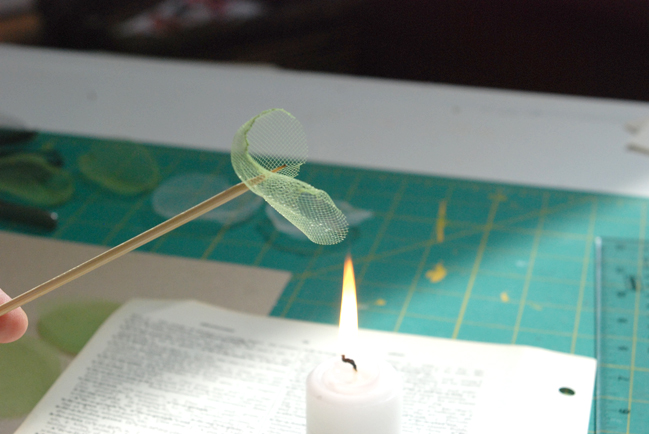
4. Turn the skewer so the edges of the tulle start to melt and the circle starts to curl up.

tulle flower headband tutorial
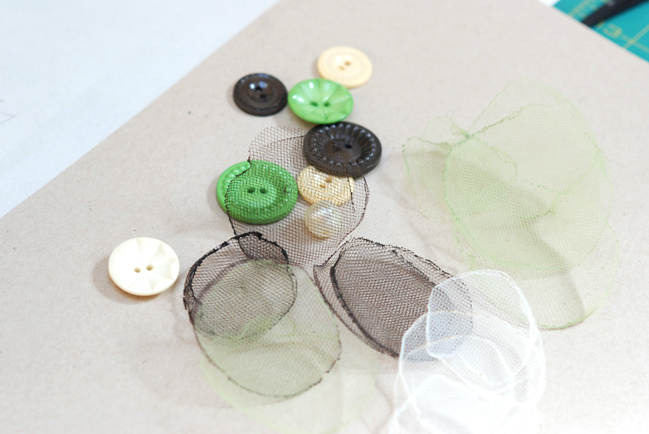
5. When you are done, you will have a bunch of tulle circles whose edges are now melted and more defined.

tulle flower headband tutorial
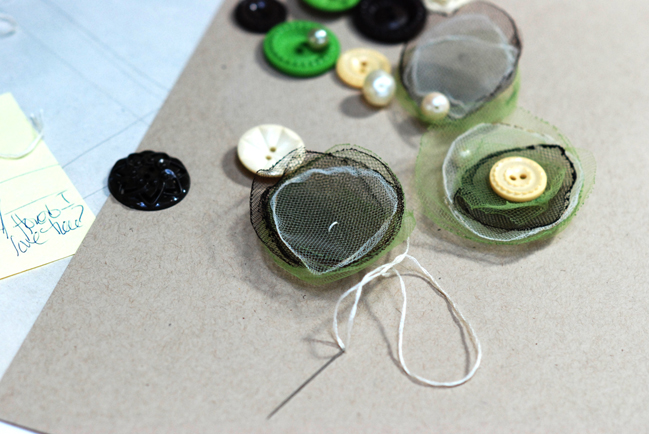
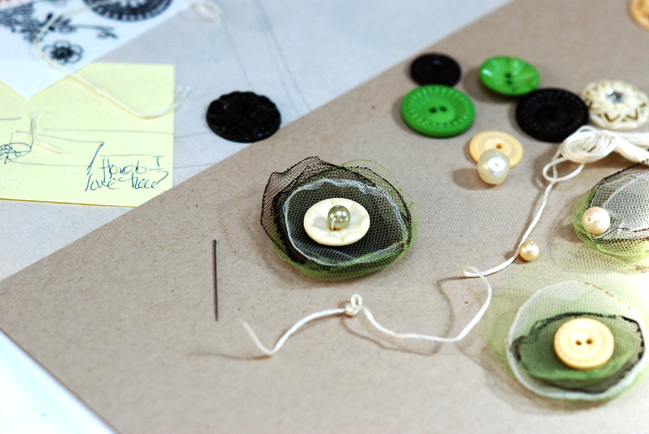
6. Layer your tulle circles until you get a look you like. Place a single stitch in the middle of the bunch to keep the layers together.

tulle flower headband tutorial
7. Stitch a button, pearl, or both into the center as your flower center.

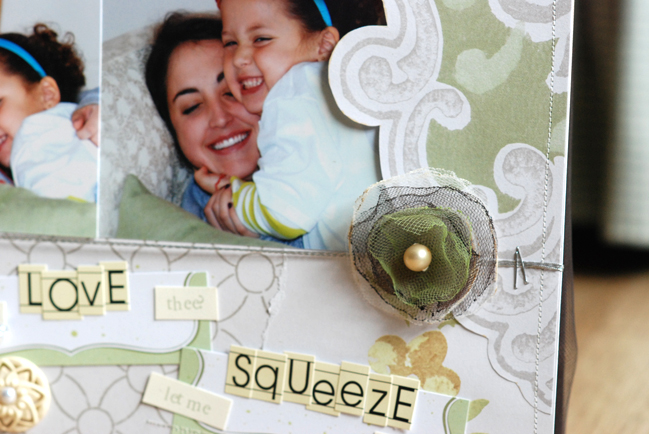
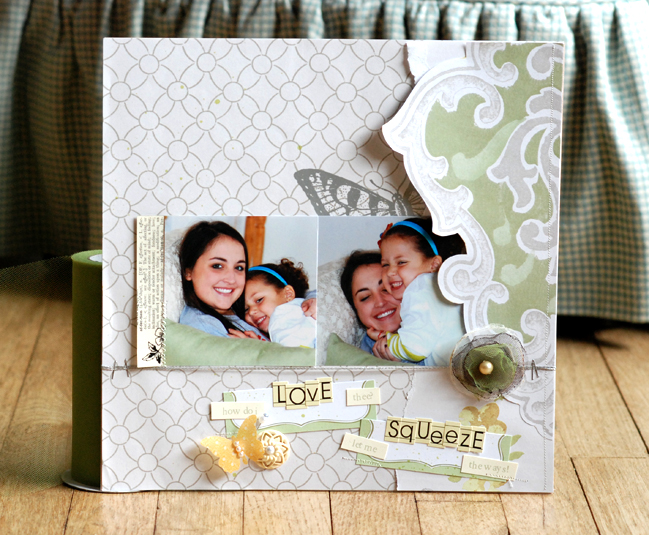
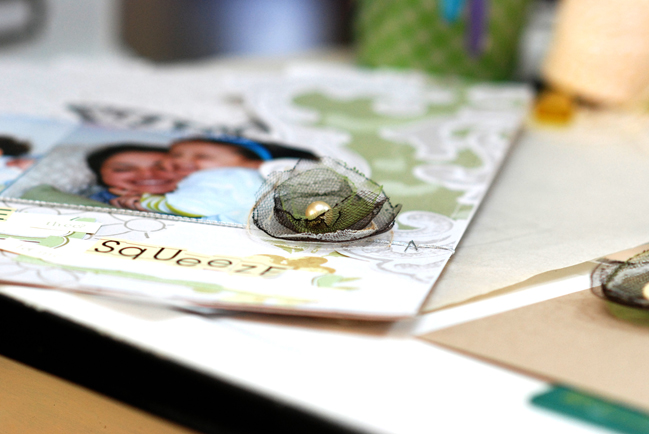
I used one of these flowers as a sweet embellishment for a layout:
tulle flower headband tutorial
Other supplies: Jenni Bowlin Studio patterned paper, alpha stickers, rubons, button, journaling card, stick pin, and butterfly embellishment.

tulle flower headband tutorial
I love the dimension and definition this technique gives to tulle!


Betsy Sammarco is a Connecticut-based pharmacist with two sons and a love of papercrafts! She designs for Jenni Bowlin Studio and Jen Martakis Digital Designs. Read more about Betsy on her blog, Just a Pharmgirl.

Notes from home

notes from home
travel notes :: homecoming
And just like that, we are home.

For the past fourteen weeks, I’ve lived out of a small backpack. The Boy and I have visited eleven countries on three continents. We stayed in hotels, hostels, short-term apartments, the spare rooms of friends and one bright orange camper van. Traveled by plane, train, bus, bicycle, boat, foot, rental car, elephant, taxi, tuk-tuk, back of a pick-up truck and one bright orange camper van. Completed so much visa paperwork that I have no empty pages in a passport that doesn’t expire until 2018. Coped with six languages we don’t speak at all and one I haven’t spoken for fifteen years. Earned qualifications in scuba diving and making coffee. Snapped around nine thousand photos. And still found we were smiling at the end.

And yet, now I write this sat on my very own chair in our very own flat in our very own neighbourhood in Londontown. Our Christmas decorations are still on the floor in the corner of the living room. There’s a stack of post that will take all week to read. So many ‘let’s catch up’ dates we want to make with friends. So many big announcements have been made while we were a bit off the grid. I keep feeling like this is the new year and then realising everyone else feels it’s a quarter over already.
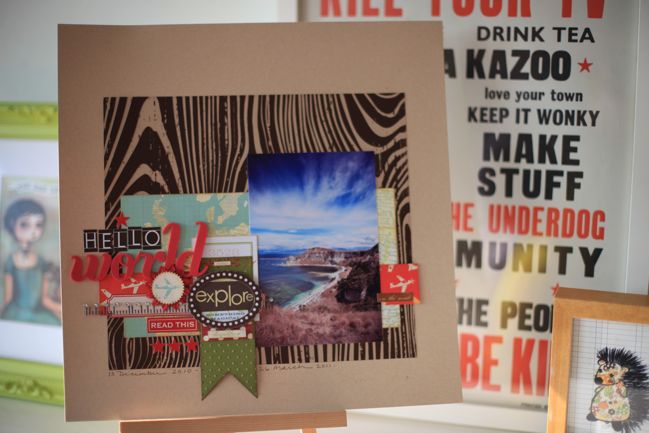
scrapbook page
Right now, there’s a funny honeymoon feeling about our homecoming. Things I have missed seem shiny and new now. Laundry that involves neither a sink nor coins. Reliable hot water. Fluffy towels. My hair dryer and a hair brush that was not a courtesy gift on an airplane. When I open my wardrobe, it’s like all my clothes are brand new again and there’s so much choice! But at the same time, I can’t remember where anything is, even though I know there was some sort of system to what was grouped in each drawer and basket. Scrapbooking supplies are the same: almost like I’ve forgotten what I’ve collected, which is strange since I am used to using that stuff every day and knowing exactly where everything is even when it looks as though that’s completely impossible.
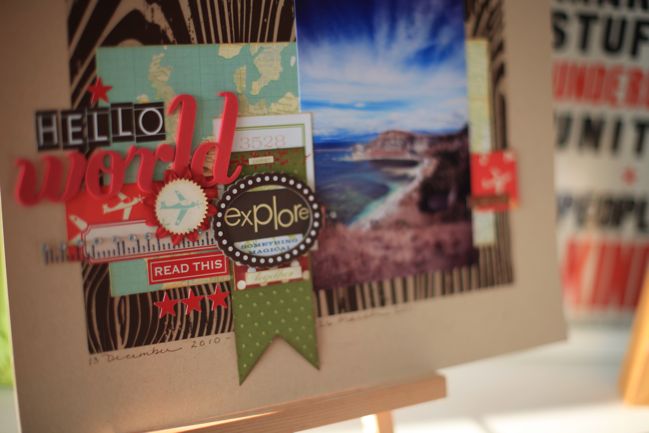
scrapbook page
I’ve been writing notes throughout our entire journey. I fell terribly behind at transferring them from notebook to blog when we hit the lands of less internet (which weren’t necessarily the places on the map you might expect!) and so my plan is carry on writing those posts, a bit at a time. I can even post some of them with coordinating scrapbook pages!
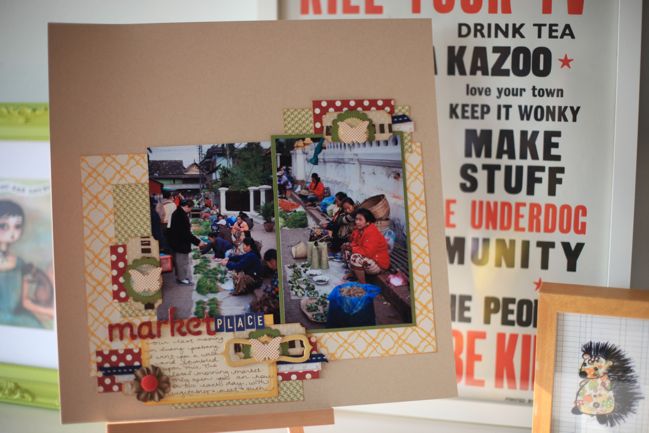
scrapbook page
Which brings us to the big question crafty girls ask about something like this: how are you going to scrapbook those nine thousand photos? And it’s something I’ve been thinking about quite a bit. I think I have a plan, and yet it seems so simple that perhaps something else will come about, but these are my intentions. At the moment, I’m in the process of editing out the rubbish photos and deleting things that are extraneous (in tricky lighting, I tend to take three or four exposures of the same thing, for example, and now that I can view them on my monitor, I don’t really need all the duplicates) and uploading them to Photobox. I’ll be ordering a huge amount of 4×6 prints. Not nine thousand, but I wouldn’t be surprised if I order close to two thousand, all told. Which sounds insane. But here’s how I scrapbook 90% of the time: I go to the drawers where I keep tons of 4×6 prints, choose something and start scrapbooking. I don’t scrap chronologically. I don’t feel a themed album has to be completed all in one session. I just go with whatever catches my eye on a given day and that means I’m still adding pages to the album from our trip in the summer of 2006 and our honeymoon album has about a zillion layouts in my head but only a dozen or so actually on paper. Plus I love divided page protectors for adding in more photos without creating more full pages. So I’m excited to get started scrapping those prints but I’m also happy to have lots of other pictures in the photo drawer so I can carry on that process of working with whatever seems right on a given day. That is what keeps scrapping from ever feeling like ‘work’ even when it is my actual job! And I planned from the beginning to use the journal entries and blog posts about each of the different spots as journaling for those pages. I may type it all out on the old typewriter, especially if I can find a ribbon that will give it a bit more ink.
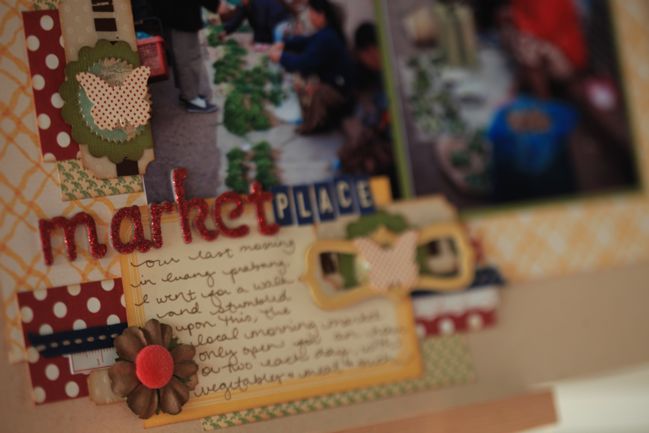
scrapbook page
But I also realise that my scrapbooks are a ‘me’ thing. I love scrapbooking. If you read this, you probably understand scrapbooking. Not everyone does – not even all our family and friends. So I also want to make something more accessible, that takes little to no explanation, and that will come in the form of a chunky photobook. I’ve done photobooks of various events over the years, but they are mostly small in format. Ever since Liz of Paislee Press posted about this book she created with pictures of her daughter, I have kept the idea of a proper coffee table photobook in mind. I’m going to go through and select the very best images and create a book with lots of full page photos and very little text. And in chronological order. So I can look at it on the table and think ‘oh yeah, remember that year when we decided to just drop everything and travel around the world? that’s in that book.’ So I’ll keep you posted on that too. Interestingly, I was convinced in my head that such a big book would be far more than it is, but you can print 200 pages of pretty in hardcover for under £50, which although certainly not crazycheap is about a quarter of what I had imagined.
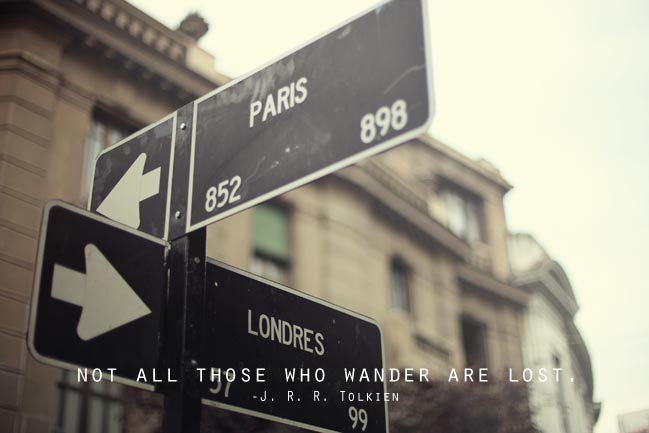
street signs
But other than those rambled plans, I’m in a little bit of a haze as to where to go from here. Is it worth doing a travel Q&A post? I don’t know if anyone is really interested in how to live from a ridiculously small backpack or how to find out if your spider bite is going to kill you or eleven ways to wear your hair with no more than nine bobby pins. Or if the more curious part is the planning or the budgeting or figuring out what to eat. So if you have questions, please ask away. I can even persuade The Boy to write some answers if you want to hear his perspective. He is far more well-travelled than I, having grown up in three different countries just for starters. And while I am quite excited to come back to different choices of ‘stuff’, he was actually quite happy to continue living from his selection of three shirts indefinitely. He is also more adventurous, so he did some things that I didn’t do, like deep sea diving and eating spiders for dinner. (Well, I ate femur of spider. That’s all I could manage. He ate entire spider for starters and then followed it up with a main course of tree ants. Call it adventure or call it crazy; I won’t argue.) So yes, go ahead and ask what you like in the comments and we’ll put together some answers!

And now that I’m back to my own computer and my paper and scissors, I’m excited for some lovely things here on the blog. The weekly sketch will continue, giveaways every weekend but then some other non-scheduled things too. Absence makes the heart grow fonder, and that means I am very fond of home and pretty paper right now. Very fond indeed.

xlovesx

Scrapbooking Sketch of the week

Scrapbooking sketch and page ideas
scrapbook page idea
layout ©twopeasinabucket.com. Click here for supplies or to add to your Two Peas bookmarks.
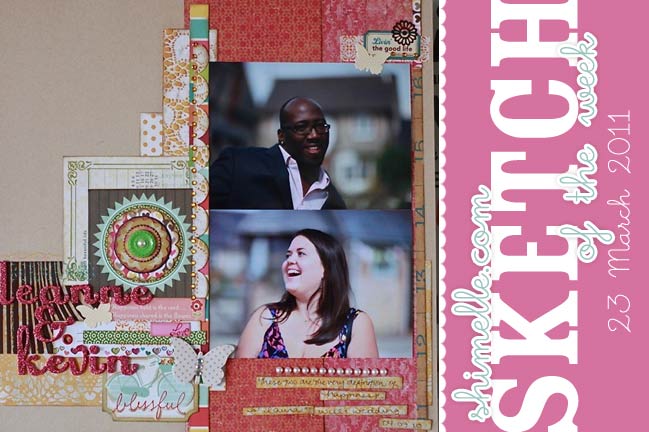
Say hello to lovely friends Leanne and Kevin on this week’s page, one from the garden at Two Peas. They are getting married this summer and I am so excited to catch up with them when I get home (so soon now!) to hear all about their wedding plans. And these photos? Taken at another wedding, so there we go!

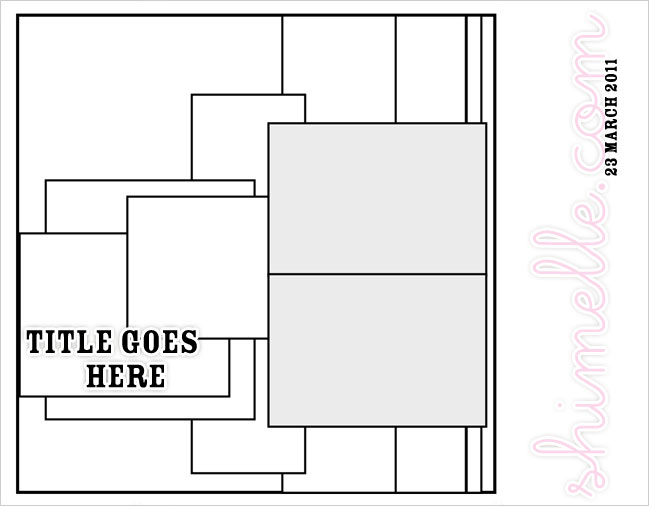
scrapbooking sketch
I suppose this sketch could look a tiny bit crazy, but I promise there is method to my madness. Or at least that’s what I tell myself. Look at the sketch from right to left (probably opposite to how your eyes naturally flow) and see how the boxes of patterned paper start quite big on the right (12” strips of paper) and then get smaller and boxier as they head toward the left edge of the page. Great for using lots of patterns or colours, and you can just skim through your scraps to find some strips for the longer pieces of paper and smaller boxes for the area to the left of the photos. (Again, it’s two four by six pictures! How I swoon.) Once in the habit of using up all those bits and pieces of paper, I just carried on with the embellishment, so I grabbed lots of sticker sheets that were three-quarters used and just had a few bits left and threw quite a few of them at this page. You can do the same or you can keep it much cleaner if you prefer!

As always, the sketch is for fun and no stress! If you create something, please link us up in the comments as I’d love to see and share it here too.

scrapbook page ideas
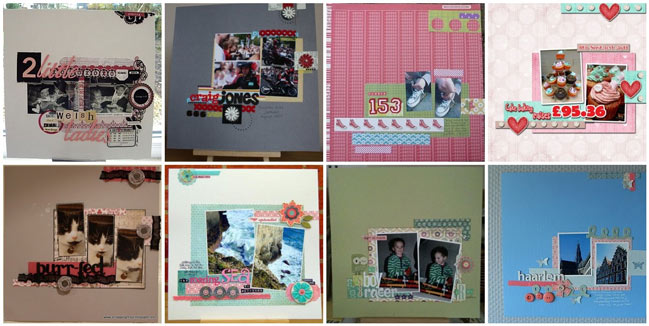
And here are eight of my favourite pages submitted for the last sketch. Thanks to everyone who shared a page! Click any of these links to see these in more detail:
Top row, L to R: one, two, three, four.
Bottom row, L to R: five, six, seven and eight.

xlovesx

Scrapbooking giveaway winner

scrapbooking giveaway winner
True Scrap scrapbooking event

And the winner is….

The True Scrap giveaway winner is Rosalie!
Rosalie, Lain will be in touch to get you all set for the True Scrap weekend!

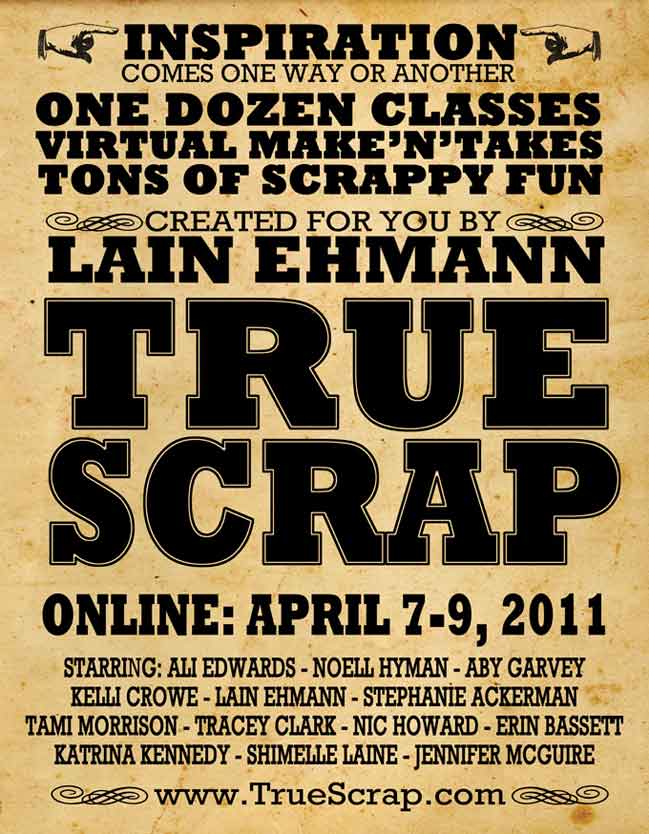
If you didn’t win but would still like to join us for True Scrap, we’d love to see you! You can sign up here, and remember, if you sign up by clicking my link and then email me your receipt, you can have a free shimelle.com class too! Bonus!

Happy scrapping!

xlovesx

Blogging for Scrapbookers :: 10 Reasons to join us!

online scrapbooking class :: blogging for scrapbookers
This Monday, the 21st, marks the first day of a new run of Blogging for Scrapbookers, an online class all about how blogs and scrapbooks are not all that different. It’s not to late to join us! If you’re thinking about it, here are ten reasons to jump on board!

Write with meaning.
There are blog posts that say a little and there are blog posts that say a lot. You know the posts you have read that made you really sit back and rethink something or even physically nod in agreement? The sort of reading material that captures your emotions? We’ll break down just how easy it can be to move your blog from a list of things that have happened to something that captures your true feelings and captivates your readers.

Keep in touch.
Have friends and family far away and wish you could keep them up to date with what’s been going on, but find it hard to find the time to write or phone everybody? Use your blog to write everything once, and in class we’ll discuss how to get your family involved so they communicate with you too, even if blogging isn’t for them.

Scrapbook with your blog.
Blogs are words and photos. Scrapbooks are words and photos. So really, they have the very same starting point, which means you can use your blog to gather your thoughts and words together and craft this part of your scrapbook page, even when you can’t get to your scrapbooking supplies. When you do have time to get crafty, you’ll have a bank of posts ready to help you. And if you’ve never approached a layout with the words written first, you’re in for something that can totally change the way you feel about the most important memories in your albums.

Make new friends.
Our class is filled with people who love the exact same thing you do: scrapbooking! And they all blog too. On our private message board, you can chat and get to know your fellow classmates and follow their blogs. Leave a comment for them and they might leave a comment for you and suddenly, new friends! There are several bloggers who met in our original class run in 2009 who are now the closest of friends. Love it!

Pretty up your corner of the internet.
Sold on the idea of having a blog but want to make it look great too? We’ll cover all the technical stuff (in an easy-to-follow way) for giving your blog a make-over, customising the look and making sure everything is exactly your style.

Remember little moments you might forget.
Scrapbooking is all about preserving our memories, right? We’ll talk specifically about ways you can use your blog to get the littlest of things you want to remember committed to words as soon as possible so you don’t lose the details between the time something happens and you get around to scrapbooking it. Whether you share your blog with the world, with a group of trusted friends or just keep it to yourself, this is something that makes blogging a fab journal to day to day life.

Something for everyone.
Whether you’re just thinking of starting a blog or you’ve been blogging for a long while, if you love scrapbooking there is something for you in this class. In our first run, some of the most amazing blog posts came from participants who hadn’t written a composition since school and some experienced bloggers pushed their blogs to the next level and even started their own blog-based businesses.

Discuss everything with like-minded bloggers.
When you read a book, it’s been edited by someone other than just the author. But blogging eliminates that step and lets us publish anything we want, whenever we want and from wherever we want. But sometimes a little direction and editing is just what we need to make things have that lovely polish. No scary editors here, but a members-only message board where you can discuss your goals or get opinions on a post from others in exactly the same boat.

Participate in multi-blog events.
One way to bring new readers to your blog is to participate in blog parties or events that jump from blog to blog. Throughout the class you’ll have the opportunity to participate in events like this and even step up and host one of your own. Jump in and have some fun when you see a topic that inspires you!

Continue your learning.
In addition to fifteen detailed prompts (delivered to your inbox, Monday to Friday for three weeks) you can also download two workbooks to continue your Blogging for Scrapbookers experience: Blogging Blueprints is a step-by-step technical guide for making things work on your chosen blogging platform and A Year of Blogging includes a blog post idea for every single day of the year, all written specifically for scrapbookers! Follow along daily or just refer to the workbook when you need some ideas to get your blogging thoughts going again.

And reason number eleven? All that is just £9 or $15! Click to sign up and join us now!


xlovesx

Five ideas with Fauxlaroids

scrapbooking with fauxlaroids
scrapbooking with polaroids
Today please welcome Kirsty Smith, a London teacher by day, scrapbooker by night! I love her designs with fauxlaroids – things that are a bit like a Polaroid picture, but not really! Today she’s sharing five of her favourite ways to scrapbook with Polaroid-inspired design.

Create the instant-look border
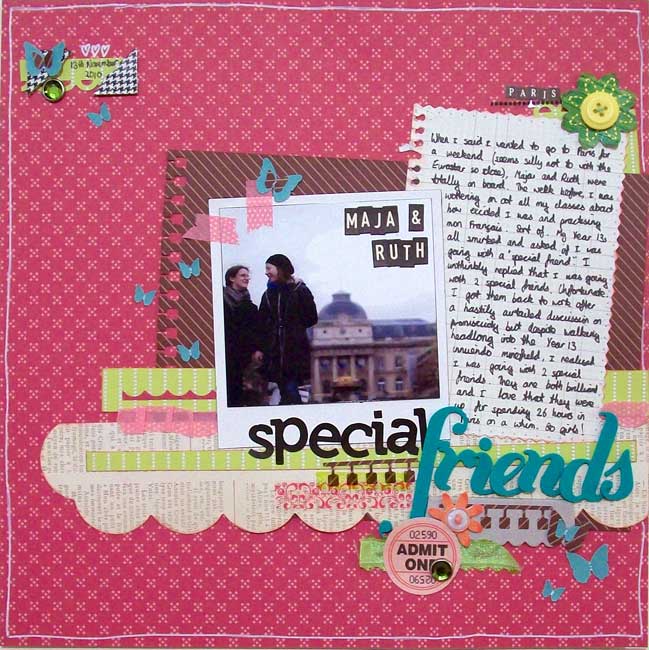
A quick and easy way to make photos pop is to give them a border, and I’ve been totally inspired by the polaroid photos popping up all over the place. So, by matting a photo onto white paper, leaving a larger border at the bottom, and a little spot of inking, I give you: the Fauxlaroid.

scrapbooking with polaroids
Change up the colour
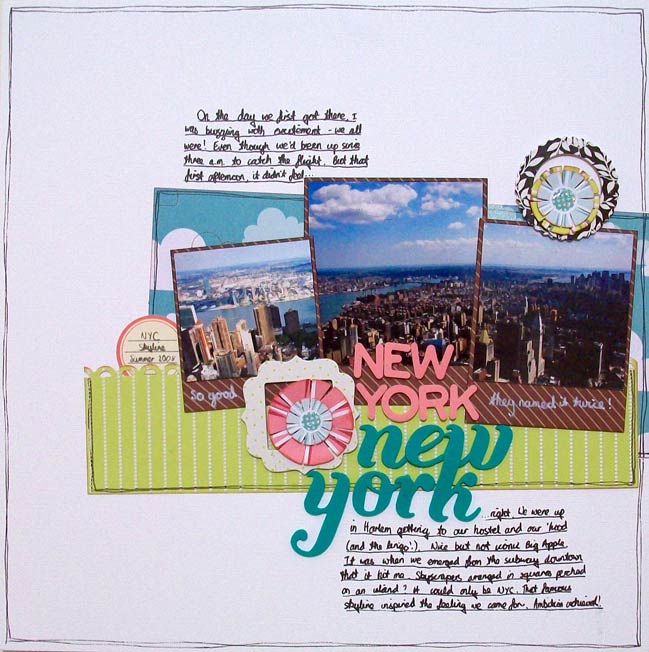
The great thing about making your own polaroid pictures is having the freedom to make them any colour. You can pick a colour that complements your photo and lifts it from the page. The borders here disguise the fact that my so-called panorama pictures of that famous skyline don’t really match up, plus there’s space at the bottom for a few words. So will the term Polaroid-arama catch on? Probably not.

scrapbooking with polaroids
Or change up the size
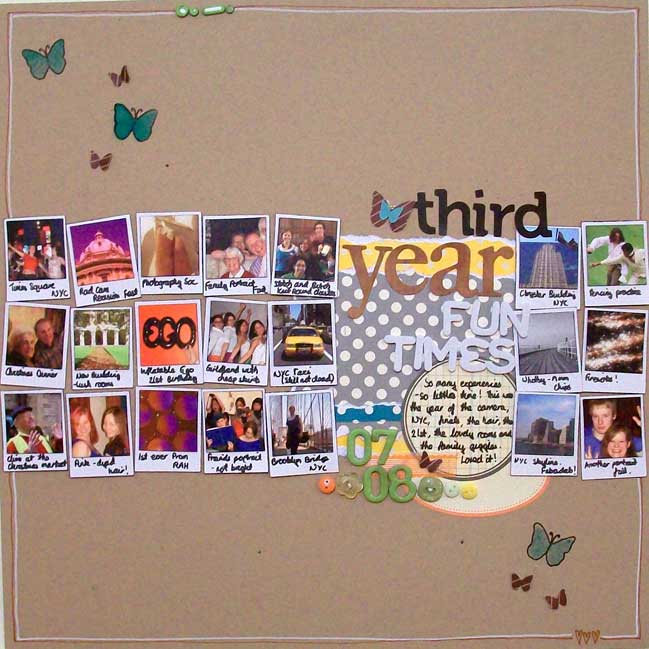
Once again, making your own polaroids wins out as you can do them in custom size. A year in review page is a fab way to make use of mini pictures and index prints and mounting each one as a tiny polaroid means they can each be labelled with a word or two of explanation. Miniroid it is. (These terms are really not working)

scrapbooking with polaroids
Frame up your words as well as your pictures
Polaroid-style doesn’t just give you space for a sentence. You can put your journalling where the photo would normally go in not only do you get an instant lift for the journalling, but as a design element, it will draw together your words and photos. To me, journalling is the most important part of the layout as it tells the stories that I want to remember, so I love to find new ways to incorporate it. In this page I used a stamp to get both frames to be the same size.

scrapbooking with polaroids
Framearoid a title
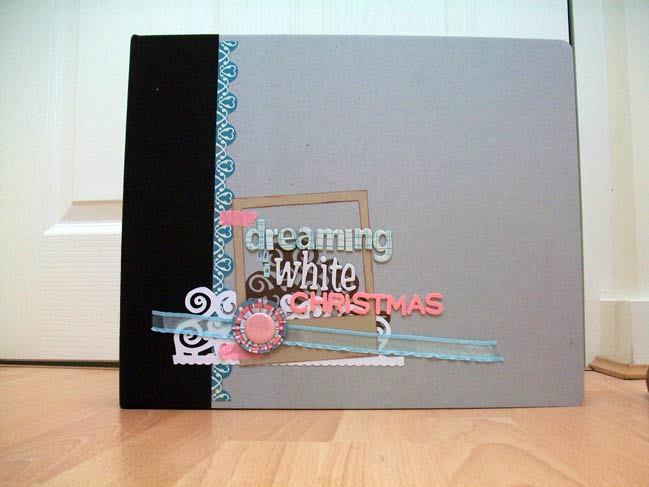
Something I do every year is wish for a White Christmas. Well, I don’t always get the snow but I can always document the wishing in my Christmas album. Here the polaroid is frame only. It’s a nice way to highlight the title without confining it – the title extends beyond the frame(aroid?).


Kirsty is a 23-year-old maths teacher living in North London who tries to avoid marking by scrapbooking instead! She loves taking pictures in the city, puns, reading, baking, singing, macaroni cheese and then scrapping it all. Oh, and she’ll take a cup of tea with all of the above. She is a member of the ScrapaGoGo design team and you can find more of her work and stories at her blog.

Scrapbooking giveaway day


True Scrap scrapbooking event

A very special giveaway for you today – and it’s open until the 20th! One person will win a free basic admission pass to the True Scrap online scrapbooking event on the 7th to 9th of April. That’s a $97 value, so definitely worth leaving a comment!

For one entry into the prize drawing, leave a comment on this post. Easy!
For an additional entry into the prize drawing, link to this post on your blog, Facebook page or Twitter feed and indicate as such on your comment here. You get one extra entry for each of those, for a maximum of four entries! Entries close at midnight UK time on the 20th of March, 2011.

And a little bonus for you if you sign up for True Scrap via this blog post. If you sign up for the event (basic admission or the fancier version that lets you have access to the classes after the weekend too) through my link, you can also have a free shimelle.com class. Here’s how: click here and sign up for True Scrap. You’ll get a receipt via email. Forward that receipt to me via email (shimelle at gmail dot com) and let me know what class you would like: Blogging for Scrapbookers (starts 21st of March), Learn Something New (runs every September) or True Stories (an archived class you can do at your own pace). So that means you’ll get access to the full event plus full access to a class here too! (If you’ve already taken all three classes, let me know in your email and I have an option for that too.)

True Scrap includes a full weekend of workshops online, including a keynote interview with Ali Edwards, a workshop with me and lots more, so if you’ve always wanted to go to a scrapbooking convention but it seemed like a lot of hassle or cost to travel to something like that, this could be perfect! It’s a convention right in your own house.

I’m spending a lot of time on buses this week as we are crossing through the mountains and plains of South America. Have a great week!

xlovesx