pretty paper. true stories. {and scrapbooking classes with cupcakes.}

lovely to meet you Twitter Facebook Pinterest YouTube

Take a Scrapbooking Class

online scrapbooking classes

Shop Shimelle Products

scrapbook.com simon says stamp shimelle scrapbooking products @ amazon.com shimelle scrapbooking products @ amazon.co.uk

Reading Material

travel

4x6 Photo Love :: March 2011

4x6 Photo Love March :: free online scrapbooking class
free online scrapbooking class
©twopeasinabucket.com. Click here for supplies and class details or click here for the message board thread.

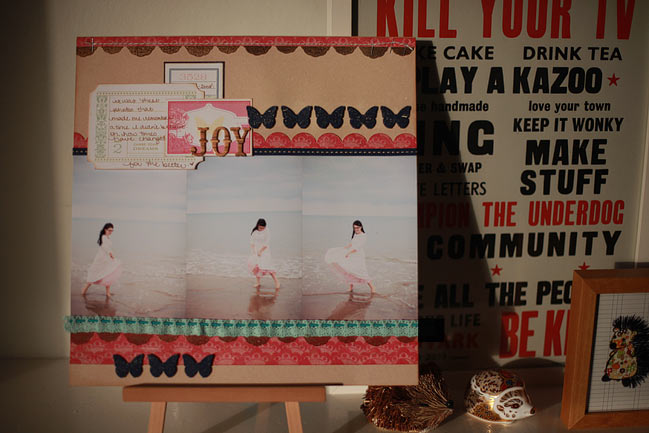
Have you checked out the latest edition of 4×6 Photo Love? In the third prompt of the year, we’re scrapping with three 4×6 photos. It’s a design concept that lines everything up and makes use of border strips, so you can get a big impact from relatively little stash – and it’s also quick to do! You can pretty much scrap right along with the video in real-time – just pause to grab your photos and papers perhaps. Have a look:

As always, this video includes random facts like why there is a swirl stamp permanently attached to my large acrylic block, blue nail varnish and paint spattering. Which may or may not be the true reason for wearing blue nail varnish. Oh, and making a layout with three 4×6 photos, of course!

scrapbook page ideas
The first page features some photos taken by SJ a while back. So much fun – a highly recommended post-wedding occasion to wear your dress again! But back to the layout: this month’s design concept using three photos and three borders. This page uses Crate Paper for the border strips and some lovely ribbons and trims (from Making Memories and American Crafts). And butterflies. Here’s a secret: I like my butterfly punch. I bet you never, ever knew.

scrapbook page ideas
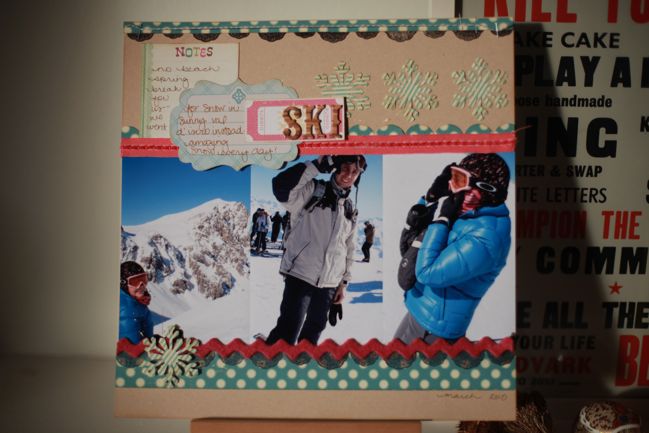
And this is the page I walk you through in the video. No butterflies this time, I promise. Snowflakes seemed far more appropriate. This page uses October Afternoon papers and a border stamp by Studio Calico. Both pages use this EK Success border punch which is one of my absolute favourites.

scrapbook page ideas
The lovely Laura is my special guest this month, and she gets all creative with this month’s design concept – one option for using landscape photos instead of portrait and a second option for scrapping in 8.5×11 instead of 12×12. You can leave her a little comment love if you like her pages, you know! I love how her pages are always so bright and fresh.

So now it’s your turn! Throughout this month, I challenge you to create a page with three 4×6 photographs and three border strips. As an added incentive, you have two chances to win a prize too! When you upload a picture of your completed project to the scrapbook gallery at Two Peas, make sure to check the box for the 4×6 Photo Love challenge in step four of the upload process. Then come back to this post and leave a link to your page here in the comments. One person from all the entries at Two Peas and one person from all the links here will be chosen and each wins a gift certificate to go shopping for your favourite stash! (By the way, they have added a crazy amount of new stuff in the last week – like several thousand new products! Just in case you felt like you needed some new product to inspire your creativity!) You need to upload and link by the 29th of April for both chances to win.

So what do you think about three pictures? Can’t wait to see what you create!

xlovesx

PS: As this is a free class and it lasts all year long, I’d love for you to invite a friend to join in the fun. Click the share button or grab the badge there on the left for your blog. Thanks!

Scrapbooking giveaway winner

scrapbooking giveaway winner
This weekend’s winner is Jennifer! Congrats!
Kelly will be in touch with all the details for your class pass for Sketchbook 3!

There’s a new giveaway every Friday night, so check back next week for another chance to win just by leaving a comment.

Have a great week!

xlovesx

Scrapbooking giveaway day

online scrapbooking class giveaway
online scrapbooking class
If you love scrapbooking sketches or online classes, this weekend’s giveaway is for you: Kelly Purkey’s Sketchbook 3 class. Kelly has created fifty sketches to share in this four week class, and I’m thrilled to be one of the guest artists. You can read all about the class on Kelly’s blog. One commenter will win a place in the class, which starts Monday. 

To enter, simply leave a comment on this post mentioning something that has recently made you happy! One comment will be randomly chosen as the winner. Entries close at midnight Sunday, UK time, and the winner will be posted here on Monday. Be sure to check back to see if it’s you!

Good luck!

xlovesx 

Scrapbookers: Enter the Scrap Factor Contest!

scrap factor scrapbooking contest
scrapbook page ideas
First up: something you should consider this weekend. Enter the Scrap Factor contest. Scrap Factor is happening over at UKScrappers, but you don’t have to be from the UK to enter. The grand prize is £500! (If you don’t speak pounds, that’s 800 American dollars once you convert it.) That’s enough to buy a fancy new camera or a fancy electronic die-cutter and the ultimate in sets of fancy Copic markers. Or you could just buy every piece of patterned paper you liked and then go shoe shopping. Heck, you could remodel a room! So yes, a very nice prize to win.

Scrap Factor is a bit like the X-Factor, one of those televised talent show series in which the audience vote every week. For Scrap Factor, things start with an ‘audition’ in which you choose five layouts to represent your scrapping style. They can be 12×12, 8.5×11 or a mix. And you enter in your choice of category: Paper, Digital and Hybrid. Hybrid pages should be paper layouts with at least one digital element included – like printing digital designs onto paper to use as accents or adding digital text to your photographs before printing.

scrapbook page ideas
In choosing your five layouts for your audition, you need to include a few things: one page about yourself, one page with no photos and one double-page layout. You’re free to scrap in any style, with any products, any themes, as long as you’ve met those three requirements somewhere in your five layouts, you’re all set.

Your five layouts don’t have to be created just for the contest – you can choose them from your albums if you wish! They just can’t have been published (print magazine or book, online magazine, online course materials, etc) and if they are on your blog or in an online gallery, you’re asked to remove them until the audition phase finishes.

scrapbook page ideas
Once you’ve chosen your layouts, you’ll need to upload them to enter. You need to be a member of UKScrappers with at least 10 posts OR 30 days of membership. That means you can certainly join UKS this week – from anywhere – and just find ten conversations to join in and you’re set! Of course, existing members are certainly welcome, whether you’ve been a regular chatter for ages or actually haven’t said that much recently. So log into UKScrappers, make ten posts if you’re new, then head to the gallery. Just above the first row of gallery pages, there’s a link at the right to upload a project. There you go! Upload your five layouts and choose the Scrap Factor Auditions from the drop-down menu. When you title your layouts, declare your category with the page title – so PAPER – A Day at the Seaside, for example. That’s all there is to entering! The deadline for uploading your entries is Noon (UK time), Friday the 8th of April.

From the auditions, fifteen scrappers will go through to the next stage. Five paper scrappers, five digital scrappers and five hybrid scrappers. Each group has a mentor – Mary Anne is mentoring the paper group, Dolly is mentoring the digi group and hybrid girls, I’m your mentor! We’re not judges and we’re not there to tell you what to do – just to be a sounding board. You can ask us questions, show us something and get feedback. We’re there to help and cheer!

scrapbook page ideas
Those fifteen finalists will then go through a series of week-long scrapping challenges with the members of UKScrappers voting, just like talent shows on television. It’s generally one layout per week to create throughout the contest, and we say good-bye to one scrapper each week until we’re down to the final three. The final three have a special final round, of course! And the grand prize winner gets £500 plus a variety of sponsored prizes and the two runners-up receive £100 and a selection of sponsored prizes. So cash and stash for three scrappers at the end of it all! For the rules of the contest, you can see this post at UKS.

Entries close next Friday, the 8th of April, and we’d love for you to join in the fun! I’d especially love some hybrid entries so I can have a full team – at the moment we are outnumbered by paper and digi girls! But seriously – no matter which category you enter – UKS has thrown some great contests in the past and I know this one will be fabulous too. In fact, I made these three layouts as part of a UKS contest several years ago and I absolutely loved how it stretched my creativity. I hope you’ll consider entering!

In other news, I am working on the travel Q&A, yay! And there’s a giveaway post here this evening, so stop back for a comment-to-win chance!

Have a lovely and craft-filled weekend!

xlovesx

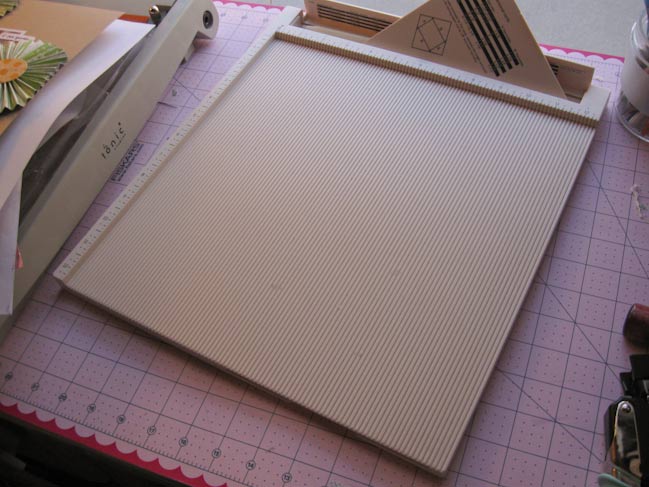
Five ideas with the Martha Stewart Score Board

crafting ideas - martha stewart scoring board
Please welcome a new guest blogger today – Britta! She’s a big fan of the scoring board and I have to admit this is something I wanted to know more about as I don’t have one! I hope you enjoy her five ideas this week!

crafting ideas - martha stewart scoring board
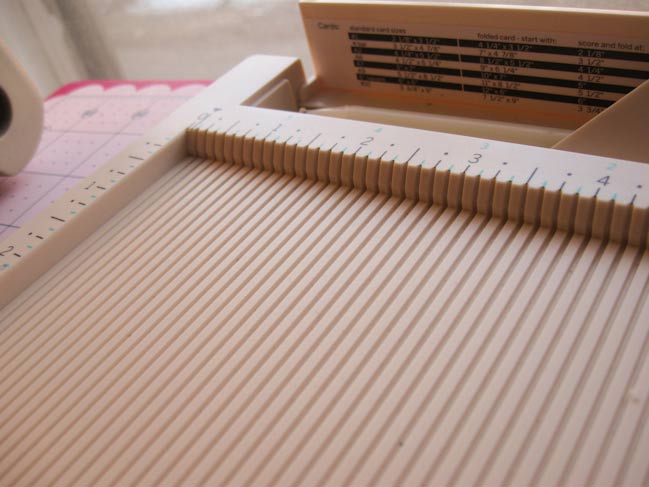
One of my favorite tools in my craft space is my Scoring Board. It’s so easy to use and can be used to produce many looks. From layouts to cards to boxes, this tool is something that I’m constantly reaching for. Today I have five ideas to share with you so you can get the most from this versatile crafting tool.

crafting ideas - martha stewart scoring board
Scoring to Create Rosettes
Rosettes are a super hot trend right now in the crafting industry, and with a couple simple steps, you can create your own out of any paper.

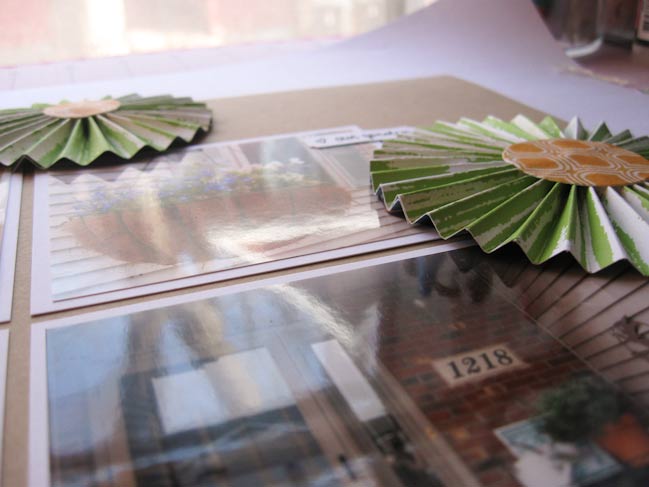
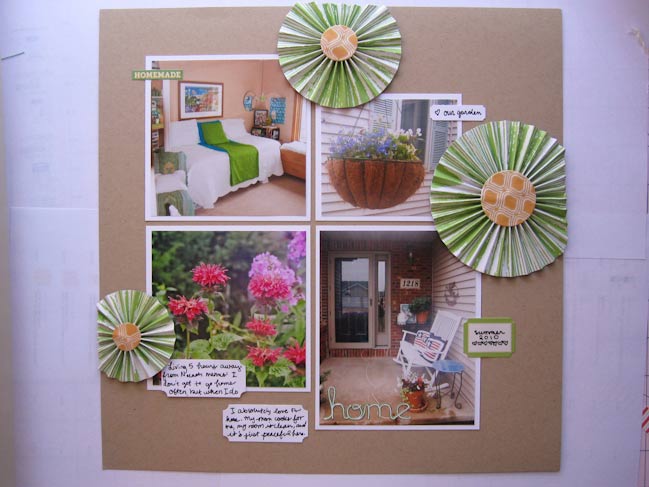
Here, I just cut strips in different widths from patterned paper, scored every 1/2 inch, flipped the paper over, and scored in between the lines I made on the other side. Just fold the strips accordion-style (places where you scored become a mountain fold while places where you scored on the other side become a valley fold). Glue the ends together so that you have a contiguous zig-zag circle and then gather and press one of the edges into a rosette. Use strong dry glue and liquid adhesive (I used Glossy Accents by Ranger) to keep everything in place. Set an object on top of the rosette to help everything stay in place while drying. Embellish as desired.

crafting ideas - martha stewart scoring board
Scoring to Add Emphasis
Measure and draw out straight lines in a square on the inside of a card. Score the lines from the inside of the card, making sure to stop where the lines intersect. Cut a piece of paper down to fit inside the scored square that is slightly smaller. The scoring around the outside of the focal piece provides texture and a level of sophistication.

crafting ideas - martha stewart scoring board
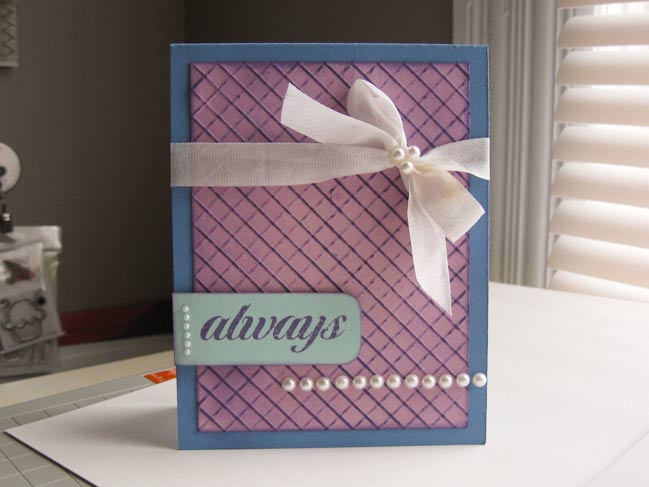
Scoring to Create Texture
Using the diagonal envelope guide included with the Martha Stewart Score Board, Line up a card on the diagonal and score every 1/4 inch. Turn the card 90 degrees to the left or right, and then score going the opposite direction to create a diagonal grid. Use an ink pad directly to the paper as well as with a blending tool to emphasize the texture with a coordinating colour.

crafting ideas - martha stewart scoring board
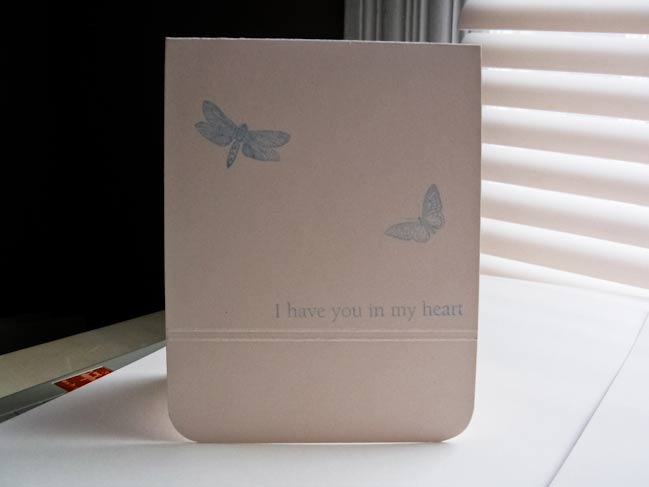
Scoring to Keep it Clean and Simple
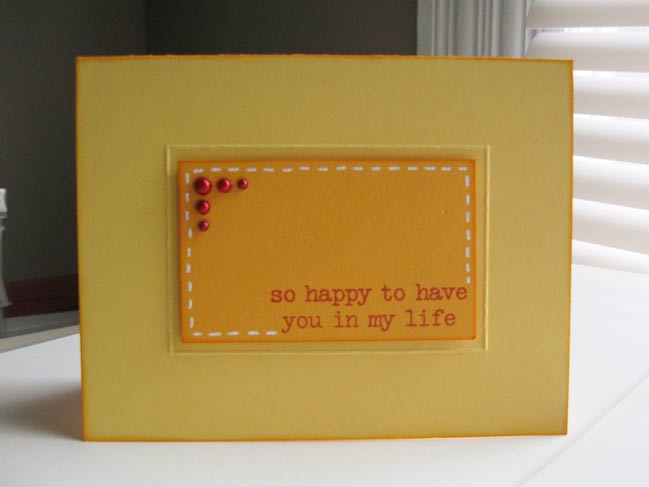
Simple cards are easy, fun and elegant. Scoring on the front of a simple card like this adds a lot of interest and texture without overpowering the message.

crafting ideas - martha stewart scoring board
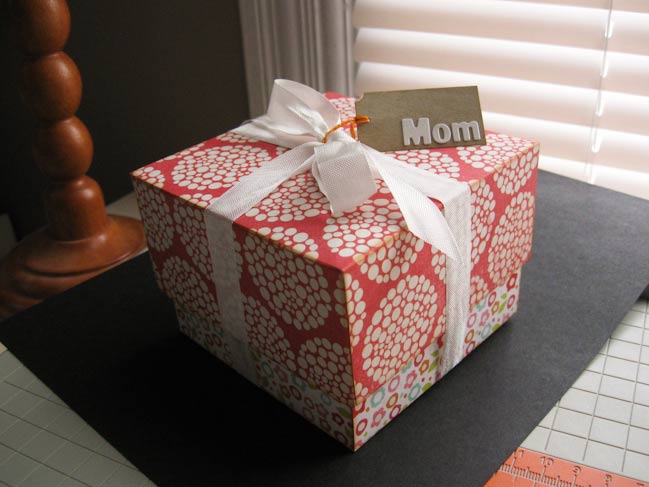
Scoring to Create Clean and Accurate Folds on 3D Projects
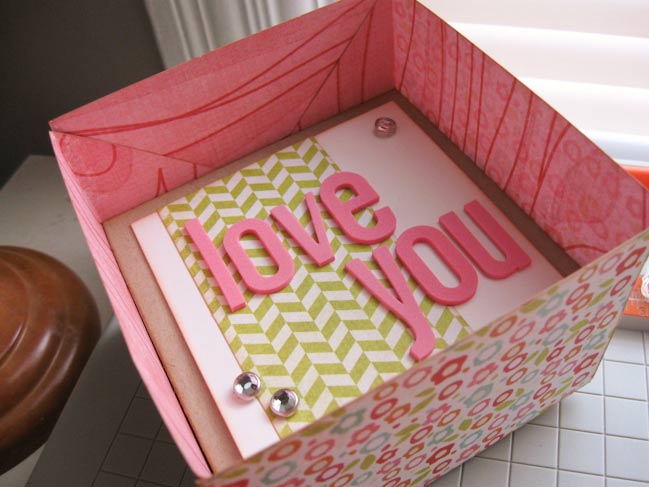
Create quick and easy gift boxes using just two sheets of double-sided patterned paper and a few embellishments. The score board helps to keep all of your sides the same measurement and create nice, clean folds that look like you spent a lot of money on the box and the gift inside.

crafting ideas - martha stewart scoring board
To make the bottom, I started out with a sheet of paper cut down to 10 inches by 10 inches and scored 3 inches in from each side. Cut down one of the folds from the outside to each corner, and use the remaining extra flap for each side to glue everything together. I followed the same process for the top as well, just using an 8 ¼ inch by 8 ¼ inch piece of paper and scoring 2 inches in from the side. The result is a fantastic box that your recipient will love almost as much as the gift you put inside.

crafting ideas - martha stewart scoring board
Do you have a scoring board? We’d love to hear your favourite techniques!


Britta Swiderski is a 21-year-old Graphic Design major at the University of Minnesota and spends her free time inking and making projects. She’s tried pretty much every hobby out there but always seems to gravitate towards paper and all of the amazing things that are possible with it. To see more of her stamping, scrapping, and cardmaking projects, visit her blog and check out the tutorial videos she posts at least once a week on her YouTube channel.

Scrapbooking Sketch of the week

Scrapbooking sketch and page ideas
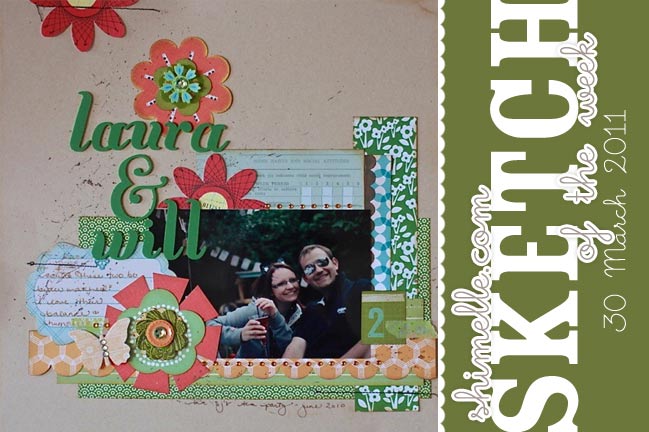
Layout ©twopeasinabucket.com. Click here for supply list.
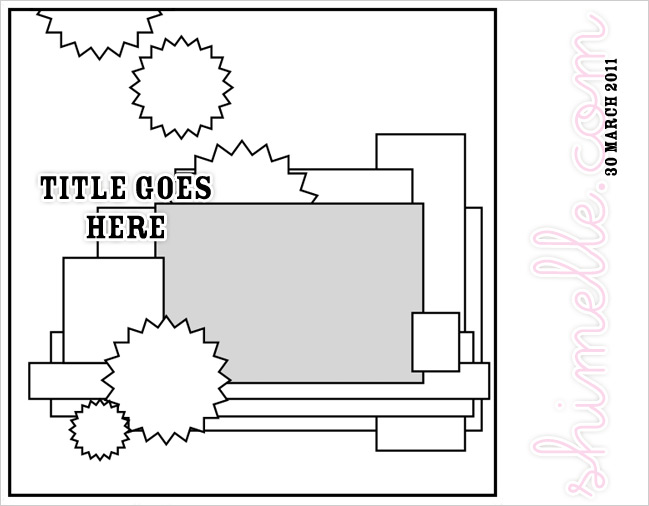
It’s Wednesday, so time for a page and a sketch! This sketch is not completely removed from the design concept featured in the January edition of 4×6 Photo Love – it’s one 4×6 photo and a loose line of embellishments. But from there things are switched around, with layers of patterned paper and a different placement on the page. (By the way, that’s Laura and Will, who recently announced something lovely!)


Here’s a very quick look at how the page came together.

scrapbooking sketch
Here’s how it breaks down, with one landscape photo and lots of blocks of patterned paper. You can simplify easily by replacing all those layers with just two or three. And you can swap out flowers for any other motif – snowflakes, butterflies, footballs, cupcakes, doilies… do you like how I threw in one that I don’t tend to use on my pages? I’m sure you can think of others as you probably don’t suffer from repetitive embellishment injury like I do! (Or maybe we all do!)

As always, the weekly sketch is a no-stress challenge to create something if you fancy! If you do, I’d love to see what you make – leave a link in the comments!

scrapbook page ideas
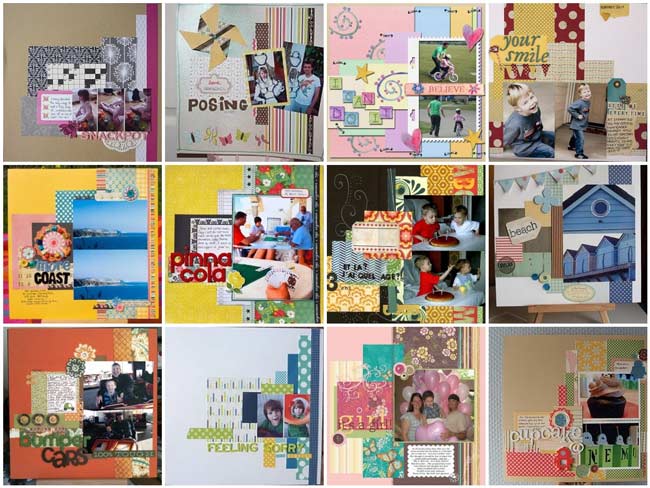
How about a dozen pages from last week’s sketch? Click through to see any of them in more detail!
Top Row, L to R: one, two, three, four.
Middle Row, L to R: five, six, seven, eight.
Bottom Row, L to R: nine, ten, eleven, and twelve.

Thank you to everyone who has joined in or is saving the sketches for future crafting time. I love seeing what you’ve made and I’m so honoured that you like them!

And one little note from Monday – several people said a Q&A sounded cool, but there are only a few questions so far! If there’s anything you want to know about our crazy round-the-world adventure, let me know so I can include it. Thanks!

Have a lovely Wednesday!

xlovesx

Tulle Headband Tutorial

tulle flower headband tutorial
Today I’m happy to welcome Betsy Sammarco to the blog to share her technique for tulle flowers. They are perfect for wearing in your hair or adding to a layout! I hope you enjoy – let us know if you give this technique a try!

I was so happy when Shimelle asked if I’d share a technique with her blog readers. I was browsing around a handmade gift store where I saw little tulle flower barrettes. It looked like the edges were melted and I tried to recreate the effect myself.

tulle flower headband tutorial
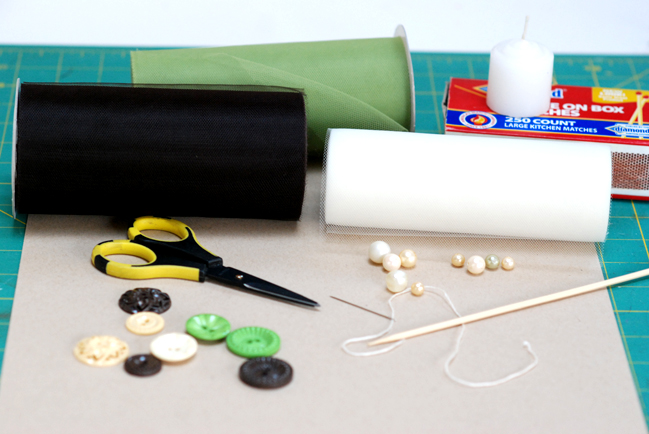
Supplies: 3 rolls of tulle in coordinating colors, buttons and pearls for the flower centers, scissors, needle and thread, barbecue skewer, and small candle. I’m using tulle from Celebrate It, buttons from Jenni Bowlin Studio, and pearls from grandma.

tulle flower headband tutorial
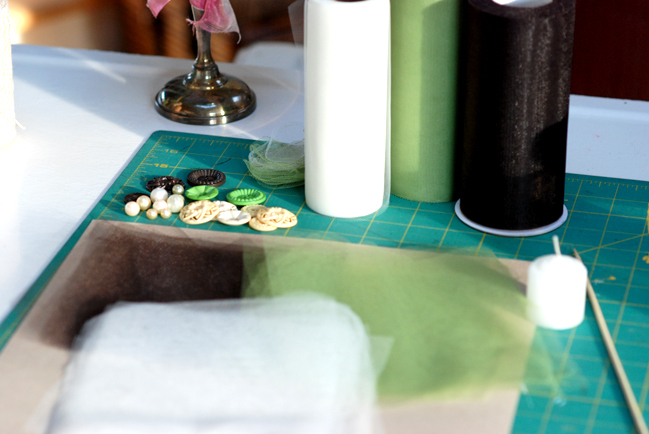
1. Cut the tulle into pieces about 6 inches square.

tulle flower headband tutorial
2. Cut various sized circles from the tulle. To do this quicker, cut a couple pieces of tulle at one time.

tulle flower headband tutorial
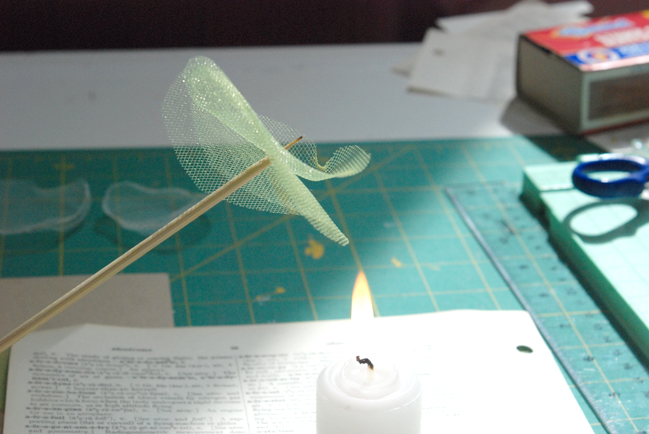
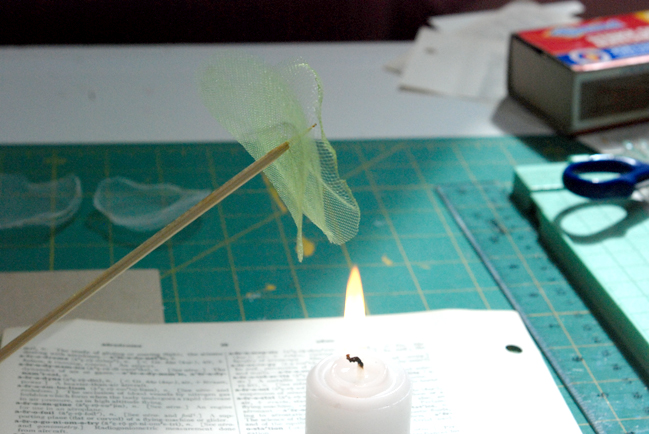
3. Stick 2 or 3 circular pieces onto the end of a barbecue skewer. Hold the tulle close, but not directly into, the candle flame.

tulle flower headband tutorial
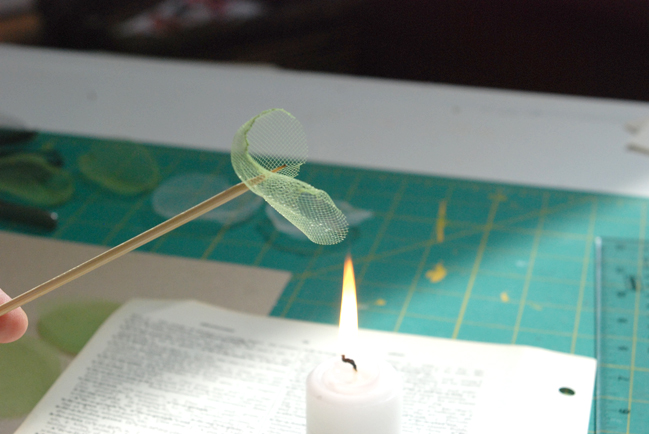
4. Turn the skewer so the edges of the tulle start to melt and the circle starts to curl up.

tulle flower headband tutorial
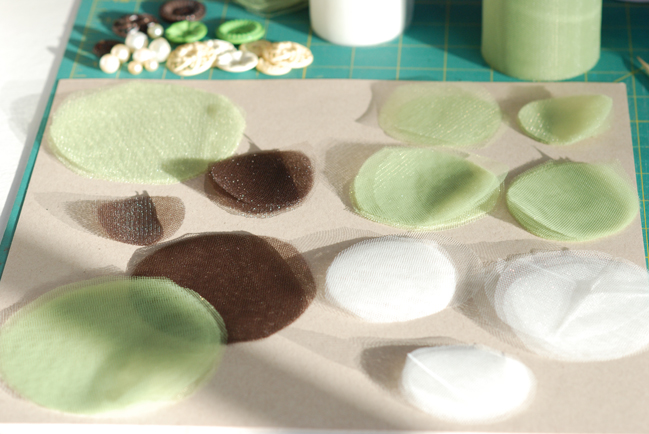
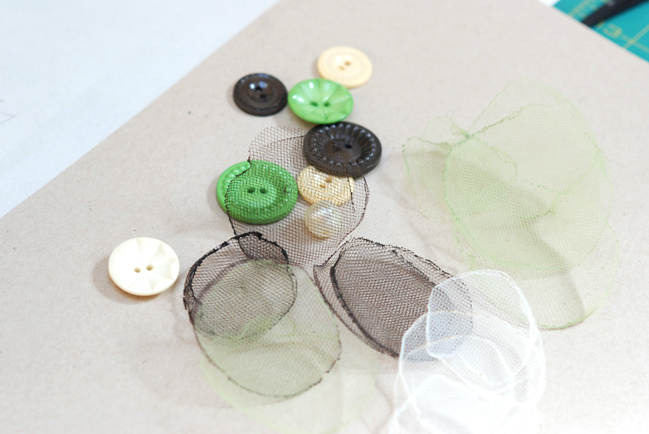
5. When you are done, you will have a bunch of tulle circles whose edges are now melted and more defined.

tulle flower headband tutorial
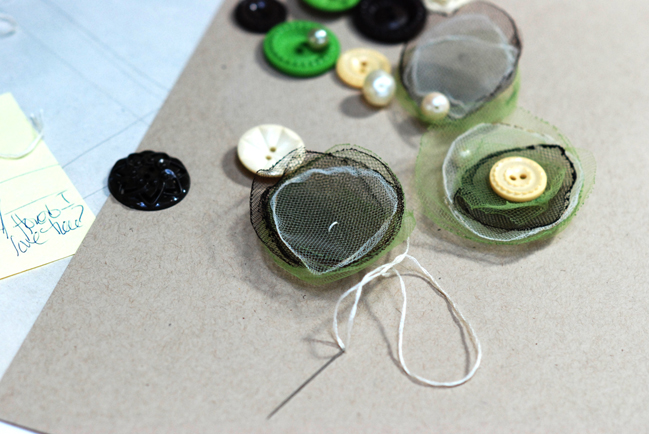
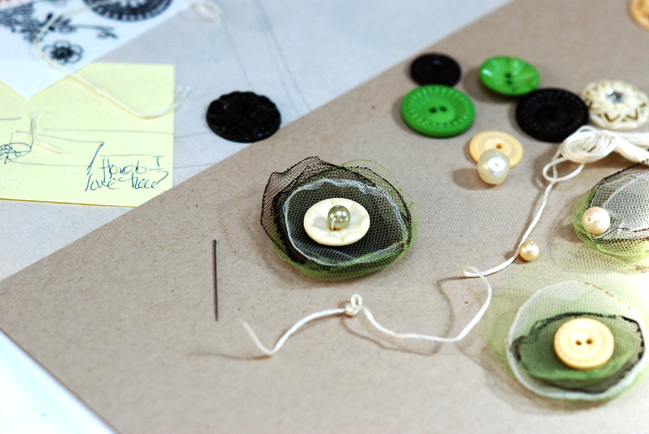
6. Layer your tulle circles until you get a look you like. Place a single stitch in the middle of the bunch to keep the layers together.

tulle flower headband tutorial
7. Stitch a button, pearl, or both into the center as your flower center.

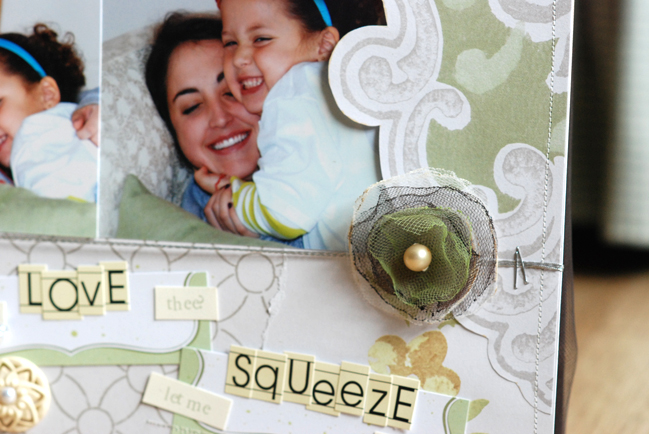
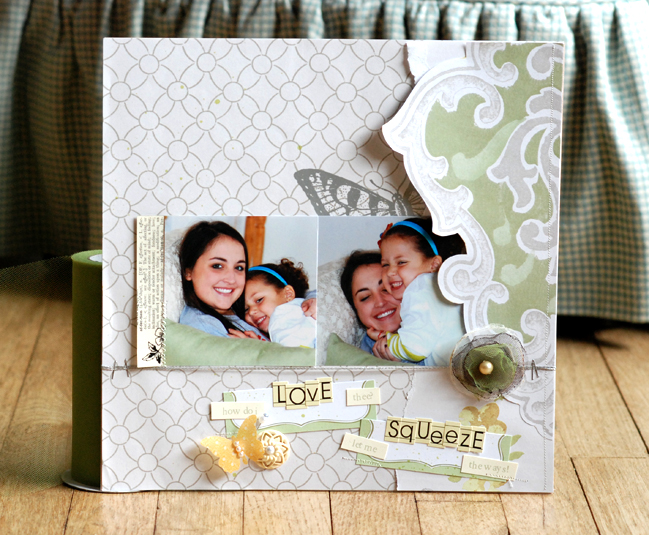
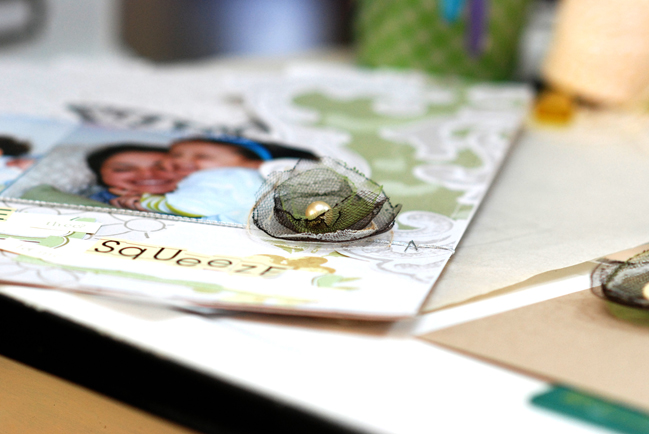
I used one of these flowers as a sweet embellishment for a layout:
tulle flower headband tutorial
Other supplies: Jenni Bowlin Studio patterned paper, alpha stickers, rubons, button, journaling card, stick pin, and butterfly embellishment.

tulle flower headband tutorial
I love the dimension and definition this technique gives to tulle!


Betsy Sammarco is a Connecticut-based pharmacist with two sons and a love of papercrafts! She designs for Jenni Bowlin Studio and Jen Martakis Digital Designs. Read more about Betsy on her blog, Just a Pharmgirl.

Notes from home

notes from home
travel notes :: homecoming
And just like that, we are home.

For the past fourteen weeks, I’ve lived out of a small backpack. The Boy and I have visited eleven countries on three continents. We stayed in hotels, hostels, short-term apartments, the spare rooms of friends and one bright orange camper van. Traveled by plane, train, bus, bicycle, boat, foot, rental car, elephant, taxi, tuk-tuk, back of a pick-up truck and one bright orange camper van. Completed so much visa paperwork that I have no empty pages in a passport that doesn’t expire until 2018. Coped with six languages we don’t speak at all and one I haven’t spoken for fifteen years. Earned qualifications in scuba diving and making coffee. Snapped around nine thousand photos. And still found we were smiling at the end.

And yet, now I write this sat on my very own chair in our very own flat in our very own neighbourhood in Londontown. Our Christmas decorations are still on the floor in the corner of the living room. There’s a stack of post that will take all week to read. So many ‘let’s catch up’ dates we want to make with friends. So many big announcements have been made while we were a bit off the grid. I keep feeling like this is the new year and then realising everyone else feels it’s a quarter over already.
scrapbook page
Right now, there’s a funny honeymoon feeling about our homecoming. Things I have missed seem shiny and new now. Laundry that involves neither a sink nor coins. Reliable hot water. Fluffy towels. My hair dryer and a hair brush that was not a courtesy gift on an airplane. When I open my wardrobe, it’s like all my clothes are brand new again and there’s so much choice! But at the same time, I can’t remember where anything is, even though I know there was some sort of system to what was grouped in each drawer and basket. Scrapbooking supplies are the same: almost like I’ve forgotten what I’ve collected, which is strange since I am used to using that stuff every day and knowing exactly where everything is even when it looks as though that’s completely impossible.
scrapbook page
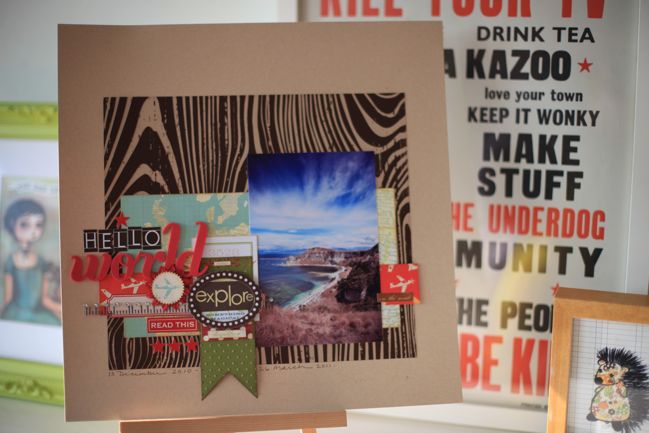
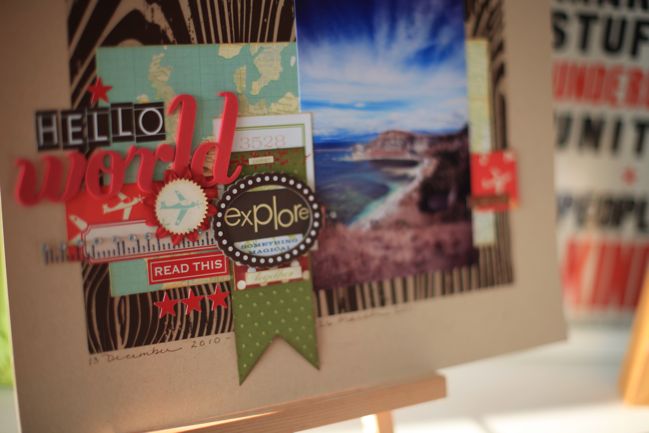
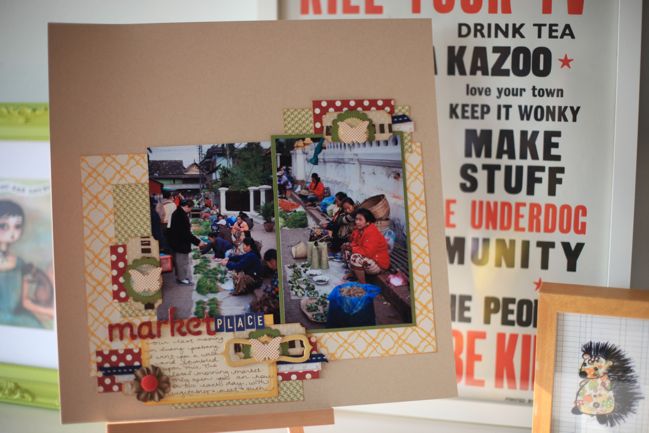
I’ve been writing notes throughout our entire journey. I fell terribly behind at transferring them from notebook to blog when we hit the lands of less internet (which weren’t necessarily the places on the map you might expect!) and so my plan is carry on writing those posts, a bit at a time. I can even post some of them with coordinating scrapbook pages!
scrapbook page
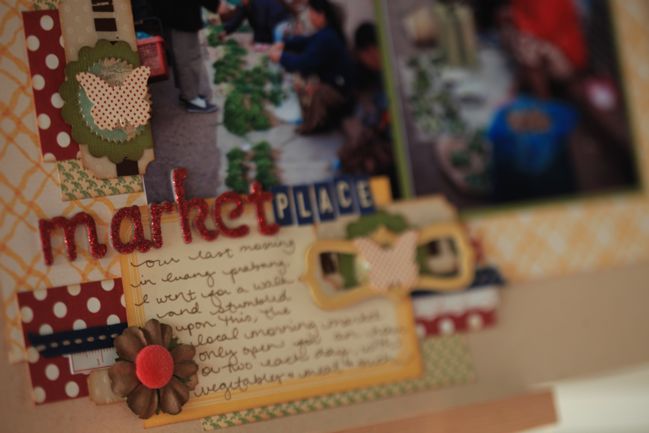
Which brings us to the big question crafty girls ask about something like this: how are you going to scrapbook those nine thousand photos? And it’s something I’ve been thinking about quite a bit. I think I have a plan, and yet it seems so simple that perhaps something else will come about, but these are my intentions. At the moment, I’m in the process of editing out the rubbish photos and deleting things that are extraneous (in tricky lighting, I tend to take three or four exposures of the same thing, for example, and now that I can view them on my monitor, I don’t really need all the duplicates) and uploading them to Photobox. I’ll be ordering a huge amount of 4×6 prints. Not nine thousand, but I wouldn’t be surprised if I order close to two thousand, all told. Which sounds insane. But here’s how I scrapbook 90% of the time: I go to the drawers where I keep tons of 4×6 prints, choose something and start scrapbooking. I don’t scrap chronologically. I don’t feel a themed album has to be completed all in one session. I just go with whatever catches my eye on a given day and that means I’m still adding pages to the album from our trip in the summer of 2006 and our honeymoon album has about a zillion layouts in my head but only a dozen or so actually on paper. Plus I love divided page protectors for adding in more photos without creating more full pages. So I’m excited to get started scrapping those prints but I’m also happy to have lots of other pictures in the photo drawer so I can carry on that process of working with whatever seems right on a given day. That is what keeps scrapping from ever feeling like ‘work’ even when it is my actual job! And I planned from the beginning to use the journal entries and blog posts about each of the different spots as journaling for those pages. I may type it all out on the old typewriter, especially if I can find a ribbon that will give it a bit more ink.
scrapbook page
But I also realise that my scrapbooks are a ‘me’ thing. I love scrapbooking. If you read this, you probably understand scrapbooking. Not everyone does – not even all our family and friends. So I also want to make something more accessible, that takes little to no explanation, and that will come in the form of a chunky photobook. I’ve done photobooks of various events over the years, but they are mostly small in format. Ever since Liz of Paislee Press posted about this book she created with pictures of her daughter, I have kept the idea of a proper coffee table photobook in mind. I’m going to go through and select the very best images and create a book with lots of full page photos and very little text. And in chronological order. So I can look at it on the table and think ‘oh yeah, remember that year when we decided to just drop everything and travel around the world? that’s in that book.’ So I’ll keep you posted on that too. Interestingly, I was convinced in my head that such a big book would be far more than it is, but you can print 200 pages of pretty in hardcover for under £50, which although certainly not crazycheap is about a quarter of what I had imagined.
street signs
But other than those rambled plans, I’m in a little bit of a haze as to where to go from here. Is it worth doing a travel Q&A post? I don’t know if anyone is really interested in how to live from a ridiculously small backpack or how to find out if your spider bite is going to kill you or eleven ways to wear your hair with no more than nine bobby pins. Or if the more curious part is the planning or the budgeting or figuring out what to eat. So if you have questions, please ask away. I can even persuade The Boy to write some answers if you want to hear his perspective. He is far more well-travelled than I, having grown up in three different countries just for starters. And while I am quite excited to come back to different choices of ‘stuff’, he was actually quite happy to continue living from his selection of three shirts indefinitely. He is also more adventurous, so he did some things that I didn’t do, like deep sea diving and eating spiders for dinner. (Well, I ate femur of spider. That’s all I could manage. He ate entire spider for starters and then followed it up with a main course of tree ants. Call it adventure or call it crazy; I won’t argue.) So yes, go ahead and ask what you like in the comments and we’ll put together some answers!

And now that I’m back to my own computer and my paper and scissors, I’m excited for some lovely things here on the blog. The weekly sketch will continue, giveaways every weekend but then some other non-scheduled things too. Absence makes the heart grow fonder, and that means I am very fond of home and pretty paper right now. Very fond indeed.

xlovesx