paper: pretty paper. true stories. {and scrapbooking classes with cupcakes.}

lovely to meet you Twitter Facebook Pinterest YouTube

Take a Scrapbooking Class

online scrapbooking classes

Shop Shimelle Products

scrapbook.com simon says stamp shimelle scrapbooking products @ amazon.com shimelle scrapbooking products @ amazon.co.uk

Reading Material

travel

DIY Embellishments:: A Scrapbook Tutorial by Ann Schneider

DIY Embellishements:: A Scrapbook Tutorial by Ann Schneider @ shimelle.com

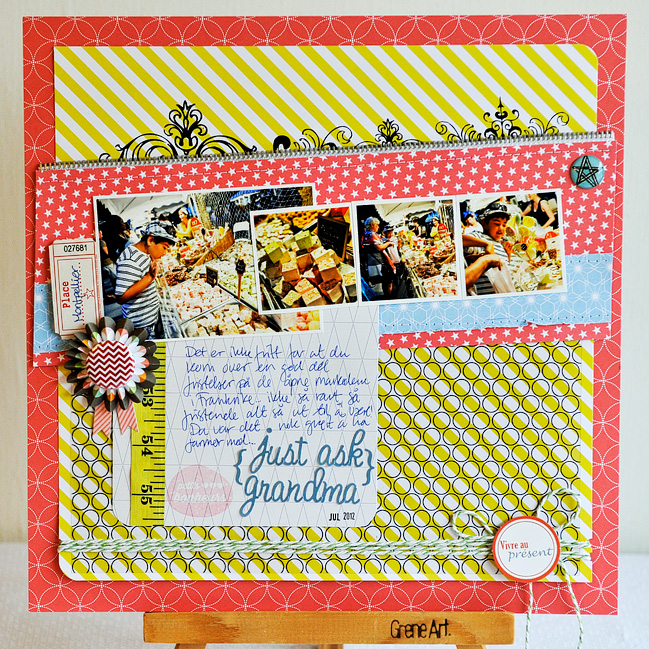
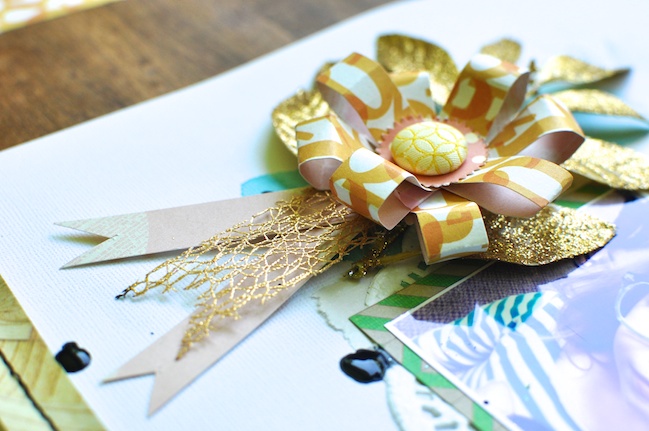
I have a lot of patterned paper. Who doesn’t, right?! Well, I have an overwhelming tendency to buy tons of paper and when I start a layout, I love to layer that paper and build my page. Which is all good and fine, but usually something is missing. Something to take my layout to the next level. I need an embellishment. But I only have a billion sheets of patterned paper sitting on my desk. Hence, this is where I start making my own embellishments out of my collection of patterned papers. This is where my beloved prize ribbon was born! Easy peasy!

DIY Embellishments:: A Scrapbook Tutorial by Ann Schneider @ shimelle.com
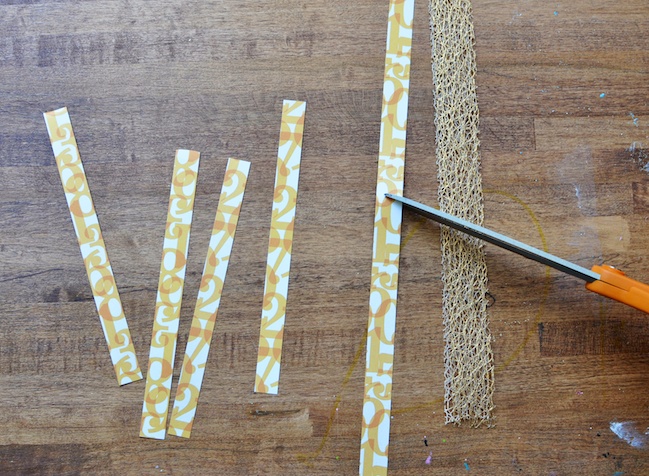
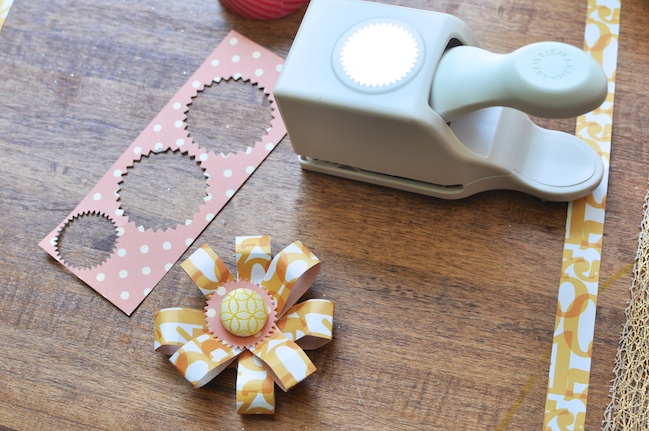
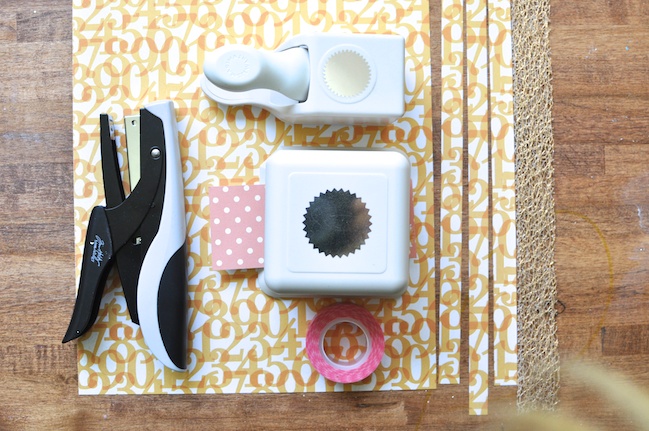
Use your scissors (or some sort of cutting tool) to cut your favorite patterned paper into two 1/2 inch wide strips.

DIY Embellishments:: A Scrapbook Tutorial by Ann Schneider @ shimelle.com
Next cut those (2) strips in half so you’re left with 4 strips measuring 6 inches in length by 1/2 inch across.

DIY Embellishments:: A Scrapbook Tutorial by Ann Schneider @ shimelle.com
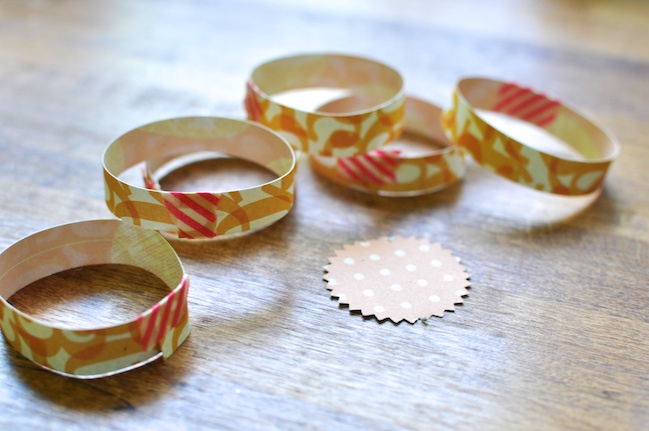
We all made those chain hoops as a child. Let’s do it again. This is where I used washi to form my circle. Use any other tape or maybe glue, if you’d like. Just don’t form that chain we like to make at Christmas. That’s not part of our master plan!

DIY Embellishments:: A Scrapbook Tutorial by Ann Schneider @ shimelle.com

DIY Embellishments:: A Scrapbook Tutorial by Ann Schneider @ shimelle.com

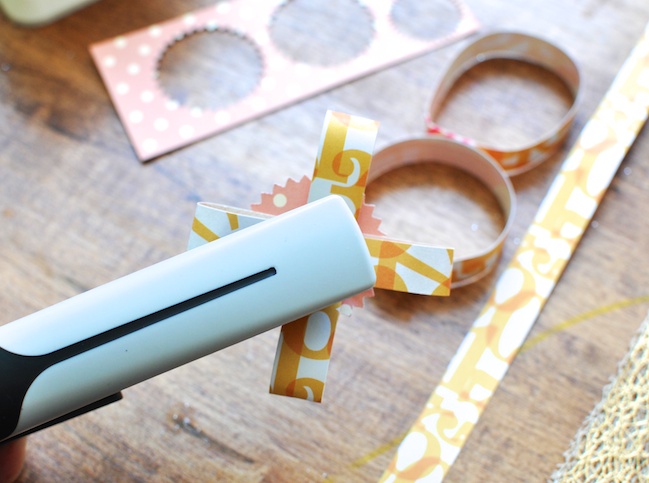
Ok, grab the larger circle that you have cut out. This is our base. Pick up one of your loops and pinch it in the center and staple it onto the large circle. Repeat this step in a clockwise fashion until you form the flower portion of the prize ribbon.

DIY Embellishments:: A Scrapbook Tutorial by Ann Schneider @ shimelle.com

DIY Embellishments:: A Scrapbook Tutorial by Ann Schneider @ shimelle.com
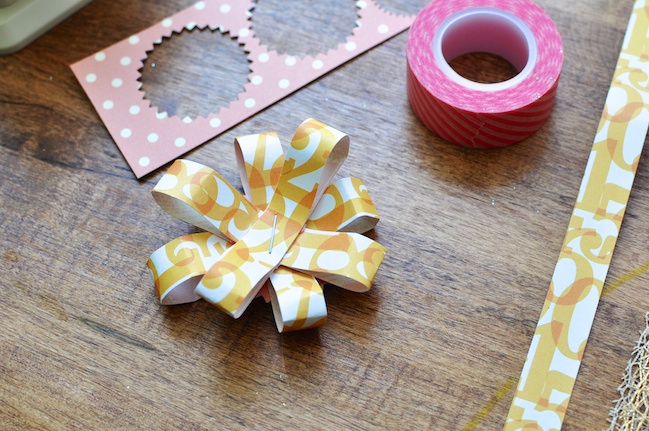
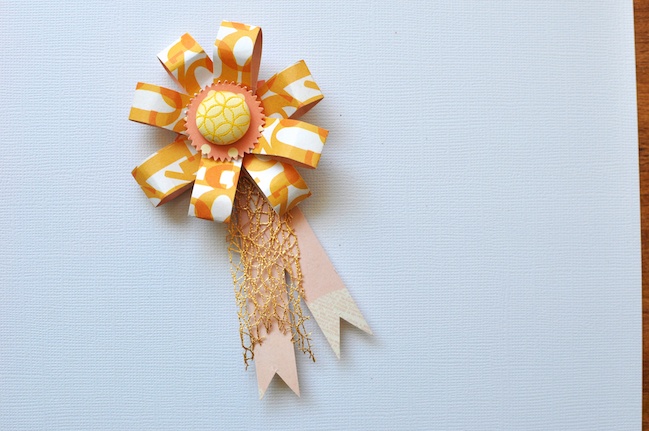
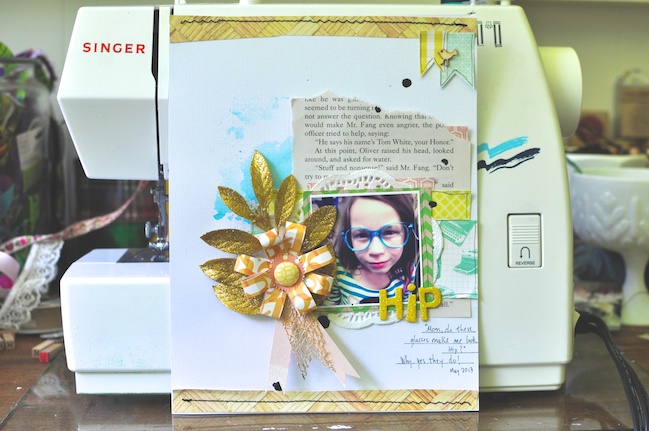
That small circle I had you cut out? Pull it out now and put a brad through it. Maybe glue or sew a button through it. Glue it to the top your prize ribbon. I used two extra strips I had left over to create a tail if you will, to hang down from the flower portion. I even threw in a scrap of ribbon. Thus, creating a prize ribbon worthy of a layout or a card!

DIY Embellishments:: A Scrapbook Tutorial by Ann Schneider @ shimelle.com

Be creative! Use different patterned papers to create this. Mix it up! I love to make a prize ribbon using fabric and ribbons. I’ve made several through the years as hair decorations. Oh, they’re so pretty!

Well, I hope this inspires you to pull out your patterned papers and cut them up to use for embellishments! It’s a great way to use up your stash!


Ann Schneider lives with her family in Rochester, NY. She and her husband, Craig, were high school sweethearts who married in 1999. They had their first daughter, Nora, in 2004. She was followed shortly by another daughter, Charlotte, in 2005. She started scrapbooking in 2005 as a way to capture the fun and crazy life she was living with two babies 15 months apart. Ann is a former bookstore manager who still reads every day. She loves being crafty and volunteering. She has been published in Scrapbook Trends. You can follow her at her blog Pinky and Sisters and check out her gallery at Two Peas in a Bucket

Best of Both Worlds :: My scrapbooking product picks for July 2013

Best of Both Worlds Scrapbooking Kit July 2013
Ooooh, what an eventful day. This is the first month that I had to do some major changes to my plan for the Best of Both Worlds kit because some of the items I had ready to highlight as of last Friday ended up jumping in too many shopping carts over this past weekend! But items replenished and switched around just a little, and now I’m back to a kit that we have in stock and I’m happy with the choices!

But… it means my video and photos are wrongedy wrong wrong. So I’m going to take new pictures and make a new video. Huzzah. (ETA Video is below now! Yay!) I don’t want you to have to wait to shop, so you can find the kit online now and shop right away if you prefer. Click here to shop for the May Best of Both Worlds scrapbooking product picks.

That small set of letter stickers seems expensive because it looks like you get one sheet. You get way more. If you want to see these in use, Glitter Girl showed the whole pack in this video.

A couple items are at big discounts – these won’t be restocked, so if you want them, grab them at that bargain price. Items that are in newer inventory tend to be restocked if they sell out, so if you’re reading this post a few days later and items have run out, click the ‘request and notify’ button to make sure you get the first chance to grab them when they return to the shop.

It’s a very paper-based kit this month – the embellishments are paper die-cuts. If you want to mix it up with some other items, I would recommend the Freckled Fawn paper clips and enamel dots for a different texture available in great colours!

Right: I will be back soon with actual photos and the normal introduction post for this month’s kit, and I look forward to scrapping with these goodies and sharing all that with you!

20 Minute Layout:: A Scrapbook Tutorial by Relly Annett-Baker

20 minute layout by Relly Annett-Baker @ shimelle.com

Do you know how much time I get to scrapbook at the moment? Roughly, 20 minutes around three or four times a week. That is pathetic. It’s so pathetic I might have given up altogether, if I didn’t love it so much. But I do love it, so I’ve found ways to work with it.

It helps that I’m a big believer in managing my calendar and booking myself in, and that you can get pretty much anything done given a 15 minute chunk. I am, you see, not a huge believer in busywork. I like to cut things down right to the bare essentials – what is called the minimum viable product, in product development – and build from there.

In my day job as a content strategist, I help companies and individuals work out how to prioritize creating content for their websites, to keep their business goals ticking over – removing the obstacles that prevent them from committing to a schedule. I applied the same methods to enable me to get back to scrapbooking.

First of all I thought about the ‘blockers’… what stops me from scrapbooking?

1) Organizing supplies. I got pretty ruthless about my amassed collection of pretty stash. I donated almost as much as I kept. I dedicate one of my 15 minute blocks to ordering photos/clearing my desk/checking my essential supplies are full and in the right place.

2) Picking up and putting down layouts. I looked through my layouts and picked out which ones I felt were most successful. Then I noted down what I’d replicate from them. I also watched a video of Shimelles about using a kit from beginning to end and thought about how to get the most out of patterned paper, ink and stickers which are my go-to pieces for layouts. Also, I use Pinterest to save sketches and layouts to refer to.

3) Patterned paper. I had so much patterned paper that I loved to look at but hardly ever cut into. And then I didn’t know what to do with my scraps. So, I took a radical step and it has changed the way I scrapbook. I’m so much faster and happier combining patterns and colours now. Wanna know what it was?
20 minute layout by Relly-Annett Baker @ shimelle.com

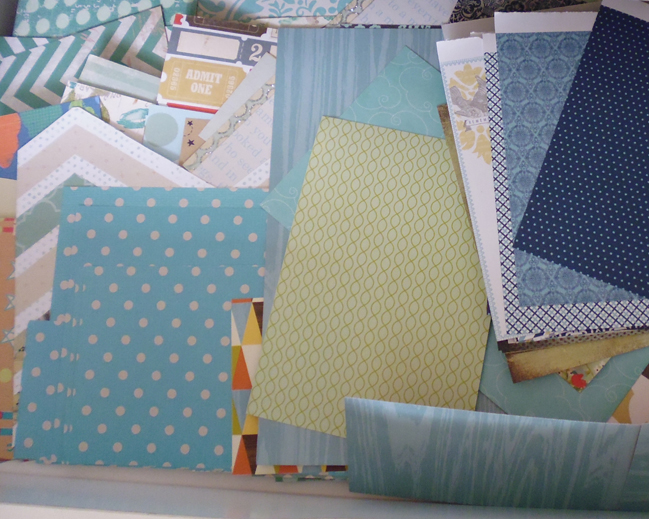
I cut all my patterned paper. All of it. Into a variety of stripes, squares and rectangles. They live in a plan chest, by colour (with some pieces spread out if they have multiple colours), and the ease of mixing patterns and the serendipity of the combinations is now the basis of my super-quick scrapbooking.

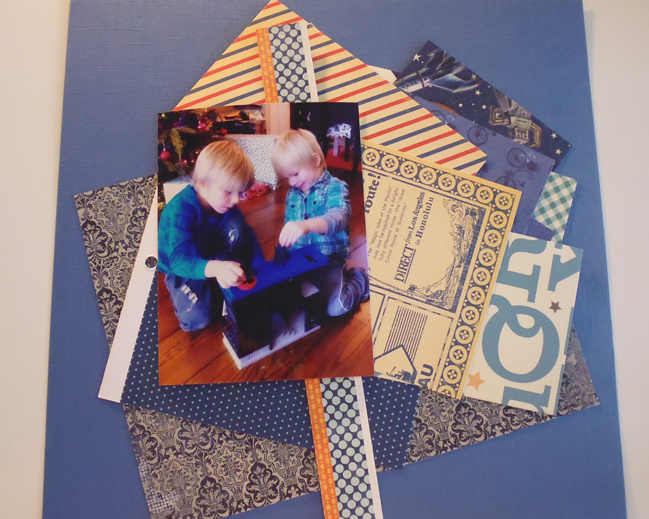
Anyway, Here’s how to make a simple layout (I made) in 20 minutes.
20 minute layout by Relly Annett- Baker @ shimelle.com

Choose the photo that you want to scrapbook. Mostly I start with a photo, and I usually have a post-it note attached to them of the story I want to tell. The more time I have the more in-depth a story I’ll choose to tell. This was a quick snap on Christmas Day of the boys playing nicely together (as any mother knows, a moment well worth capturing!) that I wanted to document. I went to my colour drawers and picked out two shades of blue, a royal/navy blue and a green-turquoise, that picked out colours in the photo. I decided a contrasting red-orange would also work, so looked for some strips that had that colour too. A piece of cardstock in faded royal blue, and we’re good to go. Try shopping from your scraps basket for this layout to work with what you have and find combinations you’d not have thought of otherwise.
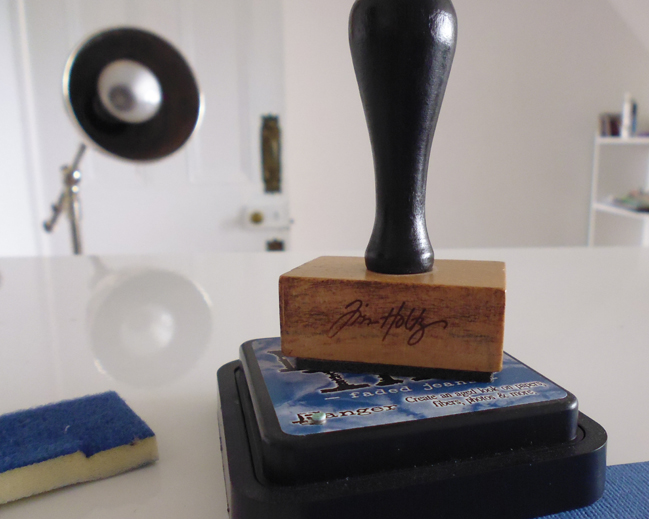
20 Minute Layout by Relly Annett-Baker @ shimelle.com

Some quick inking around the pieces with the Tim Holtz sponge tool and some Blue Jeans ink (I use sticky Velcro squares to keep the sponge pieces attached to the ink pads, so they are always there when I need them).
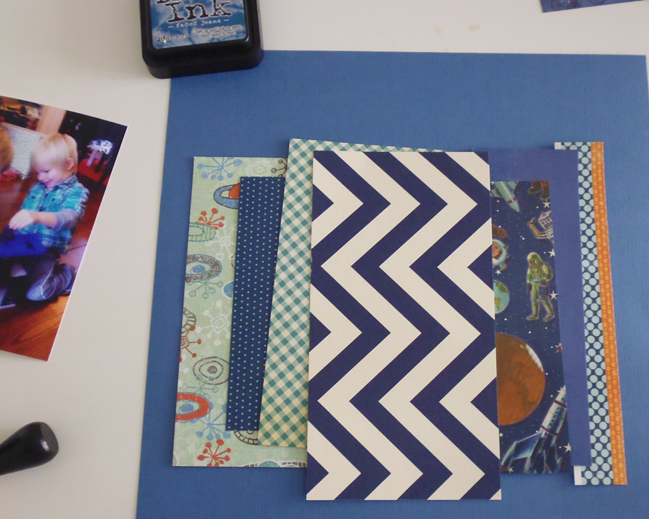
20 minute layout by Relly Annett-Baker @ shimelle.com

And we’re ready to place. I was using a portrait photo, so I wanted to place the pieces in a vertical style, with some horizontal lines to inter cut the shapes. Do a rough placement to check the patterns worked together. A handy camera phone snap here is good for reference too.
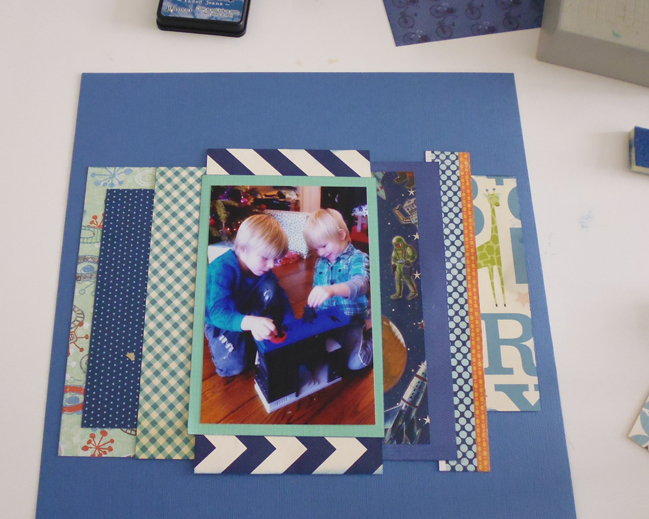
20 minute layout by Relly Annett-Baker @ shimelle.com

Stick them down, along with a cardstock mount for the photo, leaving good space for title and journaling.
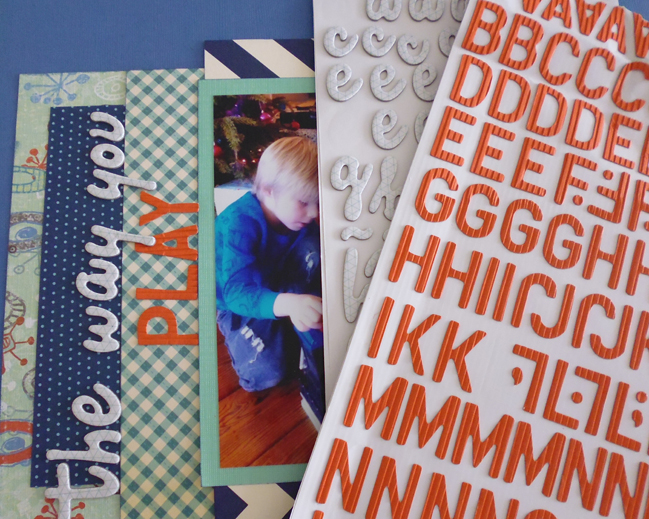
20 minute layout by Relly Annett-Baker @ shimelle.com

Title time! I deliberately placed some straight lines on the left, knowing that’s where I wanted my title. I picked out some Amy Tangerine thickers for a colour contrast, dimension and texture. Again, try working with what you have to hand – mix and match can be a great way to use up alphabet sheets.
20 Minute Layout by Relly Annett-Baker @ shimelle.com

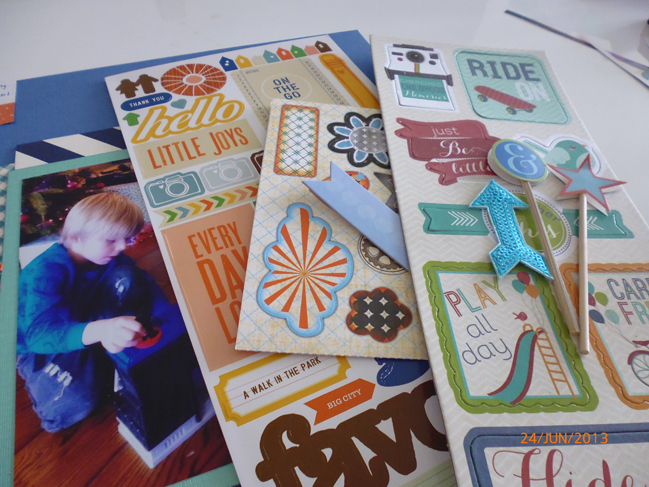
Next, gather up some stickers and embellishment, and draft your journaling. I found a journaling card from my collection to cut up. The orange provided a great horizontal colour pop and focused the eye on the photo.
20 minute Layout by Relly Annett-Baker @ shimelle.com

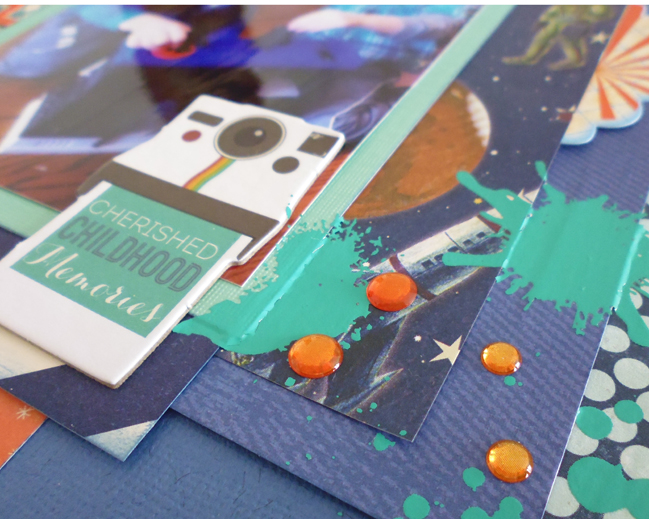
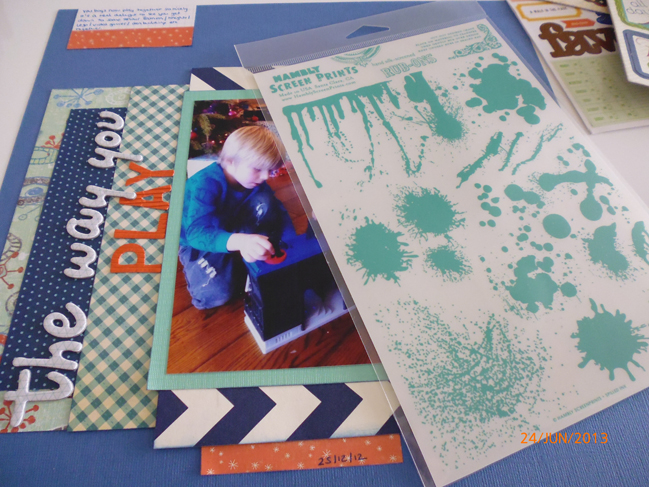
Go for bonus marks in your remaining minutes. I try and use something I have either been saving or overlooked on each quick layout. Sometimes they become the focus of the layout as the main embellishment. Here I knew I wanted to use this aqua ink blot Hambly rub-on, that I’d had sat in my ‘must use or donate’ pile for a while.
20 Minute Layout by Relly Annett-Baker @ shimelle.com

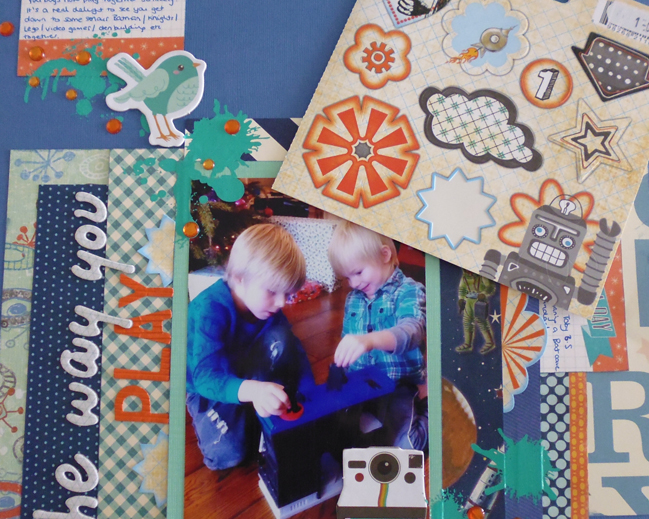
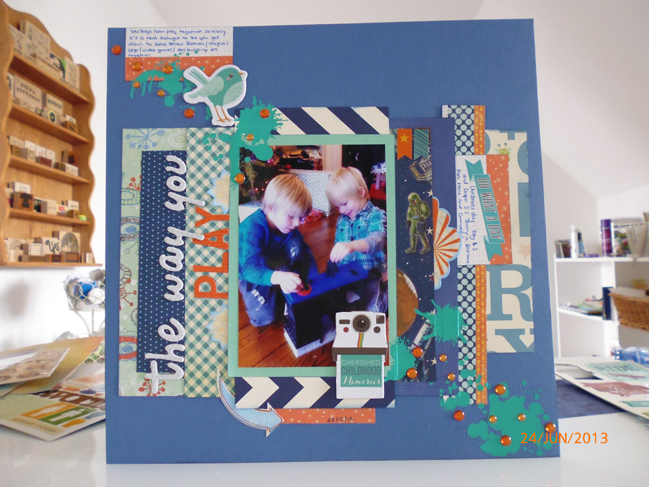
Create your finishing touches. I had some great chipboard pieces and stickers that I thought would work well. I decided a diagonal embellishment design would pull together the ink blots so that it looked less like an accident with a leaky pen, contrasted with some shiny orange gem drops, and the stickers add some extra layers sliced and interspersed with the paper layers.

The time saving elements here – chopping up patterned paper ahead of time, keeping embellishments to a minimum, and having elements like journalling cards and stickers do double duty – are things I do all the time to try and prevent myself from getting lost in all the possibilities of what I could be scrapping and keep me focused on what I am scrapping.
20 Minute Layout by Relly Annett-Baker @ shimelle.com

I stopped the clock at 19 minutes and 47 seconds. Can you beat me?


Relly Annett-Baker is a content strategist, wife, and mother to two small boys. She likes making things with paper but unfortunately it is usually spreadsheets. She blogs sporadically and teaches online classes about creating web content at Rel.ly. She tweets enthusiastically, with much CAPSLOCK and swears, as RellyAB.

Her next class, 30 days to done, is to help all (and future) bloggers, site owners and Etsy store keepers get their content in order. It starts July 1st. More at 30 days.

BONUS Relly has a place on her 30 Days to Done online course to give to one of you. Also, she likes Hello Kitty. Leave a comment on this post that includes the magic phrase ‘Hello Kitty’ and Relly will pick a commenter to win the class for free. (And you don’t need to wait if you want to sign up – your class fee will be refunded if you win!) Good luck!
Sketch to Scrapbook Page :: Mixing 'proper' photos and phone photos

scrapbook page by shimelle laine @ shimelle.com
The next four scrapbooking sketches in this series all mix what I call ‘proper’ photos with phone photos – 4×6 prints and square prints – though really you can take 4×6 photos with your phone and you can crop photos from your ‘proper’ camera to a square, obviously. What I do know is that I often find myself with a mix of these sizes now, as I will use both my camera and my phone to take photos during the same day. I can’t be the only one, so a few scrapbook page sketches dedicated just to that seems like something more useful than unpacking your craft shopping only to find that discount offer of 100 tiny sewing needles might have been because there was no seal on the packaging. Never in my life have I so regretted that I brought my own bag. I digress.

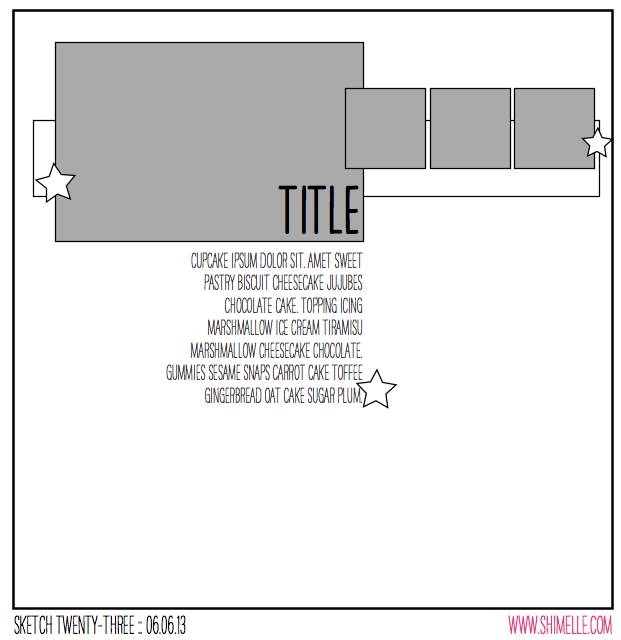
scrapbooking sketch by shimelle laine @ shimelle.com
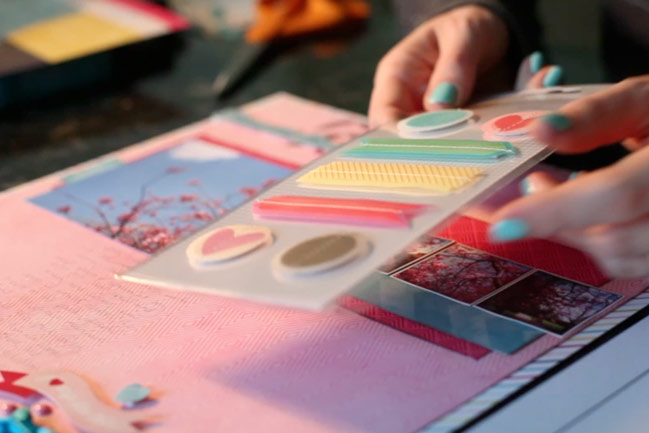
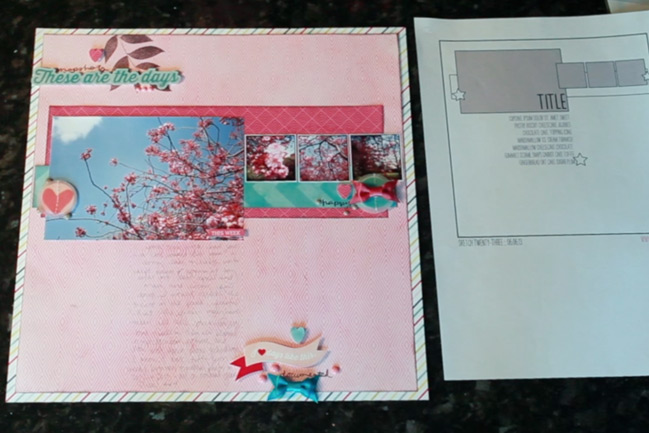
So yes: one 4×6 landscape photo, three small square photos! I printed mine at 1.5 inches square, and left a tiny white border on the smaller images.


Most of the supplies for this page come from the Echo Park Here & Now collection, plus a bit of paper and a stamp set by Kesi-Art, with embellishments by Crate Paper and American Crafts.

scrapbook page by shimelle laine @ shimelle.com
Here’s a quick look at how that page looked by the end of the video. A bit more reserved than Glitter Girl’s crazy embellishment last week!

Sketch to Scrapbook Page:: Slanted Elements by Anne Jo Lexander @ shimelle.com
Please welcome today’s guest, Anne Jo Lexander, who has a brilliant take on this one large + three small idea – place everything on an angle!

Sketch to Scrapbook Page:: Slanted Elements by Anne Jo Lexander @ shimelle.com
Personally I think that the more plain and simple a sketch is, the more inspiring it is. Why? It allows my brain to automatically start pondering about the possibilities, instead of locking myself in all the details that’s supposed to be in a sketch. I’m fond of telling my brain: It’s not like it’s a technical blueprint! The purpose of a sketch is rather to be a kicker for your brain to start make it your own, but I can’t help it – the more detailed, the more obligated I feel to stick to it somewhat.

Here’s a tip for you if you feel like you struggle with a sketch: Study it for a little bit, then put it away and just think of the main lines you want to add to your project. If you really struggle – ask yourself why you do this to yourself – it’s supposed to be fun, no? Ditch the sketch then!

I knew right away I wanted to do slanted elements with this particular sketch. While the ColorConspiracy-papers used here are fairly new, I’m particularly satisfied about incorporating three really “old” scrapbooking-products – the KI memory epoxy sticker from the Love, Elsie line, and the transparency, and rub-ons (it’s funny how happy it makes you – finding out that old rub-ons still works) both from Hambly Screenprints. I’m fighting hoarding one small step at a time!


Living at an island right outside the west coast of Norway, Anne Jo Lexander alternates between telling other people’s stories as a local newspaper journalist by day and telling her own story in the evenings through the use of fancy paper, embellishments and photos. She’s quite fond of creating layouts, cards, and boxes, and having scrapbooked since 2005, she’s definitely learned this one thing: You never tire of pretty paper and cute embellishments!

These days she is designing for Maya Road, Craft Origine and ColorConspiracy, and you’ll find her at her blog , her resume blog , on instagram or TwoPeas gallery.


Gardeners' Digest scrapbooking blog hop (June 2013)

scrapbook page by shimelle laine @ shimelle.com
Welcome to the June Gardeners’ Digest, with updates from the Garden Girls! Since last month, Glitter Girl has finished her mini series on scrapbooking weddings and moved on to a few new ideas, including an episode with printables and paperclips and this week’s adventure wherein she goes a bit crazy with different embellishment motifs!


Here’s a look at Glitter Girl’s latest adventure, and you can find her new video weekly here at Two Peas.


This project from Garden Girl Lilith Eeckels has inspired me to get back to some interactive layouts soon. I love how she compromised between a single and double layout by adding a section to a single page that folds out to include more, and the photos, colours, and design are just beautiful. See more of her project here.

Plus if you want some drama in a scrapbooking video, don’t miss Wilna’s latest In the Mood to Scrap. I always love all of Wilna’s videos and projects, but this particular episode is amazing as Wilna worked around one of the biggest accidents to happen while filming: spilling an entire bottle of mist on her layout!

Plenty of new items have arrived at Two Peas lately, and my favourite is probably the entirety of the Travel Girl collection by October Afternoon. Can I pick an entire collection as my favourite product? I’ve also been excited to see the new Project Life collections arrive in the store even though I don’t keep a weekly Project Life album. I just want to use the cards on my standard 12×12 pages, and to help with that, I’ve split several collections with friends so we could each have a variety of the cards rather than a full set of each colour scheme. I do think the full core kit (plus page protectors and an album) is a great way to introduce a new scrapbooker to this hobby, and it would make a fabulous gift! But if you’ve been scrapping already, you’re probably a fan of the variety, so splitting the kits with other scrapping friends (either in real life or online friends you can swap with by post) makes for a great way to get just enough and not have to commit to just one design. My favourite collection was midnight, but this week I’ve been working with Honey and Blush, and they are both lovely too! The bright colours are great and mix well with other collections. Plus Two Peas has the coordinating 12×12 papers for the collections, and I’m looking forward to working with those soon.

If you’re a big Christmas scrapper, definitely check out the sales at the moment. In the 75% off section, there is a lot of Christmas stuff, including some really fancy embellishments that have gone from pricey to bargain with that discount, plus there are papers and other themes too. Definitely worth a look.

Want a little help with your shopping? One comment left on this post by the end of the month will receive a $10 Two Peas gift certificate to buy whatever you fancy. Make sure you include a valid address in the email box when you leave your comment. Good luck!

Now it’s time to hop on over to the next Garden Girl, and that’s the lovely Janna Werner, who will have more fun to share with you! Enjoy! And you can find the full list of links on the Two Peas blog. Don’t miss Jamie Sorenson’s pregnancy album series while you are there – if that’s something you might want to make (for yourself or a friend!) she is sharing some fabulous tips and her album is just delightful.

Gardeners' Digest :: Scrapbooking News from the Garden Girls
Gardeners’ Digest is a monthly update from the Garden Girls, the design team at Two Peas in a Bucket. To keep up with the Garden Girls throughout the month, check out the garden gallery any time!

Five Fun Ways to Stitch on your Layout by Marie-Pierre Capistran

Five Fun Ways to Stitch on your Layout by Marie-Pierre Capistran @ shimelle.com

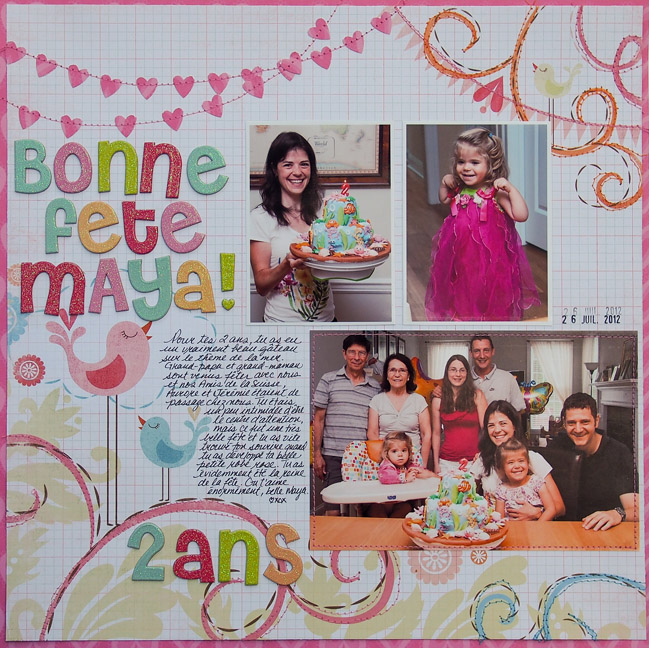
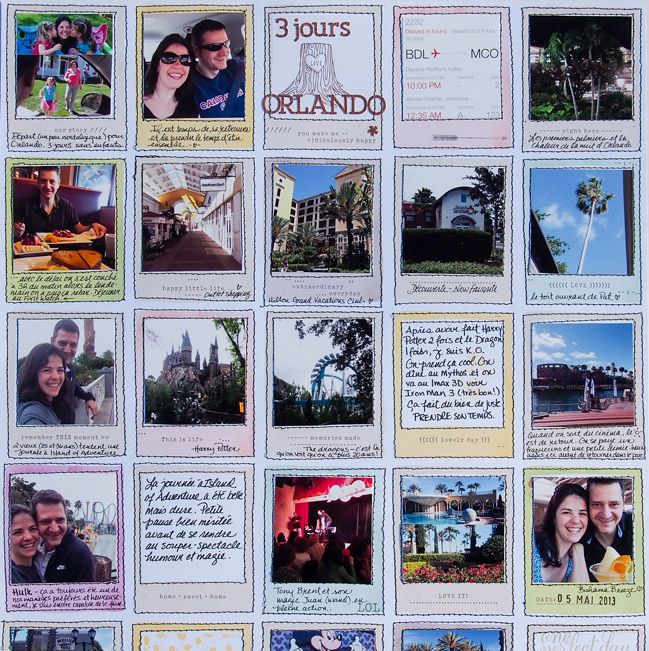
Stitching is really trendy right now in the world of scrapbooking. It’s a very nice and easy way to add some color and texture to a page. I keep my sewing machine out and accessible in my scrap room and I do stitch on every single layout I make! Let me show you 5 ways I like to add stitching to my pages.

Five Fun Ways to Stitch on your Layout by Marie-Pierre Capistran @ shimelle.com

Five Fun Ways to Stitch on your Layout by Marie-Pierre Capistran @ shimelle.com

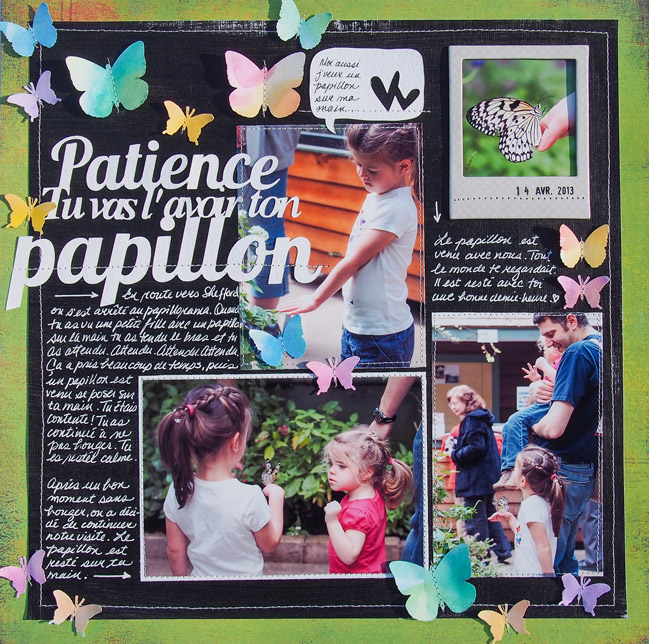
Making lines on which I can write my Journaling
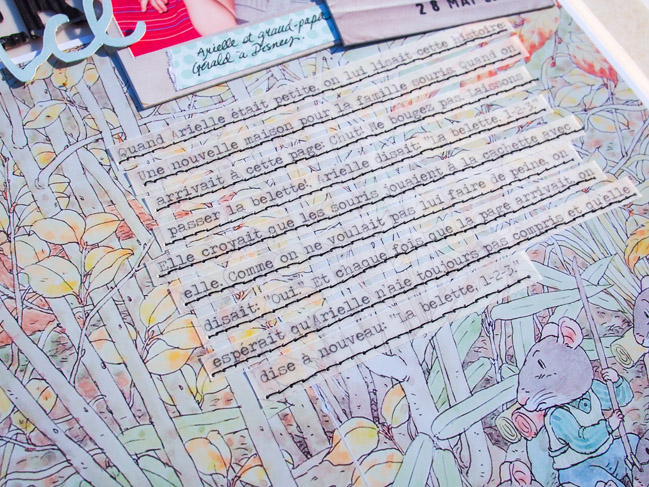
Usually I will stitch some lines and then hand write my journaling on the lines I have just created like I did here but on this layout I ended up wanting to type my journaling on vellum, instead of handwriting directly on the photo, so that it would be easier to read, so I stitched every strip of text one by one. The stitching is still working as lines for the text, guiding the eye through the block of words.

Five Fun Ways to Stitch on your Layout by Marie-Pierre Capistran @ shimelle.com

Five Fun Ways to Stitch on your Layout by Marie-Pierre Capistran @ shimelle.com

Adhering Elements such as Embellishments, Titles, Chipboard Elements to my Pages
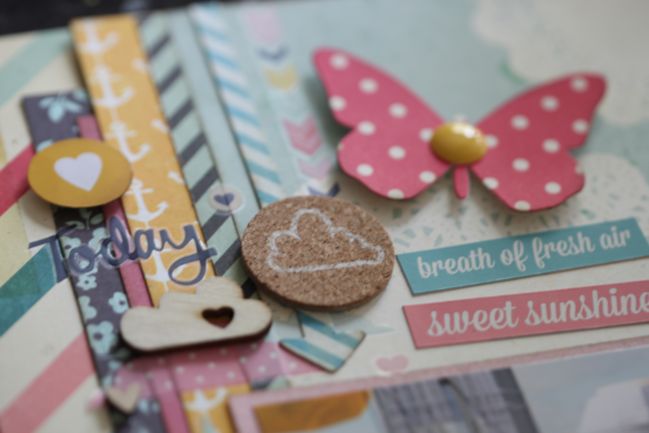
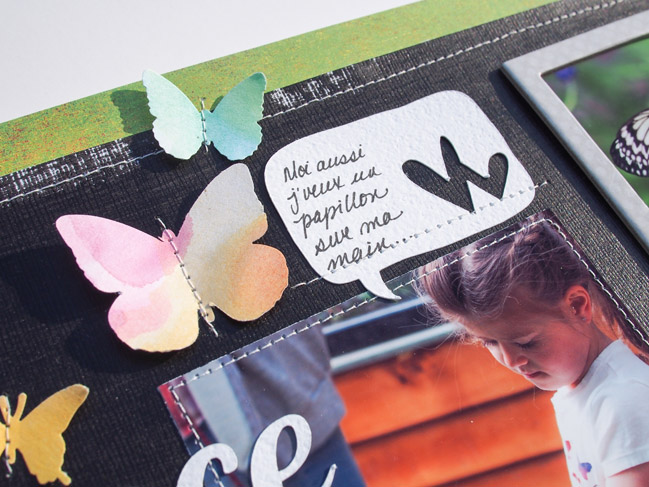
You can add any kind of embellishments by stitching them to your page. Here I stitched through one word of my title and in the middle of every butterfly, lifting the wings a little to give extra dimension. I even stitched through the chipboard frame as it was the only effective way of having it adhere properly to the chalkboard painted background. I love stitching in the middle of butterflies. Sometimes I let the thread loose at the end where the head is to mimic antennas just like I did on this page .

Five Fun Ways to Stitch on your Layout by Marie-Pierre Capistran @ shimelle.com

Five Fun Ways to Stitch on your Layout by Marie-Pierre Capistran @ shimelle.com

Making Elements on the Patterned Paper Stand Out and Creating Texture
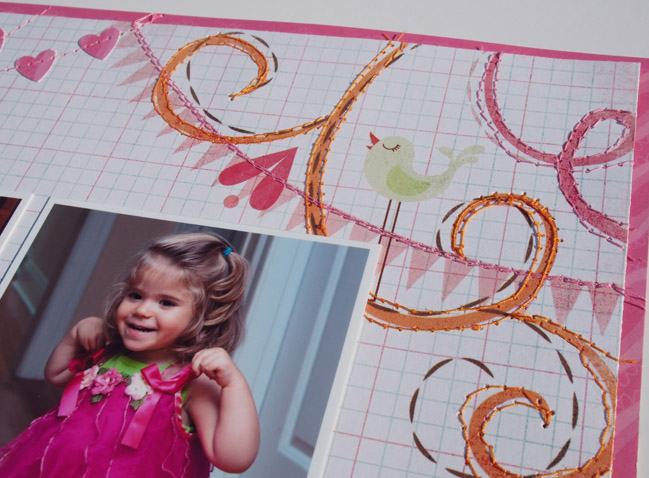
Another great way of embellishing a page with your sewing machine is by stitching along the lines of the elements that are already on the patterned paper. Here I followed the swirls on my background paper. I have been intentionally not very careful and the stitching ended up way off the lines and that gives a little more movement and interest to the background. I also stitched on the top of the banner under the orange swirls and added another (hearts) banner to the page. On this layout I used thread in the same color than the lines, but using another color of thread could also be interesting. This technique could also work great with embroidery thread like I did here .

Five Fun Ways to Stitch on your Layout by Marie-Pierre Capistran @ shimelle.com

Five fun Ways to Stitch on your Layout by Marie-Pierre Capistran @ shimelle.com

Adding a Frame around my Pictures and/or my Page
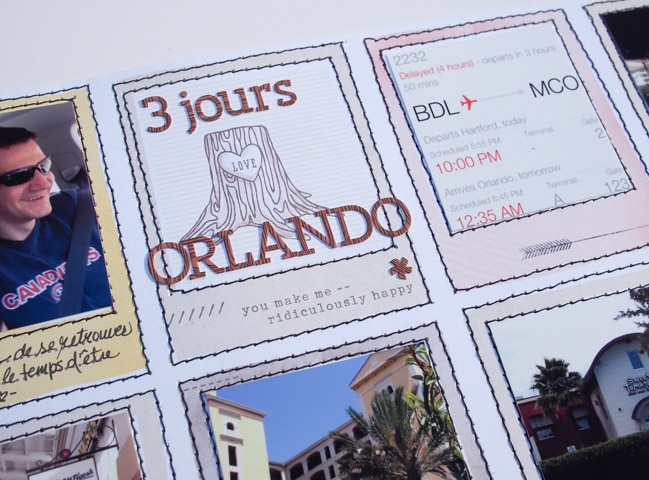
On almost every page I make, I sew around my page or my photos so that the thread act like a frame. Here though, I did something different: I used a patterned paper with frames on it and I stitched all around the frames. I then placed my picture in the frames, being careful not to adhere the photos over the stitched lines.

Five Fun Ways to Stitch on your Layout by Marie-Pierre Capistran @ shimelle.com

Five Fun Ways to Stitch on your Layout by Marie-Pierre Capistran @ shimelle.com

Sewing Ribbons and Banners to Create a Border
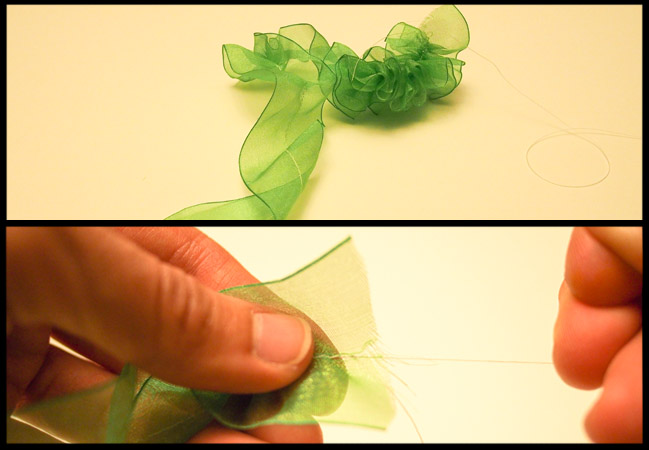
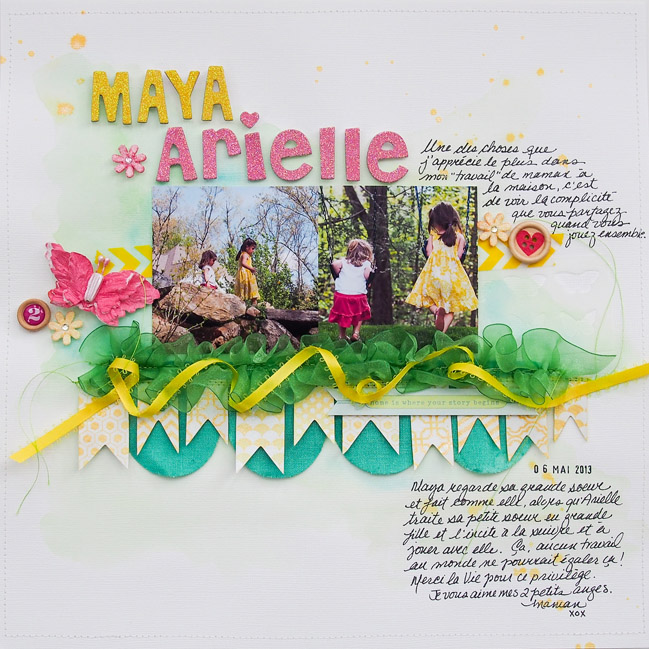
I love to layer ribbons and different kind of banners and trims to create a very dimensional border full of different textures. Here I first stitched a Pink Paislee muslin scallop ribbon that I had sprayed with Heidi Swapp’s Color Shine and I then added a cardstock banner that I also sprayed with some Color Shine. I toped that with a very broad ribbon that I ruffled. To achieve this look, sew on your ribbon once without adhering it to the page and then pull on one of the thread that is hanging at the end of the ribbon, as shown in the pictures. I finished my border with a ribbon that I loosely adhered with some hot glue.

You could also use stitching to create borders between patterned paper, or to draw some elements like sunrays or garlands .The possibilities are infinite and if your sewing machine is out and ready, it will be fun to add sewing everywhere! I hope that you are going to give it a try.


Marie-Pierre is a French-Canadian who has lived 12 years in Switzerland before moving to Connecticut, 2.5 years ago. Although she’s a French teacher, she’s currently staying home with her two little girls ages 3 and 5. Marie is an artist at heart and has been crafting for years, trying her hand at different crafts like watercolor, paper cutting and calligraphy before she fell in love with memory keeping. Scrapbooking is now her biggest passion alongside photography and writing. She is on her second year on the creative team for Get It Scrapped . You can find her on her blog on Instagram and on Pinterest .

Messy Mood:: A Scrapbook Tutorial by Missy Whidden

Messy Mood:: A scrapbook tutorial by Missy Whidden @ shimelle.com

Do you sometimes print out your photos and you just don’t know which papers to use or where to begin? I feel like that a lot. I tend to go through “scrappy moods” and sometimes I just don’t feel like using patterned papers. So I like to create a page completely from scratch, which means I get to dig through all of my old stash. I have so many random scrappy items that don’t get used because it’s either in a drawer or in a stack somewhere. I like to get out my paints, brushes, stamps, washi tape and random stickers, bling, twine and buttons and just start creating.

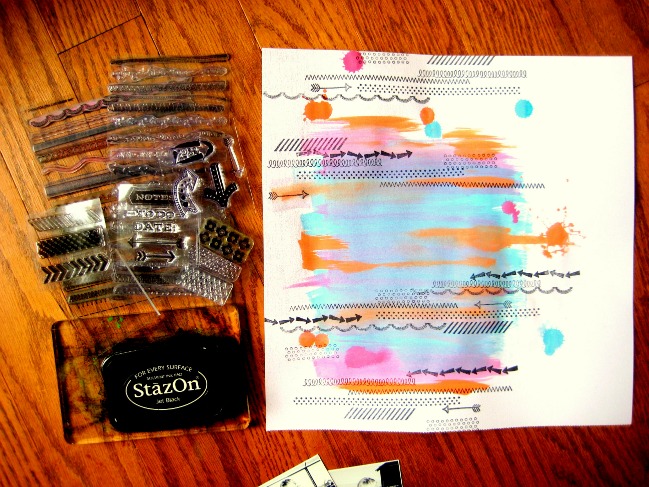
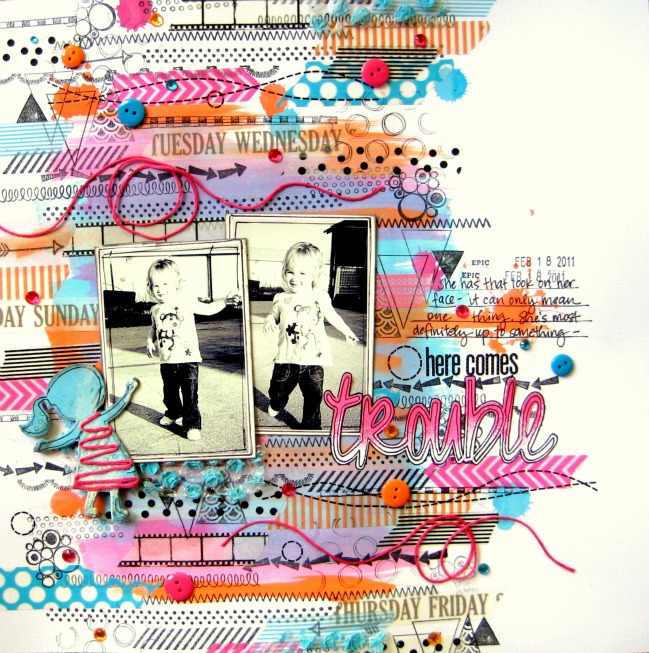
I started this page with a piece of plain white cardstock and my paints. I printed my photos in black & white, so I was free to choose my own color scheme. I chose blue, pink and orange and went from there. If you have color photos, you can totally choose paints that match exactly. Sometimes that’s hard for me to do with patterned papers. For this page, I didn’t use a sketch or have any ‘real’ plan. I just started by brushing paint onto the cardstock. I love this technique because it’s totally unique, and it feels liberating to be so messy and random and yet still create something worthy of going into my scrapbook albums. And the best part is that you can’t tell when you make a mistake!

Messy Mood:: A Scrapbook Tutorial by Missy Whidden @ shimelle.com

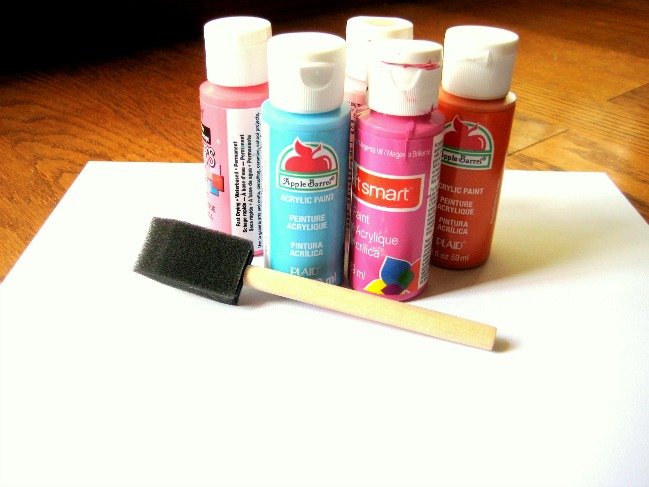
Start off with a piece of plain white cardstock, your choice of paint colors and a foam brush.

Messy Mood:: A Scrapbook Tutorial by Missy Whidden @ shimelle.com

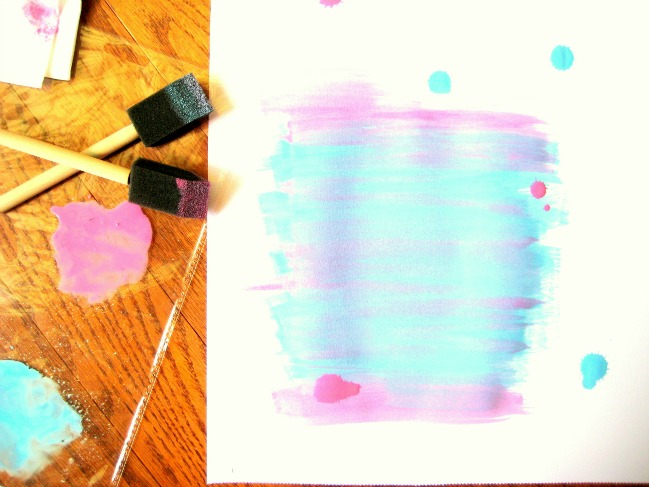
I like to water my paints down a bit, so I use old plastic packaging from paper collections or stickers. I squirt some down and spritz it with water to give it a watercolor-like consistency. Then I just start brushing. I also hold the brush up high above the paper and use my fingers to squeeze the foam to create big splatters.

Messy Mood:: A Scrapbook Tutorial by Missy whidden @ shimelle.com

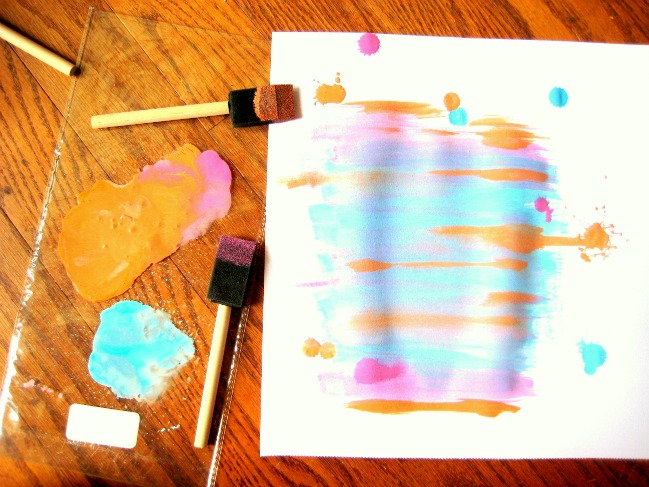
I like the blue and pink, but I wanted a third color in the mix, so I added some orange. Again, you have endless color options.

Messy Mood:: A Scrapbook Tutorial by missy whidden @ shimelle.com

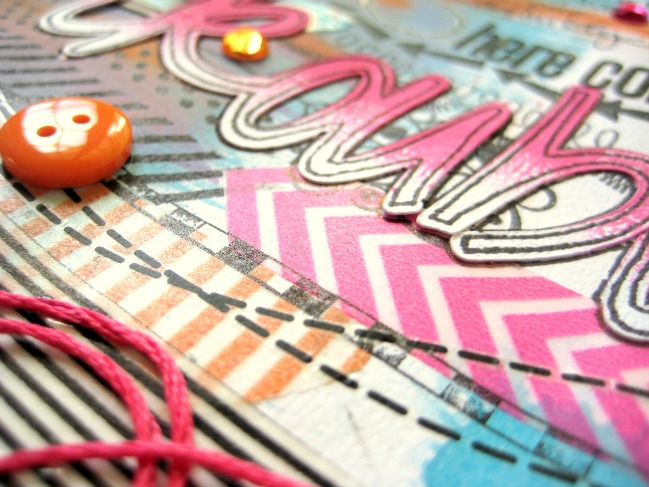
The hardest part is waiting for it all to dry. Once it dries, I start stamping. I like to use border stamps, but you can use whatever kind of stamps you like. There is no right or wrong place to stamp. Just add some here and there and use a variety to give it some interest.

Messy Mood:: A Scrapbook Tutorial by Missy Whidden @ shimelle.com

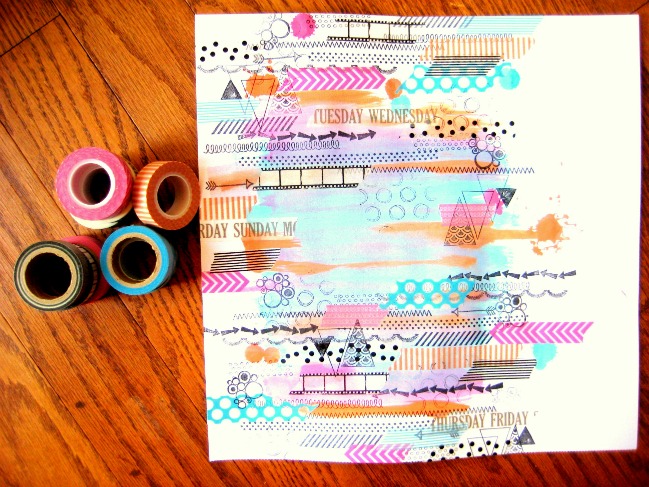
Next comes the washi tape… my favorite! Again, you can choose colors that go with your color scheme. I always like to add in black because it contrasts against the bright colors. Just like the stamping, just stick it where you see fit. I like to make sure my three base colors are evenly spread out, so that helped me figure out where to put which color tape.

Messy Mood:: A Scrapbook Tutorial by Missy whidden @ shimelle.com

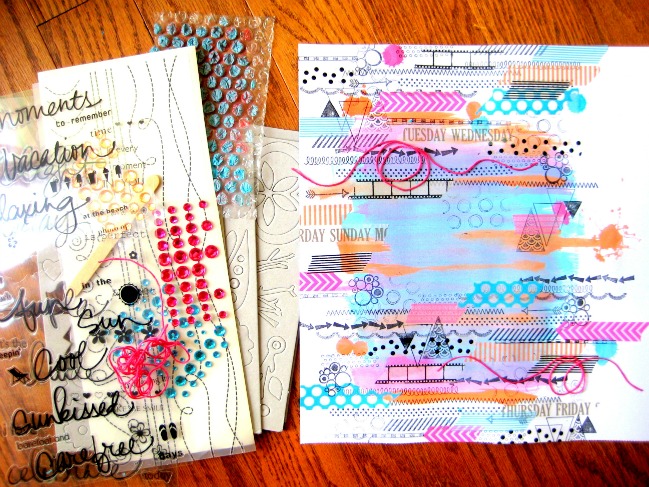
Lastly, I went through my stash. I found pink floss/twine, rub-ons, rhinestones, stickers, some old bubble wrap and chipboard that I wanted to somehow add to the layout. I simply glued down some of the twine in a few places and added some of the bling. I only used a few rub-ons. I found a cute little girl in my chipboard shapes that I painted blue. I stamped a little bit on the dress and added some twine for some texture. I also tore up some bubble wrap that I used as a stamp on another project.

Messy Mood:: A Scrapbook Tutorial by Missy Whidden @ shimelle.com

I hope this inspires you to set aside your patterned paper for a minute and try creating something from scratch. It’s a great way to use up some of your older stash, and it’s actually a fast type of layout once you have all of your goodies ready to go. Plus, it’s fun to get messy!


Missy Whidden lives with her family in a small town in Florida. She and her husband both grew up there and went to high school together. They began dating in college in 1994 and got married in 2000. They have two beautiful daughters, Reese and Paige. She is a former high school English teacher turned fitness instructor. She loves all things crafty, reading and working out. She fell in love with scrapbooking in 2006 when her mother-in-law asked her to help her create a baby book for her son. She was instantly hooked and has been a scrapbooking fan ever since. She has been on several design teams and kit clubs. She currently serves on teams at My Scraps and More , My Creative Scrapbook , Challenge Me Happy and Love My Tapes . She loves inspiring others to create, and believes that being creative is a wonderful form of therapy.

Sketch to Scrapbook Page :: A Corner Gathering

scrapbook page by shimelle laine @ shimelle.com
Can I start with something almost entirely random for this post? I haven’t taught local (or local-ish) workshops for years. I think the last time I was doing that with any sort of regularity was when the Craft Barn was still open, and that’s been a while. This morning I’ve just had a possibility present itself, and I could teach workshops for eight to sixteen people (I’m thinking the smaller end of that scale would be more comfortable in the space, but it might take a bit of trial to see) in London. It wouldn’t be immediately, as it would take some planning and so forth! But it would be lovely to judge if this is something any of you would want to attend. Could you let me know if London-based scrapbooking workshops would be something you would put in your diary? Thanks!

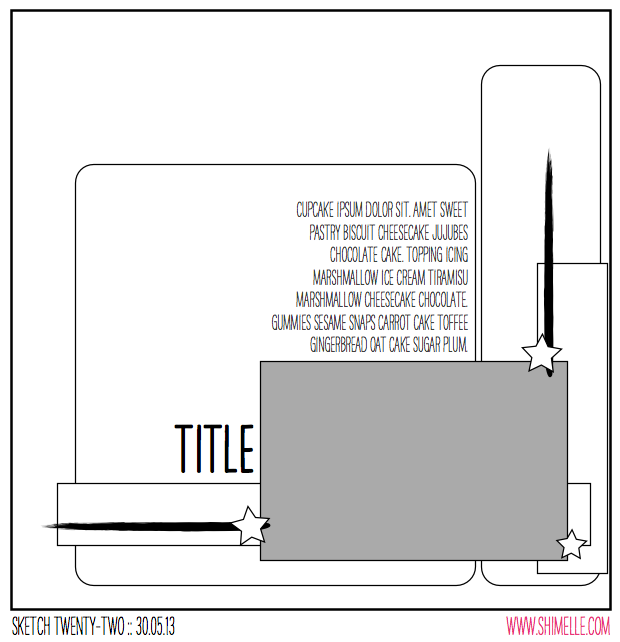
scrapbooking sketch @ shimelle.com
And then to less random: the next sketch! (Look how close that date is to getting caught up! SO CLOSE!) This sketch is designed to feature one landscape photo and two patterned papers, perfect for setting a colour scheme, as you can have two bold blocks of those colours, then plenty of space elsewhere to work with various shades, lighter or darker. I’ve drawn it as a 4×6 photo, but it could easily be a 5×7 or swapped for something else you have in mind.


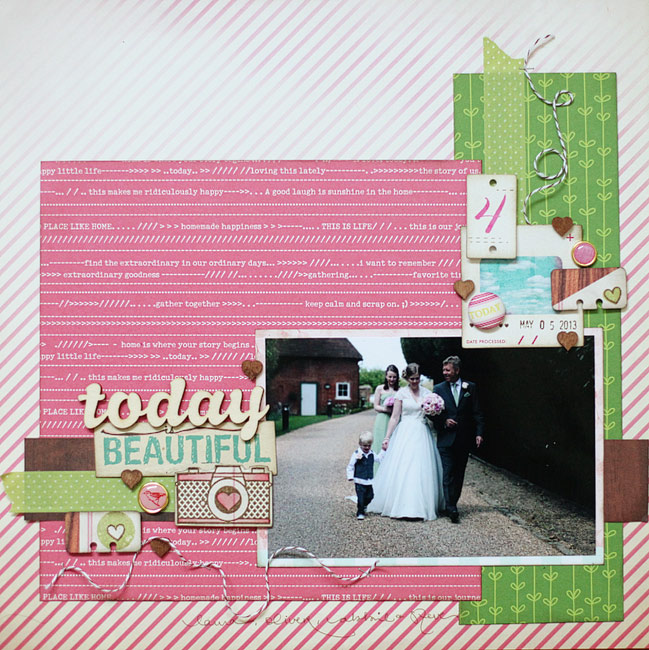
Taking a break from the May kit, I headed back to the wedding album supplies I set aside to create an album filled with the photos from my sister-in-law’s wedding. You can find more details on all those supplies here, along with Glitter Girl’s tips for starting and planning a wedding album. The camera stamp is from this set by Allison Kreft for Webster’s Pages, which is on sale right now. These stamps are red rubber with cling foam already attached and cut out, ready to stick to your acrylic block. They stamp so beautifully!

scrapbook page by shimelle laine @ shimelle.com
I must say creating this album is a little twist for me in terms of journaling! I have plenty of stories to write on my own wedding pages, and I do have quite a few things I want to write for this wedding too, but those stories mostly don’t seem to match the more formal photos – they match the more relaxed snaps from getting ready and the reception. So for now, some of the more formal photos are accompanied by just names, and I’m ready to start working on some pages with more writing soon to achieve a bit of balance!

scrapbook page by Stephanie Howell @ shimelle.com
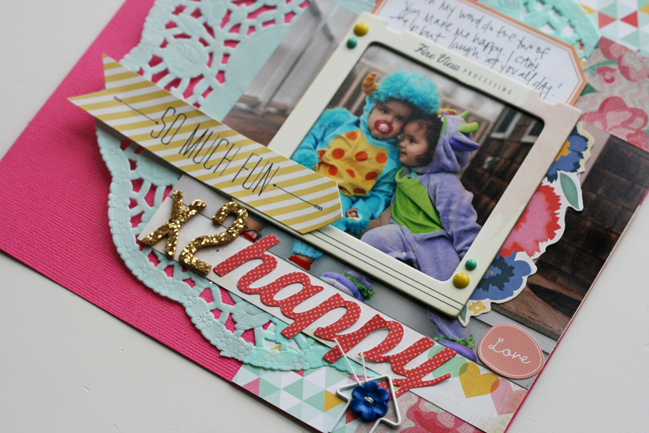
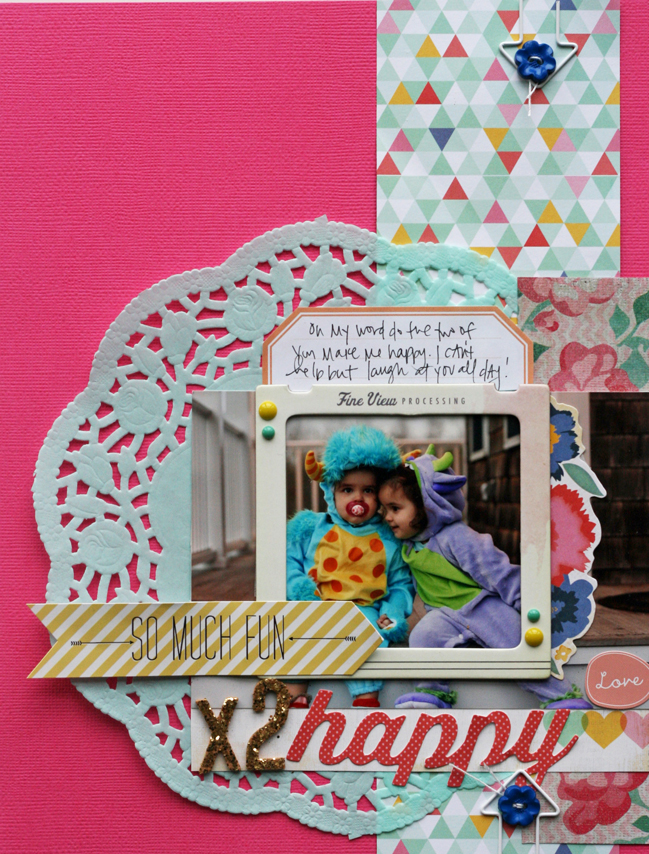
Today I’m delighted to share a second interpretation of this page, by talented scrapper Stephanie Howell. Stephanie worked her magic on this sketch in an 8.5×11 format, and I love how she used a slide frame with a photo without cropping the picture. Definitely remembering that as a note to self!

scrapbook page by Stephanie Howell @ shimelle.com
I was so excited when Shimelle asked me to do a guest post for her blog. I haven’t had the opportunity to use a sketch in a really long time, and this could not have been a more perfect assignment at this point in my life. You see… I’m preparing my family of six for a big international move to Italy! This doesn’t leave me much time to scrapbook. And I miss it. But my time is extremely minimal, to say the least.

So this sketch was perfect! I kind of just followed it exactly. Hey! What can I say? I’m short on time and my imagination is seriously depleted. The only change I made is that I switched this to an 8 1/2 × 11 layout instead of the 12 × 12 in the sketch. I replaced the big square of paper with a doily. Because I have to put doilies on everything. I can’t help it. It’s a sickness.

The 4 × 6 photo had a distracting background so I used a Crate Paper chipboard frame to draw the focus to my two little monsters. I also put some pop dots under the ‘So Much Fun’ arrow embellishment from MME. The layout just needed a little visual interest.


Stephanie is the social media director and design team coordinator for My Mind’s Eye. She lives in Rhode Island, where she spends most of her days chasing her four maniac daughters and losing her mind. You can follow her adventures on her blog