paper: pretty paper. true stories. {and scrapbooking classes with cupcakes.}

lovely to meet you Twitter Facebook Pinterest YouTube

Take a Scrapbooking Class

online scrapbooking classes

Shop Shimelle Products

scrapbook.com simon says stamp shimelle scrapbooking products @ amazon.com shimelle scrapbooking products @ amazon.co.uk

Reading Material

travel

UK Readers: Grab a special scrapbooking Christmas offer today!

Christmas scrapbooking supplies @ shimelle.com
Today I have a special offer for UK readers looking to treat themselves with a bit of Christmas joy in the form of pretty paper!

This special Christmas box includes what you see above:
Four 12×12 double-sided patterned papers by Crate Paper
Two 12×12 double-sided patterned papers by Studio Calico
Three 12×12 specialty papers: metallic gold stars on kraft cardstock, metallic gold spots on white vellum, and white stars on a transparency
Full set of sixty winter themed Project Life cards, including 4×6 and 3×4 sizes
White foam Thickers by Amy Tangerine for American Crafts
Gold glittered chipboard star stickers by Studio Calico
Red, white, and chalkboard black stickers by Studio Calico
Roll of American Crafts gold ribbon
PLUS five sheets of 12×12 coordinating cardstock, not shown.

Christmas scrapbooking papers @ shimelle.com
Here’s a look at the b-sides of the six double-sided papers. The overall colour scheme is traditional red, green, and gold, with an energetic shot of pink thrown in for good measure!

I have a very limited number of these kits and they are ready to ship to you today, if you order by 2pm. The kits are £25, which includes first class shipping via Royal Mail. Remember, this is available for UK addresses only.

This kit is a smaller version of the full 2013 Christmas in a Box kit I’m using to (slowly!) put my Christmas journal together this year. I have just three of the full kits left. The full kit has everything in the photo above and also includes many more papers from Echo Park, Simple Stories, Elle’s Studio, and Webster’s Pages, and a few more small embellishments. It does not include the five sheets of cardstock. Rather than put up a separate button just for those, if you would like the full kit, please leave a note in the ‘notes to seller’ section of your payment to say so. The first three people to do so will get the full kit, and I’ll send you a click-to-pay invoice for the remaining amount. The full kit is priced £40, which includes shipping, so you would be invoiced a further £15.

This offer is only while supplies last. If there are additional boxes left after 2pm, I will update this post as I’m happy to still sell them, but won’t be able to ship them nearly so fast.

Thanks so much and happy scrapping!

Get Started with Gelatos:: A Scrapbook Tutorial by Loredana Bucaria

get started with gelatos:: a scrapbook tutorial by loredana bucaria @ shimelle.com

Do you know the fabulous gelatos? I really love them. They are something like crayons but more soft and funny! You can decide to use them with or without water for many different looks.
If you have never used these magic colors don’t worry because it’s very very simple. They will steal you! Try to believe!

So Take your favorite gelatos colors, a brush and water and simply have fun! I had the idea to create a background for my page in a different way, playing and having fun using these amazing colors! I love to play with my fingers so they are perfect!

get started with gelatos:: a scrapbook tutorial by loredana bucaria @ shimelle.com

get started with gelatos:: a scrapbook tutorial by loredana bucaria @ shimelle.com

I have used a white cardstock from bazzill as background, start drawing some circles on the paper. You can choose to use one color or mix many different colors together in the same circle.

get started with gelatos:: a scrapbook tutorial by loredana bucaria @ shimelle.com

get started with gelatos:: a scrapbook tutorial by loredana bucaria @ shimelle.com

Take a brush and with water paint the circles, you can use your fingers as well.

get started with gelatos:: a scrapbook tutorial by loredana bucaria @ shimelle.com

Let the circles dry, if you prefer you can use the heat gun to dry faster.

get started with gelatos:: a scrapbook tutorial by loredana bucaria @ shimelle.com

You can embellish every circle with stamps, sequins, enamel dots, pearls, whatever you like and you want to use to create your own background for you page.

get started with gelatos:: a scrapbook tutorial by loredana bucaria @ shimelle.com

This is very easy and very fun! Give it a try!


Lory knew scrapbooking in 2003 thanks a friend and a little journey in a Funfair Park where she was attracted by a scrapbooking book full of colors and of die cuts! Since then she made a long internet research about this hobby and she was really lucky to discover a new wonderful world!he loves scrapbooking because it makes her happy, free, with the scrapbooking she forgets all the ordinary worries, all the bad thoughts and only the page, the photos, the story about the photo exist ! In Italy she organized an international convention of scrapbooking and mixed media for four years. knowing the most famous scrapbookers and enjoying so much everything! It was a dream came true! She is solar, joyful, full of things to do but she loves her everyday life even if something is not like she would. She has got married with the love of her life and now she has a new so cute home that she improves day by day. She loves her life even if she isn’t a Hollywood star! You can follow Lory on her blog, Facebook, Pinterest, Twitter, Instagram and Studio Calico

Five Ways to Add Glitter into your Holiday Crafting by May Flaum

five ways to add glitter into your holiday crafting by may flaum @ shimelle.com

Hello there, May Flaum here, and I adore the holiday season. Everything is merry, bright, and I have loads of excuses to glitter everything up! As I am a huge fan of sparkles in general, this just adds to my love of the season. To celebrate, I’ve got five ways to add glitter into your holiday crafting!

Now if you’re thinking you hate the mess of glitter I have a great surprise for you – four of my five ideas do not require actual loose glitter! That’s right – I’m using all kinds of pre-glittered products to keep your hands clean and your workspace sparkle free. If you find yourself out doing errands and someone points out glitter on your face (ah stray glitter, you do get everywhere!) just smile because this time of year it’s totally normal and even acceptable to be sparkly and glitterific out in public.

five ways to add glitter into your holiday crafting by may flaum @ shimelle.com

Trim with Glitter
I adore American Crafts glitter ribbons because they give me sparkle and controlled glitter instantly! No mess, no fuss, just add a bit of glitter ribbon to any tag, layout, or other project and it has instant pizazz. Here I’ve added some of the (adhesive backed!) ribbon to a Lawn Fawn tag that is now ready for gifting.

five ways to add glitter into your holiday crafting by may flaum @ shimelle.com

Edge a Card
Even if you don’t make cards often, it can be as simple as stamping + cutting out an image, then edging with glitter! Here is pictured a personal favorite – holly stickles! I love that it has flecks of red, and that because it is glitter glue my hands can stay mess free.

five ways to add glitter into your holiday crafting by may flaum @ shimelle.com

Glitter your Gifts
For the love of glitter – this is double the fun. I used glittered alphabets and edged the hand cut heart with white glitter glue so that my brown paper package tied up with simple red ribbon becomes a gift to remember.

five ways to add glitter into your holiday crafting by may flaum @ shimelle.com

Glitz up the Table
Glitter paper + glittered letters = glam name cards in an instant! What I love about these products is that they will not flake off glitter onto your guests, or your food!

five ways to add glitter into your holiday crafting by may flaum @ shimelle.com

Glam up the Wooden Accents!
I adore the wooden accents that are all the rage now, but sometimes they are a bit plain. Never fear – just grab glitter and you’ve got a fancy accent in no time! My tip to you on this is that using a glossy medium such as glossy accents is a must. The shine of this product will make sure your glitter shines and it also holds down the glitter really well. Need extra hold? Just add an extra coating over the top after you apply your glitter.

I hope you’ve enjoyed my ideas here today, and if you’d like to learn more about my holiday crafting ideas I hope that you’ll join me in my new holiday crafting class! I’ve even got a special just for Shimelle’s fabulous readers – 20% off of a class (or two!) at my new website! Just use this link and the discount will automatically be added at check out.


When it comes to crafting May Flaum has one rule: it’s gotta make her happy. She’s not afraid to get super grungy or work with bright colors, dabble in lace and doilies then make something more splattered and wild. If she’s not in her studio (aka ‘the bat cave’) then she’s probably out running around having fun with her family or cooking up a storm. May has been working in the Scrapbooking industry for a decade and currently blogs her crafty adventures, teaches online classes, and works with amazing companies sharing her projects and ideas. She just launched her own on-line craft class website where she’s hard at work on her next fun idea. If she has one piece of advice to share, it’s always to be true to your creative heart.

Showcasing Patterned Paper:: A Scrapbooking Tutorial by Paige Evans

showcasing patterned paper:: a scrapbooking tutorial by paige evans @ shimelle.com

I love using lots of different patterned papers on my layouts and I find one of the best ways to include dozens of papers is to use a punch and make lots of shapes! American Crafts just came out with a bunch of new, fun, small shapes – perfect for showcasing patterned paper!

Start by gathering your supplies. I chose to work with mainly the Colorwash line by Pink Paislee because the subtle colors perfectly coordinate with the photos I wanted to scrap.

showcasing patterned paper:: a scrapbooking tutorial by paige evans @ shimelle.com

Use a punch or or die cut machine to punch a shape from each of the papers in the 6×6 and 12×12 paper pads of the Colorwash line or whichever line you are using.

showcasing patterned paper:: a scrapbooking tutorial by paige evans @ shimelle.com

Flip over all the punches so you can see the pretty designs. Consider taking a picture of all the pieces.

showcasing patterned paper:: a scrapbooking tutorial by paige evans @ shimelle.com

Begin placing the punched pieces where you want them on your layout. Since I used a banner punch I went with a banner theme and placed them in concentric curves around opposite corners of my layout.

showcasing patterned paper :: a scrapbooking tutorial by paige evans @ shimelle.com

Lightly adhere each of the punched shapes onto the background.

showcasing patterned paper:: a scrapbooking tutorial by paige evans @ shimelle.com

Sew across the top of each line of punches to ensure they’ll stay in place for eternity.

showcasing patterned paper:: a scrapbooking tutorial by paige evans @ shimelle.com

Leave the strings long for interest or trim them off for a cleaner look. I chose to keep them long.

showcasing patterned paper:: a scrapbooking tutorial by paige evans @ shimelle.com

Bend up each punched shaped a bit for added dimension.

showcasing patterned paper:: a scrapbooking tutorial by paige evans @ shimelle.com

Add a title then adhere photos and embellish until the layout looks complete!

showcasing patterned paper:: a scrapbooking tutorial by paige evans @ shimelle.com

I think the fundamental scrapbooking embellishment is patterned paper so why not try to use as much of it as possible?! With a simple punch you can create dozens of fantastic shapes and designs and create eye-catching projects in a snap.


Paige Evans has been scrapbooking since she was 16 years old and worked at her first job at a local scrapbook store. The first time she put pictures and papers together it was a match made in heaven! She currently works from home for Northridge Publishing – the makers of Scrapbook Trends, CARDS, the Create series, Cricut Magazine, Cricut Idea Book, and Signature Series magazines. She is also the design team manager/blog hostess for American Crafts and is a Garden Girl at twopeasinabucket.com. While not scrapbooking she makes pacifier clips for her etsy shop. Paige is the mother of two adorable children – Fox age 3 and Jane age 1.5. She and her husband Chris have been married for 7.5 years and currently live in Grafenwoehr Germany where Chris is a dentist for the Army.
You can check out more of her and her work on her blog, Instagram, Etsy shop, Pinterest, Twitter and 2Peas Gallery

A Christmas Manifesto and Some Holiday Honesty

christmas journal scrapbook page by shimelle laine @ shimelle.com
I always start my Christmas journal with a manifesto of sorts. It’s a declaration that tends to lead me in two directions – both in how I go through life through the holiday season and to remind me to finish what I start when it comes to keeping my journal. When I first started writing these, they were more about the book itself. Now they tend to be more about the life side of things, and I’m happy with that natural evolution. Part of my personal process with Journal your Christmas over the years has been to realise the book is secondary for me. In a way I suppose that could be seen as a teensy bit too radical, but I don’t want to make plans and do things just so I have something to scrapbook. I want to do the things I’m inspired to do… and then feel they were worth the time of taking photographs and writing words and gluing bits of paper to other bits of paper in an aesthetically pleasing manner. Live first, scrapbook second.

So yesterday December arrived on the doorstep and since that is the first day of class, it’s always a work day for me even if it falls on a Sunday this year. I don’t mind that. The less fun part of starting the class like spreadsheets and data entry and jumping through hoops of spam filters is always far, far outweighed by all the good parts, like seeing familiar faces pop up who have done this project several times or seeing all sorts of happy photos turn up on online, thanks to the ease of tags like #JYC2013 and #ChristmasJournal and modern day fanciness like Instagram. (We use two different tags – the former for all sorts of Christmas activities and the latter specifically for the pages in our books.) But the truth is that even though I write my manifesto for the year before the first of December, I don’t like making the actual page before December hits. I tried making all my entries early one year and it just didn’t work – it’s far more fun to be in the actual moment than guessing the moment days ahead! All that stuff added together means I very, very rarely actually finish a manifesto page on the first of December.

What you see above is what I’ve done so far. For me, the important thing is there: I’ve written the words I want to live by this year and they are there in ink for me to remember. The rest is all icing. There’s a bit of icing, but not enough to call this done. I guess I am very pro-icing once I know the cake is good cake. My December first reality check looks something like
Missions Accomplished
Class started.
Supplies collected.
Manifesto written in ink.
Tree retrieved from hallway cupboard of mystery.
Missions Nowhere Near Completion
Papers cut to size for album.
Balanced embellishment and title for first entry.
Fabric photo backdrop ironed.
Tree removed from duct-taped cardboard box, assembled, and decorated.

Maybe in some years I would have powered through and done all those things in one day. I think I have. This time I took it all a bit slower – just a bit. But I am okay with all that. Yesterday was only the first. Today is the second. There is still time for everything that is truly important. We’ll see if that includes the ironing or not. With a bit of luck, eh?

With that in mind, my Christmas Manifesto for 2013…
a year of more joy, more gratitude, more careful thought.
a celebration of gladness, not a glorification of busy.
a time of giving, not comparing. of enjoying, not worrying.
This Christmas, I will take each moment as it comes and wrap it in my own holiday spirit.
I will seek out beauty in simple things and choose time with loved ones over most anything else.
All this will lead me to a holiday season of nothing short of true sparkle.

You can find previous Christmas manifestos here and here. Those were probably a bit more poetic, but every year leads to its own natural focus so sometimes poetic just isn’t what wins out for me. But we all create our own manifesto for the year, so perhaps some of the JYC participants will also share their words and pages for 2013?


Preparing for a December scrapbooking project like Journal your Christmas

2012 Christmas Journal by shimelle laine @ shimelle.com
Tomorrow marks the start of Journal your Christmas 2013, and I’ll be starting a new album just for this year. But I’ve made more than one by now, so I’ve found over the years that different processes work well for different types of creative people and all the individual factors that go into their unique December for that year. Some crafters love to prepare in advance and have their book read to go as soon as the Christmas products hit the stores! I am not one of those people, and I’ve found that the albums I prepared the most in advance were the ones that were most difficult for me to complete as the month went on, so my preparation is more limited yet there’s still a tiny bit of a system that works for me. The good bit is that system doesn’t require much time at all, and it’s absolutely fine to do even in the first few days of December, if not later.


This video is from Journal your Christmas 2012, and this is the preparation I did for the start of December – meaning I painted my album cover on either the 30th of November or the first of December, and then the video also shows my very first entry which I made on the first. And you can see an idea of the type of preparation I do: choosing an album to work with and the page size, gathering supplies, and having some design ideas in mind. That type of preparation works really well for me! Sometimes I work on the album cover at the beginning of the project, sometimes at the end, and once or twice I’ve actually made changes to my cover in the middle of the project itself. I will warn you I started December with a pretty gravelly voice last year and I can hear that in this video! So far this winter, my voice is intact. Long may it last!

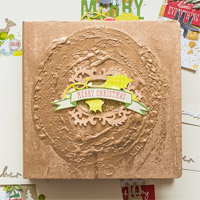
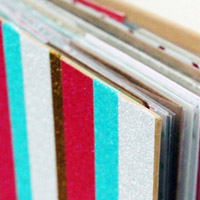
The album I used last year is a Studio Calico Handbook (I used the chevron cover, which is currently 30% off, but there are several different designs and currently all on sale). The page size is 6×8 inches, and I used a mix of page protectors to have pockets in 3×4, 4×6, and 6×8. I really liked this size for the project and this year I’m using the Dear Lizzy Canvas Album with the same page size but a variety of different types of page inserts as well as the pocketed page protectors. I haven’t done anything to my album at all yet, but will be doing that in the next few days and will share with all the class participants!

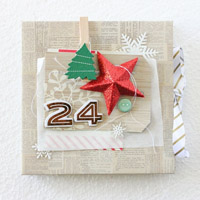
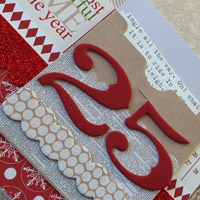
Another thing I sometimes prepare in advance are date tags or page numbers to be added as I go. I’m not doing matching numbers this year so haven’t done them in advance, but this video shows the process I have used for making matching (or coordinating) layered embellishments with numbers to count the days of December and early January.


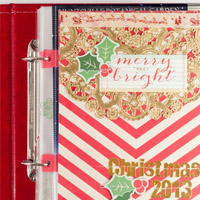
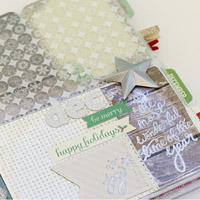
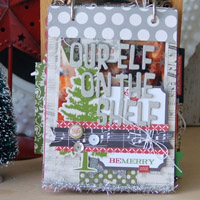
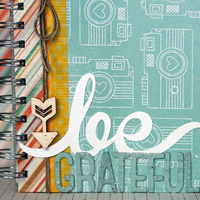
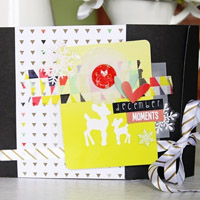
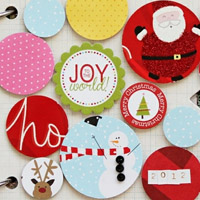
For further ideas on album covers and design styles, the Garden Girls have so much beautiful stuff to share! They’ve each made a holiday album this year – some albums ready to be filled with this year’s memories and some scrapped with stories of Christmas past. Have a look through and see what speaks to your creative style. Click any of the images to see more of that album, plus all the supplies used to make it – pretty much all of which are at least 30% off at the moment. They are gorgeous projects from start to finish.

I’d also love to point you in the direction of two blog posts from two JYC participants who have been part of this adventure for several years: Dolly shares her unique 2013 project and Rachel shares her full 2012-2013 album.

Every year I see at least a few people lament that they haven’t made an album and a stack of pages by the first of December, so they might as well not start with any sort of project like this for the year. While some crafters work really well with pages prepped in advance, it is not the only way and I really hope it won’t put you off jumping right in. If you can type on your screen or jot notes on a piece of paper, you can create a memorable journal this Christmas – even a very beautiful, crafty one – without a single thing prepared in advance.

The other big worry I hear from Christmas journalers is the idea that they can’t ‘keep up’ or making an entry every day is too much. With Journal your Christmas, there is no such thing as falling behind. I believe you really must live first and scrapbook later and that means not every single day in December will be the same. Some will be filled with holiday activities from start to finish. Some will be quieter and could be any day of the year really. The writing prompts for Journal your Christmas are not just about your activities this year, so you can mix memories of Christmas past, documentation of Christmas present, and hopes for Christmas future all in the same book. You can do ‘daily’ entries that are not truly made every day, like keeping notes and then filling things in here and there when time allows, be that in December or July. And most importantly, you don’t have to do daily entries. It’s not a requirement in any way – it’s merely one way you can work on this project and definitely not the only way or the right way! In fact, if you’re not feeling up to writing much this year but really wish you could finish the season with a great library of holiday photos, you could ignore the daily writing themes entirely and focus on the daily photo prompts that come to your inbox too! This is truly a project where everyone is welcome and you’re encouraged to make the project work for you in absolutely any style.

Christmas journal supplies @ shimelle.com
You truly can use any supplies you would like for this project, and if you have a stack of stuff that needs to be used, I really encourage you to use what you have on hand. I’ve assembled a kit of supplies that I’ll be using, though I inevitably throw in a few things sitting on my table just as they happen to seem useful, and I have a very small number of those kits left here for UK addresses only. I’ll be listing those here on the blog tomorrow, the first of December, once the first prompt has been sent. No matter where you are in the world, you can order your choice of supplies from Two Peas, and if you’re thinking of shopping now, I would do it this weekend while the prices are greatly reduced for their Black Friday sale. You can find my individual product picks here and options for collection packs and paper pads here, if that helps! (Neither of those lists are meant to be one where you need everything! Just pick what you like to suit your budget.)

And one last note – you can join Journal your Christmas absolutely any day of the year! It’s never too late to jump right in, so no matter when you see this post, you are very welcome to join us.

It’s so close to December!

Five Ways to Use Stencil Masks by Natasja Verbeek

Five ways to use Stencils-Masks by Natasja Verbeek @ shimelle.com

I guess most of us have used masks in one or more ways with our scrapbooking. The stencils-masks by Hazel and Ruby which I am using here are fun because they are the positive sides which gives you a whole range of new possibilities.

Five Ways to use stencil masks by natasja verbeek @ shimelle.com

On a Layout Background with Mists
For this layouts I added the stencils straight down on my cardstock and sprayed my mist over it. You can peel of the stencils with you nail or use a pin to flip it up. Stick the stencils down on the stencil sheet and use a baby wipe to clean them. They can be used over and over again. Let your mist dray and create your layout.

Five Ways to use stencil masks by natasja verbeek @ shimelle.com

On a Layout Background with Ink
For this layout I repeated the same steps except instead of the mist I used ink, which I added using a sponge. By making circular movements you can divide the ink in an even matter. The ink wipes of just as easily from the stencils as the mists does. While creating the layout I cut out some fun items from the patterned papers, Very Mary by Hazel and Ruby, to use as embellishments.

five ways to use stencil masks by natasja verbeek @ shimelle.com

Creating a Gift Jar
Well using those stencils on a layout is fun, but how cool is it to create a gift jar with Christmas just around the corner? Here I stuck a stencil on the inside of an empty jar and painted the inside with acrylic paint. Remove the stencil and let the paint dry. When adding a gift or something like cookies, make sure to fold it in baking paper or anything like that. The lid is decorated with tissue paper and a tag cut from a patterned paper sheet. Add some stickers on the outside of the jar to finish it.

five ways to use stencil masks by natasja verbeek @ shimelle.com

Creating a Card
When giving a gift it’s fun to add a card with it. Here I used the stencils to add text to my card. Like on the layout I used ink .Added some cut outs from the patterned paper and stickers to finish the project.

five ways to use stencil masks by natasja verbeek @ shimelle.com

Subway Art
I for one love all the subway art that we see these days. The texts, the used and old look. Just imaging how fun it is to create your own! Here I used a thin mdf background in a 12×12” size. I adhered my patterned paper using modge podge. When dry I added a second layer on top of the paper. When dry I spelled out my text using the stencils. Painted a thin layer of paint so the pattern of the paper was still shining true. When the paint was still wet I removed the stencils.


Natasja lives in a city in the Netherlands together with her husband and two kids. She started scrapbooking about 12 years ago. After her first child was born scrapbooking evolved into more than just a hobby. After being on her first designteam for October Afternoon, she has been a part of the Cosmo Cricket for a couple years and now loves creating for Simple Stories. You can find layouts of her published in European and American magazines. Scrapbooking brought her around the world teaching in Austria, Israel, Germany and even at CHA for which she is very grateful.

You can follow Natasja on her blog, Facebook, Pinterest and Instagram

Make a Mini Album from Scratch:: A Scrapbook Tutorial by Cassandra Cyr

make a mini album from scratch:: a scrapbook tutorial by cassandra cyr @ shimelle.com

Hello everyone! I’m so thrilled to be here guest posting for Shimelle, who is such an amazing scrapper! Today I’ll be sharing a tutorial for making a mini album from scratch using some leftover cardboard. I love using this technique because it saves money plus you can customize your mini album to any size that you want. There are a few low cost supplies you’ll need up front but once you have them the possibilities are as endless as your creativity! I’ll be sharing a quick and simple album that I used to document our adventures with the Elf on a Shelf last December.

make a mini album from scratch:: a scrapbook tutorial by cassandra cyr @ shimelle.com

Choose the size of your album cover and make a template out of scrap paper. You can choose any size you want, however for this project I wanted to make a small album and decided on 3 ¾ inch x 5 ¾ inch. Once you have your size determined and template cut you can trace this twice onto cardboard.
Cut out your album covers. When placing your template be careful to avoid any bent or warped areas on your cardboard.
This step is optional, but I highly recommend it! Apply a light coat of polyurethane to both sides of your cardboard covers. This ensures that the cardboard will stay stiff and not yield to bending over time.

make a mini album from scratch:: a scrapbook tutorial by cassandra cyr @ shimelle.com

Once your covers are dry you can adhere them to your patterned paper of choice. I cut my patterned paper approximately 1inch larger than the size of my cardboard cover. I also prefer YES! paste as my adhesive because I’ve found it gives the best seal between cardboard and paper.
Along each corner of the paper cut a diagonal line leading up to the cardboard. On the top and bottom of the album apply a small line of Gloo (or Glossy Accents) and adhere the top and bottom strips down, similar to wrapping a present.
Trim the triangular edges off the top and bottom strips of paper.

make a mini album from scratch:: a scrapbook tutorial by cassandra cyr @ shimelle.com

Fold in the tabs on the left and right hand sides of your patterned paper (again, just like wrapping a present).
Fold the left and right sides of the patterned paper in towards the cover and use Gloo (or Glossy Accents) to adhere them down to the cardboard. Cut a piece of coordinating patterned paper slightly smaller than the size of your cover and adhere to the inside piece of the cover using YES! Paste.

make a mini album from scratch:: a scrapbook tutorial by cassandra cyr @ shimelle.com

Now your covers are complete, and if you chose to use the polyurethane they are also very sturdy! Punch holes in both covers wherever you desire and thread some binder rings through. Since my album is going to be horizontal I decided to punch them towards the middle of the cover.

make a mini album from scratch:: a scrapbook tutorial by cassandra cyr @ shimelle.com

To choose your page size I also suggest using a page template from scrap paper. In this case I chose cutting the pages 1/4 inch smaller than the cover, so 5 ½ x 3 ½ inches. Overlay your page template onto your cover and trace where the cover holes are. Keep in mind here that you don’t want your page template to be perfectly centered; you’ll want the page holes to be punched closer to the edge of the covers since the pages are smaller. Construct however many pages you desire by gluing two pieces of patterned cardstock together for each page in the same size as your page template and add them in between the covers.

make a mini album from scratch:: a scrapbook tutorial by cassandra cyr @ shimelle.com

make a mini album from scratch:: a scrapbook tutorial by cassandra cyr @ shimelle.com

The base of your album is now complete and the last step is to embellish, add photos and decorate the cover (aka the fun stuff!). I kept my mini album pretty simple and even had some fun changing up the orientation of the photos from page to page. All of the embellishments and paper are from the 2011-2012 Noel Mignon December kits, I love how mini albums are such a great way to use up some of your stash!

If you need some more inspiration here are a few other mini album covers all made from cardboard.

make a mini album from scratch:: a scrapbook tutorial by cassandra cyr @ shimelle.com

make a mini album from scratch:: a scrapbook tutorial by cassandra cyr @ shimelle.com

I’ve made so many albums using this cover technique, in all different sizes and orientations. I hope you’ll give it a try; it’s inexpensive, sturdy, and completely customizable to you!


Cassandra Cyr (aka Glue Meets Paper) lives in CT with her husband and 3 year old son, Charlie. Cassie currently works as a QC Analyst in a Microbiology lab when she’s not obsessively paper crafting. She has been crafting for 6 years and been published over 70 times, including on the covers of Scrapbook Trends and CARDS, and she currently is part of the Design Team for Noel Mignon Kit Club. If you’d like to learn more you can find her blog at gluemeetspaper where she shares scrapbooking projects, cooking recipes, and posts about everyday life living with a toddler with Cystic Fibrosis.