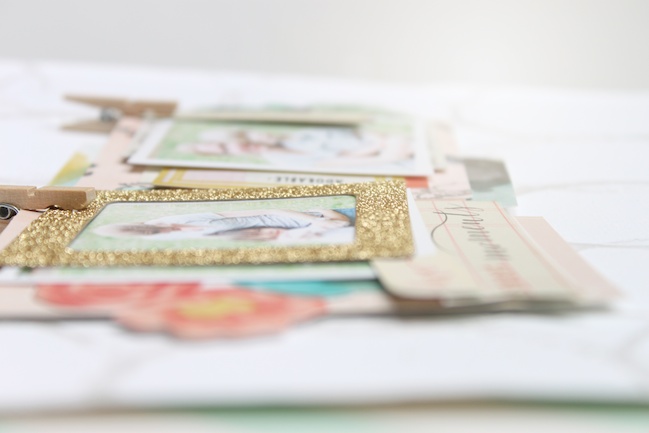
paper: pretty paper. true stories. {and scrapbooking classes with cupcakes.}

lovely to meet you Twitter Facebook Pinterest YouTube

Take a Scrapbooking Class

online scrapbooking classes

Shop Shimelle Products

scrapbook.com simon says stamp shimelle scrapbooking products @ amazon.com shimelle scrapbooking products @ amazon.co.uk

Reading Material

travel

The Art of Layering:: A Scrapbook Tutorial by Wilna Furstenburg

the art of layering:: a scrapbook tutorial by wilna furstenburg @ shimelle.com

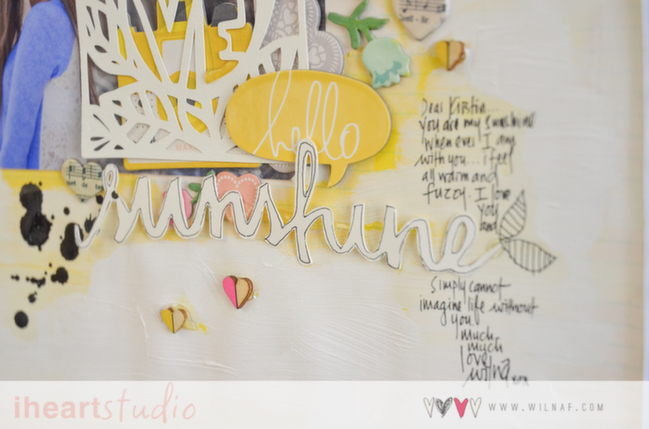
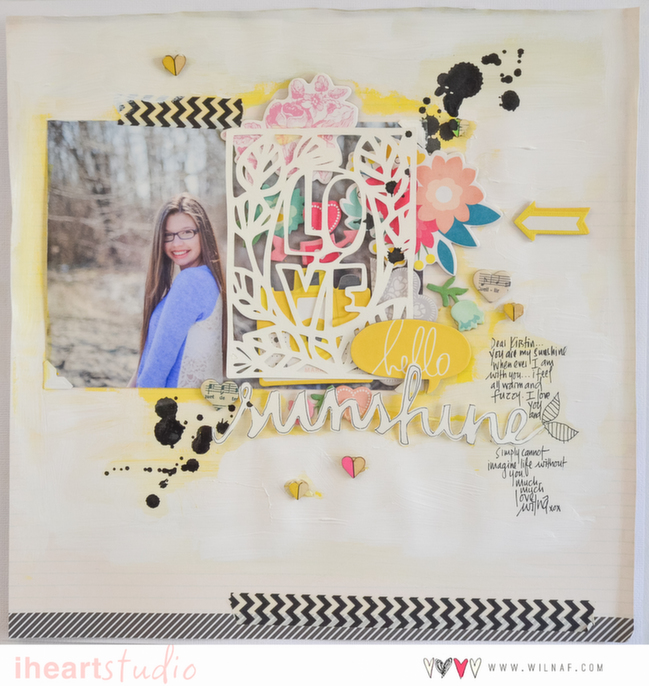
We never really get enough about layering around here: I could layer different papers every day and still love looking at how another crafter has layered their details. Today please welcome someone with her own gorgeous style of layering: Wilna Furstenburg. We will be layering cut files from iheartstudio) with chipboard and paint. In this video, Wilna will show you how she approaches a scrapbook layout and work on it until everything feels just right. I hope you enjoy! -S.

the art of layering:: a scrapbook tutorial by wilna furstenburg @ shimelle.com


Wilna Furstenberg is a artist and scrapbook designer that’s been in the business since 2006. She has designed for Manufacturing companies like Making Memories, Jenni
Bowlin and October Afternoon. Currently she doing a weekly Scrapbook technique series on her blog, designing products for iheartstudio and is a Garden Girl on Twopeasinabucket. Wilna is the teacher of the hugely popular Artclass One and Artclass Two available on 2peas. She lives in Canada with her husband of twenty three years, three teenage girls and two mini schnauzers. You can also find her on Instagram and Youtube.

Embellishing Baby Scrapbook Pages

scrapbooking embellished pages @ shimelle.com
With Wonder Boy now just over a month old, I’m starting to think more and more about how his baby album will look. I scrapbook with so much that can be seen as feminine: lacy layers, butterflies, and a heap of pink. I’m not hugely worried about any sort of gender roles of pretty paper (after all, The Boy wore pink for our wedding, so clearly we don’t have any girls-only rules for pink in this household), I don’t want it to feel visually the same as stories that are purely my own. He deserves his own trademark look! How will I keep the embellishment true to something I love without making it girly to the point of confusion? I’ll start working on that soon. To help with my inspiration, I’ve asked three of my favourite scrapbookers to share an embellished baby page with you today, with their beautiful looks for scrapping baby girls in their lives.

First up: Megan Klauer.

scrapbooking embellished pages @ shimelle.com

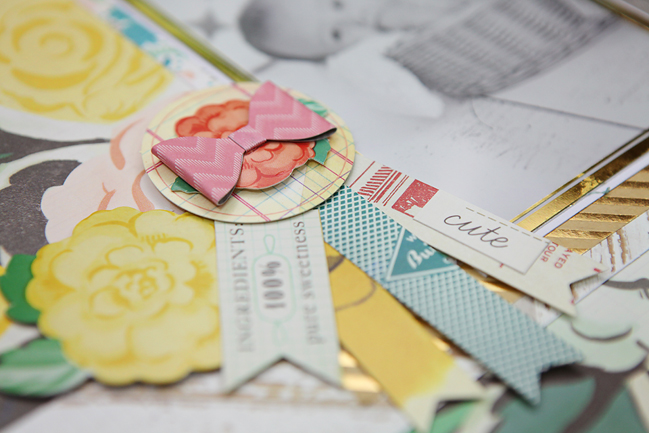
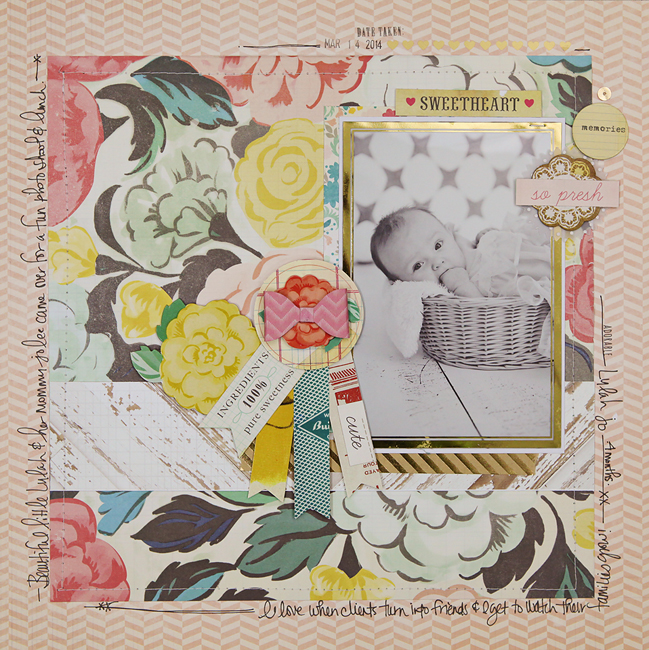
I used the new Crate Paper line: StyleBoard by Maggie Holmes to showcase the photo of my friend’s little girl. To add a bit of a girly touch, I added one of the paper bows to the layered prize ribbons. That makes for layering done easily, perfect if you’re short on time.

scrapbooking embellished pages @ shimelle.com

And something delicate from Stephanie Bryan.

scrapbooking embellished pages @ shimelle.com

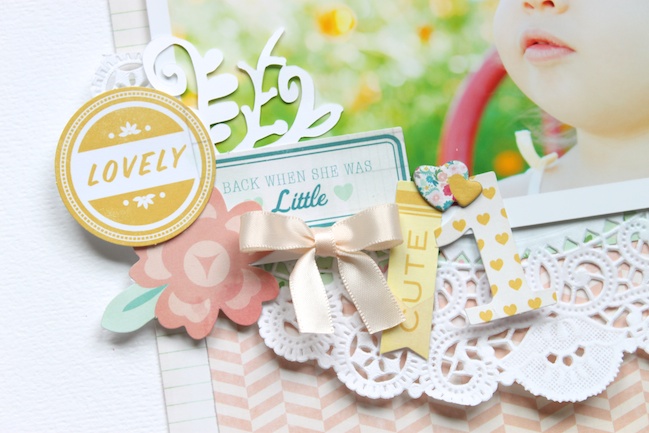
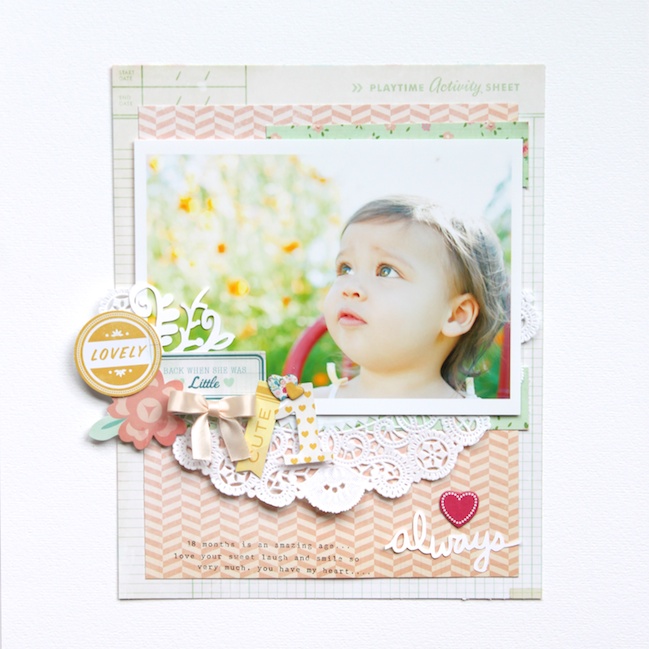
Two things that make my heart go pitter-patter are baby photos and embellishments! Combine the two and and I am in heaven! I knew I wanted to use a cluster of embellishments on my page, so I chose to use a larger photo of my daughter to help balance out the layout. I built my photo layers using a few larger pieces of patterned paper and a large doily. My embellishment cluster is placed to the left hand side of my photo since the main focus of the page is to the right hand side. I used my photo as the guide for choosing my embellishments and tried to coordinate my colors with the different colors in the photo. I kept my journaling simple by typing onto my patterned paper and layered a die cut title and chipboard heart in the opposite corner to continue the overall balance of the page.

scrapbooking embellished pages @ shimelle.com

Then a bit of loveliness from Mel Blackburn.

scrapbooking embellished pages @ shimelle.com

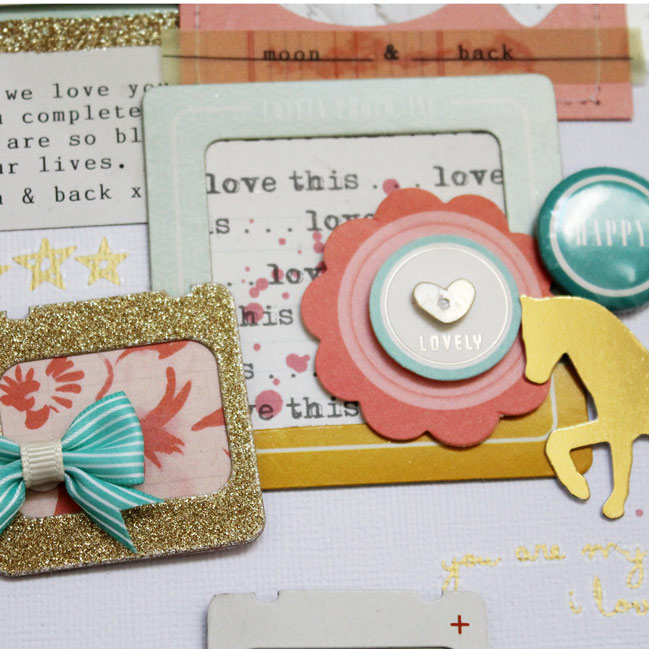
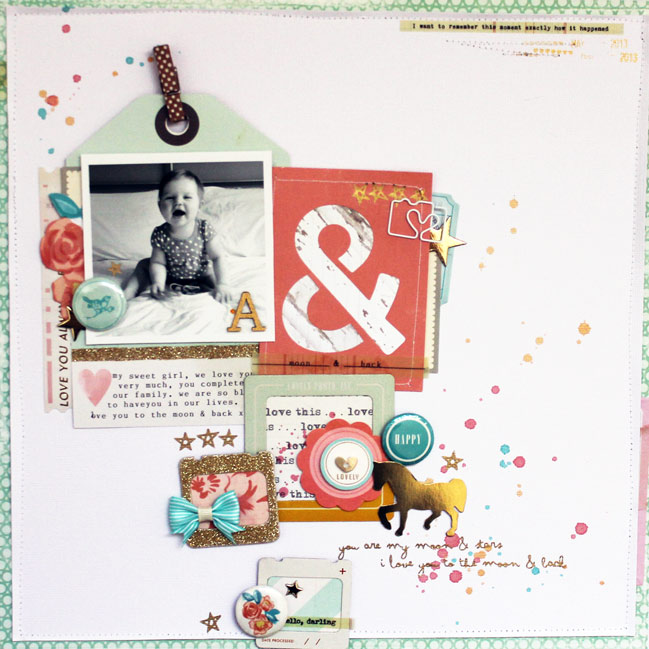
My inspiration for this layout was the wonderful frames which I thought would be ideal to create mini canvas to showcase embellishments that would complete the picture of my youngest daughter. I loved the gold horse and mini bow, I thought both would be ideal for a baby page, although not traditional items like a baby cradle or a stroke, they added a fun whimsy feel to my layout. I hope you enjoy!

And finally, a little something from the archives. Before Wonder Boy, Glitter Girl scrapbooked the occasional baby page between the little ones of friends and family. She even has a god-daughter who appears in her albums of course, this time with lots of layers and tiny details. I loved making this layout, but spending so much time on one page seems a little far off right now! (Further details on this page can be found here.)

Any examples – of either your favourite embellished baby pages or things I should keep in mind in scrapping Wonder Boy’s first year – to share? I can’t get enough of the cute baby inspiration right now, so bring it on!


Megan Klauer is a momma of three and wife to her high school sweetheart. She currently designs for Crate Paper, Bella Blvd, Elle’s Studio, Jenni Bowlin, & A Flair for Buttons Etsy shop. In her spare time she does on location photography & works full time as an office secretary.


Stephanie lives in North Carolina with her husband and two children. She loves all things creative and has a slight obsession with paper and photography. She started out with memory keeping through Project Life in 2011 and has not looked back yet. Her style is simple, but classic with occasional fun pops of color. Stephanie currently serves on the Design Teams for Two Peas in a Bucket, Crate Paper, Glitz Design, Gossamer Blue, Jot Magazine and My Mind’s Eye. She shares her adventures in scrapbooking and Project Life on her blog at Stephanie makes and through Instagram.


Melanie Blackburn is a mom to 3 beautiful girls, they are her inspiration and the reason why she took up scrapbooking. She loves to play with paper, it satisfies two needs; one of which is to preserve memories for her family, the other is to do something crafty. She describe her style as “eclectic”, she loves to mix patterns, embellishments, and include fun accents on her layouts. She loves to add lots of layers and techniques to her projects, sewing on a layout is also a must for her. She’s a Garden Girl for Two Peas in a Bucket and designer for Jillibean Soup and Chic Tags. You can follow her work on her blog and Instagram.

Scrapbooking Milestone Moments in your Project Life Album

Scrapbooking milestone moments in your project life album @ shimelle.com

Aside from the look of the pages in the scrapbook, the philosophy behind the documentation might be the biggest difference between Project Life and more traditional full page scrapping. When I started scrapbooking, there was so much emphasis in capturing the biggest events, and many people found the hobby by way of a wedding, baby, or travel adventure. Of course, those were pre-digital days and the film costs of capturing one’s morning coffee would usually be deemed quite a silly expense. Today we can take twenty shots and not worry about the price! And so enters Project Life, with the idea of keeping a record of the normal little things of life, but surely to maintain an accurate record, these albums should include the big events too. Today I’ve invited three scrapbookers to share their ideas for including the major moments right alongside the everyday details.

First up: Carly Robertson.

scrapbooking milestone moments in your project life album @ shimelle.com

I have been doing Project Life for about two years now and my approach is to document what I can, when I can, over each month to create my pages. I like to keep my layouts pretty simple so that the process is as quick and easy as possible. This year I have made one small change to my documenting and it is to take my PL photos with more purpose. Last year I just took snaps here and there with really not a lot of thought behind what I was photography. This year I’ve decided to take at least one photo a day of something I am grateful for. I think the big thing to remember when it comes to documenting is that there is no right or wrong way to do it. You just have to find a way that works best for you and that is easy to stick to.

scrapbooking milestone moments in your project life album @ shimelle.com

And some insight from digital Project Life scrapper Abigail Beach.

scrapbooking milestone moments in your project life album @ shimelle.com

For me, one of the joys of project life is that the small moments and the big moments sit side by side. Milestones come in between the everyday photos and together they shape our year. Small triumphs and large events are worth recording. It is wonderful to have a record of everyday life and also what things stand out in our days. I hope these have given you a few ideas of how you can include milestones both big, small and silly in your albums.

scrapbooking milestone moments in your project life album @ shimelle.com

Then one more look from April Joy.

scrapbooking milestone moments in your project life album @ shimelle.com

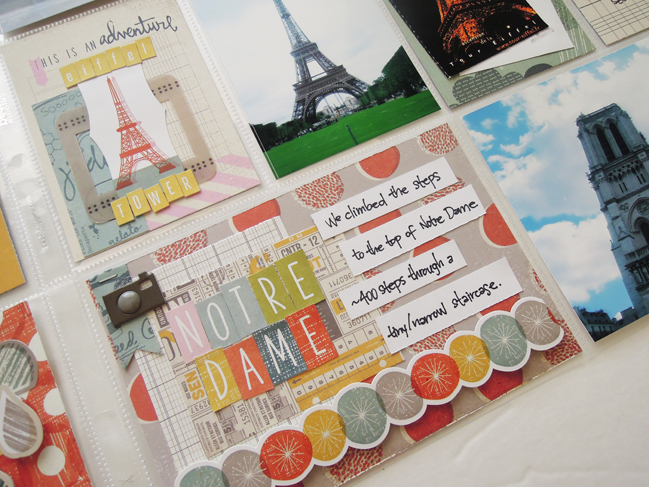
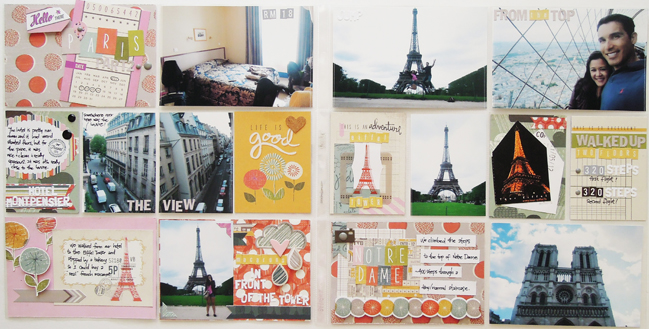
Milestones are the best reason for documenting using Project Life. But when I think “milestones”, I always think babies and the new things they accomplish. Since I don’t have any babies of my own (yet), I chose to document a part of my husband’s and my life that was a big thing to us and something we can consider a milestone in our marriage: going on our honeymoon. In this spread, I included a part of our trip that we were in Paris using Kelly Purkey’s Mon Ami line for BasicGrey.

From the archives, Glitter Girl shares her process of documenting a rather important milestone made from a mix of sad and happy moments. This double page layout includes one Project Life divided page and one full 12×12 page, a format that continues throughout the album, alternating sides as the pages are turned. (Further details from this adventure can be found here.)

What techniques do you use to include the bigger moments in your Project Life album of everyday memories? Do you add inserts between two larger pages? Print photos larger than usual? Add folded elements to provide more space for photos or writing? Share your favourite tricks and examples!


Carly is a stay-at-home mom to the sweetest twin girls, wife to her best friend and cat wrangler of two crazy, but much loved cats. She absolutely loves to take pictures and document her family’s story through project life. Carly’s other passions include decorating, cooking and creating anything handmade. You can always visit Carly’s blog, The Simple Things, her Instagram or see what she has been pinning on Pinterest.


Abi Beach is a student studying at Durham University. She used to be a paper scrapbooker but with the demands of a student life and budget she has turned to digital memory keeping. She loves documenting the everyday, rejoicing in the ordinary and trying out all sorts of crafts. She writes about this at Creating Paper Dreams. You can also find her on Instagram as @abibeach.


April Joy lives in San Diego, CA with her husband of 2.5 years. April is an engineer by day, but paper crafter at heart. She is primarily a Project Life style scrapbooker and loves to treat each pocket as an individual layout, so she tends to include lots of layers, embellishments, and other fun details. April’s style is typically eclectic yet always coordinated. You can find her blogging here.

Creating Dimension using Paint:: A Scrapbooking Tutorial by Stephanie Bryan

creating dimension using paint:: a scrapbooking tutorial by stephanie bryan @ shimelle.com

A piece of white card stock is just like a blank canvas to me.  I love how it’s ready to be painted, layered, stamped or misted.   I love how the smallest little detail shows right up and invites you in!!  And today I wanted to share one of my favourite tricks with you!!  

Stephanie Bryan here and I’ll be showing you how to use a round lid and some puffy paint to create a wonderful, iridescent background!  I will also be showing you two ways to utilize this background to complete two beautiful project!
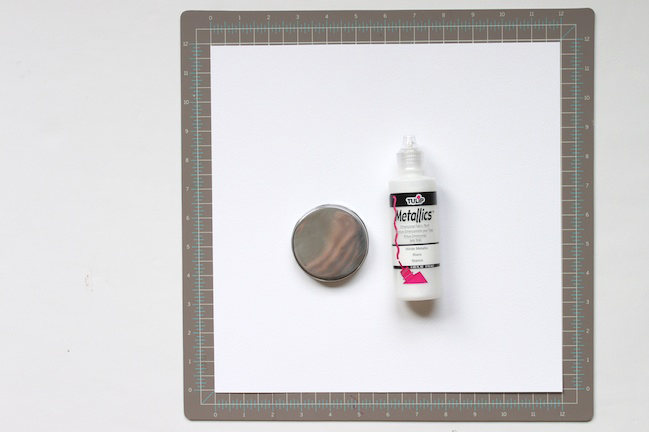
creating dimension using paint:: a scrapbooking tutorial by stephanie bryan @ shimelle.com

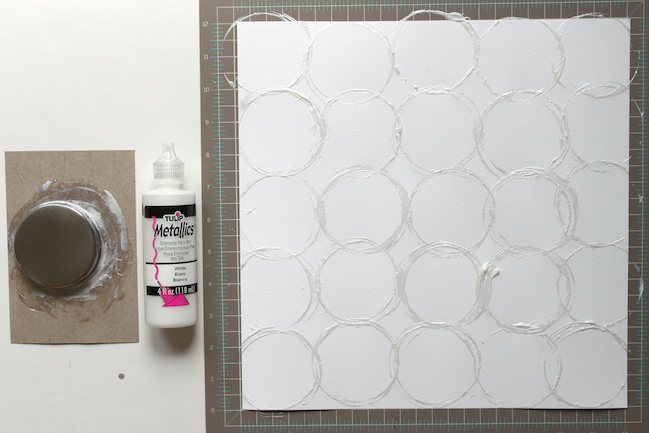
For the first project, you will need a piece of white card stock, a round lid and dimensional paint (think puffy paint).  There are a large variety of colour options, but just like my canvas, I love to stick with white.  The metallic element creates a pretty, shiny effect on your page. Non-metallic dimensional paint would great too.
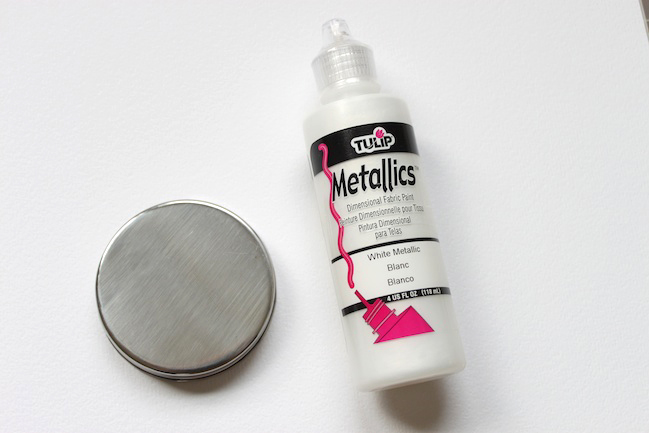
creating dimension using paint:: a scrapbooking tutorial by stephanie bryan @ shimelle.com

creating dimension using paint:: a scrapbooking tutorial by stephanie bryan @ shimelle.com

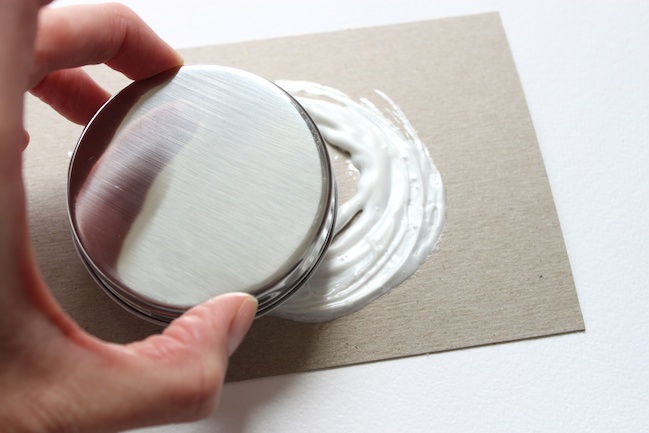
To begin, add some of your puffy paint to a piece of scrap chipboard.  I like to eyeball the size of my lid and create a circular shape about the same size.  Grab your lid and dip it into your dimensional paint, making sure to coat all the way around your lid. 
creating dimension using paint:: a scrapbooking tutorial by stephanie bryan @ shimelle.com

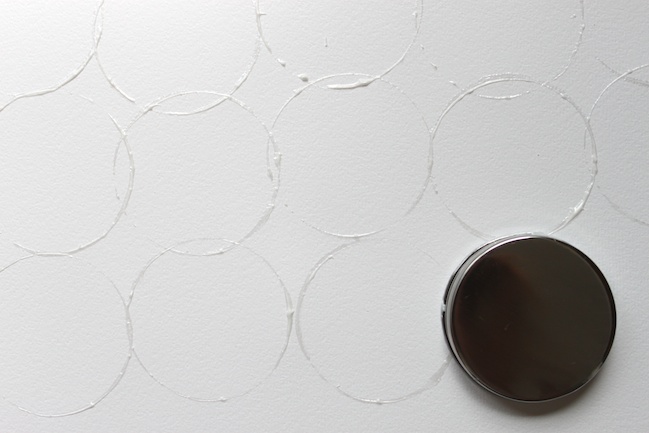
Now, stamp your lid on your card stock.  For this first layout, I wanted to create a background of circles so I stamped all over my page, starting with the top left hand corner and working my way down.  
creating dimension using paint:: a scrapbooking tutorial by stephanie bryan @ shimelle.com

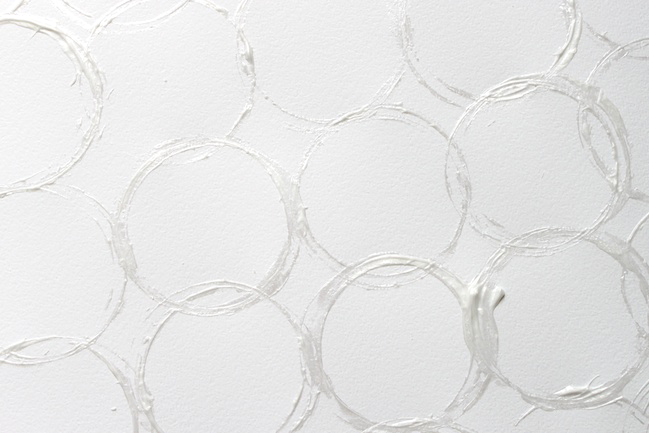
As you can see, I like to overlap my circles a little and I like for the circles around the edge of my paper to be slightly cut off.  After you stamp each circle once, go back and stamp over your circles a few more times.  This adds depth and dimension to your circles. 
creating dimension using paint:: a scrapbooking tutorial by stephanie bryan @ shimelle.com

Here is a closer look at a few of the circles.  Feel free to play around and get messy here!  I think the “non-perfect” look adds to the playfulness of the page.
creating dimension using paint:: a scrapbooking tutorial by stephanie bryan @ shimelle.com

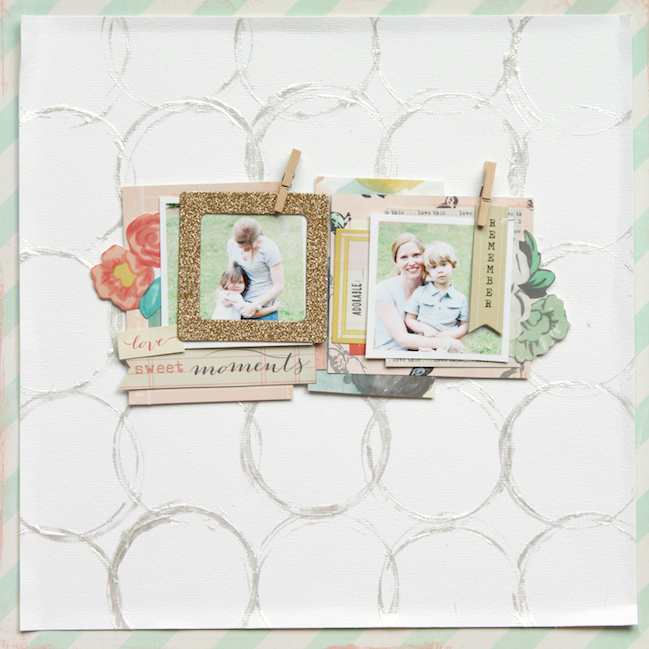
Once my circles were dry, I added two photos, paper layers and embellishments in the center of my page.  I also trimmed a little from each side of my background paper and backed my work with a piece of patterned paper for balance.

I love the iridescent effect!  And you just have to see it in person!  It looks even better!!

Ok! Don’t put your dimensional paint away yet!!  I have another fun project to share with you!
While I have the paint out and my fingers are all messy, I like to go ahead and create a few more backgrounds just to have on hand.  
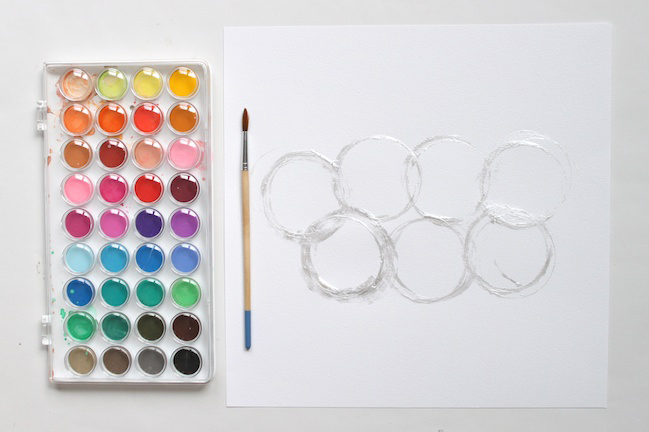
creating dimension using paint:: a scrapbooking tutorial by stephanie bryan @ shimelle.com

For this second layout, start by stamping circles on the middle of your page in two rows.  Be sure to stamp over each circle a few times to create a larger, messier circle.  Let it dry.
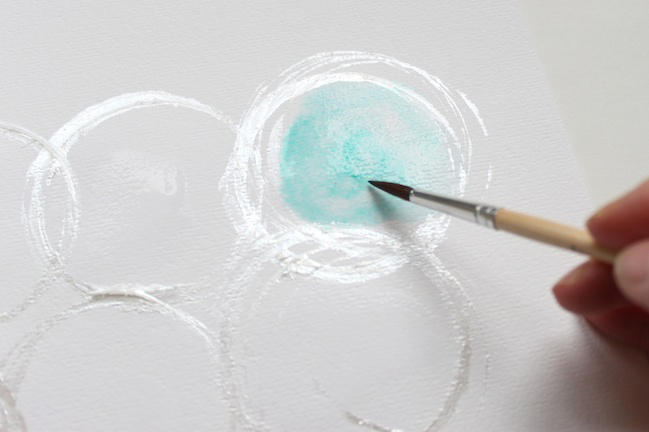
creating dimension using paint:: a scrapbooking tutorial by stephanie bryan @ shimelle.com

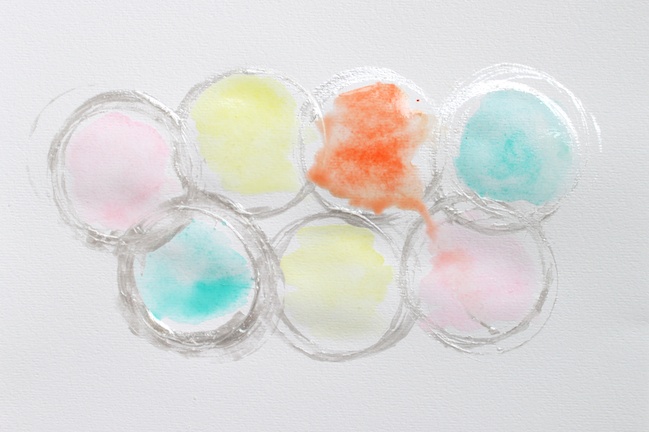
Instead of leaving these circles blank, I thought it would be fun to add watercolours inside of each one to add some colour and pop to my page.  Pick your favourite colours and paint away. I like to use a wet-on-wet watercolour technique by adding plain water to my circle first and then adding my paint colours. The water already in the circle helps the spread and flow of colour..
Creating dimension using paint:: a scrapbooking tutorial by stephanie bryan @ shimelle.com

creating dimension using paint:: a scrapbooking tutorial by stephanie bryan @ shimelle.com

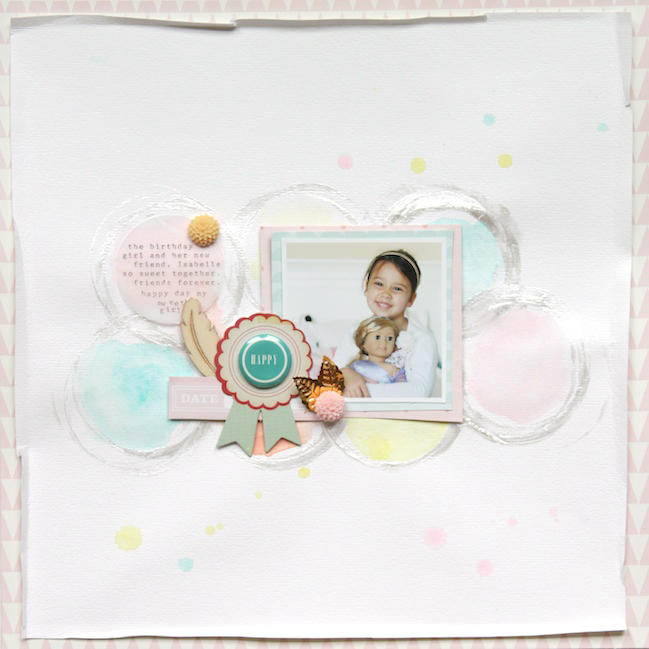
After your watercolours dry, you will have a fun little canvas for a photo, journaling and embellishments!
The colours screamed party to me, so I decided to add photo of my daughter with her new birthday present!!

Thanks so much for joining me today!!  I had so much fun stamping away to create these pages and I hope you will try out this fun technique!!  Happy crafting!


Stephanie lives in North Carolina with her husband and two children. She loves all things creative and has a slight obsession with paper and photography. She started out with memory keeping through Project Life in 2011 and has not looked back yet. Her style is simple, but classic with occasional fun pops of color. Stephanie currently serves on the Design Teams for Two Peas in a Bucket, Crate Paper, Glitz Design, Gossamer Blue, Jot Magazine and My Mind’s Eye. She shares her adventures in scrapbooking and Project Life on her blog at Stephanie Makes and through Instagram.

Weekly Scrapbook Challenge:: Scrapbook Paper Strip

weekly scrapbook challenge:: scrapbook paper strips by relly-annett baker @ shimelle.com

Hi, I’m Relly Annett-Baker and Shimelle has asked me to take over her weekly challenges while she has some well-earned maternity leave.

weekly scrapbook challenge:: scrapbook paper strips by relly-annett baker @ shimelle.com

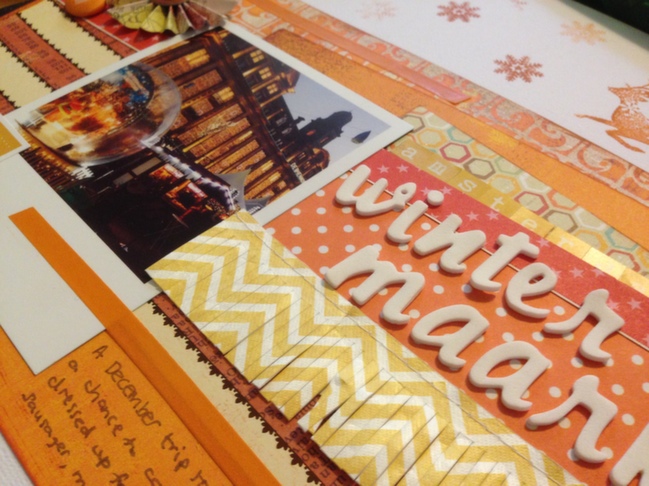
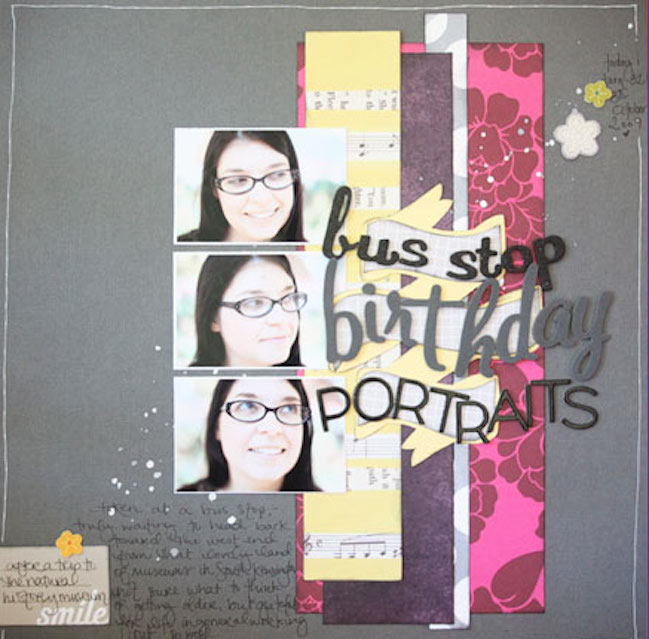
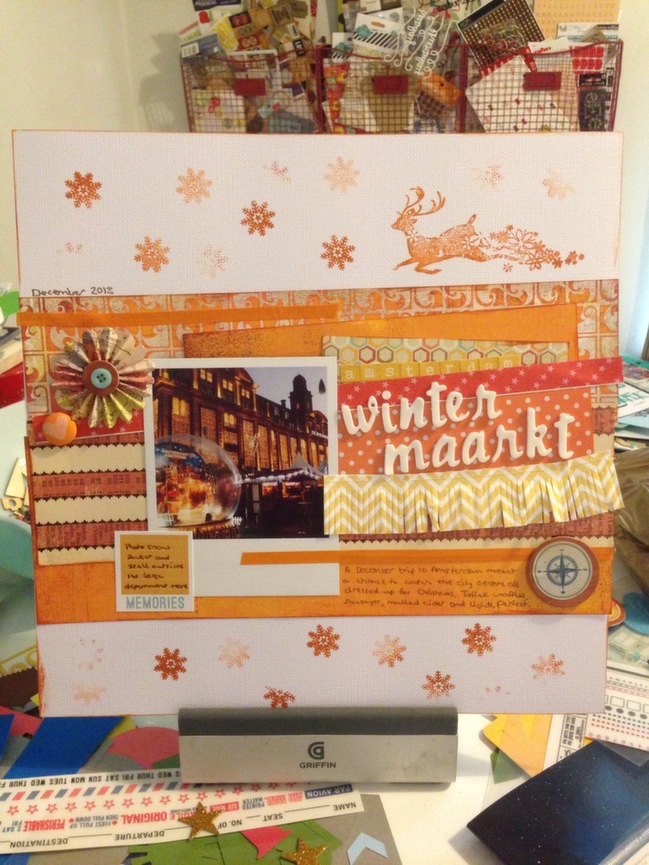
It uses up patterned scrap strips to bring colour to the three portraits. I decided I also wanted to use scrap strips, especially to complement the colour of my photo. This picture was unusual because it is from a wintertime scene, the Christmas Market in Amsterdam, but is predominately oranges.

weekly scrapbook challenge:: scrapbook paper strips by relly-annett baker @ shimelle.com

I pulled out a range of orange strips from my colour drawers, with one accent piece to pick out the blues and reds too, and decided to invert the traditional ‘snow white’ of Christmas layouts and make that the background with some simple orange stamped snowflakes to bring the page together. By using strips, the pattern isn’t overwhelming and it means I could add some playful angles to some of the more linear and graphic patterns.

weekly scrapbook challenge:: scrapbook paper strips by relly-annett baker @ shimelle.com

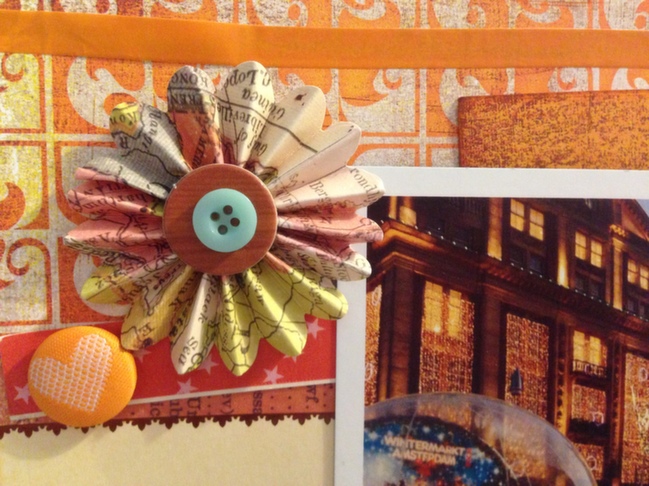
I inked and stuck down the strips in jaunty layers, before adding my photos and title. I then added the stamping and journaling before finishing with three round accent pieces to reflect that this was a trip away, not a scene from home.

I hope you’ve enjoyed this exploration using up scraps and thinking about unusual colour palettes for traditional themes. You have two possible challenges this week – use scrap strips to build a layout, or (maybe even ‘and’ !) use non-traditional colours as the basis for a seasonal layout.
I’m really looking forward to seeing your work – add a link to it below and there will be a special prize for one of you lovely scrapbookers, to say thanks for taking part.


Sewing with Alice:: The T-shirt

sewing with alice:: the tshirt @ shimelle.com

Hello! This week I am trying a little something new for you lovely readers!

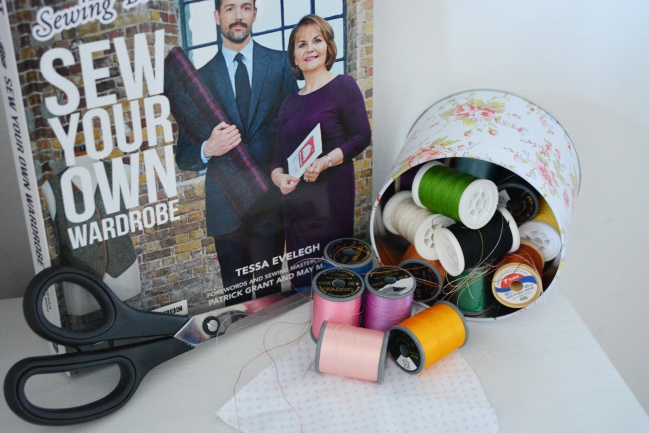
Over the last few months I have felt less drawn to creating my own home furnishings/gift type creations and more drawn towards making garments (the Great British Sewing Bee has definitely been a part of it!). Dressmaking & pattern cutting has something I have always had a massive interest in, from studying it at two different colleges to teaching myself. However, I feel I still have so much more to learn and can’t wait to keep learning! Thats the great thing about sewing… you can never run out of things to do! That is the genius of the new GBSB book.

It is full of projects that will either really push you or something you can complete in an afternoon. The tutorials are super easy to follow and they give you all the information you need to know, such as what fabrics are best to use and if its suitable for a beginner or not. And when you’re sewing a project, you need to do know what you’re dealing with! Am I right?

sewing with alice:: the t-shirt @ shimelle.com

Today is a ‘introductory’ project. You will find that I haven’t given you a tutorial as such or attached anything for you to work with. Instead this will be how you can take a project and make it your own.

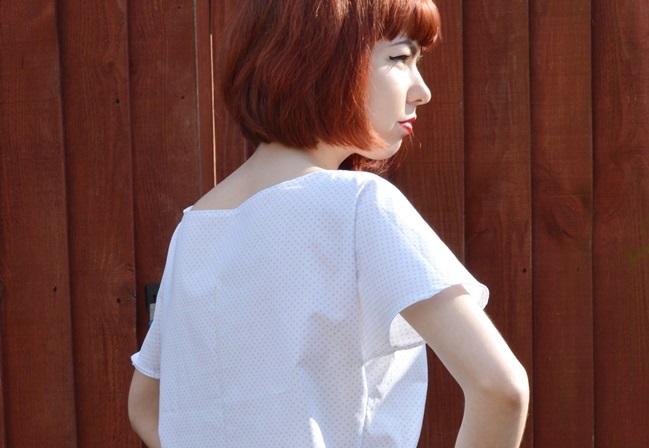
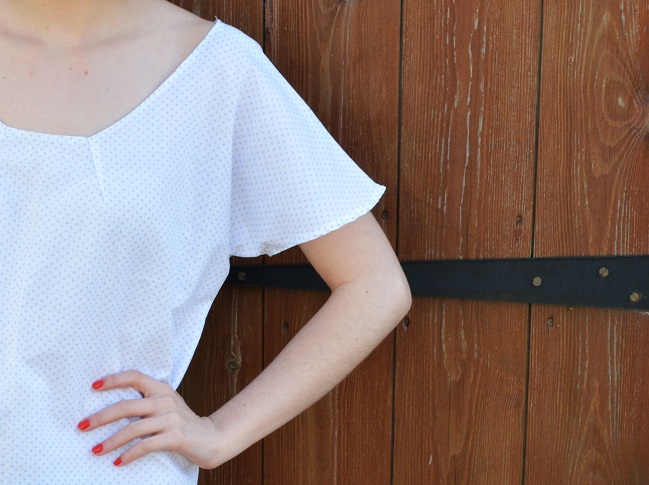
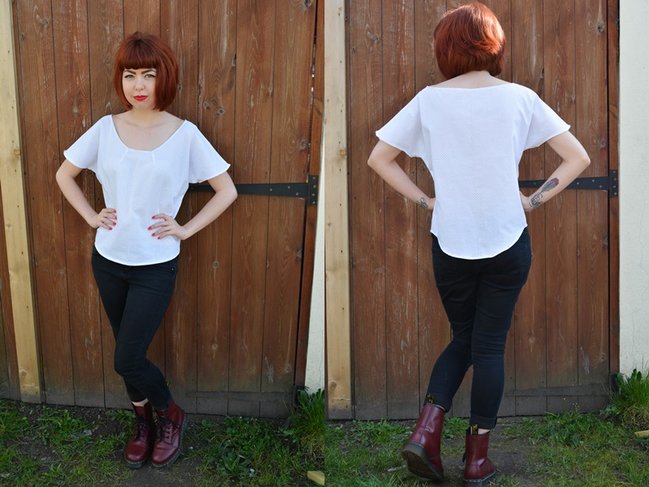
This particular project you see pictured is from there newest book, and I have to say, it is perfect for a beginner. When they said it would be easy, I didn’t quite believe that it could be – a pattern with sleeves is never easy right? The magic of this pattern however is, you don’t need to put in the sleeves. Result! With dressmaking, I love a good fit – like the majority of my wardrobe, its structured and fits well. (Unless I’m having a bad day, then out comes the baggy jumpers). So, if I see a pattern I like but feel its not quite made for me, what do I do? I make it into how I want it. There are no rules with patterns, you can change it or add to it just as you would any other garment. Which is exactly what I did with this pattern… The t-shirt.

sewing with alice:: the tshirt @ shimelle.com

So, How did I make this my own? Well, one, the fabric I chose wasn’t as ‘drapey’ as the book suggested. Its a lot more stiffer and doesn’t flow as well. Two, I added darts to my pattern to give it a more fitted look a long the neckline. Darts are a great technique to learn if you wish to alter anything to make it fit better, such as skirts or dresses.

sewing with alice:: the shirt @ shimelle.com

This pattern is made of two pieces. The front and the back. Once pinned together, you sew the shoulders together, then the side seams. That is pretty much it! As an added feature, you can do bias binding, but I chose to do a rolled hem all the way along the neckline, shoulders and the bottom of the top.

I hope you have enjoyed this today and are keen for more! If you have any dress-making needs, feel free to let me know what they are. I shall be back in a few weeks with a freshly made garment and a tutorial!
Until then, happy sewing!


Alice Partridge is a young designer-maker from southeast England. She hopes to make a living doing what she loves, and spends most of her free time reading blogs, drinking tea, or stitching with a needle in her hand. In addition to working behind the scenes at shimelle.com, her recent work includes Kirsty Neale’s recent craft book, Hoop-La: 100 Things to do with Embroidery Hoops. She blogs when she can on
Alices Homemade Studio and you can follow her on pinterest.

Making your Own Patterned Paper:: A Scrapbooking Tutorial by Ashli Oliver

making your own patterned paper:: a scrapbooking tutorial by ashli oliver @ shimelle.com

Every now and then a collection comes along that I find to be complete perfection. From the colors, to the icons… I have most recently fallen head over heels in love with the Dear Lizzy Daydreamer collection.

While my budget wouldn’t allow for me to purchase every single item, I was able to pick up several things… most importantly the stamp set. This will allow me to stretch the look of this collection and to make some patterns of my own. Let’s have a look…

That was super fun! I hope this has inspired you to embrace what you love in a collection and to make the most of it in your crafting!

making your own patterned paper:: a scrapbooking tutorial by ashli oliver @ shimelle.com

So, next time you head to your crafty space, grab some stamps, an inspiring collection, and craft up some patterns that you can call your own!

Thanks for joining me!


Ashli Oliver (aka soapHOUSEmama) is a recovering graphic designer, a homeschooling mother, wife, daughter, coffee addict, knitter and gardener with an extreme passion for mixed media paper crafting and memory keeping. Ashli finds great joy in both the creative process and the final piece. Most of her craft time is found in the wee hours of the evening when all of her kiddos are in dream land. Although, Ashli never misses an opportunity to grab a snippet of time during the day to shuffle some paper around.
When Ashli is not blogging, you can also find her on Pinterest, Instagram, and Twitter.

Weekly Challenge:: Make the most of your Title

weekly challenge:: make the most of your title by relly-annett baker @ shimelle.com

Shimelle asked me to take the reigns for the weekly challenge on here while she takes some well-earned maternity leave. Each week I’ll be taking a project from the Shimelle.com archives as inspiration for a layout and setting a challenge with a new twist.

weekly challenge:: make the most of your title by relly-annett baker @ shimelle.com

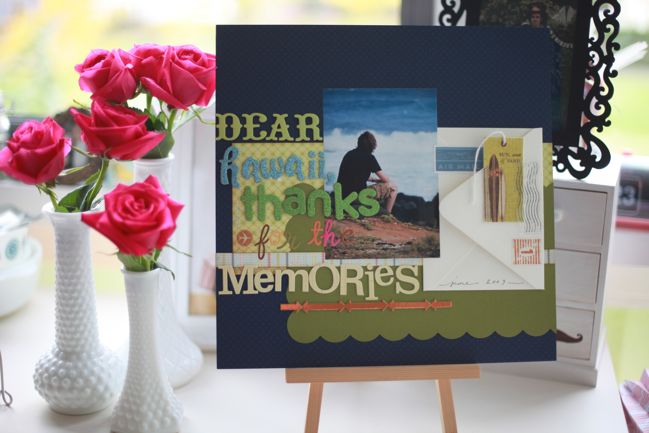
Titles are often an afterthought for me, but when I saw this layout in which the title was the main design feature I knew I wanted to give it a go. I’ve been inspired by handcutting, like that of Rob Ryan, recently but as I am more likely to slice my fingers off wielding an X-acto rather than produce a beautiful piece of art I decided I would stick to my trusty Silhouette cutting machine.

weekly challenge:: make the most of your title by relly-annett baker @ shimelle.com

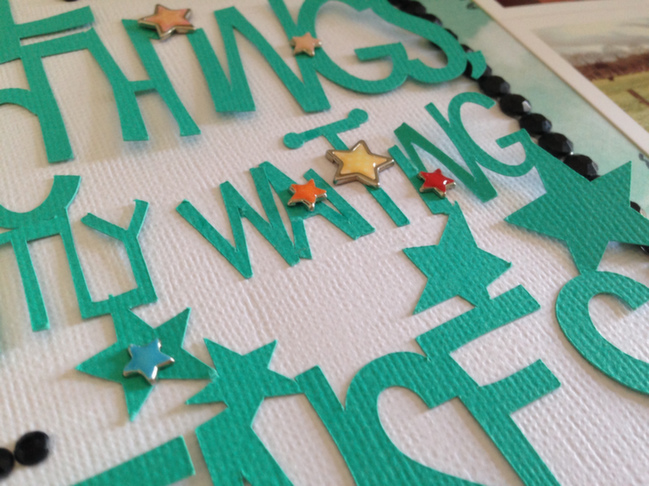
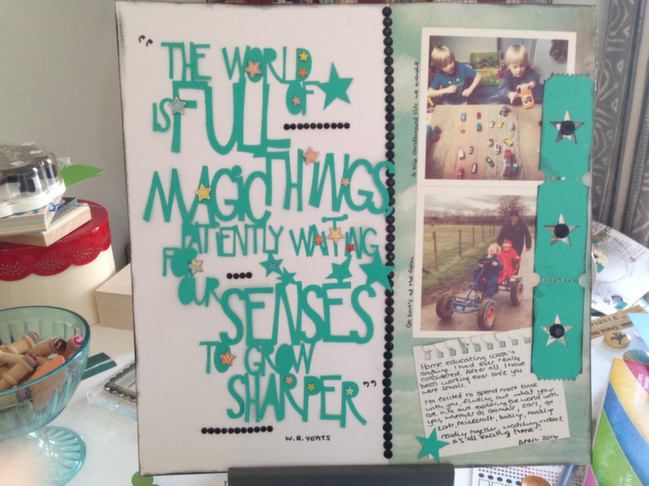
I found this Yeats quote in the Silhouette store, complete with my favourite design motif – stars. A quote of this size doesn’t cut well small, so I figured I might as well go for broke and have it lead the design like Shimelle’s page . I wanted to keep the look of a handcut piece, so I used a variety of star-shaped brads to attach it rather than glue, allowing it to lift and overlap on the page for dimension.

weekly challenge:: make the most of your title by relly-annett baker @ shimelle.com

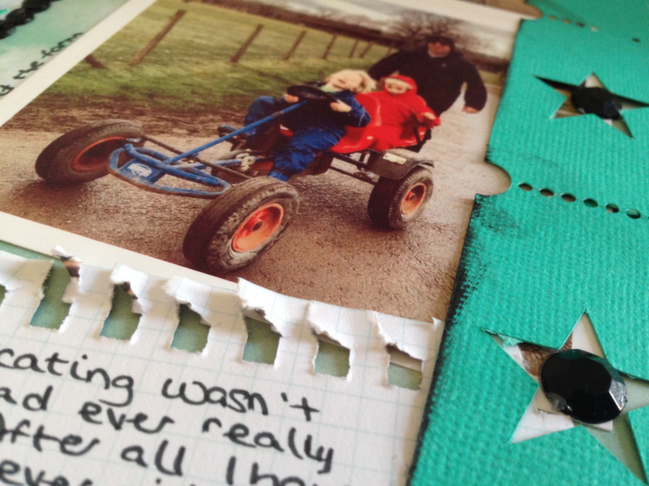
I paired this quote with some photos of my sons, and inked the page with black for contrast. I backed the pictures and journaling onto some cloud patterned paper from Crate paper, and finished with the teal blue star ‘tickets’ (also a Silhouette cut) and the black crystal border stickers.

Your challenge for this week is make a layout in which the title is a leading star in the design. You might use a long quote or the start of journaling, or just some really big lettering!