paper: pretty paper. true stories. {and scrapbooking classes with cupcakes.}

lovely to meet you Twitter Facebook Pinterest YouTube

Take a Scrapbooking Class

online scrapbooking classes

Shop Shimelle Products

scrapbook.com simon says stamp shimelle scrapbooking products @ amazon.com shimelle scrapbooking products @ amazon.co.uk

Reading Material

travel

It's Party Time! And there are cupcakes!

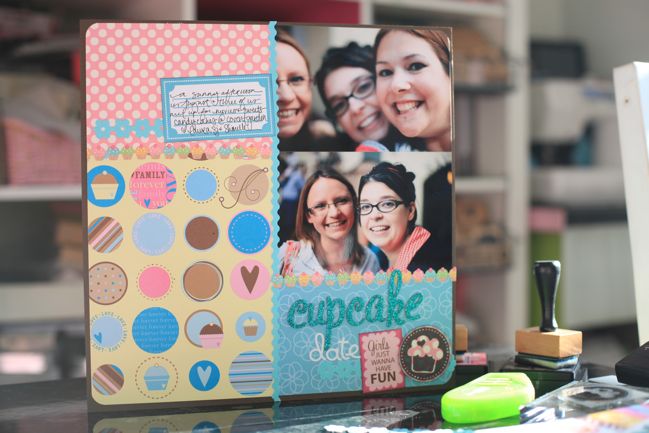
scrapbook page

It’s 6pm here so it’s time to get the party started! Shall we put on a little party music? That’s better!

The party schedule is pretty simple: even numbered hours have challenges and themes and the chance to win prizes. Some odd numbered hours have a little post about something I find inspiring — no challenges for those, just something to keep you creative! Those inspiration posts start tomorrow though! Tonight there are challenges at 6, 8 and 10 — so I’m devoting this Friday night to three of my very favourite motifs! Starting with…cupcakes!

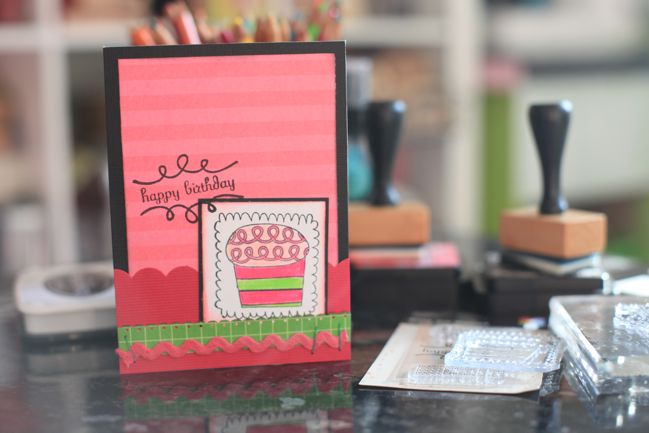
birthday card

I love to bake cupcakes even though I don’t get to make them quite as often lately. Turns out it helps to have a captive audience when you bake something that often has two dozen servings!

Plus I do tend to like going overboard. Like how we had more than three cupcakes per guest at our wedding. That was just a perfect amount in my mind! My friend Jackie makes amazing cakes (and teaches cake workshops here) and she made every single cupcake and even made them with our favourite recipes to make them extra perfect. Perhaps I shall tell you more cupcake stories over the weekend!

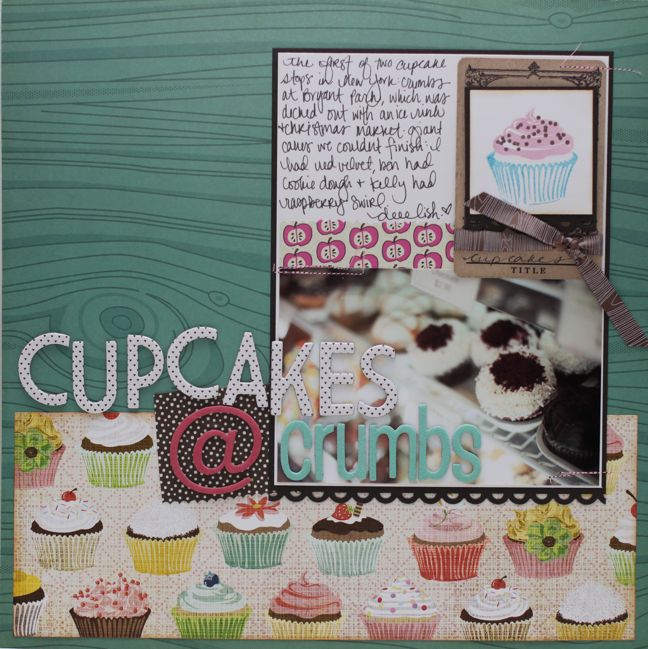
scrapbook page
©twopeasinabucket.com

So your very first challenge is to create something – anything – cupcake related! Make a card, a layout, go bake a dozen cute cakes! Then take a picture, post it online in a gallery or on your blog and leave a comment here with a link.

One project will be randomly chosen to win a prize package filled with cupcake themed scrapbook supplies.

You can enter until 6am UK time on Monday 19th April.

And if you’re a shimelle.com member (you’ve taken a class!) then hop over to the forum for a place to chat!

xlovesx

Stamped bunting -- a giveaway at Banana Frog

stamped bunting banners

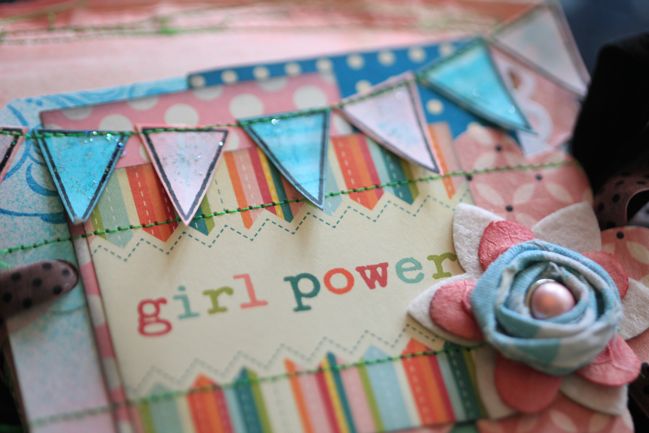
If I were to do this post as a character in Zoolander, I would have to say things like ‘Bunting: it’s so hot right now!’ because it really is the trend of the moment in scrapbooking terms. Paper Chains is a bunting stamp set that I designed for Banana Frog last year and I still love the look of all the little pennants. The set has solid and outline stamps for triangles, circles, rectangles and hearts and you can stamp as many as you want to get just the right length and angle. There’s also a teeny alphabet that fits inside! You can see the stamps in action in this video that shows this minibook cover’s creation:

This project also uses Tattered Angels Glimmer Mists and a free printable kit by Wilna. I’ll show you the inside of this book as part of this weekend’s upcoming scrapbook party!

And if you hurry over to the Banana Frog Blog, you can comment there for a chance to win a free set of Paper Chains stamps! So click here to enter that giveaway!

xlovesx

Ooooh...it's almost Scrapbook Party Time!

scrapbook pages

Participants in Something from Almost Nothing already know this is on the horizon, but it’s about time I extended the invitation to all of you! This weekend, from Friday to Sunday, I’ll be hosting our very first online crop party here at shimelle.com!

Throughout the weekend there will be tutorials, projects and downloads as well as challenges, prizes and a few surprises! And it’s all free. You can stop by and participate in as much or as little as you like, and you can participate no matter where you are in the world (or what time it is there)!

If you have taken a class here before, you’ll have access to our members-only forum, where you’ll find a new section of the board set up just for the three-day scrapbooking party. If you’re not a member, you’ll still be able to find quite a bit right here on the blog, or you can become a member by signing up for any of the online scrapbooking classes you fancy, of course.

All of the party classes and challenges are designed for you to create using what you have on hand, so you won’t need to purchase any special supplies in order to participate. You can use any photos too — there are projects with photos at 2×3, 4×6 and 8×10 inches — but all of them can be adjusted to whatever size of photo you prefer to use. There’s also a balance of paper-only, hybrid (paper + computer) and digital-only projects, and you can pick and choose which ones suit you.

So if your desk is looking a little messy, maybe today is the day to tidy things up and get some photos in your to-scrap pile. Then join us here on Friday, when it will be scrapbook party time!

(Seriously, if you can say the words ‘party time’ without wanting to follow them with ‘excellent’ and an irrational desire to perform Bohemian Rhapsody in a packed car, I bow down to your ability to not have your entire world affected by this key moment of my adolescence.)

xlovesx

Call for scrapbook page submissions

scrapbook pages

With our first edition currently available and volume two moving toward the final stages of preparation, we’re searching for fabulous pages to feature in volume 3, the autumn edition of Scrapbook Inspirations.

If you’re interested in submitting to this call, please email me with a photo of the pages you would like to submit. An image around 600 pixels wide is ideal — please do not send full-size photographs straight from your camera. (If you don’t know how to resize the image with your own software, you can do this at Picnik online.)

Submissions of both digital and paper projects are welcomed from anywhere in the world. Please keep in mind that paper pages will need to be posted to the UK for photography. Your pages will be returned with a complimentary copy of the book when the book goes on sale.

I’m currently looking for layouts for these themes and techniques:
Autumn
Teens
Home
Celebrations
Family trees
Your favourite things
School
Layouts featuring fabric
Great ways of using stickers
Pages with five or more photos
Layouts created with your favourite scrapbooking gadgets
Pages that feature one area of detail surrounded by a fair amount of white or unembellished space

Please keep in mind that all submissions should be unpublished and your own work. We would prefer pages with fewer than 100 views in a gallery or on your blog but will consider those with up to 1000 views. You will need to be able to take your pages offline until a given date if your pages are chosen. Pages shouldn’t have won contests or been posted on other websites where you can’t take them offline. If your pages posted online fit those guidelines, you’re all good to go!

This call closes on the 25th of April. Successful submissions will be requested during the following week.

Looking forward to seeing your favourite pages!

xlovesx

Happy Easter!

Easter 2010

A very happy Easter Sunday to you and yours!

xlovesx

A scrapbook from a coffee cup

scrapbook made from a coffee cup

Wilna comes up with some fabulous ideas and this is one I have been meaning to try for ages: an album made from a tall Starbucks takeaway coffee cup! She has three of these in her shop, each with a different theme. Cupcakes and coffee, love and this kit with a garden theme.

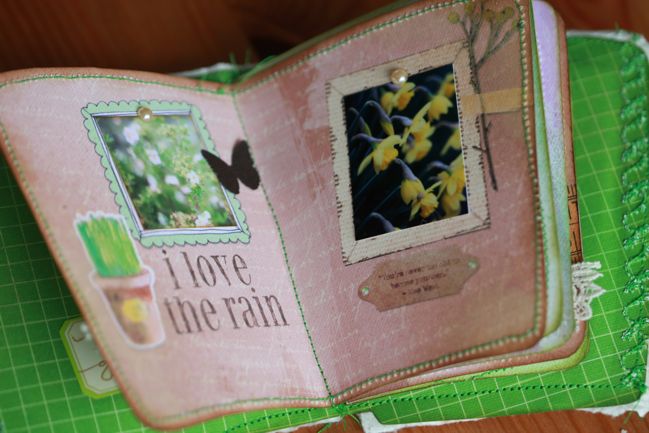
The beauty of these is that you don’t have to do anything digital other than print the pages onto cardstock or photo paper. Just like you would print anything else from your computer. If you want to get all digital, she includes PNG files you can use for that, but I used the straight print-and-go PDF files in the kit and did everything else at my scrapping table, not my computer.

scrapbook made from a coffee cup

Well, you will have to do one other thing away from your scrapping table, and that’s order a coffee. (Well, actually you can print that too if you like — she’s included a printable cup too.) I used a tall sized cup from Starbucks, rinsed it out and let it dry, then took it apart following her directions. So easy. I added colour to the cover and some of the pages with Glimmer Mists and added a bit of patterned paper, some trims and some gems, but most everything here is just print it out, stick on a photo and glue and/or sew it all together.

Of course gardening isn’t the most obvious theme for someone who lives in a flat without a garden and hasn’t even managed to keep the herbs alive through the winter, but I have plenty of photos of my favourite nearby green space and maybe this little book can will some blue skies to fruition so it can soon be the perfect place for a picnic. I love few things more than a picnic.

So here’s the inside of the book:
scrapbook made from a coffee cup

The cupcakes and coffee kit is a free download, so go get it, order a hot beverage and get crafty! Soon you’ll want to make one in every theme imaginable…so more coffee for you or you’ll have to invite a friend. Shame!

Also, just a little heads up: I’ll be teaching a 5 hour workshop at Eclectic Keepsakes in Essex for National Scrapbook Day. It’s an album class (not a minibook!) and there shall be a great deal of Dear Lizzy on the premises, along with some other fabulous goodies. The places are very limited, so if you would like to come, book your place soon.

xlovesx

Minibook Marvel Tutorial :: part three

scrapbooking tutorial - minibook

My goodness — hello there! I didn’t mean to disappear like that! What started out as a harmless change up of the weekend became a Monday morning with a construction crew on the road, a lovely on-and-off-and-on-again effect with the power and now scaffolding that covers all our windows. And although I am sure all the construction workers are fine and lovely people, there seems to be no Diet Coke break effects, merely a strange feeling of living and working in a fish bowl! Anyway, it now appears that the power will stay on so I’m trying my best to catch up! Shall we finish off this nice and simple minibook then? Four more basic designs to get you started with your punches… and of course you can add as much to these as you like to get things just right for your book!

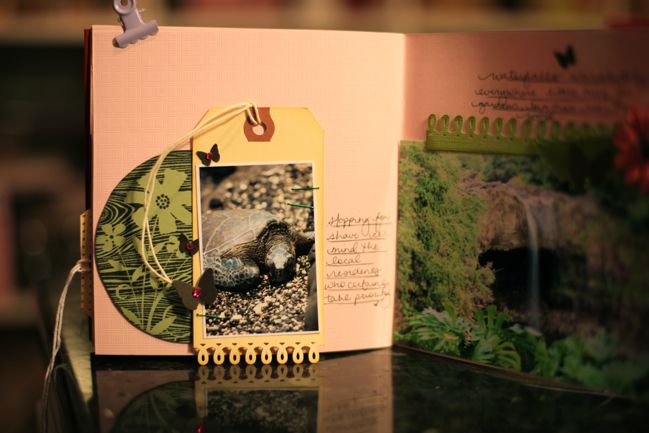
The page above uses a portrait 2×3 photo on a shipping tag, with the bottom of the tag punched with the loopy border punch from Martha Stewart. Behind the tag is a stamp from Hero Arts stamped with black ink on green cardstock, then cut out with scissors. The photo is stapled to the tag and that punched edge hangs off the bottom of the page so you see a bit of the border even when the book is closed.

scrapbooking tutorial - minibook

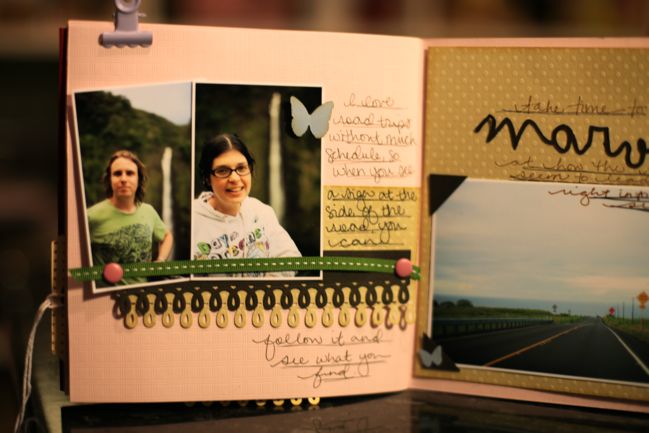
Same border punch here, with two 2×3 photos. Just punch the border from two pieces of cardstock between 5 and 6 inches wide, then layer them with the loops slightly offset. Add a strip of narrow ribbon over the top of the photos and secure the ends with brads. Add journaling and butterflies of course!

scrapbooking tutorial - minibook

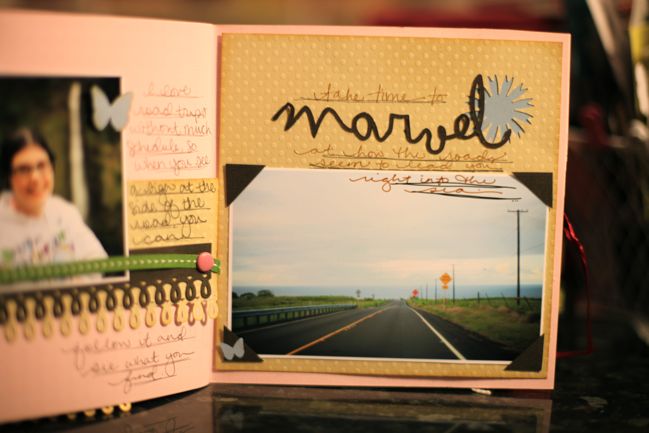
Instead of strips of cardstock, cut a box that is about 5.5 inches square and adhere a 3×5 photo to the bottom half. Then use a flower punch to create a shaped window in the top right corner and place contrasting paper underneath — just something a little different than gluing the punched piece over the top. Punch or cut two squares from brown cardstock and cut them in half on the diagonal to make simple photo corners — and dress one up with a tiny butterfly. The title is the same as the one on the cover, cut with the Silhouette SD.

scrapbooking tutorial - minibook

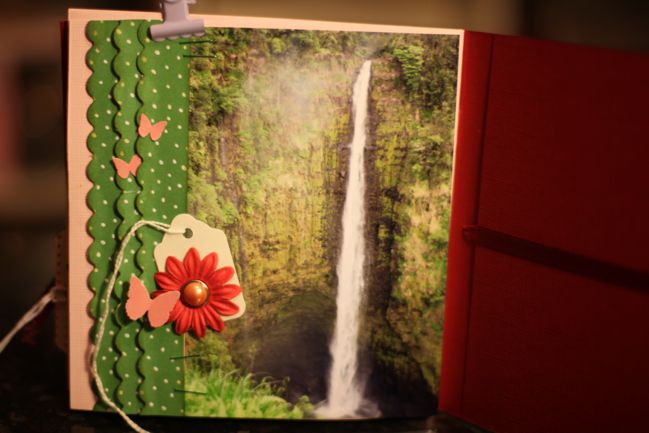
To close, create another border that follows along the side of a 4×6 photo, but instead of one punched piece, punch three pieces and layer them. Use a pencil to roll each border piece up so they don’t just lay flat. Ink on the punched edges will help the design show up as well. Add a tag with a flower and a butterfly, and tuck some tiny butterflies (or gems or anything else you fancy) into the layers of the border pieces to finish.

So that’s that — then each page design repeats somewhere else in the book to create 16 6×6 pages in total. There’s a butterfly somewhere on each page — partly because I really love them right now and partly because I like having something that remains consistent from page to page in a small project like this. A mini like this is quite different to my normal 12×12 scrapping — and it’s nice to return to just a small set of supplies now and then. This is the type of project you could easily take on the road since everything you need would fit in your handbag! I can’t say that about the majority of my scrapping supplies unfortunately!

Now I have another mini to share with you and ordinarily I would say ‘tomorrow’ but clearly that might just jinx me at this rate! So cross your fingers and with a bit of luck it shall appear ever so soon! (Thanks for hanging in there for my delayed Friday on this little project!)

xlovesx

Minibook Marvel Tutorial :: part two

scrapbooking tutorial

So on we go with part two of this little workshop! (Here’s part one if you missed it yesterday.) In this class we really focused on using very basic supplies like small pieces of cardstock while we tried to get the most from a few tools — punches in this case. So all of the pages in this book follow that idea – different designs you can make with just a few scraps of cardstock and some punches. If you have plenty of supplies to hand, feel free to add things and dress these pages up! But if you’re just starting or you want to make something – possibly a gift – that is a bit less supply heavy then you can leave things as they are.

The book has sixteen pages but I essentially have eight page designs, and each one appears twice in the book. So here are four to get started!

The page above starts the album. Use a 4×6 photograph and 2×6 strip of cardstock. Add a fancy edge with a border punch in any style you like. Layer three punches: a circle, a flower and a butterfly. I tend to just glue one wing of the butterfly so you can fold the shape in half and give it a bit of dimension. With this set of three stacked up and glued together, attach it so it goes off the page just a bit and cut off the excess. Then add a title with stamps or journal with a pen on the rest of the cardstock border for a simple start to the minibook.

scrapbooking tutorial

The next page design is for a 3×5 landscape photo, but you can adapt it to suit a photo smaller or larger by moving the border placement.

Start with two circular punches, like a plain circle and a small flower or some other combination. This one uses two punches I think have been discontinued (sorry!) — a Martha Stewart circle with pinked edges and a really ancient EK Success sunshine from the time of Punchkins (and if you remember that product line, you have my respect). But you can do this with any shapes that are vaguely round and will layer to show both circles. Glue the smaller circle in the middle of the larger circle then cut the set in half. Start from the inside and add your half-circles in a row to the outside, then cut off any extra that hangs off the edge of the page. Add something straight to cover the imperfection of the top line – I used ribbon here but you could use paper, gems or a border sticker easily. Adhere your photo so it overlaps the ribbon slightly.

I used the 3-in-1 butterfly punch, so I had small and large butterflies in the same shape. Glue the small butterfly to the large butterfly so they have the same spine, basically. Then add a pearl or a gem to the centre. No, butterflies don’t actually look like this but they also don’t look like a silhouette punched from paper. It looks pretty, so I’m cool with it. If you’re not, I understand.

Place a small pop dot (foam square, whatever you like to call them) where each pair of half-circles meet on your border. Place a set of butterflies on each pop dot. Add journaling below the border to finish.

scrapbooking tutorial

For 2×3 photos, I like to add a few more pieces to the page even if we’re staying very simple. Start with another punched border but run it off the page so it’s just short of the full 6 inch width. Add a shipping tag below that, stamped with polka dots and just a small scrap of brown cardstock at the left. Place the photo on top of those.

Add another layered butterfly to the left and a short border punch piece just below the picture. Staple that straight to the page (you can cover up the back when you get to that page, so use this on a right hand page if you’re working in order!) and add a few gems. Journal above all of this and leave quite a bit of empty space at the top. This helps with the pace as you flip through the book and see photos in different sizes.

scrapbooking tutorial

Something that still uses punches but in a different way — here I used three punched flowers at the top right corner as masks. Adhere them with repositionable adhesive and then add colour over the top using ink pads or sprays (I used Glimmer Mist in Cherub Pink) and when it’s dry, take away the punches and rub away any extra adhesive. Then add a 4×6 landscape photo, another border punched strip of cardstock, a scrap of ribbon and a paper flower with a pearl brad in the middle. Write your journaling above the border, then add some punched butterflies (seriously, what did I ever do before I owned this punch? My table is a butterfly explosion these days.) to the masked flowers we created earlier.

Right: that’s half the page designs done then! Four more to show you Friday evening, then they pretty much repeat to form the full sixteen pages. If you have a friend who you think should really be a scrapbooker, maybe this is a project you could try together to get her hooked!

ETA: We had a bit of a change to our plans this weekend — I’ll be home on Sunday to post part 3. Thanks for your patience! :) Hope your weekend is lovely!

xlovesx