Crafting with Alice :: Heart Felt Moments Tutorial
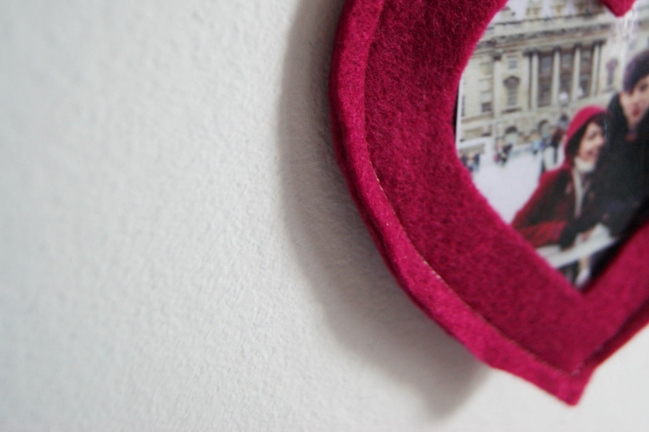
Alice is here today with a little project for your weekend! Enjoy!
I love going through all my photos. Time and time again I do it and it never gets boring. Every time I look at a photo, I get the same feeling I did the first time I saw it! With all this ‘lovely dovey’ talk in Valentine’s week, plus some behind the scenes work on an upcoming article that’s a little bit ‘Scrapping your Significant Other’, I felt this project would be best shared with that in mind.
The photo I’ve used for this was taken at Christmas last year, when I went ice skating with the boyfriend’s family at Somerset House. Now I have to say, ice skating is not my most favourite thing to do, however it didn’t take away the magical atmosphere! This is one of my favourite photos of him and me as it very much was a memorable day (unfortunately due to the fact I nearly cried the whole way round the rink).
Anyway, let’s get cracking with showing off those heart felt moments! (I hope you like my little play on words!)
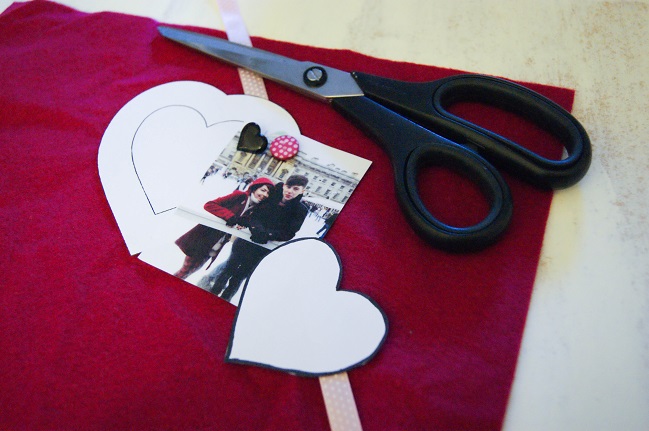
For this you shall need: one photo, felt in a colour of your choice, ribbon, embellishments you wish to add, sewing utensils and standard supplies e.g. scissors. Oh, and a heart stencil! If not you can easily make one in a word document. I found mine on Pinterest. When choosing your heart, remember to keep in mind the size of your photo. My photo is wallet size, so I chose a heart template a bit bigger than that.
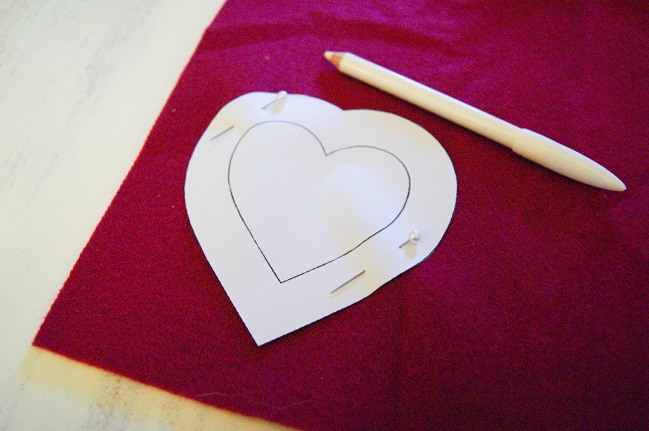
Once you’ve found the template you wish to use, print it, pin onto your fabric and draw around. I drew around mine with a little bit of room, in case I needed to trim off any bits, however that choice is yours! You’ll need to cut two hearts from the felt.
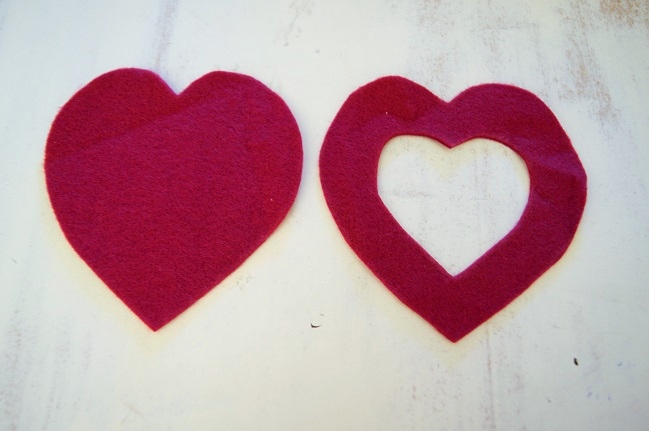
When you’ve finished cutting out your two hearts, you will need to cut out a smaller heart of one your pieces. If you don’t wish to do this freehand, either print out a smaller version of your heart or find a stencil with the heart already inside, just like mine. Nevertheless, if you’re feeling brave, go ahead and draw a heart freehand! It will work whatever technique you use!
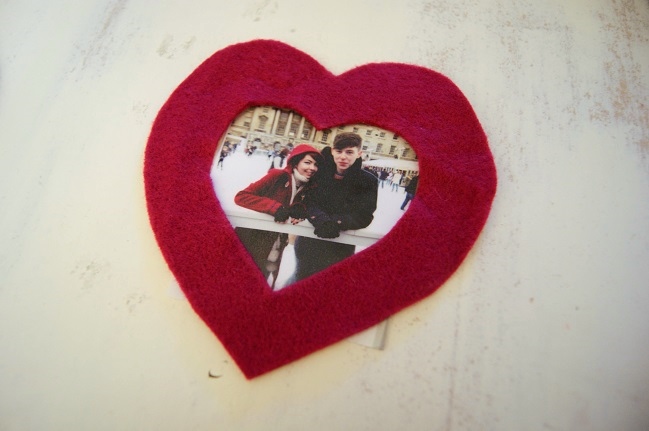
Pin down the two hearts, and cut your photo to size. For the photo, I printed it out wallet size. Obviously the bigger the photo, the bigger the heart will need to be, so always keep that in mind!
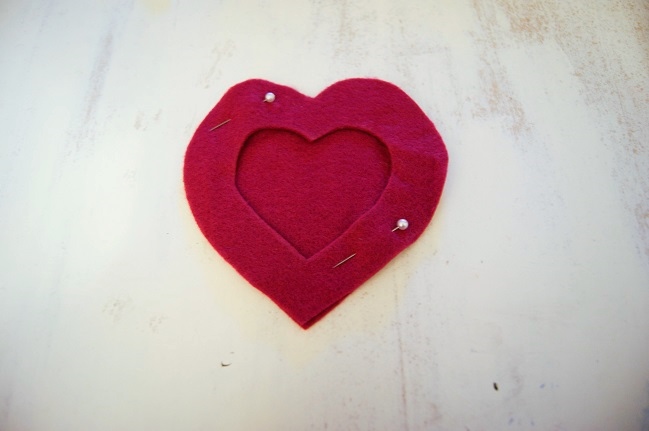
Remove your photo at this stage and pin your hearts together. Making sure the full heart is at the bottom and the open heart on top. When you’re pinning, place your pins closer to the inner edge. This will give you more room to work with when it comes to sewing. At this stage, get your ribbon, fold in half and tuck the edges at the top of your heart. Pin it down! Annoyingly, I forgot to take a photo of this stage, so do forgive me!
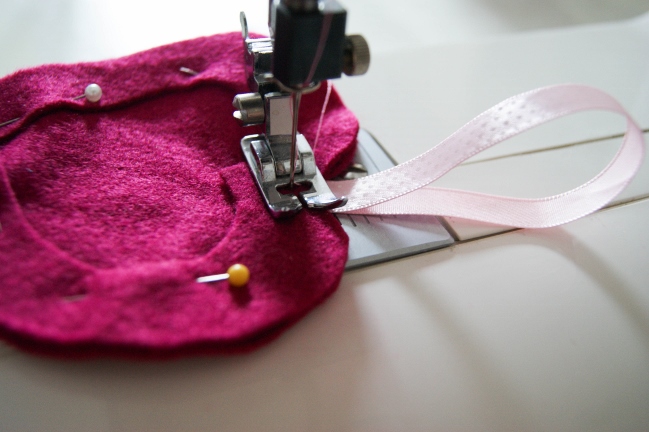
Place under your sewing machine! You want the tension to roughly be on about 1.5 or 2, most likely, though your machine may vary. It’s completely up to you what stitch you wish to use, whether it be tiny and straight like mine or zig-zag!
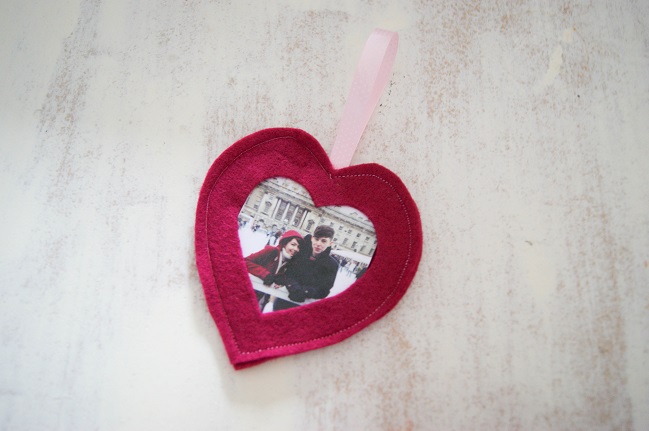
Once you’ve tidied up everything, you should be left with a cute heart photo frame! It’s such a quick, simple project- you could make many and use them for gift wrapping or a banner. If you’re up for a challenge, why not make a heart photo frame chain? Continue sewing hearts and attach them together via the ribbon, making such a cute gift for someone or wall feature. Dress it up by securing the hearts to each other with buttons or bows. Of course, if red love hearts aren’t your thing, the entire idea is easily switched to any motif you care to cut from felt! It could even work with a lettered banner – place your photos in the centres of letters that have a window (A, B, D, O, and so on) and spell out a name or phrase adding in the rest of the letters as just cut from felt or fabric. How would you customise this project?
Happy Belated Valentine’s to all you wonderful readers and happy sewing!
And a P.S. If my boyfriend reads this – Happy fourth Valentine’s to us and hopefully many more!
| Alice Partridge is a young designer-maker from southeast England. She hopes to make a living doing what she loves, and spends most of her free time reading blogs, drinking tea, or stitching with a needle in her hand. In addition to working behind the scenes at shimelle.com, her recent work includes Kirsty Neale’s recent craft book, Hoop-La: 100 Things to do with Embroidery Hoops. She blogs when she can on Alices Homemade Studio and you can follow her on pinterest. |  |
![]() Read more about: tutorials
Read more about: tutorials
Next post: Five Ideas from May Flaum with the February 2014 Best of Both Worlds Kit
Previous post: The Important Pages :: a scrapbook page to capture a childhood memory


