pretty paper. true stories. {and scrapbooking classes with cupcakes.}

lovely to meet you Twitter Facebook Pinterest YouTube

Take a Scrapbooking Class

online scrapbooking classes

Shop Shimelle Products

scrapbook.com simon says stamp shimelle scrapbooking products @ amazon.com shimelle scrapbooking products @ amazon.co.uk

Reading Material

travel

two tutorials Category

Two Tutorials :: No-Sew Collar and a Floral Scrapbook Page
The no-sew collar by Alice Partridge @ shimelle.com
Two Tutorials is a series with two step-by-step craft projects: a non-paper project by Alice followed by a scrapbooking project by Shimelle. You can see previous posts here for further details. We hope you enjoy!

Every now and then we all look through our wardrobe and feel like it needs a bit of a lift: your favourite garment needs updating or maybe you wish you had more accessories! Well, look no further – this little simple collar is easy to make and perfect for customising any garment you wish. With free reign of fabric and embellishments, it can be made to suit you!
The no-sew collar by Alice Partridge @ shimelle.com

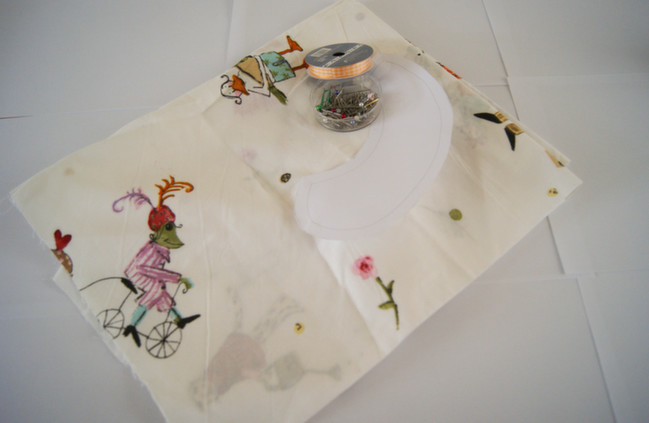
For this you shall need the essentials, such as scissors and pins. Then your chosen fabric, ribbon, embellishments and most importantly, collar template! There are plenty floating around on the internet you can use and this tutorial can suit all shapes. (Have a look here for a variety.) Because you aren’t sewing the edges of this collar, check to make sure you choose a fabric that doesn’t fray. (The no-hem tactic is what makes this ‘no-sew’ in my book. There may be a few stitches to come, but you can sew on a button, right?)
The no-sew collar by Alice Partridge @ shimelle.com

The no-sew collar by Alice Partridge @ shimelle.com

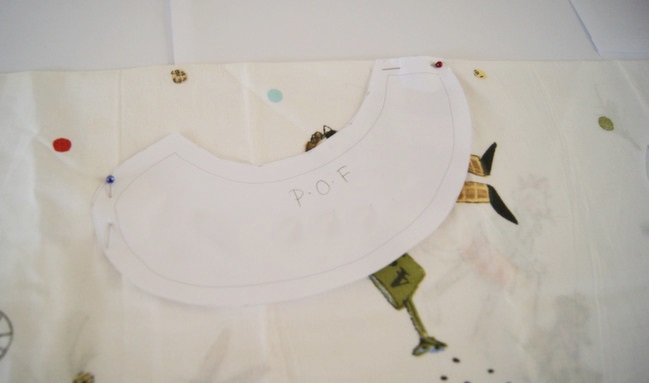
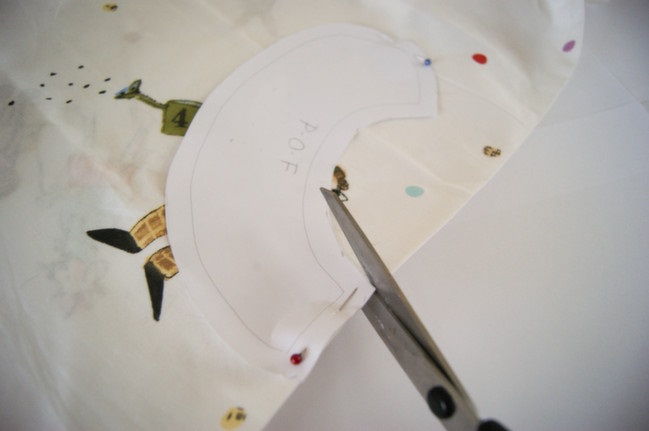
Place your collar template on the fold (P.O.F) and cut carefully around. Don’t remove the template until your happy with the shape. Also, you don’t have to use pins, you could draw around the shape with a fabric pen (one that washes off) or tailor’s chalk – you will still get the same shape whatever you use.
The no-sew collar by Alice Partridge @ shimelle.com

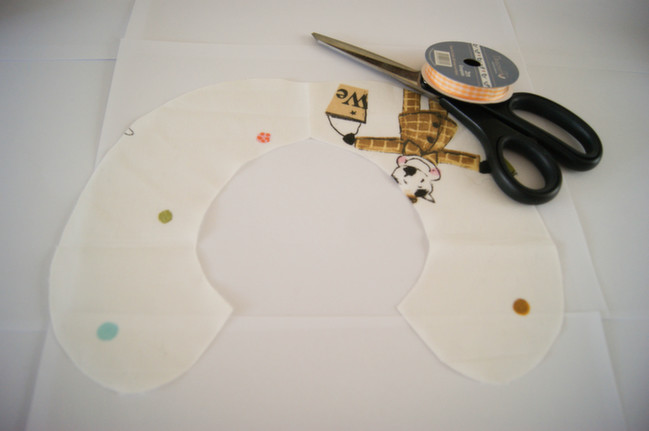
When you open it up, it should look like this. At this stage I ironed it out and tried it out for size. Next step: Ribbon!
The no-sew collar by Alice Partridge @ shimelle.com

The no-sew collar by Alice Partridge @ shimelle.com

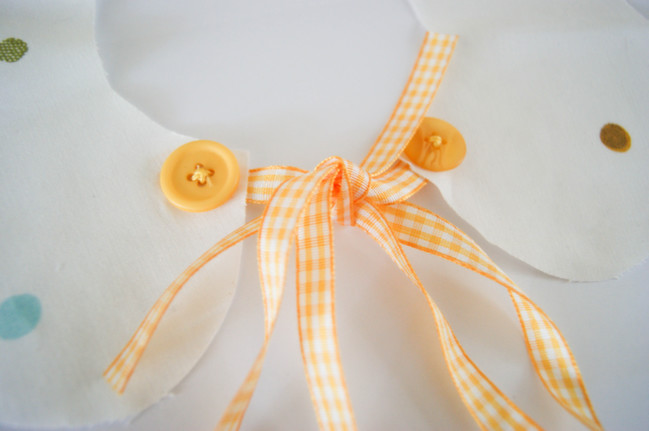
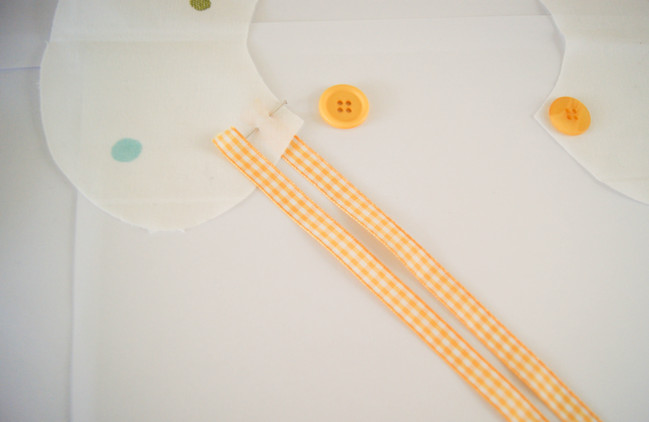
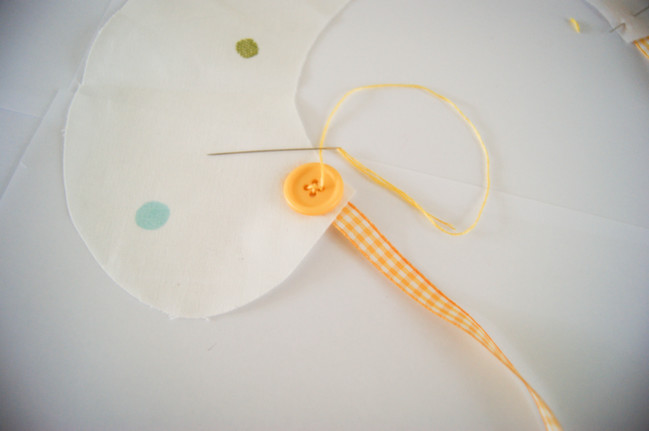
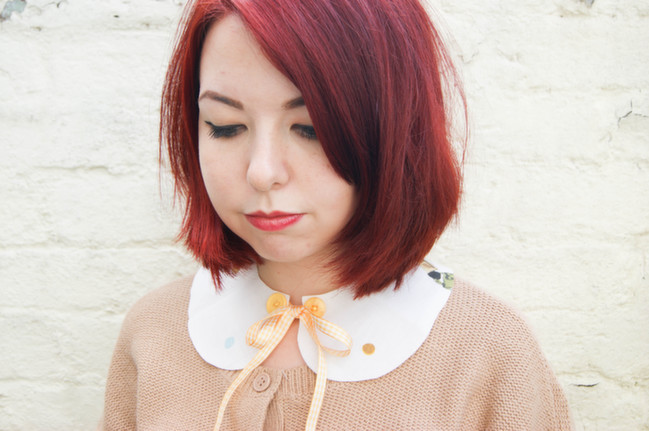
I cut 2 pieces of ribbon, 32cm in length and placed the ribbon underneath the collar (as shown). I put 2cm of ribbon under each side and pinned in place. To hide the stitching you shall do for the ribbon, I decided to sew them with a button and it made it look a lot neater! It’s up to you which type of button you use, one hole, four holes! I used four holes, so it was all much sturdier.
The no-sew collar by Alice Partridge @ shimelle.com

How easy was that!? There you have it, the no sew collar with a big impact. You could easily make a ridiculous amount of collars and have one for each day of the week. I get excited just thinking about how many fabric and embellishment combinations you could use! I hope you’ve enjoyed this tutorial and will join me again next week.
scrapbook page tutorial by shimelle laine @ shimelle.com
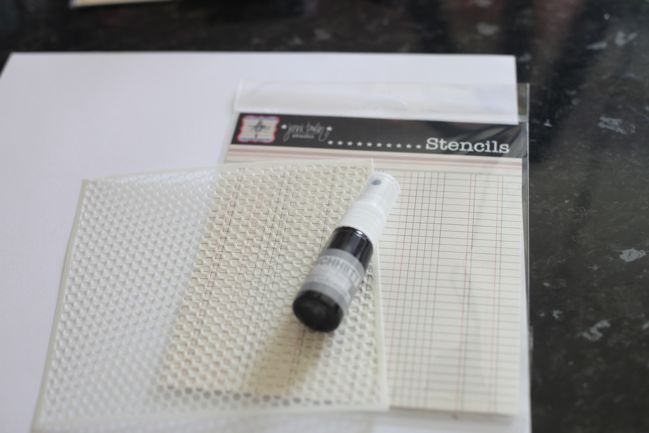
Taking inspiration from Alice’s project and heading to my paper this week gave me a little something at the start and a little something at the end of the layout! To start, I was taken by how the full piece of fabric in Alice’s project looked quite different to the pattern shown in the finished collar, and thought I might use this idea to make use of some patterns that wouldn’t necessarily be my very first choice. I started with the new Jenni Bowlin fishnet stencil, plus some white cardstock and grey spray mist.
scrapbook page tutorial by shimelle laine @ shimelle.com
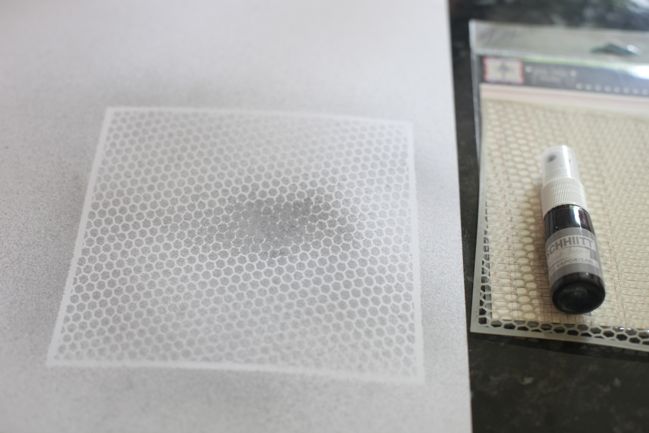
With a few sprays, I ended up with this look. I sprayed too close to the paper in the centre, resulting in that section where the pattern isn’t at all clear. Easy to remedy with another try, but I didn’t worry about it since I was pretty sure the photo would cover it in the finished design.
scrapbook page tutorial by shimelle laine @ shimelle.com
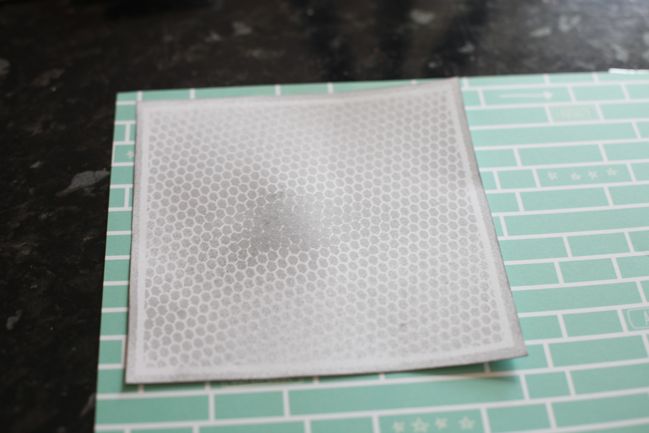
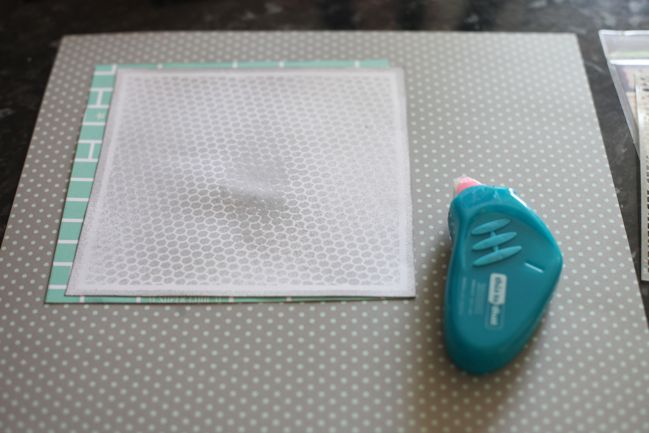
I trimmed that down to the square (I like the frame that the edge of the stencil created, so I left it intact) and cut a larger box of paper in a brighter colour (High Five paper by Elle’s Studio)…
scrapbook page tutorial by shimelle laine @ shimelle.com
…and layered those two in the top left quadrant of a background patterned paper (Mix Tape paper by October Afternoon) that included both those colours – the neutral grey and the bright aqua.
scrapbook page tutorial by shimelle laine @ shimelle.com
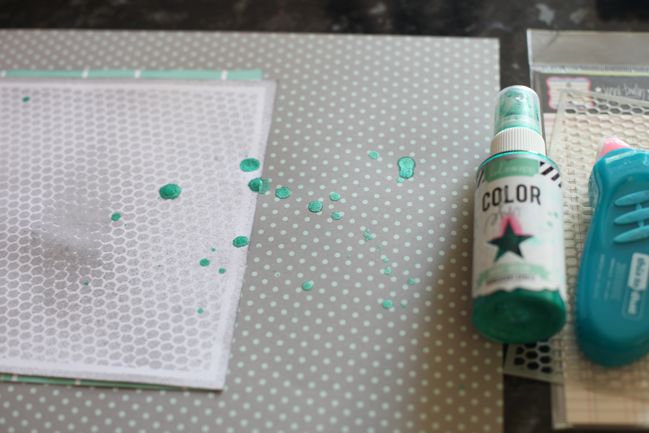
Sticking with that same bright colour so far, I added droplets of ink following a loose horizontal path across the page, around the midpoint of the patterned paper block. I used metallic ink here but non-metallic for the grey at the beginning so it wouldn’t be too much sparkle overload, especially considering I already had the super glittery letter stickers waiting on my desk.
scrapbook page tutorial by shimelle laine @ shimelle.com
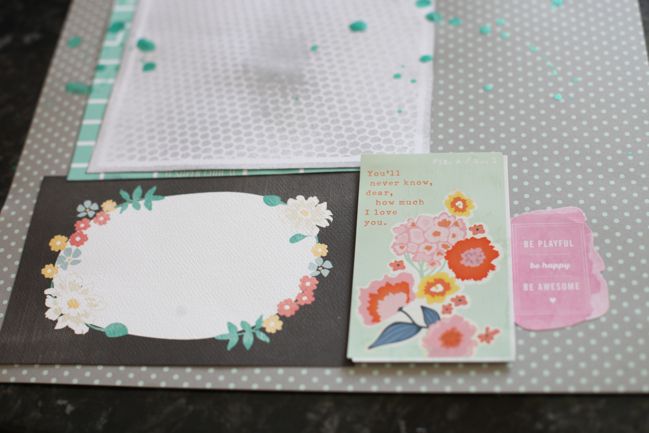
Next I added a series of blocky elements to fill the bottom half of the page. I started at the left and worked right, letting some element of each card help choose the next. The first card was inspired by Alice’s design, as the flowers looked like a collar to me (vaguely!) and the colour of the leaves was a great match for the mist and the patterned paper so far. The next block to the right is a Dear Lizzy sticker, chosen because the flowers here shared a similar look and colour. These two florals together strike me somewhat as two different artists interpreting the same bouquet, if that makes sense? The style of the illustration is different, and yet they both have similar colours and shapes repeated through the blossoms. The final block to the right is an Amy Tangerine sticker, chosen because the colour was a good match for the colour in the Dear Lizzy flowers.
scrapbook page tutorial by shimelle laine @ shimelle.com
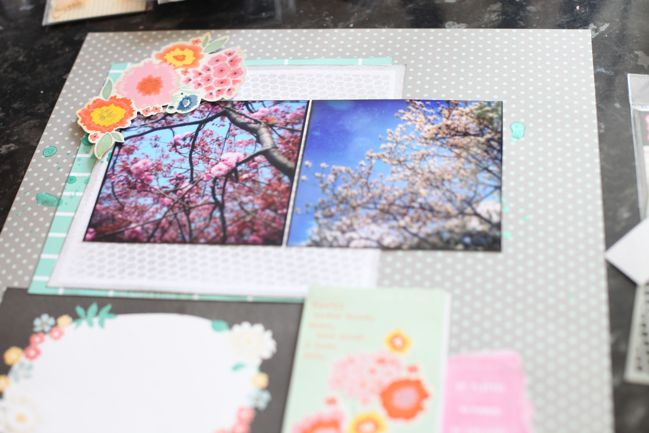
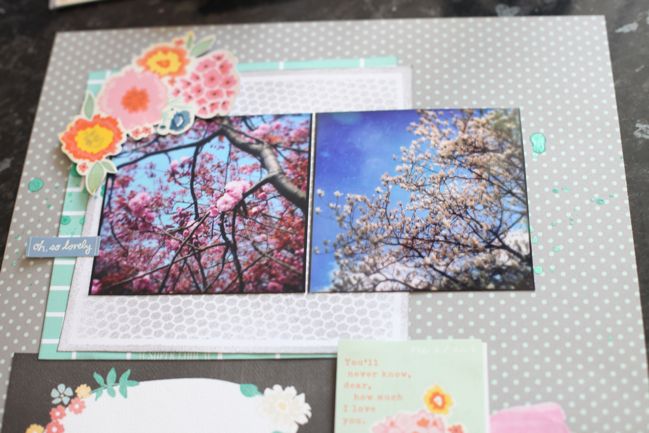
Wanting to take that one-linked-to-the-other concept and move it to other areas of the page, I added the photos and topped the corner with a larger floral sticker from the same Dear Lizzy sheet, with the matching flowers.
scrapbook page tutorial by shimelle laine @ shimelle.com
Smaller stickers can be very useful for covering up any ink drops that didn’t wind up quite so aesthetically pleasing as the others!
scrapbook page tutorial by shimelle laine @ shimelle.com
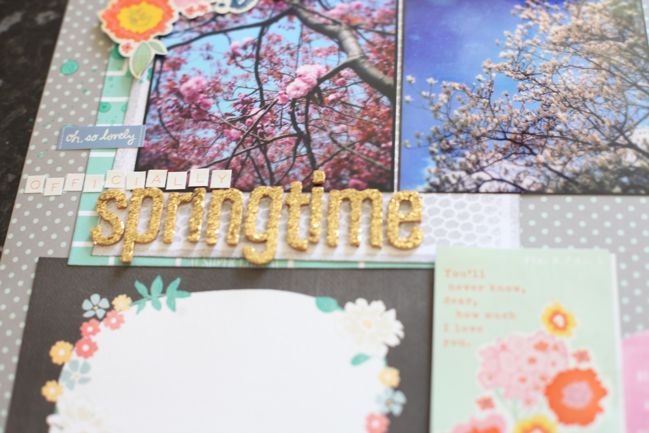
If the trapped white space between the photos and the cards made you nervous, you can breathe now. That space fit the title, with the super sparkly Maggie Holmes Thickers, plus small letter stickers from the Dear Lizzy sticker sheet.
scrapbook page tutorial by shimelle laine @ shimelle.com
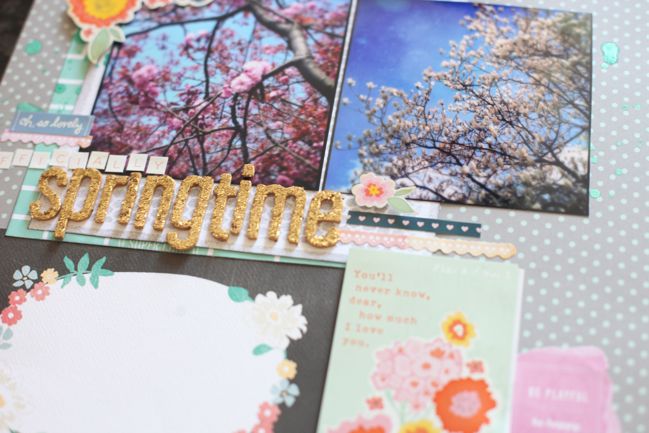
Even with the title in place, there was some trapped space that needed help. Border stickers were useful for filling the space to the right of the title and also just above of the small letter stickers.
scrapbook page tutorial by shimelle laine @ shimelle.com
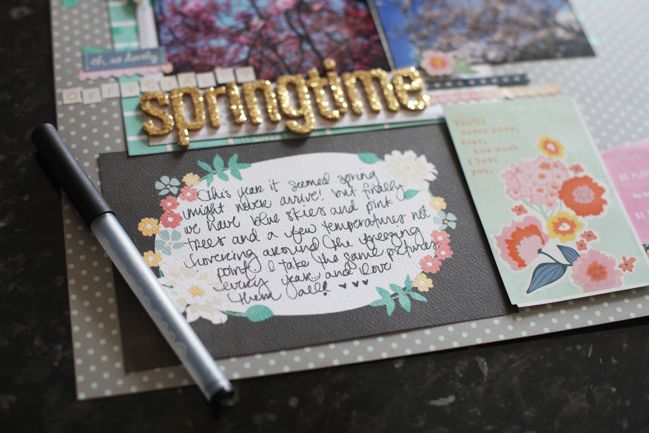
Then I filled in the journaling card, and got so carried away that I apparently thought the word ‘all’ had three Ls, so I may have tried to turn one into an exclamation point. Can’t contain the excitement! (I guess.)
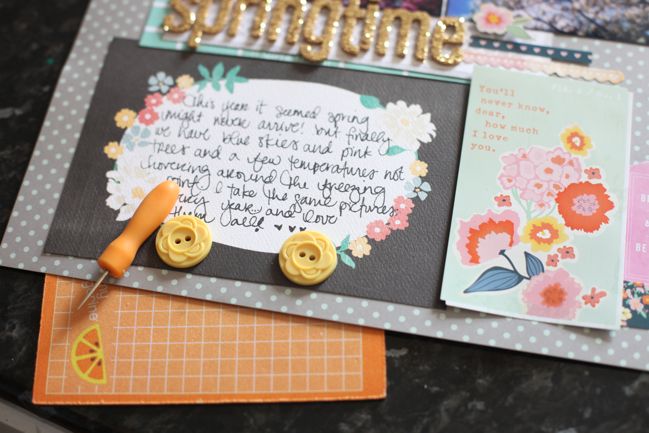
scrapbook page tutorial by shimelle laine @ shimelle.com
Then for the finishing touch to match Alice’s project: some button and twine detailing to that loop of flowers. I tack the buttons in place with normal adhesive while I punch the holes and stitch them onto the page. If you hate sewing buttons on, then glue dots will hold them really well, but I like my buttons to have string through them, and sewing through glue dots is just more trouble than it’s worth, I think.
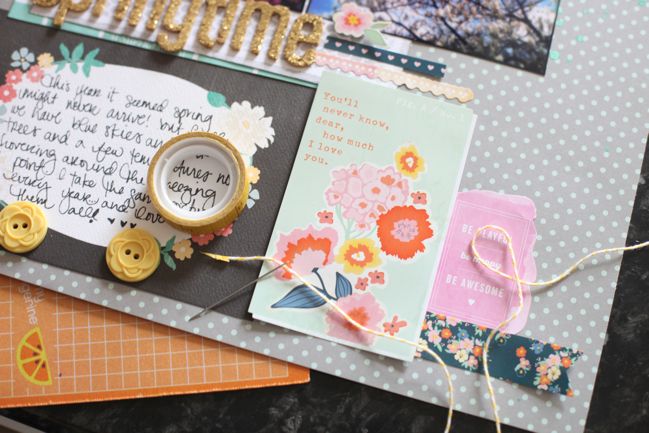
scrapbook page tutorial by shimelle laine @ shimelle.com
Baker’s twine is a pain in the neck to thread through a needle. Either you have to use a giant needle, have the patience of a saint, or be very careful with a threader, else the baker’s twine will split into the two different colours and one will feed through the needle and the other will stay on the other side. I didn’t have too much luck using threaders with this, even with reasonably sized needles, and have found washi tape to be far easier. Run a bit of tape over the end of the twine and press it against itself so there is no sticky left. Then take your scissors and cut it into a really skinny triangle so the washi tape has a point that can go through the needle, but the twine is still sandwiched between the ends of the tape. Pull that through the needle, discard the tiny bit of tape, and you’re all set.
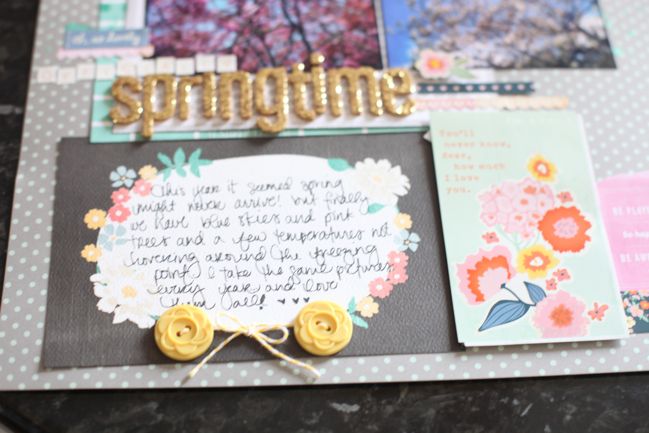
scrapbook page tutorial by shimelle laine @ shimelle.com
Buttons stitched in place, then thread tied into a cute little bow to mimic the collar! Of course this could also be done with ribbon, but I didn’t have anything that was a good match. I wished I had a lush yellow satin ribbon for a very pretty bow! Maybe next time.
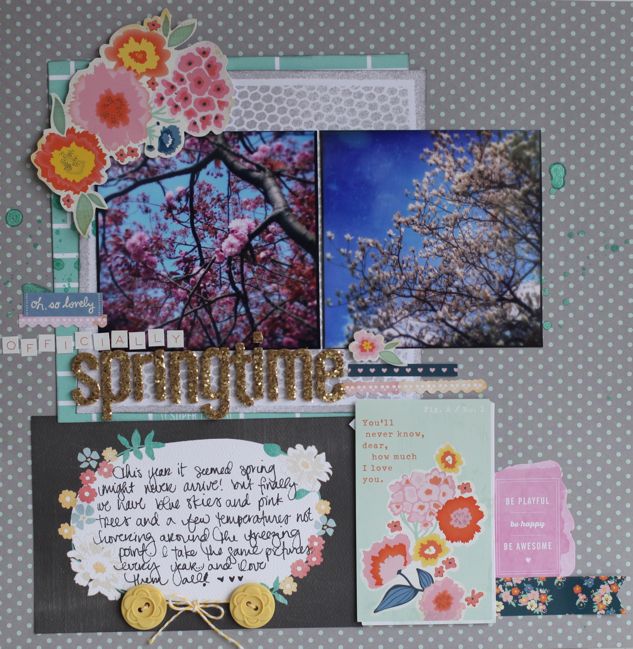
scrapbook page tutorial by shimelle laine @ shimelle.com
Here’s my finished page for this week’s project! Supplies, apart from the twine, mists, and mask, are from the August Best of Both Worlds kit.

That’s it for this edition of Two Tutorials! We’ll be back most weekends with a new pair of step-by-steps, so if there is a craft or technique you’d like to see, let us know and we’ll keep it in mind. Happy crafting!

Two Tutorials :: Floral Headbands and Paper Pinwheels

by Alice Partridge @ shimelle.com
Today I’d like to introduce you to something and someone a little new. Way back when last December, I was making a masterplan for 2013, and I knew this was going to be a challenging year in terms of time and work and all those things that life throws at us. This year has involved so much that falls into the category of never thought I’d do that, and just a lot of non-work stuff that was going to take up so much time. On one hand, that’s a great time to be working for myself, because there’s no need to worry about a boss thinking I’ve lost focus and need to work more. On the other, if I don’t have time to work, I don’t have a business. That’s not very useful! The answer seemed pretty obvious: I needed some help in 2013! Enter a lovely lady called Alice, who was looking for a job that would give her experience in the crazy world of being self-employed, making and crafting, and still keeping the lights on at home. Thank you, 2013, for throwing some pretty good stuff in the mix!

So far, everything Alice has worked on has been behind the scenes, so few of you have spoken with her. (Don’t worry – if you had an email from me, it’s actually from me!) She’s a very talented crafter, but Alice works with fabric and thread for most of her projects rather than paper and glue. Over the last few weeks we came up with a little project that would let us combine the two: a series of joint tutorials. For each of these so far, Alice has created her project and step-by-step tutorial first, then I’ve taken inspiration from her project to create a scrapbook page tutorial in response. We’re not sharing the same ideas in two formats, but it’s really an exercise in how one thing can inspire something else quite different, so there are two step-by-step tutorials you could follow, or you might be inspired to take another step to your own idea. We hope so, anyway!

That’s enough rambling for today, but I we hope you enjoy this new series, whether you’re a dedicated scrapbooker or you take up all sorts of crafts! Today we’re taking you through floral headbands and paper pinwheels, so please welcome Alice Partridge for her first tutorial, followed by my scrappy steps.

floral headband tutorial by Alice Partridge @ shimelle.com
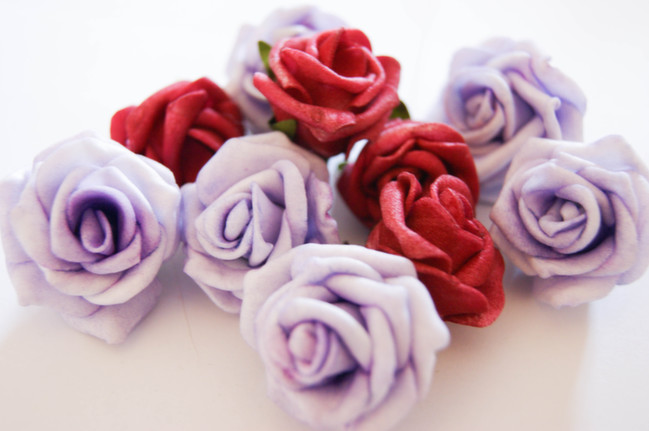
The genius of this project is it doesn’t require much doing, yet you get a lovely creation at the end of it! For the headband, I bought a simple silver alice band and two packs of small stemmed foam roses. You can always add extra decoration, but I will go into that later on.

floral headband tutorial by Alice Partridge @ shimelle.com
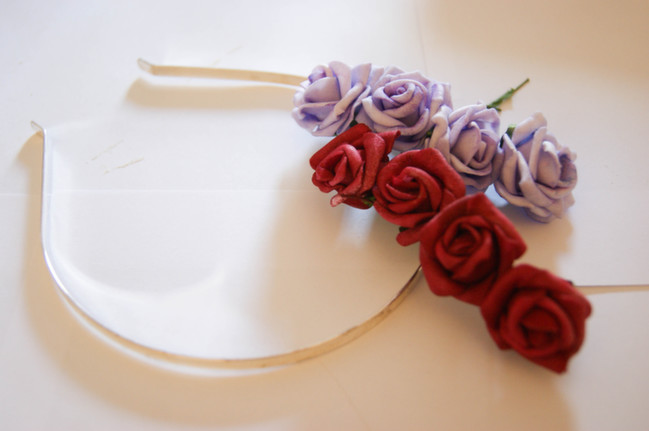
Before you start to put the flowers on the headband, figure how you want them arranged. Do you want a pattern, like three of one colour then two different, or perhaps all one colour? They can be quite fiddly to remove, so make sure you’re happy with your pattern beforehand.

by Alice Partridge @ shimelle.com
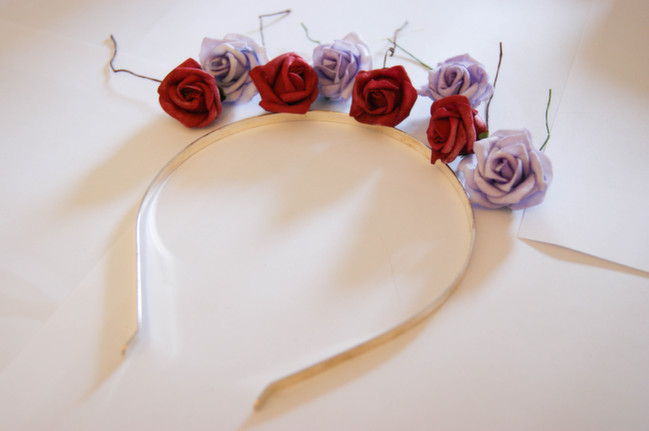
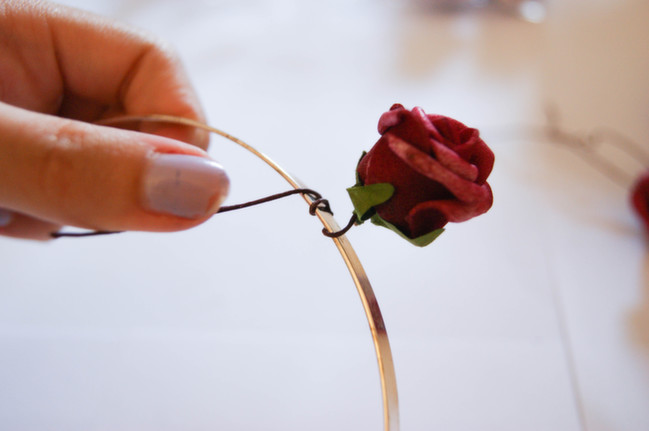
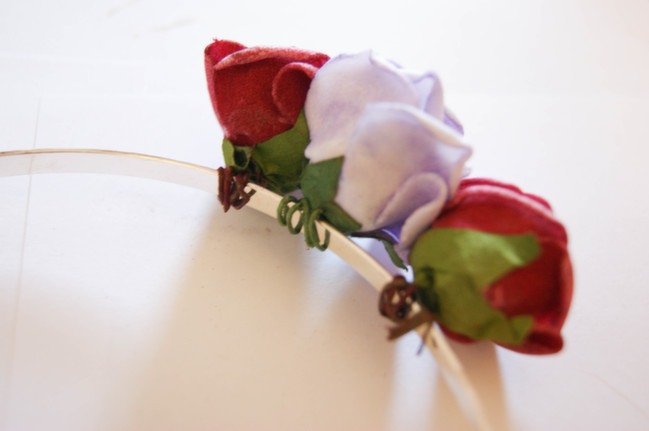
It’s fairly easy to attach the flowers. Simply place the flower where you want and hold it down. Wrap the stem around the headband. You may find that it’s still quite loose, but this will change once a few more surround it and you can push the stems closer together. It can be fiddly but once you’ve done one, you get the hang of it.

by Alice Partridge @ shimelle.com
Continue to add on as many as you wish! Whilst making this, I kept trying it on my head to see if one or two more flowers were needed to even it out. Always handy to check and add more on then rather than before you’re about to wear it out!

by Alice Partridge @ shimelle.com
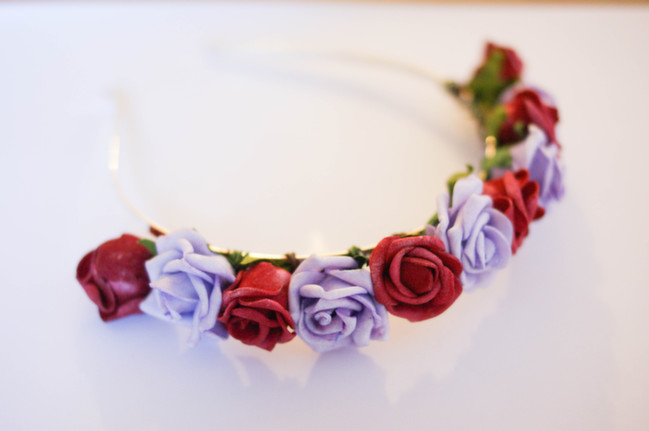
Ta-dah! The finished headband. Doesn’t it look lovely?! If you wanted to add some ‘glam’ to the headband, why not add some beads onto the petals and a sparkle of glitter? Or if you wanted to get the kids involved for a little summer project, instead of using an alice band, get some pipe cleaners to make a headband with funky shapes on top, such as hearts or stars.

I hope this has inspired you to get out your inner flower beauty and has made you feel all summery! If you make your own summer headband, I’d love to see.

scrapbook page tutorial by shimelle laine @ shimelle.com
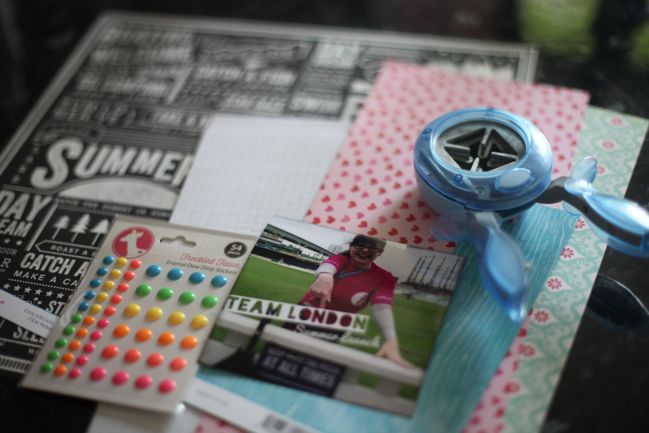
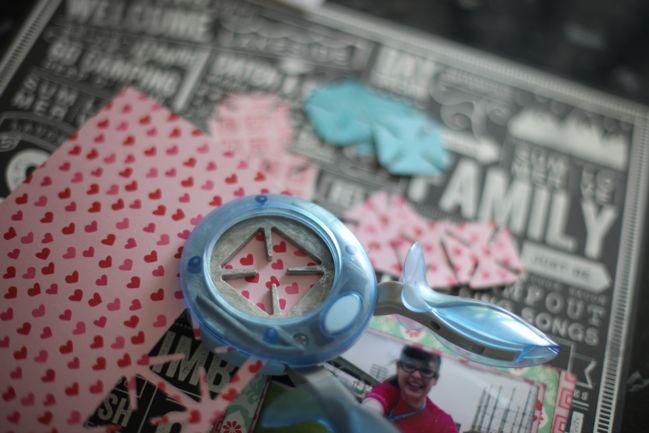
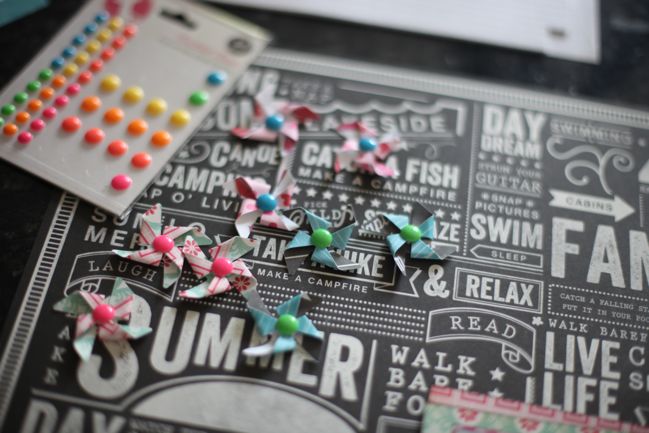
Taking inspiration from Alice’s project, the first thing that came to mind was a design with paper flowers, but I felt I needed to keep thinking for two reasons: first, that it was just too obvious, and also that after a long expanse of using paper flowers on nearly every page, I haven’t used any in a long while and I haven’t really been missing them. I returned to my thought behind the July kit of creating embellishments with punches, and remembered one punch that is great for creating embellishments with dimensions: the pinwheel punch by Jenni Bowlin for Fiskars.

Other supplies I gathered included that text print patterned paper by Pebbles, the neon enamel dots by Freckled Fawn, a few scraps of patterned paper in bright colours, baker’s twine, and some foam squares.

scrapbook page tutorial by shimelle laine @ shimelle.com
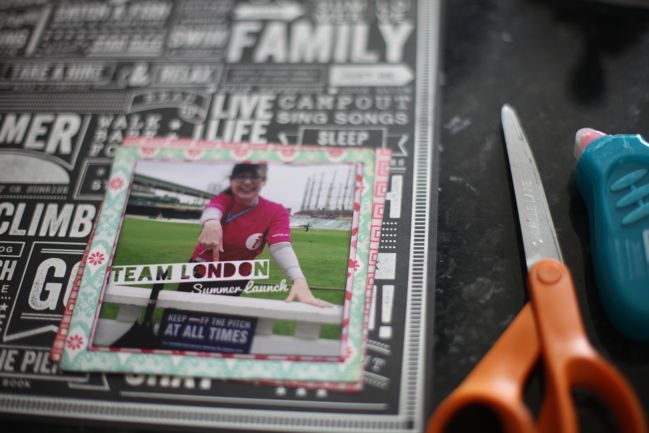
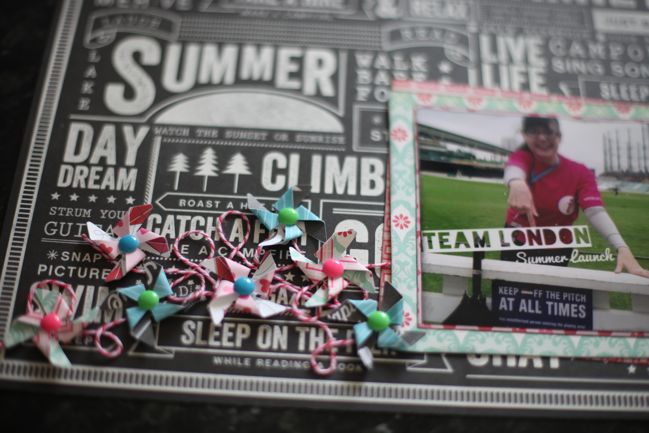
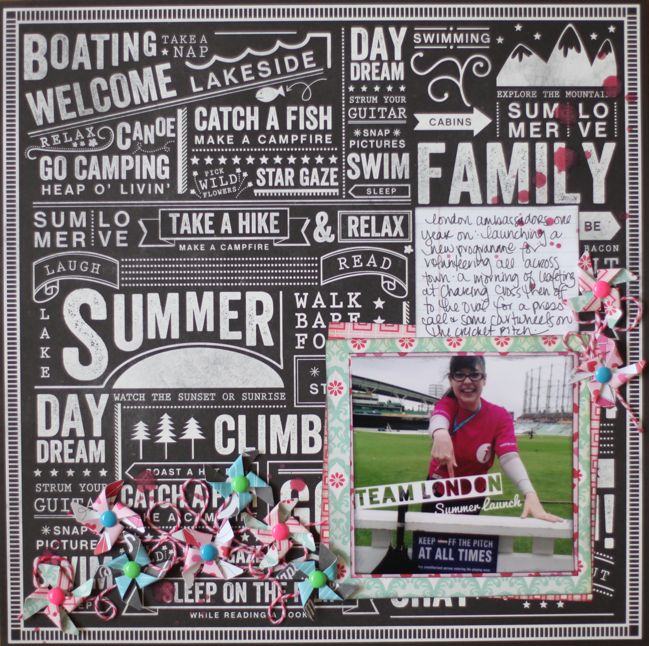
When I ordered this patterned paper, I knew I wanted to use just a single photo with it, so much of the design could still be appreciated. It’s summer themed, and this Instagram photo fit that. The text on the patterned paper makes it a bit difficult to include a title in my normal style (though large or very bright titles would still work well) so the text that was already on this photo seemed to make it the best match. A few mats in the colours of the event branding (pink and turquoise, thanks Team London!) help to keep the picture from disappearing into that busy background.

scrapbook page tutorial by shimelle laine @ shimelle.com
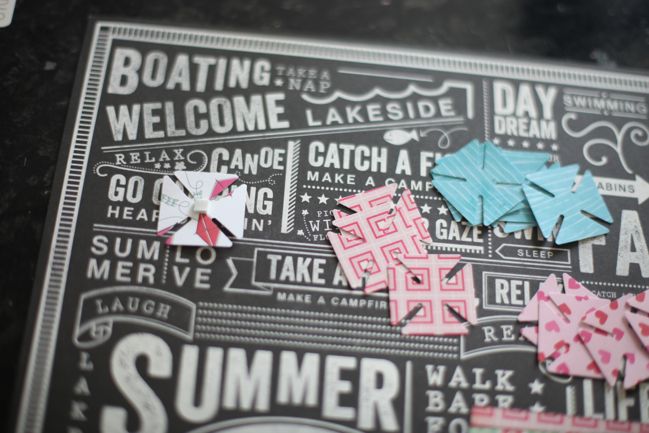
Then scrap punching! With this punch, you’ll either need patterned papers with both sides that you are happy to show, or punch double and glue the different papers together before you create the pinwheels. Luckily these scraps were all double-sided in colours and patterns that would work together. I punched three pieces from each of three different papers.

scrapbook page tutorial by shimelle laine @ shimelle.com
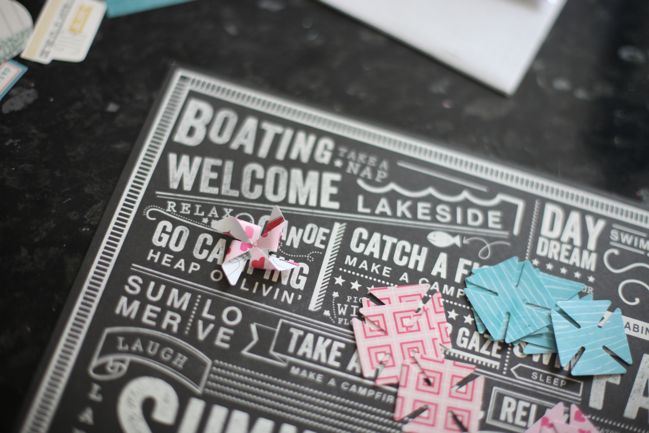
To build the pinwheel embellishment, add a foam square in the middle. They can also be made with flat adhesive in the centre, but I prefer that little bit of dimension.

scrapbook page tutorial by shimelle laine @ shimelle.com
Then curl the four corners into the middle. The adhesive of the pop dot will probably be enough to hold it all together, but if not, it’s easy enough to add more adhesive to make sure it’s secure.

scrapbook page tutorial by shimelle laine @ shimelle.com
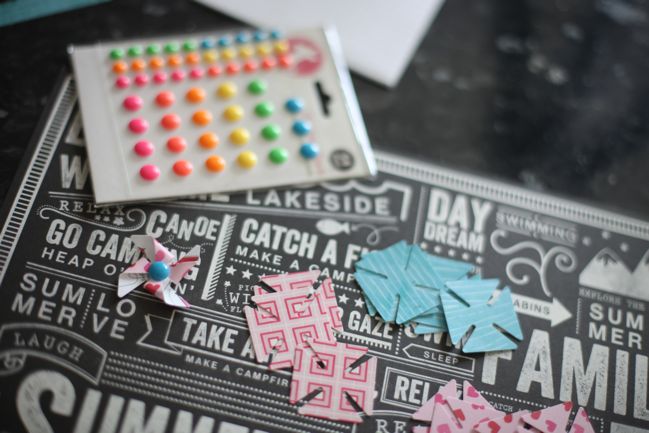
Top with an enamel dot. These just stick on, so that’s super quick and easy.

scrapbook page tutorial by shimelle laine @ shimelle.com
Repeat with all the punched pieces. For this design, it helps to fold at least a few in the opposite direction to the rest, so they don’t all look completely identical. If you want something orderly, like pinwheels in a grid, or a realistic scene where they are caught in the wind, then you might want them all facing the same way.

scrapbook page tutorial by shimelle laine @ shimelle.com
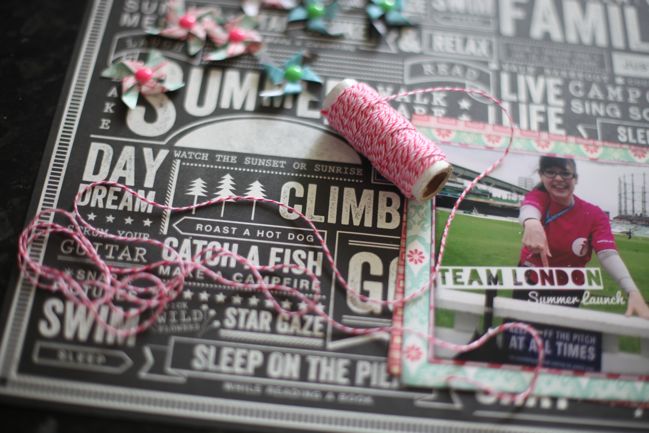
When Alice attached the flowers to her headband, all the loops of wire really caught my attention. I didn’t want to bring wire onto my page, but liked the idea of loops. Lately I make my loops from baker’s twine, so I unrolled it here to see if I liked the look of this twine with all these papers, and decided it would indeed do.

scrapbook page tutorial by shimelle laine @ shimelle.com
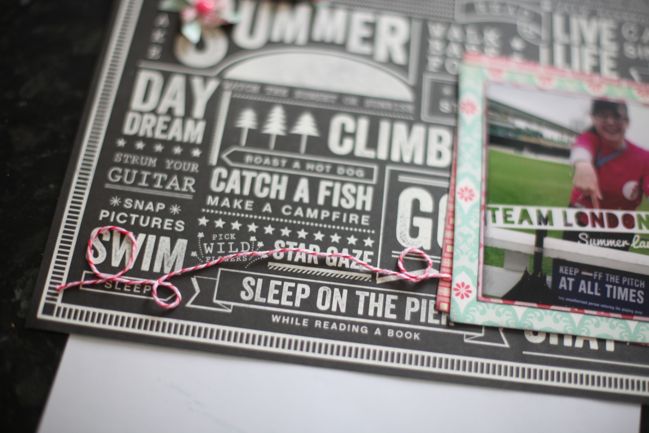
Cut the thread to a little longer than the space you want to cover so you’ll have room for the loops. I love spray adhesive for loops of twine, but it’s really not indoor-friendly, so I use my normal dot adhesive on the roller. It’s messier and uses more of the adhesive than I would like, but it’s quick, convenient, and doesn’t require an extractor fan for fumes!

scrapbook page tutorial by shimelle laine @ shimelle.com
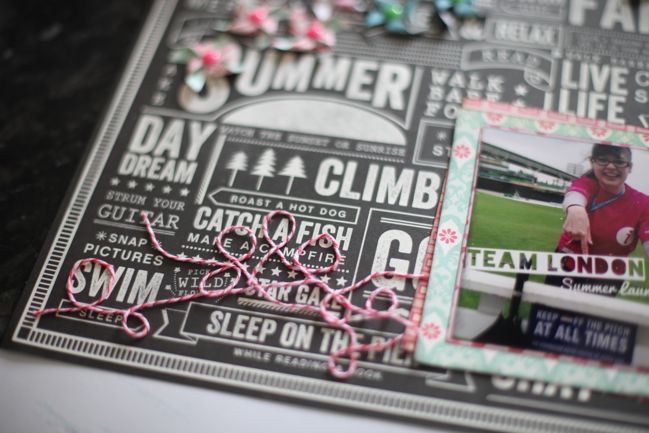
Continue looping and pressing into place until you are happy with the look. Err on the side of going just slightly overboard, because some of it will be covered by pinwheels. Tuck the edges on the right side under the photo mats.

scrapbook page tutorial by shimelle laine @ shimelle.com
Add the pinwheels, dotting them about the loops. I used seven in this section of the page.

scrapbook page tutorial by shimelle laine @ shimelle.com
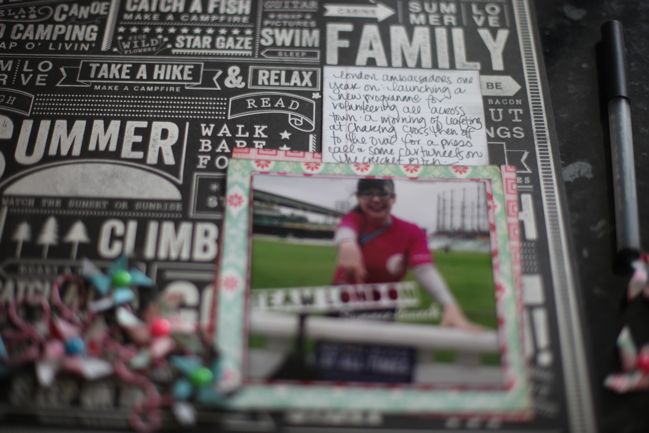
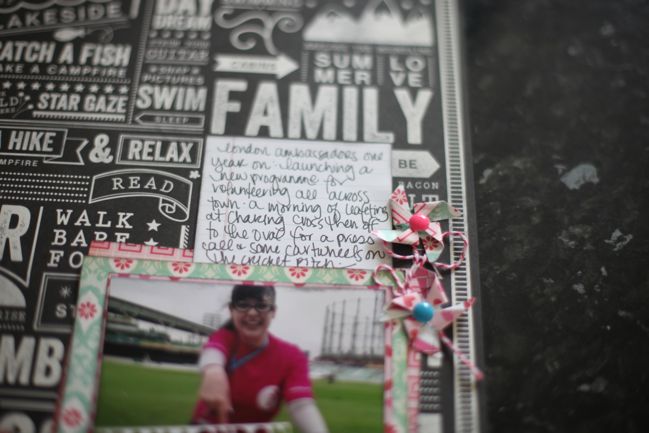
So far, everything on the page has formed a horizontal line across the bottom third of the page. Now work up from the photo on the right side, building the page into a corner design. The writing here is on a 3×4 card.

scrapbook page tutorial by shimelle laine @ shimelle.com
Repeat the loops of twine and the pinwheels on a smaller scale, next to the writing. For my page, two pinwheels was a good balance, but I might have broken things with six and three if I had left more room to the right of the photo.

scrapbook page tutorial by shimelle laine @ shimelle.com
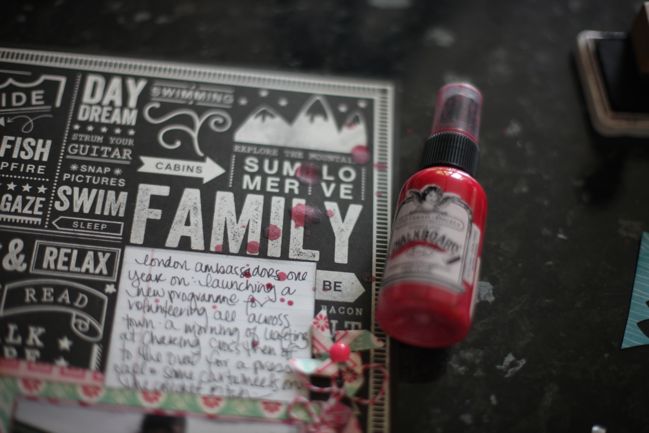
Some mists just disappear on black papers, but there are some that are quite opaque. I used Tattered Angels Chalkboard Mist for this and the hot pink colour stayed visible over the pattern. Start with some mist that connects the journaling card to the top right corner of the page, running off the right edge just below the corner. Then add a few more drops to the bottom left of the page, with all the pinwheels.

scrapbook page tutorial by shimelle laine @ shimelle.com
That’s it: the finished design. There’s no real need for lots of extras with the busy patterned paper in the background.

That’s our first edition of Two Tutorials! We’ll be back most weekends with a new pair of step-by-steps, so if there is a craft or technique you’d like to see, let us know and we’ll keep it in mind. Happy crafting!


Alice Partridge is a young designer-maker from southeast England. She hopes to make a living doing what she loves, and spends most of her time reading blogs, drinking tea, or stitching with a needle in her hand. In addition to working behind the scenes at shimelle.com, her recent work includes Kirsty Neale’s upcoming craft book, Hoop-La: 100 Things to do with Embroidery Hoops, out at the end of this month. She’s busy working on her own blog to share with you soon, but looks forward to sharing her first crafting tutorials here over the coming weeks.

Oh, one last thing! Today and tomorrow, everything at Two Peas is 20% off. That includes brand new releases from summer CHA, like My Mind’s Eye’s new collections, the new exclusive stamps and flair from Two Peas, digital printables and cut files, and all the workshops. You don’t need a code, which means you can also use the shipping code VHHSFE. This gets you free shipping within the US when you spend $50 on physical items (so not digital files or workshops) that are not being phased out (when you look at your shopping cart, you’ll see anything like that marked as ‘phasing out’, and most of these items have further clearance discounts). If you’re outside the US, that same code gets you $5 off the international shipping, and the same requirements apply. Hope you find something good!
20% off storewide sale at Two Peas