pretty paper. true stories. {and scrapbooking classes with cupcakes.}

lovely to meet you Twitter Facebook Pinterest YouTube

Take a Scrapbooking Class

online scrapbooking classes

Shop Shimelle Products

scrapbook.com simon says stamp shimelle scrapbooking products @ amazon.com shimelle scrapbooking products @ amazon.co.uk

Reading Material

travel

tutorials Category

Creating a Scene with Anna Komenda
Creating a Scene with Anna Komenda @ shimelle.com

Happy Tuesday friends! Please welcome today’s guest artist Anna, who joins us from Poland! And of course a reminder that supplies are listed with affiliate links that make all this possible. Thanks! -Shimelle.

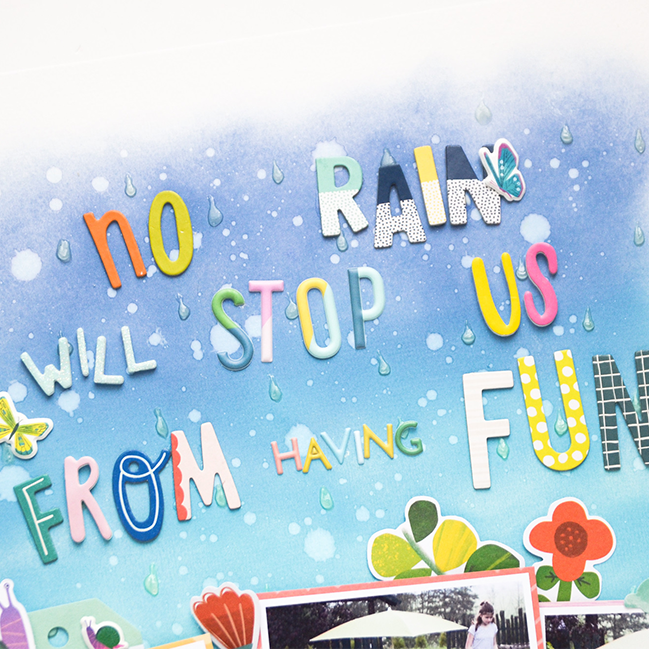
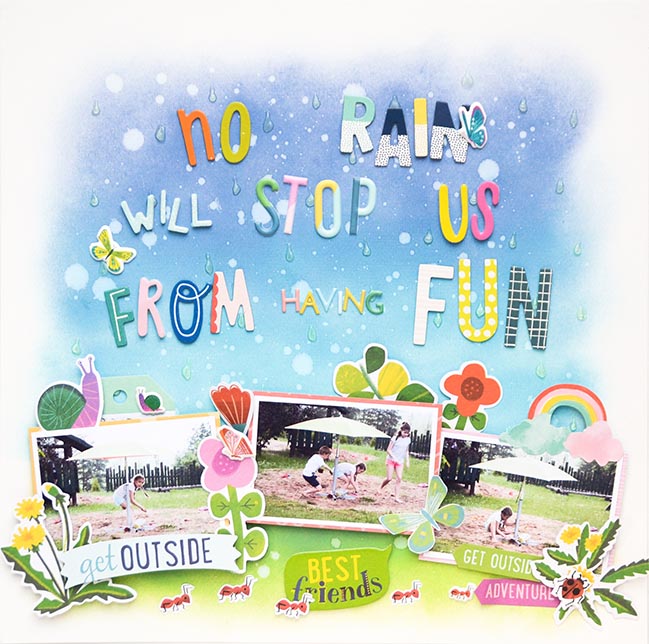
We have this saying in Poland that “dirty kids are happy kids” and it totally applies to my daughters. We live in a city but we are lucky enough to have a grandma at the countryside, where girls can run barefoot, catch butterflies, make sand pies and just enjoy being kids. Nothing can ruin the fun – even rainy weather! One day it was raining few hours but they wanted to play in mud so much, that they just took beach umbrella and spread it over the sand pit so they could play with their heads dry. It all ended up with running in the rain. I, of course, as a mamarazzi, was totally prepared with my camera and I snapped some photos safely hidden under the roof.
Creating a Scene with Anna Komenda @ shimelle.com

It was time to finally scrapbook those photos. I used just the perfect collection – Shimelle’s Never Grow Up line from American Crafts. I was so excited when it was revealed while ago as I was sure it will be great for all our countryside adventures. It’s full of colors and fun motifs that my kids can totally relate to.

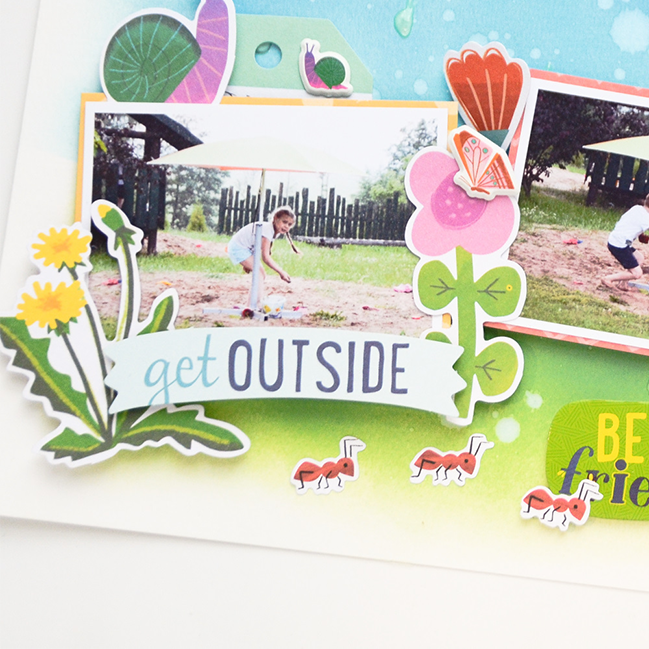
However I had to add my own special touch by making the background. It was quite a simple process with blending some Distress Oxide Inks onto the background creating sky and grass. I then splashed it with clear water to make it look like it is raining. Last step was to add clear Pops of Color in a shape of raindrops. After everything was dry I made a composition out of photos and some ephemera pieces. Final step was to add title on the sky with a mix of various alpha stickers. It turned out colorful and fun. My journaling is hidden under the photo, written of the tag that can be pulled out. I like to keep it hidden as I am not a fan of my handwriting.
Creating a Scene with Anna Komenda @ shimelle.com

This page can be recreated in many ways with the sky and grass in the background. You can skip the rain and make a layout about some outdoor activities of your kids. You can also change the scene and add more layers with mountains, forest. Change the colors for winter fun in the snow! All the techniques will still be the same, just the motifs used will be different. Simple designs like this gives you so many possibilities. Colorful title is an embellishment of it’s own so I highly encourage you to try making one.


If you’d like, you can watch my video on how I made this layout, over on my my Youtube.

Anna Komenda started scrapbooking in 2009 as a way of documenting her new adventure – becoming a mom. It quickly grew into a bigger hobby. She discovered her passion for mixed media and painting incorporating them into layouts and albums. Scrapbooking became a very important part of Anna’s life. She started sharing her knowledge by teaching live classes and creating her own YouTube channel. You can follow Anna’s work on Facebook, Instagram and blog.

Scrapbooking using Stencils with Brianna Lepper

Scrapbooking using Stencils with Brianna Lepper @ shimelle.com

Hello friends! Please welcome Brianna today as our special guest here to share a stencilled page! Remember supplies are affiliate linked at no cost to you. Thanks as always.

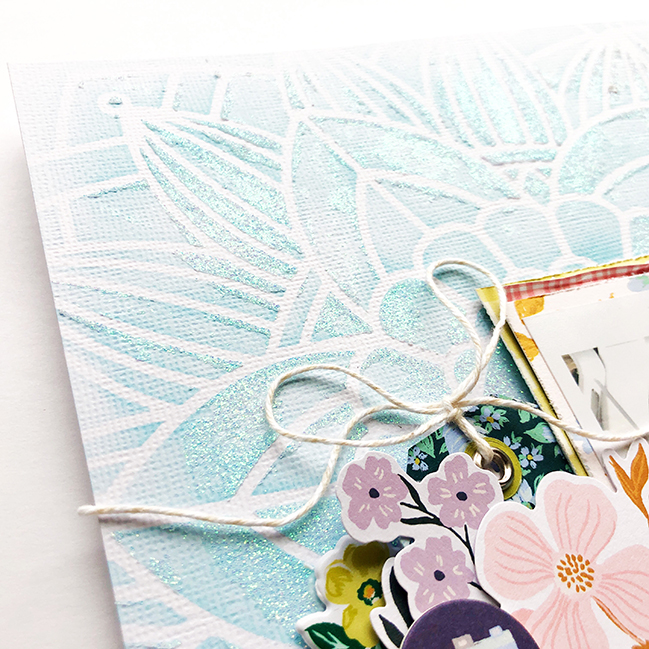
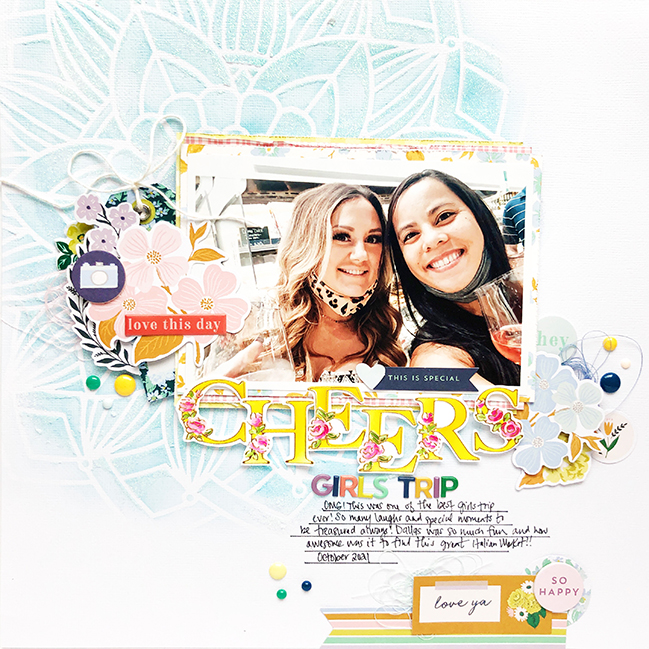
I absolutely love adding mixed media to my scrapbook layouts and one of my favorite tools are stencils! There are several different ways to use a stencil and for this page, I did some ink blending with it. To start, I pulled out a piece of textured white cardstock and a large mandala stencil from my stash. I put the stencil on the cardstock and kept it still by adding magnets to it, since my glass mat is magnetic. You can use washi tape, painters tape, or even pixie spray to keep your stencil from moving around the page too much. I chose a few Pinkfresh Studio ink cubes in blue shades and with light circular motions, began ink blending all around the stencil. I love adding subtle mixed media backgrounds to my pages and ink blending has been one of my favorite go to techniques! To add some sparkle and texture, I pulled out my Nuvo Glimmer Paste and pushed it through the stencil in a few random spots.

Scrapbooking using Stencils with Brianna Lepper @ shimelle.com

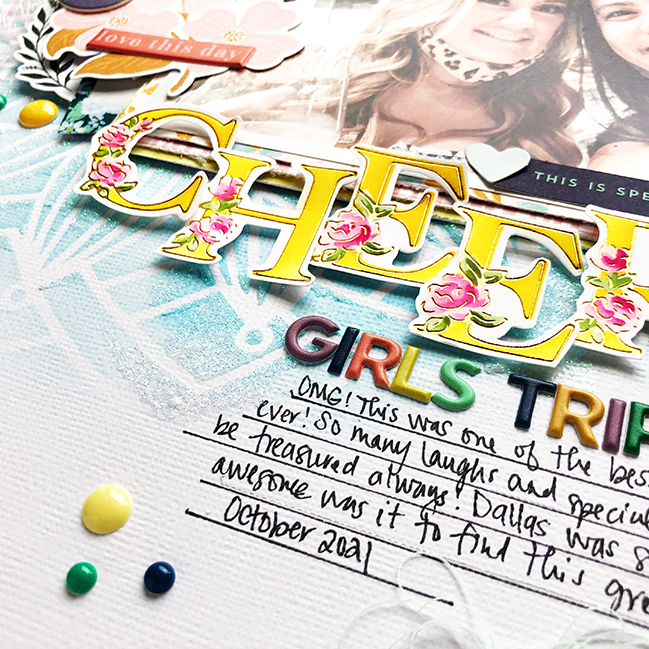
This photo is of me and my best friend from a girls weekend trip to Dallas. We had stumbled across this super cute Italian market that had wine tasting, gelato, a bakery and a restaurant all inside of it. It was one of the best weekends I had in a long time and we made so many great memories! I wanted to incorporate more stenciling on my page, so I created my title using the Pinkfresh Inna Alpha layered stencils and hot foil plates to spell out the word “Cheers”. The layered stencils are so fun to use and the gold foil outline really made the letters pop!

Scrapbooking using Stencils with Brianna Lepper @ shimelle.com

I used The Best Day collection by Pinkfresh Studio and embellished the rest of my layout using the ephemera, puffy stickers, 6×6 paper pad and enamel dots. I didn’t want to embellish too heavily since the mandala background was already a big element on my layout. I love how this page turned out and I hope you like it too! If you’ve been wanting to add mixed media to a project but wanted to start out with something simple, I would definitely recommend doing some ink blending with stencils! It’s super simple and when you’re finished, you are left with a gorgeous background!

Brianna Lepper has been scrapbooking for over fifteen years. Brianna’s military family and are currently stationed in Northwest Louisiana. She has two boys, Noah and Elijah, and three dogs, two of which are Corgis. They are the stars of her scrapbook pages. When not scrapbooking, Brianna can be found reading, cooking or doing jigsaw puzzles. You can find Brianna on Instagram, Facebook, Youtube, and Pinterest.

Colours and Dimensions with Ronelia Devilliers

Colours and Dimensions with Ronelia Devilliers @ shimelle.com
Happy Friday! Please welcome the fabulously colourful Ronelia, here to share a colourful project! As usual, supplies are listed with affiliate links.

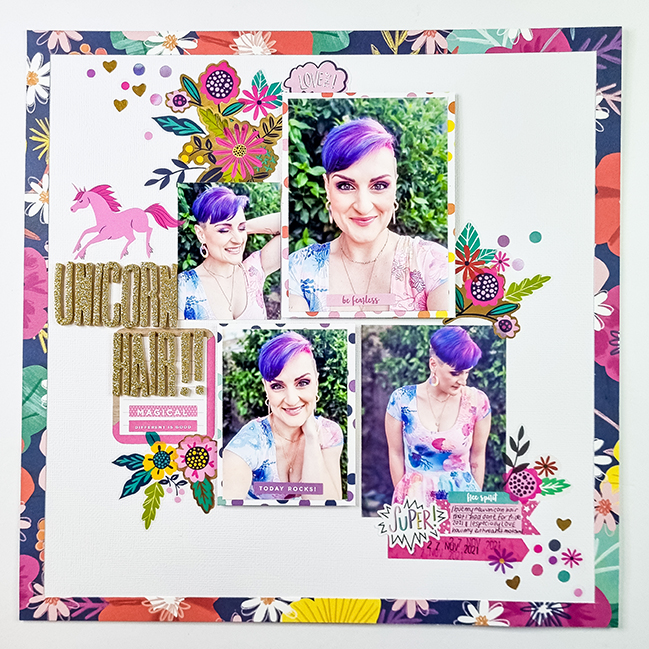
Hello scrappy friends! Today I’m creating this 12×12 layouting using beautiful products from Shimelle. I love colour, it’s one of the main reasons why I craft, I love playing with colour and tones and rainbows. My original plan for this layout was to follow my favourite colour scheme being pink, blue and purple (largely dictated by my colourful hair of course) but as you can see it turned into more of a rainbow layout, which is also a favourite colour scheme of mine.
Colours and Dimensions with Ronela Devilliers @ shimelle.com

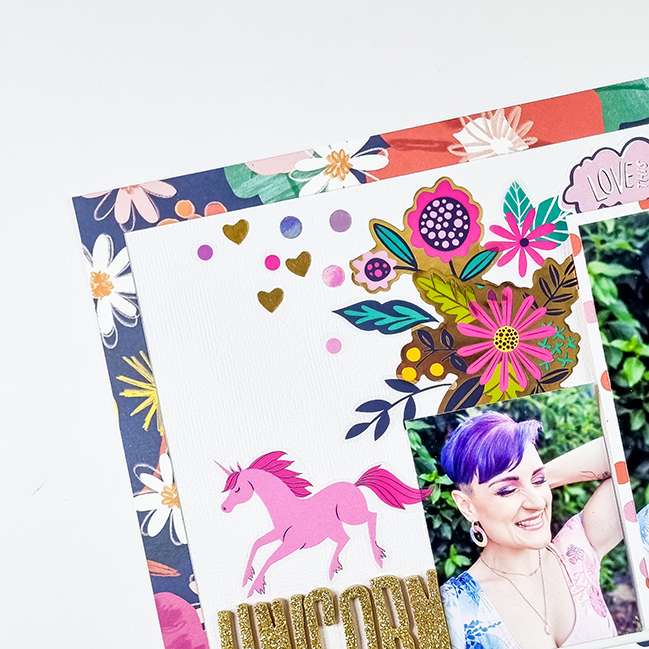
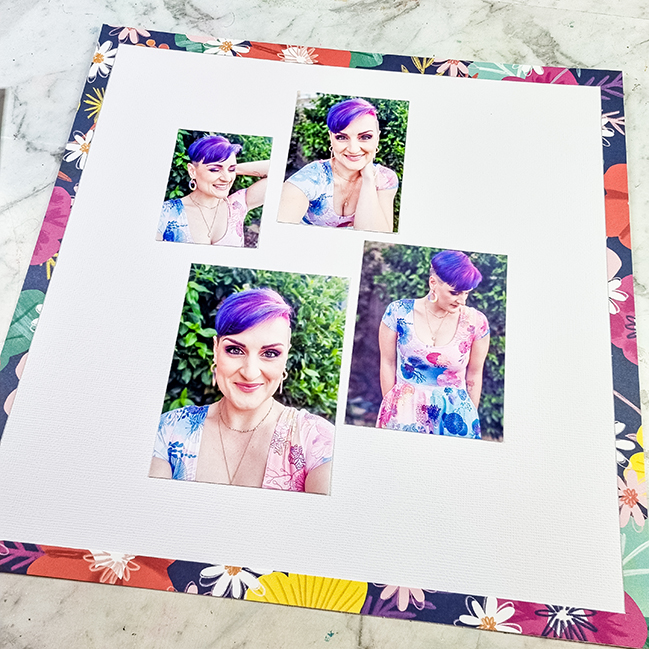
I started with adding a border to the layout using that lovely floral paper. I then laid out my photos in lopsided grid pattern and chose two of my favourite photos to mat on another beautiful Shimelle paper.

Colours and Dimensions with Ronela Devilliers @ shimelle.com

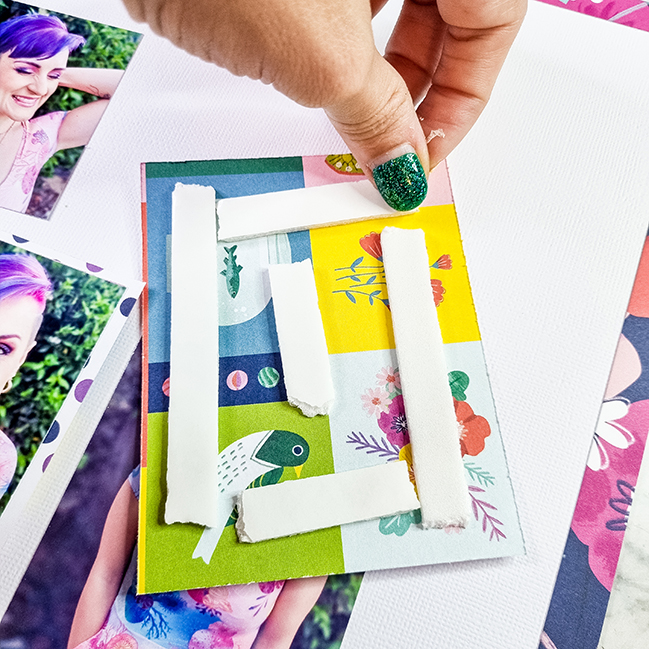
I added some dimension by propping those same two photos up on some foam tape.

Colours and Dimensions with Ronela Develiers @ shimelle.com

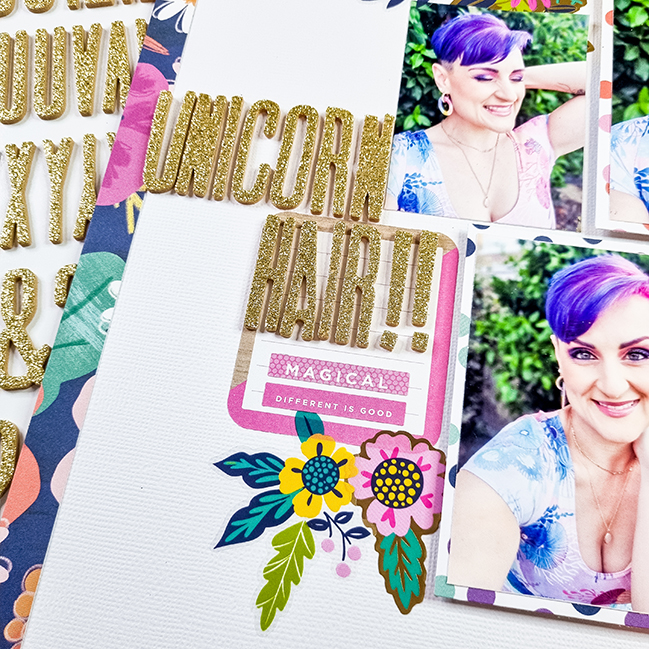
My original plan was to create a journaling spot on the left of my photo cluster but I decided that my title should go there instead. Those gold glitter thickers were so pretty and I love how tall and skinny they are, they allowed me to have a longer title in a relatively small space.

Then for the fun part… embellishing! I used Shimelle’s sticker book and I wanted it to look like flowers were exploding from underneath my photos! If you know me then you know that my style is not exactly minimalist. I love to add ALL of the embellishments.

Colours and Dimensions with Ronela Develiers @ shimelle.com

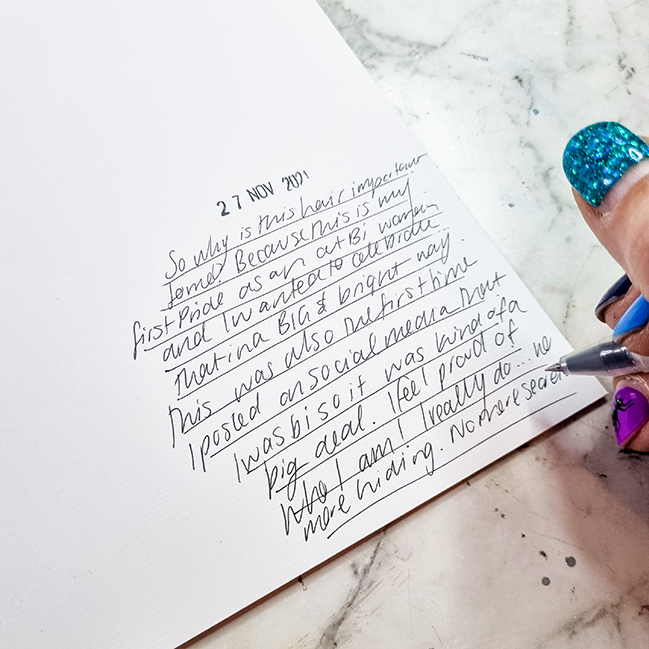
The story is a really important part of any layout for me. If I don’t have enough space to tell the entire story, then I usually just flip the layout over and add more detailed journaling on the back (like I did on this layout).

Colours and Dimensionswith Ronela Develiers @ shimelle.com

What I love about this grid style layout with a colourful border is that it can be translated into any size, from 6×8 to 9×12. You just need to adjust the size of your photos and maybe choose smaller (or fewer) embellishments.
I had such a blast putting this one together and I hope you enjoy the explosion of colour.

Ronelia has been a storyteller and crafter for almost 4 years since the birth of her daughter in 2018, but has been a creative person her entire life. She still has her high school scrapbook in storage… somewhere. She crafts because she believes that telling your story is so important and she loves the treasured memories she has documented over the years. In her non-crafty time Ronelia works in artisan market organisation, supporting creative small business owners in selling their hand designed and handmade goods. You can follow her creative journey on Instagram.

Scrapping & Making your own kit with Lauren Hender

Scrapping & Making your own kit with Lauren Hender @ shimelle.com

Hello hello friends! Please welcome today’s guest artist, Lauren!

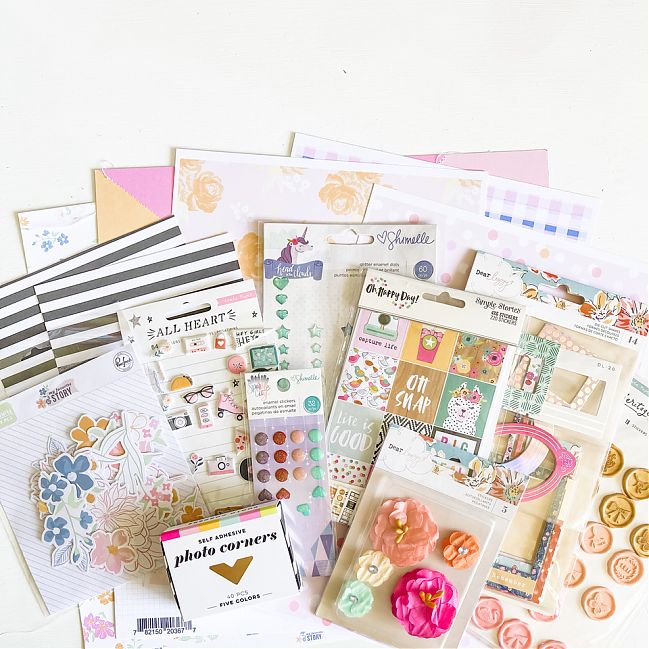
We all have them, they are all over our crafty spaces and tucked into our crafty totes. Yes, you know what I am talking about, those much loved and most treasured favourite scrappy purchases that you just can’t bring yourself to use. As a 20yr + scrapper I know this situation well. Reflecting on this I thought it is time to bring out those treasured items and start enjoy using them to document some meaningful moments. One way of doing this is by making your own kits.

Scrapping & Making your own kit with Lauren Hender @ shimelle.com

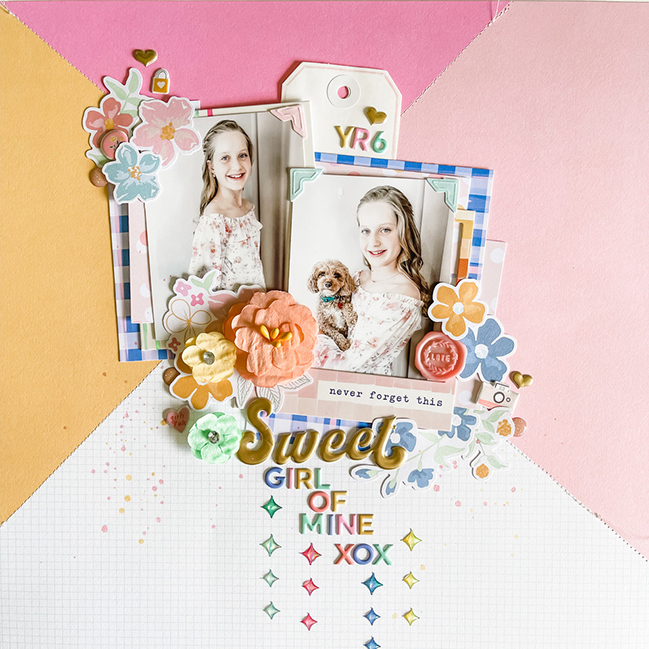
Often those treasured items are just one or two things in a collection so taking sometime to go through your stash and making your own kit is a great way of including those much loved items and having them ready on hand for the right photo to come along. Don’t be frightened to mix collections or manufacturers as long as they all coordinate in colour and/or theme you will be on the right track. The kit I used to create this layout had beautiful products from Shimelle, Dear Lizzy, Heidi Swapp, Simple Stories, Crate Paper and Pink Fresh Studio. All these different collections and manufactures have different styles but when I put them all together it created a beautiful kit.

Scrapping & Making your own kit with Lauren Hender @ shimelle.com

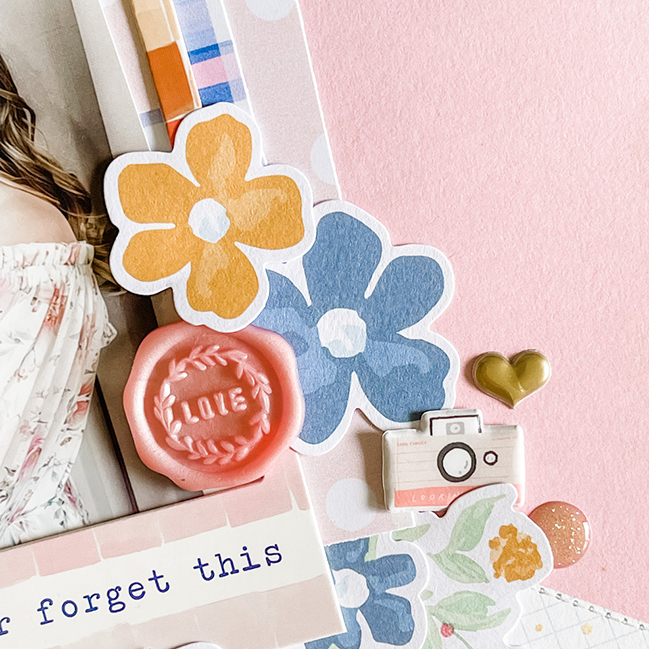
To create this layout I used some fundamental techniques which include using a photo where the subject, in this case my beautiful daughter and her puppy, is looking directly into the camera, bordering my photos, creating cluster groups with flowers and embellishments and having a title that stands out. These few basic layout rules along with a hand crafted kit with all your favourite scrapping supplies will ensure that you create a beautiful layout that you will treasure.

Scrapping & Making your own kit with Lauren Hender @ shimelle.com

Having been scrapbooking so long my motivations for why I create have changed overtime. Early on my motives were about documenting my life and then my children’s lives, but now as a middle aged (yes, I’m 43 this year and therefore I feel I can officially call myself middle aged lol) woman, who is busy working full time and raising a family, scrapbooking as evolved into a therapeutic retreat for me. The joy is now in the journey from taking the photo, to selecting the supplies or in this case creating a kit, to making the layout and admiring the creation. It gives me a little time to switch off from this crazy busy world and recharge a little. I feel blessed that I have a hobby that is able to bring me so much joy while at the same time allowing me to have some much needed time out. I hope this layout inspires you to dig into your supplies and put together some kits using all those favourite goodies you are hiding.

Lauren Hender lives on the Mid North Coast of New South Wales, Australia. She is mother to three beautiful children who have been the subject of most of her twenty plus years of scrapbooking. Lauren loves scrapbooking because it provides a little time out in this busy world. She also runs a local scrapbooking group supporting creative women who get together to nurture and share with each other. Follow more of Lauren’s work on her Instagram account.

Applying Distress Oxides with Petra De Vroege

Applying Distress Oxides with Petra De Vroege @ shimelle.com

Hello hello and please welcome Petra De Vroege, here to share a lovely idea for the sprays we collect. Do you have an air blower tool or could you try something similar with a straw? I’m curious what ideas you’ll have from Petra’s project today! A reminder that supplies are affiliate linked to make all this possible. Thanks! -Shimelle

Hi creative friends! I’m so thrilled to be joining the 2022 Shimelle project to inspire other crafters. The layout I made was a growing project. Sometimes I start with an idea that suddenly turns out completely different, this time that was the case. I wanted to create half a circle, but it turned out “slightly” different ;) and that is also what I love about our hobby, get those creative juices flowing! Crafting gives me a way to get rid of stress and soothes me in many ways. Every project is different and every time it is a little adventure on its own.

Applying Distress Oxides with Petra De Vroege @ shimelle.com

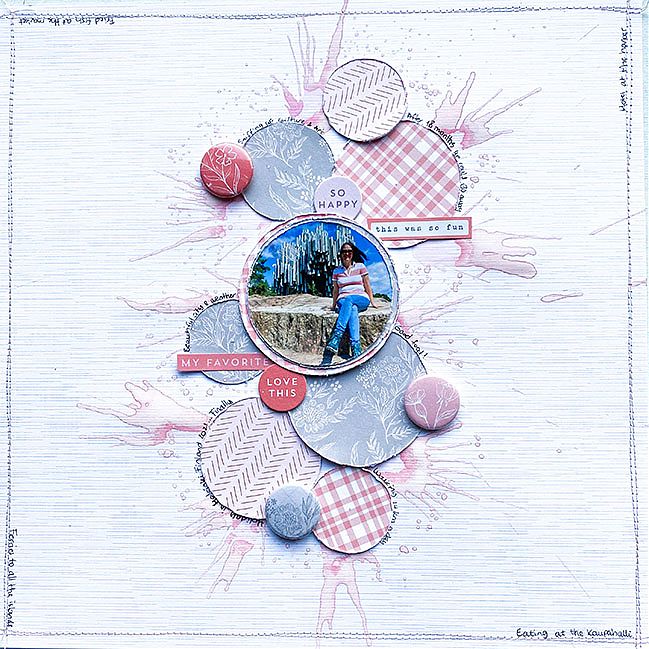
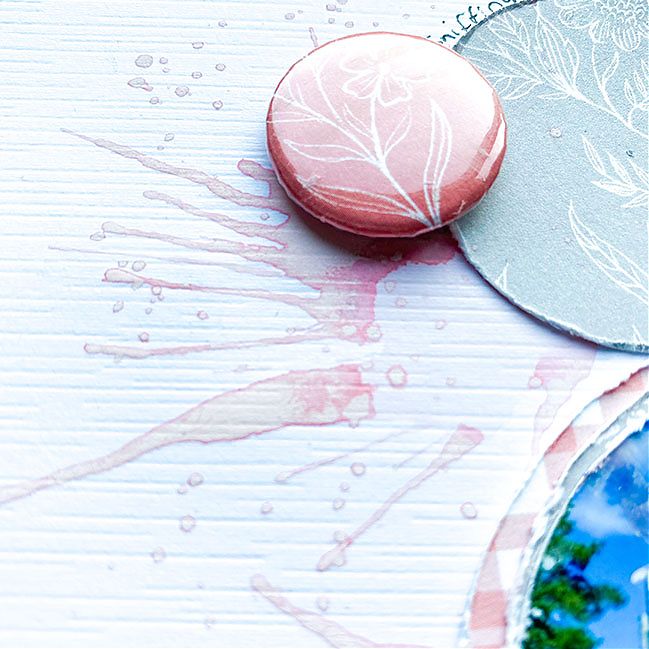
In almost all of my projects I use Distress Oxide inks. I love to create backgrounds with them and give my work a touch of mixed media. This time I wanted to try something different and used the Oxide spray in Spun Sugar. I made little puddles of ink on my page and used my Tim Holtz Air Blower to get that splattered look. I love how that turned out! It gives such a cool effect and you see the different shades of pink that are in that spray. I’ll try this technique again for sure!

Applying Distress Oxides with Petra De Vroege @ shimelle.com

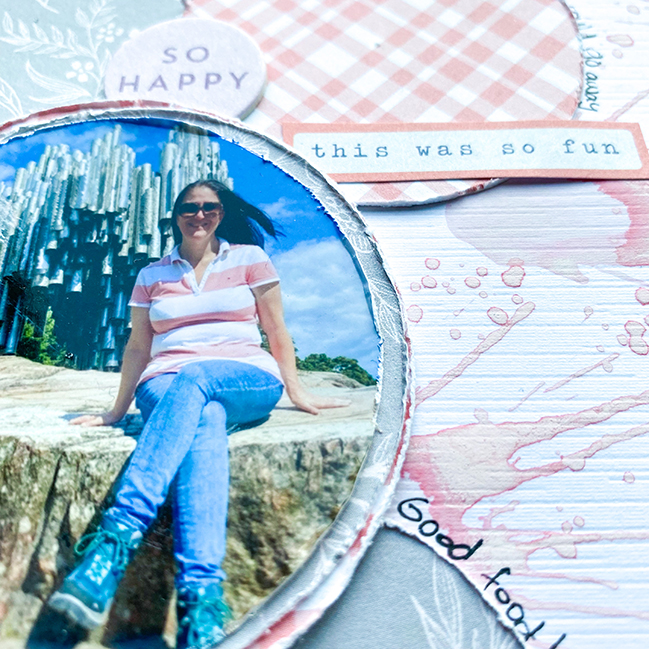
Since I’m the only girl in our happy little family, I rarely use pink, and certainly not a lot. This photo of me on our very first “after COVID” vacation was the perfect excuse to use pink! I used The Best Day collection by Pinkfresh Studio, such pretty and soft papers! The flair buttons are made with the WRMK Button Press, and it was so cool to be able to create matching flair with the papers from the same collection!

Applying Distress Oxides with Petra De Vroege @ shimelle.com

So, to finish it off I wanted to add some black to make it stand out more, but… I also wanted to incorporate some journalling. I never do journalling on pages, but since this was a special vacation for us, I wanted to do it for the first time. I decided to follow the “lines” of the layout, so I journalled along the circles and along the stitching around the border. Not a complete story, but small phrases about what we did, ate and saw.

I hope I was able to inspire you in some way, perhaps to get creative with your inks, or different use of different colors, I would love to see your work! Get those creative juices flowing!

Petra de Vroege is a mother, wife, vocal coach and scrapbooker from the Netherlands. Scrapping for almost 20 years, she loves the creative freedom and amazing community. Crafting has given her so many beautiful friendships and she loves it most when we all can inspire each other. You can follow Petra’s work on her Instagram feed.

Off-Cut Scrapbooking with Jen Schow

Off-Cut Scrapbooking with Jen Schow @ shimelle.com

Today I am delighted to welcome a very special crafty friend to share a project with you: it’s Crafty Jen Schow! You might already know that I love her stamp designs but you might not know that we got to spend some excellent time together at ye old craft trade show in the before times and friends, I MISS HER. So this is my next best thing: getting to see her scrapbook. Enjoy. -Shimelle

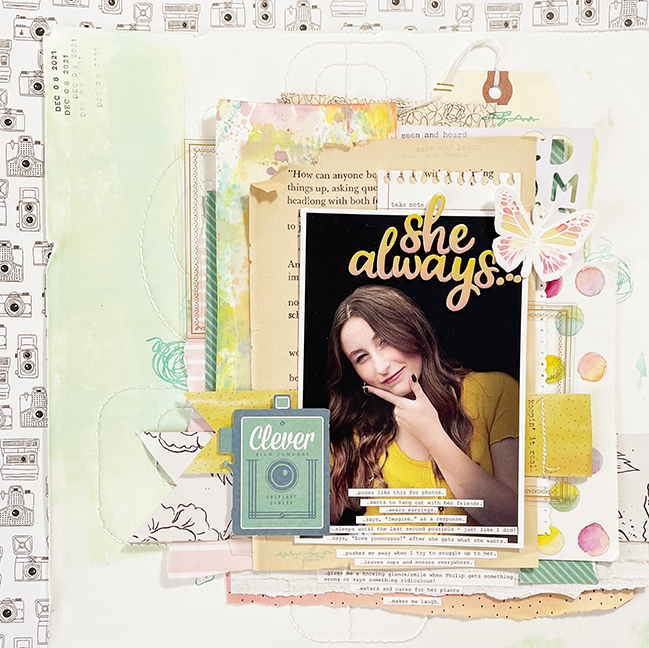
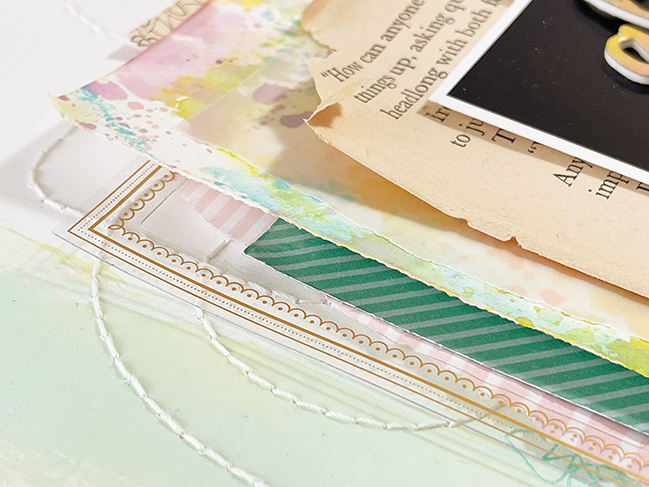
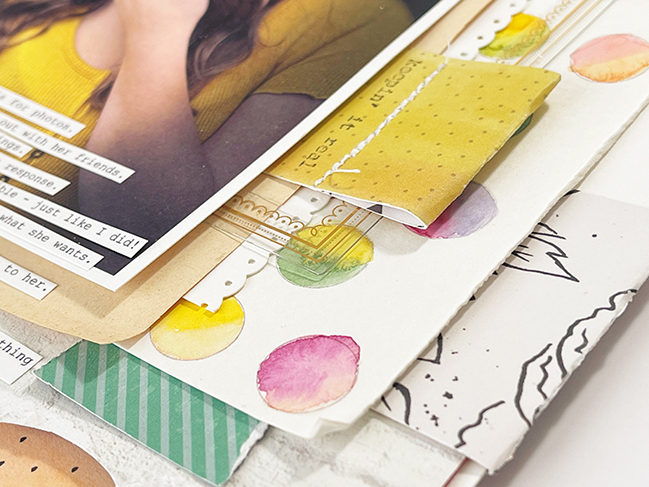
I love layers and textures to create interest on my layouts. One of my favorite things to do is create with leftovers and off-cuts from previous projects. I love the sort of “organic” look of torn edges and punched papers sticking out of a bunch of layers.

Off-Cut Scrapbooking with Jen Schow @ shimelle.com

For this layout, I went through my stash of scraps and my bin where I keep interesting off-cuts, random inked or painted pieces, and embellishments that didn’t find homes on other pages. I layered them up behind my photo letting all of the interesting bits show. In order to keep the chaos contained, I like to add tight layers and keep them right around the photo. This allows room for your eye to rest on the outer edges. The other thing I like to do is make sure to add in lots of neutrals so the colors and patterns don’t become super overwhelming – book pages are a favorite! The last thing I really pay attention to when adding layers is to make sure none of the corners or edges line up – something that I’ve learned from Shimelle!

!Off-Cut Scrapbooking with Jen Schow @ shimelle.com

For texture, I’ve added stitching, roughed and curled up the edges of the papers, used embellishments with different finishes, and added in stamping, staples, and embossing. Simple things really do make a big difference, so if you feel like your next layout is missing something I encourage you to try some of these techniques!

Off-Cut Scrapbooking with Jen Schow @ shimelle.com

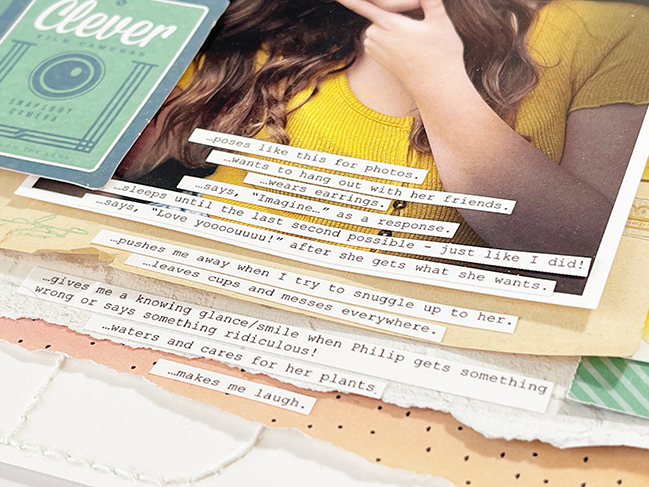
For me, the most important part of any layout is the story. I had this funny photo of my daughter and when I saw it I thought, “She always does this pose!” It was the perfect jumping off point for a list of the things she’s always doing right now – teenagers change so quickly!

I hope you’ve gathered some ideas for adding layers and texture to your next layout or maybe documenting the things that someone close to you is always doing!

Jen Schow loves documenting her most important everyday stories using words, photos, and pretty papers. She has been scrapbooking since age 12 and has worked in the industry in some capacity for about 12 years. She is most active on Instagram these days, but you can find her popular Use It or Lose It series on Youtube.

Colour Techniques with Dana Tatar

Colour Techniques with Dana Tatar @ shimelle.com

Happy March! Please welcome Dana Tatar to the blog today, and she has made a scrapbook page with three of my collections, which has really made me smile. I hope you find it inspiring too! Remember, supplies have affiliate links and shopping through those makes the guest artist project possible, so thank you for your support! -Shimelle

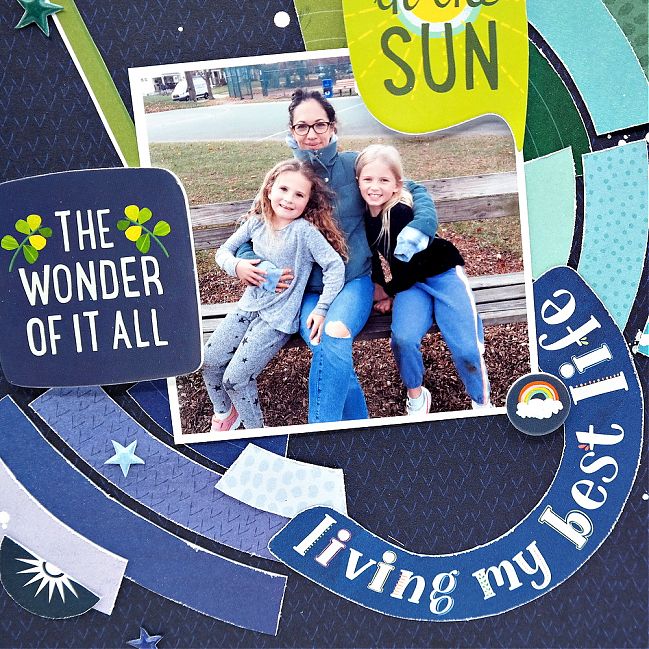
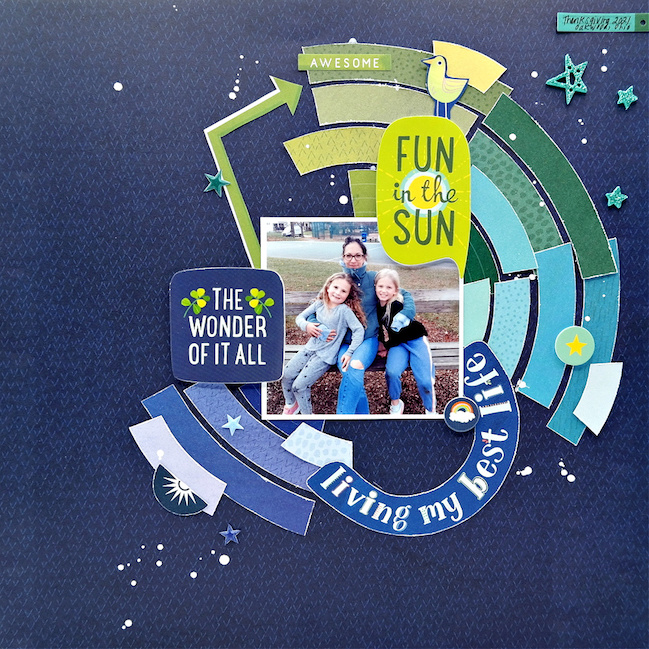
I’ve created a family themed scrapbook layout using a fun mix of Shimelle products and the color wheel as my guide. My sister and her four kids came to visit me over the Thanksgiving holiday, and we had an amazing time together. I took the photo of my sister with her two daughters at a local neighborhood park where we spent time enjoying the full palette of falling leaves, something that they don’t get to see living in central Texas.

Colour Techniques with Dana Tatar @ shimelle.com

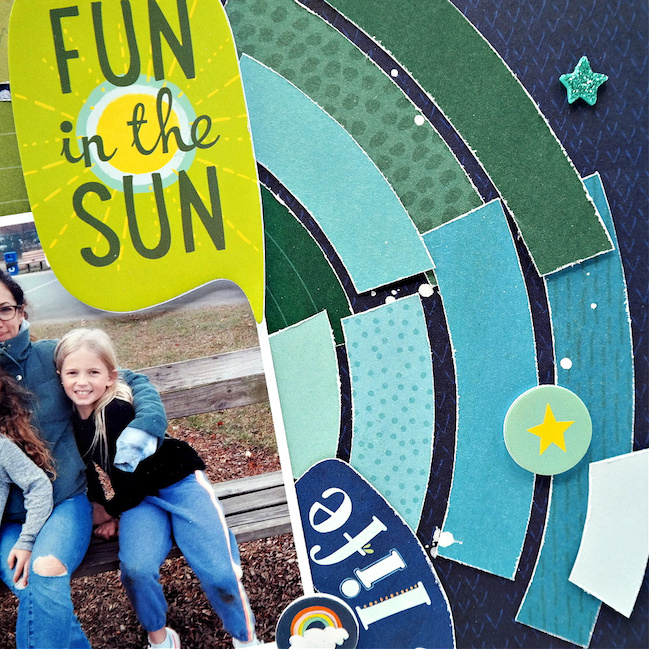
I always gravitate to specialty papers. The 12×12 Die-Cut Cardstock from the Field Trip Collection, with the rainbow of colorful punch-out segments, was the starting point for my page design. I popped out the cool tone die-cuts that matched the colors in my photo. After trimming away the white border from each die-cut and distressing the edges with scissors, I arranged the pieces of patterned paper by color onto the base patterned paper.

Colour Techniques with Dana Tatar @ shimelle.com

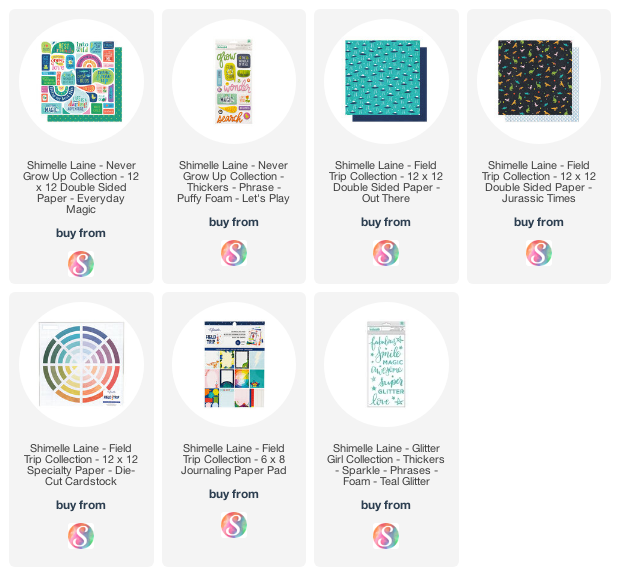
Once I had the bands of color secured to the page, it was time to embellish! Shimelle’s paper collections are full of color and fun designs that have a lot of texture and dimension, so I had plenty to choose from. I applied puffy and foam stickers, and small images that I cut from patterned papers, into the matching-colored sections on the page. I mixed elements from two collections to create this layout; Never Grow Up and Field Trip.

Colour Techniques with Dana Tatar @ shimelle.com

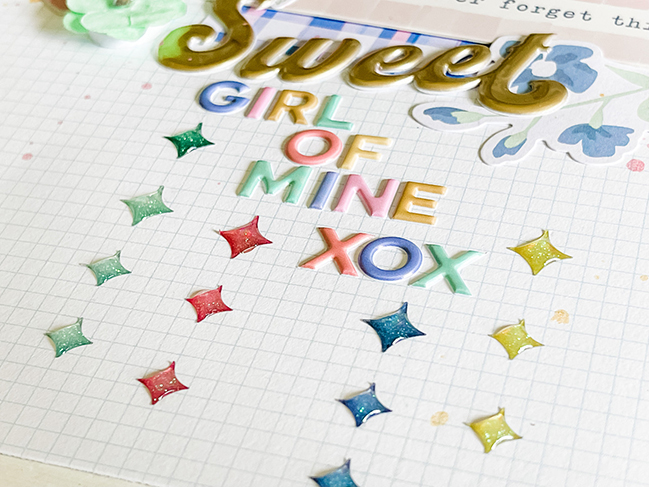
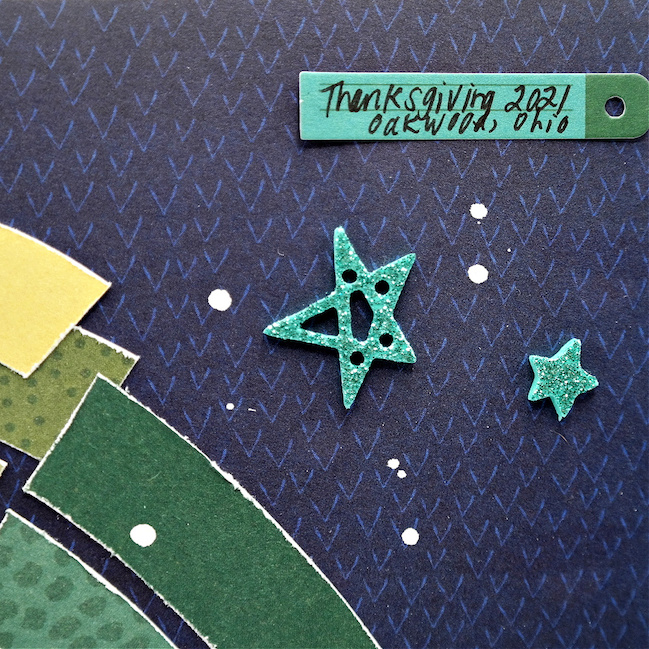
I applied teal glitter star stickers (from Shimelle’s Glitter Girl collection!) for a touch of sparkle and white chalk ink splatters for contrast before adding a small journaling sticker to finish the page.


Dana Tatar currently lives in Ohio with her husband and two teenage children. She started paper crafting about fifteen years ago and has expanded from scrapbooking since then, now creating a little of everything including cards, tags, mixed media pieces, and small gift and home décor items. Dana has an eclectic style in terms of what and how she designs. She frequently finds inspiration in music, poetry, and pop culture. When not creating art, Dana enjoys baking, reading, listening to music, and spending time outside with her family and basset hound Peach. You can find more of her work on her blog,They Call Me Tatar Salad, and her Instagram feed.

Mixing Scrapbooking Collections with Aline Martins

Mixing Scrapbooking Collections with Aline Martins @ shimelle.com

I love crafting and scrapbooking because it’s an activity that relaxes and reconnects me. Keeping memories through scrapbooking is magical and fun. What I like most is being able to mix different types of art and techniques, making that memory even more interactive and alive for my family and friends to remember the moments we spent together.

Mixing Scrapbooking Collections with Aline Martins @ shimelle.com

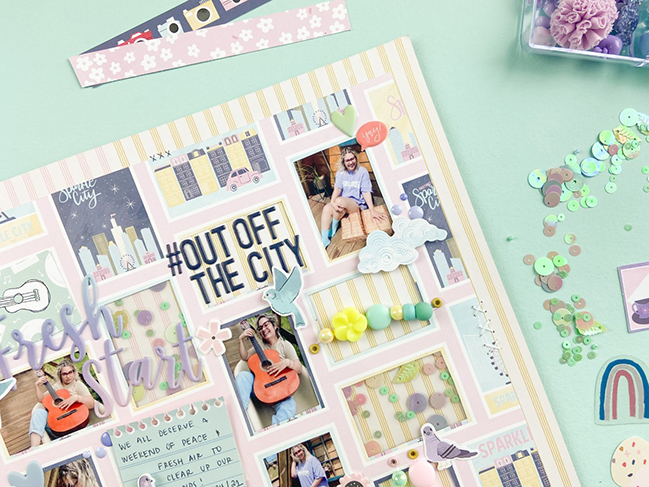
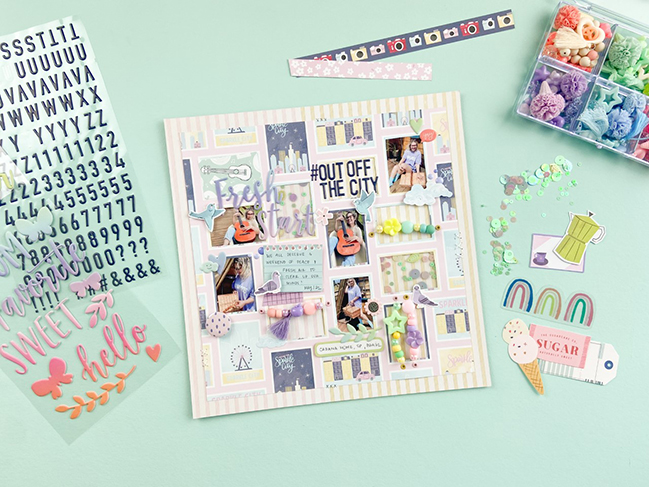
For this layout, I decided to challenge myself to do something I rarely do: mix products from different manufacturers. I selected a few collections that I thought had a similar color palette and that somehow would have elements which could support the photographed moment. I started with Shimelle’s Sparkle City and Paige Evans’ Bloom Street collections, then added a few other elements as well.

Mixing Scrapbooking Collections with Aline Martins @ shimelle.com

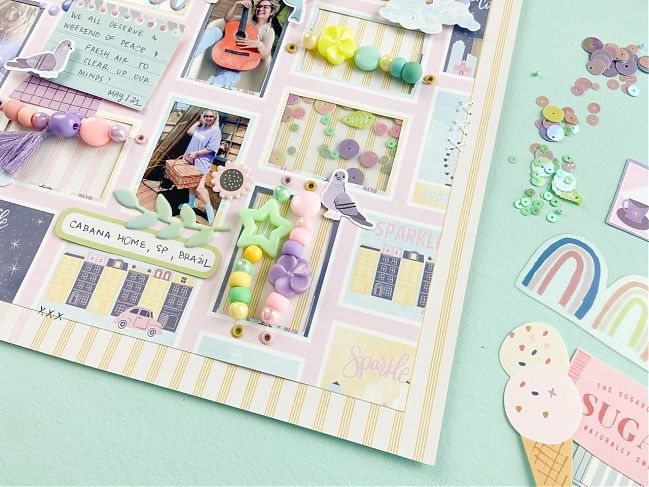
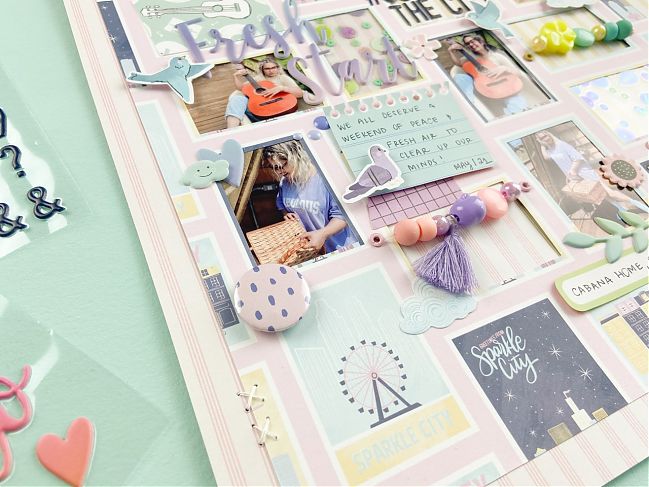
I like to choose my supplies and techniques first and let that guide my plan. I wanted to use sequins with Polaseal, which is very trendy here in Brazil. It’s a way of using laminating supplies to create windows of sparkle. I chose this patterned paper because the frames of the design let me create three kinds of windows: some filled with photographs, some filled with embellishment, and others left intact with the original travel-inspired design.

Mixing Scrapbooking Collections with Aline Martins @ shimelle.com

The photos I chose were from the last trip I took with my husband to a beautiful and peaceful place, in the middle of nature, so that we could rest and get out of our routine a little bit. This place is in the countryside of São Paulo, Brazil; a few hours by car from the big city.

If you enjoyed how this layout came up, my suggestion is that you find a patterned paper with frames or shapes printed on it, then carefully cut out the inside of some of the frames. Then you can fill each spot with photos, Polaseal, beads, journaling, and whatever else you find interesting… I love die cuts and mini puffy stickers too! See what special embellishments you can find that are frame-worthy to you!

Aline Martins, also known as A Scrapper, is from from Brazil, and scrapbooks full time as the owner of a scrapbooking store, teacher and designer. She holds a degree in Tourism and Pedagogy, and I found herself making scrapbooks when she was a kindergarten teacher. Aline loves the freedom of expression and the countless possibilities found in scrapbooking and art. Find more of Aline’s work on her Instagram feed.