pretty paper. true stories. {and scrapbooking classes with cupcakes.}

lovely to meet you Twitter Facebook Pinterest YouTube

Take a Scrapbooking Class

online scrapbooking classes

Shop Shimelle Products

scrapbook.com simon says stamp shimelle scrapbooking products @ amazon.com shimelle scrapbooking products @ amazon.co.uk

Reading Material

travel

tutorials Category

Making a Minibook with Alena Grinchuk
Scrapbooking a mini album with Alena Grinchuk @ shimelle.com

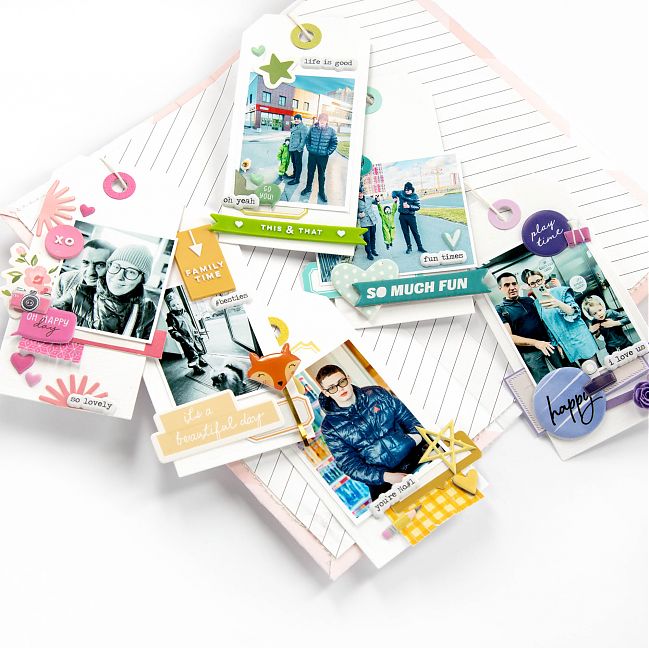
One November day we were walking with the whole family, just like that, for no reason. We had fun, drank coffee, laughed. I took a lot of photos and decided that I must definitely keep the memories of this day!
The photos turned out to be different – dark and light, so I decided to make a mini album where the most favorite shots were included.
Organising craft supplies by colour with Alena Grinchuk @ shimelle.com

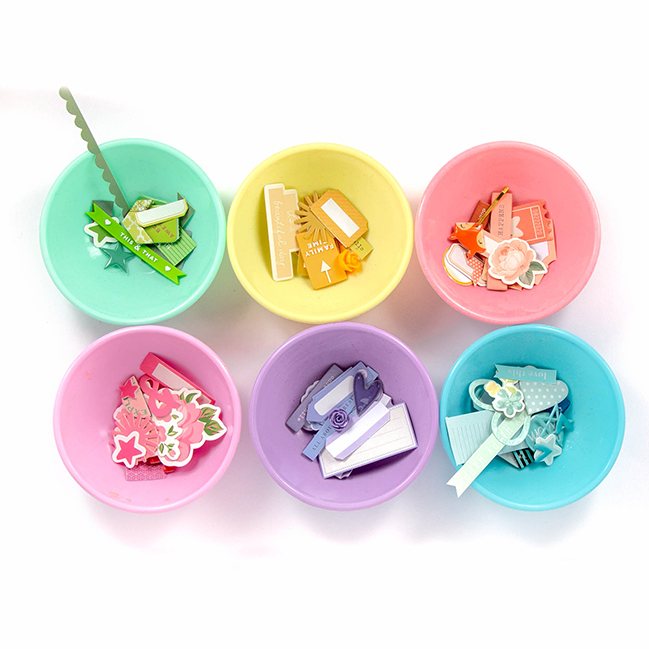
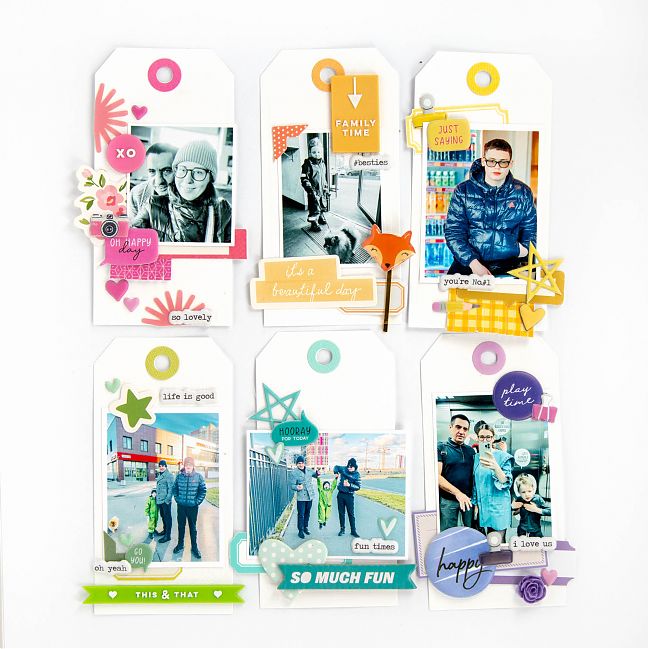
To begin with, I sorted by color the remnants of embellishments from different collections. Then I prepared the basics of white cardstock in the form of tags
Scrapbooking a mini album with Alena Grinchuk @ shimelle.com

Each of the tags was embellished in one color surrounding one photo.
Journaling tags - Scrapbooking with Alena Grinchuk @ shimelle.com

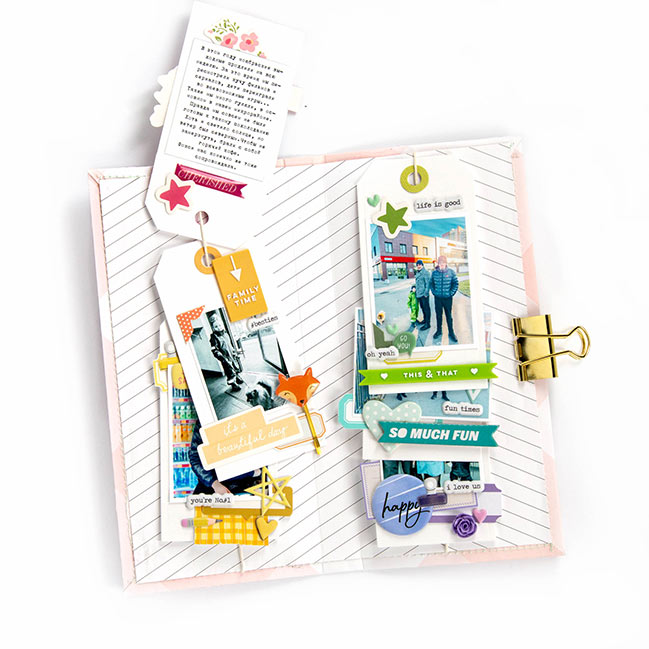
The back of each tag includes the journaling along with a bit more embellishment in the matching color. When each tag was complete, I added it to a string so it’s easy to see both sides of each tag.
Scrapbooking a mini album with Alena Grinchuk @ shimelle.com

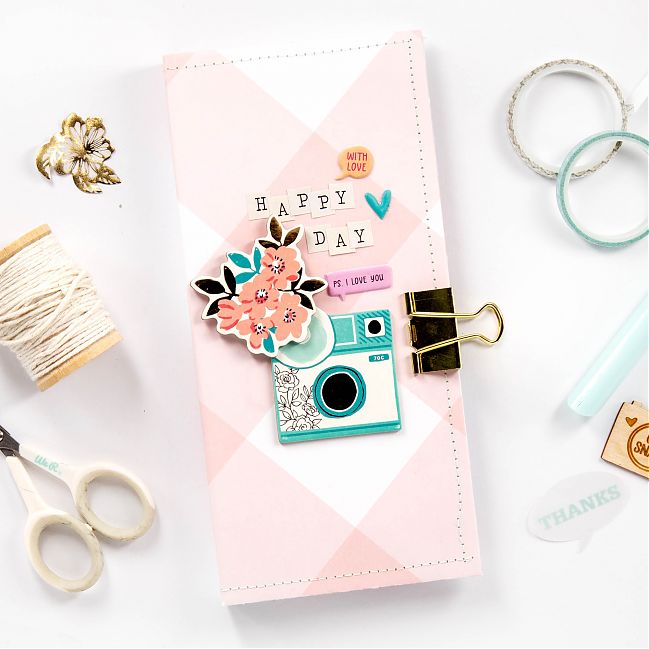
Next, the cover was made using thick cardboard and patterned paper, plus a few embellishments and letter stickers. It’s all held closed with a bulldog clip. I really like the result! I’d love to see what you enjoy making with tags when you’re scrapping your stories!

Alena Grinchuk lives in the beautiful city of Saint Petersburg, Russia, with her husband and two sons. She loves photography, scrapbooking, shopping, and travel. When not crafting, you can find Alena cooking and baking and cuddling up on the sofa listening to a good audiobook or watching Netflix. When it comes to scrapbooking, traditional layouts are her favorite but she also loves working in Life Crafted albums, creating mini-albums, and documenting in a Project Life style. Find more from Alena on her Instagram feed.

Scrapbooking with Vellum Pockets with Danielle Jensen

Scrapbooking with Vellum Pockets with Danielle Jensen @ shimelle.com

Happy Thursday! Today’s guest artist has made an adorable project that’s something a little different and just right for a gift, a mini book, or a journaling addition to a traditional page. Get your vellum at the ready and have a look at this project from Nelly & Clem’s Danielle Jensen. -Shimelle

(Supplies linked with affiliate links; thanks for supporting this project!)
Scrapbooking with Vellum Pockets with Danielle Jensen @ shimelle.com

Colour is very important to me. I’ve always been obsessed with mixing and matching my favourite shades to get cheerful results. There’s something very special about adding colour pops to a project that is mostly white too, it just really helps those bright shades to stand out if you have a neutral background, like white vellum.

Scrapbooking with Vellum Pockets with Danielle Jensen @ shimelle.com

Scrapbooking with Vellum Pockets with Danielle Jensen @ shimelle.com

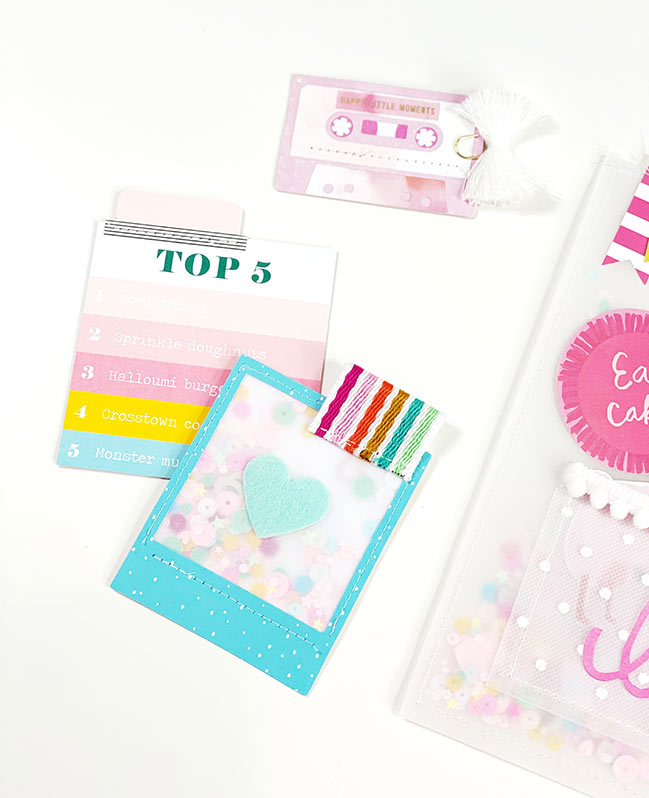
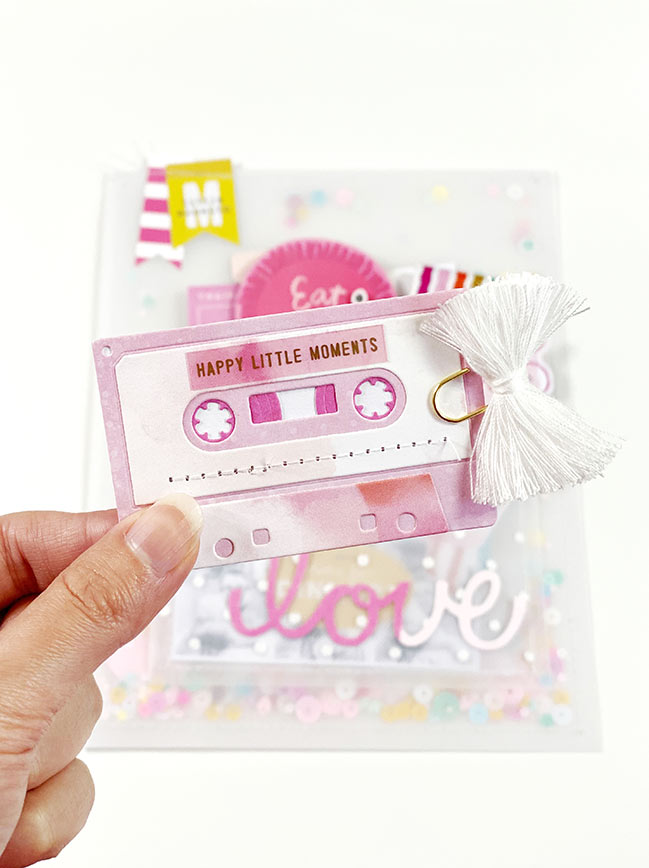
I’ve recently purchased a sewing machine, so every project I touch at the moment has some sort of stitching involved – this one is no different. I couldn’t resist creating a vellum pouch using a border of white thread. I then filled that pouch with a bunch of sequins in my favourite colours – pink, yellow, blue and turquoise to create a giant transparent shaker background.

Scrapbooking with Vellum Pockets with Danielle Jensen @ shimelle.com

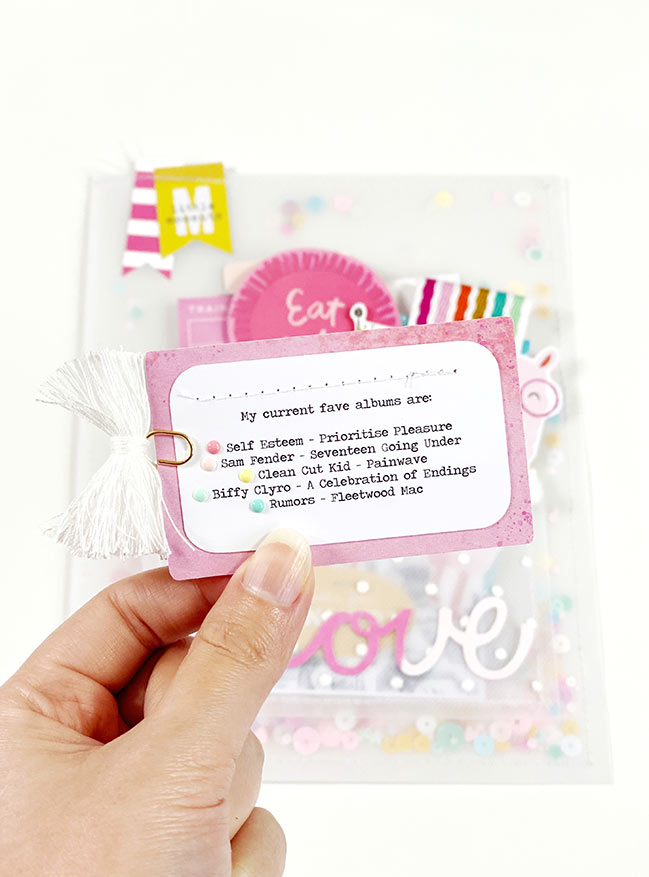
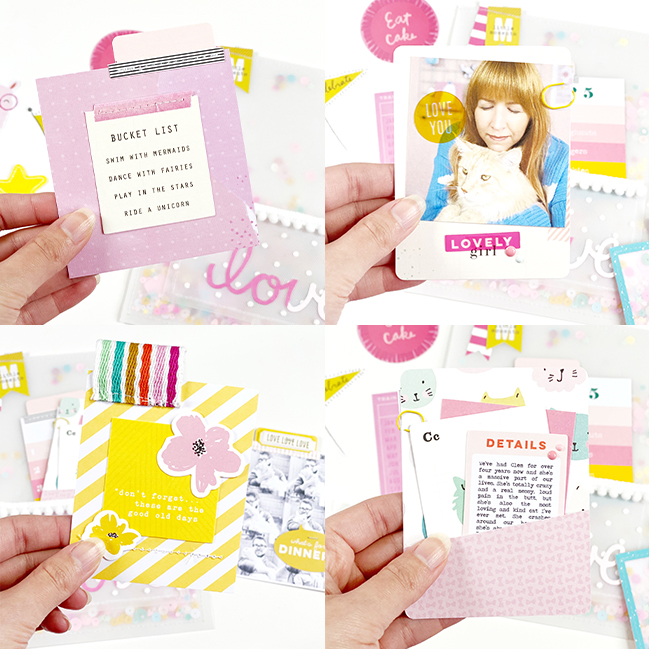
I went through all of the die cuts I own (stored by colour, of course) and dug out all the yummy bits in my top colour combo. I did the same thing with my papers and used the dies to embellish little lists, photos, and a shaker pocket. I found some polka dot tulle and created another vellum pocket on top of my pouch to hold all the little mini projects.

Scrapbooking Papers & Pockets with Danielle Jensen @ shimelle.com

Although this is just a super cute pocket I created to pop on my desk and make me smile, it could easily be replicated as a little happy mail gift to fill with treats and send to someone you love.

Scrapbooking Papers & Pockets with Danielle Jensen @ shimelle.com

Scrapbooking Papers & Pockets with Danielle Jensen @ shimelle.com

Scrapbooking Papers & Pockets with Danielle Jensen @ shimelle.com

Danielle, or Nelly to her friends lives in Sussex, England, with her husband Chris and their great big fluffball of a cat called Clem. Scrapbooking since Sept 2018, she’s obsessed with bright and cheery colours, candy stripe patterned papers, and enamel dots. By day she works at a law firm filing patents and designs to protect people’s Intellectual Property, and by night she sits in the tiny box room creating paper projects and designing and selling her own printables on her Etsy store. Find more of Danielle’s creations on her Instagram feed.

Using big inspiration for smaller layouts with Diane Williams

Using big inspiration for smaller layouts with Diane Williams @ shimelle.com

Today’s guest artist brings us a project that might inspire your next 12×12 page or might be something far smaller: this is actually a double page spread in a small notebook! Please welcome Diane Williams, and remember affiliate links are used at no extra cost to you and shopping through them makes this guest artist series possible. Thank you and enjoy! -Shimelle

There is something so therapeutic about cutting paper and glueing it down with your photos and stories. I love all the colours and patterns. I also love working at the slightly smaller scale of Traveller’s Notebooks. Because these notebook layouts literally fold down the middle, I just adore any of Shimelle’s half and half layouts. They are almost perfect inspiration to be scaled down and added to the pages of my notebook. I especially loved the colours of this layout by Shimelle and wanted to translate it into my own style. You can watch Shimelle’s tips for creating her 12×12 page on the Scrapbook.com blog.

Using big inspiration for smaller layouts with Diane Williams @ shimelle.com

I started with two different patterned papers from the Garden Party collection from Maggie Holmes and Crate Paper. I added the darker pink polka dot piece to the left-hand side of my spread and then the lighter and simpler blue stripe to the right-hand side. To create the anchor point to build my photo layers, I added a strip of dark teal paper, making sure to add it to one side of the fold. It’s important with these notebooks to keep the fold free of paper and embellishments so the notebook continues to function properly.

The same goes for creating the layers under my photo. I made sure to add pieces of paper and die cuts without crossing the fold. If you want something to cross both sides of the spread, you can easily cut it and add one half to each side. I tried to balance out the colours by adding little pops of chartrese as well as the pink and blue.

Using big inspiration for smaller layouts with Diane Williams @ shimelle.com

My story and photo is all about my weekend coffee dates with my husband, so it made total sense to use a few little puffy sticker cups around my layers. As well as a few tiny little puffy stickers, I added a gold scripted word sticker as my title. I am terrible at making up titles for my pages so this is a super easy way to add a fun title and finish up my page! This fun and colourful layout took less than 20-minutes to put together and I know I’ll be able to use Shimelle’s layout as inspiration for many, many more pages in my Traveller’s Notebooks!

Diane is a paper-loving, coffee-drinking, designer from New Zealand. She lives with her husband and two pets. Scrapbooking since age fourteen, nine years ago Diane switched to Project Life and Traveller’s Notebooks and they remain her memory keeping style. Find more of Diane’s work on her Youtube Channel, Patreon, blog or Instagram feed.

Combining Techniques in Scrapbooking with Claire Hawkins

Combining Techniques in Scrapbooking with Claire Hawkins

Here’s little something floral and dimensional today from our guest artist, Claire Hawkins. And a heads up that there’s a free shipping code for shopping today! You could use it for the March Best of Both Worlds kit or anything else you fancy! You can find the kit shopping list (affiliate link!) here and add code LOVESHIP22 for free US shipping or LOVE7OFF for $7 off international shipping. Both codes are good once you hit a $70 total. Okay, enough already of that stuff! Let’s get onto Claire and her project ideas! -Shimelle

Hi everyone, Claire here and I’m delighted to be participating in this exciting project with Shimelle! I’ve loved pretty paper for as long as I can remember and have always enjoyed being creative in one form or other. As I grow older, I really cherish the opportunity to scrap my favourite moments and love the escape it provides.

Combining Techniques in Scrapbooking with Claire Hawkins

Growing up near big cities, I was never an outdoorsy girl, but since moving to the countryside a few years ago, one of my favourite things to do is walk in the forest. My layout captures one of these walks and the silly photos we take along the way. Paige Evans’ Bungalow Lane collection was perfect for this project – I’m always drawn to the smaller patterns (usually found on the b sides). They provide a great splash of colour without being overpowering which gives so much flexibility when creating. The beautiful patterns and colours in this collection really remind me of my local woods.

I started with plain white cardstock and added a brushed Distress Oxide background with leaf stencilling on top.

Combining Techniques in Scrapbooking with Claire Hawkins

To that, I added two semi-circles of patterned papers, a large detail cut tag and a long banner to act as an anchor for my page. I distressed the edges and stitched around each piece to add interest and texture. Next, I rolled some paper to imitate twigs and positioned these at the bottom of my papers, almost acting as a shelf for my photo to sit on.

Combining Techniques in Scrapbooking with Claire Hawkins

Alongside my photo, I created a mini envelope using a template from Cricut to hold some extra journaling. Once all these pieces were in place, I embellished with floral clusters and leaves, to which I have added a few coordinating Nuvo Drops for texture and shine.

Combining Techniques in Scrapbooking with Claire Hawkins

As a final touch, I used large but subtle white letters for my title and added a patterned paper border with stitched edges to frame the page.

I hope you’ve enjoyed this layout. The techniques I’ve used here like the rolled paper and combining basic shapes like circles, tags, and banners are so versatile they can be applied to any layout theme or design. I hope it has inspired you to get creative!

Based in the UK, Claire fell in love with papercrafts over 15 years ago. Originally drawn to card making, once she discovered the world of scrapbooking, she never looked back. Her layouts often capture her travels, as well as everyday moments with her family. Today, she lives on the South Coast and enjoys exploring the forests and beaches on her doorstep. When not creating, she loves to travel and explore new cultures. You can see more of Claire Hawkins work on her Instagram feed.

Scrapbook stamping with Sara Scraps

Scrapbook stamping with Sara Scraps @ shimelle.com

You know by now that I love a bit of MOAR when it comes to page design, and I adore how today’s guest artist has chosen one shape and then embellished more and more with that idea! You could make a version of this with hearts for Valentine’s Day, with apples for back to school, and on and on it goes. Please welcome today’s guest artist, SaraScraps! A little reminder that supplies are affiliated linked to make this series possible. Thanks as always for your support! -Shimelle

Hello Everyone! Sara with you today! I have a fun project to share featuring my favourite crafting tool- stamping! I love to create my own stamped backgrounds so I thought today I would share some of my go to tips for creating a fun, inky background.

Scrapbook stamping with Sara Scraps @ shimelle.com

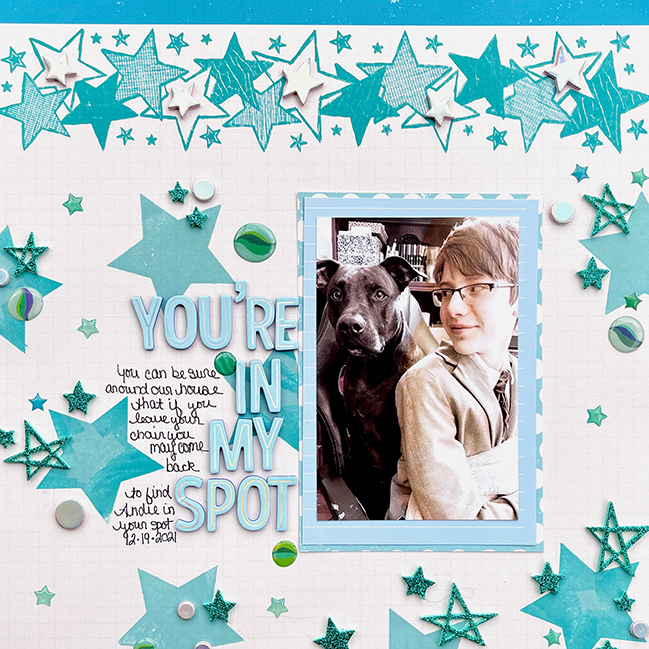
I started my background by printing (Yep, this layout is hybrid!) one of the patterns from Shimelle’s first collection’s digital kit. I matched two shades of Catherine Pooler ink to my background, pulled out two star stamps from my significant stamp collection and got to stamping.

!Scrapbook stamping with Sara Scraps @ shimelle.com

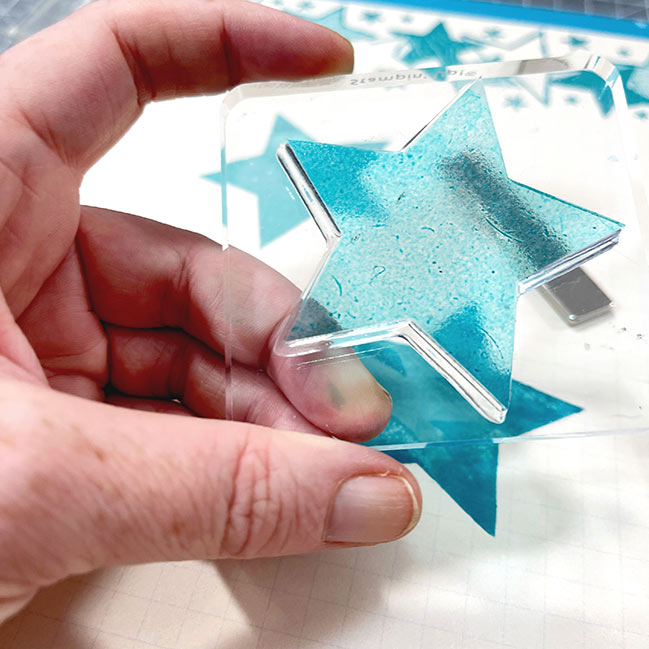
My Memory MISTI is a workhorse in my craft room so I started by stamping a star border across the top of my page. I loved the idea of creating a background that looked as though the stars were “falling” down my page. To give my solid star stamps some unique coloring, I use a very simple technique. I stamped the image with my lighter shade of ink and then took the darker shade and just swiped the stamp pad around the edges. around the edges. Stamp and done. Just a little texture on an otherwise flat stamp!

Scrapbook stamping with Sara Scraps @ shimelle.com

Journaling, title, and lots of small sparkly details, and this layout is done! I added lots of different textures using Shimelle’s foil and sparkle Thickers and glitter enamel dots. Those little additions pack a punch on my layout so I kept the colors to shades of blue so your eye isn’t overwhelmed. This is also why I kept things to a few simple shapes . I like my layouts to be interesting but not too busy.

Next time you are in your craft room, how about trying a stamping background? Pick a shape, add some texture, and have a fun time getting inky! If you give this a try, I’d love to see!

Sara is in her early 40s. Married to her best friend for over 20 years. Mother to 2 boys and 2 furbabies. She is an autism mom, home-schooling mom, and is also a lupus warrior. When not papercrafting, she loves to curl up with a glass of wine and get lost in a good book. Sara has a Youtube Channel and is on Instagram and Facebook.

Travel Scrapbooking with Youngmi

Travel Scrapbooking with Youngmi  @ shimelle.com

Please welcome Youngmi as today’s guest artist, who has created a pocket page and full 12×12 scrapbook page to sit together as a multi-photo double page spread. I love this balance and hope you enjoy Youngmi’s design ideas! A reminder that supplies have affiliate links which make this guest series possible. Thanks for your support as always! -Shimelle

I have enough photos and stories in my to-scrap pile that I could never get it all scrapped even if I cloned myself a few times. That’s why I love sketches and scraplifting. Having a starting point gives my creative juices a boost so I can get more photos off my phone and into my albums.

Floral Scrapbook page by Shimelle with April 2021 Best of Both Worlds kit

It’s so inspiring to look at layouts created by other scrappers and think of ways to adapt them to my style, story, and supplies. Sometimes I stick closely to my inspiration. Sometimes I turn it around, flip things over, nudge bits here and there. By the time I’m done, it may look nothing like the original! This layout was inspired by a dreamy, gorgeous layout Shimelle made with her April Best of Both Worlds kit. (You can watch that layout come together in this video.)

Travel Scrapbooking with Youngmi @ shimelle.com

These photos are from a trip to Vernazza, Italy. Since my photos were landscape, I started by flipping the sketch on its side. Since this layout will go in my Italy album, I made my design decisions based on the overall style of that project. The look I’m going for is “light and sweet vintage” which means soft florals, delicate details, and pretty color palettes.

When it comes to embellishment clusters, I like to think of a phrase I learned in Thailand – “same, same but different”. Notice that each embellishment cluster features the same colors but they appear in different elements? And that they all have tags but none of them are the same? See? Same, same but different! Everything coordinates and flows throughout the page but the little differences keep the layout exciting and engaging.

You may have noticed that this layout is missing one very important thing – journaling! That’s because I knew from the start I would create a coordinating pocket page.

Travel Scrapbooking with Youngmi @ shimelle.com

I love using pocket pages for photos I want to include in my album but don’t have a story of their own. They’re like the supporting cast in a film. They may not be the star but the story can’t be told without them. The pocket page gave me ample space to journal, show off the many beautiful views from the top of the castle we climbed and provided a home for my ticket stubs. The top left photo flips up to reveal two more photos and additional journaling. All together, this two page layout has ten photos!

I always make my coordinating pocket page after the main layout is complete. The scraps and supplies that didn’t make it on to the layout get scooped up into the pockets. I stick with the same color scheme and pull in some elements from the layout. If you look closely, you’ll spot a couple of familiar patterned papers, butterflies, a little gold thread and a torn edge.

Travel Scrapbooking with Youngmi @ shimelle.com

I hope this inspires you to grab a sketch or layout created by another scrapper and adapt it to your style and story. Try it on a different page size! I’m definitely going to create 8.5×11 and 9×12 versions of this page for my other albums. Or the next time you finish a layout, gather up those scraps and see if you can make a quick pocket page. Happy scrapping!

Hello! My name is Youngmi and I’m a midwest girl living on the Central Coast of California with my husband. I’ve been scrapbooking for over 20 years! In the moments when I’m not scrapbooking, I enjoy baking, traveling, reading, quilting and living out all my nerdy dreams. That includes DisneyBounding, gaming, being a proud Ravenpuff and dreaming of cosplays for the next con. Nerdy scrappers unite! You can see more of my work on Instagram.

Tiny Books and Bags on a Scrapbook Page with Suse Fish

Tiny Books and Bags on a Scrapbook Page with Suse Fish @ shimelle.com

Welcome to February! This month I’ll be working with a collection kit focus for the Best of Both Worlds series, sharing a look at how my album strategy panned out over the last year, and I’m happy to continue to share the work of talented guest artists from all over the world. Today we go to a little island with an interesting flag to meet a crafty lady with a love of layers and a particular colour palette. Please welcome Suse Fish! – Shimelle

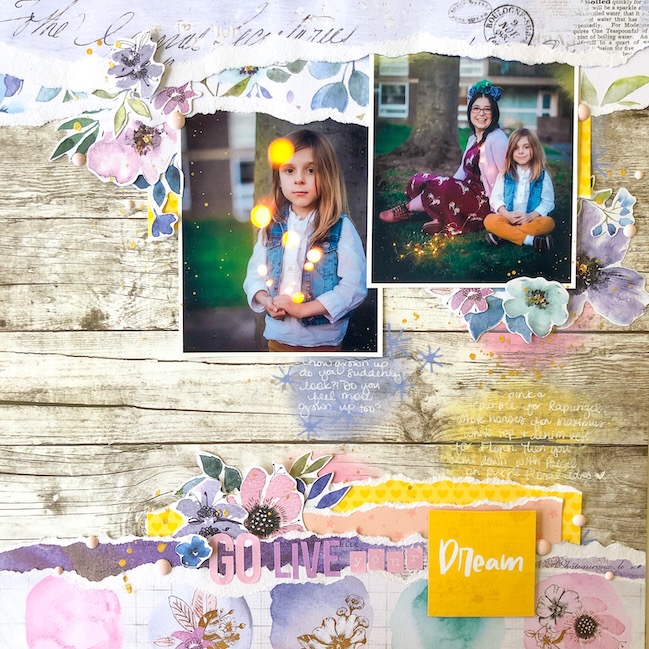
There’s something really lovely about the tween stage, isn’t there? That super-sweet bit after Care Bears, but before boys. I often remind myself to be a little more like my girl at this age: when a bottle of vanilla body spray or a pair of fluffy llama socks bring so much joy and there’s nothing more fun than making cupcakes and decorating each one in a different rainbow colour.

I wanted to capture something of that simple joy in this layout and had the idea to have things dangling from the page, like the colourful keyrings from Kitty’s backpack. Of course, I’d struggle to get this one in a page protector, so it’ll go on the wall instead, but I’m so happy with how it turned out.

Tiny Books and Bags on a Scrapbook Page with Suse Fish @ shimelle.com

I’m kind of obsessed with mini things and at the moment, really love making pint-sized travellers notebooks and mini albums. I decided it would be fun to make a teeny-tiny version of Bea Valint’s gorgeous acetate bag, then pop a miniature planner in it. I’m wishing now that I’d had a tiny pencil to go in there too…

My motto with scrapbooking is, “Why not?” I love taking things that probably shouldn’t go on a scrapbook page and working out how to tuck them in there. The fun is in the playfulness for me and I know that I need to lighten up whenever I start making pages that are a bit too involved or labour-intensive in an attempt to be impressive!

Tiny Books and Bags on a Scrapbook Page with Suse Fish @ shimelle.com

The photo is one of my very favourites. My lass isn’t so keen on having her photo taken, so I actually had to pay her for this photoshoot (oh yes, she’s canny) but she’d just dyed her hair pink and looked so fab that I had to get at least a few shots.

I hope you fancy having a go at a page like this. Just layer up lots of white elements behind your pic, thread a piece of elastic for your ‘charm line’ and most important of all: keep everything wonderfully scruffy and ruffled!

Suse Fish lives on the Isle of Man with her minister hubby, daughter Kitty and two Ragdoll cats. She spends her time scrapbooking and putting things back where they came from. You can follow her work on her Instagram.

Scrapbooking with Ink and Cut Files with Rasha Badawy

Scrapbooking with Ink and Cut Files with Rasha Badawy @ shimelle.com
Please welcome today’s guest artist, Rasha Badawy, here to share a technique combining cut files and inking on a scrapbook page. Supplies are linked with affiliate links that make this series of guest posts possible, so thank you for clicking through them when you’re inspired to shop! And don’t forget to go say hello to Rasha on Instagram for more of her beautiful crafting. -Shimelle

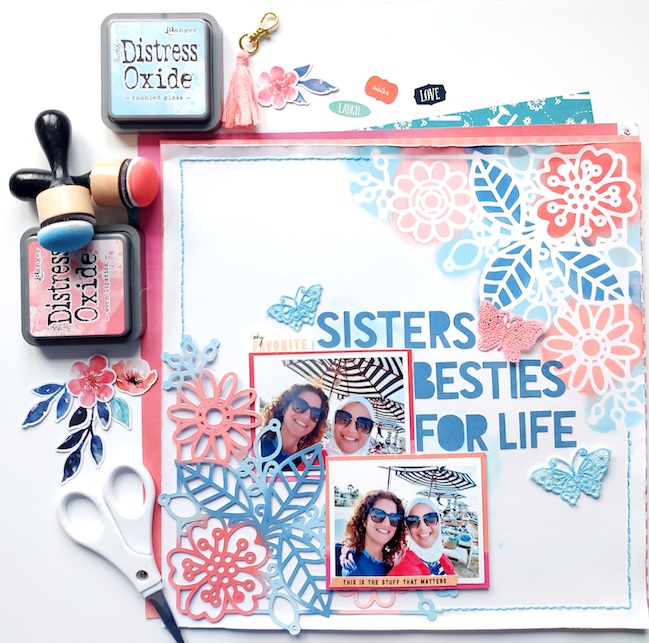
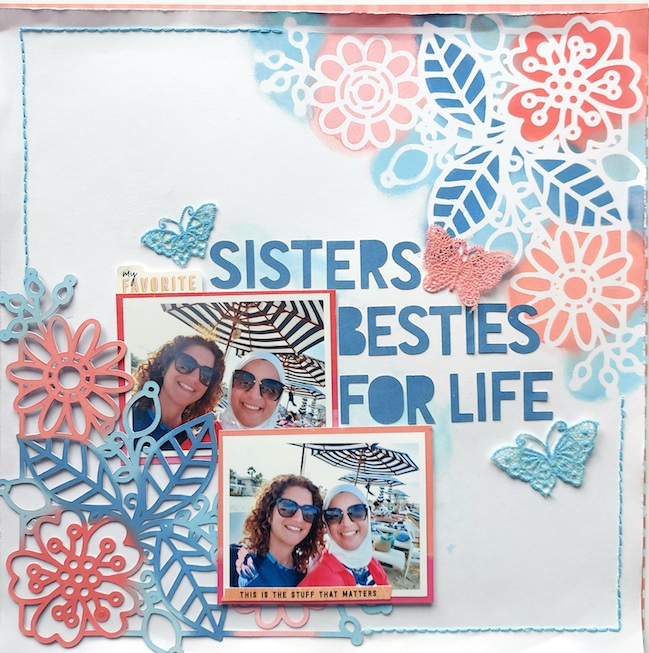
Hi, I’m Rasha and I am delighted to be here. For my layout, I started with a focus on Distress Oxide inks. I used five different coloured ink pads from Tim Holtz that matched my pictures: Worn Lipstick, Abandoned Coral, Candied Apple, Tumbled Glass and Faded Jeans.

Scrapbooking with Ink and Cut Files with Rasha Badawy @ shimelle.com

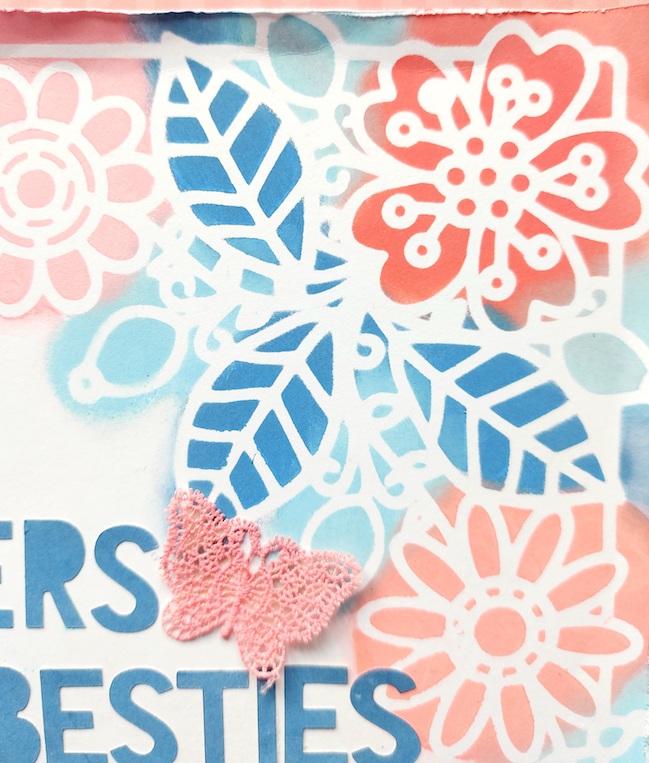
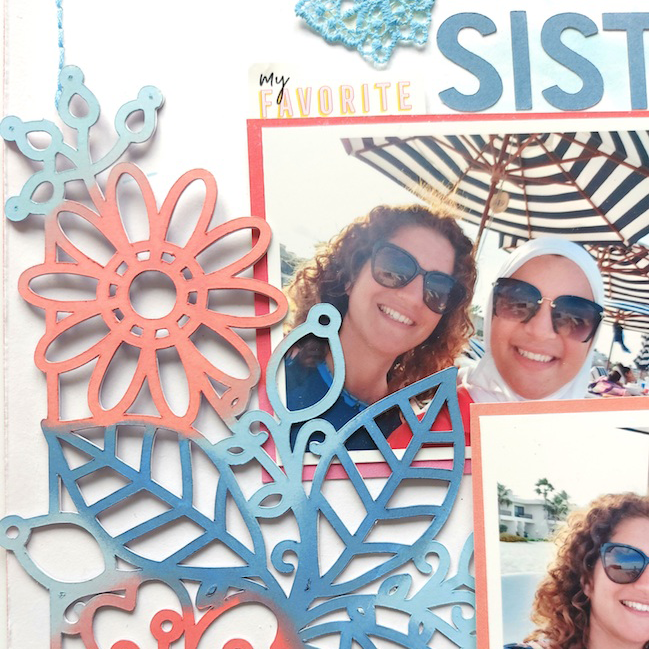
I started my project by cutting out a flower corner cut file by Paige Evans. I used the flower corner as a stencil and stamped different distress ink on white cardstock. Then I removed the inked cut file and placed it on the opposite corner of the paper. It gave the effect of positive and negative image. I stitched a frame outline using sky blue thread. I used my scissors to distress the edges of the white cardboard and mounted the cardstock on coral paper.

Scrapbooking with Ink and Cut Files with Rasha Badawy @ shimelle.com

I decided where I want to use my pictures and lightly outlined the position. I inked the Tumbled Glass Distress Oxide on a piece of acetate, mixed it with water, and gently applied it to the background to add some blue behind the pictures.

Scrapbooking with Ink and Cut Files with Rasha Badawy @ shimelle.com

For the title, I used a cut file by ‘Cut to You’ with white paper. I inked the letters using Faded Jeans Distress Ink and when the letters dried I adhered them. The last step was the butterflies which are actually white and I decided to ink them as well to match the colour story throughout my layout. I used minimal embellishment to finish the layout, just a couple stickers to complement my photos.

I hope you enjoy this idea to get a little different treatment from your cut file collection, and I’d love to see your stencilled and inked projects!


Hi! I am Rasha Badawy. I am Egyptian. I moved to Dubai in 2006 and was lucky to call Dubai home for twelve years. Then I moved to the Netherlands and I have been living here for three years. As a child, I loved collecting pretty cards and stickers for no apparent reason. I did not know that one day it would develop into a hobby called scrapbooking! I was introduced to scrapbooking by a complete chance five years ago and I was immediately hooked. It became my escape place from a busy life as a wife, mother, and teacher. You can find more of my work on Instagram, Scrapbook Tales.