pretty paper. true stories. {and scrapbooking classes with cupcakes.}

lovely to meet you Twitter Facebook Pinterest YouTube

Take a Scrapbooking Class

online scrapbooking classes

Shop Shimelle Products

scrapbook.com simon says stamp shimelle scrapbooking products @ amazon.com shimelle scrapbooking products @ amazon.co.uk

Reading Material

travel

Weekly Challenge :: Go Big with Red!
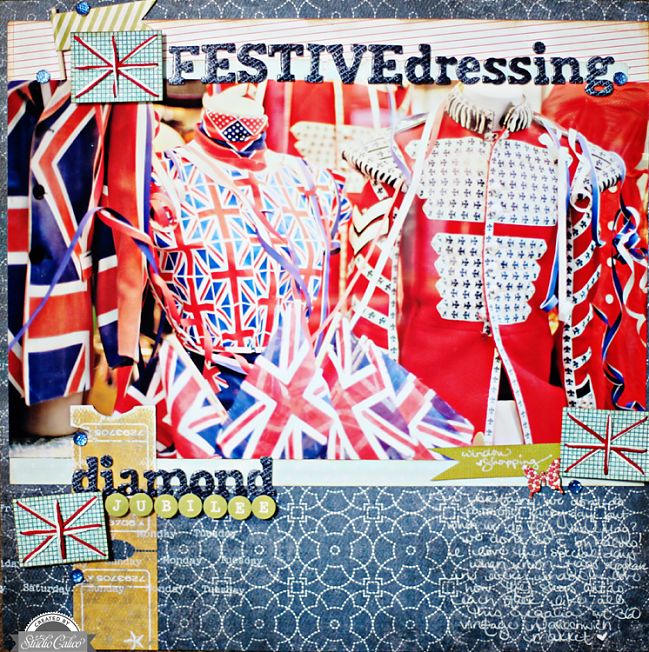
weekly challenge: go big with red // scrapbook page by shimelle laine
Scrapbooking process video for this older layout can be found on YouTube if you fancy a watch.

Maybe it’s the inspiration of bonfire night just this past weekend or maybe it’s the arrival of little signs of the holidays, but the colour on my mind right now is red! Time to bring it to a scrapbook page, and this week, we challenge you to do just that. Go big with red on your next page to participate this week. You can do that through paper, embellishments, ink, paint, ribbon, or washi tape – whatever gets you excited to create something new. To get you started on this week’s challenge, take a look at these examples from contributing designer Heather Leopard and guest artist Jessica Brown.
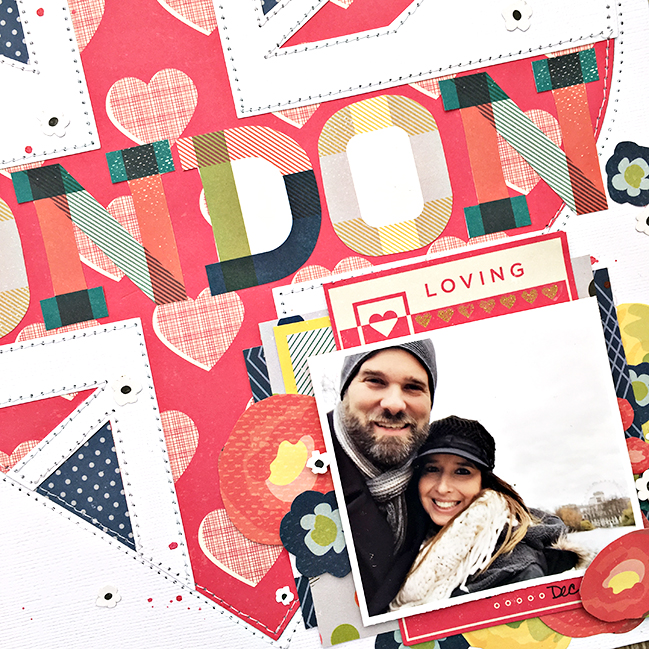
weekly challenge: go big with red // scrapbook page by Heather Leopard

weekly challenge: go big with red // scrapbook page by Heather Leopard

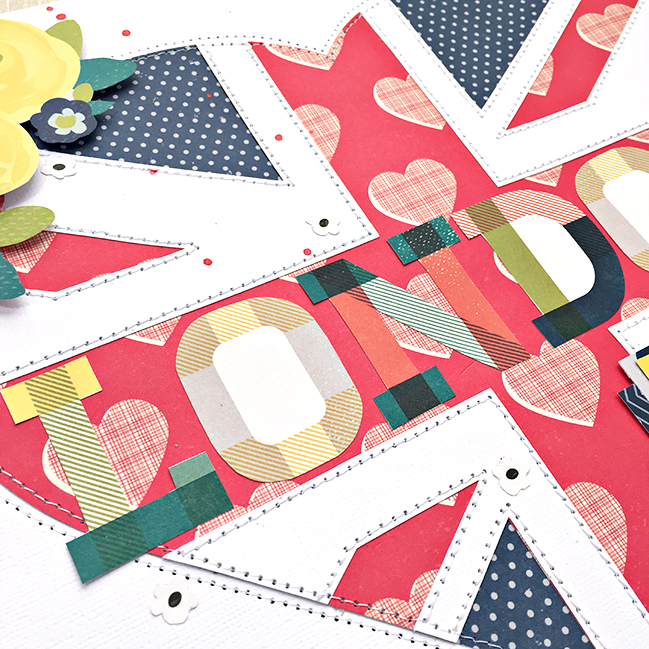
For this week’s Go Big Red theme, I knew I wanted to document a recent trip to London and that I wanted to include two things that I’ve enjoyed seeing in abundance almost every time I’ve visited – the Union Jack and red Poppies. I had this cut file in my files so I supersized it and cut it out of some fun pattern papers in the same color scheme as the Union flag. Of course I stitched all of the different patterns together.
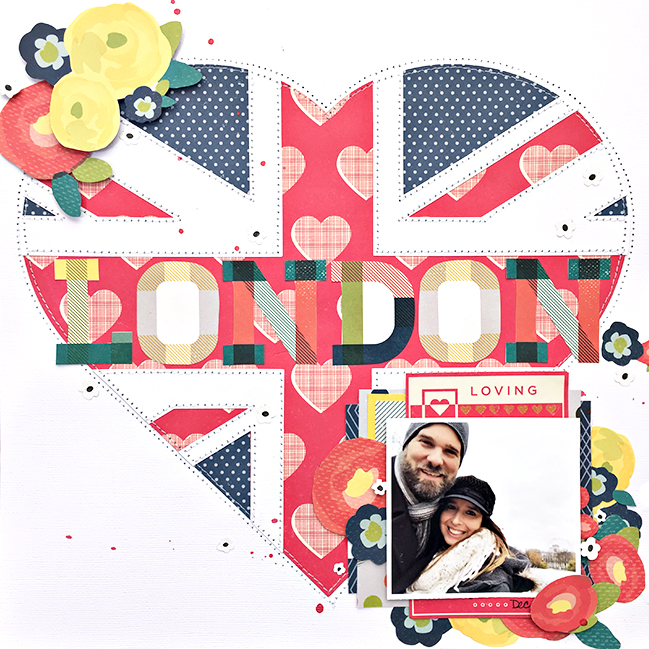
weekly challenge: go big with red // scrapbook page by Heather Leopard

I kept the embellishments to one – fussy cut flowers to demonstrate the poppies. I layered most of them around my photo on the bottom right and a small cluster in the upper left. Then I added a journaling tag tucked behind my photo. I think this will make the perfect opening page for our London album.
- Heather
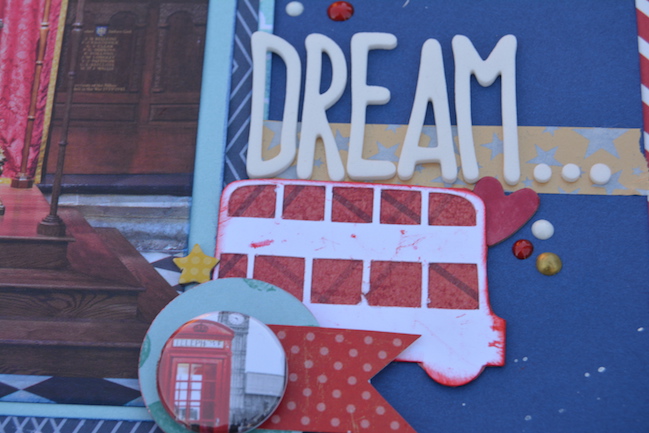
weekly challenge: go big with red // scrapbook page by Jessica Brown

I found the big red challenge very challenging indeed, because I didn’t want to just go with all red and ignore all the other wonderful colours out there! I started with red and navy due with my London photos, then I added aqua and finally, to brighten it up a bit I chose yellow. For the London theme, while I considered doing something more abstract, I decided upon going with an obvious use of London motifs. I love London and I don’t often embrace theme scrapbooking. I know that a lot of scrappers make themes work beautifully, so I went with it!
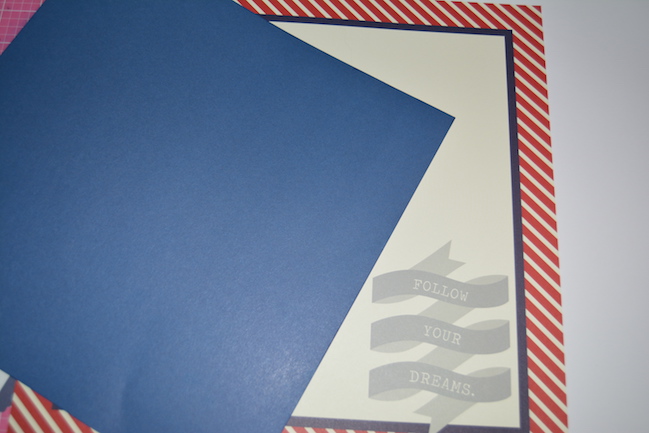
weekly challenge: go big with red // scrapbook page by Jessica Brown

The background paper is one that has a pre-printed design on it. These are difficult for me to use so I wanted to show one way that I use them – cover up the parts that you don’t want!
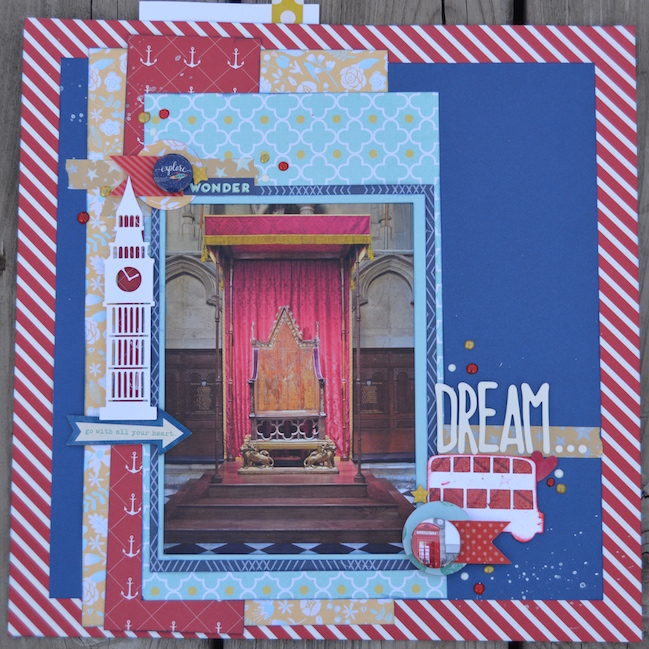
weekly challenge: go big with red // scrapbook page by Jessica Brown

Simple, but it makes you look at those papers hanging around in your stash in a different way.

- Jessica


You have a week to complete the challenge and share a link – but of course you’re welcome to set your own time schedule. Whatever keeps you happy and creative!

Today’s Guest Artist: Jessica Brown loves travel, history, and scrapbooking. You can find more from Jessica on Instagram, YouTube, and her blog.

Scrapbooking Autumn

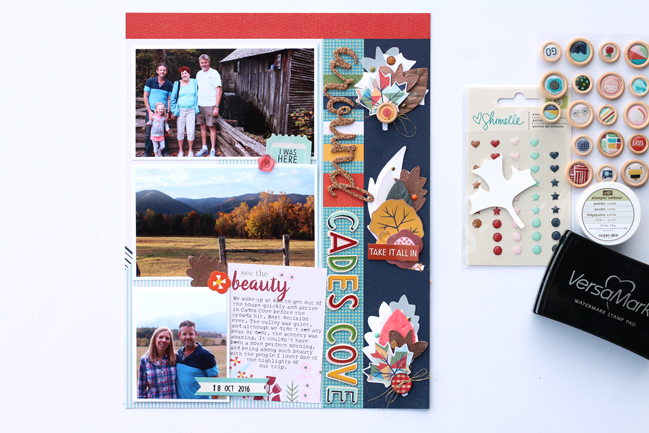
Scrapbooking Autumn // scrapbook page by Meghann Andrew

With autumn in a colourful force in our neighbourhood this year, it’s with a big smile that I share a beautiful Go Now Go autumn layout today, by contributing designer Meghann Andrew. Enjoy! And jump in some leaves if you can.

Autumn layouts are my most favorite to create. Sadly, I have to travel a few hours north to get photos of autumnal colors, but luckily, I did just that a few weeks ago, and I had a day to document using the Go Now Go collection.

Scrapbooking Autumn // scrapbook page by Meghann Andrew

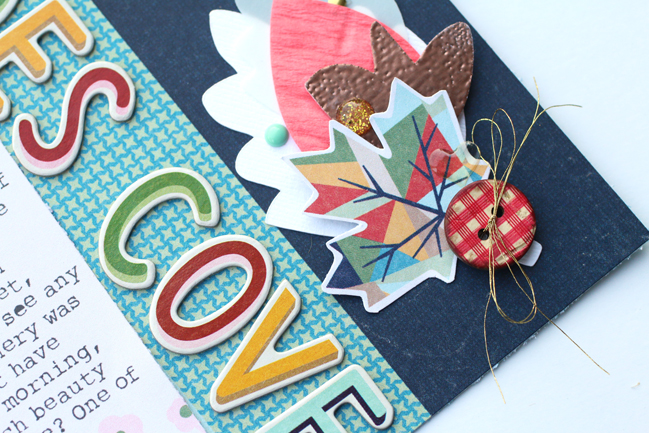
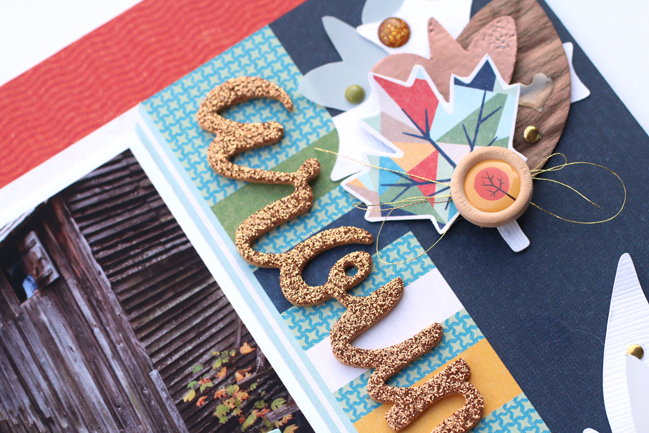
The design of this layout came together quickly using the “World” patterned paper. The delineated lines on the “B” side told me exactly where to place my photos and title, then the dark blue vertical section became a playground of sorts for some fun embellishment. I find that autumnal layouts almost require layers upon layers of leaves and pretty things, almost like a pile of leaves.

Scrapbooking Autumn // scrapbook page by Meghann Andrew

I gathered plain white and vellum die-cut leaves, colored paper leaves, as well as fussy-cut leaves and trees from the “Live” and “Park” patterned papers, and layered them, using dimensional adhesive, buttons and string. I wanted to match the copper color of the beautiful glittered Thickers in my piles, but I didn’t have any copper metallic paper. So, I grabbed white die-cut leaves, and pressed them into a Versamark pad, then covered them with copper embossing powder. After heat-setting, they were beautiful and shimmery, and the perfect metallic accent on the right side of the page. For additional texture, I added small enamel dots.

Scrapbooking Autumn // scrapbook page by Meghann Andrew

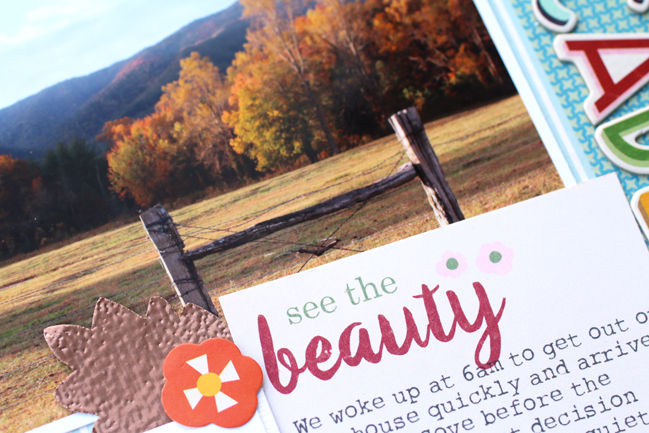
The “see the beauty” journaling tag from the “Run” patterned paper couldn’t have been more perfect for this layout about a beautiful valley that we visited, and I typed and printed my journaling onto the tag to get the most out of the space I had. I love that this layout feels like fall on a page!

PS: Don’t forget the challenges from last weekend remain open for this weekend too. We’d love to see what you’re making!

Design Decisions: A New Online Scrapbooking Class!

Design Decisions Online Scrapbooking Class

After six exciting scrapbooking challenges over the weekend (those remain open, by the way) I’m thrilled to share with you a new class for November. In working on this project, I’ve broken down design into smaller thoughts than I have previously, and I’ve actually discovered so many little reasons I do particular things that I’d never really thought about consciously. In contrast to The 20 Project, in creating the pages for this class I really took my time and consider all the decisions I make along the way. What makes a page too busy or too bare to my eye? Why do I feel compelled to add dimension somewhere on the page? What role does texture play when choosing my embellishments? What makes me include a variety of shades of one colour rather than keeping everything an absolutely exact match? And from that comes this new class: Design Decisions.

Class starts Wednesday, the 9th of November and ends Friday, the 25th of November. All shimelle.com classes include permanent access to the materials so there is no rush to complete everything in that time.

Design Decisions includes fifteen extended-length process videos with a focus on the choices we make in designing scrapbook pages. For example, both you and I might start by deciding to make a page with Halloween photos, but from there our decisions have many things to consider: how many photos do we want to include? What size will we print them? What mood do we want to convey? How can we achieve that mood through colour, products, and placement on the page? The videos answer these questions and share design decisions that work for balanced, attractive, and meaningful pages with a variety of techniques.

But Design Decisions is not just videos: each video is accompanied by a full-colour PDF file that gives you a desk reference to the particular decisions made that day. The PDFs include large, printable page sketches, design notes, and photos of the pages shown in the videos as well as additional scrapbook pages that employ relevant design principles. All the videos are my own pages, but a few of my favourite scrappers have also contributed pages to the PDFs to share how the design decisions work in a variety of scrapping styles.

Design Decisions Online Scrapbooking Class

Design Decisions is $25 US dollars. To see what that may be in your local currency, check XE.

Email Address for Class:

If you’re new to classes here, it works like this: sign up at any time on this page. Within 24 hours, you’ll receive an email with your login name and password to access the class on our private forum. From the 9th of November to the 25th, you’ll receive emails with the class materials, which are also posted on the forum so you can choose which method is easiest for you. The forum is also a place to chat with other participants and share any pages you make. If you’ve taken classes here before, the class will be added to your existing account. If you sign up after the 25th of November, you won’t receive daily emails but will have full access to all the class materials to work through at your own pace.

Any other questions, feel free to get in touch by email or in the comments. I’d love to see you in class!

Challenge 06 :: Scrapbook with a BIG Title

Scrapbook with a BIG Title // scrapbook page by Nicole Nowosad

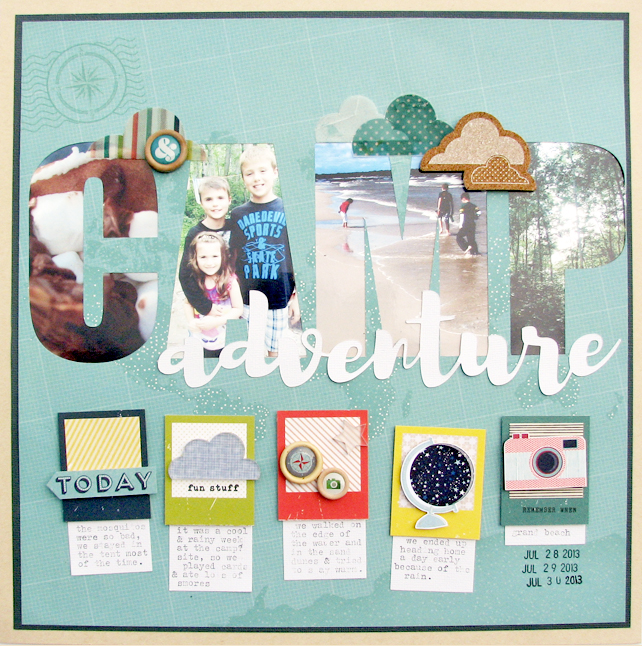
Ready to make something big? Contributing designer Nicole Nowosad joins us now for our next challenge: make a big title for your page! I love her page design – it’s one I want to try myself this weekend!

Scrapbook with a BIG Title // scrapbook page by Nicole Nowosad

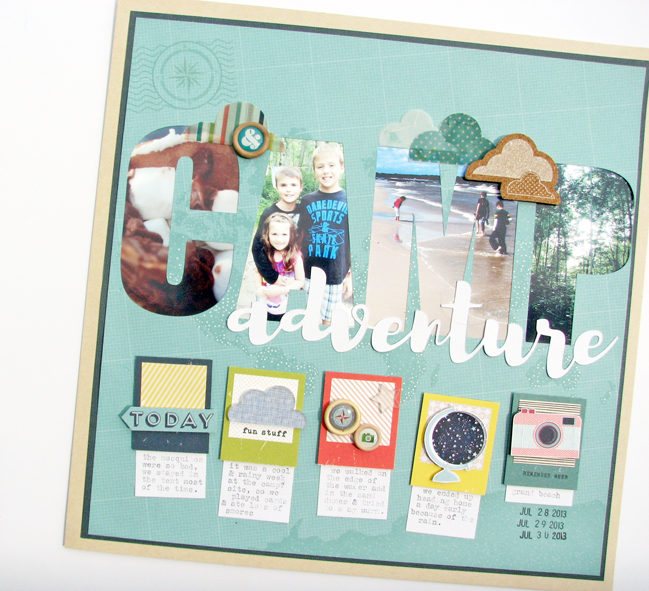
We are fortunate to have a lot of outdoor camping spots within close range of our city. We don’t often take the opportunity to battle the mosquitoes and make a weekend of it. Truth is, we are more of hotel travellers! A few years ago, we made a trip out to a local camping ground and had a brief and wet weekend at the park. Although it wasn’t the greatest of weekends, we still made some great memories and spent time together.

Scrapbook with a BIG Title // scrapbook page by Nicole Nowosad

Scrapbook with a BIG Title // scrapbook page by Nicole Nowosad

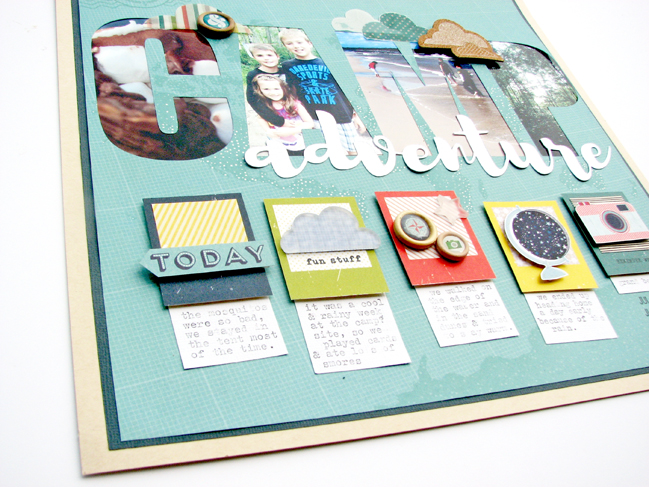
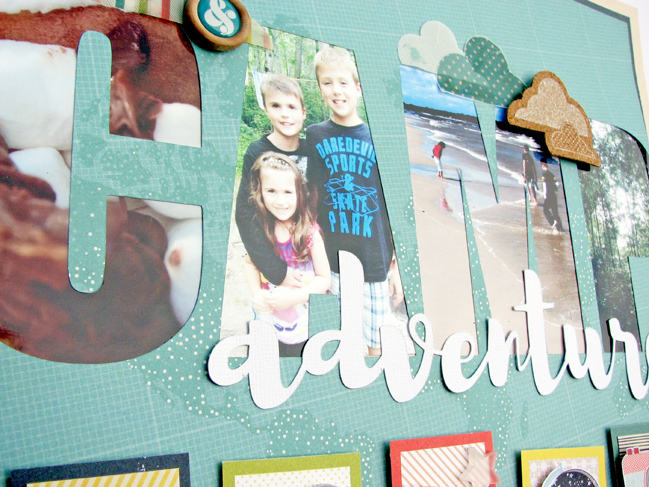
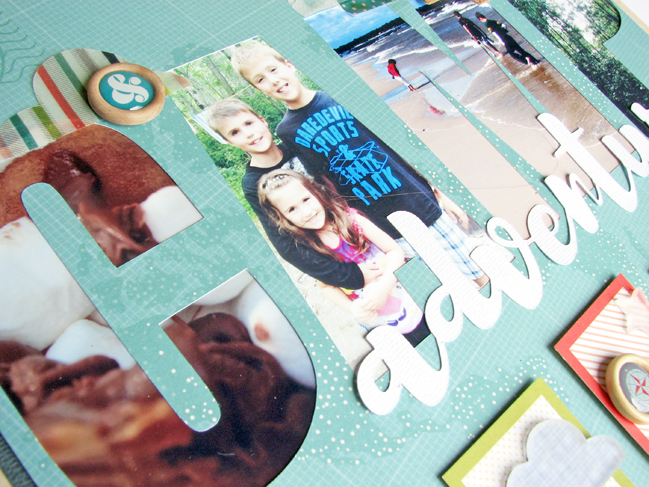
I only captured a few photos from that weekend and wanted to highlight them in a different way. The photos we are pretty busy but I didn’t want to just narrow it down to one or two on the page. I decided to diecut a large title “CAMP” out of some patterned paper and then in the open spaces, added a photo behind each of the letters – one photo signifying something we remember about that trip. I love how each of the letters highlights a different photo, while also making a title for the page. It took a little time to balance out what photo would look best behind what letter, but the result something different and unique!

Scrapbook with a BIG Title // scrapbook page by Nicole Nowosad

Scrapbook with a BIG Title // scrapbook page by Nicole Nowosad

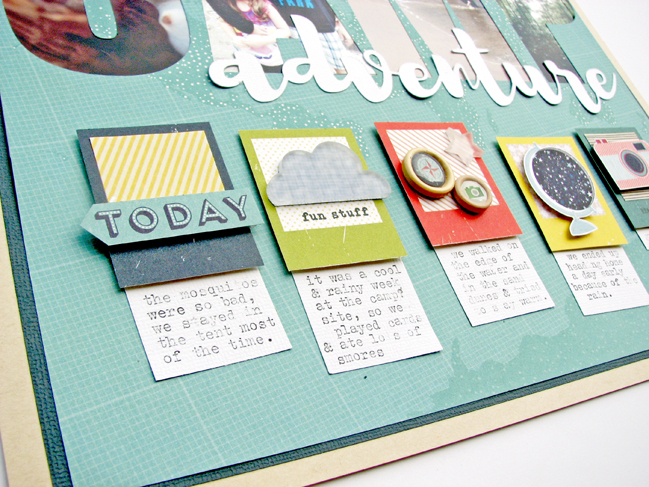
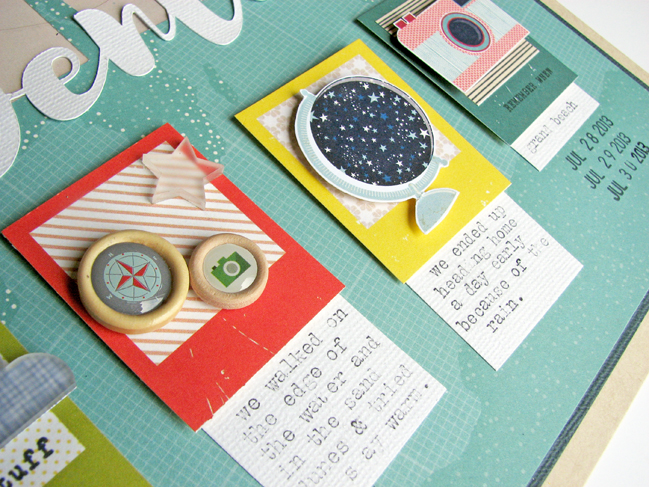
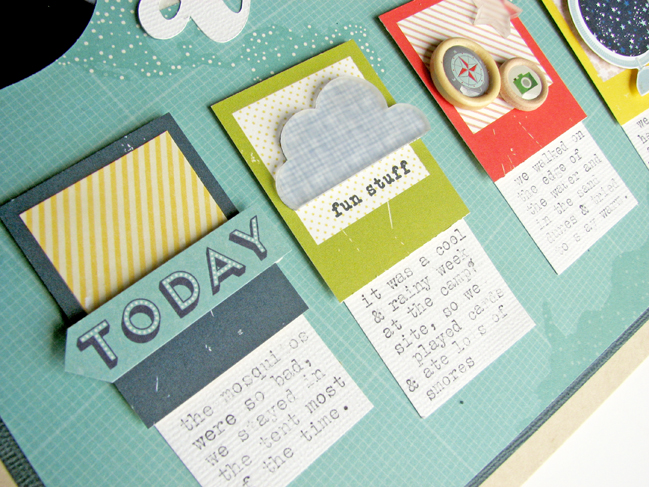
We had a few small different memories of the trip that I wanted to make sure to have included on my page, so I documented little bits of journaling beneath each the five small polaroids that I had cut from some patterned paper and embellished with more fussy cut patterned paper, wood buttons and clear shapes. It is an easy way to note a few small things about this weekend away with the kids.

Scrapbook with a BIG Title // scrapbook page by Nicole Nowosad

Scrapbook with a BIG Title // scrapbook page by Nicole Nowosad

Now it’s your turn – what word will you turn into a BIG title for your next page? Don’t forget to share it here this weekend to get your discount on the new class!


A note about this weekend’s challenges: I’m leaving all the challenges open until the end of the following weekend to allow more time to participate, but the special discount on the new class will be sent to those who upload a new project just this weekend – by the end of Sunday, 30th of October, 2016. This is for new layouts created this weekend, not archived layouts made previously. One discount applicable per person. You can upload your page to another site (blog, Instagram, Facebook, scrapbooking gallery, etc) and use the InLinkz button above to link to that OR you can upload a photo of your page directly with the same button rather than linking elsewhere. Either is fine! If you have trouble figuring out what to click, give a shout in the comments and I’ll email you with help. Thanks!

Challenge 05 :: Scrapbook the Outdoors

an outdoor travel colour story // scrapbook page by Helen De Ram

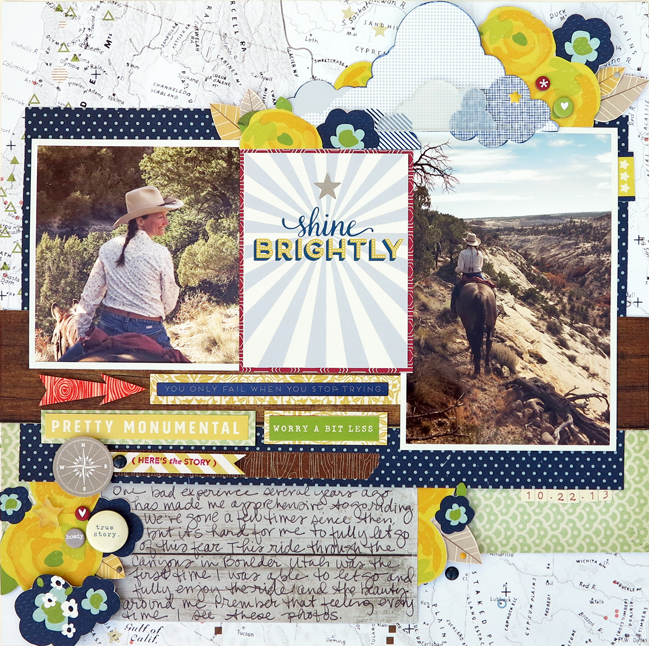
Hands up if you have plenty of outdoor photos you need to get into your albums! As beautiful as they are, it can be easy to fall into a rut of ruddy, dark colours and neutrals with outdoor pages, and sometimes it’s nice to remember the world outside our windows isn’t actually entirely made of kraft, evergreen, and bark. Please welcome guest artist Helen De Ram, who challenges you to scrap at least one outdoor photo in a colourful style of your choice.

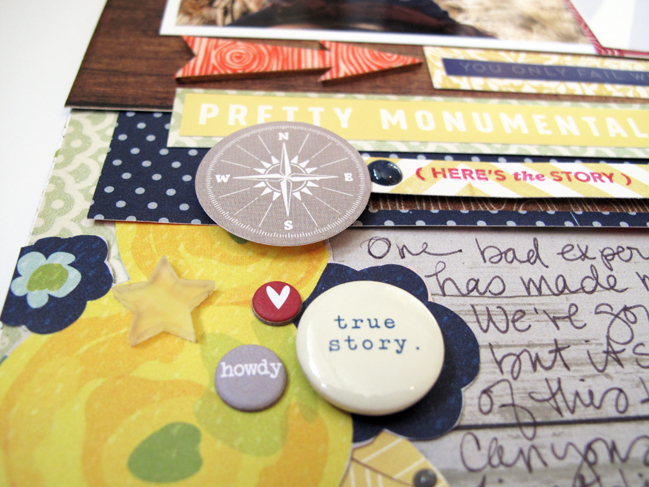
My husband and I enjoy the great outdoors and try to experience it in different ways. A road trip out west every summer gives us the opportunity to take horseback rides through beautiful landscapes in a part of the country that we love. This page tells the story of a ride we took through southern Utah that helped me let go of a previous bad experience so I could fully enjoy myself.

When selecting a color story for the layout, I took my inspiration from the photos and my memories of the colors in the canyons and deserts we rode through. I selected blue, green, brown, and grey, as well as yellow and red.

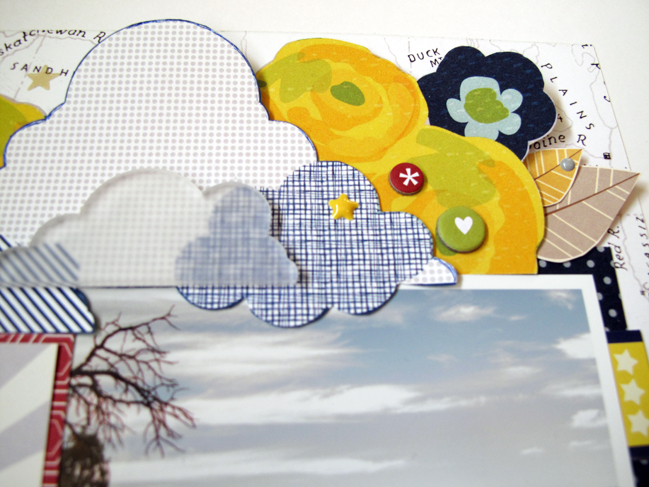
The Grey Floral paper from Shimelle’s True Stories collection did double duty as I was able to use the navy polka dot side behind the photos, and the yellow and blue flowers on the other side were perfect to cut out and use as a visual triangle around the page.

an outdoor travel colour story // scrapbook page by Helen De Ram

I usually use letter stickers to create my title, but instead the Shine Brightly card from the Starshine cut apart sheet was perfect in color and sentiment. To make it clear that it was my title, I placed it in the center and used red patterned paper as a border.

I was able to find several sentiments in the phase stickers from both Starshine and True Stories that were good matches to my color story. They also help to connect the photos and title card to the journaling and embellishments at the bottom of the page.

an outdoor travel colour story // scrapbook page by Helen De Ram

Starting with a color story made it easier to select patterned papers and embellishments to create the design as well as support the story and the photos on my page. Will you choose your colors first for this challenge or is there a perfect product you have in mind to suit an outdoor story of your own? We can’t wait to see what you make with those pictures.


A note about this weekend’s challenges: I’m leaving all the challenges open until the end of the following weekend to allow more time to participate, but the special discount on the new class will be sent to those who upload a new project just this weekend – by the end of Sunday, 30th of October, 2016. This is for new layouts created this weekend, not archived layouts made previously. One discount applicable per person. You can upload your page to another site (blog, Instagram, Facebook, scrapbooking gallery, etc) and use the InLinkz button above to link to that OR you can upload a photo of your page directly with the same button rather than linking elsewhere. Either is fine! If you have trouble figuring out what to click, give a shout in the comments and I’ll email you with help. Thanks!

Today’s Guest Artist: Helen De Ram loves coffee with cream, old movies, and quiet country roads. You can find more from Helen on Instagram.

Challenge 04:: Layers of Colour

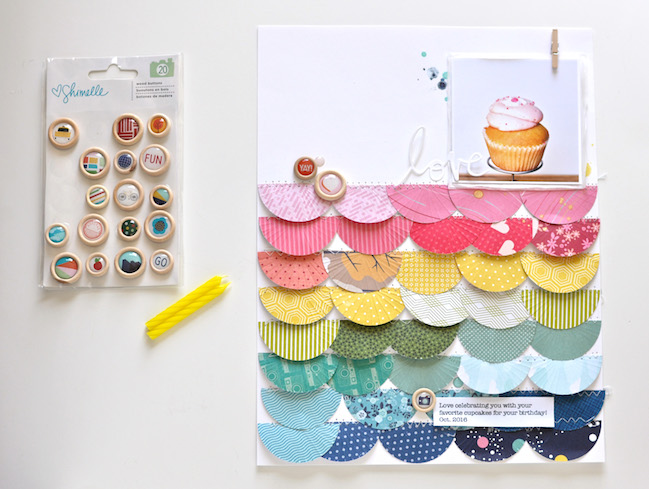
Scrapbooking with layers of colour // scrapbook page by Leigh Ann Odynski

For our next challenge, contributing designer Leigh-Ann Odynski, invites you to embrace colour and pattern with layers of simple shapes. It’s a great project for small scraps of paper and the end result is beautiful – I can’t wait to see what you make!

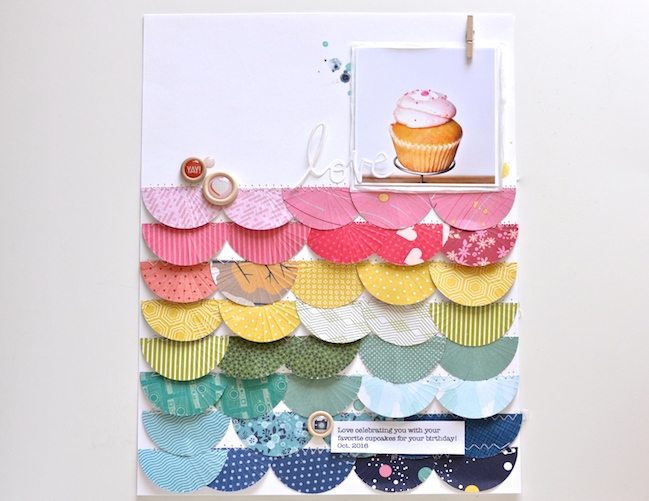
It’s almost time for trick or treating! How fun is that? I am sure I am not alone in loving a good sweet treat! On this scrapbook page, I wanted to feature a different kind of treat. It’s one of our family’s favorite birthday treats, cupcakes.

Scrapbooking with layers of colour // scrapbook page by Leigh Ann Odynski

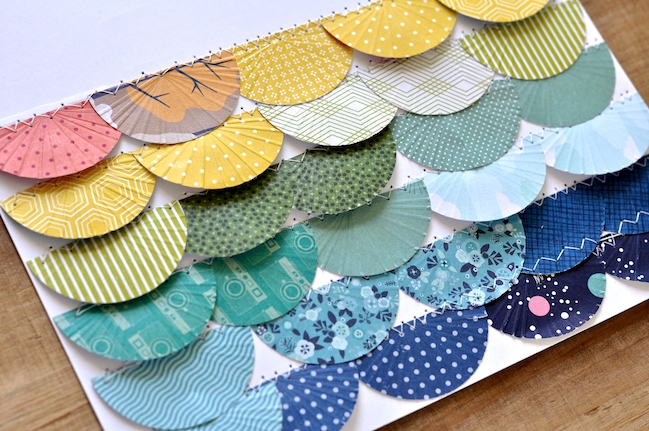
I thought about how to embrace dimension on this layout. I came up with the idea to punch circles and score them so that they resemble cupcake wrappers. In Shimelle rainbow colors of course! Just punch 2 inch circles and score them with straight lines as shown above, before cutting them in half. You can use a score mark (at 1 inch) to cut them in half.

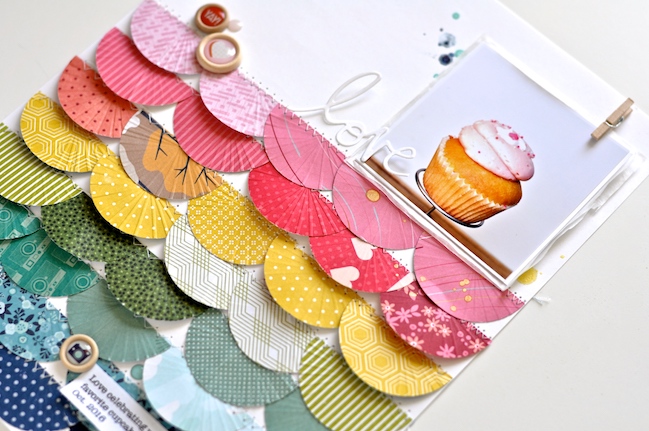
In deciding where to place them on the layout, I tried different spots, but thought they looked most like cupcake wrappers when placed this way. Try it out and see how you can layer them up!

Starting with the bottom row, attach some of the “wrappers” with foam dots. This gives tons of dimension. The scoring also adds dimension to each half circle.

Once you have a full row, just zigzag stitch across the top to give even more texture. Continue with the rows and stitching until you have the amount you desire!

Scrapbooking with layers of colour // scrapbook page by Leigh Ann Odynski

I decided to drop a few splats of Heidi Swapp Color Shine behind the photo, just for a fun icing look. I added tissue behind the photo to give more dimension and resemble bakery paper.

Scrapbooking with layers of colour // scrapbook page by Leigh Ann Odynski

The wood buttons from the new Go Now Go collection were just perfect as a minimal embellishment, and they tie in the wood grain color from the photo.

Your turn to have a go at this challenge with plenty of layers of colour! You can also share what sweet ideas you have to embrace dimension!


A note about this weekend’s challenges: I’m leaving all the challenges open until the end of the following weekend to allow more time to participate, but the special discount on the new class will be sent to those who upload a new project just this weekend – by the end of Sunday, 30th of October, 2016. This is for new layouts created this weekend, not archived layouts made previously. One discount applicable per person. You can upload your page to another site (blog, Instagram, Facebook, scrapbooking gallery, etc) and use the InLinkz button above to link to that OR you can upload a photo of your page directly with the same button rather than linking elsewhere. Either is fine! If you have trouble figuring out what to click, give a shout in the comments and I’ll email you with help. Thanks!

Challenge 03 :: Scrapbook with Autumnal Colours

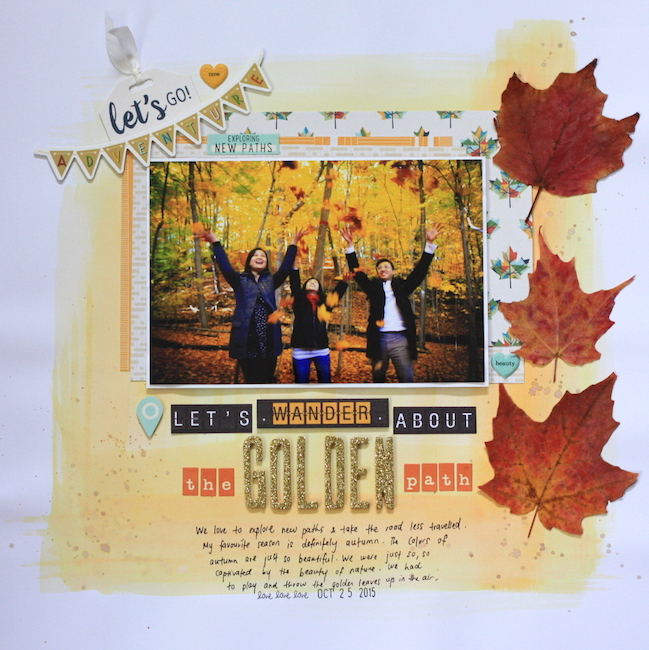
an autumn colour story // scrapbook page by Karen Lai

Next up, please welcome guest artist Karen Lai with our third challenge. This one is all about the colours of autumn!

I love the colours of autumn. I love to go on a hike to see the beautiful leaves and actually bring some of the leaves home.

I wanted to scrapbook this photo of a hike that we went off trail and found an area full of beautiful golden-leaved trees and red leaves on the ground. We dove right in – playing and throwing the leaves up in the air as though we were kids. It was so much fun!

an autumn colour story // scrapbook page by Karen Lai

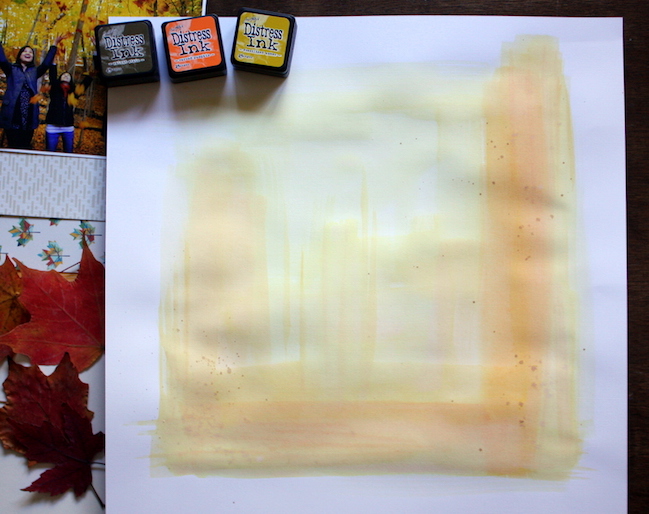
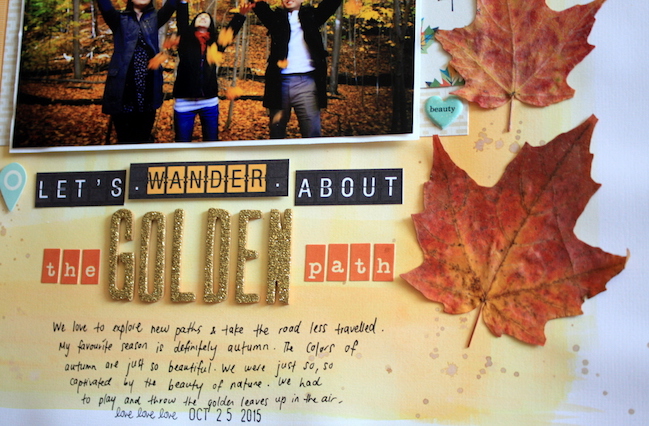
For my layout, I started by painting the background with autumn colours with Distress Inks. I love using them like watercolours. Then I chose papers and embellishments from Shimelle Go Now Go collection because it matches perfectly to my autumn hiking adventure theme. I added the leaves I collected during the hike in my layout as well because the colours were just so pretty. Then I created the title by cutting parts of the patterned paper and added different alphabet stickers from October Afternoon and American Crafts.

an autumn colour story // scrapbook page by Karen Lai

Now it’s your turn – I challenge you to scrapbook with a colour scheme inspired by autumn!


A note about this weekend’s challenges: I’m leaving all the challenges open until the end of the following weekend to allow more time to participate, but the special discount on the new class will be sent to those who upload a new project just this weekend – by the end of Sunday, 30th of October, 2016. This is for new layouts created this weekend, not archived layouts made previously. One discount applicable per person. You can upload your page to another site (blog, Instagram, Facebook, scrapbooking gallery, etc) and use the InLinkz button above to link to that OR you can upload a photo of your page directly with the same button rather than linking elsewhere. Either is fine! If you have trouble figuring out what to click, give a shout in the comments and I’ll email you with help. Thanks!

Today’s Guest Artist: Karen Lai loves coffee, watching tv dramas and hiking. You can find more from Karen on Twitter, Pinterest, and her blog.

Challenge 02 :: Patterned Paper Fringe (and a free pumpkin cut file)

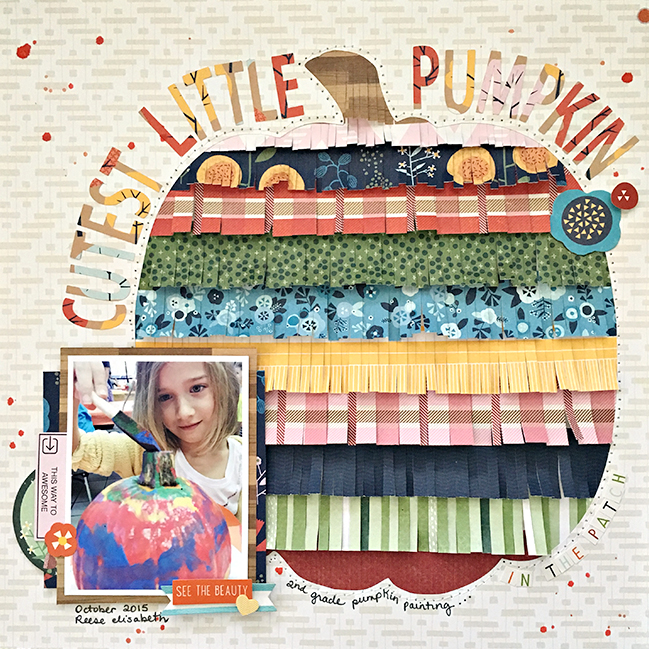
Patterned Paper Fringe and a free pumpkin cut file // scrapbook page by Heather Leopard

Ready for your second challenge this weekend? It’s from contributing designer Heather Leopard, who gives you two options for your page: try patterned paper fringe or scrap with her pumpkin cut file. Or you could be an overachiever and try both!

Hello my friends…While Halloween is all about dressing up and going out trick or treating, it’s also about decorating pumpkins, whether carving or painting so I thought I’d do a layout about my daughter’s Halloween party at school. Sorry, no costumes allowed and by the way, where’s the fun in that?

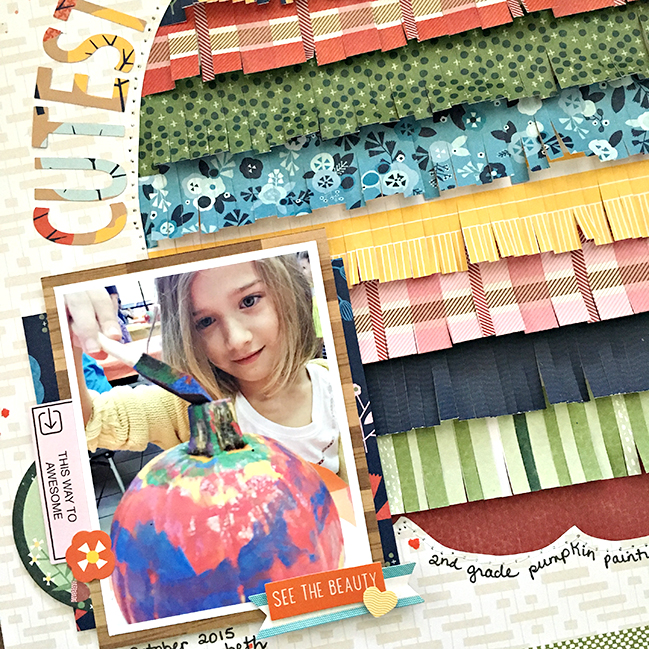
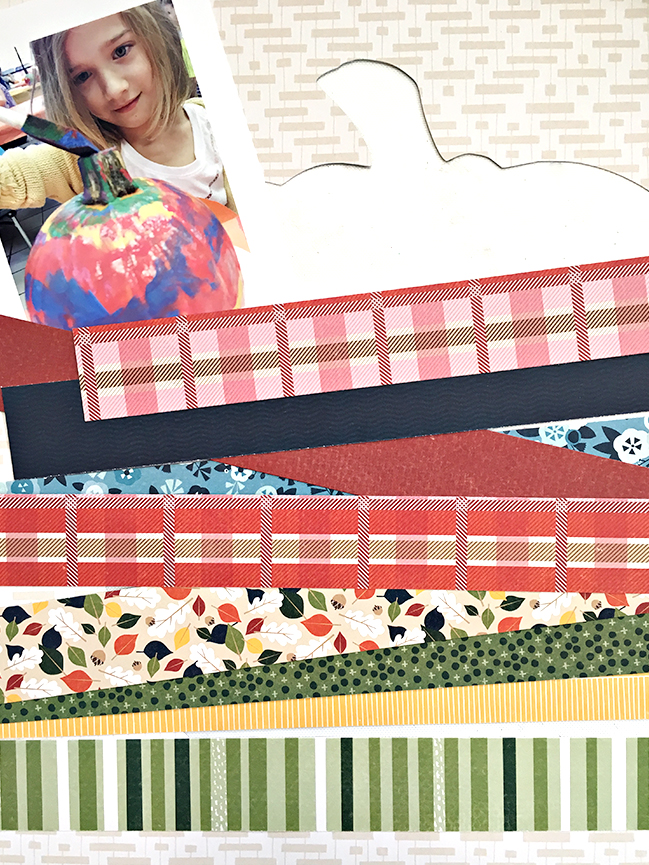
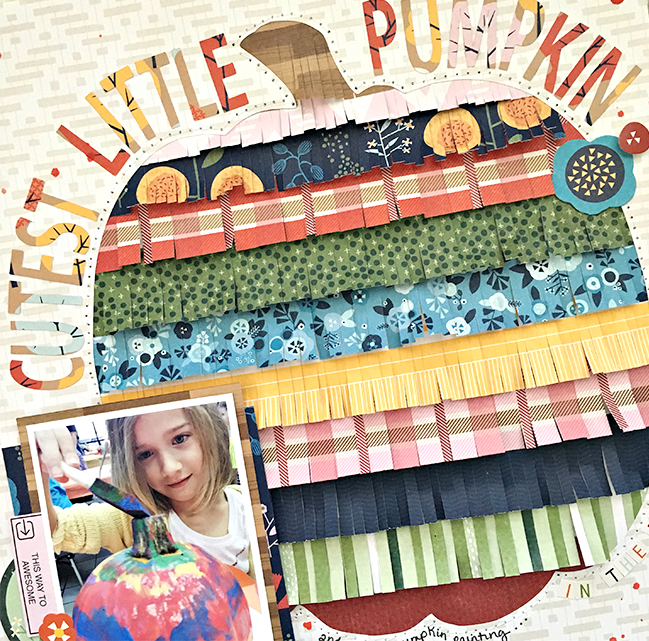
Anyway, today’s tutorial is all about super sized die cuts. I’m sharing a few TRICKS as well as a TREAT with you today. I was inspired by this cute photo of my daughter painting a pumpkin at her school last year. I decided I wanted to do a super sized pumpkin cut with fringe on the inside. At first, I had planned to use varying colors of orange for the fringe but orange is a bit hard to find in this collection so I went back to the drawing board. I put my thinking cap on and went ahead and cut the pumpkin out. You can download my free Silhouette cut file HERE. I kept both pieces and you should too if you plan to recreate this project. Set them both aside.

Patterned Paper Fringe and a free pumpkin cut file  // scrapbook page by Heather Leopard

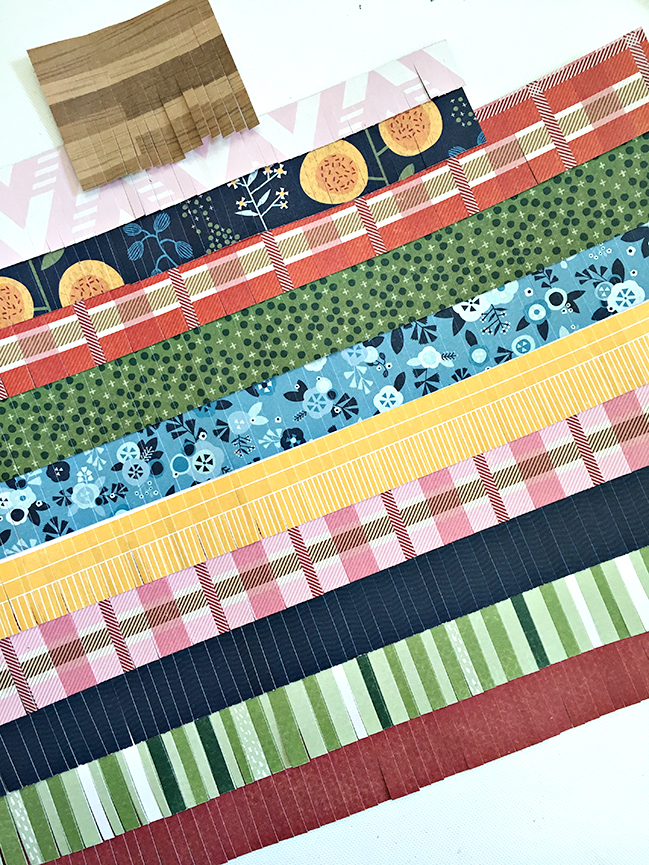
As I was pondering, I realized I should mimic the colors my daughter was painting her pumpkin – blues, red, yellows, green, etc. so I set out to look for fun patterns in those colors.

Patterned Paper Fringe and a free pumpkin cut file  // scrapbook page by Heather Leopard

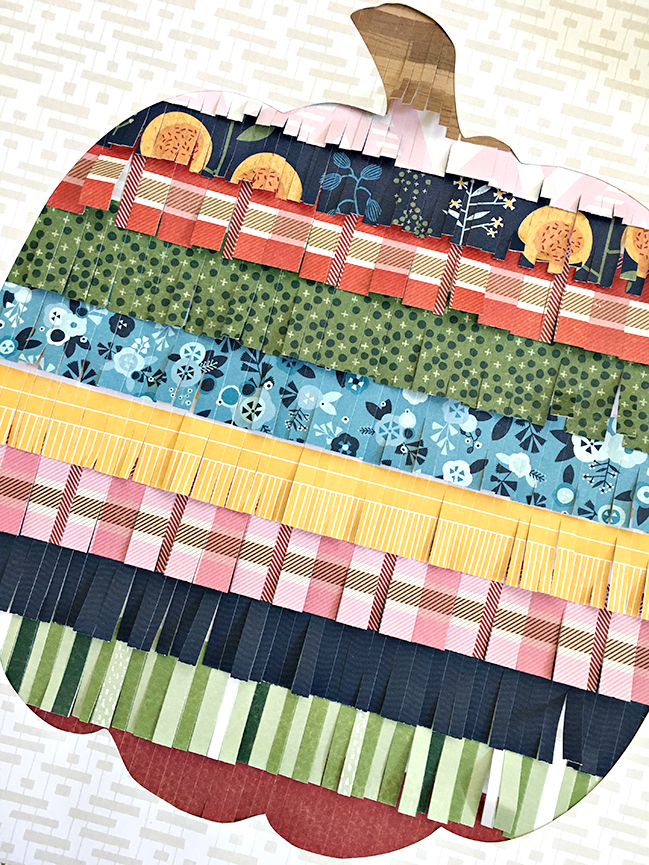
Next I cut little slits about 1/4” to 1/2” apart on each strip and adhered one on top of the other use the cut out piece that I would typically throw away as the base.

Patterned Paper Fringe and a free pumpkin cut file  // scrapbook page by Heather Leopard

Once all the layers have been added, trim around the pumpkin and lay the overlay on top. Stitch it to the top for a pretty effect.

Patterned Paper Fringe and a free pumpkin cut file  // scrapbook page by Heather Leopard

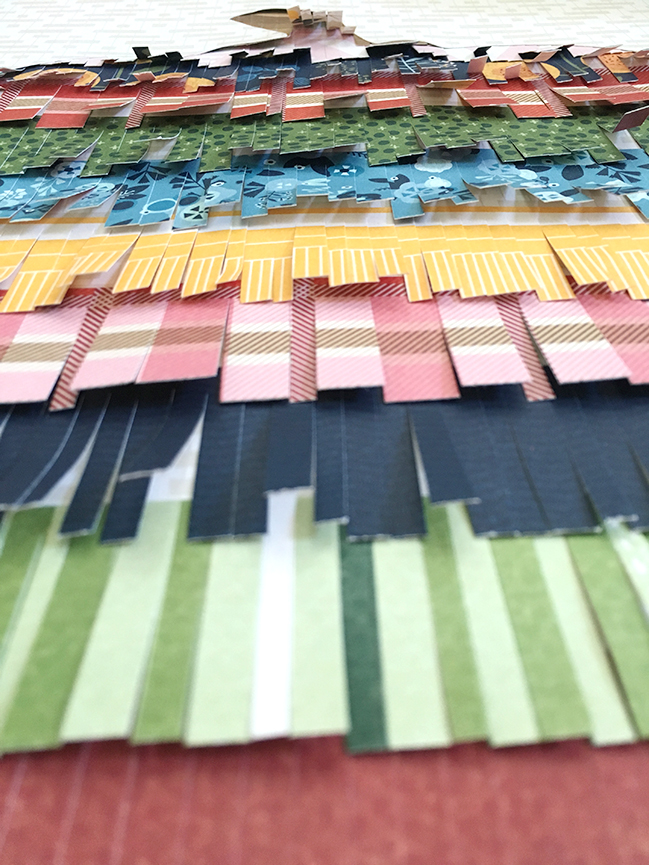
Pull up gently on the little strips to lift them up. You can simply lift them or roll them up over a thin pencil or like object to curl the edges.

Add a title around the top of the pumpkin. This title is included in the free Silhouette cut file, which you can download HERE or you can create your own.

Patterned Paper Fringe and a free pumpkin cut file  // scrapbook page by Heather Leopard

Add layers of pattern paper, die cuts and stickers over and under your photo. Adhere to the page using foam adhesive to lift it up. You don’t want to crush those lovely lifted strips.

Patterned Paper Fringe and a free pumpkin cut file  // scrapbook page by Heather Leopard

To complete the layout, I added journaling below the photo and around the bottom of the pumpkin along with a smaller alpha to complete the title, even though the large title at the top works great if used alone.

Thanks for stopping by today. Please share any projects you make using this free cut file or with patterned paper fringe to participate in this challenge!


A note about this weekend’s challenges: I’m leaving all the challenges open until the end of the following weekend to allow more time to participate, but the special discount on the new class will be sent to those who upload a new project just this weekend – by the end of Sunday, 30th of October, 2016. This is for new layouts created this weekend, not archived layouts made previously. One discount applicable per person. You can upload your page to another site (blog, Instagram, Facebook, scrapbooking gallery, etc) and use the InLinkz button above to link to that OR you can upload a photo of your page directly with the same button rather than linking elsewhere. Either is fine! If you have trouble figuring out what to click, give a shout in the comments and I’ll email you with help. Thanks!