pretty paper. true stories. {and scrapbooking classes with cupcakes.}

lovely to meet you Twitter Facebook Pinterest YouTube

Take a Scrapbooking Class

online scrapbooking classes

Shop Shimelle Products

scrapbook.com simon says stamp shimelle scrapbooking products @ amazon.com shimelle scrapbooking products @ amazon.co.uk

Reading Material

travel

Travel Notes on Sleeper Trains

Travel notes on sleeper trains
Travel notes on sleeper trains nong khai train station
I always thought I spent a fair amount of time on the train back home in London. Not a huge amount… not enough to make me completely stressed when the trains don’t run on time, but enough to give a heavy sigh when I run to the station to find that’s the case. A nice, in-between, middle of the road amount of time to spend on a train.

I have quickly been learning: I have never really spent time on trains.

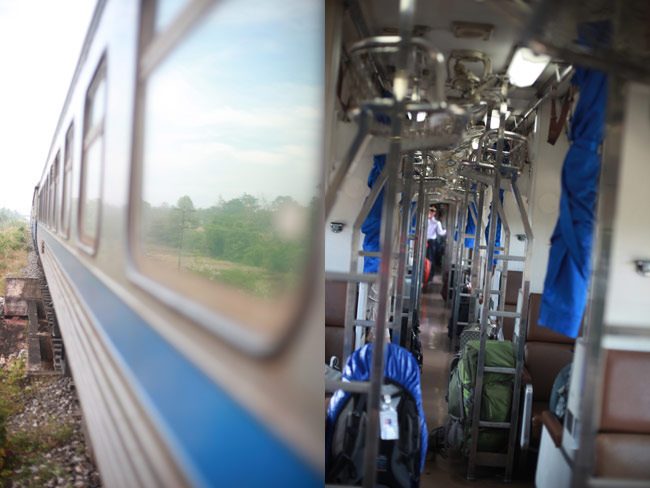
There is a small element of our trip that is a bit Darjeeling Limited in that we’re doing most of our travel throughout southeast Asia by train. Including my first ever ride on a sleeper train, traveling from Bangkok to Nong Khai, a much smaller town in the northeast of Thailand, right on the Mekong that creates the border with Laos.

Upon finding our seats, we’re given a menu should we want dinner or breakfast delivered from the dining car. “What time is breakfast served?” we ask.

“An hour before we arrive in Nong Khai.”

“What time is that?”

“Oh. That’s different every day.”

Classic.

Travel notes on sleeper trains
The term ‘sleeper’ train has continued to make me giggle, because we often tell ourselves it’s good to take sleeper trains as it means we don’t need a hotel room for the night, so we can save a little money (train tickets are considerably less expensive than rooms in some cities) and not waste any time by traveling during the day. This is all true in theory.

In fact, it is pretty much impossible to really sleep on a train.

Perhaps it is possible in first class of a brand new train on smooth tracks traveling at a constant speed. Perhaps then, with ear plugs and an eye mask. Perhaps.

So far, I’ve learned it’s not possible with a group in the same carriage who have decided to turn the carriage into a bar, with an all-night happy hour special on local whiskey. It’s not possible when the train rocks back and forth to the point that you’re searching for something to cling to so you don’t fly from the top bunk. It’s not possible when someone’s story of a much-worse experience has you convinced the moment you shut your eyes, you will be attacked by giant insects. It’s almost possible when your bunkmates turn out to be very young mothers who already have their babies tucked in bed asleep, but it’s then you’ll realise you arrive at your stop at 5am and therefore need to be awake in order to not miss it – nor wake said sleeping babies by setting an alarm clock.

Travel notes on sleeper trains
Still… sleeper trains is what they are called. And they can be rather fun.

I’ll let you know if at any point in time I learn to actually sleep on one.

xlovesx

Shooting with shallow depth of field

shooting with shallow depth of field
The last time I bought a new lens for my camera, I spent the better part of two months reading every review I could find. I hate that feeling of making a major purchase and wondering if I’ve made the right decision or in three weeks will I find something else that would have been two percent more perfect and now I’m left without a means to change, you know? So read, read, read was my system. Go through pages and pages of search results looking for the good, the bad and the ugly.

One of the reviews mentioned that the lens in question was perfect for _one of those crazy depth-of-field photographers. And if you don’t know if you fit in this category, then you definitely don’t. Oh, that just about sold me. For I’ll say it right now: I love crazily shallow depth-of-field. I will go to every length I can think of to get just a tiny sliver of the photo in focus and everything else pleasantly blurred. If that makes me crazy, so be it.

shooting with shallow depth of field
That lens isn’t actually one I have with me on this trip, because it’s the heaviest thing in my entire camera bag and really not practical for carrying every day, but I’ve brought the best compromise I can: the Canon 50mm f1.4. (I’m just carrying two lenses, by the way – the other is a wide angle I’ll talk more about another day.) The 50mm is my most used lens at home and has been my most used lens so far on this trip. It’s small and lightweight, but sturdier than the less expensive f1.8 (which I used and loved until all the king’s horses and all the king’s men couldn’t put the plastic 1.8 back together again) And I almost always have it set wide open to f1.4, which means it’s fast, great even in low-light and creates that crazy one-thing-in-focus look.

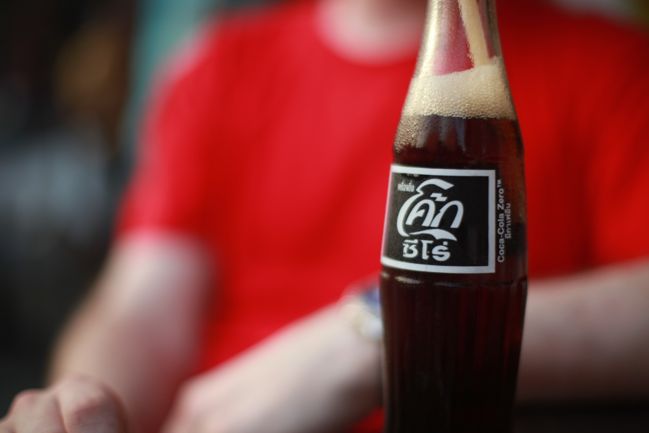
If depth of field is a new concept for you – it’s totally easy. See the picture of the soda bottle above? That’s the only thing in focus and the background of the picture is blurred, right? That’s because the depth of field is shallow. The wider the opening on the camera (the aperture), the more you’ll get this effect. If the lens isn’t opened as much, more of the scene will be in focus. That’s why pinhole cameras don’t need to be focused – the opening is so small that everything is in focus! On many cameras (even some point and shoots), the aperture is something you can adjust, and the numbers always work in the same way: the lowest number is the widest opening and the highest number is the smallest opening. So f1.4 means not much will be in focus… f22 (no decimal point) means pretty much everything will be in focus.

shooting with shallow depth of field
As for why I love my depth of field to be so crazily shallow, well… it’s partly because it’s how I see with my own eyes! I’m near-sighted to a pretty crazy amount, so without my glasses I’ll see just one thing in focus and the rest as a blur. There’s something comforting about recreating that with a camera lens! But mostly it’s because I like how you can focus on just one detail, no matter how small, and make the rest of the world fade away into the background. That ornate iron window screen? The background included traffic, a government building and a construction site. Not at all as peaceful as the window itself! I find that time and time again I come back to the idea that you can take all the visual stress out of a photo with shallow depth of field… though it does mean you have to pay attention to getting the right thing in focus, as it would be just as easy here to blur the window frame and focus on the building. Easy but not as lovely, I do believe.

shooting with shallow depth of field
Are you joining the crazy club with me for loving the softness of shallow depth of field? Or does it actually drive you mad wanting to just see everything in focus? I would love to know! If you want to share a link to your favourite shallow DOF photo, please do!

For advice on trying more with shallow depth of field, try
this post for a well-rounded technical discussion,
this post for a quick look at how camera modes can help,
this post if you shoot video,
and this post includes some notes on point and shoot cameras with good control of depth of field (namely the Lumix and the Powershot).

xlovesx

Scrapbooking giveaway day

scrapbooking giveaway day
everyday keepsakes jewelry giveaway

One new thing I’m excited to bring you for 2011 is a weekly giveaway here at shimelle.com! Something new each week, and all you have to do to enter is leave a comment, then check back to see if you’re the winner!

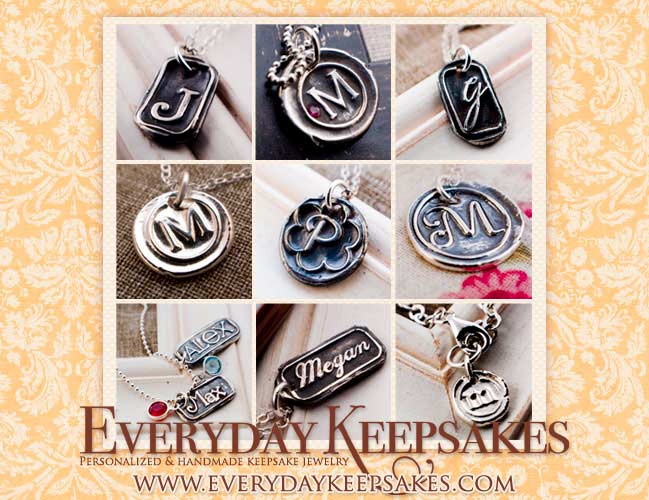
Our first giveaway is from Everyday Keepsakes, the beautiful handmade jewelry collection from the lovely and talented Meredith. Two lucky readers will win $50(USD) gift certificates to Everyday Keepsakes to choose personalized, handmade keepsake jewelry just for you! Great for yourself or as a gift to someone special, every piece is made by hand by Meredith Fenwick, owner and designer at Everyday Keepsakes.

_Meredith says…
I started making jewelry in September of 2008 and opened my Etsy shop selling handmade jewelry pieces in January of 2009… Originally, I mostly made and sold gemstone and crystal jewelry. As the business grew, I wanted to work more with custom and personalized pieces. Also a graphic designer, I began designing and making my own fine silver charms and selling those through my Etsy shop. Combining two of my favorite things – cool design and sparkly stuff, this was finally the thing that I had been looking for as a business. In October of 2010, Everyday Keepsakes opened its virtual doors and the new adventure began._

My personal favourite from Meredith’s collection has to be the Sweethearts design – initials carved on a tree trunk? Cute! And actually nicer as a necklace than an actual tree, of course. I like this style with the layered tags a great deal too – although there are so many lovely designs it’s hard to pick.

To enter this giveaway, leave a comment on this post mentioning one thing you want to do at some point this year — absolutely anything, big or little. Entries close at 11:59pm UK time, Sunday night, and the winner will be posted on Monday. Don’t forget to check back to see if you’re a winner!

This giveaway has now closed. Winners have been posted, so check to see if you won!

xlovesx

If you would like to sponsor a giveaway in 2011, please email me at shimelle at gmail dot com and I’ll get back to you with all the details. Thanks!

Five ideas with Lilybee Papers

scrapbook page ideas with lily bee papers
scrapbook page ideas with lily bee
Today it’s my pleasure to introduce the lovely Julie Kirk to share her own love of pretty paper here on the blog. I hope you enjoy her guest post!

Hi, hi, hi.

It’s great to be over here today sharing five of the different ways I’ve been using some of my current favourite papers and embellishments. If you’re missing Ms Laine already you might like to squint hard while reading my post, as both she and I are brunettes of the same height, you might just be able to trick yourself that I’m actually her. It’s worth a try, no?

Now let’s get on with the pretty things …

For me the allure of Lily Bee Papers is first and foremost their use of pattern. As a long-standing pattern lover, and a collector of vintage fabrics and wallpaper, the retro feel of Lily Bee designs never fails to grab my attention. Then, in turn, I grab those papers!

It’s telling that I always wanted to use the papers straight away. While non-crafty-types might think that sounds obvious, [I can hear their common sense yelling: ‘Well, what else would you be doing with the supplies you’ve gone to the effort of buying?’] I think we all know that just because we’ve made that purchase… it doesn’t necessarily mean it’ll get used. Luckily for them, my Lily Bee purchases never find themselves in the undignified position of being left stranded in the bottom of my paper storage boxes.

So, today I’m sharing five ways for you to get those perfect patterns on to your projects.
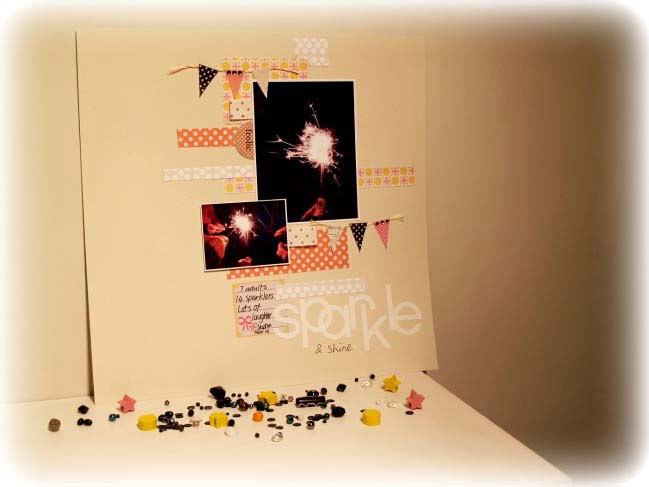
scrapbook page ideas with lily bee Supplies: patterned paper and stickers by Lily Bee Design, Bakers’ Twine by Jillibean Soup and letter stickers by American Crafts.
#1: The delicate, modern page
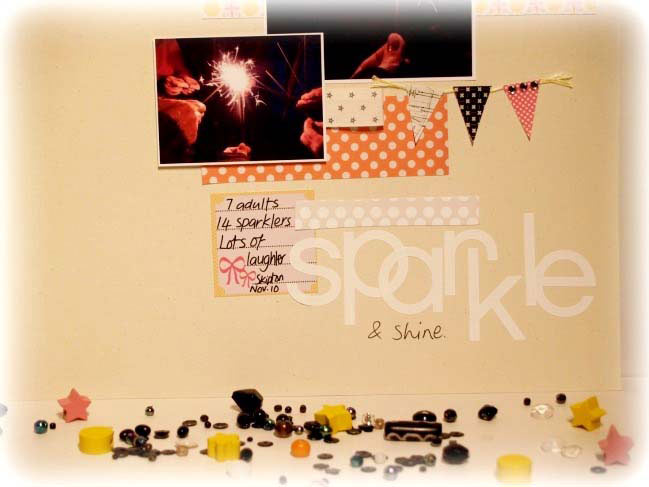
I wanted a fairly sparse yet pretty feel to this page to keep the focus on the striking, glittering, sparkling photographs I took while on a recent crafting holiday with friends. But, for me, one of the trickiest aspects of the clean and simple look is the effort it takes to ignore my desire to use lots of patterns which, while attractive in themselves, could distract from the focal point.

This is not helped by the fact that Lily Bee papers are double-sided which, while certainly a treat to have two lovely designs on offer, makes deciding which to use, while showing restraint, doubly difficult!

To get around my indecision I bravely [or should that be rashly?] chopped into various full sheets of 12×12 freehand and relatively randomly until I had a handful of small strips on my desk. An act which freed both my head and my hand from all that dithering and simply forced me into something with the strips less they go to waste. Because wasting paper is simply not the done thing round here is it?

I then spent time pushing the strips around on my cardstock base until I felt they balanced with one another and, most importantly, with my photos. The patterns I chose were clear and bold enough to retain impact even in such small amounts.
scrapbook page ideas with lily bee
My final touches were the bunting stickers and a journaling block to record those all-important sparkling details!
scrapbook page ideas with lily bee Supplies: patterned paper and stickers by Lily Bee Design.
#2. The vintage, distressed page
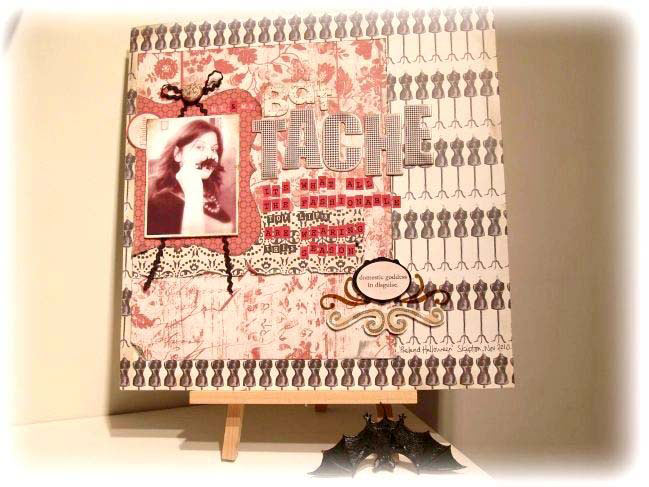
In contrast to the ‘Sparkle + Shine’ layout, this page reveals the amount of pattern-clashing and layering that can occur when I haven’t set myself any ‘clean and simple’ restrictions!

The photograph, which I’d edited to give a sepia, aged effect inspired me to reflect a vintage style in my page. But before I go on, perhaps I should clarify that yes, that is indeed me wearing a plastic Halloween bat as a moustache in the photo. A photo which while I felt it gave me the air of General Custer a friend suggested it was more like ‘General Bonkers’ and she may just have a point!

That said, it gave me a good reason to use some of my favourite paper ageing techniques such as running the blade of my craft scissors along the edge of the paper followed by a generous swipe of Tim Holtz Distress Inks and then some general paper-mistreatment including the folding over of corners!
scrapbook page ideas with lily bee
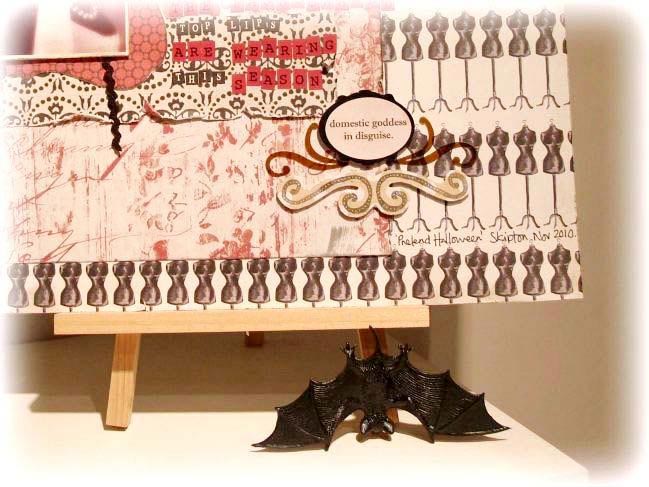
The ‘Domestic Goddess in Disguise’ sticker was the ideal embellishment for this page and what better finishing touch than recreating the perfect handle-bar moustache by stamping a scroll-design on to patterned paper. [I have something of a history of crafty ‘taches as “this blog post full of mustachioed greetings cards”: http://notesonpaper.blogspot.com/2010/04/blog-hop-moustache-mania.html can attest to!]. Plus that particular scroll stamp was actually designed by Shimelle … so I really had to use it here didn’t I?
scrapbook page ideas with lily bee Supplies: patterned paper and stickers by Lily Bee Design, cardstock by Bazzill Basics and border punch by EK Success.
#3. The minimal page

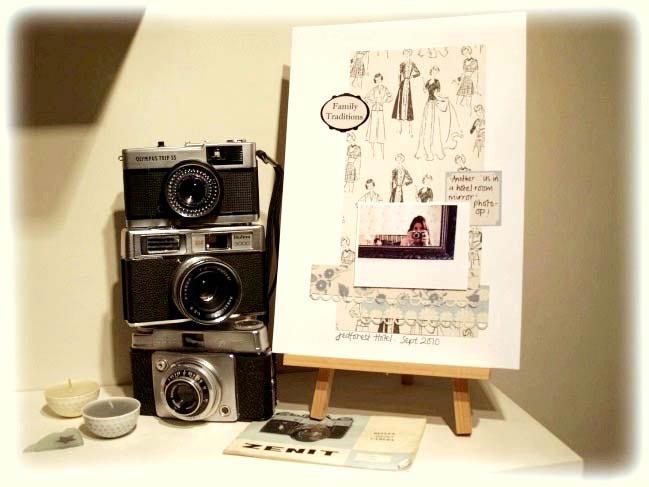
When you’re faced with a paper as divine as a sheet of the ‘Pearls + Heels’ design, with its beautifully sketched images of super-chic vintage ladies, it would take a hard heart [and a foolish scrapper] to cover it all up with layers and embellishments! So another very minimal page was born.

Placing such a retro themed paper directly on to a pure white cardstock made for a modern, stark contrast, which subsequently reflected the white border which I always leave around my photos. My few additions included some strips of blue floral paper, which are similar to those behind me in the actual photo, and the ‘Family Tradition’ sentiment sticker.
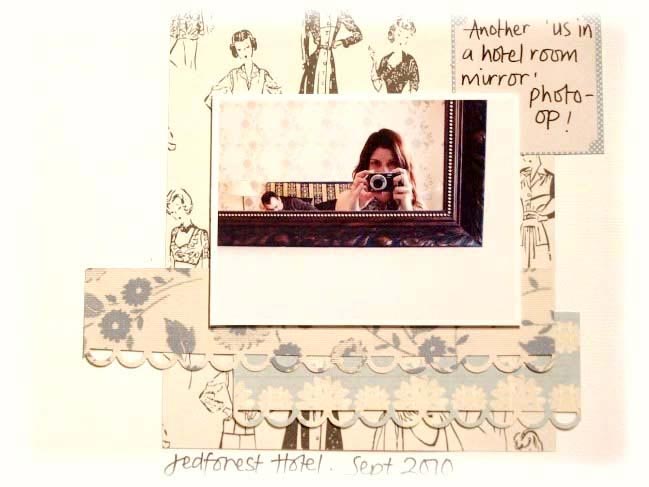
scrapbook page ideas with lily bee
I clashed the retro with the modern once again by punching along the edge of the vintage-style papers with a crisp, graphic scallop border punch.
scrapbook page ideas with lily bee Supplies: patterned paper and stickers by Lily Bee Design.
#4. The kitschy card
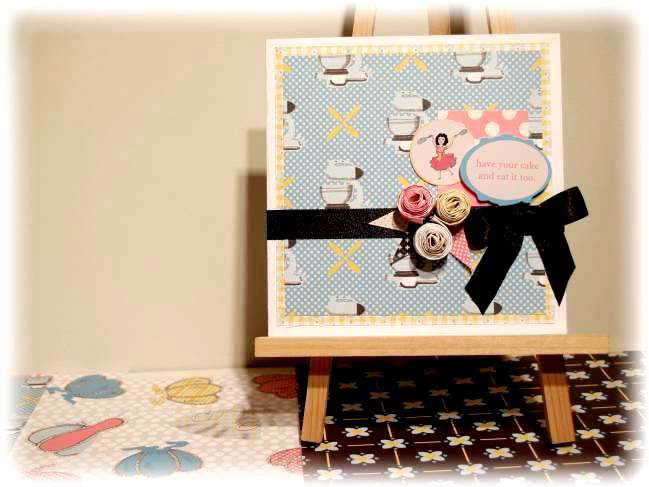
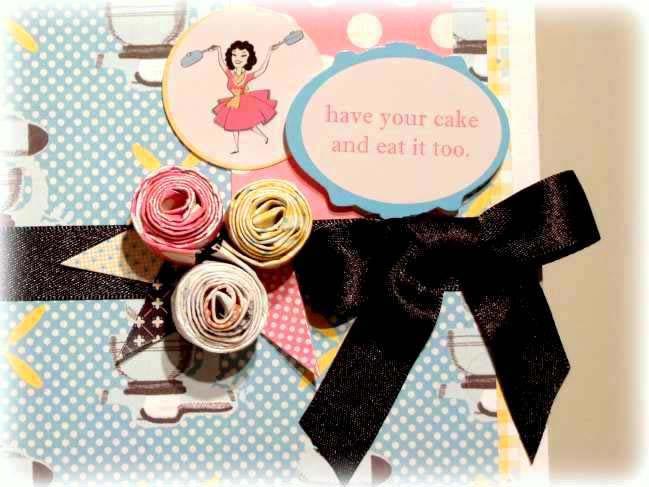
Who doesn’t like 1950s-style kitchen accessories? Seriously, who? I can’t think of anyone. Neither can I believe there’s anyone out there who doesn’t want to hear the message behind the ‘Have your cake and eat it too’ sentiment sticker.

All of which makes the Domestic Bliss range perfect for using on greetings cards so you can pass-on that kitschy kitchenalia goodness to others!
scrapbook page ideas with lily bee
I especially like the papers’ contrast of black against the softer turquoise, yellow and pink so I added a big black bow to co-ordinate. And finally, I added bunting-stickers for the leaves on three of my latest favourite home-made embellishments: coiled paper blooms, which such simple little things to make:
Cut a narrow strip of paper approximately 3cm wide;
score down the full length approx 1cm in from each side;
fold the paper along the scored lines inward toward the middle of what should now be a thin strip;
soften up your strip by curling it as you would a ribbon when wrapping a gift;
roll up the strip into a coil and secure with a few cms of double-sided tape at the end.
scrapbook page ideas with lily bee Supplies: patterned paper by Lily Bee Design.
#5. ‘Off-the page’ collaged home decor
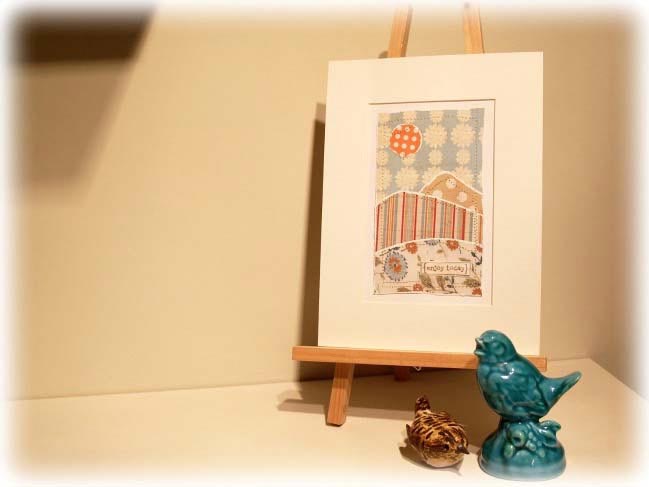
Collage is a craft I adore for many reasons, not least of which is it’s such a creative and attractive way to use up any remaining scraps of precious patterned paper. And, as you might have guessed by now I am perpetually drawn to the layering-up of pretty papers!

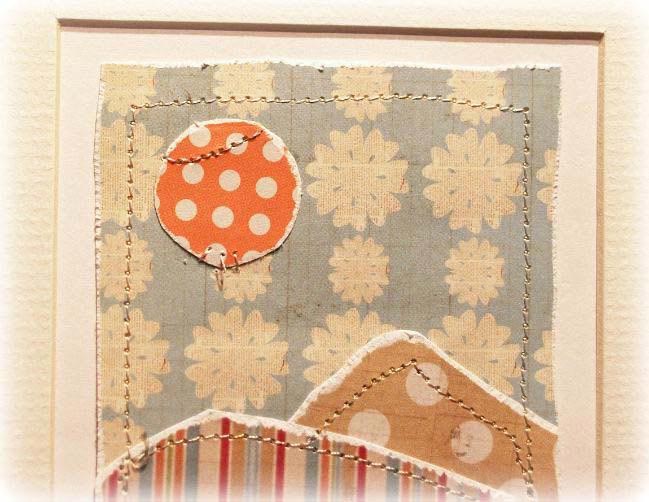
For my little framed scene I began with the blue of the sky as my first layer tearing it freehand until the edges to fit inside the frame mount I had waiting for it, eventually the edges of all the papers were sanded back to the white core to define the outlines of sky, hills and foreground.

Throughout the layering process it’s worth keeping in mind the balance of prints, patterns and colours you’re using. You want them all to harmonise one against the other, in much the same way that you build up a layout, only on a smaller scale.
scrapbook page ideas with lily bee
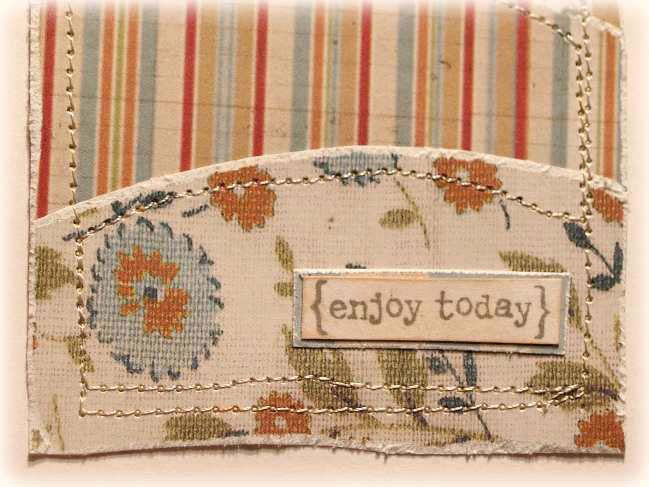
Once I was happy with the placement of my layers, which were initially held in place with a swipe of a gluestick, I ran them through my sewing machine for a traditional patchwork quilt feel.

As well as making pretty additions to your home, similar paper-scrap collages can also be added to the fronts of your cards, tags and layouts and require only the simplest of sentiments to complete them.
scrapbook page ideas with lily bee
In fact, I like this idea so much I’m making a range of them to sell in my Etsy store.

I hope you’ve found something amongst my ’5 Ways’ has inspired you to pick up those patterned papers and then argue with yourself over which ones to use first!

Thank you for reading me today … and thanks to Shimelle for letting me poke my head around her door and say ‘Hi’ to you all. It’s been fun!


Julie Kirk works as a freelance craft designer for several UK craft magazines. When she’s not surrounded by patterned papers she can be found assisting students with disabilities at a university.

Her blog Notes on Paper regularly features papercrafting projects; vintage treasure-hunting adventures along with some of the noteworthy things she overhears on campus!

Julie delivers online crafting workshops with her Copy + Paste Project co-blogger Kirsty Neale and also opened up an Etsy shop Julie Kirk & The Carousel Zebra selling her handmade fashion and crafting accessories.

You can also find her on Twitter.

Layout ideas to stretch your scrapbooking supplies

4 formulas for stretching your scrapbooking supplies
scrapbook page ideas
I’m convinced that whether you have a tiny stash of crafting supplies or a whole room filled with so much paper you’re not sure how you’ll ever use it all, there is a certain satisfaction that comes from stretching our scrapbooking supplies and getting plenty of projects without a refuel. Right? Whether you’re a fan of getting a monthly kit or like me, you like to choose your own supplies to make sure you love everything in the mix, stretching your supplies to multiple layouts can help you get the most for your crafting budget and also help avoid the ongoing struggle of how to practically store all those half-used sheets of patterned paper. Plus it’s a great way to be productive when scrapping with friends, if you find the conversation distracts you from remembering the great plans you had for your scrapbook pages — though that could just me with that problem!

I have four formulas that I love for taking one set of supplies and making a variety of different layouts without needing to unpack any extras. I started with three sheets of cardstock, six sheets of patterned paper, one set of Thickers letter stickers, one sheet of themed stickers and a small selection of journaling cards, adhesive gems and a tiny bit of ribbon. For tools, I added a border punch, a mask (like a stencil, but in negative) and spray ink to the usual line up of paper trimmer, scissors, adhesive and black journaling pen. All the papers are older designs that had been sitting in my stash – I loved the designs but it was time the went from the shelf to the scrapbook, I do believe!

With all that ready to go, I sat down to create four scrapbook pages using easy formulas – all designs you could reinvent with your own style.

scrapbook page ideas
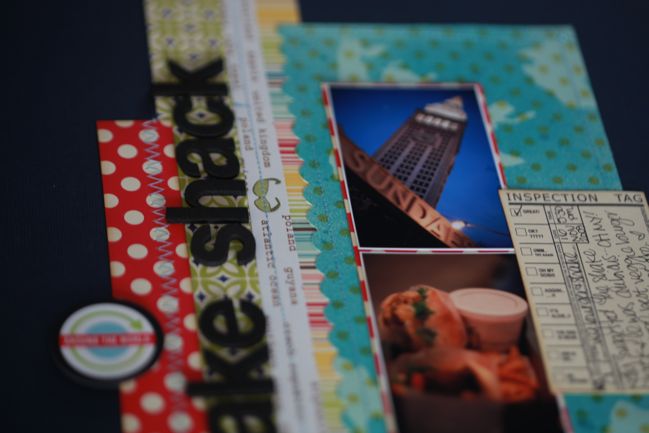
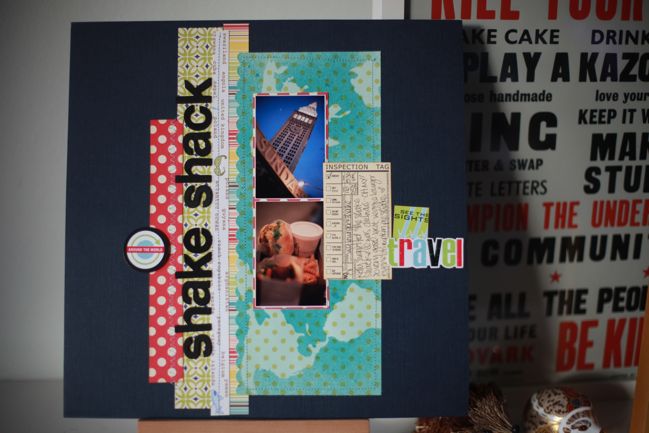
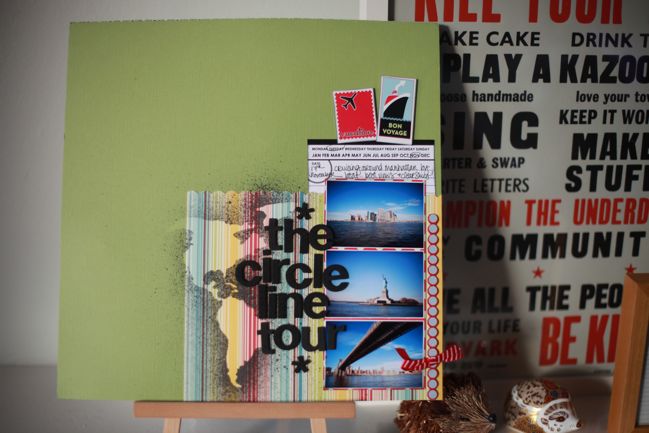
The first formula is Several Strips. It’s just as simple as that really: start with a sheet of cardstock as the background and cut strips of several patterned papers. Trim them into different lengths and overlap them in a group in the middle of the page. One one half of the page, add your photos and journaling; on the other add the title. I love vertical titles for something just a little different, and easy-to-read fonts help them work. And for the record? Shake Shack in NYC serves the best veggie burger possibly ever. Sigh.

scrapbook page ideas
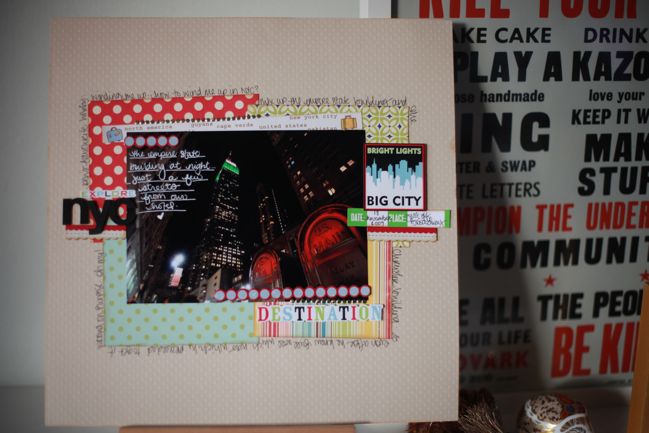
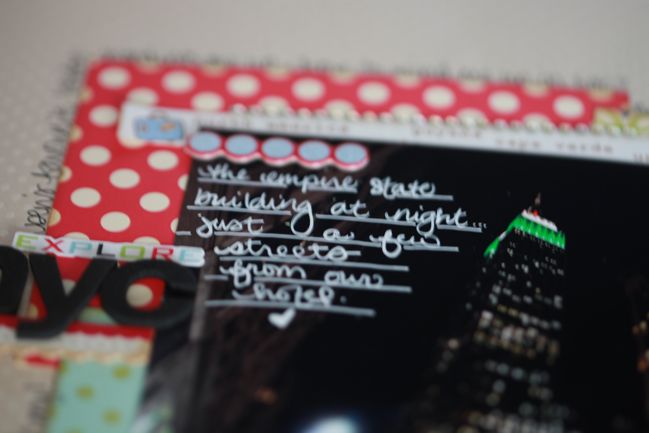
For one photo, 4×6 or larger, I move away from the strips to go for a Bunch of Blocks. I love scrapbooking with quadrants but sometimes that’s a little too formal or I want to use a bit less of each patterned paper. So for this look, the size of each block is less important, since they will be a bit more haphazard than the equally spaced quadrants. Overlap all the blocks and place the photo on top of the pile. The edge of the patterned papers gives you room to journal and it’s easy to add just a bit of embellishment in three spots around to the photo to hit a balance of look-at-the-photo-but-appreciate-the-crafty. And I love white ink on a dark photo too!

scrapbook page ideas
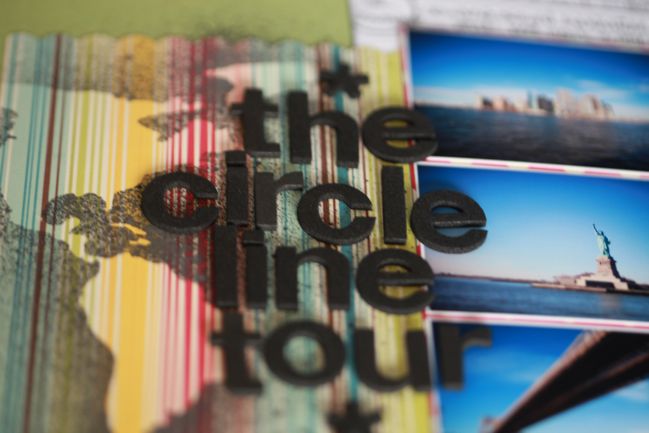
If you have three photos – especially printed at a small size – you can stack them up to create a Totem Pole. Just think of how a totem pole is designed: several figures, roughly the same size, stacked on top of one another, with some sort of extra flourish at the top, and usually something somewhere on the sides. So stack up the photos by placing them in a column, and your flourishes can be a title on the side and a journaling card and accents at the top! I like to anchor the totem pole design by placing it in the corner of the page, and use the mask and ink on this page to go just over the edge of the patterned paper so everything sat just right on the cardstock background.

scrapbook page ideas
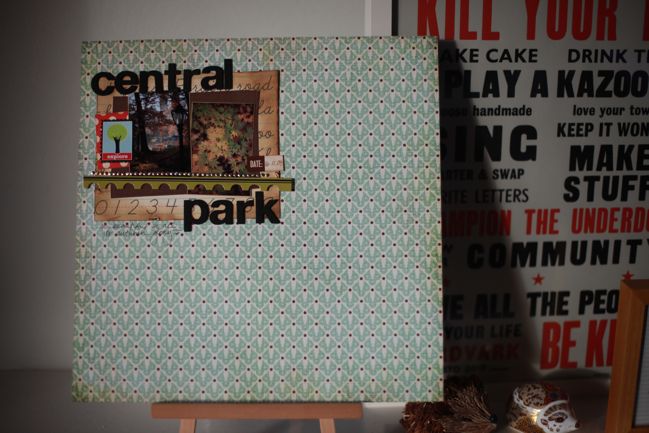
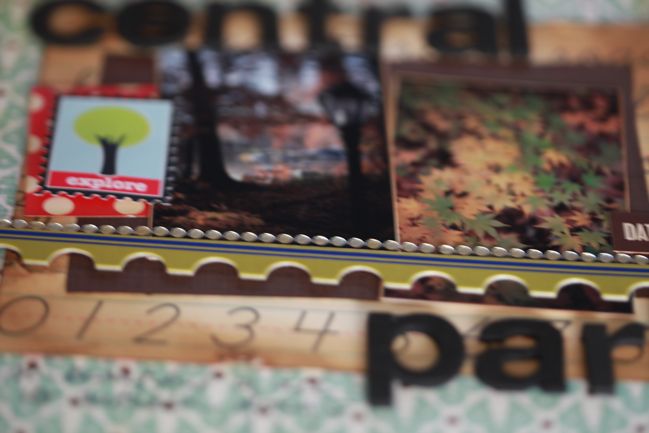
As for the last page? Now concentrate. Layouts with a concentrated design style always help to stretch your supplies, because they simply don’t need as many things to be added before you call it done. This is the only layout I didn’t start on a plain cardstock background: instead, I chose my favourite pattern from the six sheets and kept it as a whole sheet, then chose one quarter of the page as the scrapping canvas and just left the rest of the page alone. Admittedly, concentrated designs are a bit of a love/hate issue perhaps – but if you’ve never given it a shot, you might be surprised with the variety they can add to your albums. I wouldn’t want every page to be so sparse but i love the look just now and then.

One last little suggestion: I find it easiest to stretch one set of supplies to multiple pages when the photos have something in common, so the theme looks like a choice rather than turning the pages of my albums and suddenly thinking ‘Oh, and I made all these pages when that paper collection came out’. These photos are all from a trip to New York on the way home for Thanksgiving 2009. These four layouts used the majority of the supplies I started with, but I have some scraps left over so I can carry those into other layouts from that same trip perhaps – and stretch the scraps even further.

Okay, so now I’m curious: what’s your opinion on stretching one set of supplies? Do you love the look you get over multiple pages from one kit of supplies (either purchased as a kit or assembled from your own stash collection) or do you prefer that every page in your albums have a different combination? Like it’s okay for the red polka dot paper to appear on more than one layout, but the next time you used it, it would be with other papers entirely? Is it something you actively think about when you scrap? Ooooh… discussion time! Let me know what you think.

xlovesx

Back later today!

scrapbook page ideas
Sorry for the few days of absence there… we’ve been spending more time on trains and out of towns in our last few days. We’ve just arrived in Saigon and have internet access now! I’ll be back later today with a scrapbooking post, if you can believe it. A scrapbooking post with four layouts! Shocking, I know.

Looking forward to catching up with everyone after a few days of doing things like this.

A note to those of you on Facebook — Facebook is blocked in Vietnam, so although I can read messages by email, I can’t reply. If you need to contact me in the next few days, please feel free to email me at shimelle at gmail dot com and I’ll be able to write back! Thanks so much.

xlovesx

Travel Notes from Thailand's Ancient City

Travel Notes from Ancient City, Thailand
The Ancient City in Thailand… it’s an interesting sort of place. Imagine you were a wealthy businessman who wanted to do something nice for your country. I know, you think, I’ll build an amusement park! But not the sort of amusement park with daredevil rollercoasters and log flumes. The kind that plots a map of the entire country on some empty land and fills it with a mix of transplanted, recreated or just plain made up landmarks that correspond to each region of the country’s geography. That makes sense, right? Well, that is the Ancient City in a nutshell.

Pay to get in, then ride a bicycle or drive a golf cart around the winding paths to see various structures either moved here or constructed here so you can get a feel for every part of the country and all the unique cultures contained therein. You’ll see things like this:

Travel Notes from Ancient City, Thailand
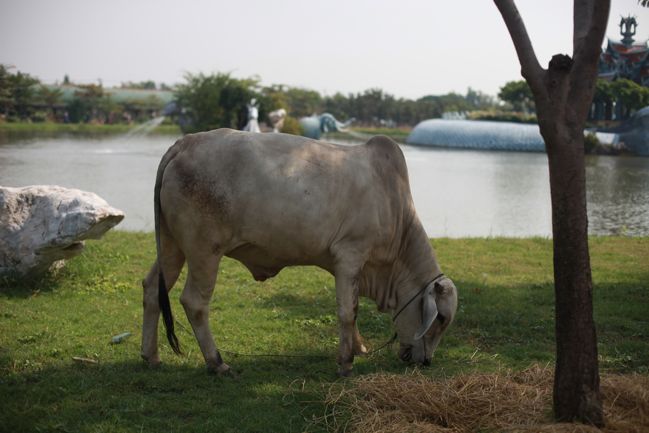
Because every theme park needs some random cattle, right?
Travel Notes from Ancient City, Thailand
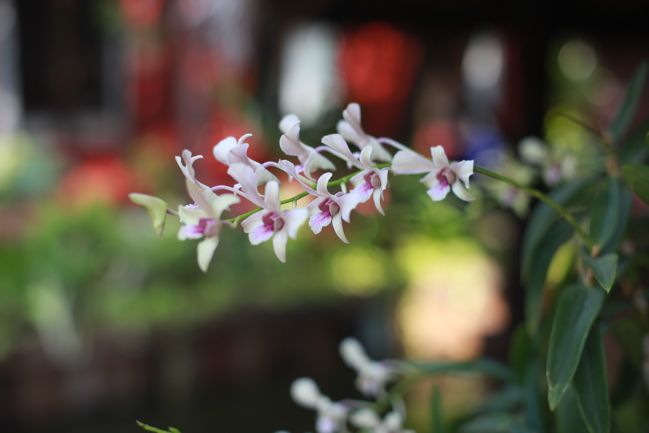
And some pretty flowers.
Travel Notes from Ancient City, Thailand
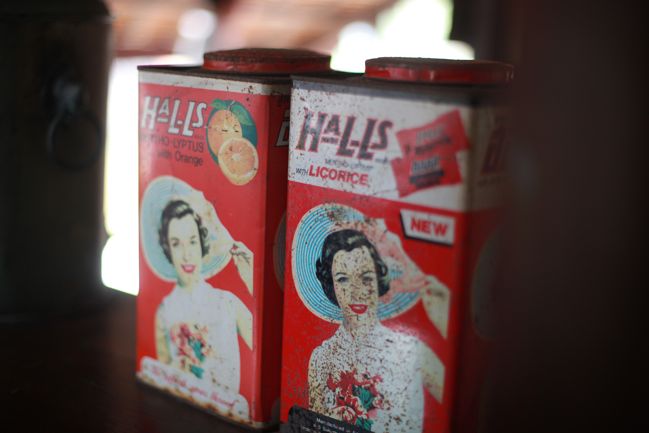
As well as samples of product packaging over the years.

No rollercoasters, but on the plus side, you also don’t have to queue for anything and the ladies’ room was the cleanest of all I saw in Thailand, I do believe!

Travel Notes from Ancient City, Thailand
The real reason The Boy was a fan: he could drive a golf cart all afternoon. He would quite happily forget the ‘lf’ at the end of ‘golf’ and tell you this was a go cart instead. Oh my. So maybe there was nearly one rollercoaster, if you were a passenger on this cart!

Travel Notes from Ancient City, Thailand
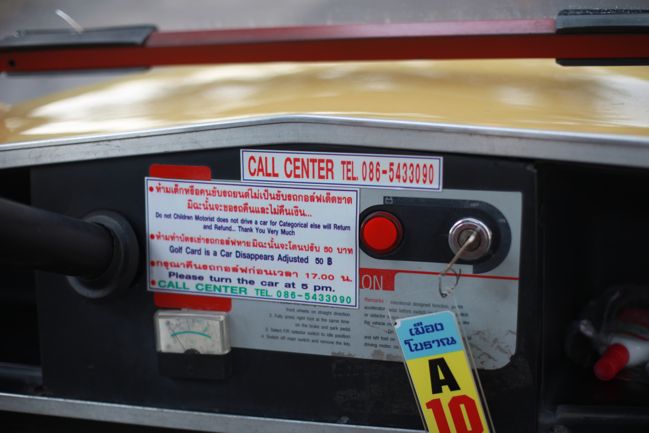
And if you can understand what they mean by all that, then your translation skills are awesome. (Not that I could read a word of it in Thai – just that this particular translation is more creative than others!)

Travel Notes from Ancient City, Thailand
There are temples, ruins, bridges, homes, waterfalls, mountainsides, rivers and ancient burial grounds all recreated here.

Travel Notes from Ancient City, Thailand
Which makes it seem like a geography teacher’s dream: can you imagine the field trip potential? I am sure there are often many children here with worksheets in hand.

Travel Notes from Ancient City, Thailand
Though that might be a bit confusing when you come to a spot on the map where it indicates that some pieces were just made up from their imagination, like a bridge (over no water) painted like a rainbow and clouds. The little-known Rainbow Brite province, I do believe.

Travel Notes from Ancient City, Thailand
Rather than school children when we were there we saw a corporate retreat, with all sorts of groups doing trust falls and scavenger hunts… something comforted me that those mixed up days are part of business life all over the world! I went on many as a teacher and they were always a little hit and miss. But then they were usually in the school yard or maybe a conference room at a local hotel. Not a theme park of national landmarks!

Travel Notes from Ancient City, Thailand
Okay, so maybe I think this whole idea is slightly comical, but it is worth seeing. It’s a very pleasant place and far quieter than Alton Towers or Six Flags, of course. And it did let us see a bit about life in years gone by or parts of the country we’re not going to see with our own eyes.

Travel Notes from Ancient City, Thailand
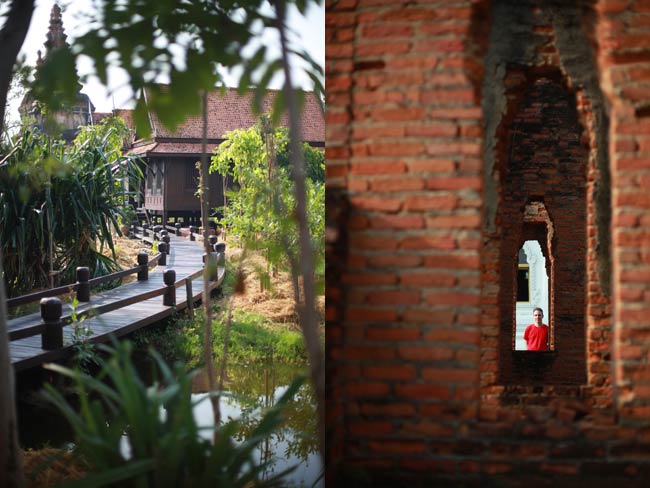
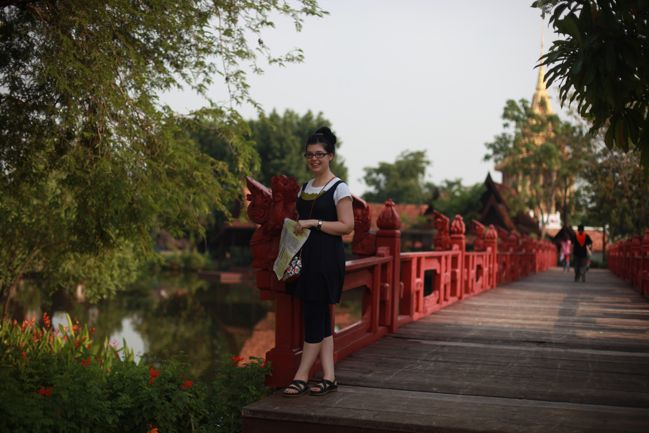
And just to ensure family and friends that I am actually here and this isn’t a random joke I’m blogging from my bedroom in London, some photographic evidence of my location:
Travel Notes from Ancient City, Thailand

Now… share a slightly funny thing to see if I came to your neck of the woods! After all, I hail from the state with the world’s second largest ball of twine, so your locale must have something unique too! (And given the choice, definitely go see the Ancient City rather than the ball of twine! But if you happen to be driving by…)

xlovesx

Travel Notes from Nighttime Bangkok

happy new year from bangkok
banyan tree vertigo bar bangkok
Happy New Year! May 2011 bring you and yours much happiness and nothing you can’t overcome with grace.
banyan tree vertigo bar bangkok
We’re a few countries on from this today, but a sparkly night in Bangkok sounds pretty New Year’s Eve to me!

xlovesx