


How to use a digital photo mask
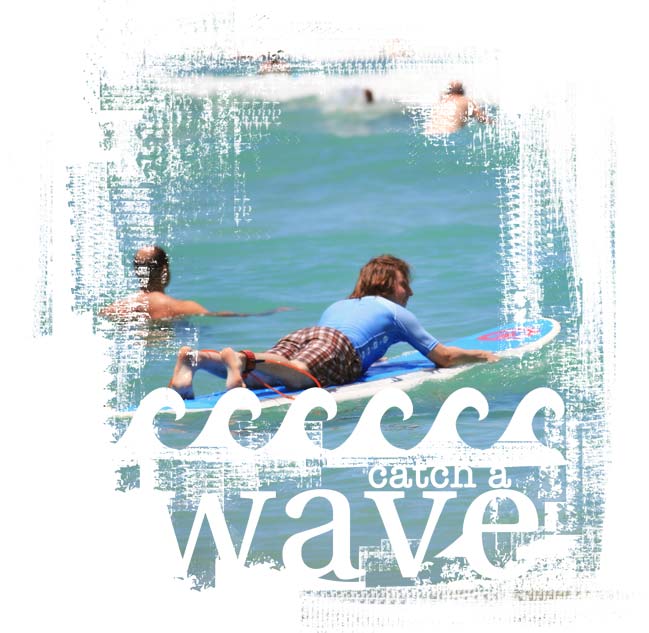
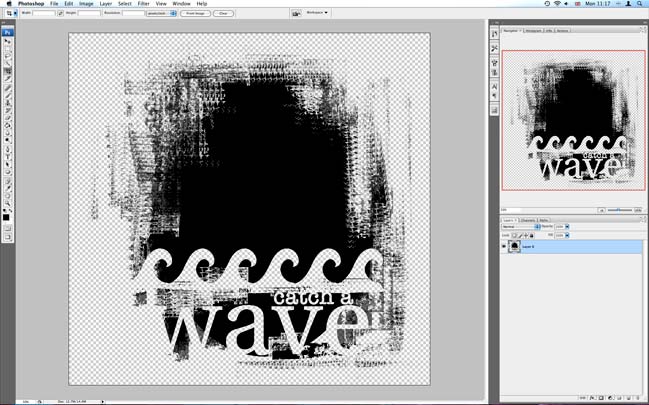
Photo masks are a simple way of showcasing a photo with pretty much any shape or design you can imagine. It’s an easy process once you know how to combine the two images—the photograph(s) and the mask. Here’s how:
1. Open the photo mask file in Photoshop or Photoshop Elements (I’m using Photoshop CS3, but you can accomplish this in any edition). The mask I am using is from Photocuts Masks v.2 by Carina Gardner.

2. Open the photograph you would like to mask in the same program. If you want to edit your photo, do that now and flatten all the layers before you continue.
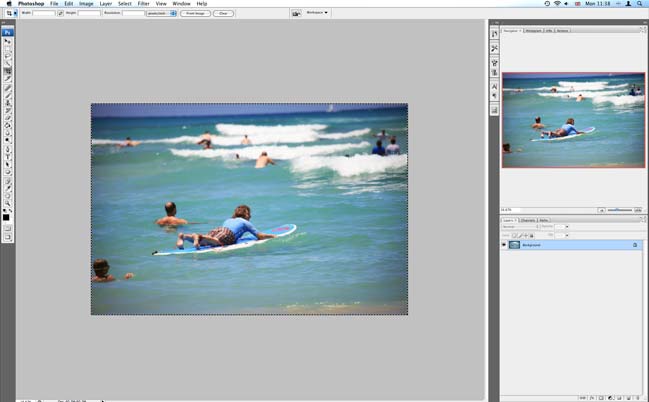
3. Select all (ctrl+a) and copy (ctrl+c) your photograph.
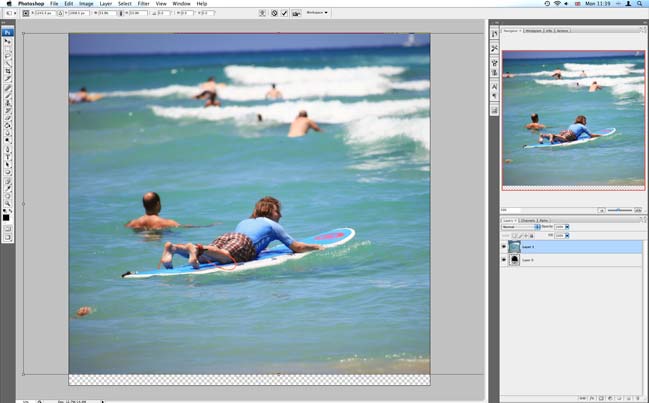
4. Go back to your photo mask file that is open in the same program (you can find it in the window tab at the top). Paste (ctrl+v) your copied photograph over the mask. Use the transform tool (ctrl+t) to adjust the size of your photograph to the rough size of the mask. To change the size without distorting your picture, hold down the shift key and pull a corner to make the image bigger or smaller.

5. Head over to your layer palette at the right of your screen. Your photomask will probably be called layer 0 and your photo will be layer 1. Right click on layer 1 to see this pull-down option menu. Select ‘Create Clipping Mask’ or ‘Group with Previous’. (These two commands act the same in this function, but have different names in different editions of Photoshop.)

6. And now your photo should have magically snapped into the shape of your mask.

7. You can continue to move your photo and change its size until you are happy with its placement in the mask. Just make sure the photo layer is highlighted in the layer palette and then use the move or transform tools to put things in the right place.
Want to transfer this image to a digital scrapbook page you’re working on? Flatten the layers (ctrl+e), select all (ctrl+a) and copy (ctrl+c). You can then paste it into your digital layout and continue to add layers above and below.
Want to save the masked image to use online, like in a blog post? Change the image size to what you use for your blog (look in the image tab at the top of the screen) and then choose Save for Web from the file tab. Saving as a jpg will default the transparent areas (the checkerboard) to white or another default colour you have selected. That’s fine—if that colour is the same background as your blog. If you want to save the transparency of the image, you’ll need to save it as a gif or png (but be aware that not all web browsers like png files).
Want to print this image to use on a paper layout? No problem. Just use your normal print dialogue and the transparent elements on your screen will become the white of your photo paper. Add a layer of digital paper below the mask if you would like the background to be anything other than white photo paper.
Ready to choose some photo masks? You can start your search here.
xlovesx
![]() Read more about:
Read more about:
Next post:
Previous post: Ten Scrapbooking Supplies I Can't Live Without


