How to use a layered page template

One of the most common things I hear from scrappers adding digital pages to their albums is that digital takes so much longer to get to a completed page. When I first started to play with digital pages, that was definitely the case. It took me hours and hours when I could make a paper page in under thirty minutes! After a little practice and some frustration, I found out my extreme timing was completely unnecessary: there are ways to make digital pages far more quickly than paper pages. Half of that pacing comes from just learning what functions you’ll be using so you remember them and the quickest ways to make them happen (like when you start to type ctrl+c for copy instead of using your mouse to go up to the top, click on edit, pull down to copy and then hope for the best) and the other half comes from the coolest thing in digital scrapbooking: layered page templates.
When paper scrappers use a sketch, we still have to do all the work. If the sketch has a circle, we have to figure out how to create that circle: use a punch, a die-cutter, trace around a plate, cut it out, paint it, embellish it — so many options! With a digital page template, you start with a sketch but with just a couple clicks you can make each part of the page ‘snap’ right to that part of the sketch. Once you get the hang of it, it’s super fast and you’ll be hooked on the wide variety of page templates available.
For today’s step-by-step process, I’m using the Remember Page Template and other papers and elements are linked as they are shown.
Start by opening the template: it will be a .psd file. PSD stands for Photoshop Document, and that means it is designed to be used with either Photoshop or Photoshop Elements. If you’ve never tried Photoshop Elements, you can download a free 30 day trial to try the software and see what you think. You can also use the templates with Gimp and later versions of Paint Shop Pro, but the commands may be slightly different that what you see in the steps that follow.
When you open the template, it will look something like this:
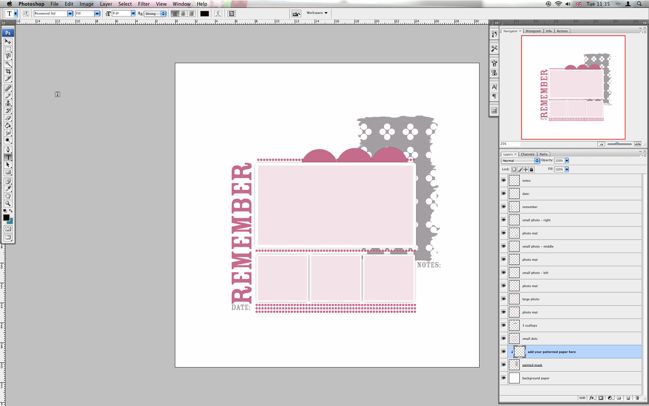
You’ll see the page and the layers palette (on the right corner of my screen – you can move it wherever you like) shows you how all the elements of the page are on separate layers, so you can work with each one separately. That’s the trick to making this magic trick work.
I keep my photographs and my digital scrapbooking kits in two separate photo libraries, so I usually open my photos first so I can have just the pictures I need, then close that library and switch over to all my digital goodies. This template has room for four photos: one large and three small squares. Go ahead and select the photos you’re going to use and open them in Photoshop. They will open as a separate file while your template stays open in the same program.
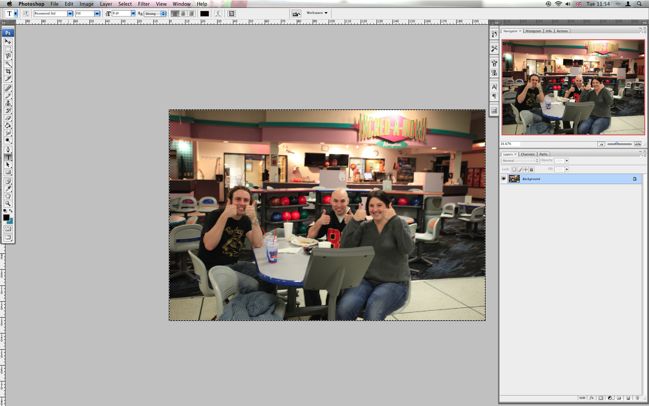
Here’s the photo I’m going to use for the large picture on my page. If you have any editing you want to do to the photo, go ahead and do that now and make sure you flatten it back down to one layer when you’re done. Then select all (ctrl+a) and copy (ctrl+c) so you have this photo on your clipboard. You can go ahead and close this photo (ctrl+w) if you want — I don’t like to keep too many files open at once, but sometimes it means I close something too quickly and have to open it again. It’s just personal preference.
By the way, if you’re following this tutorial on a Mac, use the cmd key instead of ctrl. That’s the same throughout.
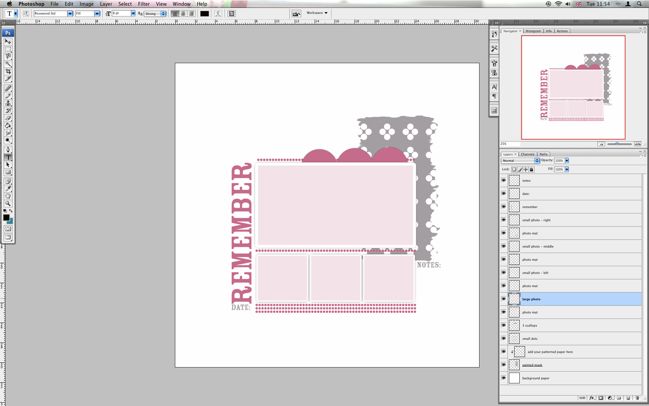
Now go back to the template file. Click the layer you want to add to — for this photo, that layer is called ‘large photo’. That layer will be highlighted in the layer palette (see how it is blue over there at the right?). Now paste (ctrl+v) so your photo is added right above that layer.
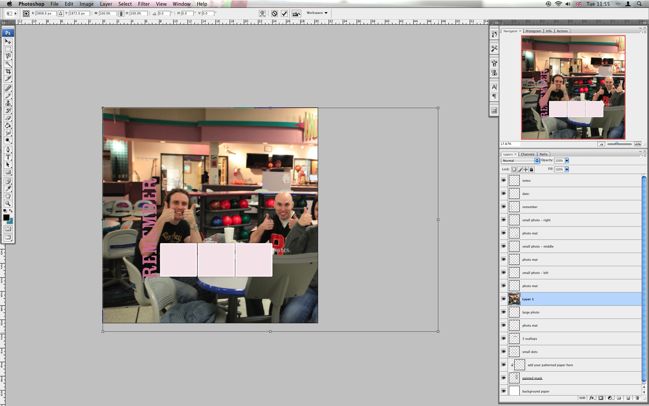
Your photo will probably be the wrong size or in the wrong place. Don’t worry! If you don’t those bars around the edge of the photo (they are default in some versons and not in others), click ctrl+t to make them appear. This lets you resize the photo. Be careful: always hold the shift key as you resize from the corner. If you don’t hold down the shift key, you’ll pull the photo into a weird ratio that will distort it and your friends and family will not like you when you skew their photos to make them look half as tall and twice as wide while you you skew your own photos to be extra tall and thin. It’s just not worth it, I promise. The shift key will keep everything in check! Magic.
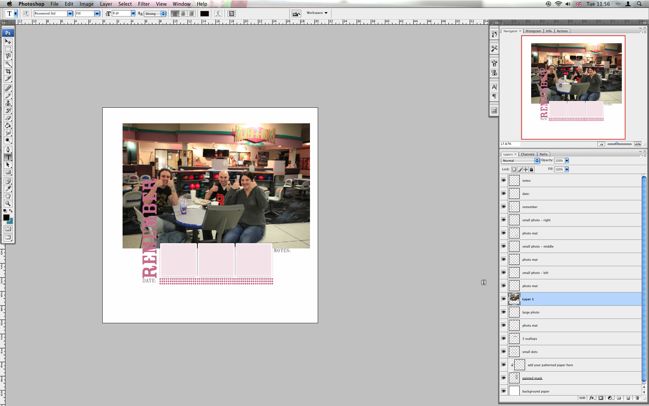
Now my photo is closer to the right size. A bit more magic: I don’t need to get it to exactly the size of that box. With just a couple clicks you’ll be able to make it snap to the box. In this case, it also means i can zoom right in on the people in the photo and get rid of the extra background that it pretty messy and unexciting. (Bad photography, Shimelle, bad.)
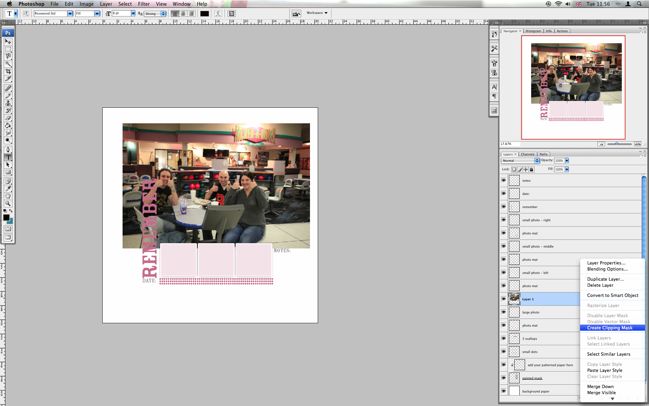
The magic snap effect has different names and is found in different places in different editions of PS/PSE, so figure out where yours is and then know you’ll come back to it often. First try right clicking on the layer with your photo, and look for an option called either ‘Create Clipping Mask’ (that’s what I have in PS CS3) or ‘Group with Previous’ (that’s what it’s called in many older editions and PSE). Click that and things will snap right into place.
If you don’t see anything useful when you right click, use the menu at the top of your screen instead. Make sure you have the layer with your photograph selected, then go to ‘Layer’ at the top and pull down to see the options. Again, look for Create Clipping Mask or Group with Previous. You should find it there somewhere. Click and magically all the extra photo will disappear.
You can continue to move and transform the photo once you’ve clipped/grouped — just make sure you have the photo layer selected.
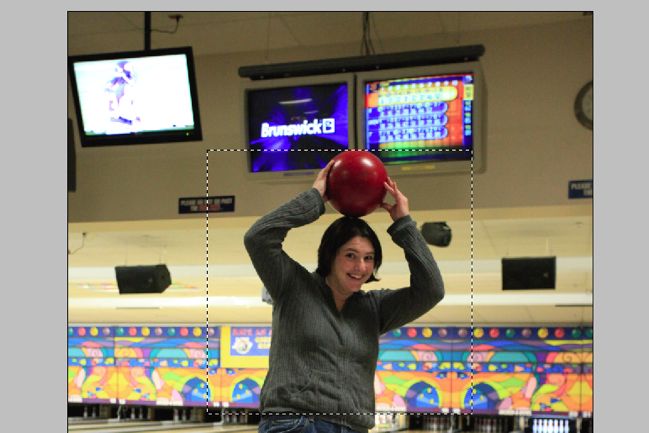
We’ll need to repeat this process for each photo (and later, each paper) to complete the page. When you work with the smaller photo spots on a template, you may want to be more selective and not copy the entire page. Use the rectangle marquee tool (near the top of your toolbar, most likely) to select just the part of your photo you want. The small photos on this template are square, so holding shift while you select with the rectangle marquee tool will keep your selection as a square. The dashed lines show you what’s in your selection. When you have what you want, copy (ctrl+c) and close the image if you would like.
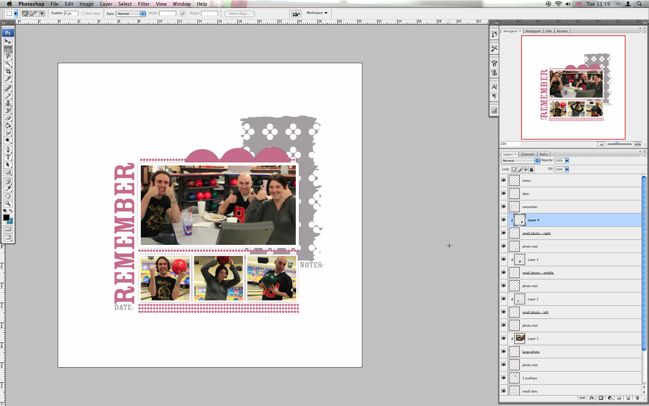
The process is exactly the same for the small photos as the large photo: click on the layer you want, paste (ctrl+v), transform (ctrl+t) to change the size or angle, then Create Clipping Mask or Group with Previous to snap it to the right spot. Here are all four of my photos clipped into place.
Now I’m going to change gears from photographs to the digital files to finish the page — time to play with pretty papers!
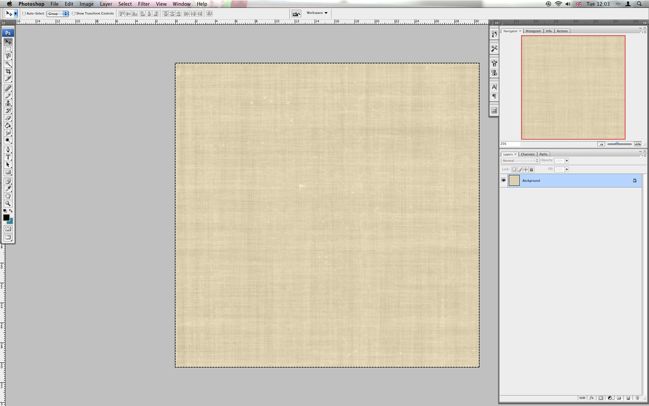
Let’s start by opening a background paper. This is from one of my favourite kits ever: Willow Tree by Brandy Buffington which has beautiful papers and embellishments that go with just about any topic.
Select all of this paper (ctrl+a), copy (ctrl+c), close it (ctrl+w) and go back to your page file.
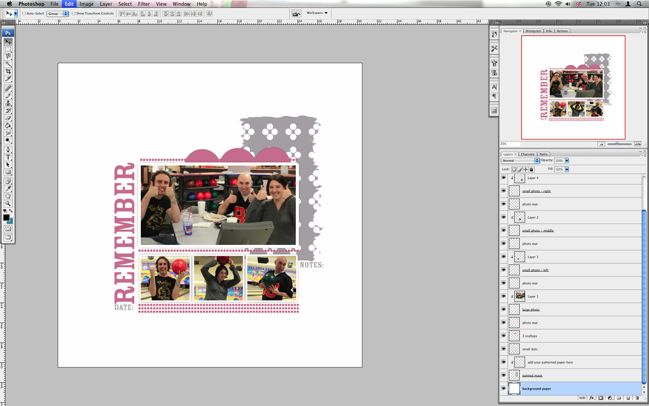
Select the very bottom layer of the page. It’s called ‘background’.
Paste (ctrl+v) in your paper.
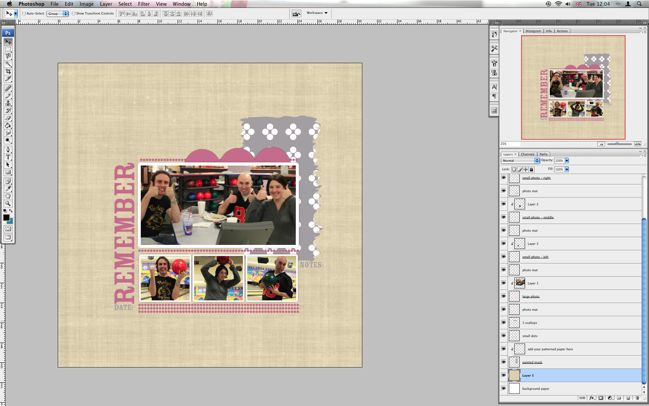
Since we’re using the full paper, we don’t need to clip or group anything — just leave it there and now we have a background to our page.
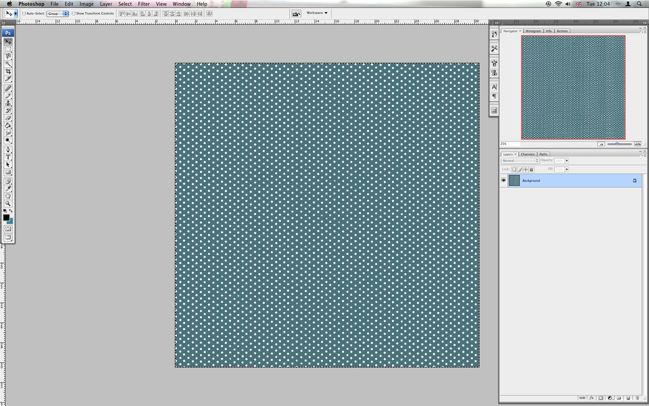
Now we’ll repeat this process for each element on the page. Open another paper (this is from the same Willow Tree kit), select all (ctrl+a), copy (ctrl+c) and close it (ctrl+w). Go back to your page.
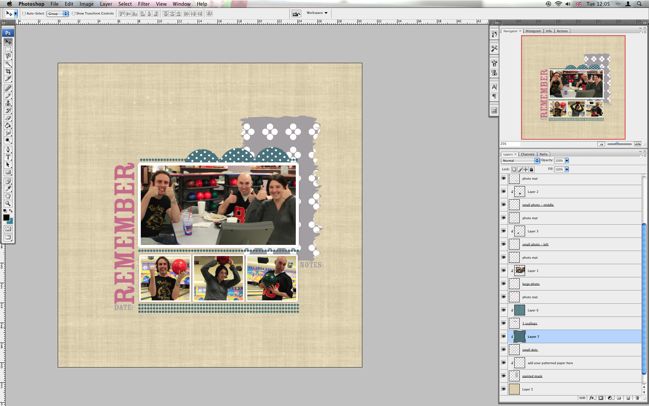
Adding paper to different page elements is exactly the same as what we did with the photographs. Click on the layer you want. Paste in the paper you copied. Group with Previous or Create Clipping Mask to snap it into place. I added the teal polka dot to the three scallops above the photo and a solid, textured teal to the rows of small dots. The small dots are all on one layer so it’s easy to colour them all at once, but if you want to colour them separately, you can just paste multiple layers and move things around to let them all show in the right place. You can clip or group more than one layer to the same page element.
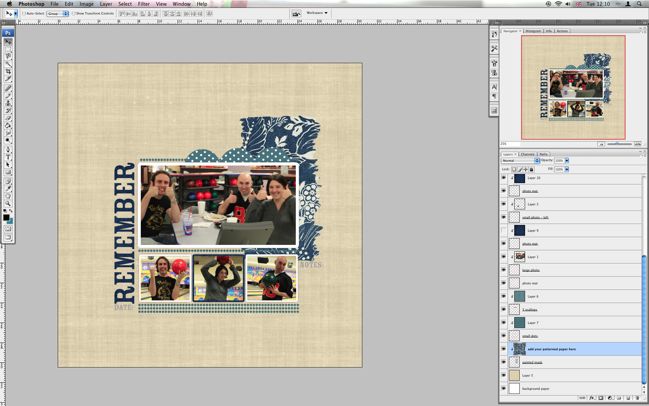
Repeat the same process for the Remember title layer, the middle photo mat and the painted mask layer. Both the navy solid and the navy pattern are rich fabric textured papers from the Art Greco kit by Queen of Quirk. Open the paper, select all, copy, close it. Then select the layer, paste and group/clip to snap in place.
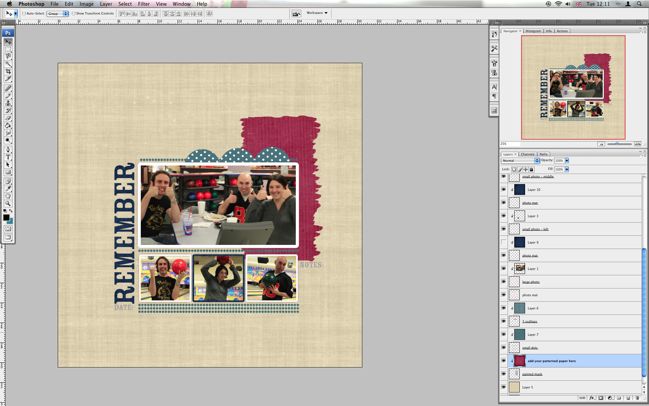
But wait! As much as I love that navy blue pattern, there’s just not enough colour going on here for me! No problem — open another paper, repeat the process and paste it in to change that painted section from blue to red. (The red paper is from the Boris Paper Collection by Queen of Quirk.) In this template, you don’t even have to use the clipping/grouping bit on this layer as it’s already built in to the template so you can just paste it right in so you can instantly see if it’s the right paper for you there.
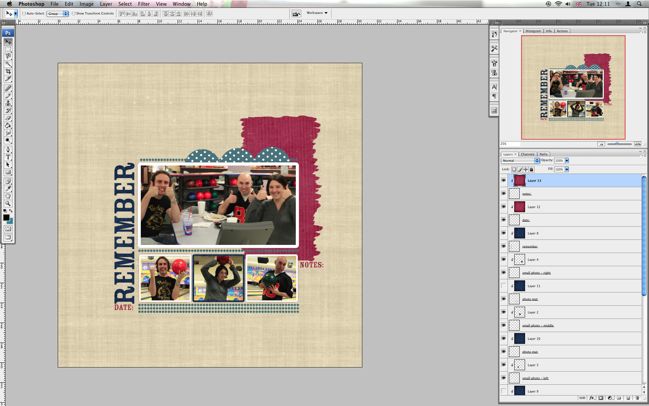
To add some balance to the red, I pasted the same red paper in for the date and notes layers. You can’t change these words with your type tool, but if you want different words there, just click the eyeball next to the layer so it’s switched off and it will disappear. Then you can use your type tool to add whatever word you would like instead. Or you can use the arrow to click and drag it to another place — you can do that to move any page element in a template!
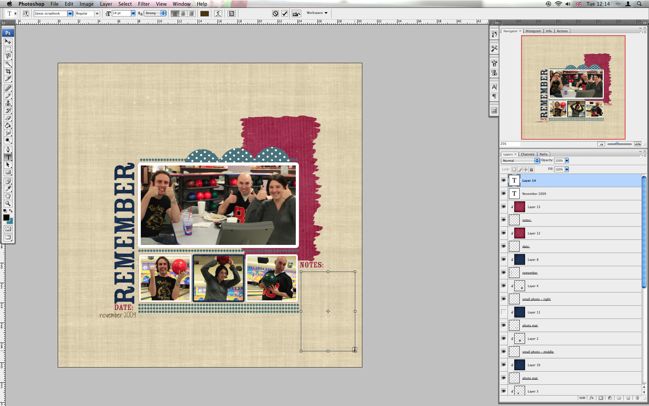
Now all my page elements from the template are in place but I need to add the date and notes. Select the type tool (it looks like a big T in your toolbar) and click under the ‘date’ heading. Type your date, change the font, colour and size to whatever you would like. I used brown writing and a free font, 2ps Scrapbook. You click on the arrow tool and then move your text around until it’s in the right place, or you can use transform (ctrl+T) if you want to change the size or angle.
When you add your journaling box, click on the type tool again but instead of just one click, hold down the mouse button while you drag the mouse to form a box. That way you can just type and it will automatically go to the next line when you’ve run out of room. The one click option will just let you type on and on and on without ever starting a new line. So one click for short things like dates and click and drag to make a box for longer things like journaling.
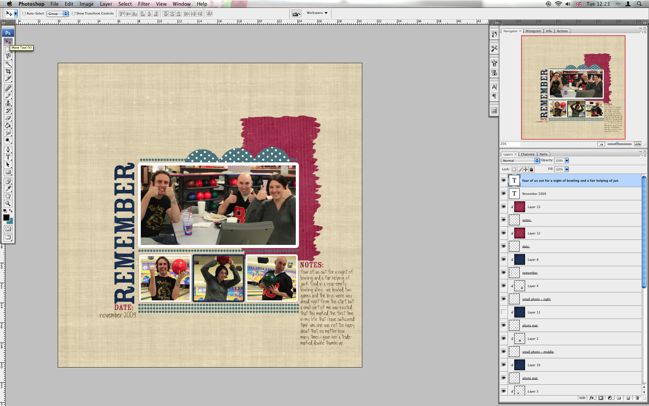
Here is the journaling box all filled in and moved to just the right place.
That’s the page done if you like! Save it as a jpg if you’re happy you won’t want to change any layers or save it as a psd if you think you will want to come back and move something later. If you save as a psd, be sure to give it a new name so you don’t write over your template (you can use it again!) and also keep in mind that psd files are significantly larger than jpg files, because you’re essentially saving all those papers and photos too, so be mindful of how much room you’re taking up on your hard drive!
If you want to add more to the page, you can add more embellishment over the top or underneath the layers of the template. Just paste things in wherever you would like them and move them around. Here’s what I added to finish my page:
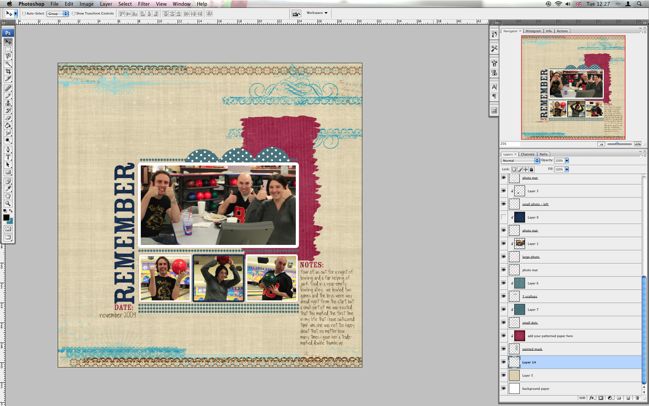
I wanted to add something to the top and bottom of the page, and I started by pasting in an overlay from the Bada Bing set by Rhonna Farrer but it was a bit too much and a bit too bright for this page.
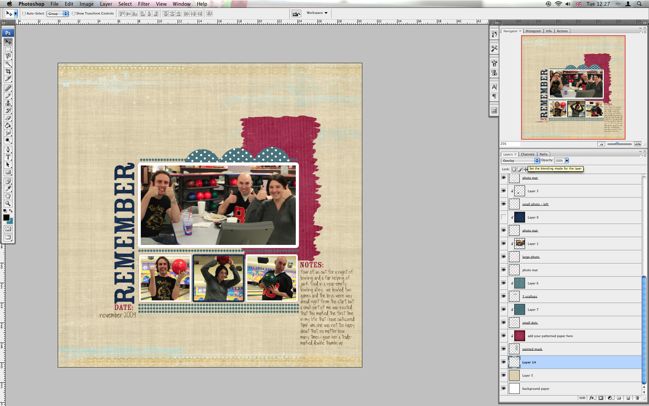
To make it more subtle, I changed the layer mode to overlay. Click on the layer to select it, then look at the top of the layer palette and you’ll see an option that says ‘normal’ by default but you can pull down to see lots of choices. Try overlay, screen or soft light when you want something to be more subtle. The result will always be unique to the combination of elements you have on your page, so just try and see what works best.
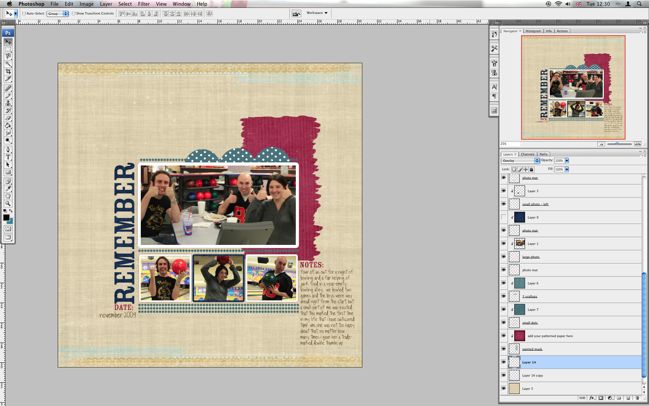
I decided I liked the simpler border at the bottom of the page the best, so I used the rectangle marquee to select and delete the top of the overlay, then select the bottom border and copied it. Then I pasted it into a new layer, used transform (ctrl+t) to turn it 180 degrees and moved it to the top of the page. Presto — all finished!
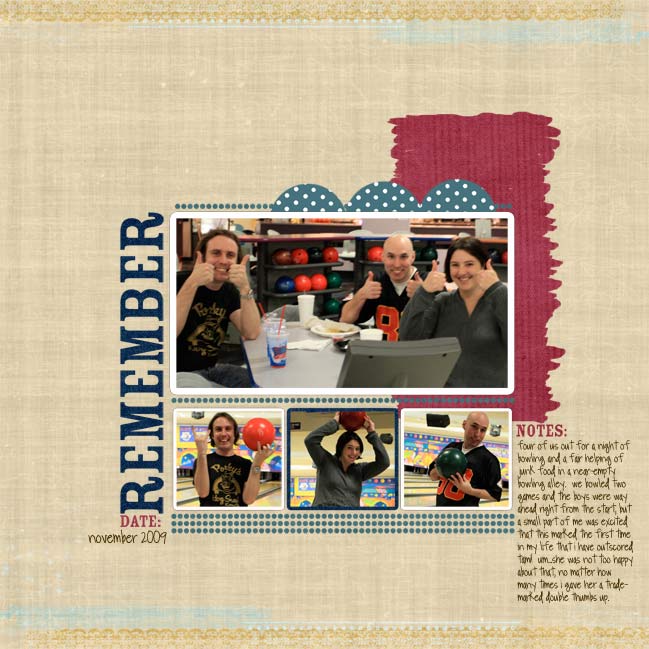
Remember, these same steps can be used for any layered page template in .psd format, so bookmark this tutorial if you need a hand putting your templates to use. You can download free templates to get you started and find hundreds more templates here.
If you found this template useful and created a page, please share a link in the comments!
You can find more digital scrapbooking tutorials here. Happy scrapping!
![]() Read more about: digital-scrapbooking-and-hybrid-scrapbooking
Read more about: digital-scrapbooking-and-hybrid-scrapbooking
Previous post: Digital scrapbooking tutorial :: Customising a digital page template


