Mixed Media Light:: A Scrapbook Tutorial by Christin Grønnslett
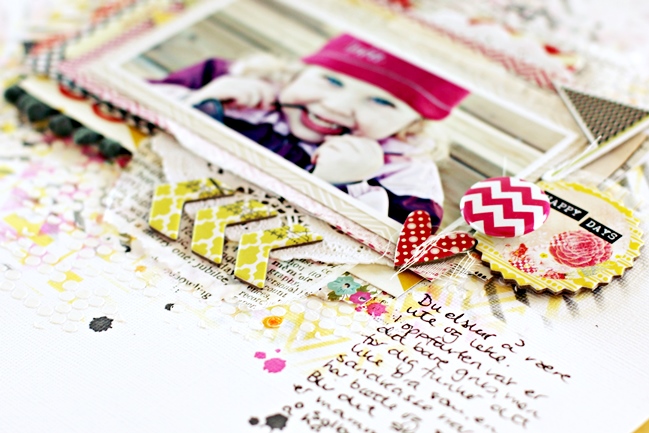
Are you afraid to get sprayed mist or acrylic paint all over your desk? Are you too impatient to wait for the different layers of color to dry or do you think mixed media is not for you? This tutorial offers a drier approach to the world of mixed media – a light version.
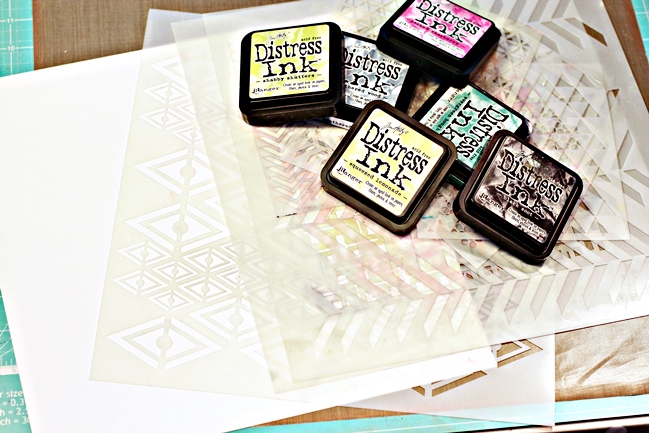
Start with a sheet of white cardstock. Start with a clean sheet and be ready for what is going to happen. See this as a small exercise in losing control – Why? Even if dry media can be more controllable, you are still playing with color.
Next thing – dust off your Distress Inks. Let them come to use for something else other than stamping because you may have noticed the same thing as I have, the Distress Inks don’t stamp perfectly on Bazzill classic cardstock.
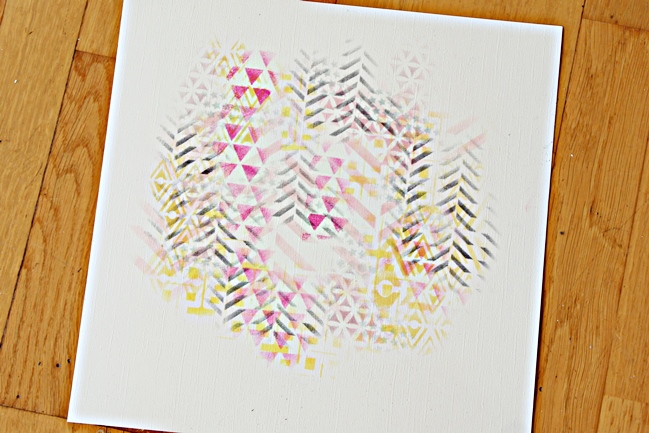
Stencils are next on the list and now it’s time to put the sponge to the test. Go look in your bathroom for those make-up sponges and use them with the Distress Inks if you don’t have a Tim Holtz ink applicator with foam. Use different colors and ink the page here and there using the sponge and stencil. (You can even do the same technique using Pan Pastel – just then remember to fix the layers so it doesn’t smudge). The Distress Inks (or other dye inks) dry very fast and you can add layers right away; you don’t have to wait for it to dry or use heat to speed up the drying time. Add as many layers and colors as you want. Here I have used a total of eight different sizes or shapes of stencils from The Crafter’s Workshop.
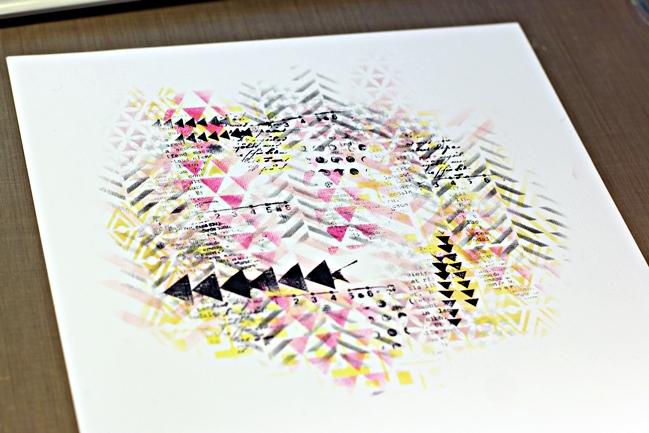
When you are satisfied with the amount of stenciled layers, it’s time to use background stamps, but this time – leave the acrylic block on the table. This time you don’t want the edges when you stamp to be clean, but rather pretty random, so just hold the stamp with you thumb and index finger and use some fingers from your other hand to push the ink on the page.
If you use a smooth cardstock you are able to stamp a little cleaner than with a canvas cardstock, but I prefer the slightly more yellow white canvas cardstock than the more bluish tone of the smooth cardstock.
If you dare not travel further in the land of mixed media, you can actually stop here and hop down to the part where I continue with layers of paper.
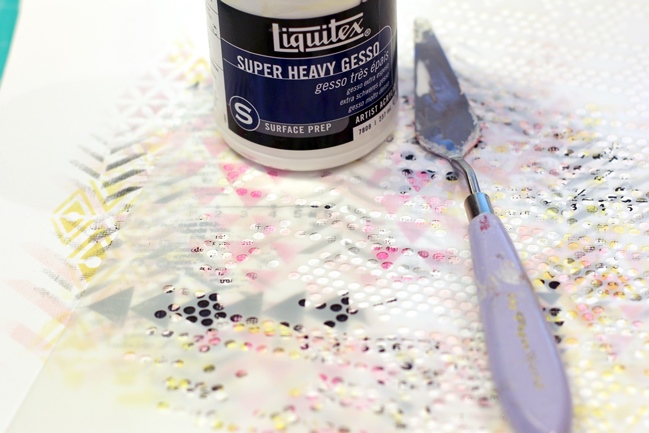
Now for a white medium – gesso. Pick out a stencil again and use a spatula to smear out the gesso over your inked and misted parts. Preferably with a heavy gesso to give the page some extra depth. The whole idea of adding a white gesso to the layout is that it gives you more texture and it softens the layers of color. The gesso takes some time to dry, but you can speed it up by using a heating tool, just avoid using too close or too long, the gesso will start creating bubbles and you don’t want that.
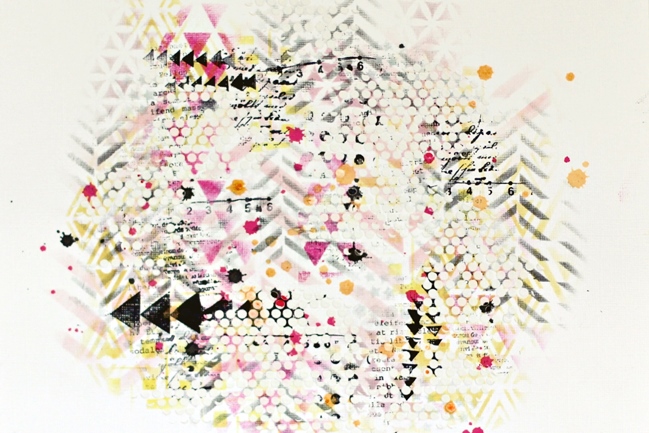
The next part requires a little drying time too. It’s time for the mist. For this project it doesn’t matter which kind of mist you use, you can also mix your own mist using the Distress Ink and some water! Drop some mist here and there in coordinating colors – a little lighter and a little darker than the distress inks to give the page some more contrast. The black inked parts and the black stamped parts help give the page some contrast. Again, this is a part you can skip too if you don’t want to use any wet mediums. Here you can see the finished background where parts of the stamped parts are covered in gesso.
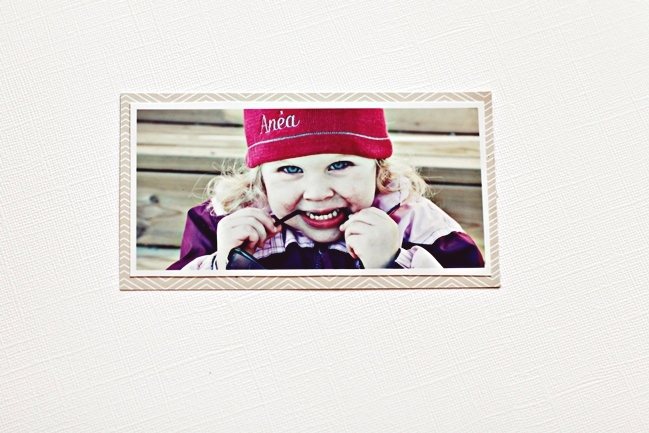
While that is drying, gather a new sheet of white cardstock and the pictures you want to use. You might wonder why you need more cardstock. It’s mostly to have a light background when you work with the next phase – the layering.
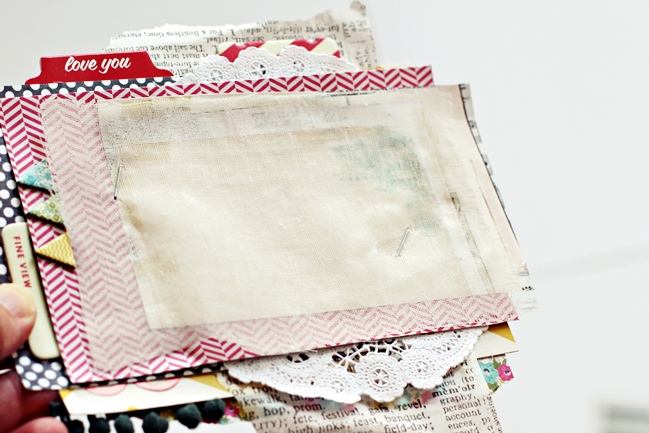
Start with the picture and pick out a light paper to have behind your picture, crop it pretty close to the picture, then start to add different sized layers behind those layers. Leave some wider and others taller. Bend the sides and corners slightly. In between the layers add patterned paper cut with border punches, add doilies and stickers and other fun things, but not too much. You don’t want your embellishments to draw the attention away from you project.
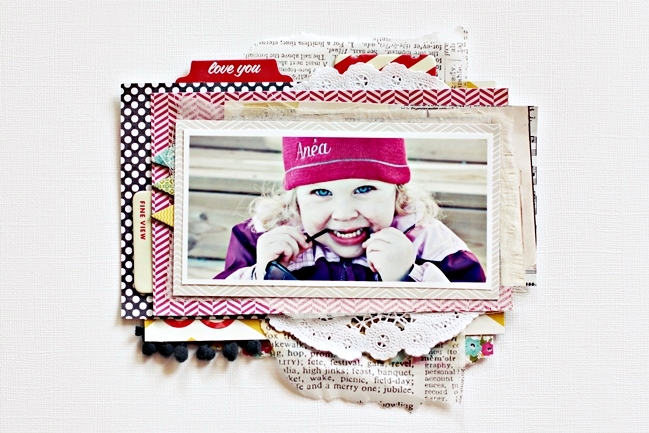
When you are satisfied with the layers pick up your stapler and staple the layers together, excluding your picture and picture mat. That way you can more easily choose where to have all your layers. Don’t worry if you cover up most of what you have inked… that is part of the game. Since you have stapled the papers together in the middle you are free to cut pieces off if you think they cover up too much. When you are happy with the placement start adding more pieces, like cut out pieces with a punch, a doily or other fun things and then tape or glue the layers to your mixed media background.
Add your last decorations, title and journaling when every thing else is in place. Don’t be afraid to use your own handwriting. During my first years of scrapbooking I never had any journaling on my pages because I hated my handwriting. My handwriting hasn’t improved, but now I don’t mind it anymore and gives the pages a more personal touch. I think that goes together with the non-measure thing of just letting go and create and not letting anything hold me back.
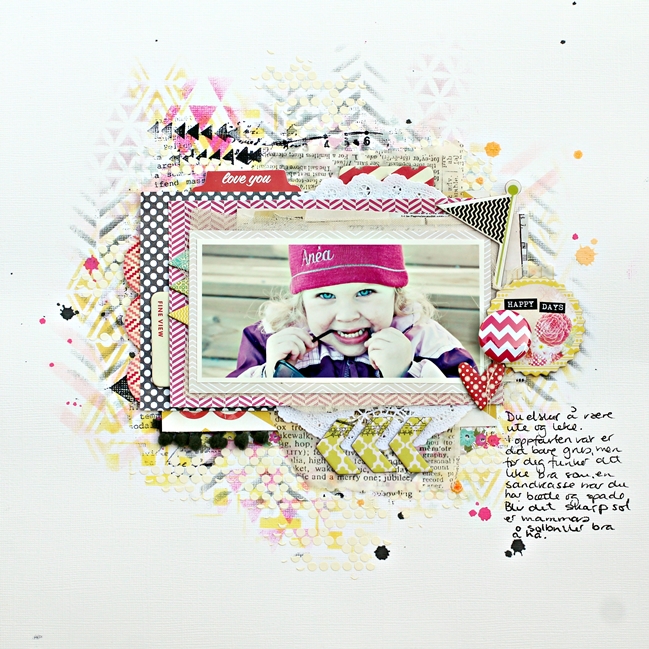
Here is the finished project. Hope you have enjoyed this tutorial and that it will give you a taste for more multi medium approach to scrapbooking. I would love to see what you create with these ideas!
| Christin Grønnslett lives in Røyken,Norway with two kids and a husband. When the kids are tucked in bed she escapes down to her scrap cave in the basement. Christin currently serves on the Design Teams for Pink Paislee, Zva Creative, My Creative Scrapbook, Papirdesign, Scrap around the world and The Color Room and will be teaching for the first time in the fall. Feel free to give her some good advice! You can find her blog here and follow her on Instagram. |  |
![]() Read more about:
Read more about:
Next post: Five Cute Ways to Use Cork Products by Yuki Shimada
Previous post: Sketch to Scrapbook Page, featuring a sketch by Allison Davis


