pretty paper. true stories. {and scrapbooking classes with cupcakes.}

lovely to meet you Twitter Facebook Pinterest YouTube

Take a Scrapbooking Class

online scrapbooking classes

Shop Shimelle Products

scrapbook.com simon says stamp shimelle scrapbooking products @ amazon.com shimelle scrapbooking products @ amazon.co.uk

Reading Material

travel

Five Ideas for Using Your Paper Scraps by Melissa Stinson

Five Ideas for Using Your Paper Scraps by Melissa Stinson @ shimelle.com
Scraps. They’re something that every papercrafter deals with at onetime or another, and you can bet that in any given week on the scrapbooking message boards someone will ask a question about how to sort, store, and use these little bits of left over paper. I’m a big fan of finding ways to use these pieces as soon as possible (since once stored they seem to never see the light of day in my scrap room again), and today I’m going to share five ideas for using up some of your paper scraps.

Five Ideas for Using Your Paper Scraps by Melissa Stinson @ shimelle.com

Five Ideas for Using Your Paper Scraps by Melissa Stinson @ shimelle.com
Layer Them Up
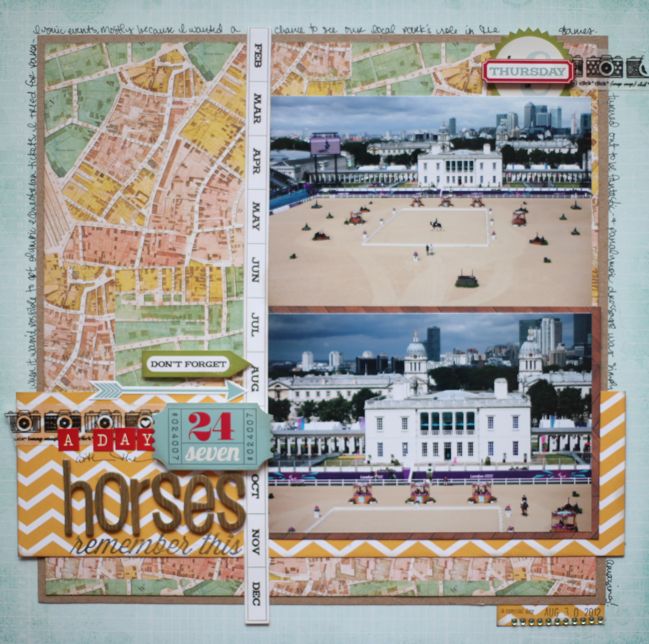
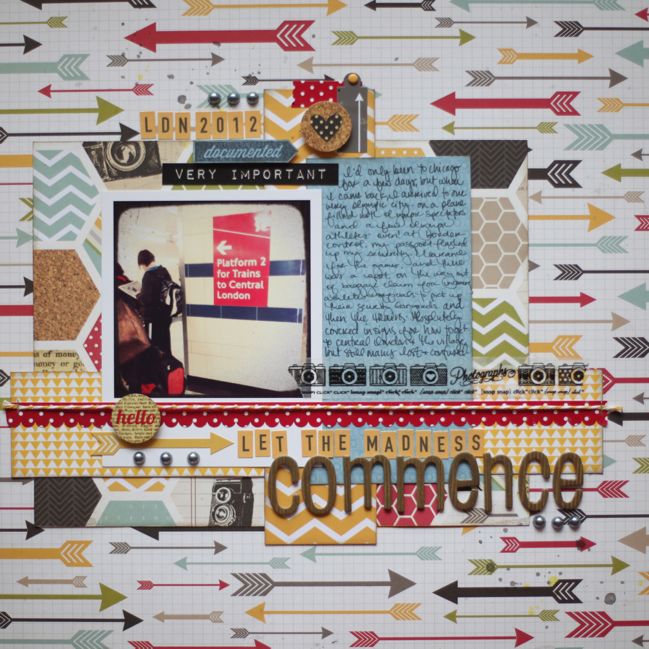
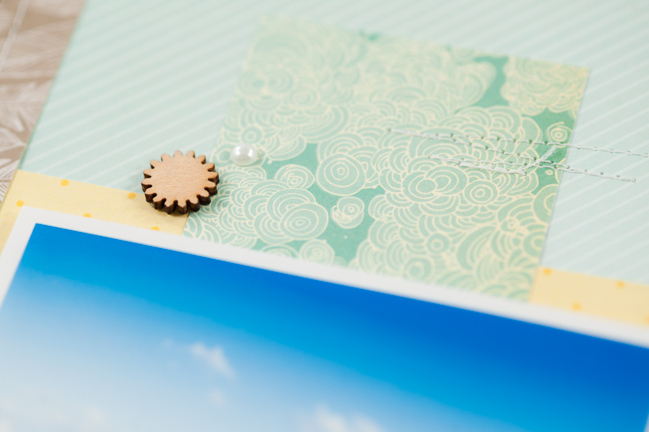
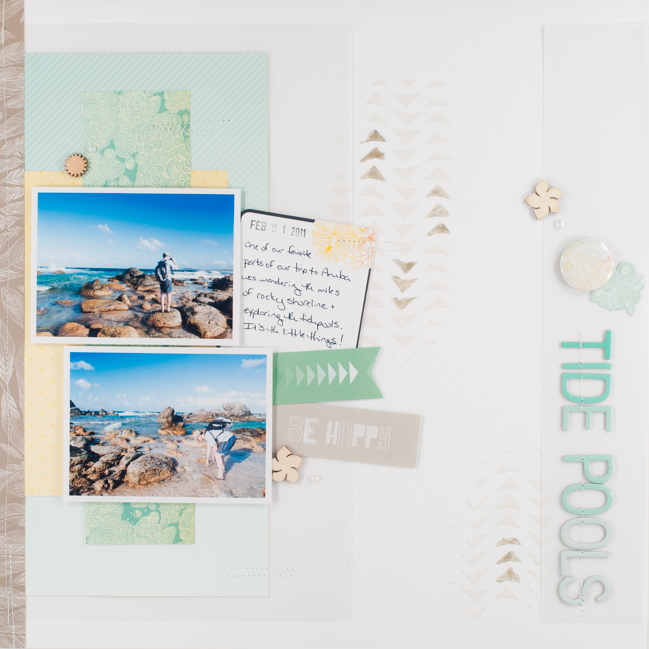
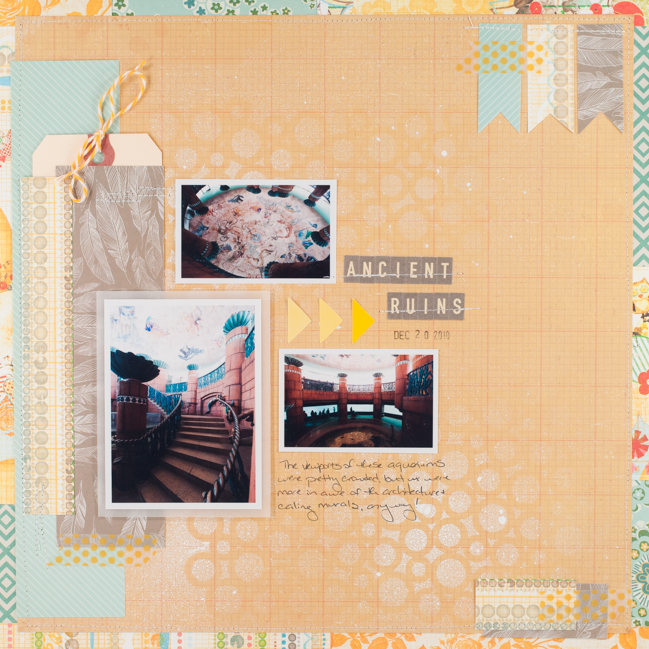
This might be the most obvious way to put paper scraps to work, but it’s also one of the most effective at using up lots at once! I recently worked on a project with the Sundrifter collection by Studio Calico, and when I was finished I had a small pile of blocks, strips, and bits of patterned paper scattered across my desk. Rather than go through the trouble of finding a way to store these little pieces with the rest of the collection (my preferred method of storing scraps), I decided to use a bunch of them on a layout instead. Sundrifter also has lots of pinks and peaches in the mix, but for this page I decided to stick with an aqua, gray, and yellow color scheme. I picked two photos, added a sheet of vellum and some embellishments, and then just played around with the placement of the scrap papers on my page until I was happy with the look.

Five Ideas for Using your Paper Scraps @ shimelle.com

Five Ideas for Using your Paper Scraps @ shimelle.com
DIY Your Own “Ephemera Pack”
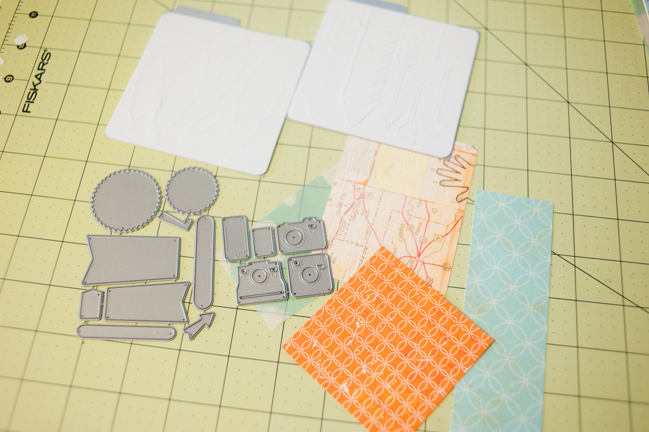
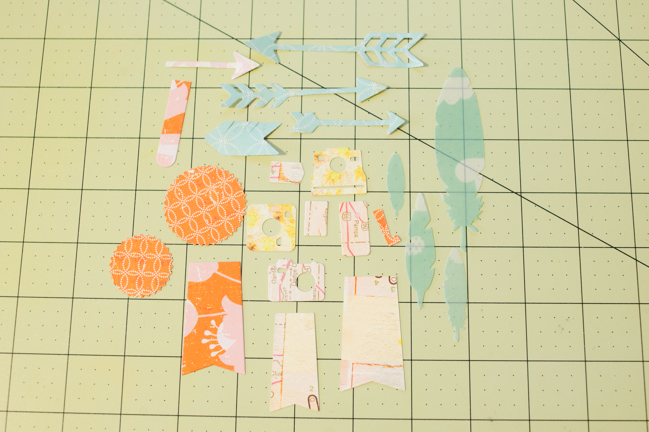
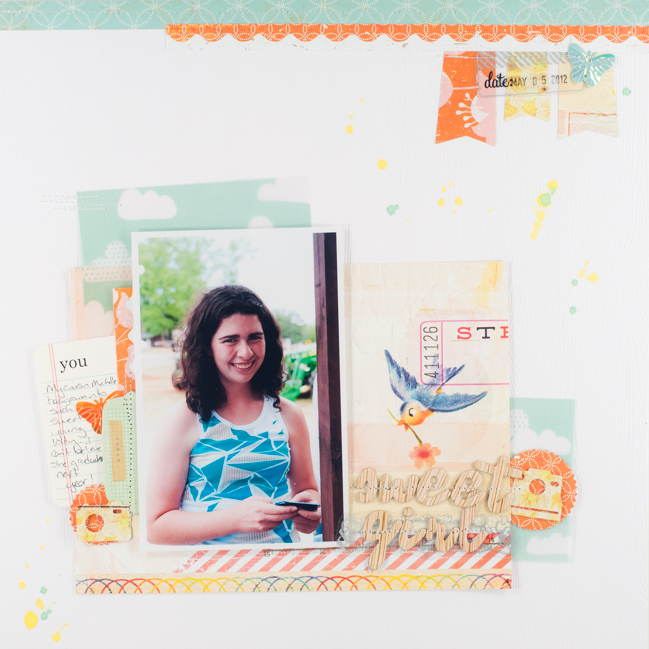
Many scrapbooking collections today include die cut and ephemera packs as embellishment options. The same goes for scrapbooking kits, but sometimes I find that the range of sizes and shapes included in the mix doesn’t really suit my scrapbooking style. While working with an older kit from Studio Calico (June 2012- So Cal), I found that I really wanted some smaller, less dimensional embellishments to work with, and there weren’t many of them in the kit. I fixed the problem by making my own die cut pack to coordinate!

I started with some of my favorite dies (Laina Lamb Designs for My Favorite Things and the feather and arrow 4×4 Quickutz dies were used for these cuts) and a few scraps of paper from the kit, and in no time I had a small pile of trendy, perfectly matched embellishments to work with! You could also achieve the same result with punches or an electronic cutter such as a Silhouette.

Five Ideas for Using Your Paper Scraps @ shimelle.com

Five Ideas for Using Your Paper Scraps @ shimelle.com
Create an Eclectic Border
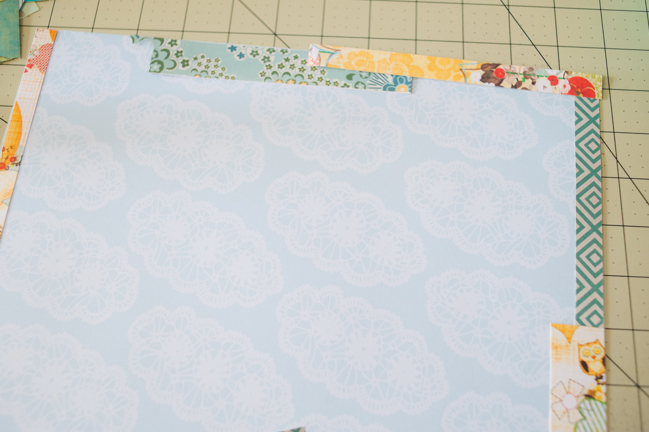
I love the look of a mismatched border around the outside of a layout- there’s just something wonderfully playful about it! It’s also the perfect place to use up small strips and slivers of paper that you might have in your scrap stash. I started my page with a 12×12 base that I knew from the beginning I would completely cover. (In case this worries you, I bought this particular paper in a pack of 25- all of the same sheet in one of those closeout deals where it was literally just a couple of dollars for all of them!) I lined the papers up all around the edges, and you’ll notice that it didn’t matter at all if they were the same width or not. That’s because my next step was to trim another sheet of paper (a grid in this case, though you could use any paper including solid cardstock) to 11.5” x 11.5” and adhere it to the middle of the page, instantly evening out all those edges. If you like the look of mismatched widths, then you can use a sheet of paper that you actually want to have on show as a background and just omit adding that final layer on top.

Five Ideas for Using Your Paper Scraps @ shimelle.com

Five Ideas for Using Your Paper Scraps @ shimelle.com
Think Outside the Page
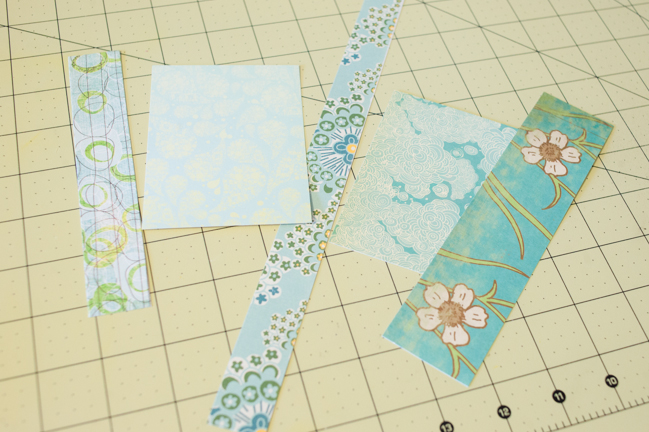
This use for paper scraps was inspired by my love of all things aqua and my absolute lack of interest in using these papers on a layout…again. They’ve all made appearances in my albums several times, but I just couldn’t bring myself to evict the last little bits of them from my scrapbooking stash- I simply love looking at them!

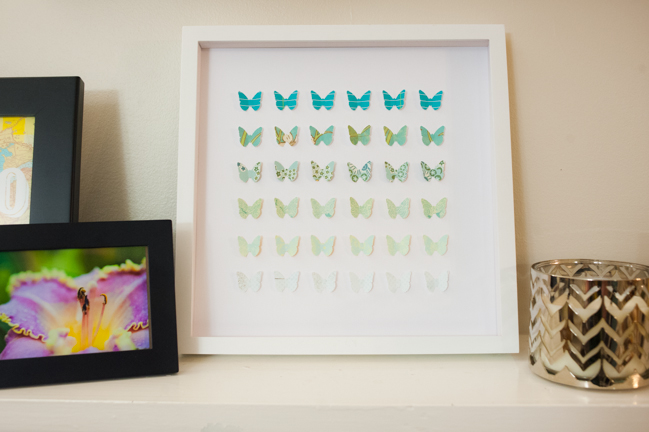
With several shades of aqua paper available to me, I decided to make something to hang on my wall instead! I’ve already made several seasonal versions of these Specimen Boxes by Tater Tots and Jell-o (where they have a free printable template available should you wish to make your own), and now I have a lovely spring version, too, complete with ombre aqua punched butterflies that finally put to rest the tiniest remaining scraps of some of my favorite papers. This is a project that can be repeated with any shape or theme of punch or die cut and in any color scheme you can imagine!

Five Ideas for Using your Scrap Papers by Melissa Stinson @ shimelle.com

Five Ideas for Using your Scrap Papers by Melissa Stinson @ shimelle.com
Cut Them To Size
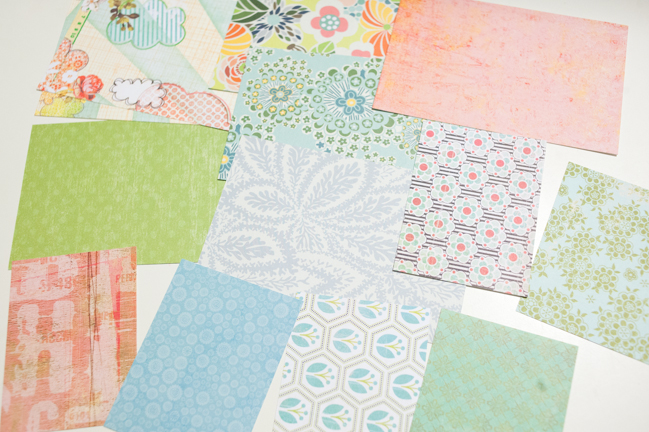
This final idea for using scraps is one that I’m just now experimenting with, but I’m quickly finding it the most useful way to keep my scraps in constant rotation along with the rest of my supplies. The idea is to take the leftovers from your project and cut them to whatever size is most useful to you before filing them away, but of course the trickiest part there is knowing what size you need to cut to! Cardmakers often find that they uses 6×6 papers time and time again. Project Life enthusiasts love 4×6 and 3×4 cuts. This tactic can work for traditional scrapbookers, too, especially if you have sizes of paper that you know you use again and again on your pages. This method is also a great way to use up some older papers or papers from big stacks and pads that you perhaps aren’t so crazy about, as discussed on this thread at Two Peas in a Bucket

I actually fall into two of those categories mentioned above and find myself most often either filing away the larger scraps in sizes that normally make appearances on my layouts with the collection that they match (I tend to store papers by manufacturer) or cutting the smaller pieces down to 4×6 and 3×4, storing them sorted by color, and using them for Project Life.

If the layout above looks familiar, then you may be recalling another set of features on my own blog that I’ve done on using scraps- Use Your Scraps Week . Under that label you’ll find not only that Project Life layout, but a look at how I pulled it together using a color palette along with many other ideas for using your scraps!

Now that you’ve been exposed to a whole new arsenal of ideas for using your scraps, is that pile of leftovers and off-cuts looking a bit more inspiring? Using up your scraps is a great way to make the most of your scrapbooking supplies and budget!


Melissa Stinson is an engineer by day, scrapbooker by night who lives in Huntsville, AL with her husband, Darren. When not working, Melissa enjoys reading (Star Wars books, of course!), DIY home improvement (which would explain why she’s lived with a partial kitchen wall for several months now), photography, and exercise. She has been published in the books Scrapbook Workshop (F+W Publishing), Everyday Storyteller (Simple Scrapper), and Fast and Fabulous (Ella Publishing). Magazine credits include Somerset Memories and the Russian publication Scrapbook-Info. Most of the time, though, you can find her hanging out on her blog, The Scrappy Jedi and also occasionally on Twitter and Instagram. She is currently a member of the Lawn Fawn and Citrus Twist Kits design teams and is a Garden Girl at Two Peas in a Bucket.

Scrapbook page sketches to get you creating

Sketch to Scrapbook Page by Diana Waite @ shimelle.com
Strangely, Glitter Girl sounds a little hoarse lately, and I’ve wound up down for the count. Instead of coming to you not-quite-live from the camera in my studio, I come to you propped up on a zillion pillows and ready to be over this already. But I’m not. Trust me to go all winter without succumbing to a cold and then doing so in a royal fashion once spring arrives.

I am mostly upset that I am currently missing Pink Tree Week as frankly, this is not acceptable.

But to get back to the point of all things crafty, I really want to share these sketches and guest interpretations with you even though I’m not quite up to crafting just yet. I’m hoping soon. Very soon. To sweeten the deal until then, I have two sketches for you, with pages by Diana Waite and Amy Tan, and a special discount code for a very limited time, all here for you today.

sketch to Scrapbook Page By Diana Waite @ shimelle.com
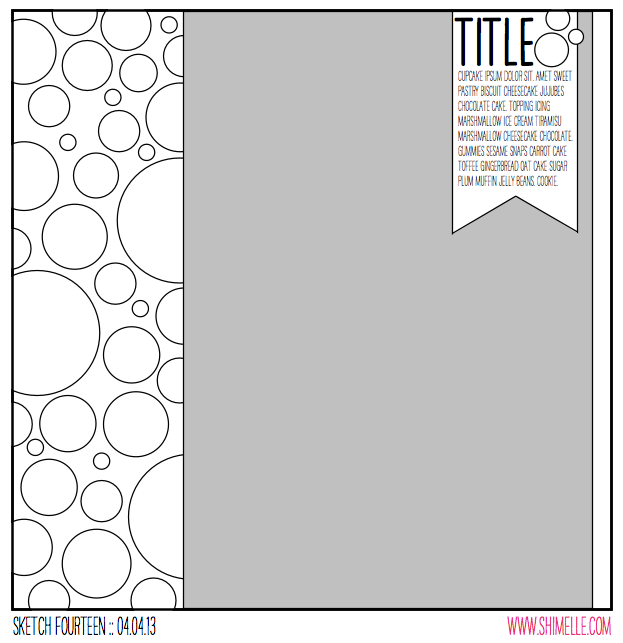
This sketch might remind you a little of a layout from years ago that I reposted just yesterday in that discussion of what to do with scraps. Except then I used it with 4×4 photos, and here the idea of lots of circles is matched with an oversized photo. Or at least that was what I imagined in my head… it’s not exactly what spoke to Diana, however!

Sketch to Scrapbook Page by Diana Waite @ shimelle.com
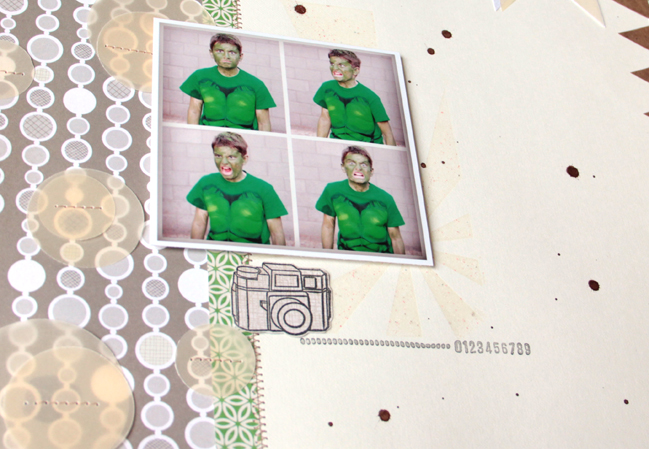
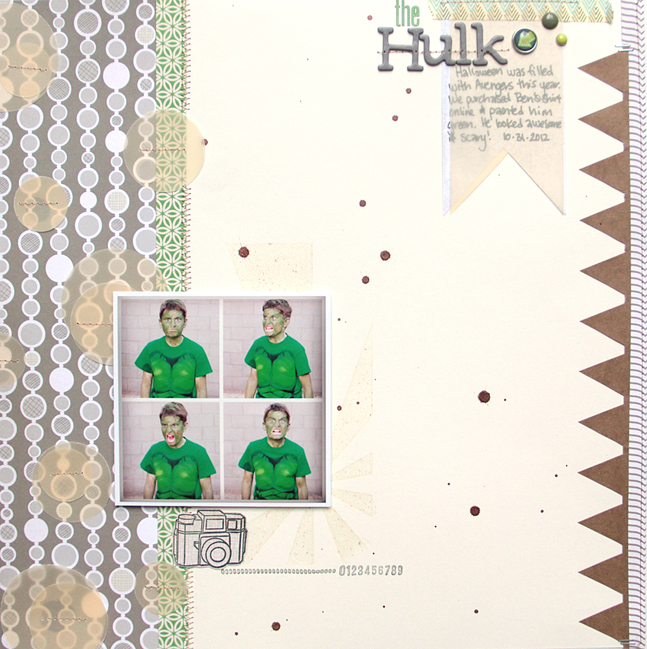
I really liked the clean lines of the sketch. I had a few goals in mind: add some techniques I don’t normally use, try something I haven’t done while using up my stash! One of the techniques I decided to try was adding vellum to my page. I’ve had vellum in my stash for a long time and have been afraid to use it! Using my 3 different sized circle punches I punched out circles and added those to the side of my layout generally following the circles found there. I carefully sewed those pieces of vellum down for my adhesive. I also added a piece of vellum to top of my journaling—and I like the look! I also added mist which isn’t a new technique, I just don’t use my mist very often. I wanted to highlight one last technique that I have always thought was magic; heat embossing. Using a versa mark ink I stamped behind where I knew I was going to place my photo, then I covered the ink with clear embossing ink. I used clear embossing powder because I wanted my layout to stay in a monochromatic tone so that the green in the pictures would pop! I mentioned before that liked the clean lines of the sketch I wanted to keep that “feeling” while multiple photos in a four inch square. I kept them small so that the viewer’s eye would really focus on the hilarious faces my son was making. Of course being a boy there were noises as well!

The photos were taken on Halloween right as the sun was setting which meant that my son was REALLY wanting me to be quick so he could go trick or treating! Within about 5 minutes I had the perfect ANGRY pictures of the Hulk.

Diana Waite lives in Arizona. She has realized that not only is scrapbooking a creative release but a joyful way to reconnect with her family. One of the best rewards is to catch the kids pulling out their albums and looking at them. Diana has been published in Creating Keepsakes, and Scrapbook Trends Magazines. She is currently designing for American Crafts and Scrapbook Circle. When Diana isn’t paper crafting she is enjoying time with her family, reading, eating chocolate, and exercising. You can find more of Diana’s work on her blog.

Sketch to Scrapbook page by Amy Tan @ shimelle.com
No, thank you, Amy. (No really, that’s actually funny to me in this current state. I’ve just laughed for three minutes and then felt quite sheepish that I thought I was funny at all, much less that funny. Anyway. Forgive me. Let’s get away from my bad humour and back to something relevant, shall we?)

Sketch to Scrapbook Page by Amy Tan @ shimelle.com
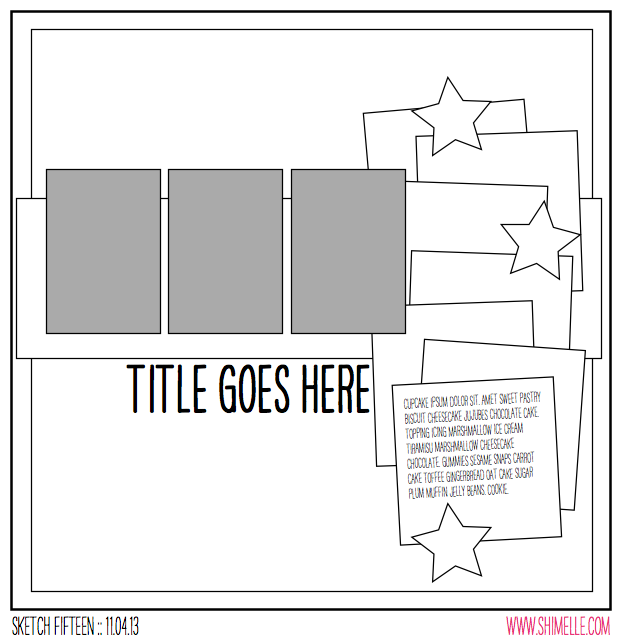
I do love a stack of papers all spread out like that, but this sketch was inspired more specifically by a previous Sketch to Scrapbook Page design, found here. (That one does include a video, by the way!) But I wanted to repeat a similar feel but a different finished structure to the design. If you compare those pages to what Amy made, you’ll see just how varied you can get with such a similar exposition!

Sketch to Scrapbook Page by Amy Tan @ shimelle.com
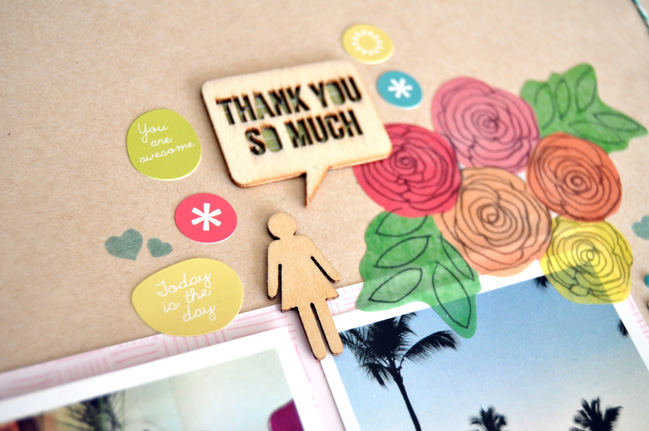
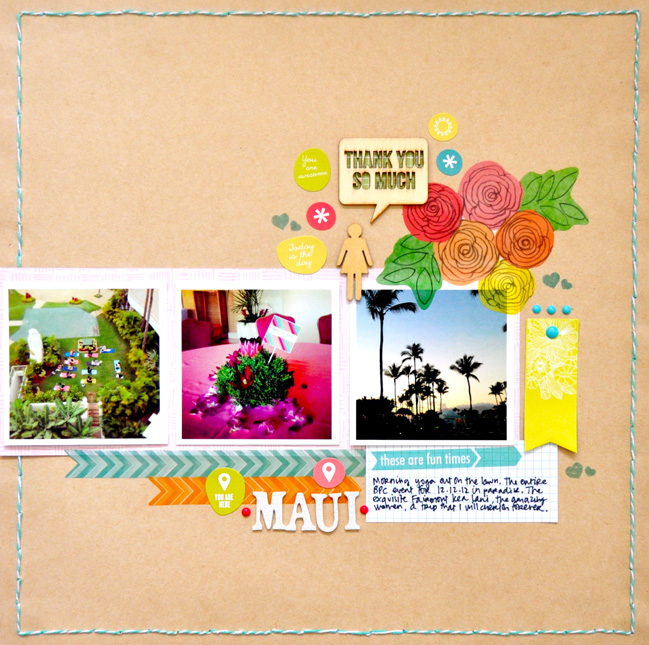
My mind was full of ideas when I first saw this sketch. I thought about stacking various patterned papers and embellishments along with 3 photos together. Then I got a bit overwhelmed at the thought of it, so I decided to start with some kraft cardstock by American Crafts. To follow the outside line of the sketch, I poked holes around the entire border and back-stitched using baker’s twine. Then I decided to use 3 square photos (3×3” Instagrams from Persnickety Prints) instead of the rectangular photos, and mounted them on a sheet of Studio Calico patterned paper. Embellishments like stickers and wood veneer are some of my favorite things, so I decided to sprinkle them along the side. For journaling, I used an Elle’s Studio tag. I stamped some hearts with Hero Arts Shadow Ink and placed some enamel dots as a finishing touch.

Amy Tan loves creating, leisurely bike rides and relaxing in her little Venice Beach apartment, which she shares with her boyfriend, JC, and her two Jack Russell Terriers, Buster and Bamboo. She’s been working on perfecting what she likes to think of as the “art of truly living,” which includes working smarter instead of harder; globetrotting; achieving balance in daily life; and collaborating with other creative people. You can see what she’s up to at her blog.

SPECIAL OFFER
Amongst other things, Amy Tan designs with Studio Calico, and just for fun we have a special discount code if you’ve been considering a kit club description. Code Shimelle30 is good for 30% off a new scrapbook kit subscription starting with the current kit, Spencer’s. But it is for a very limited time, and the offer ends at midnight (Studio Calico time) on Saturday (the 20th of April). Click here, select the subscription button, and enter the code at check out to claim your discount.

Thank you Amy and Diane for sharing your beautiful pages, though it is making me want to get up and paste things together even more! Soon, soon!!

Scrapbooking with scraps of paper :: A new episode of the Paperclipping Roundtable

scrapbooking papers @ shimelle.com
A few days ago Noell from Paperclipping sent me a message asking if I might do an episode of the Paperclipping Roundtable all about scraps of patterned paper. Patterned paper scraps? On the PRT? That’s all kinds of yes. Because honestly, there are days when I feel I could write a book with what to do with scraps of paper. I spend a lot of my working days with bits and pieces of paper, and I’m pretty okay with that. So yes, Noell, yes I would be delighted to talk about scraps of paper on the Roundtable!

We recorded this just a few hours ago, but you can listen already. PRT Episode 155: Torn by Patterned Paper. You can also subscribe for free in iTunes and listen on your computer or mobile device. Just search for Paperclipping Roundtable in the podcasts section and you’ll find it!

This episode started with a reader (maybe listener is a better word in the case of a podcast?) comment that each of us (fellow guest Erin Bassett, host Noell Hyman and I) thought about for a while on our own, then we got together online to chat about it. It was surprising which things we all had in common, but of course we had some differing ideas too. So that original prompt to start the episode was from Laura McCarty:
I watched a membership video of yours [Noell’s] and then one of Shimelle’s. You both use a lot of pattered paper and I LOVE how your layouts turn out. But I’m so torn about using so many sheets for a single layout. I am intimidated by using the leftovers. What to do when you’re a scrapbooker afraid of the scraps?

Of course we discussed our answers on the show, but I also wanted to compile some references for you here in case this is a topic near and dear to your scrapping heart!

Storing your scraps
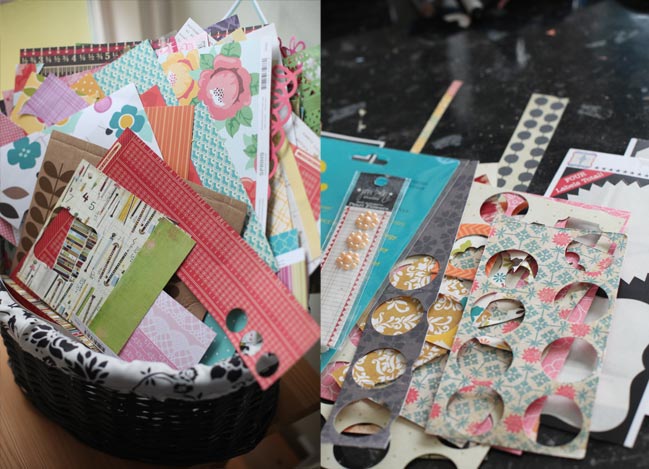
This was something we all had in common! Between the three of us, there wasn’t a single sorter or organiser! I keep something I call my scrap basket (that’s it at the top left of this post) and when I clear off-cuts of paper from my desk, I literally swipe it all off the side and into that basket! When the basket gets too full, I remove a bunch from the back and it goes into my donation box and I don’t look back. Noell and Erin have similar boxes, tins, and baskets for keeping their paper scraps and none of us devote time to organising them in any certain way. We find that the random mixing of different papers in the controlled space of one container helps us find new combinations for colours and patterns that we might not have discovered purposefully if we were selecting full 12×12 sheets from our collection. Yet the single space for these scraps keeps them from taking over and reigning in chaos.

I’m very aware, however, that not everyone’s creative process is fuelled by random, and some scrappers really prefer to have the order of separating their scraps by colour or pattern or manufacturer. We had a great discussion about it here during a previous online scrapping weekend, and you can find that discussion here. Scroll down to the comments for the good stuff, because there are dozens and dozens of replies that share different methods for storing scrap papers and off-cuts.
scrapbook page by shimelle laine @ shimelle.com
Worrying about value
I know it literally stresses some of you out to see a piece of paper get ‘wasted’ by being mostly covered by another sheet or using the b-side that is a subtle polka dot rather than the bold and beautiful floral of the a-side, for example. Right now there’s even an entire thread discussing patterned papers used for just a quarter inch frame around the whole of a 12×12 page at Two Peas. Here’s how I view the value question: once I use a patterned paper once, it has ‘earned’ its value that I paid. If I get more from that page, then that’s a fabulous bonus. But using it once means it was worth buying and I’ve invested well, unlike some of the patterned papers that sit on my paper rack and eventually leave here still as full 12×12 sheets, off to some other crafter! Take that idea of using a patterned paper for a quarter inch frame around a page: sometimes I will save some of the centre since it will be covered, but other times I won’t. It depends on so many things, including my mood and whether the other patterned paper on top is sturdy or flimsy! I don’t show this step on video because it doesn’t need explaining and it doesn’t make for very exciting viewing, so just because you don’t see it happen on a video doesn’t mean it doesn’t happen at all. But I really don’t have any problem covering up another sheet of paper because I know this might be a surprise, but patterned paper is really not in short supply around here. There is plenty to go around, even for quarter inch borders. I know I’m not the only scrapper with an extreme amount of paper to hand!

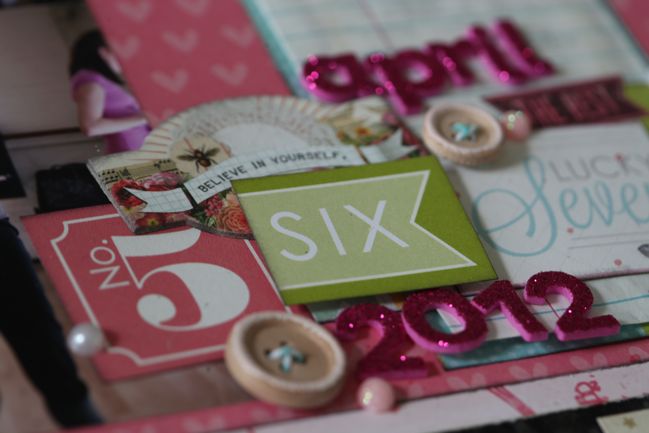
But a specific query has come up a few times with my classes, and that’s how layering often means you’ll only see a tiny little bit of any particular patterned paper. That’s true! And showing just that tiny bit is an essential part of that look – it will not work with big sections of each paper on display, which would overwhelm the photo. When I first cut into a 12×12 pattern for a page, that tends to be the time I will really feature the pattern on the page. Then the rest goes into the basket and anything in the basket is fair game for being tucked and layered and almost entirely hidden. I love the subtle continuity this can create in the scheme of an entire album, how you will have seen one pattern somewhere and then elsewhere you’ll see just a tiny bit of it and without seeing the full design, you’ll actually know what it looks like. Maybe that will help the worried crowd know that when you see just a tiny bit of a patterned paper on my pages, it’s rare that I will have cut that from a full sheet of 12×12 – chance are I have already used the pattern elsewhere and now the rest of the sheet is fair game for any placement that might work on the page. But also, I am really not scared of cutting or using new papers, largely down to my experience with what I call the story of the special paper, something I know many of you have already read. It’s one of those things I come back to so many times when I’m scrapping: use it while I love it, otherwise I really will fall out of love with it and then the purchase is a total waste! That is what I aim to avoid, so I am fearless in using what I’ve purchased while it’s still new and exciting to whatever creative part of my mind makes all this stuff work.
scrapbook page from Scrapbook Remix @ shimelle.com
Patterned Paper class resources
There are a few different classes and workshops from my corner of the world that could be useful to you if you’re aiming to make more from your scraps or get over the fear of cutting into perfectly lovely sheets of pretty paper. The Hitchhiker’s Guide to Scrapbooking covers a lot about layering in addition to ways to choose your products and just plain get started. It is suitable for beginner scrappers or scrappers with experience who feel they haven’t really found their style or really struggle knowing where to start. Many scrappers have told me they took this class after returning from a break from the hobby and that it successfully got them scrapping again, which makes me very happy to hear! But I also think that helps you know where it sits in terms of an ‘is it right for me?’ scale.

For something quite light, The Perfect Collection is a stand-alone video workshop designed for using up every bit of a collection kit. (We talked about this on the show – this is the class with the guides to different sizes you can cut.)

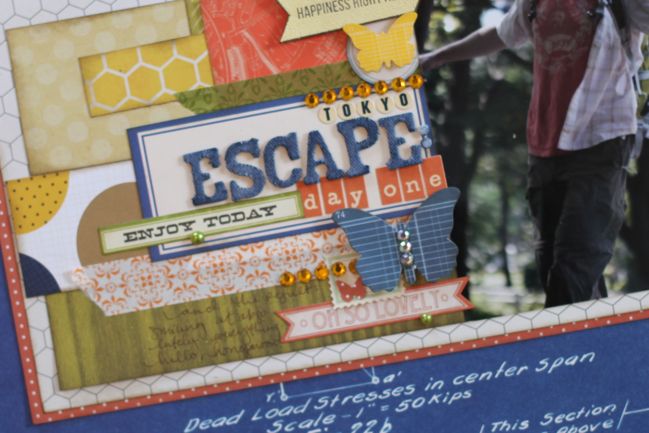
For something with more detail and specifics, there are two classes here: Pretty Paper Party and Scrapbook Remix. Pretty Paper Party came first, and is more technique-based – covering different things you can do with papers. It includes both scrapbook pages and cards (and a couple mini books) as examples. Scrapbook Remix is a more recent class from 2012 and it focuses more on the idea of how to mix patterned papers, with plenty of examples of how one paper collection can be mixed and ‘remixed’ with other papers to take on many different looks.

All of these classes can be taken any time on a self-paced format. (The first example is hosted at Two Peas; the rest are all hosted here at shimelle.com.) On the PRT, I mentioned I could be persuaded to set up live emails for those who would like to do Scrapbook Remix right about now. I don’t often rerun classes, but earlier this year we did this with Pretty Paper Party so a group who had missed it on its original live run could participate all in the same time frame, and I don’t see why we couldn’t do that for Scrapbook Remix, and start next Monday. You can sign up for Scrapbook Remix at any time, but you will need to let me know if you want to receive emails for this special PRT-inspired repeat. (If you signed up months ago, you’re welcome to get in on this – you do not need to pay again.) Just send an email to shimelle+remix2013@gmail.com with the subject line ‘Yes Please’. Ideally, make this message come from the same email address you used to sign up for the class! If that’s not possible, or your emails need to be sent somewhere else, please indicate those addresses in the message. (Because I will need to collate this list of email addresses by hand, it is really important that I be able to match your email address from your request to the payment you made, whenever that may have been.) I will need your request by Sunday morning if you want to start receiving messages on Monday! Okay? Go, go, go if you want in on that!

scrapbook page by shimelle laine @ shimelle.com
Free resources for using patterned paper scraps
Of course Glitter Girl has used her share of patterned paper scraps, and scrapping to the end of my Best of Both Worlds papers each month is making me do a lot of that too! So here’s a quick round up of some links that might be useful:
Glitter Girl’s tips for mixing and matching different patterns, with one big tip for colours
Glitter Girl’s tips for using your scrap papers as embellishments, instead of spendier premade items (Glancing at the supply list for that one, there is a lot that is now on sale, so that would make things even more affordable!)
Glitter Girl’s tips for choosing patterned papers for your page, which is something a little different to what we discussed on this episode but I think it’s probably still relevant in applying what we did discuss to making actual pages with your photos
and the most specific Glitter Girl episode on this topic: Three Scrap Strategies, all about three different page designs you can make easily with scraps and off-cuts, and it will always look different when you choose a different mix of patterns.
From mild-mannered scrapbooker Shimelle Laine, you’ll also find the end-of-month kit wrap-up posts like this, include plenty of scrap-built pages (see also this and this). Many of the tutorial posts can be done with scraps, like this one combining scraps with a single stamp to form most of the page. Even if you go back to older posts like this, you’ll find there is still a lot of cutting patterned papers into those similar sizes. If you get so far back that the patterned paper disappears to a world of all cardstock layouts, then you’ve gone too far. (For my pages anyway. There are some who can still make the cardstock look fabulous… I’m just not one of them!) Stop and step back into the present and enjoy all the patterned paper!

I hope those are some useful resources and more than anything, I hope you enjoy the new episode of the Paperclipping Roundtable!
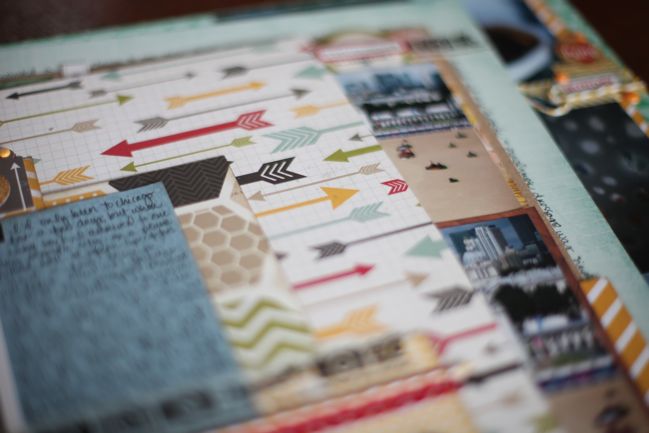
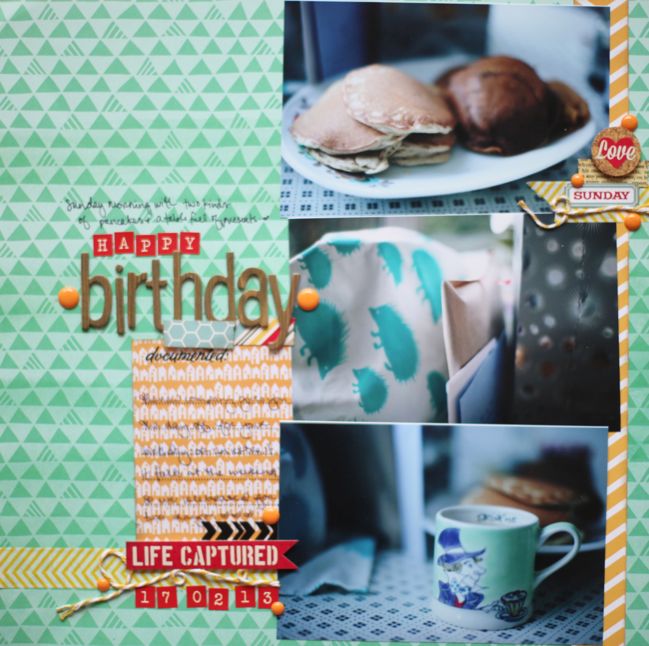
Washi Tape Frames: taking scrapbooking inspiration from Wendy's tutorial

washi tape frame tutorial by Wendy Sue Anderson @ shimelle.com
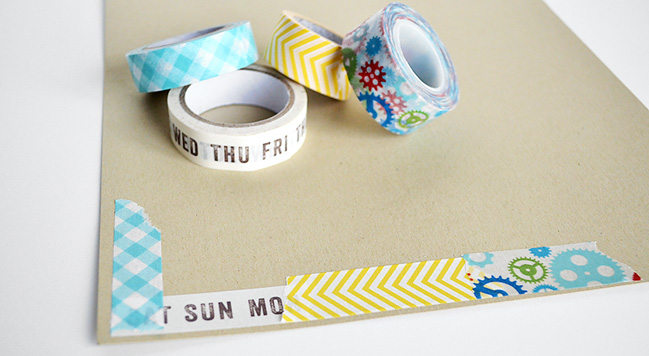
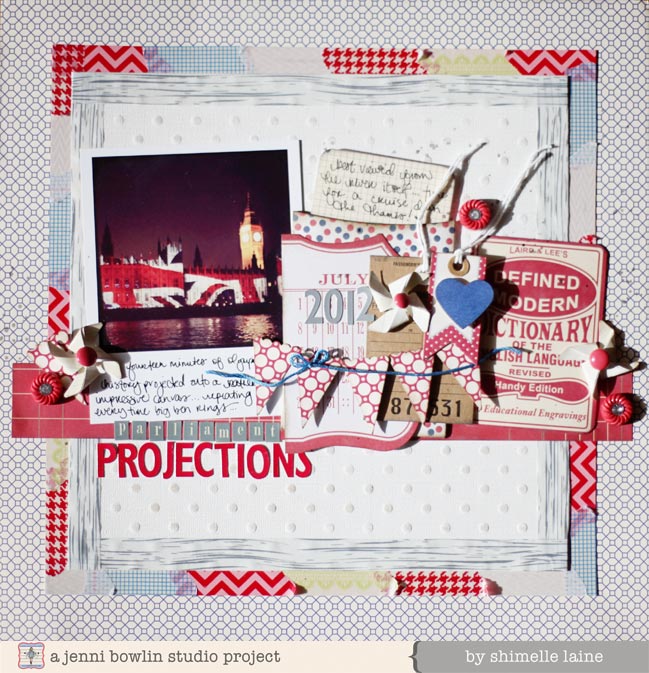
Not that long ago, Wendy Sue Anderson shared a tutorial here for a washi tape frame, so this picture might look familiar. It was this image that flashed into my head when I found the new washi tapes by Jenni Bowlin Studios in my hands: how lovely all the different coloured prints would work for the patchworked layer, topped by the elegant whitewashed woodgrain tape that is my favourite in the entire collection.

scrapbook page with washi tape frame by shimelle laine @ shimelle.com
This was the result, and it’s a look I can see myself repeating now and then for a colourful twist on the square page design I like to use when I need a creative kickstart. It includes all six designs from Jenni’s tape collection, then I started digging through all my JBS supplies pulling out anything that caught my eye in red, blue, or grey. Two of Jenni’s punches went into the embellishment too: the pinwheel and the banner flag. There’s a heart punch in there too, to make it coordinate with the page that sits opposite this in my album.

(Oh, and do excuse my excitement over those harsh shadows on this page. While they aren’t the loveliest thing in photography ever, they are evidence of the fact that we have experienced some bright sunshine in London lately! That’s reason enough to pitch up a flag and pack a picnic, I do believe.)

scrapbook page by shimelle laine @ shimelle.com
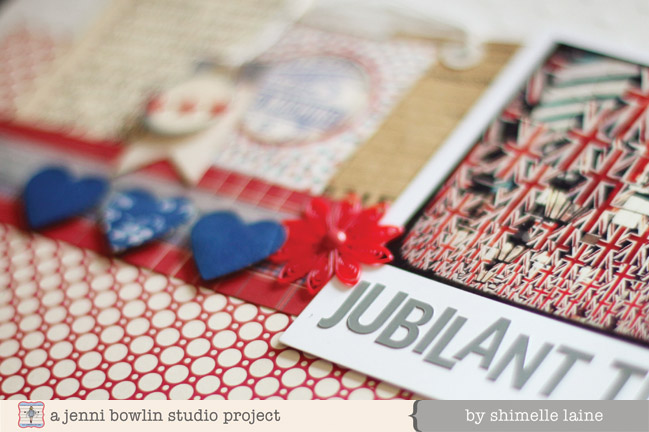
Here’s a little look at that facing page, with all the blueprint hearts in the design. You can see the full project and pick up another quick tip for using your washi collection on the JBS inspiration blog.

If you have tried Wendy’s washi tape frame idea, do share your results with us! If you’re thinking about it, you can find that tutorial here, ready to be customised to any colour and style of page you so desire.

Happy scrapping!

Layering with a Photo:: A Scrapbook Tutorial by Janna Werner

multi layered scrapbooking page by Janna Werner @ shimelle.com

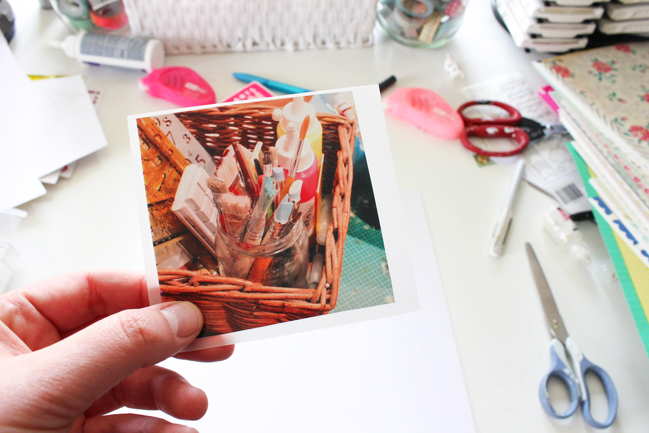
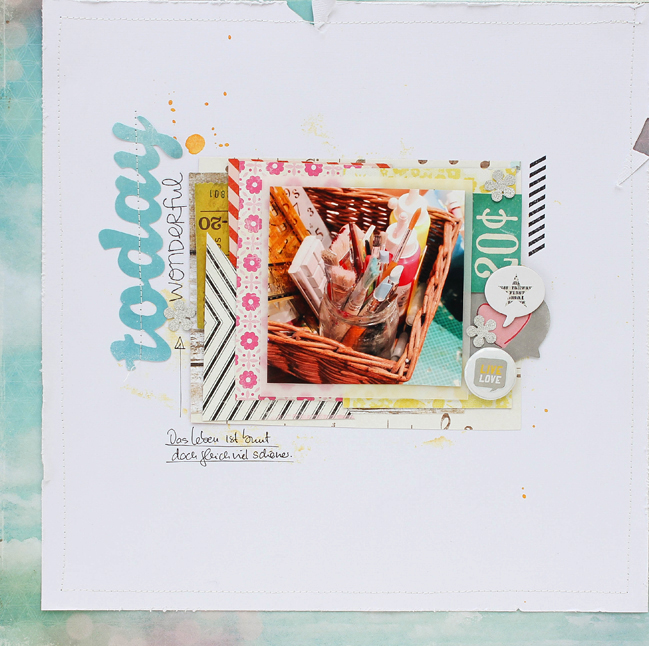
Hello there, my name is Janna. I am going to show you how to create a multi-layered scrapbooking page. I am a huge fan of layers as it is very easy to create a 3-dimensional look with this technique. Furthermore it lets the layout appear light and happy.

multi-layered scrapbooking page by Janna Werner @ shimelle.com

This layout has two backgrounds: the white cardstock on which the photo will be arranged and a patterned paper, that will be adhered behind the cardstock and frame the center part.

multi-layered scrapbooking page by Janna Werner @ shimelle.com

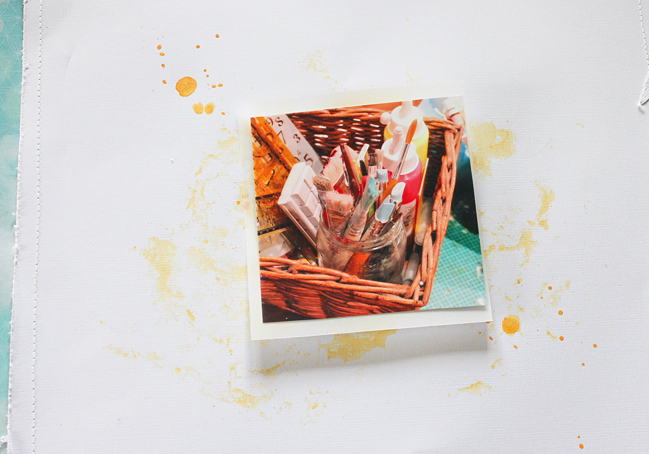
Take a piece of foil, spray onto it and press it onto the cardstock. Use a paint brush to add more splatters. Let the spray dry or use a paper towel/heat gun. After the spray layer is completely dry, take your scissors and distress the edges of the cardstock. Mount the cardstock on top of the patterned paper and fix it with a sewing machine.

multi-layered scrapbooking page by Janna Werner @ shimelle.com

The photo I used had no white frame. To let it pop out of the page, I adhered a piece of vellum behind the photo. The vellum is rather subtile and not as intense as white cardstock, for example. The advantage of vellum is that you can still see the layers behind it as it is transparent.

multi-layered scrapbooking page by Janna Werner @ shimelle.com

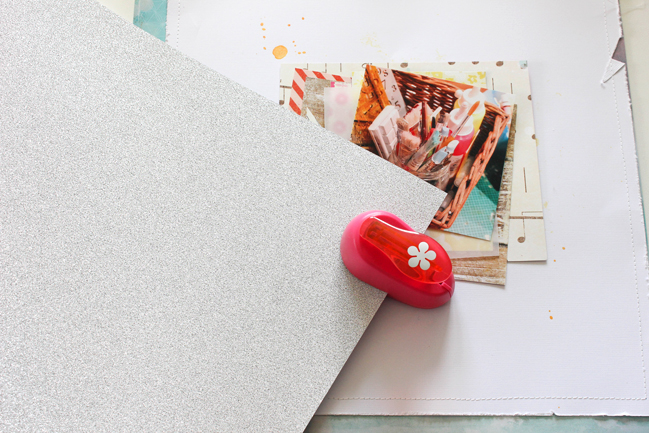
Put the photo in the centre of the cardstock and layer several pieces of paper in different shapes and colors beneath it. It´s a great way of using scraps. After creating layers with patterned paper, use 3-dimensional dots to adhere the photo on top.

multi-layered scrapbooking page by Janna Werner @ shimelle.com

The page already includes lots of layers, now it’s time to use embellishments for even more layers and accents. I started with punching out a few shapes, for example.

multi-layered scrapbook page by Janna Werner @ shimelle.com

Rub-Ons are also great for layering. Although they do not add a lot of depth to a page.

multi-layered scrapbooking page by Janna Werner @ shimelle.com

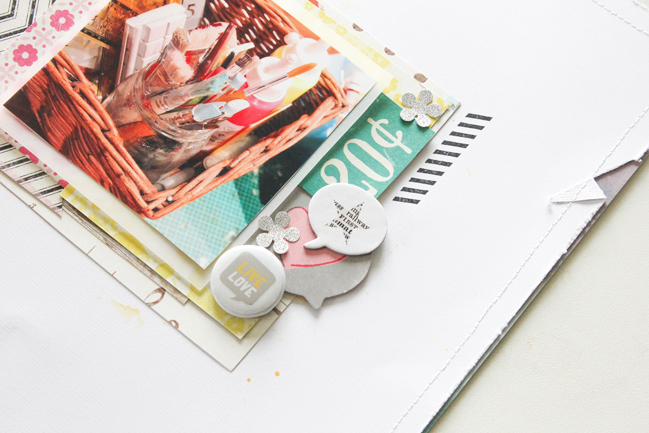
Every time I start embellishing a page, I will browse my embellishment basket. I take out nearly each package and place the elements on top of my scrapbooking page. If it fits, I let it lie on the layout, otherwise I put it back in the basket. Wait with gluing the single elements down until the very end. Like this the elements can be moved around and re-arranged, if needed.

The close-up shows the different layers this page includes: the background patterned paper, the white cardstock, the patterned papers behind the photo, the mounted photo, stamps, punched out elements, a badge, speech bubbles and die-cuts. All of them lie on top of each other. The last step is adding journaling.

multi-layered scrapbooking page by Janna Werner @ shimelle.com

Layering is not as tricky as it might sound. To create a fluffy look, the papers should not be glued down entirely. Put a bit of glue in the middle section of each paper, like this you can still bend the edges. This gives more depth and lets the page appear lighter.
This technique can also be used on other crafty projects, like mini albums, art journals or mixed media canvases.

I would love to know what you like (or not like) about layering. Do you use this technique often? Please leave a link in this post and share your layered projects – I would love seeing it.


Janna Werner is an artist, freelance writer and teacher. She lives in North Germany, together with her husband of nearly 3 years. Janna´s love for papercrafts and mixed media art evolved in 2010 when a friend introduced her to scrapbooking. Since then she has been working together with well-known papercrafting companies, magazines and international artists. She is currently doing design work for Crate Paper, Glitz Design, entreArtistes magazine, Sizzix and Two Peas in a Bucket You can also find Janna on her Blog , Instagram , Twitter , Pinterest , Facebook , Youtube & flickr

Five Ideas for Using Tags with Meghann Andrew

Five Ideas for Using Tags by Meghann Andrew @ shimelle.com
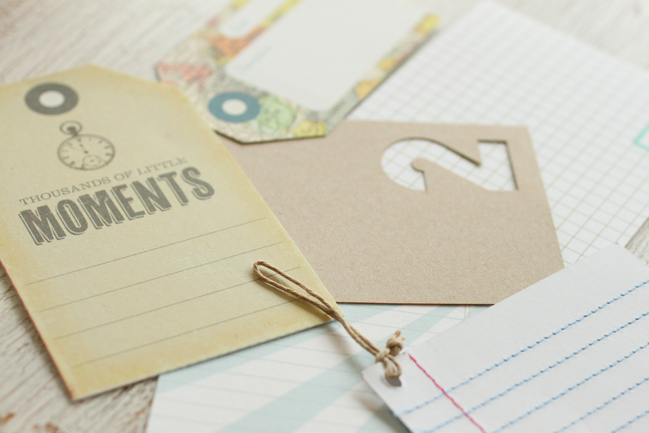
Tags are one of my must-have scrapbook supplies, and something that I find myself using on almost any project I create. It’s appropriate that my first design team position was for Elle’s Studio, a tag manufacturer. Tags come in so many shapes and sizes and are extremely versatile for use on any paper project! Today I’d like to share five ideas for using your tags for more than just journaling on a layout.

Five Ideas for Using Tags by Meghann Andrew '@ shimelle.com
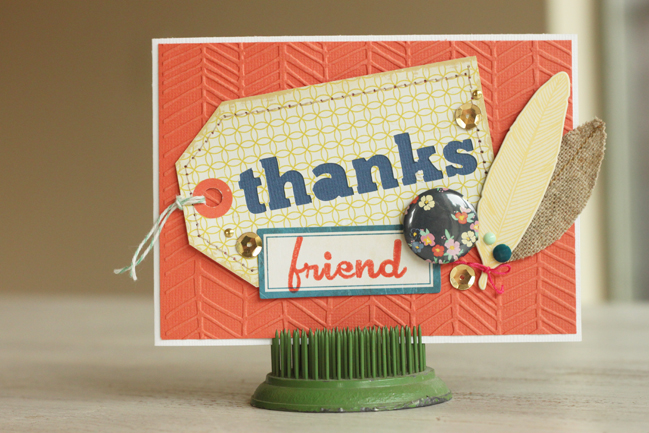
As a Die-Cut Greeting on a Card
For this card, I typed the word ‘thanks’ in my die-cutting machine’s software and sized it so that it would fit on my Crate Paper tag. Before making the final cut, I did a practice cut on a piece of scrap paper sized the same as my tag. I backed the finished tag with a contrasting cardstock to make the greeting stand out. After that, a piece of embossed cardstock and a few embellishments were all I needed to finish the card. Note: If you don’t have a die-cutting machine, you could also stamp a greeting on your tag.

Five Ideas for Using Tags by Meghann Andrew @ shimelle.com
As a Replacement for Patterned Paper
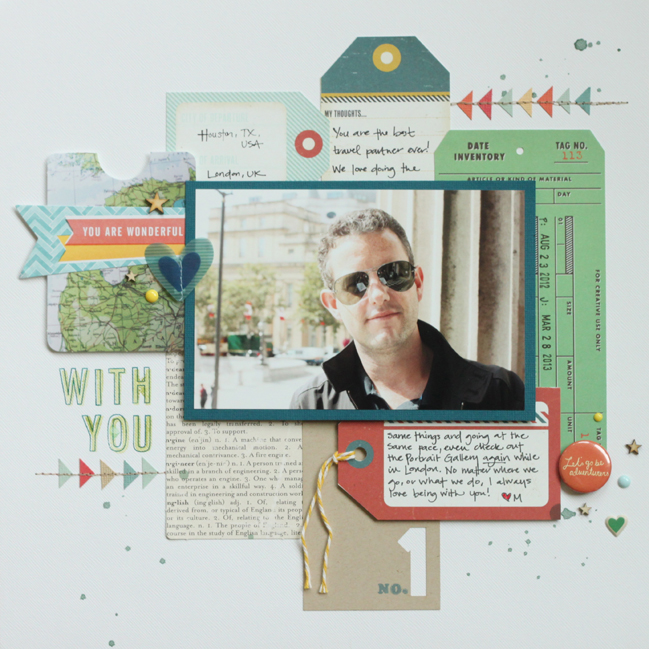
If you’re anything like me, you have a lot of tags sitting around in you stash. For this layout, I used a series of tags cut from one 12” x 12” patterned paper sheet by Crate Paper, along with a few others that coordinated, to replace patterned paper on my layout. When doing this, be sure to coordinate colors & themes in the different tags you use to obtain a cohesive look.

Five Ideas for Using Tags by Meghann Andrew @ shimelle.com

Five Ideas for Using Tags by Meghann Andrew @ shimelle.com

Five Ideas for Using Tags by Meghann Andrew @ shimelle.com
As Pages in a Mini Album
I love creating mini albums, but sometimes I find that premade albums just aren’t the right size for my project. I created a tiny mini album using Elle’s Studio tags before, but for this album, I found that the larger 4” x 6” tags worked perfectly. I created this tutorial for the smaller mini album, and you can change the sizes to suit whatever journaling tags you wish to use for your pages. When using tags to create the background for pages, I don’t feel like I have to add so much to the page besides a photo and a few non-dimensional embellishments, which helps to create the mini album quite quickly!

Five Ideas for Using Tags by Meghann Andrew @ shimelle.com
As a Title for a Scrapbook Page
On this layout, the tag I chose to use as my title was totally complete & worked really well with the story that I chose to document. You can also find tags in which you can add words to create a title. For instance, if you find a journaling tag that says, “all the little things” like this Elle’s Studio tag you can add, “‘that I love about you,” below it in letter stickers to create your full title. Sometimes, my entire layout design will start with a title that I come up with from a tag!

Five ides for Using Tags by Meghann Andrew @ shimelle.com

Five Ideas for Using Tags by Meghann Andrew @ shimelle.com
As a Way to Hide Private Journaling
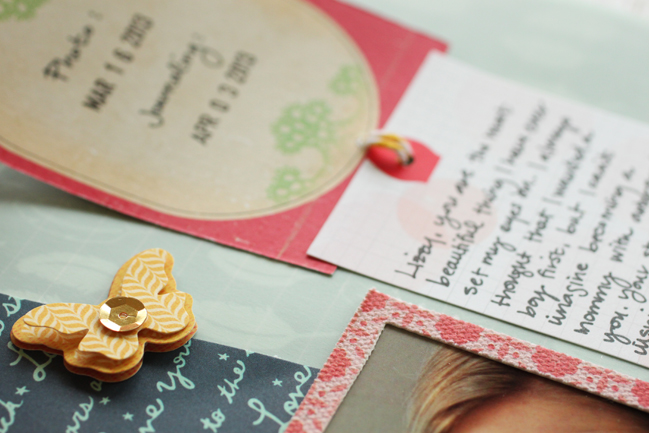
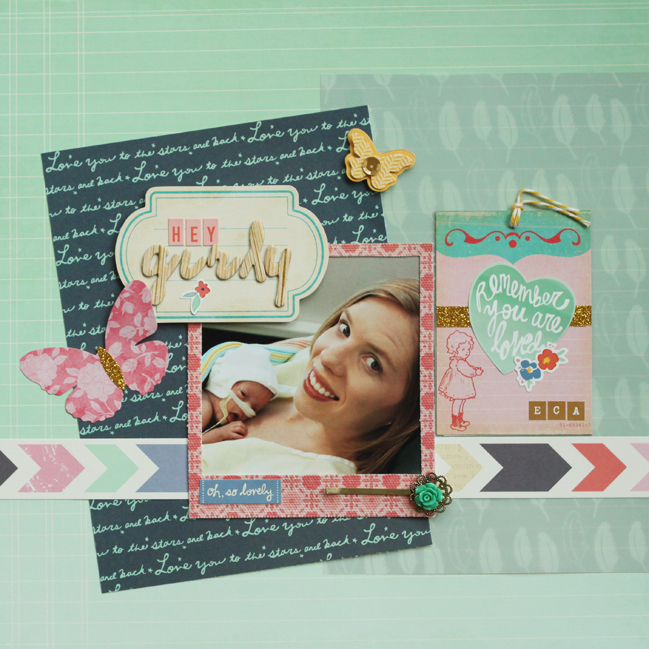
On my ‘Hey Girly’ layout, I wrote a very personal message to my daughter Elizabeth on a journaling tag. To keep the message private and only for her to read later, I layered two journaling tags and tied them together with bakers twine. I embellished the top tag to match the rest of the layout & put my private journaling on the bottom tag, which is covered by the embellished tag on top. Once the layout is pulled out of the sleeve, it will be easy for Elizabeth to lift up the top card and read my message.


Meghann Andrew is wife to Simon, brand-new mother to a beautiful baby girl, Elizabeth, and a former interior designer. She currently resides in Houston, Texas, but in the past 5 years has lived in 4 different states and the United Kingdom. Besides scrapbooking, she also enjoys traveling, cooking, baking, and of course eating what she has created! She has been fortunate to be published in Scrapbook Trends magazine and included in the design teams for Elle’s Studio (which started her obsession and hoarding of tags) and Get it Scrapped. You can find her at Meghann’s Little Corner and on Twitter and Instagram as meghannandrew.

What I made with the March scrapbooking kit

scrapbook pages by shimelle laine @ shimelle.com
I’m ready to call my March kit done, with a total of nine scrapbook pages and two cards from those supplies – but this marks a little change from what I’ve done so far this year. I added more from my stash this time around than previously – three sheets of cardstock and two sheets of patterned paper for full 12×12 backgrounds, plus two partial patterned papers. I also used some enamel dots and adhesive pearls, mists, and baker’s twine. I think I still stayed quite to the ‘spirit’ of the kit, but does it feel like cheating to have added so much? Or is that just being resourceful? I’m curious as to what you find most useful, if you have an opinion. I have a feeling it will just be a month-to-month decision based on what I fancy scrapping and the balance of paper to embellishments.


Here’s a look at everything I made and what I had left over at the end, if you prefer things in video form! But you can see everything here on the blog too. I’ve posted five already: Dance All Summer Long, with two photos, All Over, with a single photo, Girls’ Weekend, with two photos, Definitely Disney, with five photos, and Talk Amongst Yourselves, with three photos.

scrapbook page by shimelle laine @ shimelle.com
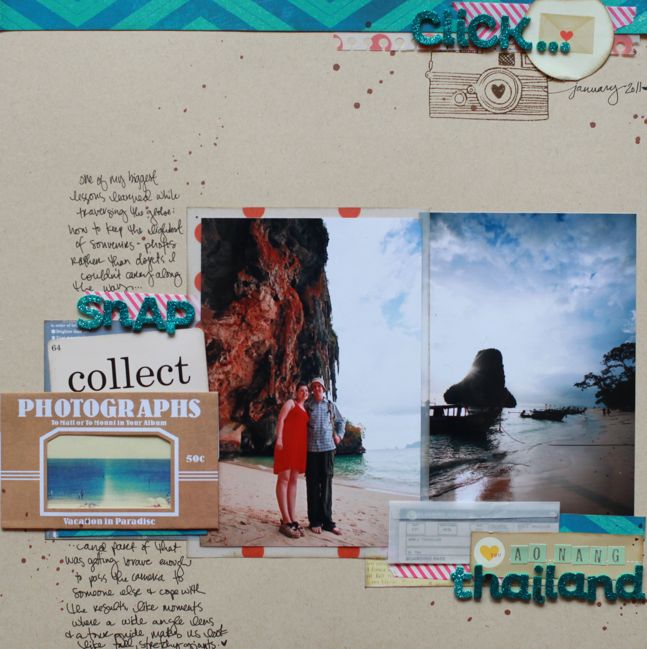
This page required a sheet of kraft cardstock for the background, and a dark brown Mister Huey ink, but everything else is from the kit. I hadn’t been quite sure how to scrapbook this slightly odd photo of us on the beach in Thailand. It looks very distorted because it was taken by someone else with my camera, but I was using my wide angle lens at the time, which isn’t really meant for this kind of picture. In the end I decided to just tell that story as it is – that sometimes an odd photo of us together is better than no photo at all!

scrapbook page by shimelle laine @ shimelle.com
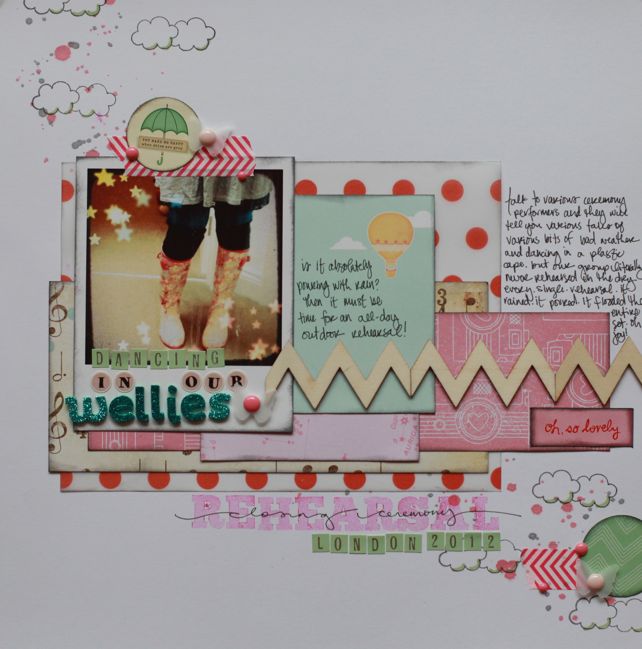
This page was created in an almost identical format as the fox page from the February kit – by taking all the scraps left on my desk, and cutting most of them into rectangles to layer onto a sheet of white cardstock. I really love this vellum over white, and there are many shades of pink and many shades of white, off-white, and cream, which is a different look for me but with so many shades together, I really like it. I added the Amy Tangerine cloud stamp to the diagonal line of ink droplets to emphasise the rainy day theme – just to try something a little different. This page is for my Olympic album, and tells the story of how we had not a single rehearsal in dry weather. Not one.

scrapbook page by shimelle laine @ shimelle.com
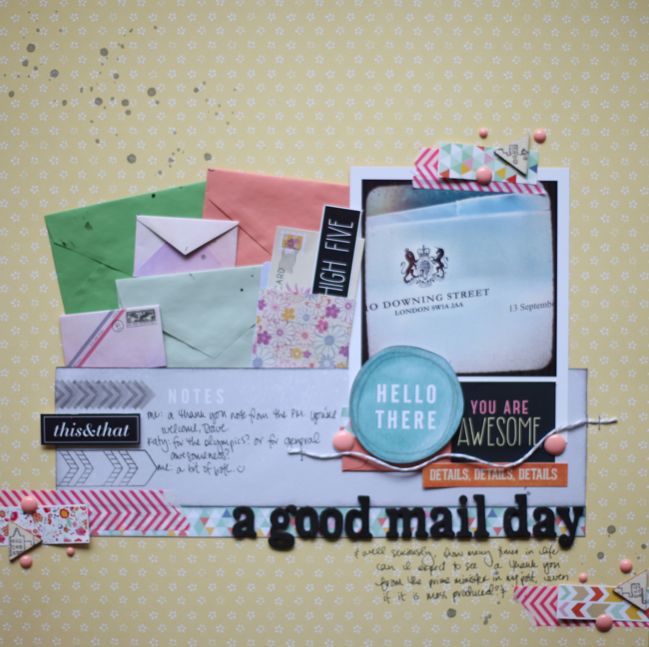
Sometimes my pages go so wrong by sheer stupidity. I had this page all designed in my head, with the cluster of envelopes to go along with the photo of the letter (a thank you note from the Prime Minister – sent to thousands of people, but still: I somehow doubt there will be many other times that letter head appears in my post!) and a bit more embellishment in a triangle around the page. When making it, the envelopes all went together politely and the skyline stamp even worked on the triangle wood veneer pieces even though they were quite small. Then I went away and left the finished page on my desk for a couple days, and in unpacking something else, I may have stacked something on top of it and well… there is a giant mess of spilled ink right below the photo. I had to go back and add more embellishment and try to balance it and cover it and make it work. So while the ‘you are awesome’ sticker is from the kit, as are a few small paper scraps, the hello die-cut, the label sticker, the twine and the enamel dots are all outside elements brought in to save the day. I’m not sure about this yet… but mostly I think that’s because it was finished in my mind and having to add more to it to cover a minor disaster has just changed the composition and it’s hard for me to figure out if it’s okay or not! But at this point, I’m living with it and getting it into a page protector before anything else happens! This page will be opposite an A4 page protector to hold the letter itself, which I want in my album but I don’t want to embellish.

scrapbook page by shimelle laine @ shimelle.com
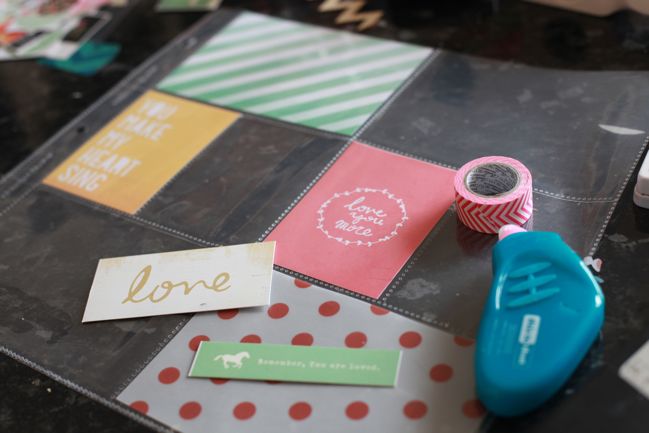
Then I started working on a little something that looks like this, which might start rumours. But before anyone worries that I’m giving up my 12×12 pages for a daily documentation album such as Project Life, rest assured I still love my 12×12 very dearly.

scrapbook pages by shimelle laine @ shimelle.com
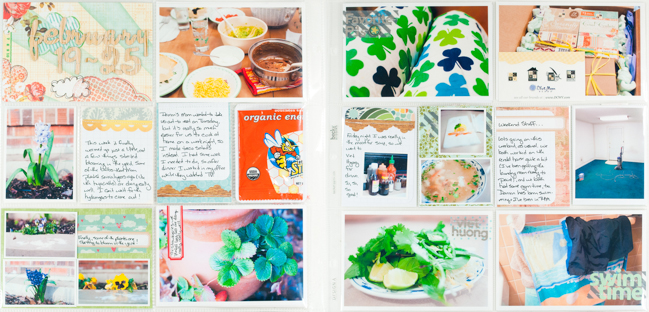
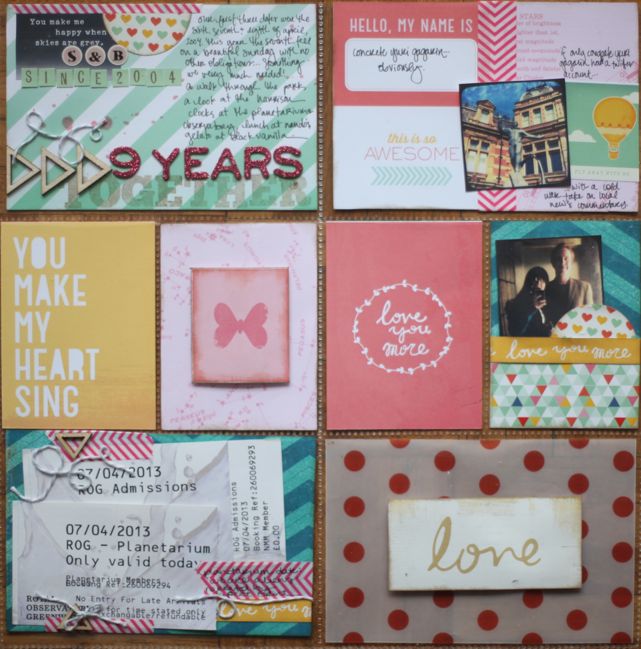
For one, if I did the traditional weekly double page about daily life, quite a lot of my daily life is… scrapbooking. At how many levels can one scrapbook about scrapbooking? That seems a little over the top for me, as well as a sure-fire way to create a never-ending spiral of stuff that ‘needs’ to be scrapbooked! That’s not the point of Project Life at all. Instead of keeping that sort of regular everyday album, I like to include divided page protectors just here and there amongst the rest of my 12×12 pages, as they are perfect for making a page from a few random items plus some pretty paper to tell a story of any particular day or activity. This past weekend marked nine years since The Boy and I went on our first date, and this Sunday we had a lovely if simple day that included lunch out along the river, an exhibit about how clocks were invented, and a planetarium show. I included a couple phone photos from the day and my ticket stubs, then plenty of pretty paper and some random notes about the day. The photo at the top right is of a new statue at the observatory, of Yuri Gagarin. I really, really wish someone clever would start a comedy Twitter account for ConcreteYuriGagarin, with local news and updates written through the voice of a cosmonaut, but sadly I don’t think anyone other than me would find it funny. And I don’t even think the statue is concrete – it must be granite or something, but that just doesn’t sound as comical as Concrete Yuri Gagarin. See, this is the sort of stuff I record on everyday type pages. I’m not sure I want to leave a complete record of that level of things only Shimelle could ever find funny.

handmade cards by shimelle laine @ shimelle.com
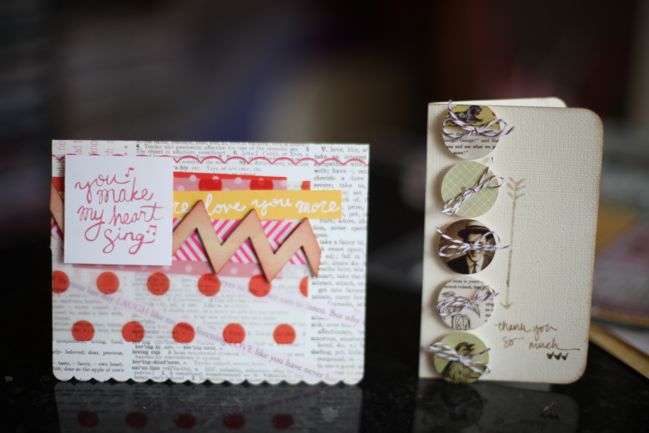
With the final pieces of the kit, I made two cards: one very pink (with a card base from an old Making Memories Valentine set) and one more vintage (with the Jenni Bowlin button stickers on a cream cardstock base).

And that’s that – nine pages and two cards! The March kit is still available, by the way – as I write this, many items that sold out earlier are back in stock and the only thing currently out of stock is the turquoise option for the letter stickers (the pink and black styles are in stock, and the letter stamps are half price). If you have posted your projects for the March kit somewhere and would like to share a link, do leave one in the comments so we can see what you’ve created!

Now I’ll start working with the April product picks, and I’ll have projects and videos to share with you very soon!

Layering Layers:: A Scrapbook Tutorial By Angie Gutshall

A scrapbook tutorial by Angie Gutshall @ shimelle.com Do you like to layer? I love layering and wanted to share my process with you. Layering on a layout can be a lot of fun and a great way to use up small pieces of scraps. You can layer a lot or a little. For me I usually like to layer a lot.

a scrapbook tutorial by Angie Gutshall @ shimelle.com
First step I took was to prepare my background paper. For this step, I first misted on a craft mat and used my cardstock to soak up the mist. Second I took a mask and used some textured paint to make the grey blocks. And lastly I took some 3d paint (yellow) and sponged it on the cardstock.

A scrapbook tutorial by Angie Gutshall @ shimelle.com
After the background dried I started to cut out my patterned papers and began layering them on top of each other. I also distressed the edges of the paper.

A scrapbook tutorial by Angie Gutshall @ shimelle.com
The next step was to add my pictures which I even layered those too. The one in the middle is slightly on top of the two pictures on each side.

A scrapbook tutorial by Angie Gutshall @ shimelle.com
Now comes the fun part of layering all the embellishments! This is my favorite part! I added some flairs, wood veneers, tags, and die cuts. I love tucking pieces here and there. It’s fun to make them peek out behind the layers.

A scrapbook tutorial by Angie Gutshall @ shimelle.com
Lastly, I added a title to the layout. The first part of the title is sticker letters and the second part of the title I cut out with my cameo. You will also notice I did some machine stitching on my layout.

Thank so much for joining me today for my step by step tutorial. I hope this tutorial inspires you to start layering!!


Angie Gutshall is a stay at home mom for four children. She is married to her high school sweetheart, Brian. She lives in the country in the central part of Pennsylvania. Scrapbooking is where she captures her everyday moments on paper so her children will have something to treasure when they get older. She also loves taking pictures, baking, watching movies with her kids, and created craft projects for gifts. She shares more inspiration on her blog