pretty paper. true stories. {and scrapbooking classes with cupcakes.}

lovely to meet you Twitter Facebook Pinterest YouTube

Take a Scrapbooking Class

online scrapbooking classes

Shop Shimelle Products

scrapbook.com simon says stamp shimelle scrapbooking products @ amazon.com shimelle scrapbooking products @ amazon.co.uk

Reading Material

travel

Camera School 04 :: Notes on Aperture (or that blurry thing)
camera school 04 :: notes on aperture and blur and stuff
Back in lesson two, I promised no triangles to explain exposure. That’s because memorising ISO gets rid of one point on the triangle (and if you read lesson two you’re remembering your rough settings of 100, 400 and 800, right?) and in this lesson, we’re going to eliminate another point on the triangle: aperture.

First, let’s get over the weirdness of the word aperture and how it applies. Cardmakers, you can come into your own here because aperture is part of cardmaking lingo too! An aperture card is a card with some sort of cut-out in the front, like a window (often a circle) that lets you see inside the card before you even open it. Well, on a camera the aperture is that window – in the lens. Aperture just means opening, and there has to be some sort of opening on the camera or how on earth would we ever take a picture? The real question is does your camera (or lens) allow you to adjust the aperture?

On an SLR, the answer is pretty much always yes. On a point and shoot, the answer used to be always no, but point and shoots (and bridge cameras) have made a great deal of progress lately so now the answer might just be yes. If you don’t know if your point and shoot gives you any aperture control, either look up aperture in your manual now or don’t even get up from your chair – just open a new window and type “Can I adjust the aperture on model of camera here“ into a search engine. The internet knows everything – someone out there will have posted your answer if it’s possible, and probably written a post with example images as part of a camera review! Oh internet, whatever did we do without you? If the answer for your point and shoot is no, then you can skip the shots at the end of this, but if you’re ever thinking of upgrading, this concept will prove quite useful.

Adjusting the aperture just means making that window bigger or smaller. Have you seen a very old photo – maybe of a house in a field – where everything seems to be in focus? Those were mostly taken with pinhole cameras, with the teeniest-tiniest of apertures. If you look through just a pinhole, everything you see is in focus. The reason those photos were often of buildings was because buildings didn’t move. See, if you’re only letting in just a pinhole’s worth of light, you need a fair bit of time to take the photo, otherwise the photo will be too dark. With people or anything else that moves, that just doesn’t work, but buildings are usually happy to stay put as long as you would like!
camera school :: shallow depth of field
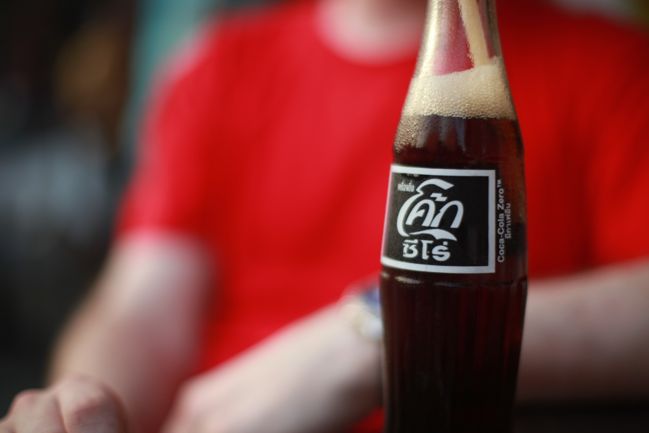
Sometimes it’s just not practical to sit there with your lens open for seconds or even longer. The moment will be gone, something will have moved or you will have lost your patience! So we adjust the aperture to let more light into the camera – we make the window bigger. But that means not everything will be in focus any more. It does, however, have a side effect – the bigger the window, the softer the blur in front and behind your point of focus. The example just above is from this post all about my love of that blur. The aperture on this shot was as wide as the lens would go. (In this case, 1.4 on a 50mm lens, for those who like those kind of details.)
camera school :: aperture
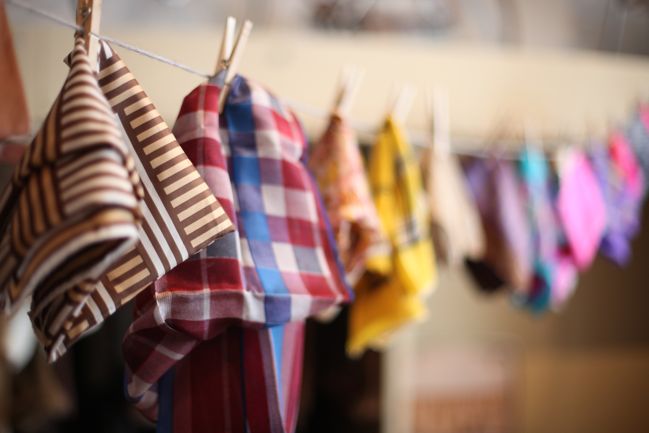
Just like ISO is made easier by remembering just a few rough points, aperture is exactly the same. Take this picture for example: it’s shot with a very wide aperture, which you’ll also see referred to as ‘shooting wide open’ or having the lens ‘wide open’. If I wanted to focus on just that particular handkerchief, then I’m all set. If I actually meant to make all of them visible, then I’ve failed miserably. The wider open the lens, the less of the scene will be in focus. Something small like a pinhole would get everything in focus (provided it didn’t move!) but that wide aperture makes it impossible to focus on everything.
camera school :: aperture for group shots
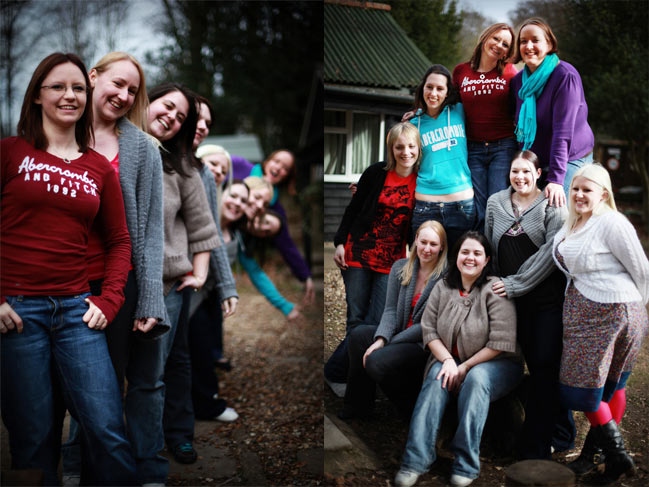
With handkerchiefs and flowers and cupcakes and assorted other objects, a bit in focus and the rest blurred is lovely. But there are times when it doesn’t work – namely with people. If you photograph a group of people, usually you want to see all of them. The shot on the left uses a wide aperture, so when photographing something with depth – like all these girls lined up toward the camera – most of the depth will be blurry and only a bit of the scene will be in focus. It’s an interesting look in this case but it doesn’t help you know all those faces at the back of the line.

There are two solutions to this: move the people or change the camera settings. The image on the right moved the people. Now they are mostly at the same depth, so I could get the girls in focus but the background is relatively soft.
camera school :: aperture for group shots
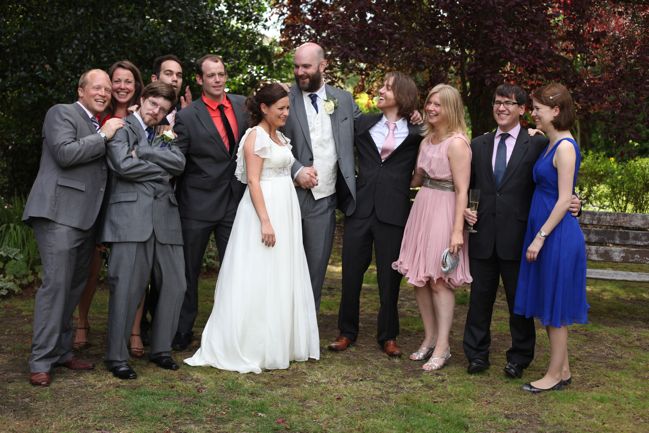
Or here’s the second solution: change the camera settings. While the two photos of the girls were shot at a very wide aperture (1.4), this little outtake with friends of the bride and groom was shot with something smaller (4.5). That makes more of the scene in focus.

I think the real reason why aperture can get confusing sometimes is its measurement in numbers. Numbers for ISO, numbers for aperture – it can look like a lot of maths going into a picture! And at some level there is but we don’t have to get that technical. If we can remember the 100-400-800 guideline for ISO, we can do the same for aperture. Hear me out.

If you have an SLR, look at your favourite lens. The full name of the lens tells you what apertures you have available. It’s usually painted right onto the lens itself, but you can also just look it up on the item description of any camera store site. So say you have a 50mm lens. If you’re a Canon user for example, the most popular options for the 50mm are this 50mm 1.8 and this 50mm 1.4. Those numbers at the end refer to the aperture. The 1.8 lens is much cheaper than the 1.4, and the aperture is a big part of that. (The 1.4 is also made with more expensive and more durable materials in both the lens housing and the glass itself, so the difference is more than just the aperture, just to be clear.) What you need to remember is the lower the number, the more it will blur. Or if it is easier for you, the smaller the number, the smaller the plane of focus. They mean the same thing, but I think one or the other usually sits a bit better so choose the one you like best!
camera school :: wide aperture, missed focus point
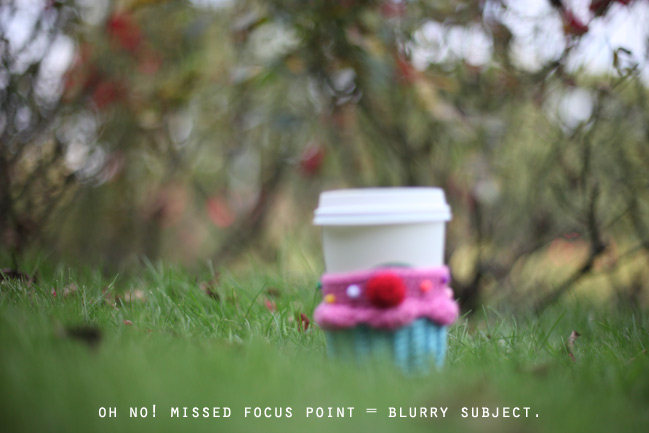
Either way, if you’re shooting at 1.4 or 1.8, you have to be careful where you focus because you’re only working with a small area that will be clear. I tried to focus this without looking through the viewfinder and the autofocus thought I wanted the grass rather than the coffee cup. Um, no… not what I wanted. With objects like this it’s easy to just refocus and shoot it again, but what if that were a toddler or a puppy? Yeah, not so much on getting that shot again, right?

Not all lenses go down to numbers that start with one. The 100mm macro goes (for ultra close-ups) to 2.8 and the 17-40mm (for crazily wide shots) goes to 4.0, but both of those lenses will blur a great deal at their lowest numbers. (Especially the 100mm – this is one of the first photos I took with the 100mm macro and it’s nearly all blur!) So you don’t need a really low number necessarily – but you need to know how low your lens can go. (Did you just say that like the limbo chant? I am really hoping you did.) Once you know how low it can go, you just need to remember that lowest number is going to have the most blur (or the smallest plane of focus – whichever you prefer).

If you can remember just that, then the rest is easy. Because if a low number gives you the most blur, what will the highest number give you? The most IN FOCUS. Or the least blur. Same thing. So really this is not complicated math – this is remembering one thing and that one thing will make the rest make sense.

Now let’s actually take some pictures to start to see this happening. Just like ISO, there are two options for this assignment. If you don’t know how to change the aperture on your camera, now is the time to learn! If you have an SLR, it’s probably easier than you think. You can put your camera in Aperture Priority mode (look for A or Av on your dial) and then you’ll be able to set the aperture but let the camera do the rest. You can use your camera manual or you can search for ‘how to set aperture’ or ‘aperture priority mode’ plus the model of your camera and there you will likely find pictures of your exact camera so it’s super-easy to follow. Basically you’re going to use one dial to set it to Aperture Priority then use the other dial to change the aperture to what you want – and the numbers will show up on your screen, but if that sounds problematic, there will be pictures of your exact camera in the manual or online so you can follow that.

Once you know how to change the aperture (or if you already knew that!) then find a scene with some depth – some things closer to the camera than others. Take two pictures – one at the lowest number you can dial to and one at the highest. I have to admit, this is the least original idea for a photography assignment, but this really is the easiest way to see just what your camera can do. Look at the two shots side by side and see just how much range your lens has. Give it a try and then come back tomorrow for something way more creative!

click here for more camera school posts

Scrapbooking Sketch of the Week

scrapbooking sketches and scrapbook page ideas
scrapbooking sketch and scrapbook page ideas
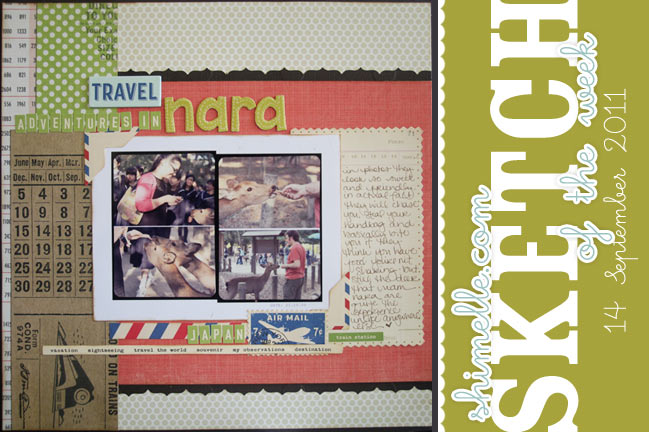
This morning I was flipping through some prints looking for something when I realised I had never printed it at all, because I had actually made a digital page about something. And it’s actually a digital page I like but I’m not completely sure how I’m going to work it in with the flow of that particular album, so I figured some other photos from the same day could live happily on paper. (And if you read my Facebook/Twitter post asking for title suggestions for this page, now you know why! I apologise for resisting all the adorable ‘deer’ puns.)

scrapbooking sketch
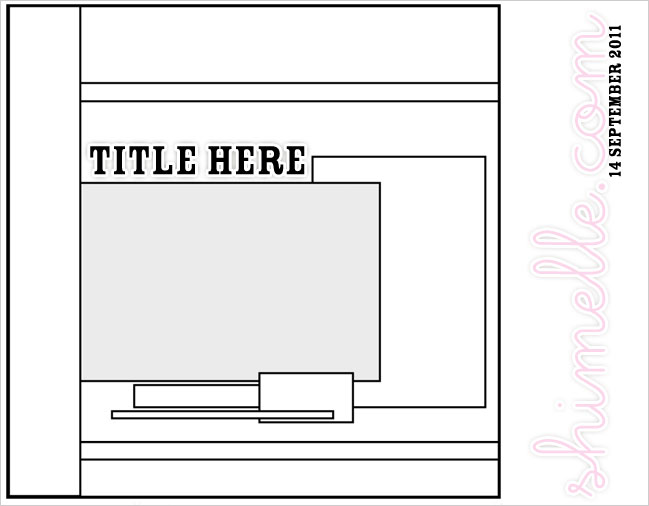
I know it’s a bit of a shock but this week I actually printed my photos at home. On my printer. Mostly because I was totally inspired by the Snapshot frames by Paislee Press. So this week’s sketch as a little something different for the photo element – a block of pictures that can be just one photo or you can fill it with as many pictures as you like in a space of about 5×7. I went with four photos, all landscape, printed with the frames.


In the video you can see my original rough for the sketch, which included scallops for the border at the side and the small punched border strips. If scallops are a better fit to your layout, then feel free to take inspiration from that version of the sketch.

As always, the weekly sketch is no-stress and just for fun! If you use it, I’d love to see, so please leave a link if you post your page online.

scrapbook page ideas
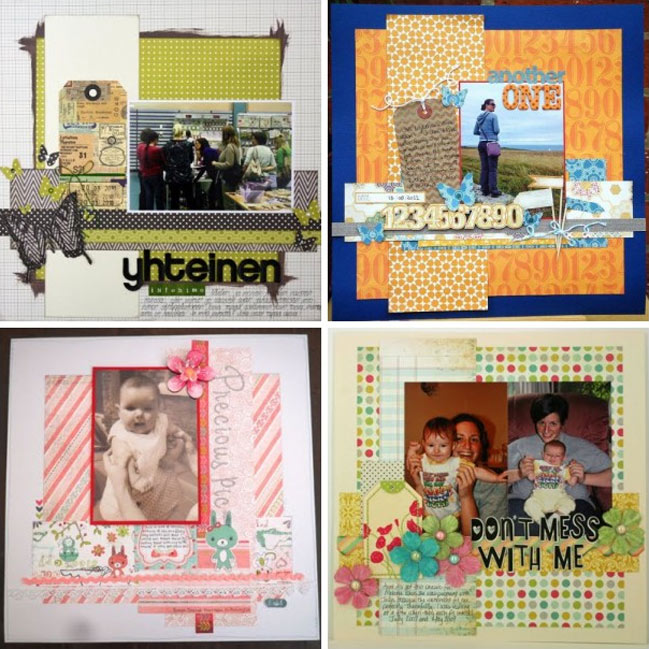
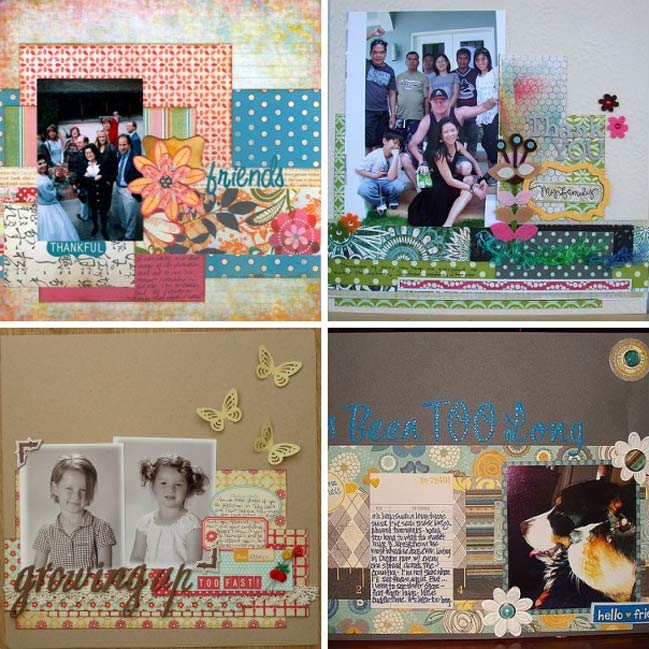
Here are four of my favourites from all the layouts shared last week. Love all those layers on so many pages! I think I’m going to take on a new motto of I have paper and I’m not afraid to use it. It can be a group motto, of course!

Click the corresponding link to see any of these layouts in more detail and get to know the scrappers behind the pages.
Top Row, L to R: one, two.
Bottom row, L to R: three and four.

Now… are you up for some sketchy scrapping this week? Will you use just one photo or add several photos to a block? Can’t wait to see your interpretation of this sketch!


(I’m trying a different linking widget lately. If you find it better or worse than the old option, could you let me know? I haven’t quite decided which option is the winner just yet. Thanks!)

Scrapbook Starting points :: Our Crafty Halloween

scrapbook starting points
scrapbook page idea :: our crafty halloween
So the bad news is that I fell behind and then I broke the internets. Turns out it takes a lot of effort to break the internets, hence the falling behind. But there is good news: if you can see this (which apparently you can), then I have fixed the internets and this is a happy, happy thing. For the longer the internets remain broken, the further behind one can fall, in this case.

If you followed all my logic right there and only had to read it once to understand, I think I should probably give you a golden ticket and welcome you to my world. Enjoy your adventures here, won’t you?

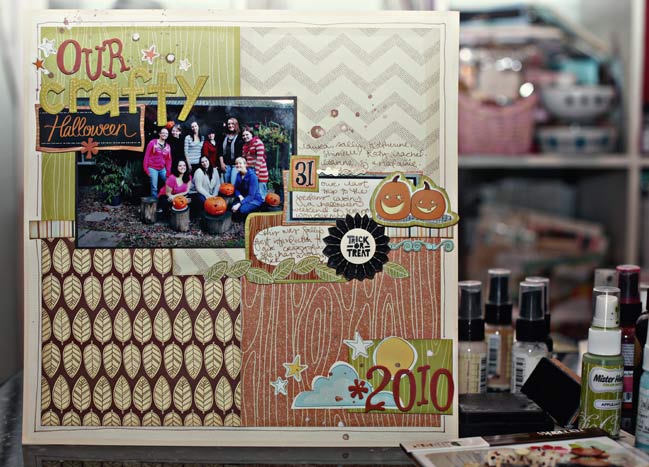
So back to this scrapbooking stuff! This starting point became the layout above, with papers from the Amy Tangerine collection and embellishments from Nightfall and a photo from last Halloween. (Even if you’re not a Halloween person, you may like Nightfall as an autumn collection. The papers are designs that could go either direction, then they’ve done separate embellishments so you can add on the Halloween-themed things or the autumn-themed things. Just in case you like leaves but not jack-o-lanterns.)

scrapbook page ideas Clockwise from top left: one, two, three and four, all from this starting point.
Here are four of my favourites from all the layouts posted for the last starting point! I may have giggled reading various comments on your posts about how many scraps were layered on that page before a single photo was stuck down! But I promise that giggling was not what broke the internets.

Assuming I can go through the next twenty-four hours without breaking those internets again, there will be a new Camera School post and a sketch video tomorrow!

Now I shall leave you while I calmly repeat to myself, ‘Do not upset the technology. Do not upset the technology.’

xlovesx

PS: Don’t forget, you can find the current starting point here. Post your link by Saturday!

Scrapbooking Giveaway Winner

scrapbooking giveaway winner
true scrap prize winner

Congratulations to Jackie, who wins admission to True Scrap II.

Jackie, please email me (shimelle at gmail dot com) and we’ll get you all set for True Scrap this October!

So sorry I could only have one winner of this great prize! You can still join in for the event here or choose individual workshops from the spring event here. Just a heads up: if you are thinking about signing up, it’s worth doing this before the 30th of September, as Lain (the event hostess) is offering some extra things to those who sign up by that date. Of course you can sign up whenever you would like – True Scrap II starts on the 20th of October.

There’s a new giveaway every Friday night, so check back next week for another chance to win just by leaving a comment, and this giveaway from the lovely folks at the V&A is open until Friday, so don’t miss that.

Have a great week!

xlovesx

Scrapbooking Starting Point

scrapbooking starting points
scrapbook starting point
Doing any scrapping this weekend? Here’s a new Scrapbooking Starting Point for you. It’s an easy start with four boxes of paper (patterned or solid) cut to 5.5” square plus one narrow strip across the middle (I used a barcode strip from a sheet of patterned paper).

Now it’s your turn: take this starting point and recreate it (or something similar) with your own stash of papers. You can work in any theme or colour scheme. Finish the page from there and share it with us!

Stop by this evening to see the finished layout and some of my favourites from the last starting point too. (If you’re reading this on Sunday morning, you have a few hours to post your link for last week’s challenge!)


10 Things (September 2011)

10 Things on the tenth
ten things i love to photograph
On the tenth of the month, we write lists of ten things. Ten of any types of things you would like to share! This month, in celebration of Camera School, I wanted to share ten things I love to photograph. Simple!

sigur ros - wolverhampton
Concerts.

cupcakes
Cupcakes.

leaves
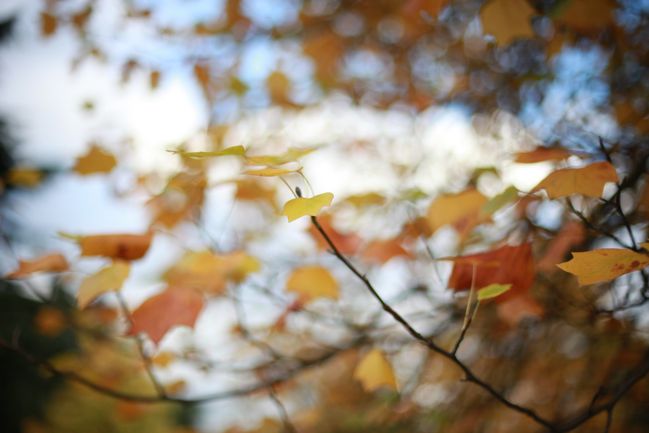
Leaves.

laughter
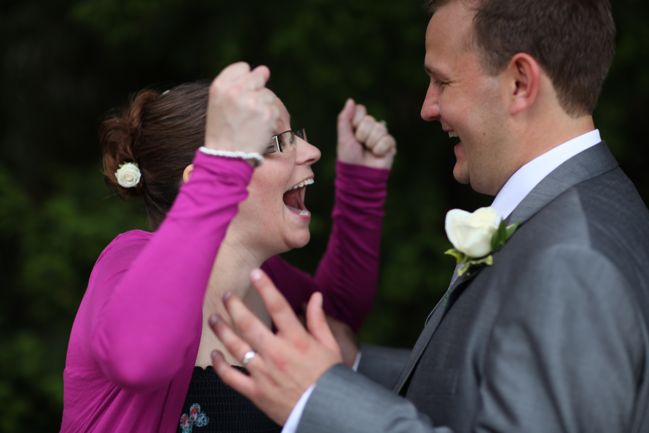
Laughter.

family portrait
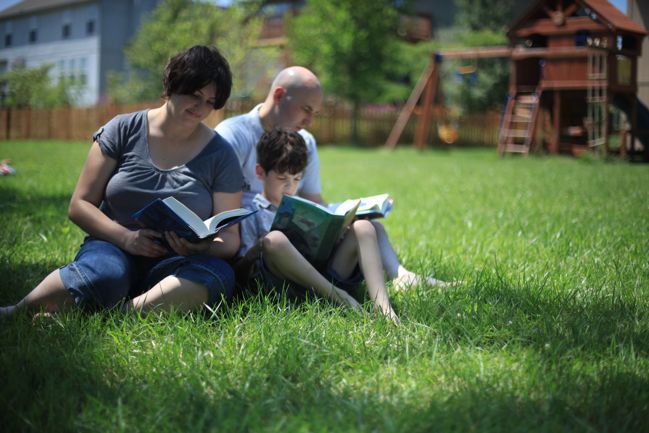
Families.

wedding portrait
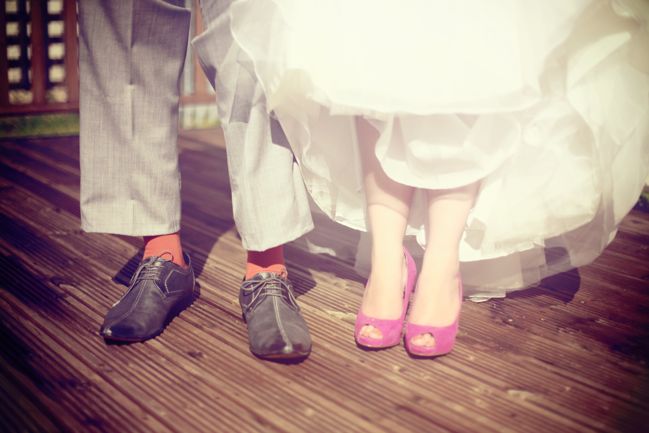
Friends in fancy footwear.

thailand
Seasides.

snow
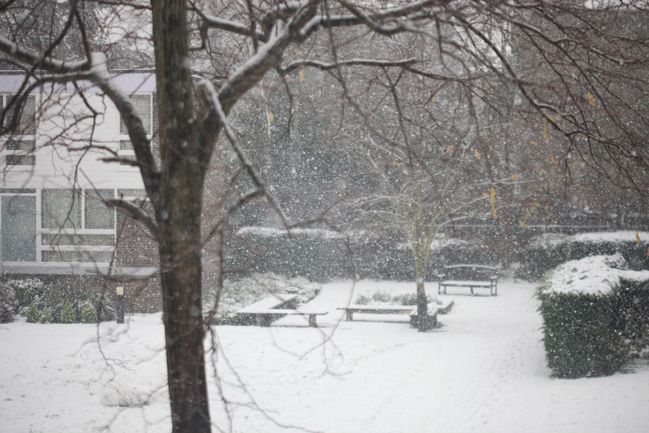
Snow days.

blue sky
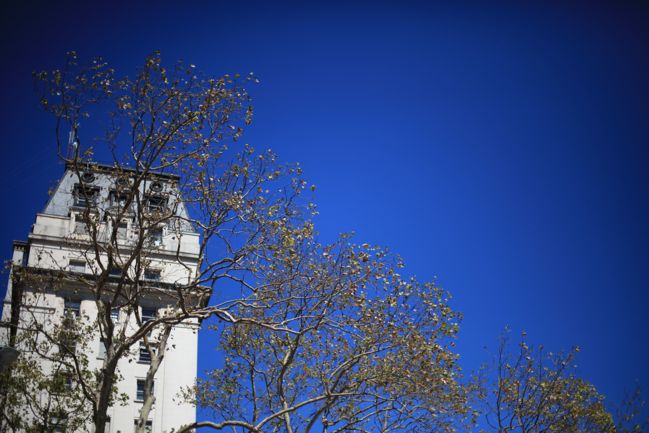
Blue skies.

dolphins
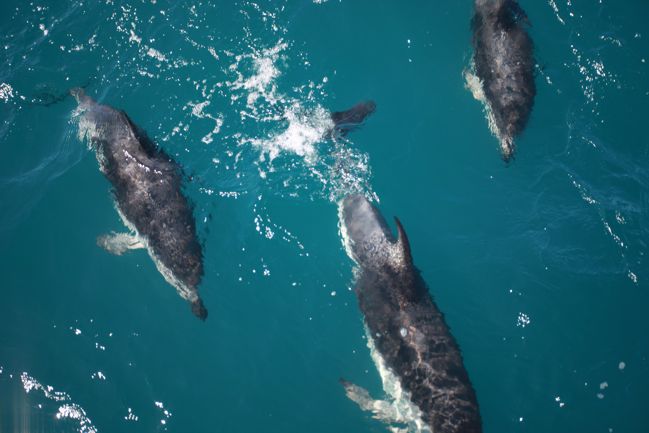
And blue seas.

Now it’s your turn – blog ten things or scrapbook ten things and upload your page to an online gallery, and share a link here:


May the tenth of September treat you very well indeed!

xlovesx

Scrapbooking Giveaway Day

scrapbooking giveaway day
true scrap scrapbooking giveaway
It’s a big giveaway this weekend. Just sayin’.

This weekend, one commenter will win admission to True Scrap II, coming up on the 20th – 22nd October. True Scrap is a scrapbooking convention in your own living room, and includes seventeen workshops (and some other fabulousness) you can watch online while chatting with other participants. Plus everyone gets permanent access to the recordings of each workshop so you can watch them at any time that suits your schedule. Take a look here to see all the different workshops scheduled throughout the three days of super scrappiness.

Want a taste of True Scrap? You can purchase individual workshops from the first event right here. For the first event, my class was all about getting plenty of pages from your stash so you can stretch your scrappy spending and eliminate the waste factor. Or you can pick up a stamping workshop with Jennifer McGuire, texture tips with Nic Howard, photography with Tracey Clark or anything else that was part of the spring event.

album snapshot
I’m teaching a brand new workshop at True Scrap II this October, and it’s all about my album system. I’ve touched on my album-keeping philosophy a bit here, here and here, but that’s just an introduction. In this workshop I’ll be covering all new content and taking you through my whole process for how much I plan in advance, how I make it all work without stress while I’m making pages and how I use extra photos, writing and ephemera to add another level to albums that takes them from just a collection of pages to something that tells the story to anyone who opens that book, even if they don’t ‘understand’ the scrapbooking thing. These are ideas that have made me so excited to scrapbook and I’ve never, ever been happier with my albums. So I’m very excited to share this with all the True Scrap participants next month!

But this weekend, you can WIN True Scrap II and get the whole shebang – it would usually cost $127.

To enter, just leave a comment on this post saying which of the workshops sounds most exciting to you! Share this post on Twitter or Facebook for up to two additional entries in the drawing!

Entries close at midnight Sunday UK time and the winner will be posted Monday evening, so be sure to check back to see if it’s your lucky day!

Good luck!

xlovesx

PS: Don’t forget – if you sign up for True Scrap II after clicking through from my blog, you can also have a shimelle.com class of your choice – any existing class or save it for the next class next month! Just forward your receipt to shimelle at gmail dot com to claim your bonus class pass.

Power of Making - exhibit at the V&A

power of making exhibit at the v&a
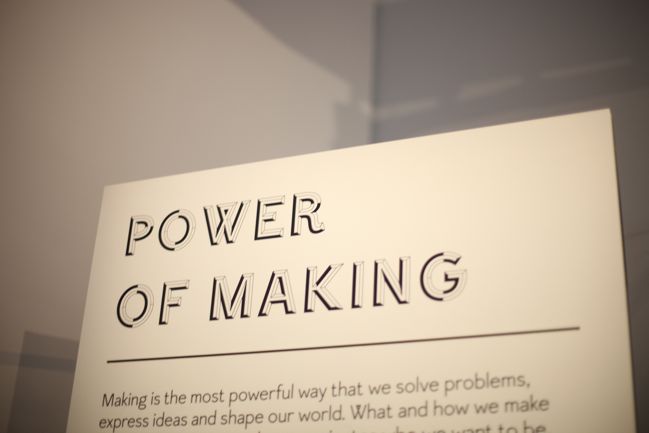
The Victoria & Albert Museum is one of my favourite spots in all of London, so I have to admit I was a little giddy when they invited me to take a sneak peek at their newest exhibition: Power of Making. It has just opened to the public and it’s free to view, so you can stop by to see this curated collection in celebration of all kinds of making. When I say ‘all kinds’ of making, I do mean a wide variety. Like…

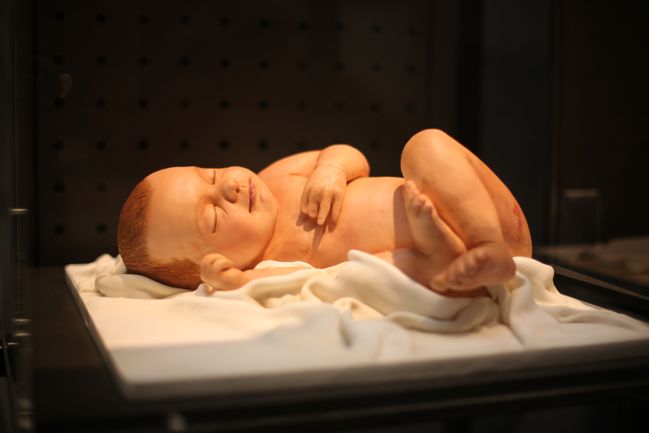
baby cake sculpture
…a lifelike baby sculpted from cake and marzipan. Truly. Michelle Wibowo’s work is certainly a whole other level to making a dozen cupcakes.

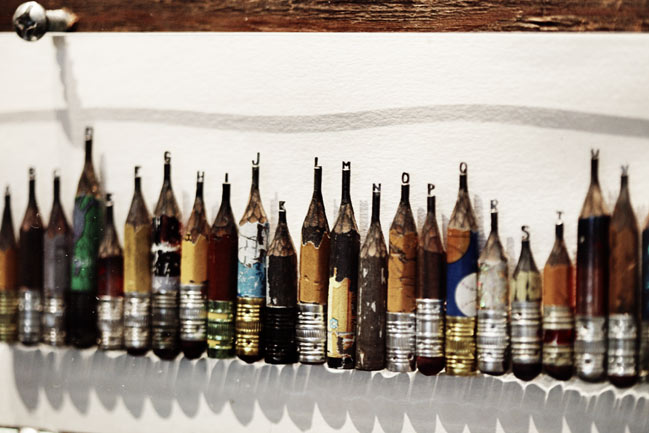
But there was one item on the list that made all the difference to me. One of the smallest items in the entire exhibition, just nondescript in a little glass case. Teeny-tiny in real life…
pencil sculpture pencil sculpture
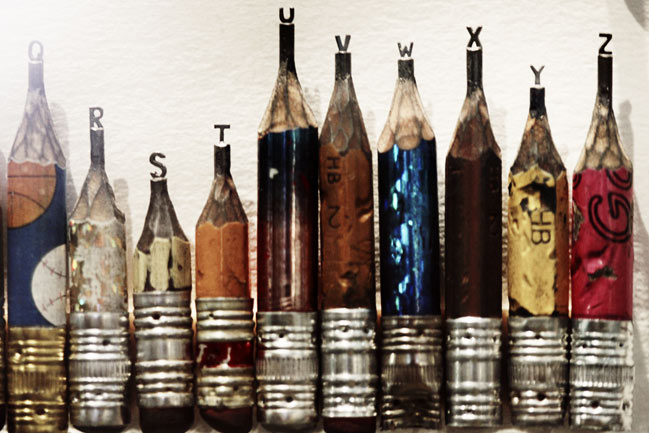
This is ‘Alphabet’ by Dalton Ghetti. Tiny and perfectly formed letters carved from the graphite of well-worn pencils. This is every bit as amazing in real life as I had hoped. I have so much respect for both the idea and the skill in crafting this collection. It took nearly three years to complete – such patience and focus.

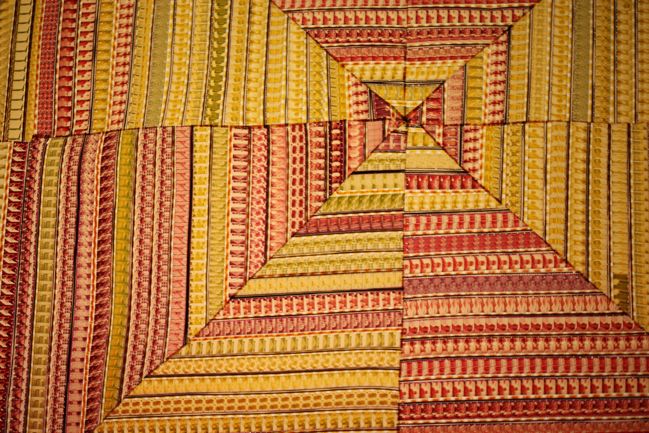
film quilt
From a distance, this piece looks like a brightly-coloured quilt, but up close you can see the twist in Sabrina Gschwandtner’s work. The quilt is made from film footage from early feminist documentaries and stitched into traditional quilt block patterns, illuminated by a light-box.

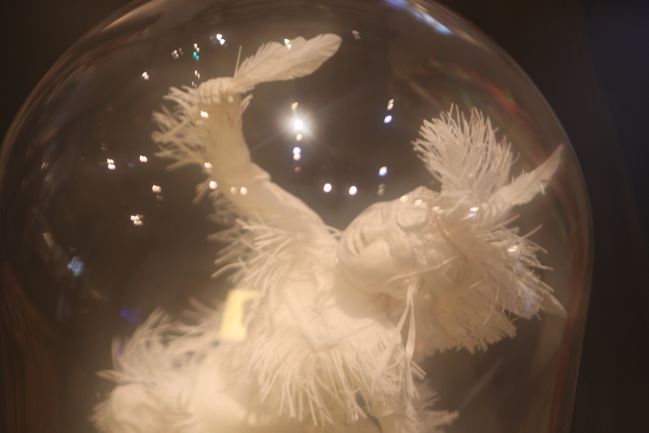
paper sculpture
This one is under so many layers of glass that it looks far more lovely in real life than on a photography, but I assume if you read my blog you have at least some sort of appreciate of things made from paper. So how about such a detailed sculpture entirely made from paper? It’s so delicate! See more of Alan and Patty Eckman’s paper work here.

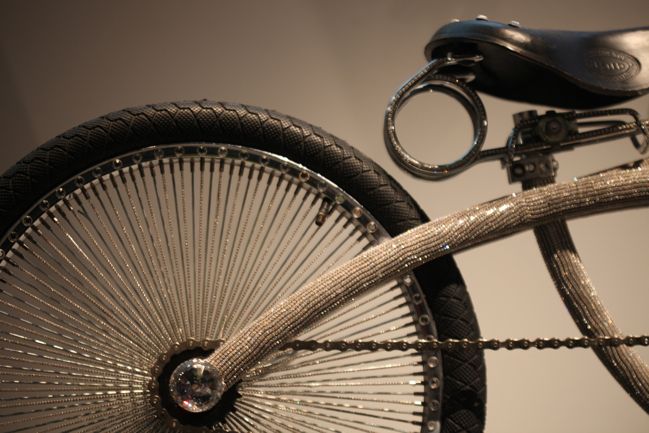
sparkly bicycle
There are many bicycles in the collection – wooden, handcarved, nylon, pedal bikes and superduper motorcycles. But this one! It’s entirely sparkly!

I suppose that doesn’t sound like appropriate commentary like an actual art critic but come on: SPARKLY BICYCLE! What’s not to love?

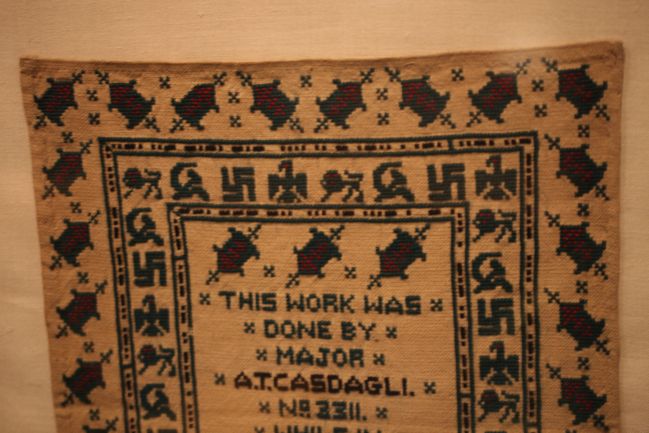
pow needlework
This piece has such a fab story, stitched by Major A. T. Casdagli while being held as a prisoner of war by the Nazis. He sat and stitched for weeks while in captivity, including various emblems that would then lead his captors to display the completed sampler on the wall. Except they didn’t bother to read the morse code border in the frame, which spelled out a rather defiant message to Hitler himself. Rebel stitchery!

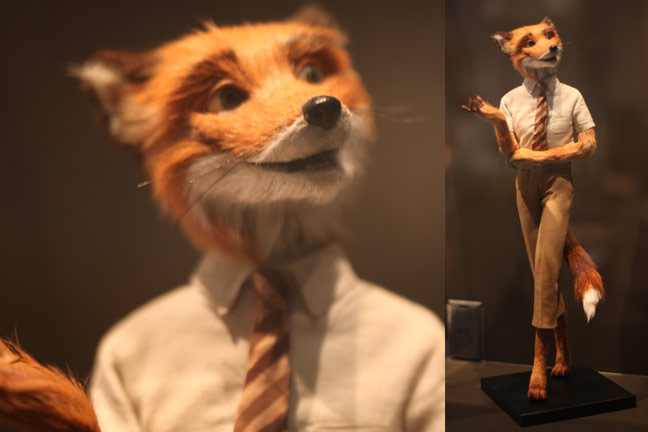
fantastic mr fox
Does this fellow look familiar? He’s one of the handmade puppets from Wes Anderson’s Fantastic Mr Fox, created by Ian MacKinnon and Peter Saunders. He’s so lush in real life and really seems to have a personality. It’s almost difficult to realise he’s not going to move or say anything!

Power of Making is one of those exhibitions that is best appreciated if you read all the cards as you go through the room. There’s so much insight into not just how people make but also why they make things by hand and how they teach and share the love of making things by hand. There’s a mix of older making techniques like building stone walls to the most modern of making technology like iPad apps and 3D printers. Throughout the exhibit’s run, there are assorted events that bring things even more to life, from a handbag-making workshop to free demonstrations on Fridays and Saturdays. Ben Wilson who made the sparkly bicycle will teach young people how to bling up their own wheels; during half-term there’s a special showing of Fantastic Mr Fox. The overall programme has a great mix of events for kids, hobbyist adults and professional creatives. Power of Making is open at the V&A until the 2nd of January 2012.

And now, a giveaway! I have a bonus copy of the Power of Making book that accompanies the exhibit, filled with essays on different concepts of making and photos of works on this theme. To enter, just leave a comment on this post. If you’re a Twitter user, you can put your name in the hat another time by tweeting this: check out #powerofmaking – the new exhibit @V_and_A (and enter to win a copy of the powerofmaking book!) http://ow.ly/6pFLW

Entries close next Friday (16th September 2011) at midnight UK time.

Good luck!