pretty paper. true stories. {and scrapbooking classes with cupcakes.}

lovely to meet you Twitter Facebook Pinterest YouTube

Take a Scrapbooking Class

online scrapbooking classes

Shop Shimelle Products

scrapbook.com simon says stamp shimelle scrapbooking products @ amazon.com shimelle scrapbooking products @ amazon.co.uk

Reading Material

travel

Camera School 06 :: Making it to Manual
camera school 06 :: making it to manual
For whatever reason, someone, somewhere decided to make the manual mode on a camera seem difficult. It’s not difficult in the slightest. It’s just not automatic. You have to rotate some dials and click some buttons now and then. But they aren’t difficult dials and complicated buttons.

For everyday photography, I use manual to set just one thing. I only think about one thing for each shot – because I’ve already finished thinking about the other stuff. That really doesn’t follow the rules of amazing photography, and I’m fine with that. I don’t need amazing for everyday pictures. I want that balance of photography that’s fun and photos with a unified style.

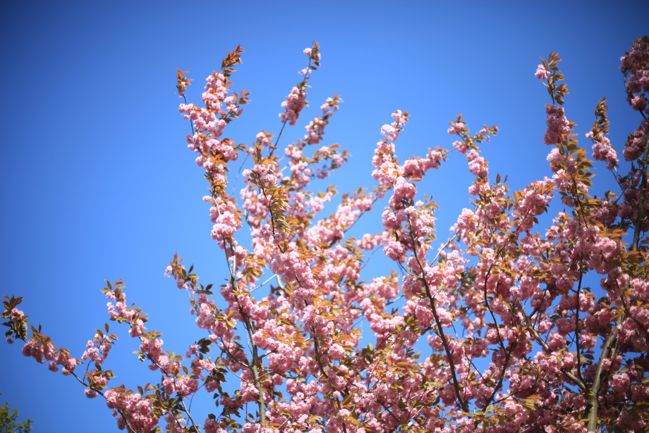
I only think about one thing because I set the ISO and the aperture once, then I can just focus on shutter speed. Because at the most basic level, there are three things that determine how light or dark a photo will be: the sensitivity of the sensor (ISO), the size of the lens opening (aperture) and how long the lens stays open – that’s shutter speed. When I pull out my camera, I set the ISO using 100-400-800 (which you can tweak to the specifics of your camera once you’re used to it) and set the aperture according to how much of the scene I want in focus. I shoot at the widest aperture the majority of the time because that’s the look I like, though there are times when that has to change to accommodate a group of people, for example. So say I am going to photograph a flower on a sunny day. I would go right to the 100 ISO and the lowest number for the aperture – on my 50mm lens, that would be 1.4. Then I stop thinking about those two things. From here on out, I only worry about shutter speed.
camera school :: making it to manual mode
On an SLR, part of looking through the viewfinder is seeing the light meter. Except if you weren’t looking for it, you might not even notice it’s there. The light meter is what made photography make sense to me when I first learned my way around a camera as a kid and it’s what makes it work for me now. It’s just that the light meter today is a little more high tech – but it tells me the same exact information. On an old Canon AE-1 series, the light meter was activated with a half-press – just like the half-press to auto-focus now… except this was still the times of all manual focus. The half-press was just for measuring the light, and a tiny arm would ping up on the side. If it was in the middle, then things were good. If it went to way to one side, the picture would be too dark and way to the other side would mean too light. The reason I noticed it more was partly because it actually moved inside the viewfinder, so it was pretty obvious! But also because a fully manual camera like that required you to look or to know every single setting on your lens… and I found it easier to look.

What’s shown in my viewfinder now is exactly the same information, just more precise and without something flicking around to get my attention. It’s more subtle, but the mechanics are the same: a half-press on the shutter button will read the light and mark a spot along a line. If the spot is near the middle, then the camera things you’re good to go. If the spot moves to the left, the shot will be dark and if it moves to the right, it will be light. Seriously, if you’ve never noticed this before, go get your camera and look through the viewfinder now. I will still be here once you’ve found it.
camera school :: making it to manual mode
So your first step once you’ve moved to M on your dial is realising that light meter is there and being able to set the ISO and the aperture and then adjust the shutter speed with its help. At first, start dialling the shutter speed up or down until you get the marker right at the middle point, then take your picture. Get used to that process, just taking pictures of all sorts of things. Walk around your house or walk around the garden or down the street and focus on adjusting the shutter speed with that dial. Soon you’ll come to remember which way you need to dial. When I looked at the preview screen, I was forever thinking if it’s too light, dial right, and I knew I need to dial left if the opposite is the case. Eventually you will dial without thinking about which way you need to go – it will just come naturally – but it takes time for that to happen. That time is so very much worth it.

But here’s the kicker: if you’re always lining it up with the middle point then you’re really not shooting in manual after all. You’re doing the work of manual, but you’re adjusting the camera to exactly what it would do in aperture priority – because it would adjust the shutter speed until the marker was in the middle. So why not just shoot in aperture priority all the time?

First of all, you can, if you really want to. I use aperture priority for certain things. Some people use it all of the time and get great pictures; some people use it none of the time and get great pictures. There are as many methods as there are photographers.

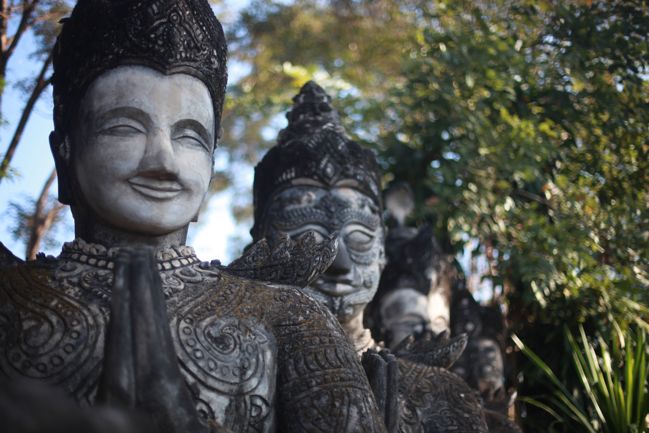
Secondly – and this is the important part – going against what the camera tells you is how you develop a style for your pictures. It makes sense if you think about it: if you shoot in automatic modes, your pictures will look essentially like all the other photos taken on all the other cameras in automatic modes, and that’s a huge number of photos. If you come up with your own combination of settings that speaks to you, then your photos will look like just your photos because most of the other photos will be in those automatic settings you abandoned. Do you see where this is going?
camera school :: making it to manual
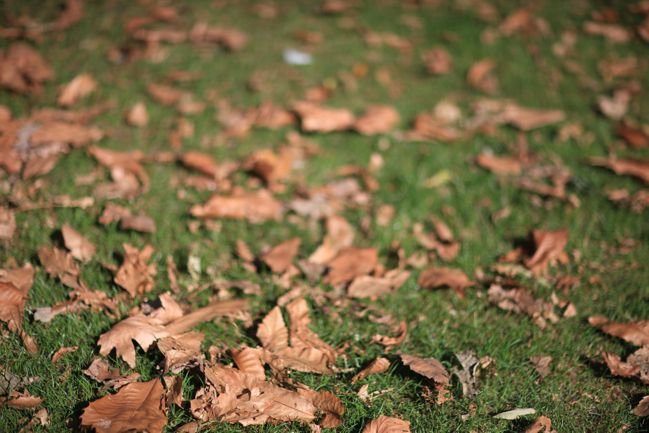
So when I look through the viewfinder, I never aim for the marker in the middle. I tend to like my pictures around two stops to the right – which means the camera things I’m overexposing my photos, just a bit. To me, it lets more light in and creates more glow and softer colours. I don’t always go with the two stops to the right (if I did, I could just set that as a custom automatic setting! How’s that for blowing your mind?) but it’s where I start. Then I go through a little process that couldn’t be done with that beloved Canon AE-1. I look at the picture on the preview screen and check for various things. I can make adjustments and shoot again if needed – provided it’s a subject that is possible to shoot again. Which is why it’s good to try this method on things that don’t move or melt or wilt rather than say… a wedding. There are no do-overs at weddings. Stacks of books allow for endless reshoots.

If you want to give this a try, you will need something like a stack of books (or something that won’t move, melt or wilt while you’re learning) and some time to put your camera through its paces. Even though setting that marker in the middle isn’t getting fully advantage of manual mode, I think it’s an important place to start. It will let you see what your camera ‘thinks’ is right – and part of taking consistent photos is learning exactly what your camera will do in any given situation. (To the point where I think I would choose sticking with an older camera I know really well over upgrading just to have the latest and greatest… but we’ll talk more about that another day.) So start by shooting with the marker right in the middle, then try moving it to the right or the left and see what happens. If you really want to be able to keep track, you can even write notes on cards and put them in the photo so you can later compare and see everything in the shot. (Though you can see pretty much all the information you ever wanted to know about a photo through the digital file, but sometimes post-it notes are just the way forward, right?)

camera school :: making it to manual mode Not to worry: there’s an entire camera school post on photographing water coming soon. We’ll get there.

This isn’t an assignment you can do in a day. This is an on-going process of learning how something works, discovering your preferred style and refining it. Photographers continue to refine their style as they work. Even real photographers. So it’s not something you’ll finish tonight and move on to something new tomorrow morning. Taking the time to really look at your images (both big on your computer screen and printed) will help you find what you like. Your style may be slightly over-exposed because you like light or slightly under-exposed because you like rich colour. You may love shooting at wide apertures with lots of blur or it may drive you crazy and make you feel you need glasses! You may like the colours very cool and crisp or you might prefer warmth to your images – just a tad or a full-on vintage look. Your style will be true to you when you choose it yourself rather than looking at something else and replicating it. Replicating can teach so many things, and it’s very useful in its place, but replicating alone cannot develop your style. Looking at your own pictures and pointing out what you do and do not like about them? That will develop your style.

So no single assignment today. More a collection of things to keep in mind. Find that light meter in your viewfinder and embrace it as a tool that can help you in such a simple and essential way. Remember manual isn’t difficult – it can be just one dial. And look at your very favourite images to see if there is a certain style already starting to emerge. If so, embrace it. If not, don’t sweat it.

It’s only a camera. You’ll be fine.

click here for more camera school posts

Scrapbooking Giveaway Winner

scrapbooking giveaway winner
LiliPopo
We have two winners today! First up is Dogmatix who wins the Lilipopo giveaway.
And secondly…..
AC winner
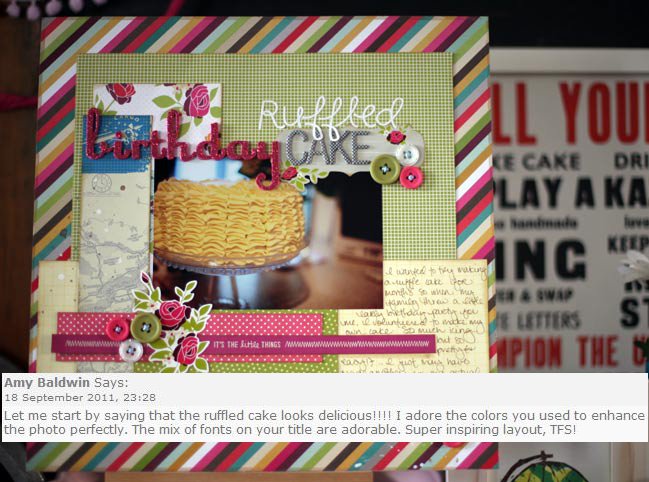
Amy Baldwin, who wins the American Crafts giveaway prize!

Congratulations to you both, please email me (shimelle at gmail dot com) with your address.

There’s a new giveaway every Friday night, so check back next week for another chance to win just by leaving a comment.

Have a great week!

xlovesx

Scrapbook starting points :: Hello from Hobart

scrapbooking starting points
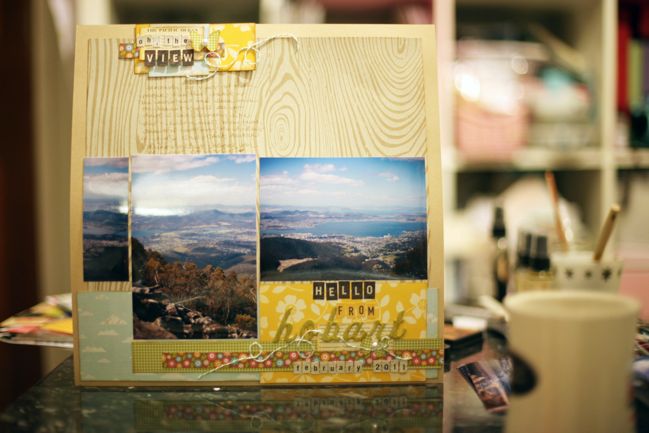
scrapbook page
I have to say I surprised myself with this page. In my head, this starting point would have ended in one of three options:
…a large photo covering most of the top of the page with title, writing and embellishment all in the bottom border of the page.
…a group of small photos in the bottom right corner and extended writing across most of the page.
…two 4×6 photos facing the same way, close to the title in the bottom right.

Instead, there are three photos here – all started at 4×6 but only one is still that size now. One is cropped a little, the other a great deal. It just happened that when I flipped through these photos on the table I found they almost-but-not-quite lined up, and it seemed like it might work. I’m really not a big fan of mixing portrait and landscape images, so it’s something a little different for me. (I don’t have any real reason to dislike the mix – some scrappers make them look fabulous, but they just tend to give me headaches when I’m trying to balance elements!)

So now I’m extra curious as to how you’ll complete this week’s starting point! If you create a page, please share your link on this post so we can see!

scrapbook pages
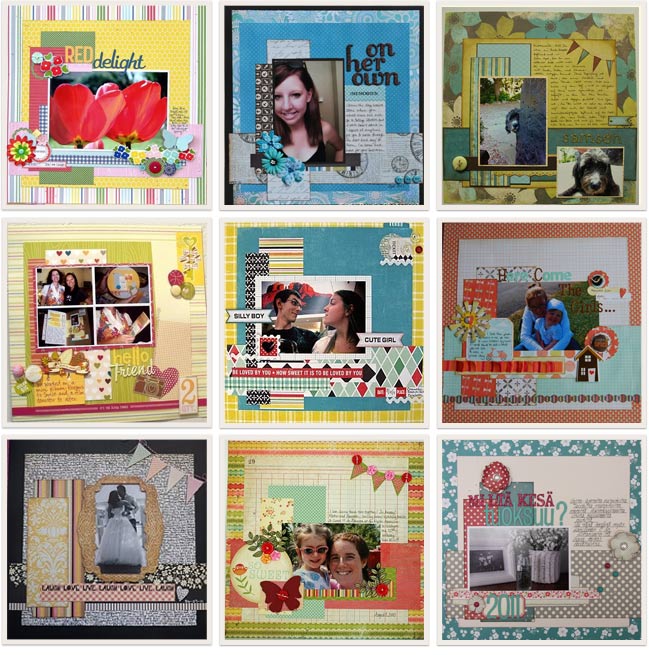
It’s always tough to choose my favourites, so this week I could only bring it down to nine! I love reading the blog posts too – I love that starting points are useful and I grin to see scrappers using their leftover papers. Thank you to all of you who join in each week. I love this little corner of the internet and all the pretty-paper-pasting we do. (I think I just sighed audibly, thinking about it, actually!) So here are nine of my favourite scrapbook pages from this starting point – do click the corresponding link to see the page in more detail and discover the scrapbooker who created it.
Top row, L to R: one, two, three.
Middle row, L to R: four, five, six.
Bottom row, L to R: seven, eight and nine.

And if you’re reading this on Sunday, go enter this weekend’s giveaway, of course!

xlovesx

Scrapbooking Starting Point

scrapbook starting points
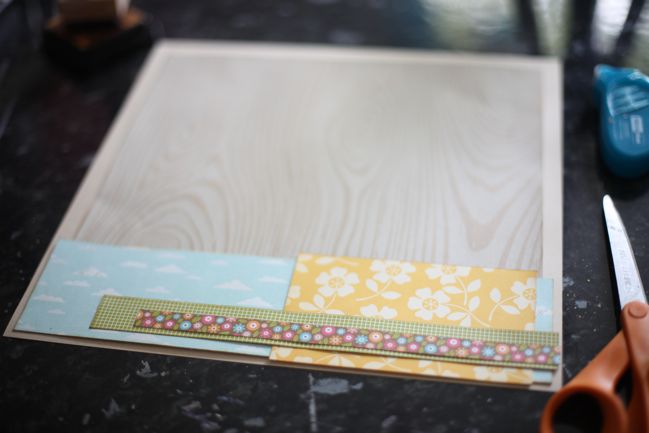
Here’s a little something different for this week’s Scrapbook Starting Point: something with most of the page wide open. I’m curious as to whether you would fill that big space with a large photo, several smaller photos, or leave quite a bit of the patterned paper on display? I also love that it creates plenty of room for potential writing space, should you not fill that space with photos. This is the before, and you can create whatever after works for your supplies and your style!

Fancy following the measurements? You’ll need a 12×12 background sheet plus these five sizes for your papers:
11×11 (though you could cheat one side of this a bit as the bottom is covered)
3×11.5
3.5×5.5
1×10
.5×9 (this was actually a branding strip design – that part that we tear off a 12×12 sheet)
All measurements are in inches. Of course you can just estimate if you prefer, and certainly use whatever you have handy in your own basket of scraps!

Find more Scrapbook Starting Points here or follow the board on Pinterest here. I’ll be back on Sunday with my own after page and some favourites from last week’s starting point!


Scrapbooking giveaway day!

scrapbooking giveaway day
LiliPopo embroidery
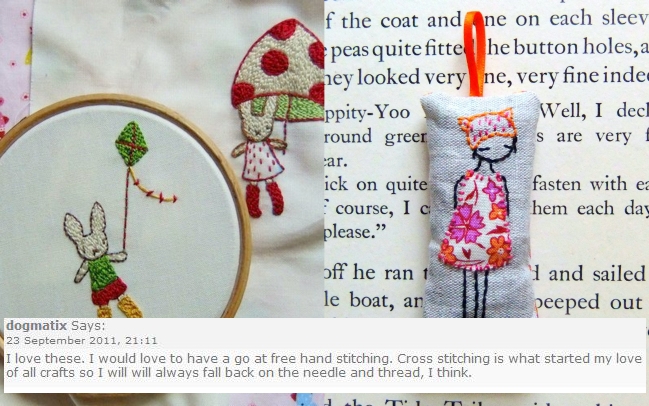
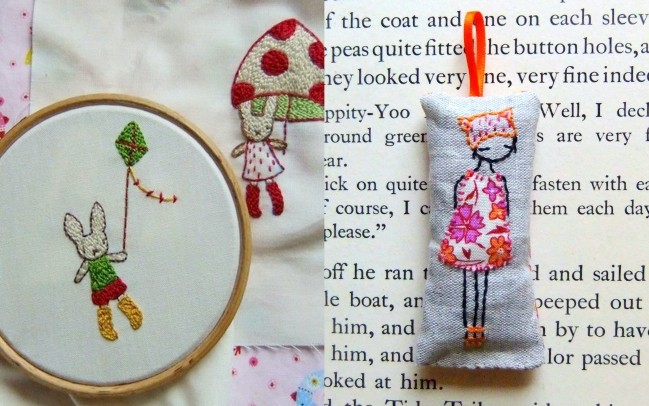
This weekend, one commenter will win this very pretty embroidered keyring and this lovely set of rabbit embroidery patterns from LiliPopo.

LiliPopo is a pretty shop of stitched wondery, selling embroidery patterns alongside beautifully handmade items.

Lilipop is the creative wonder of Kate, who loves to draw and embroider. “I’m often inspired by the beautiful fabrics I find, they make me think of girls’ dresses. I am also inspired by all the beautiful plants (weeds possibly) along the coast here in Cornwall and my lovely ten year old girl with her leg warmers and crazy hair”.

You can also read more about LiliPopo on her blog or you follow her updates on facebook page.

To enter this week just leave a comment on this post telling us what you like to stitch, or if this giveaway is inspiring you to try!

Entries close at midnight Sunday UK time and the winner will be posted Monday evening, so be sure to check back to see if it’s your lucky day!

Good luck!

xlovesx

Cupcakes and crafts this Saturday

cakes and crafts this saturday
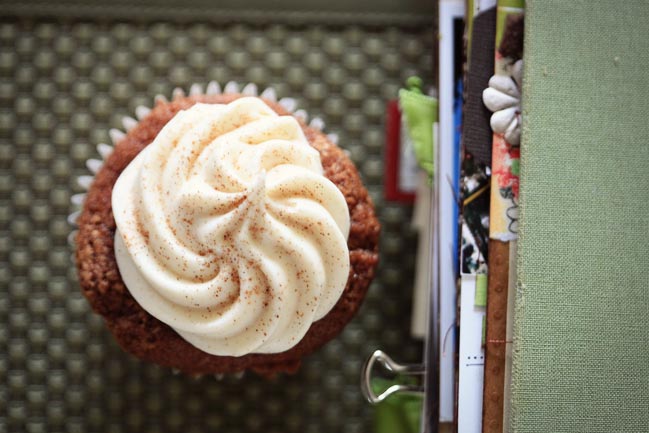
pumpkin cupcakes Recipe is here, by the way.

Lovely UK readers, are you headed to Alexandra Palace this weekend for the Big Stamp and Scrapbook Show?

Are you going on Saturday?
Will you be there when the show closes at 5pm?
Would you appreciate things like free cake and craftiness?

Here’s the deal: I’m throwing a tiny, completely-just-for-fun, after-show meet-up party. I hesitate to call it a party because there is no venue, no big plan of events, no pass-the-parcel. So micro-party, perhaps. But what I really mean is if we’re there already and we love scrapbooking and would like to say hello, then let’s do that. And let’s do that with a cupcake and a tiny little crafty gift from me.

Easy enough? It’s absolutely free, but please RSVP so I can make sure to bring enough cakes and crafty presents! To RSVP, please send me an email (shimelle at gmail dot com) and in return I will send you the details of when and where to meet. Even if you can only stop for three minutes to say hello, go ahead and RSVP – I would love to see you if only for three minutes! And if you’re coming with friends, you can RSVP for them too! As long as I can have a number by Saturday morning, I shall make sure there is cake for all.

Now… someone do RSVP please, else I may have to eat all the cake myself and that would be just the saddest of days. (On the other hand, if I need to transport 500 cakes across London on public transportation, that will be an amazing feat!)

I would love to see you there!

xlovesx

Scrapbooking Sketch of the Week

scrapbooking sketches and scrapbook page ideas
scrapbooking sketch and scrapbook page ideas
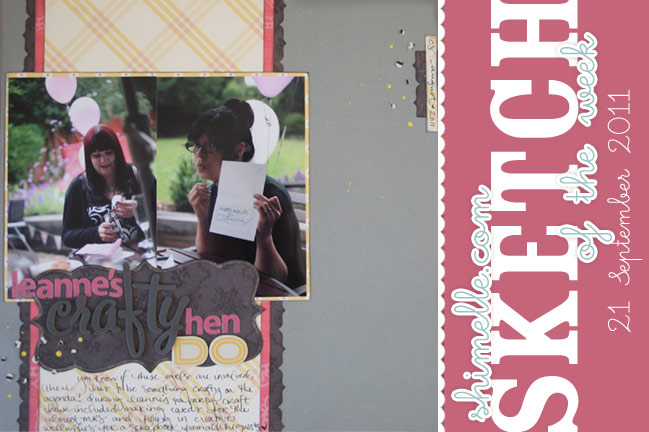
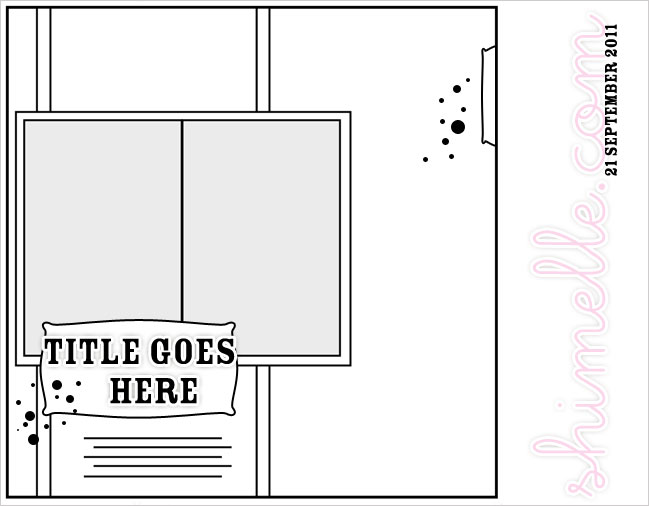
It’s been a while since I’ve sketched out my favourite photo arrangement – two 4×6 prints in the same direction on a 12×12 page – so that’s what appears in this week’s sketch! And pretty much everything aside from the background here came from my scrap basket, so it feels a bit like something from nothing, which I love! I also got to use that confetti idea that a few of you have used for earlier sketches, so thanks for the inspiration to give it a try.

scrapbooking sketch
This week’s sketch is very, very simple! I’m intrigued to see if you keep it this simple or jazz it up with lots more. Either way can work. I didn’t really purposefully set out for it to be so minimal, but after I had added the paint and fabric dots it just didn’t seem like it needed further embellishments in this case… but your page might be different! Adapt as you see fit, of course.


The die-cutting website I mentioned in the video is I Diecut and you can find the free shape I used here. I have a Silhouette SD and cut using the Silhouette Studio software from a Mac. The DXF file from I Diecut worked just fine and I could add it to my library in Studio. You do need the latest update for Studio. With Studio open, go to Help at the top menu and pull down to ‘check for updates’ if you’re not sure if you have the latest edition. I Diecut also includes SVG files for those of you who use SCAL software or other SVG-reading options. It’s definitely worth a look if you’re an Echo Park fan and would like to cut shapes to coordinate with the paper and sticker designs.

As always, the weekly sketch is no-stress and just for fun! If you use it, I’d love to see, so please leave a link if you post your page online.

scrapbook page ideas
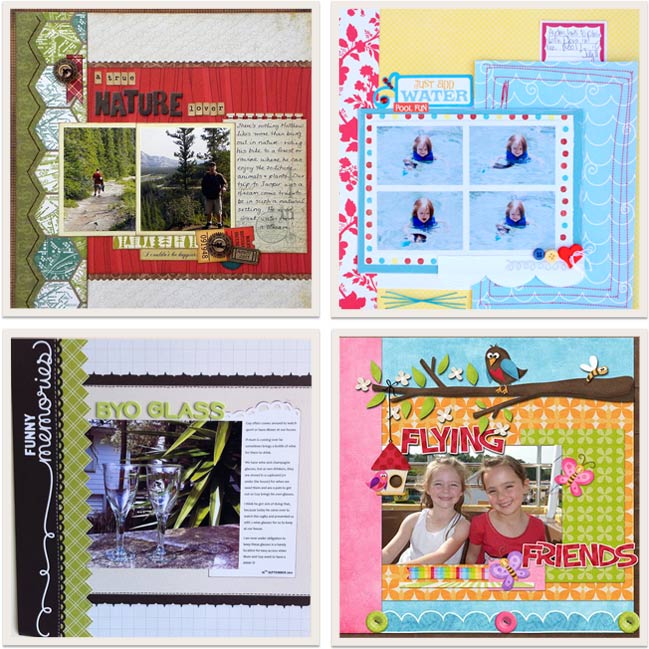
Last week’s sketch inspired a mix of pages with one, two or four photos. I loved the variety! These are four of my favourites. Click the corresponding link to see any of these layouts in more detail and get to know the scrappers behind the pages.
Top Row, L to R: one, two.
Bottom row, L to R: three and four.

Now… are you up for some sketchy scrapping this week? Grab two pictures and see how much of the page you can create from your scraps, perhaps. Give it a go and share it with us!


Camera School 05 :: Fun with Aperture

camera school :: fun with aperture

We bashed through the basics of aperture in lesson four, and I have to say aperture is way more fun when you just let go of the technical stuff and see what your camera can do. So today let’s do just that.

You may have noticed I have a habit of taking photos of things in the grass. There are a few reasons behind that – partly because that means I can shoot outside with lovely natural light. Also it means I’m getting outdoors for something in my workday, which is nice. As I don’t have a garden, it usually means I’m heading to the park, where I get all my best ideas. And I love how you can see the seasons change just from the grass. I consider grass to be the most lovely of all neutral backdrops and give the chance I will photograph just about anything there.

It’s also the perfect place to have fun with aperture.

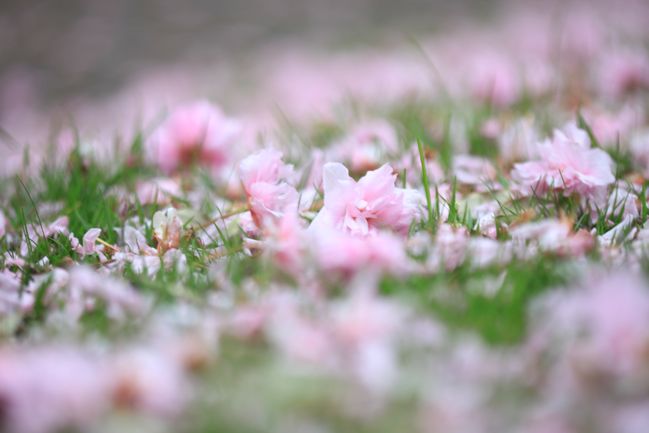
cherry blossoms in the grass
See, the grass can instantly tell you the season with springtime colours like these. The biggest part of this adventure is learning to step away from the viewfinder. All of today’s examples were taken without my eye to the viewfinder and without the preview screen – just trial and error of getting the settings right first, placing the camera on the ground (or perhaps on top of something small, to get an angle) and clicking with your best guess of the framing. Now that’s something that is really easy with fully automatic modes – because you can let the camera decide everything and it will get the lighting pretty much right and put mostly everything in focus. But shots like this are a bit boring with everything in focus, really! There’s something about the selective focus that makes the difference between ‘oh, isn’t that delicate and pretty’ and ‘why are you photographing a bunch of stuff on the ground?’ – at least to me.

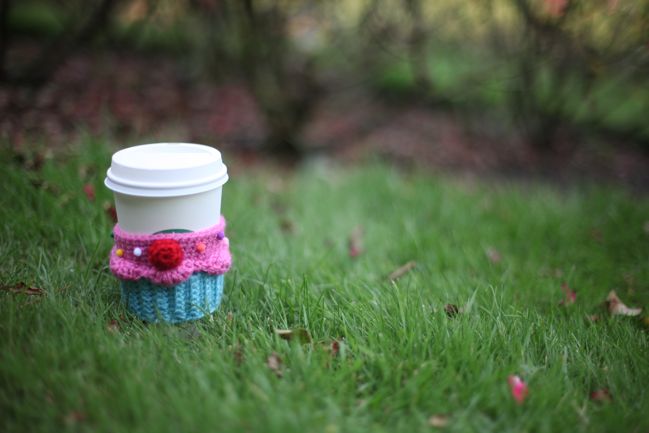
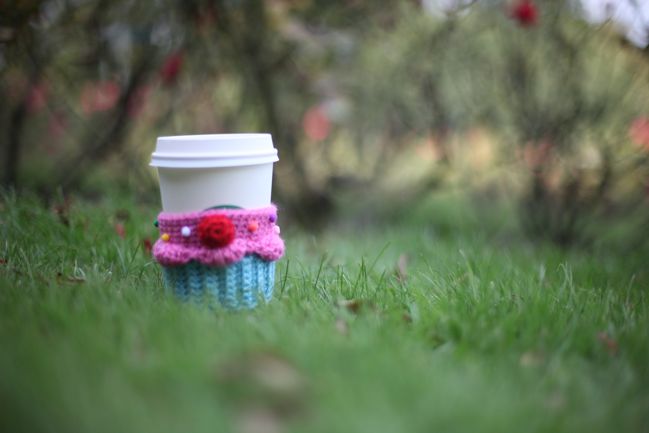
coffee cup in the grass coffee cup in the grass
Yes, ‘fun with aperture’ to me often means no looking through the camera. Here’s why – the first of these two shots is taken from a low angle, but I’m still looking through the camera. The camera is maybe eight inches off the ground? The second picture is taken without me looking, and the camera is right in the grass. The perspective is completely different and it changes the idea of size and detail and all sorts of things. Both angles have their place in different functions (like you might notice that the plane of focus in the second shot is actually too shallow to capture all the detail of the adorable stitchery by Twinkie Chan) but if you never try the not-looking option, you’ll never know what stylishness you’re missing!

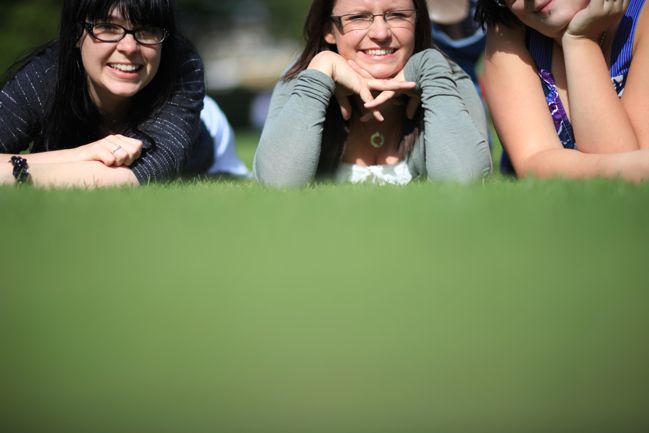
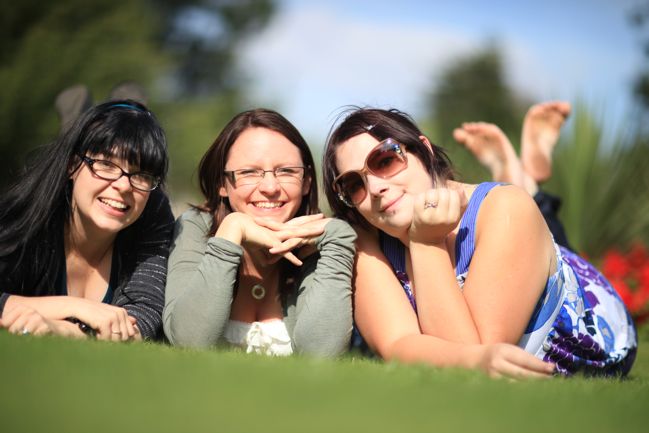
outtake :: friends in the grass friends in the grass
You can shoot just the grass, objects placed in the grass or people laying on the grass, of course. And there is a lot of trial and error involved in this. There are nine shots between the first outtake and the keeper shot here, while we got the angle of the camera right and got ourselves positioned so we didn’t have trees growing from our shoulders or the camera focusing on our elbows rather than our faces. As these were all shot with the self-timer, there’s more hassle involved in getting up, trying to correct what wasn’t right and then getting back in the shot, but still – nine shots is hardly the longest photo shoot in the world. Trial and error will get you there more quickly than you might think.

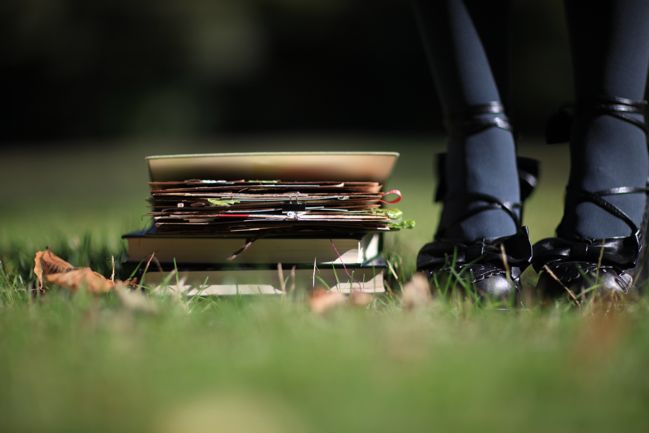
staged photo in the grass
This is a little trick you can use for self-portraits – include something that isn’t you (something that won’t move). For this example, I set up the books and got that shot just how I wanted it then didn’t move the camera and put on the self-timer and jumped in the shot. The first shot I stood a bit too far away from the books, so I tried again and stood closer – this was that second shot. A lot less trial and error. I’ve used the same technique for self-portraits that weren’t just my feet too and I find it way less stressful than just trying to get the focus right without anything else in the frame… though it always takes more than two shots for me to not make a stupid face! (More about that another day… and we can all bond over silly fake smiles we pull for the camera, even though we don’t mean to!)

concrete rather than grass
Sadly, sometimes the ground is not covered in grass and you may be confronted with concrete, dust, wood or gravel perhaps. The same ideas apply and you may find each carries its own context in the photo. The same feet in the same purple sneakers look young and playful in the grass, but carry more angst on the littered city pavement. That’s something I love about photography – how you notice some things when you take the picture and some things after. Somewhere in the middle there is a magical combination of the purposeful and the accidental all in the single snap of the shutter.

So here’s a new assignment: whether it’s grass or some other background you love, step away from the eyepiece and see what you can capture with the unique aspect of a shot without everything in focus. Embrace trial and error and enjoy the funny shots where everything is blurred or crooked or off-centre. It’s all part of the experience. If you’re happy to just give it a try with what you already now, then grab your camera and go. If you would prefer a few more steps to make it easy, then try these:

1. Before you leave the house, figure out how to set your camera to its lowest aperture. If you’re not already shooting in full manual, shoot in aperture priority (A or Av on the dial of an SLR) and set your ISO like we walked about here and set your aperture to its lowest setting, then the camera will take care of the shutter speed to give you the right amount of light for the shot.

2. Grab something you want to photograph in the grass and take it outside and set up your little scene. (Or if it’s lovely and autumnal or springlike where you are, you can just use what nature has put there in terms of leaves and flowers!)

3. Just eyeball what you think would be a good distance and angle to place the camera on the ground. Without looking through the viewfinder, press the shutter halfway to focus then completely to take the picture. Now look to see what you got!

4. From there, use trial and error to recompose the shot – closer, further away, better focus, more (or less) centred in the frame – until you get something you like. When you start to get close, you won’t want to move the camera when you review your shots, so even though you’re trying not to look through the viewfinder, you may still want to get down on the ground. So you know… don’t wear your prom dress or anything.

5. Extra-credit for trying a self-portrait! Even if it’s just your shoes. (Extra-extra credit for cute shoes, of course!)

A note for point and shoot users: if you can’t control aperture on your camera, don’t despair. Try this in macro mode (usually a little flower) and you may have some luck, especially if you zoom in to the max available. It won’t blur to the same extent but it will limit the focus more than your fully auto mode.

And one thing just to throw out there: these images – even the ‘after’ examples – are far from perfect. I know it and I’m fine with it, because I find I have far more fun when I don’t worry about perfection in every shot. And bonus: when I have more fun taking pictures, I take better pictures! I can point out flaws in these images, from focus to framing to shadows. But they were all photos that were fun to take and each of them is better than what I would have shot a year or two before, so even if it’s not perfection, it’s progress. That works for me. If it works for you too, consider us instant friends in this adventure.

click here for more camera school posts