


Step by Step :: Your handwriting on a digital scrapbook page

The newest issue of Scrapbook Inspirations included Jane Dean’s challenge for each member of the team to try something new-to-us on the digital front. For some, that meant making their first ever digital page. For others it meant printing things out and using them on a paper layout. My challenge was to find a way to include my handwriting on a digital layout—which admittedly is the biggest clash I have with digital scrapping. I always handwrite my journaling, and after years of that, it just feels wrong to start typing things again! I mean, it took quite a while for me to get used to seeing my own scrawl on those pages.
It turns out you can include your handwriting on digital pages very easily, and you don’t need a wacom tablet or a scanner, nor do you need to learn to write with your mouse! My fancy-schmancy list of equipment included a black pen, a sheet of white paper and my camera. And something tells me we all have those within reach! So here’s the entire layout from start to finish, in case you want to try something similar.
My layout uses these digital kits:
Travel Journal Tool Kit, Round & Round v4, Photo Phun Mat Pieces (all by Rhonna Farrer)
Haphazard (Erica Hernandez)
Spools of Stitches (Tia Bennett) {This is seriously one of the best purchases ever. Use it all the time and it always looks perfect. Love it!}
Sweet Notions (Meredith Fenwick)
Element-ary Stitches 2 (Carina Gardner)
Obviously, you can still follow the techniques with completely different digital supplies to customise the look.
I made my page in Photoshop CS3, but pretty much everything can be accomplished in any edition of Photoshop or Photoshop Elements—it just might mean that certain elements are in a different place or have a different name.
Right, that’s plenty of intro—let’s get started!
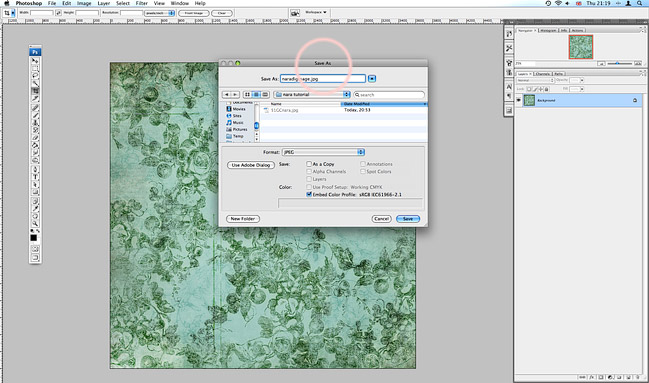
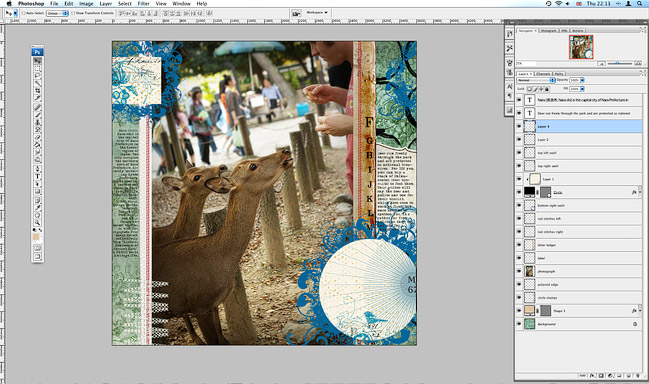
I have a memory like a sieve for certain things, and the set-up of my digital pages is one of them. So instead of opening a new document, I just open the background paper and immediately save it as a new name so I don’t lose the original file. This is paper 2 from the Sweet Notions kit. When it asks what quality to save, I save at the full 12 quality .jpg for this background layer. (By the way, throughout this post, any circle, box or arrow drawn in pink is from me, not the program! Just want to make sure some of the little things are a bit more visible.)
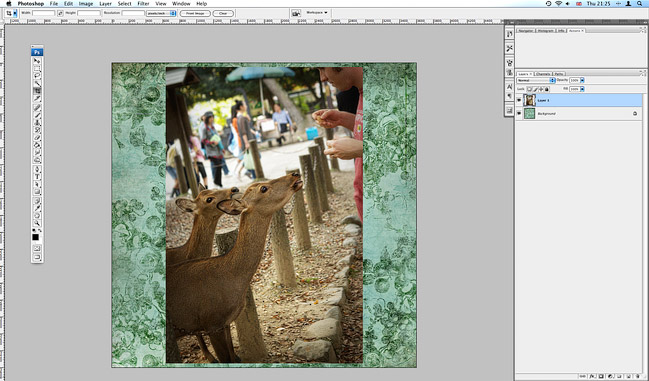
Next I open the photo in Photoshop and get it edited just how I want it, then flatten all the layers so I can copy it. Select all (ctrl + a) and copy (ctrl + c). Switch back to the digital paper (you can access this through ‘window’ at the top) and paste (ctrl + v). Now my photo is on a new layer on top of my digital paper.
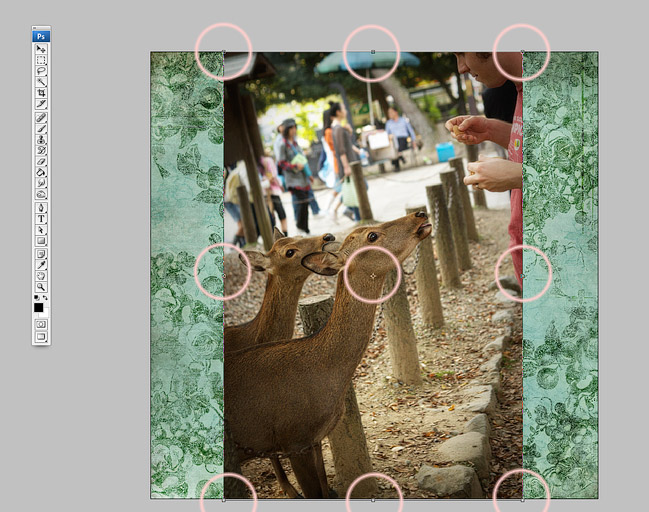
Use the transform command (ctrl + t), hold down shift and drag the corner toggle to make the photo the same height as the page. Hit enter or click the checkmark when you’re happy and the toggles will disappear.
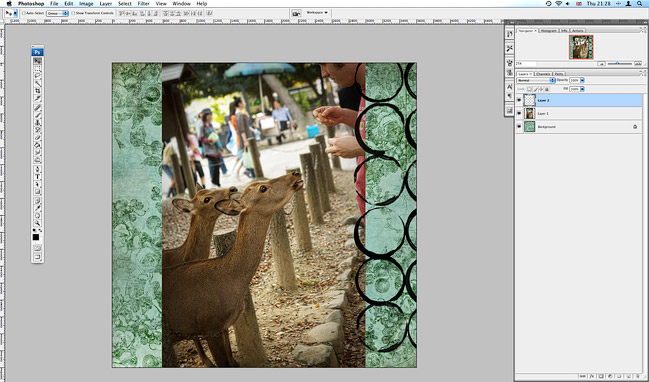
Then it’s time to start layering things on the sides. I started with the set of circles image from the Haphazard kit and added this over the paper on the right side. Open the image, select all, copy and then head back to your page to paste it in. If I know I’m only going to use something once, I just open it and then hit ctrl+a, ctrl+c, ctrl+w straight away—that opens the file, selects all, copies the file and closes it again. Otherwise I’ll end up with 20 big picture files open in Photoshop and start to wonder why my computer is lagging a bit!

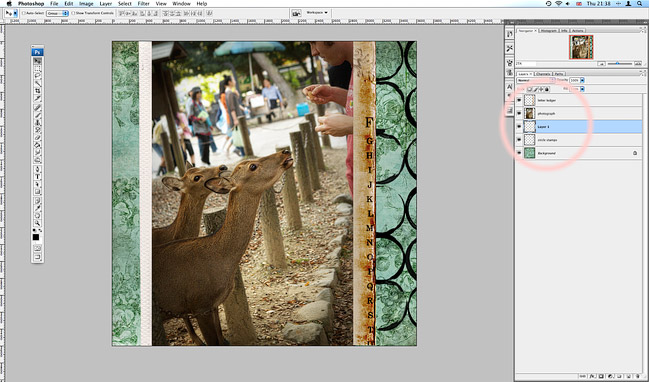
When I pasted this in, it sat on top of the photograph, but I actually want it to sit behind the picture. So go over to the layers palette on the right, click and hold on the layer and just move it into the position you want—the background is the bottom layer and now the photo is the top layer, so there are no stamped circles on the photo. Easy. (And definitely easier than rearranging layers on paper!)
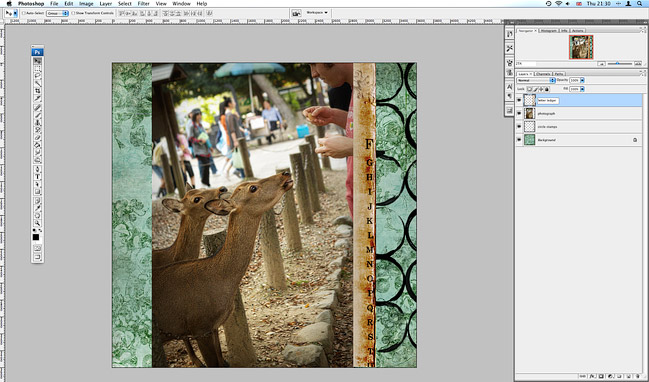
Still working on the right, I opened and copied the ledger scrap from the Photo Phun Mat Pieces kit. It was too small, so I used transform to make it the full length of the page and placed that layer on top of the photograph.
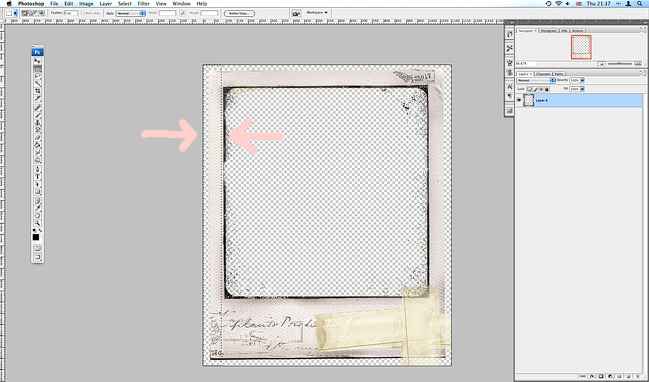
Now the left side of the photo needs some framing, but I don’t have another strip with the kind of texture I’d like. Instead I use a Polaroid frame from the Travel Journal Tool Kit. But obviously I don’t need the entire frame. So I just select the left strip before I copy—using the rectangle marquee tool instead of select-all.
Everything else is the same—paste it into the page, change the size to suit and move the layer so everything is in the right place.

Next open the double straight stitches in red from the Spool of Stitches set. This will open as a horizontal image. Go up to ‘Image’ at the top and select rotate so you can turn it into a vertical image. Now select all, copy and close. Paste into a new top layer and move that set of stitches to the right, stitching the ledger paper into place. Paste again and you’ll have another new layer—move those stitches to the left and stitch the polaroid piece.
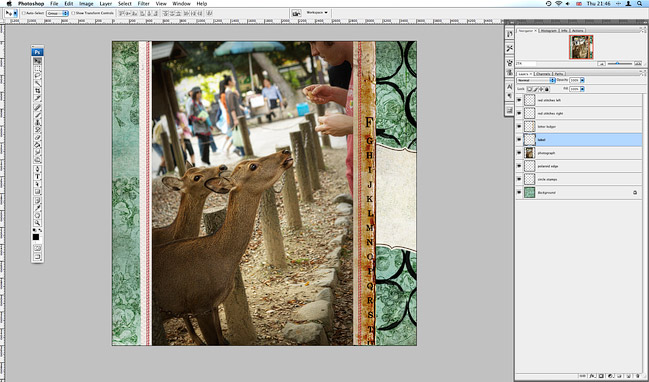
Add a label on the right and move the layer so it’s under the ledger paper. To make it run off the page, just position it where you want—anything not on your canvas won’t show.
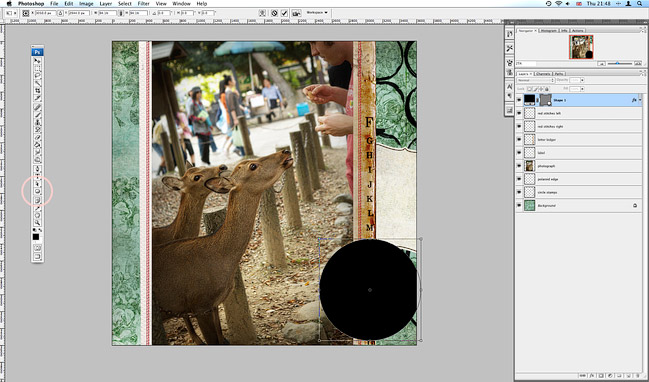
Now we’ll work on the bottom right corner. Use the ellipse tool and hold down shift to draw a circle. Don’t worry about what colour it is, as long as you can see it. Use transform to change its size if needed, then move it into place so it runs off the right side of the page. Make sure this layer is at the top of your palette.
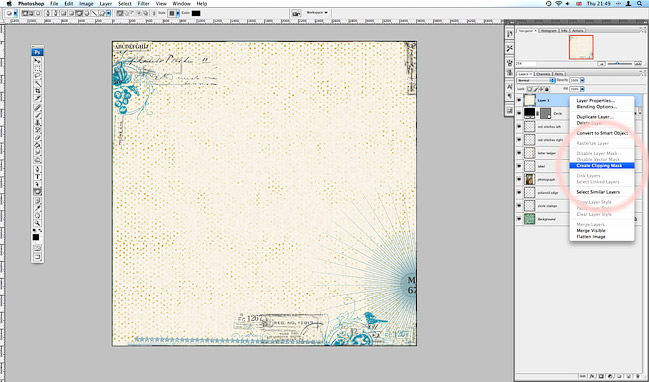
Open a new paper (this one is from the Travel Journal Tool Kit), select all, copy and close. Go back to the page and paste. It should have just covered your entire layout. Go over to the layer palette and right click—choose ‘Create Clipping Mask’. (Some versions of PS/PSE call this ‘Group with Previous’, so if you see that, go for that one.) Presto, your paper will only be visible in the circle.

To add the details underneath the title, we’ll use a brush from the Round N Round set. When you use a brush, it won’t automatically make a new layer, so you’ll need to click on the new layer icon or choose layer-new layer from the top menu.
Pick up your brush tool and choose the brush you fancy. (Read how to load your brushes here if you need help with that.) Select the colour you want to use for your stamping. I like to use the ink blotter to pick one of the colours that is already on the page so I know it will coordinate. Then stamp on the circle and use transform to make the stamp the right size, if needed.
Keep in mind that if you want to be able to move individual stamped images, you’ll need to make a new layer for each one. Otherwise if you stamp several and hit transform or move, you’ll only be able to move them as a group.
Once you’re happy with the swirly circle, move the layer so it’s under the circle.
While we have this brush and colour handy, make a new layer and stamp once in the top right, then another new layer and stamp in the top left. These are roughly the same size as each other but they are smaller than the title circle.

Next I added typed text to both sides of the layout. Click on the T for Type tool and click and drag to draw a box to hold your text. Type or paste it in and choose the font and size you want. Move it into place. Make sure the type on the right is in a layer above the stamped swirls.
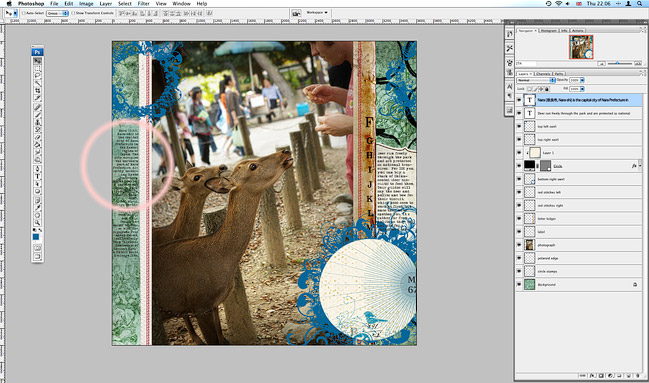
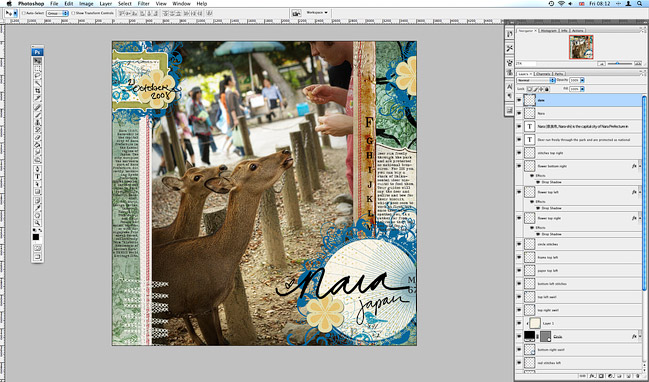
Add another text box to the left side. I used some text from Wikipedia to help with the Japanese characters and historical information.
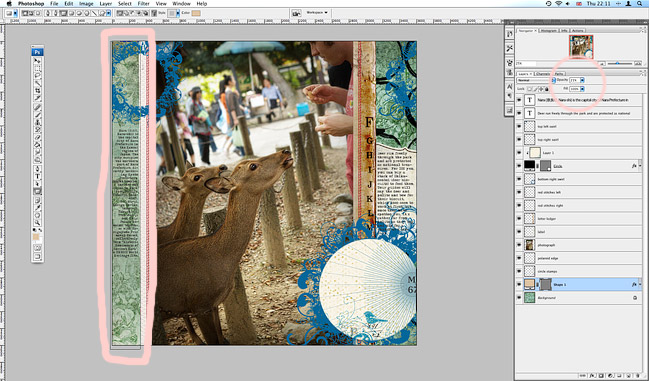
The text was too hard to read over the dark patterned paper, so I drew in a light yellow box and placed this over the patterned paper, then adjusted the opacity (at the top of the layers palette—cirlced on the right) until it wasn’t obvious that the pattern was different but the text was easier to read.

Nothing else to add to the bottom left so I added some more stitches here so it wouldn’t be so unbalanced. Just open, copy, close and paste.
Now up to the top left corner, where we already have that brush stamped in blue. We’ll use the same paper that we used inside the circle at the bottom right—you can access it either by clicking on its layer in this image or by opening the paper again. Use the rectangle marquee tool to select part of the design you like and paste this into the top left corner. We’re going to cover the edges so don’t worry too much about how it lines up with the brush stamp.
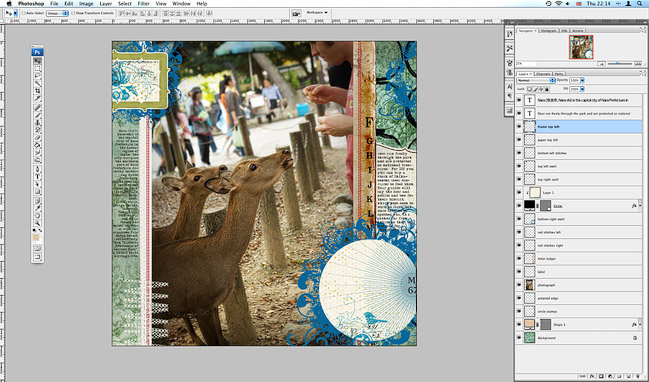
Open a frame image and paste it over the top of the paper rectangle so all the edges are covered.

At this point the page is looking pretty dark so we need something bright to lighten it up. Open and copy the yellow flower, then paste it three times to create a visual triangle. Follow the places we stamped in blue—top right, bottom right, top left.
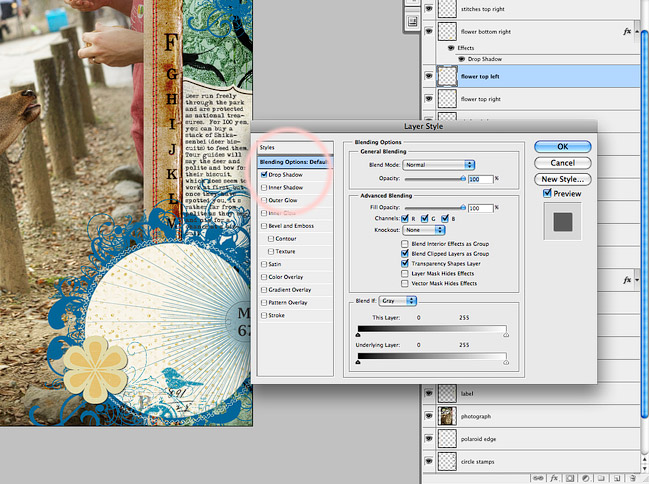
I thought the flowers were looking a little flat, so I double clicked on the layer so I could edit the style and added a subtle drop shadow. (Shadows are something that is different in pretty much every piece of software. If you can’t find them in yours, try googling “drop shadow” and the name and version of your software and you should find out where it is hiding for you!)
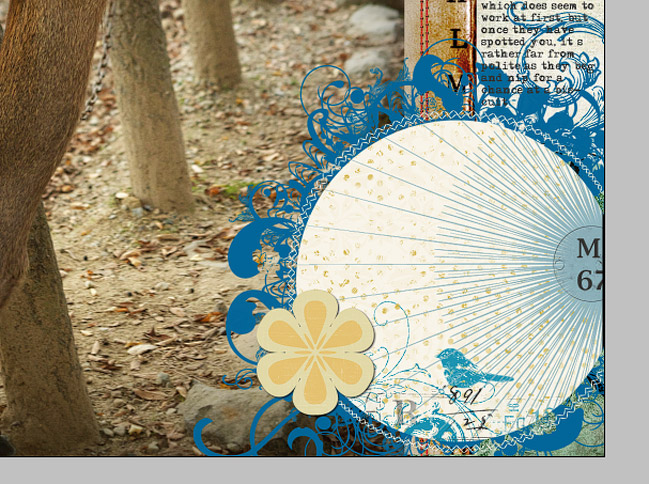
And I added a circle of stitches around the circle we cut out, just to keep it in theme with the rest of the page. The stitch layer sits underneath the flower layer.
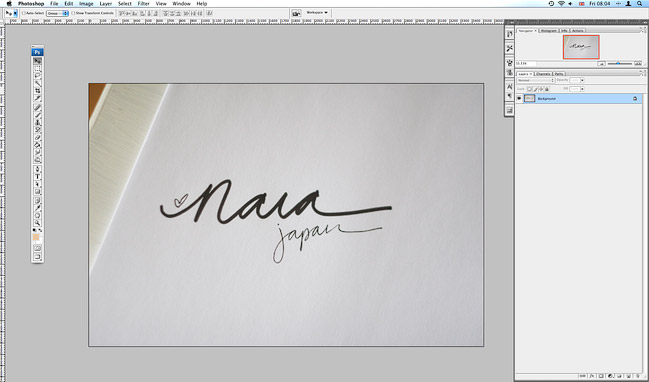
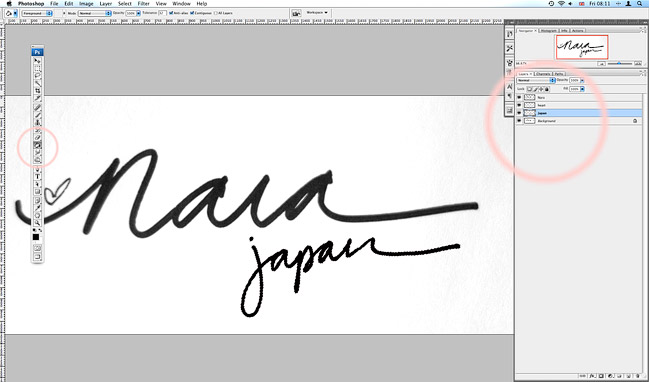
Now we are finally ready to add our handwriting! Tia has written a great tutorial for doing this with a scanner here but I didn’t have a scanner, so I adapted her instructions to work with a camera instead. Write out whatever you want to include with a black pen on white paper. Then take a picture that has good light and good focus. Open that picture in Photoshop.
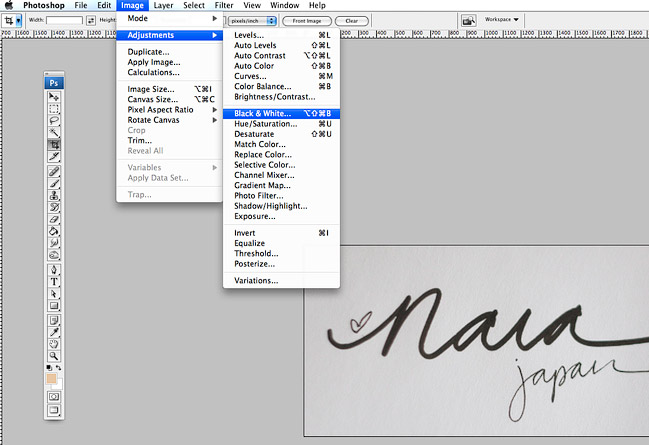
I found I got cleaner results when I changed the image to black and white.

But of course after converting to black and white, your white paper will be a shade of light grey. Use levels, contrast or curves to make it a sharp white/black image.
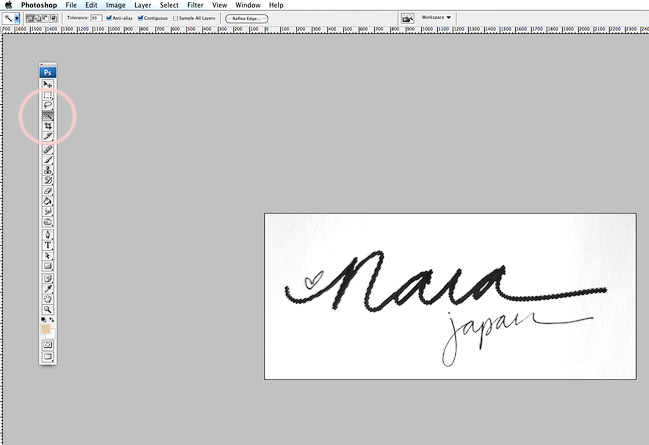
Grab the magic wand tool from the tool bar. Thicker writing is easiest, so we’ll start with the word ‘Nara’. Click the magic wand on part of the word and all the letters that are connected will be surrounded by marching ants.
Copy this (ctrl + c).

Make a new layer and paste (ctrl + v).
Now you can make the original picture invisible by clicking on the little eye by the bottom layer in the layers palette—and then the background will go to checkerboard and you’ll see exactly why you’ve pasted in. It’s just what you’ve written, but it’s taken away the white background and the other words. If that looks right, you’re ready to go back to your layout…
and paste it in. Use move or transform to get it in the right place.
Things written with a fine-tipped pen take a little more work. Turn that bottom layer back on (click on the eye) and make sure you’re working on that layer. Zoom into your image so you can see exactly where the the pixels are which colour. Use the magic wand to select the writing, just like before. (If your letters are not joined up, you will need to select each one separately. You can either select each one, fill and paste it onto the new layer, then come back and repeat the process for each letter, OR you can select one, hold down shift and select the next one and so on until you have the entire word in marching ants.)
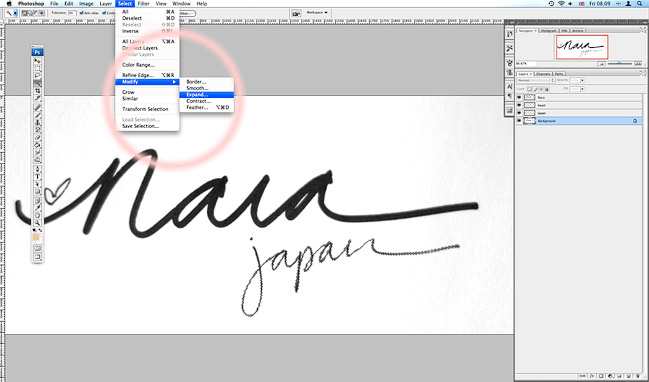
This word is too small to show up on the finished layout, so we need to give it a few more pixels. Go to Select-Modify-Expand and add more pixels to the word. I added 3, so I’m basically adding 1.5 pixels to each side of my handwritten letters. Now your marching ants will march further away from your letters so you can see the size you’ve chosen.
Create a new layer but this time do NOT paste. You should still have marching ants in the shape of your word, even though we now have the new layer selected. Click on the paint bucket, choose the colour you want for your writing, then click inside the marching ants. Now you should have your handwriting, but with extra bulk! If it looks okay, select all of this layer (ctrl + a) and head back to your digital layout.
Paste and move it to the right place. Repeat for anything else you want in your own handwriting—I also added the date at the top left.
That’s your page all done! From here, I save three times. Save once as the .psd file in case you want to change something later, you spot a typo, etc. .psd will preserve all your layers just as you see the file on your screen. Save again as a full-size .jpg file—that’s for printing purposes—all the layers will be flattened so it will be difficult to edit that image. Then change the image size to something small that you like for galleries, blog, etc and save at that size too – also as a .jpg.
So there you go—I no longer have the excuse that I can’t put my handwriting on a digital scrapbook page…and neither do you!
xlovesx
![]() Read more about:
Read more about:
Next post: Digital scrapbooking tutorial :: Customising a digital page template


